Welcome to this quick tip where I’ll be showing you how to copy layer styles in Photoshop. Unlike my Photoshop tutorials, this is going to be a short one.
Before we begin, let’s understand what is layer style. I know that some of my readers are very new to Photoshop.
What is Layer Style in Photoshop
A layer style is one or more effects applied to a layer or layer group. You can apply one of the preset styles provided with Photoshop or create a custom style using the Layer Style dialog box. The layer effects icon appears to the right of the layer’s name in the Layers panel. You can expand the style in the Layers panel to view or edit the effects that compose the style.
-Adobe
Photoshop is referring to this button with icon.
Copy Single Layer Style
I have made a Photoshop document for this tutorial. I colored my background with off-orange color, added two identical texts. One of them has a layer style and another has not.
In the below screenshot, I highlighted the layers styles with a blue rectangle. Top Text layer has layer styles and Bottom Text layer has not.
I am going to copy the one layer style which would be Bevel and Emboss from the Top Text.
To do this, hold down Opt/Alt and drag the Bevel and Emboss layer style to the Bottom Text.
Your screen would look like this while dragging.
Release the Opt/Alt after that.
Here’s a GIF for you. Make sure that you have held down the Alt/Opt key.
Make sure that you have held down the Opt/Alt key
Copy Multiple Layer Styles
There’s no shortcut for this. You need to copy each layer style one by one using the way which I have you shown you above.
Copy All Layer Styles
This is the easiest one. Right click on the layer of which layer styles you want to copy. Click on “Copy Layer Styles”.
Now, right click on the layer on which you want to paste this.
Here you go.
Copy Layer Styles to a Different Photo
We have been copying and pasting the layer styles in the same photo. What if you need to copy one layer style from one photo and add it to another.
You can also do this. But you can only do this by copying all layer styles and pasting them on another image. You cannot drag and drop a layer style.
Right click on the layer of which layer styles you want to copy. Click on “Copy Layer Styles”.
Now, right click on the layer on which you want to paste this.
This is all, guys.
Make sure that you make the most out of the offer below.
I know that I am not consistent since the past few months in terms of posting fresh tutorials. I have received so many complaints from you that I should be more consistent. I hear you and love you ❤️. I promise that I’ll be consistent again starting from today. 😊
Today, I am going to show you how to remove the background in a logo in Photoshop. Of course, there are some mobile apps out there. Some of them are good at removing backgrounds and others claim that they can remove the background as good as Photoshop can. To be completely honest, I have not tried all of them. I have tried a few and they were good. But, they were one-touch removal. They did not give me any flexibility, like Photoshop.
OK, other talks apart. Let’s get to the main topic. Today, I am going to remove the background from three different logos with three different methods. This is because I’ve heard that I should be editing multiple images in a tutorial so that I can cover as many aspects as I can.
Method 1 – Remove background using “Color Range” command
Let’s start with the YouTube logo.
1.a Select the Background using Color Range command
The logo has a big white background. Let’s remove that.
With the help of Color Range command, we can select a single color from the entire image. We’re going to select the white color as our background is of white color.
Go to Select > Color Range.
In the Color Range dialogue box, click on the “Add to sample” icon first. It is highlighted with the “1” in the below screenshot. I’ll tell you why did we do it two paragraphs below.
Now, click on the color you want to remove. I am going to click on white because I want to remove white color.
The reason we clicked on “Add To Sample” because it tells Photoshop to include multiple colors. Many times, the background is not completely white, agree? It consists of multiple colors like gray, offwhite, white, etc. With this button clicked, whichever color we click on will get selected. If this option is off, Photoshop will only select the latest clicked color.
For example, let’s say we click on the red color and then the green color. If “Add to sample” is on then Photoshop will select both red and green color. If it’s off then Photoshop will only select the color that we clicked at the last and deselect the previously selected color. In our case, it’ll deselect the red color and then select the green color.
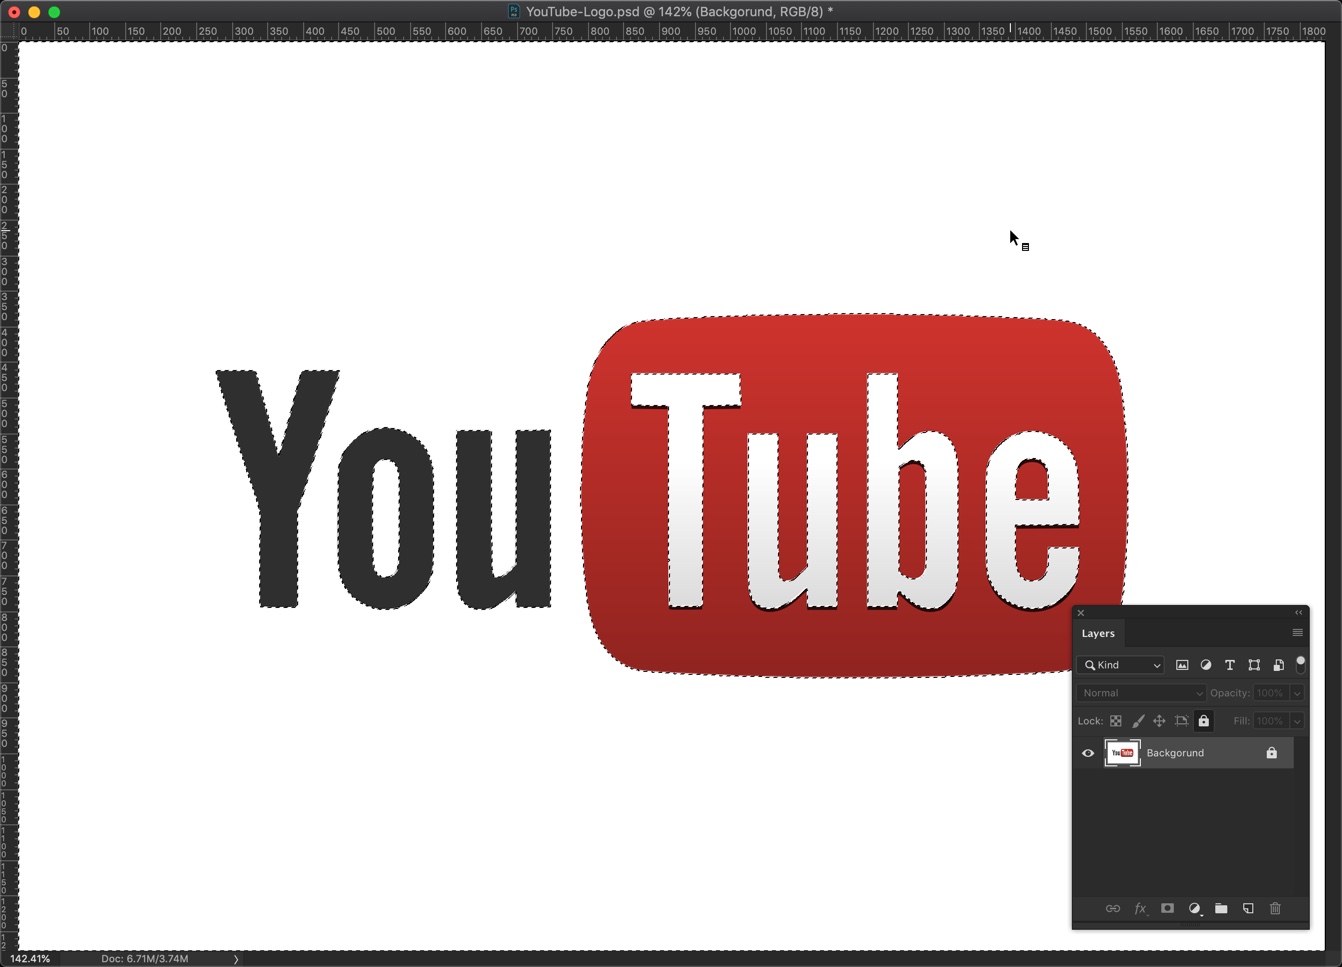
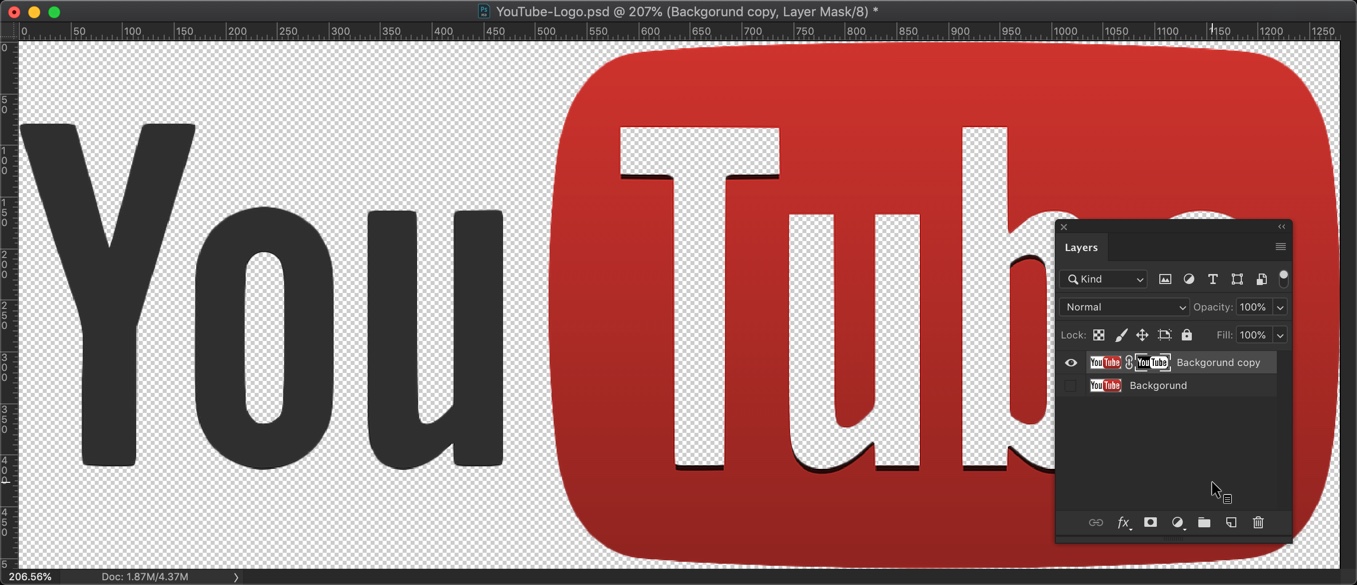
Press OK. See how beautifully Photoshop has selected the white color. You can see the dashed outline across the YouTube logo.
1.b Invert the Selection
Invert the selection because we need to select the logo. Right now, our white color is selected which we want to remove. Press Cmd + Shift + I / Ctrl + Shift + I to invert the selection. Now, our logo will be selected.
1.c Refine the Selection
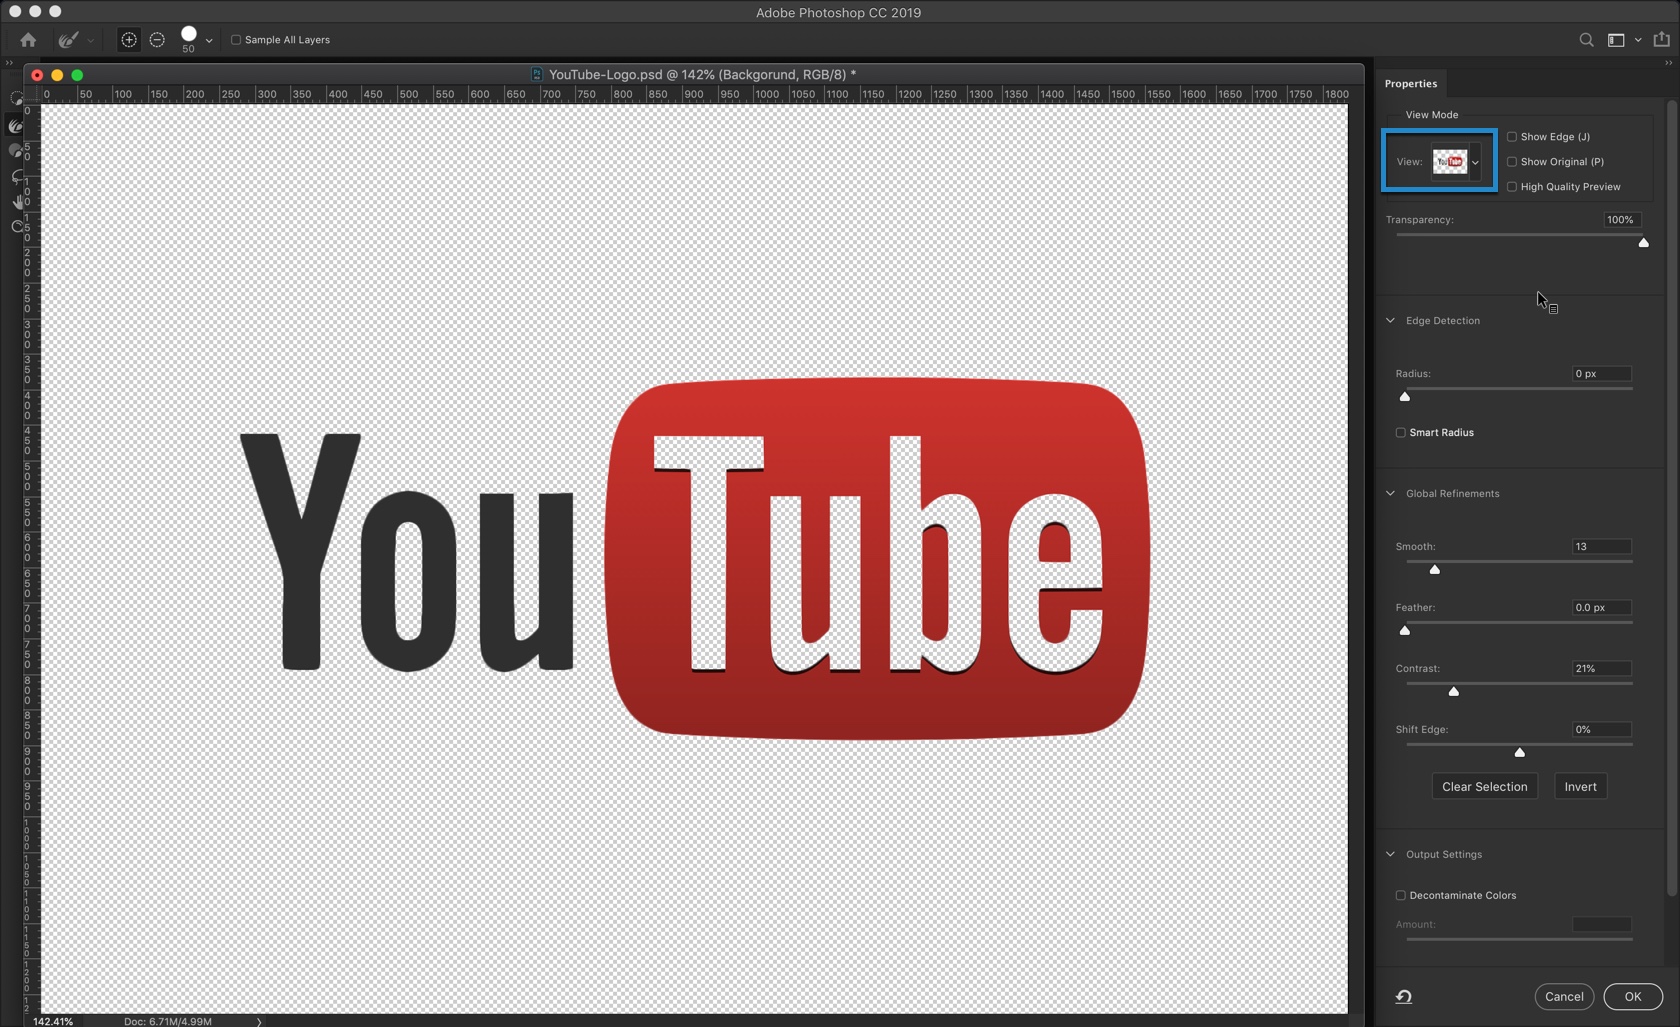
Time to refine the selection. We’re going to use Select and Mask. This tool is a replacement of Refine Edge tool. I had previously written a tutorial on Select and Mask tool in Photoshop. Check that tutorial if you want to know more on this powerful tool.
I like to keep the smart radius off and keep the radius to 0 pixels. You can play with these sliders.
Once done, press OK.
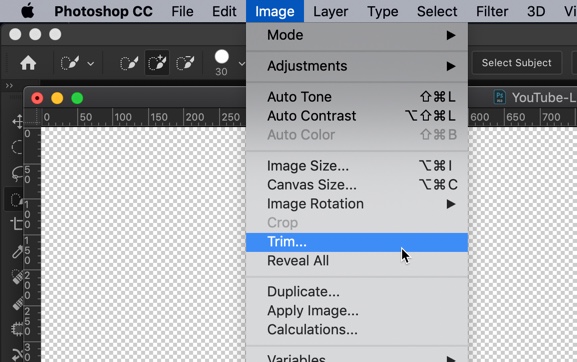
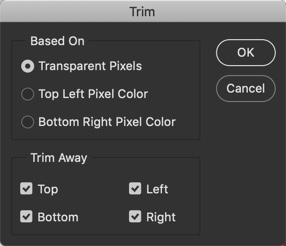
1.d Trim the Image to Remove Unnecessary Space
We’re going to remove the unnecessary space. The easiest method is to use the Photoshop Trim command. You can also use Crop tool but this command is much faster.
Choose “Transparent Pixels” and select all of the four options in the “Trim Away” area. Press OK.
Here you go.
1.e Save the Image in PNG or GIF
While saving the logo, make sure that you save it in PNG or GIF. JPEG does not support transparent background and automatically adds a white background upon saving.
Method 2 – Remove background using Quick Selection Tool
Time to remove the background using the Quick Selection Tool. This time we’re going to use a different logo.
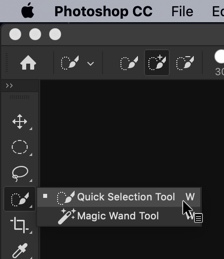
2.a Grab the Quick Selection tool and select the logo
Grab the Quick Selection tool from the tool panel or press Shift + W again and again until it activates.
Make your option panel like the one shown below.
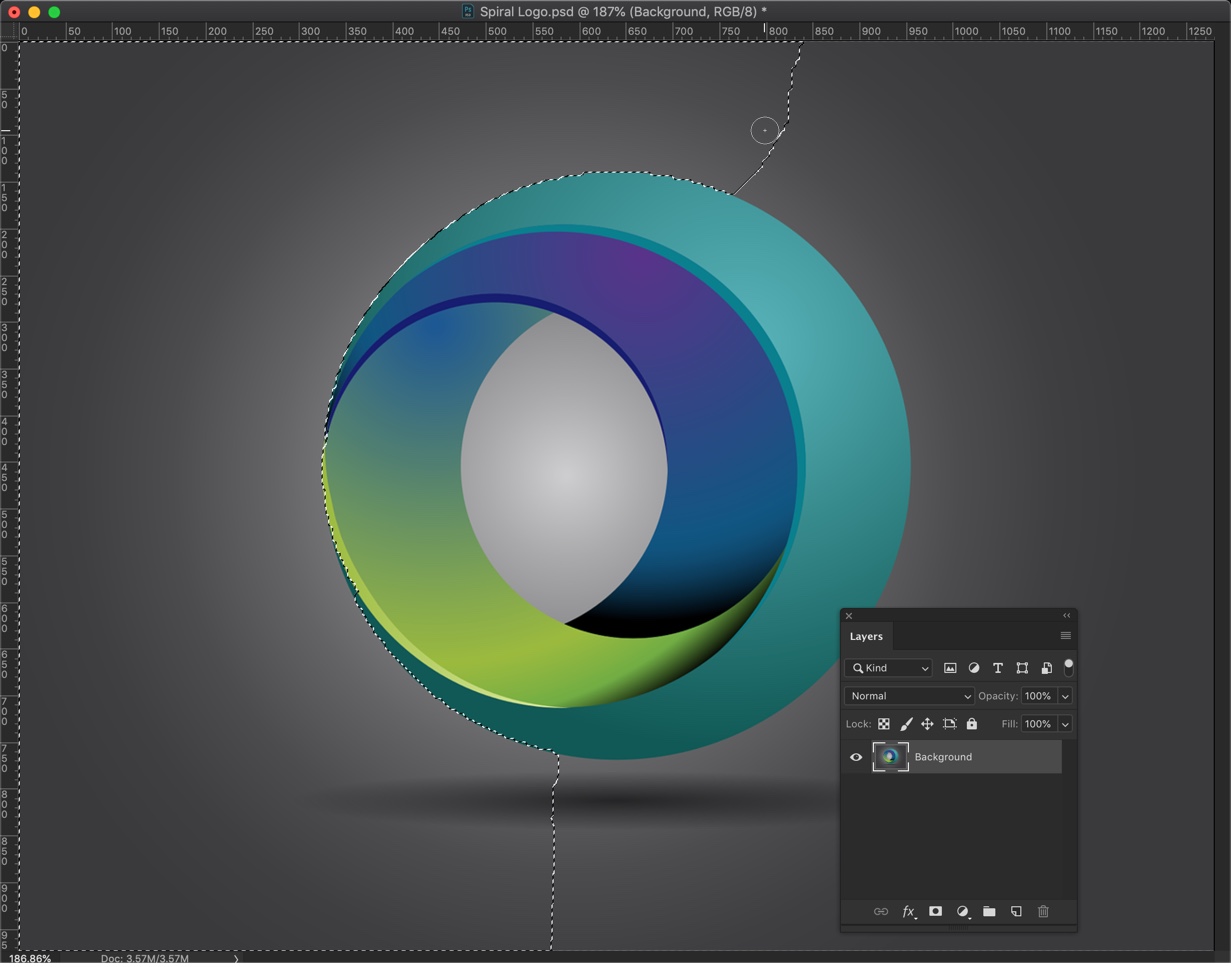
2.b Select the background
Click on the background and drag the mouse. Photoshop will keep on selecting the background until you release the mouse button.
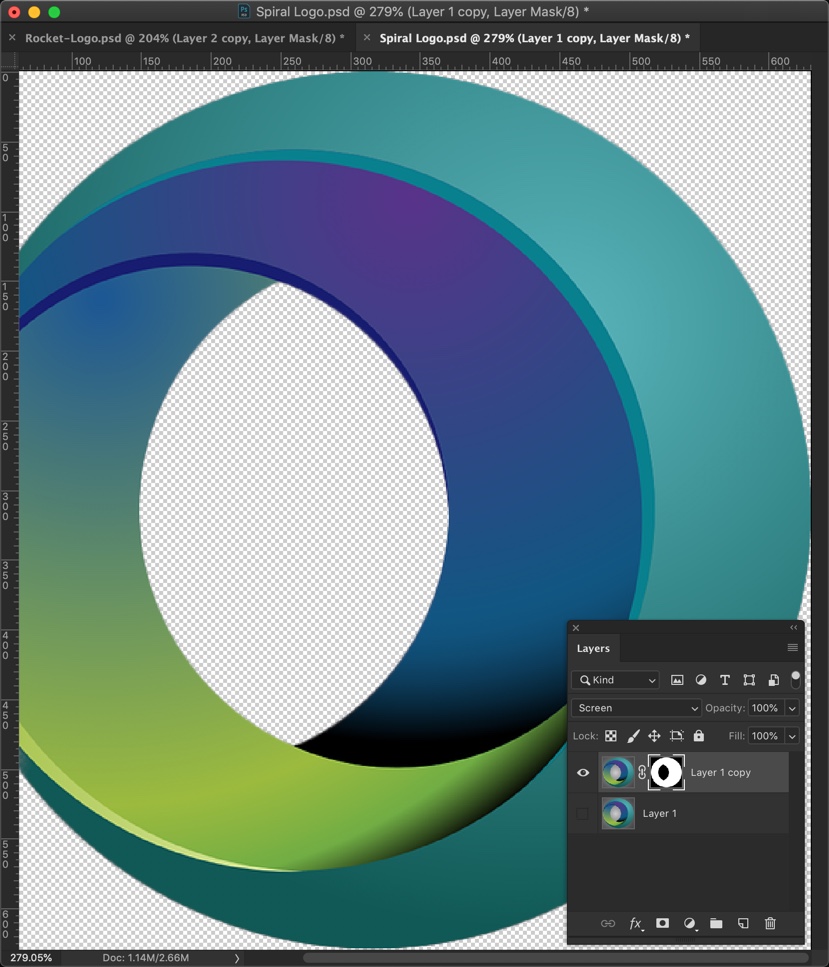
Once the outer background is selected, I am going to select the internal hole the same way.
Here’s the selected logo.
Now, you can follow the steps from 1.b till 1.e. I thought of writing the steps again but that would be this tutorial unnecessarily big.
Here’s the logo.
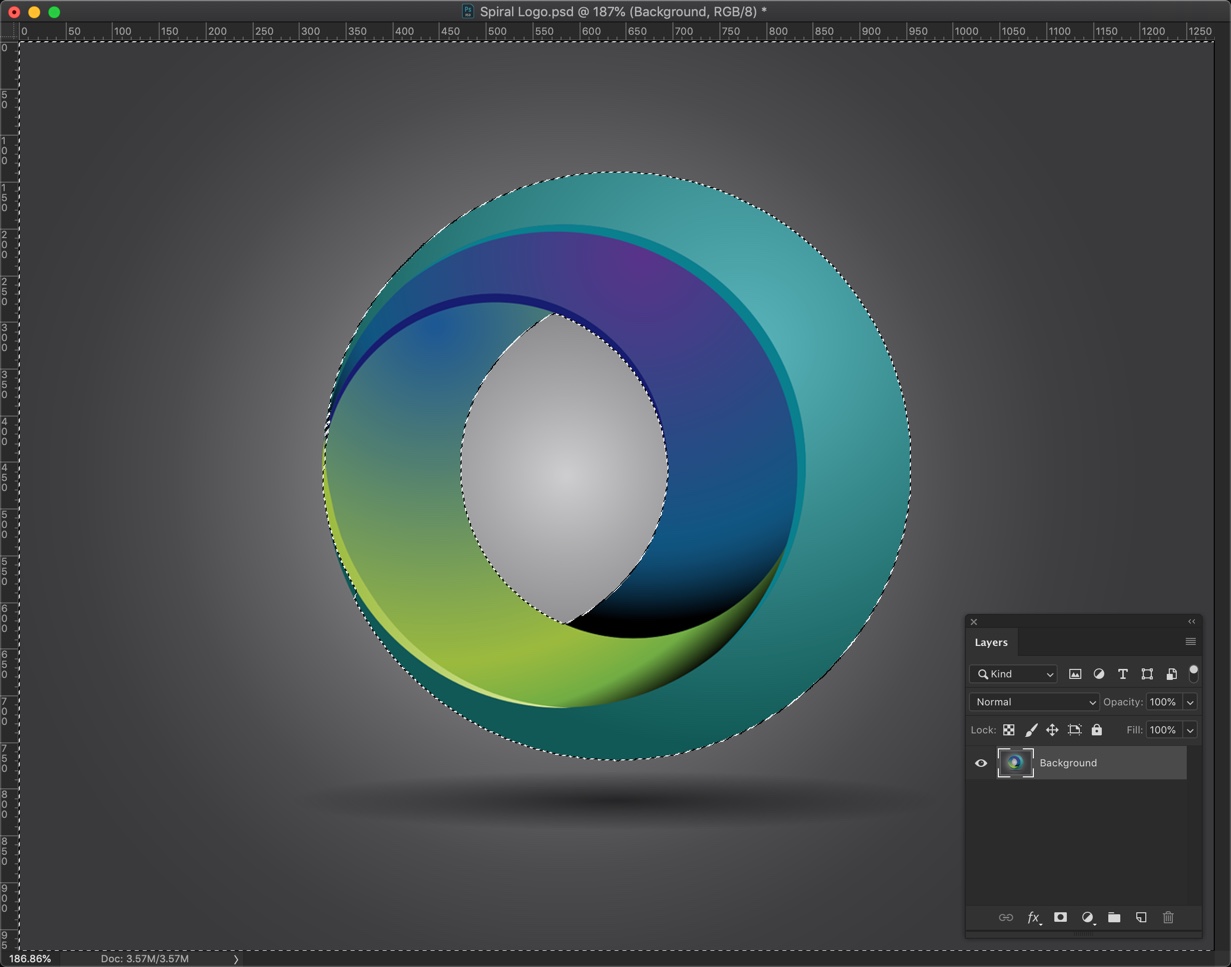
Method 3 – Remove background using Magic Wand Tool
Time to remove the background using the Magic Wand Tool. This time we’re going to use a different logo.
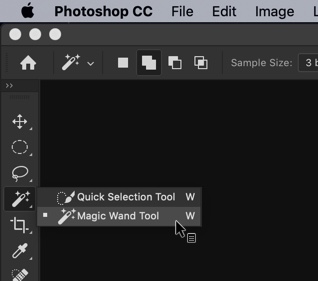
2.a Grab the Magic Wand tool and select the logo
Grab the Magic Wand tool from the tool panel or press Shift + W again and again until it activates.
Make your option panel like the one shown below. You may want to change the Tolerance value once you become an intermediate user, 15 is OK for a beginner level user.
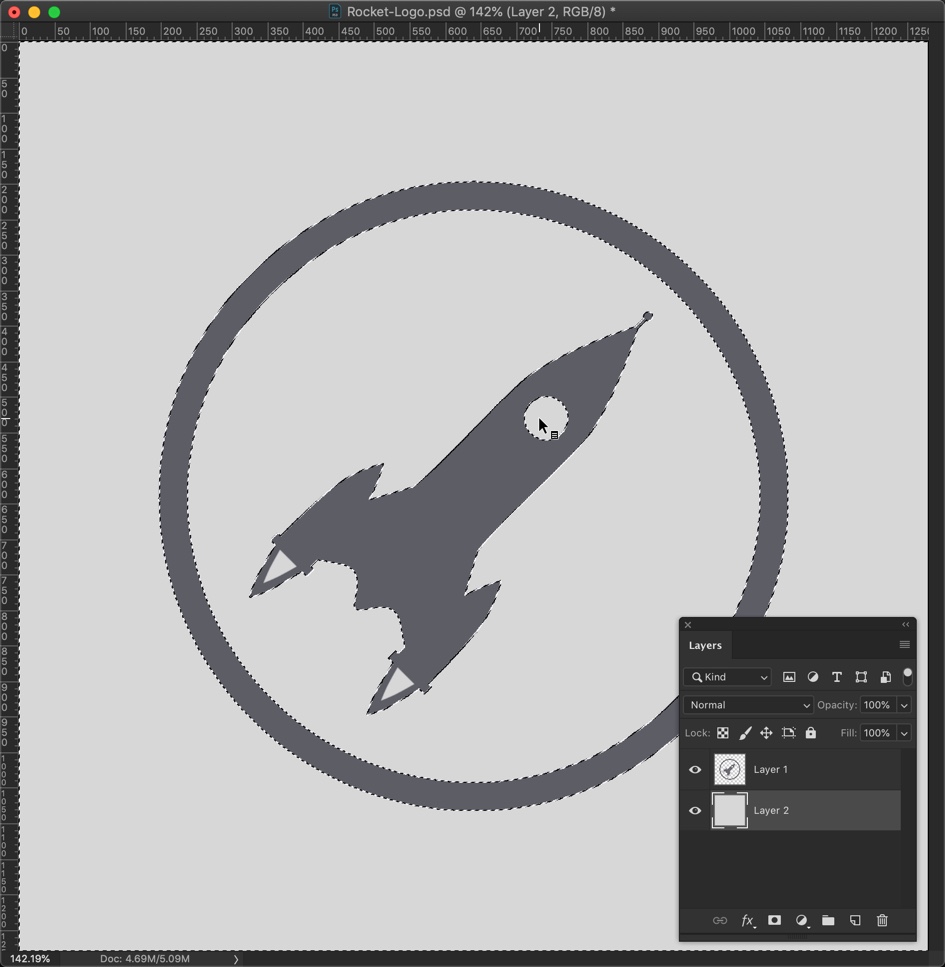
2.b Select the background using the Magic Wand tool
Now, start clicking on the background. You don’t need to drag the mouse this time. Just a single click would be enough.
Magic wand tool selects all the colors that are similar to each other and are adjacent. For example, in this below image, the background is of light gray. So, if I click on the background that is present outside the ring, it’ll select only that background. It’ll not select the background that is present inside the ring.
I am going to click on all the background now. This includes the background inside the ring.
Now, you can follow the steps from 1.b till 1.e.
Here’s the logo.
That’s all, folks.
Make sure that you make the most out of the below offer.
Perpetua filter reduces the Red color and increases the Cyan color in the photo. It also increases the highlights and shadows which ultimately decreases the contrast. We’re going to do the same thing with Photoshop.
If you want to download the action in Photoshop, you can do it with the below link.
Download the action – click here to download the action. It will scroll you down to the bottom of the page.
I wrote a tutorial on how to add lens flare in Photoshop back in 2012. It has been around 7 years and I thought that I should write a new one. I was using Photoshop CS5 and the Photoshop interface in the screenshots looked like I was using software that was developed in the 1800s.
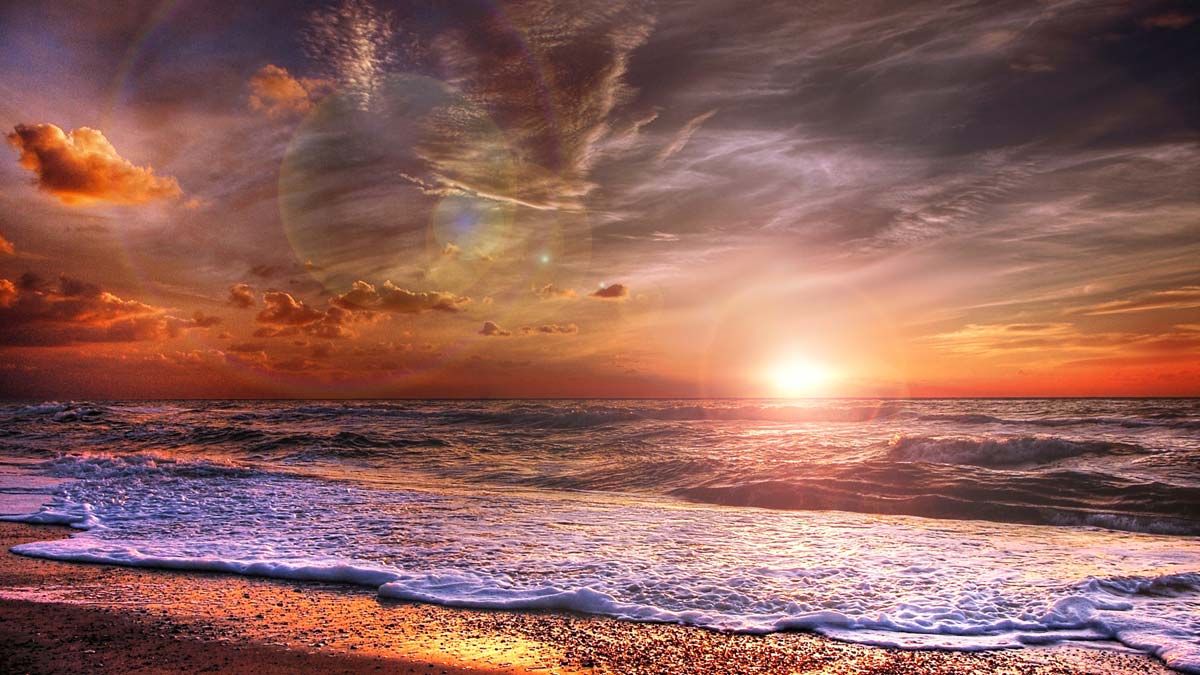
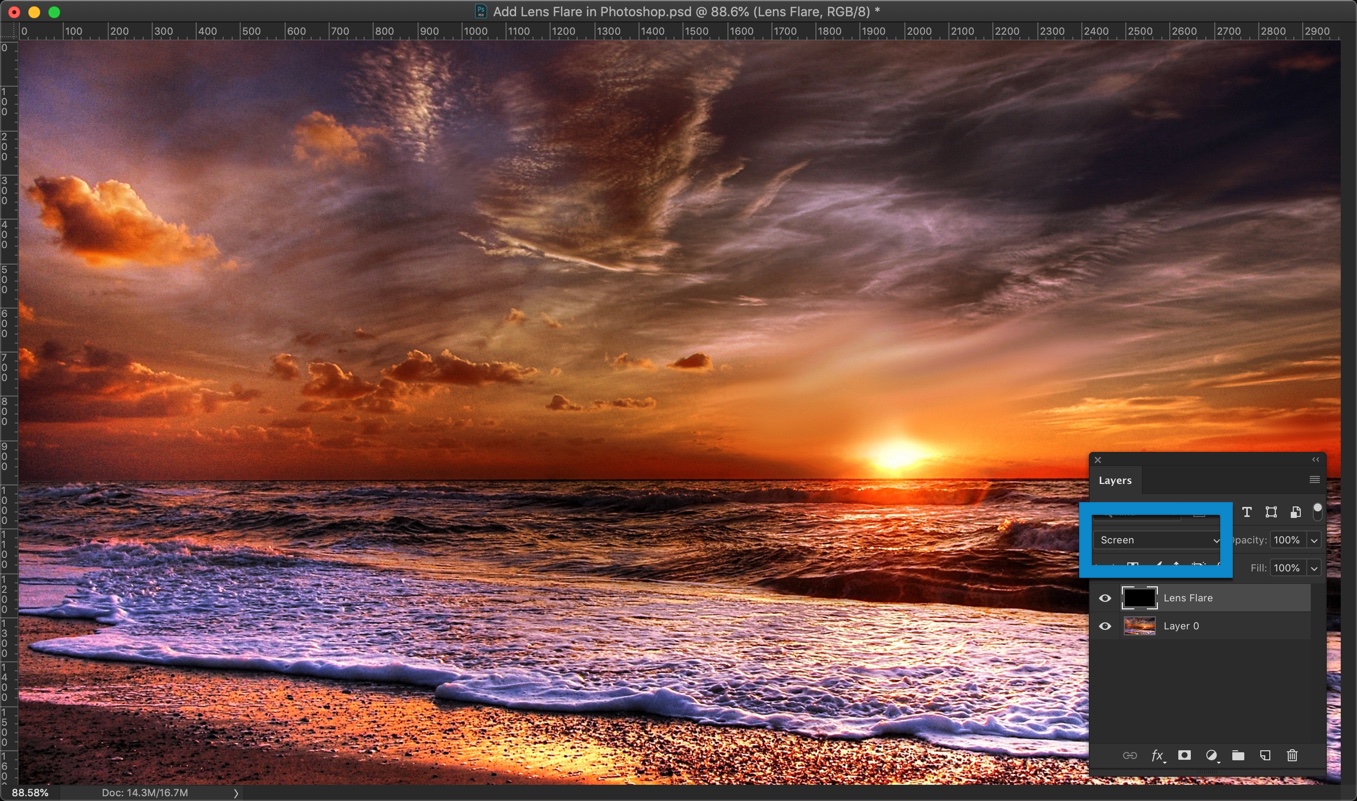
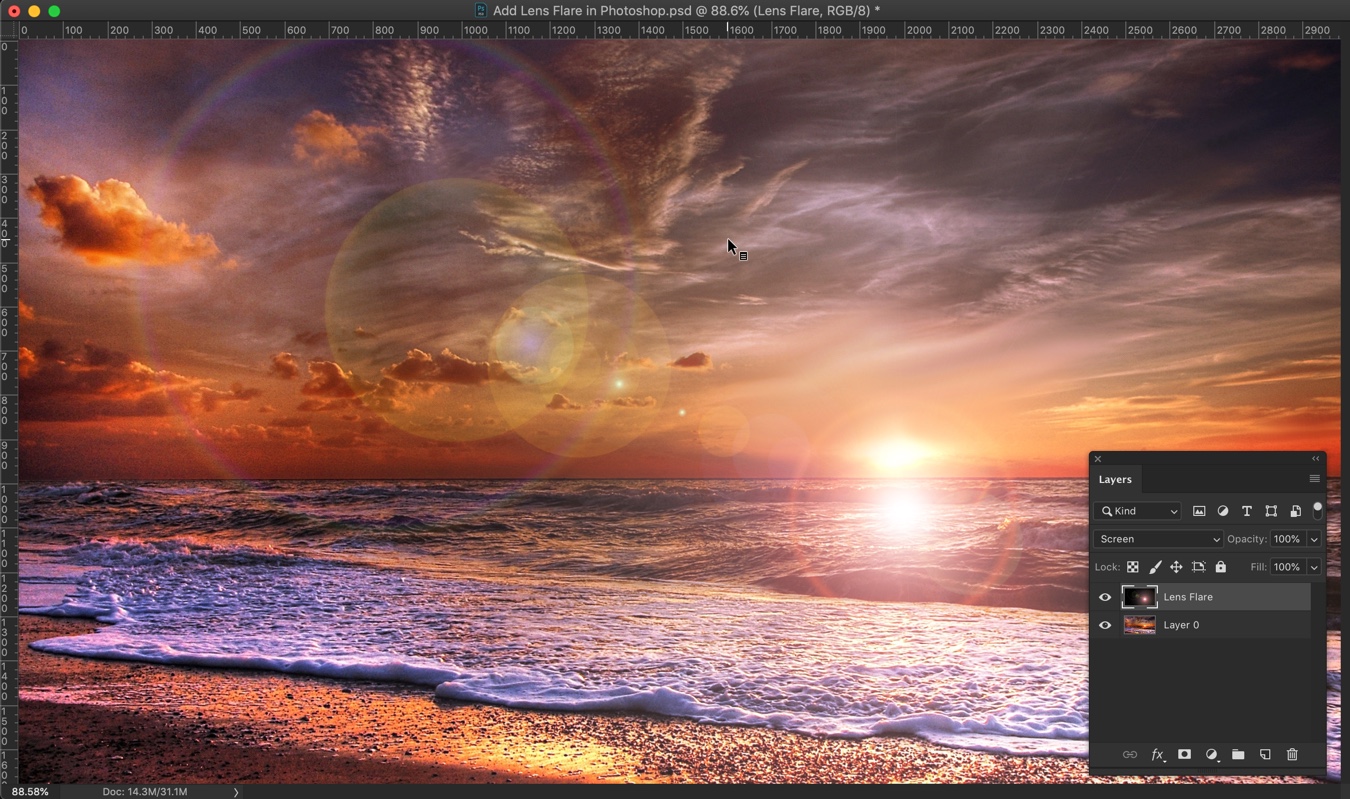
So, I am writing a new one now. Before I show you how to do it, here’s a peek to the final photo.
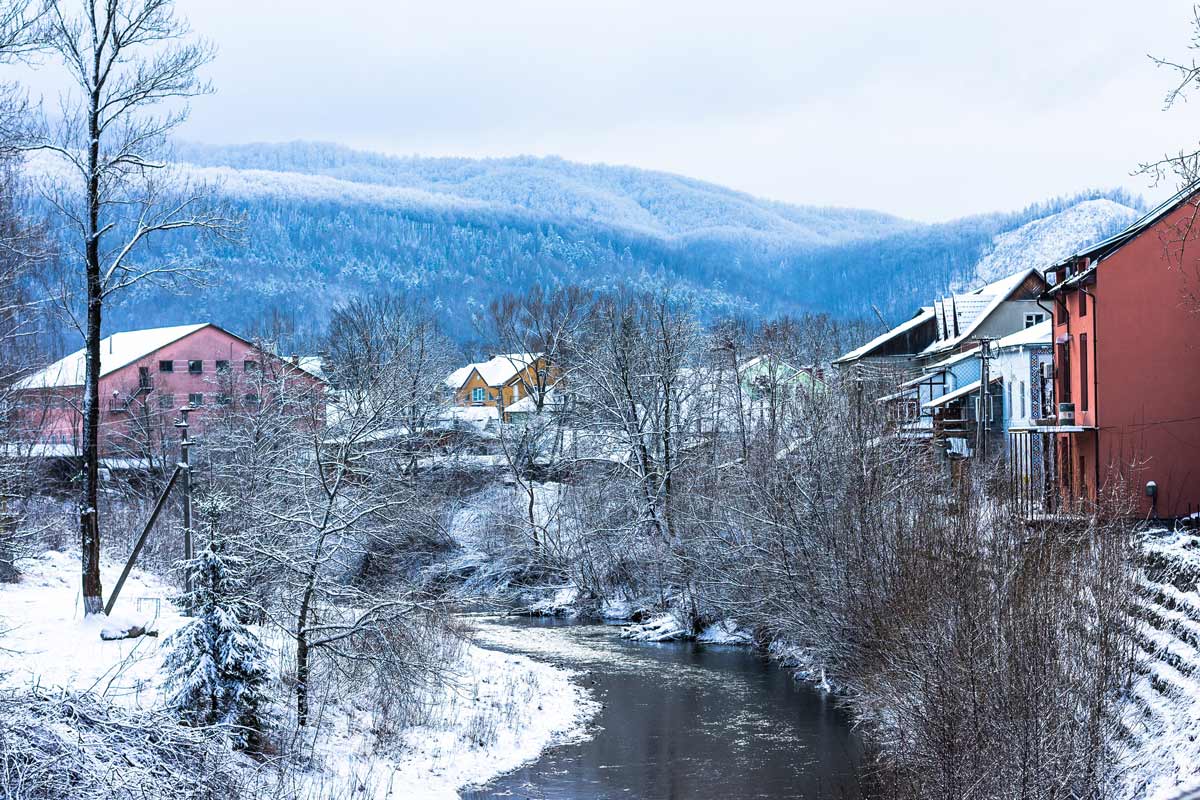
Final
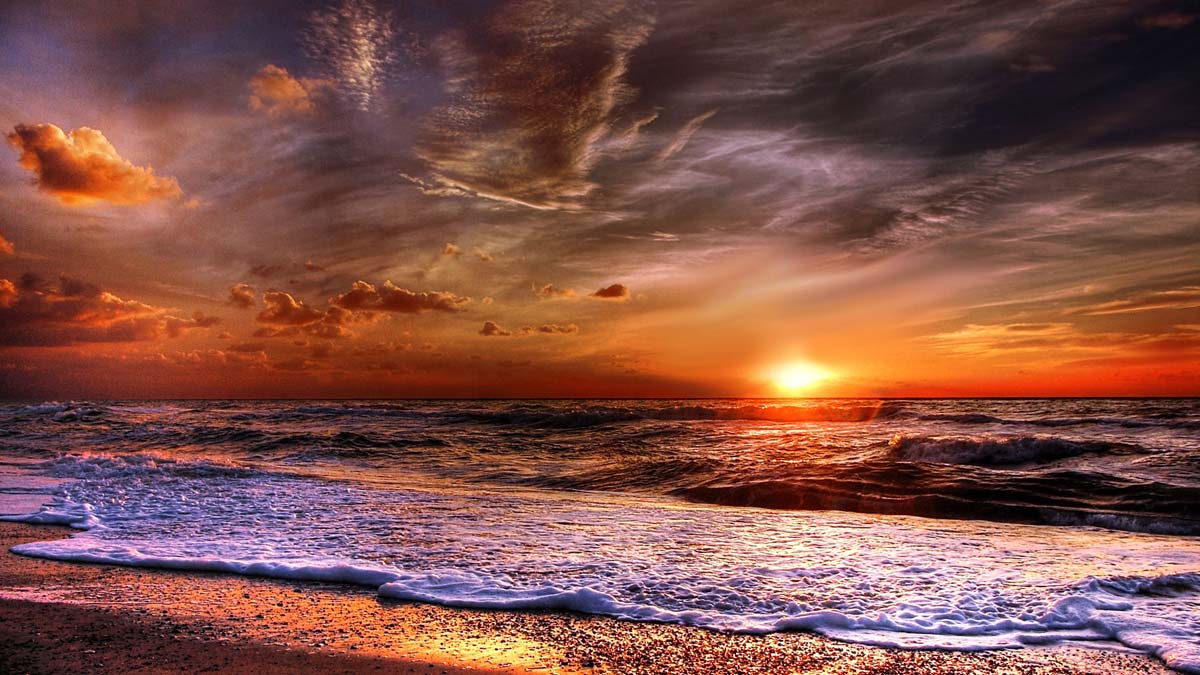
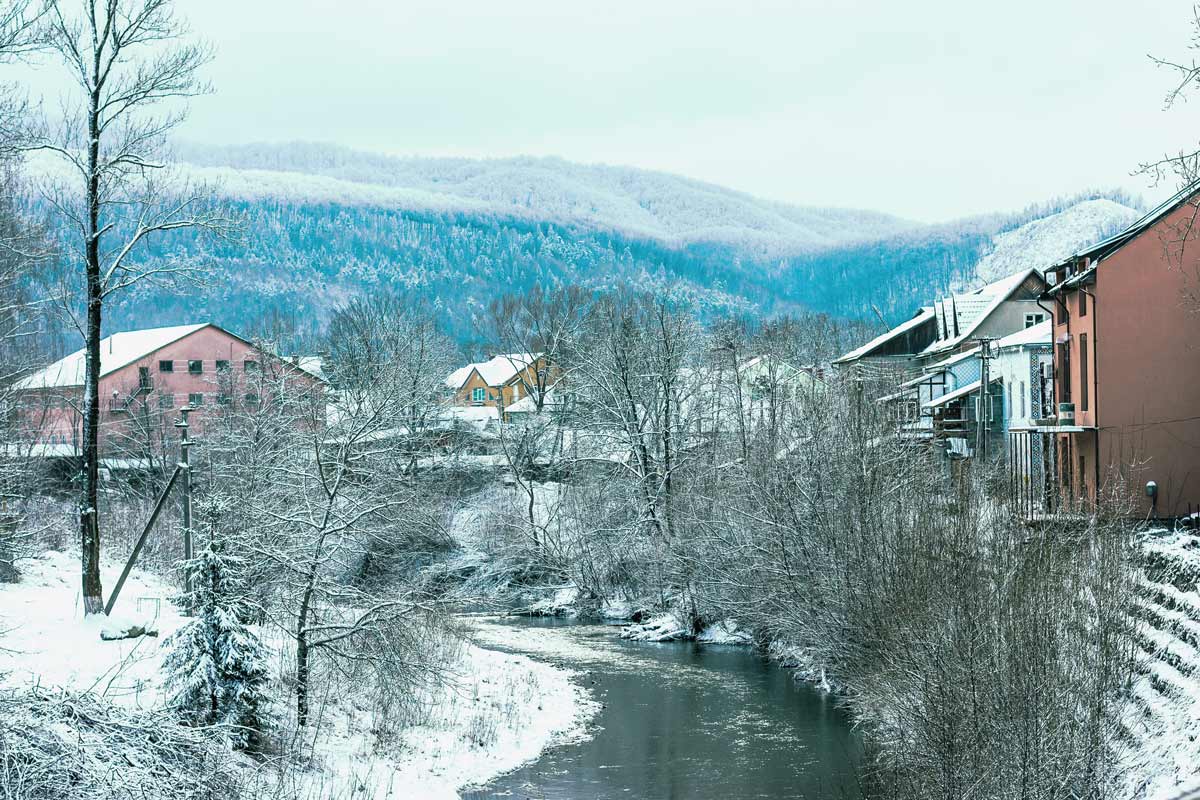
Initial
Let’s begin the tutorial.
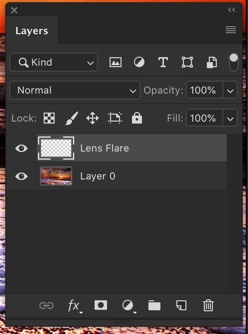
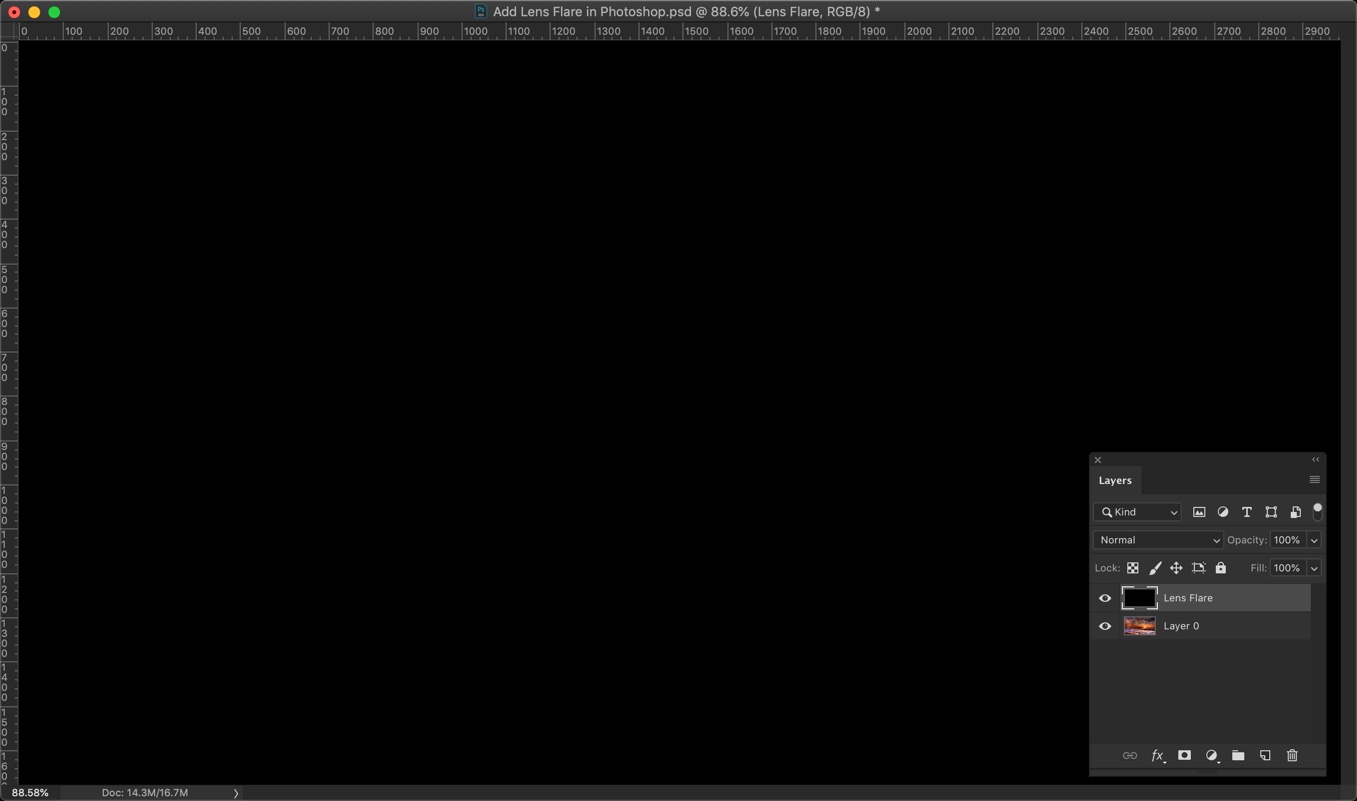
Step 1 – Create a New Layer for the Lens Flare
Create a new layer by pressing Cmd + Shift + N/Ctrl + Shift + N. Name that layer anything. I am going to write as Lens Flare.
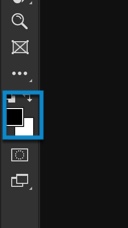
Press D to make black as your foreground color. If pressing D is not changing the foreground color to black, click on the below icon and manually change it.
Fill the Lens Flare layer with the black color by pressing Opt + Delete / Alt + Backspace. This shortcut lets you fill the layer with the foreground color which is black in this case.
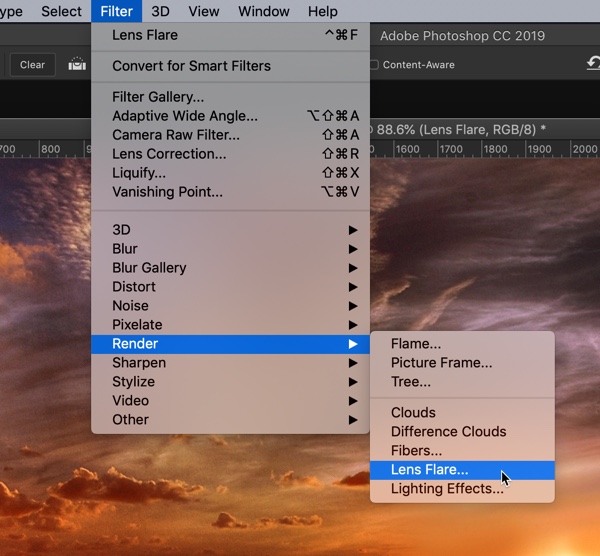
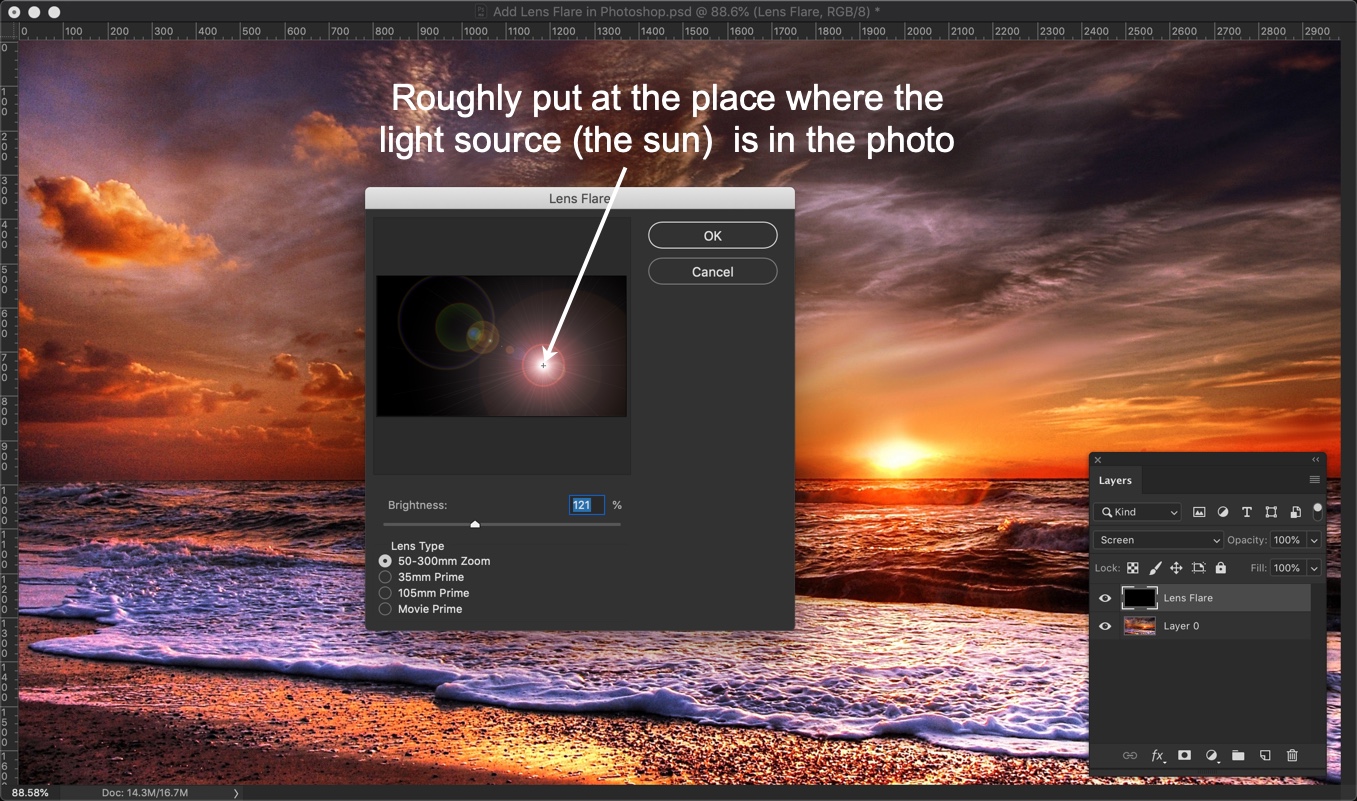
Roughly put the center of the lens flare at the place where the light source is in the photo. The light source in our photo is the sun.
Choose the brightness and Lens Type. Press OK. I am going to set my brightness as 121% and Lens Type as 50-300mm Zoom because this lens is what most photographers use.
This will add the lens flare. But the positioning may be a bit off.
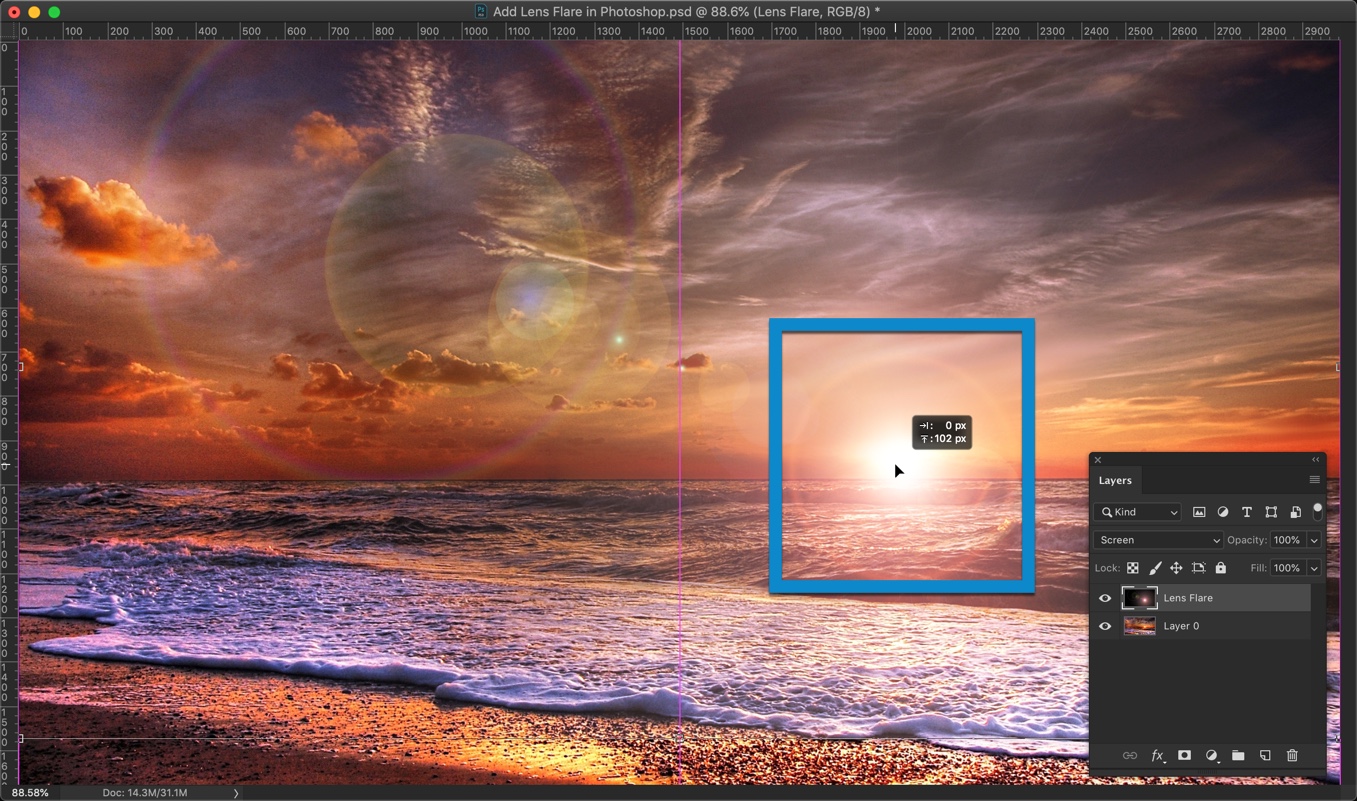
Step 3 – Move the lens flare
Activate the Free Transform Tool by pressing Cmd + T / Ctrl + T. You’ll see eight handlebars at the corners and center of the image.
Move the lens flare so that it overlaps the light source. The light source, in this case, is the sun. Press Return/Enter once done.
That’s all.
Here’s the final photo again.
Make sure that you make the most out of the offer below.
Instagram has secretly launched new filters for your posts. I didn’t receive any notification in my app. I saw a few new filters when I was posting a photo. So, guess what? We’re going to write a tutorial on achieving those filters in Photoshop. Today, we’re going to learn how to create Instagram Aden filter in Photoshop.
Achieving Instagram effects are very easy in Photoshop. You don’t need to use any brush. Just a few adjustment layers will do the job.
I am also going to use just a few adjustment layers to achieve Instagram Aden filter in Photoshop. These will be basics like Brightness, Photoshop Filter, Hue and Saturation, and Gradient Map.
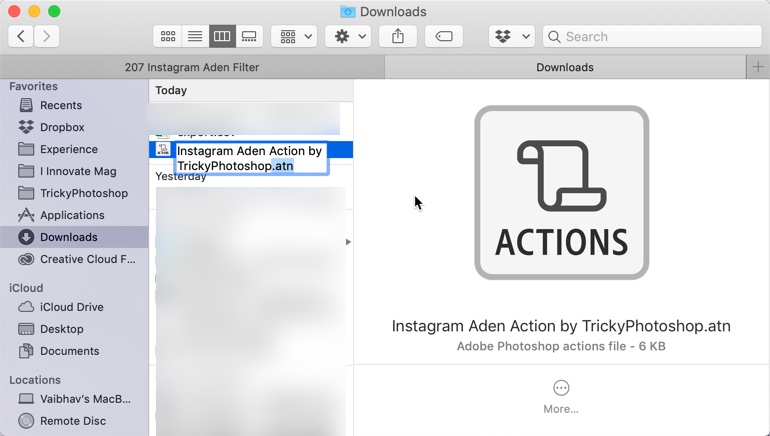
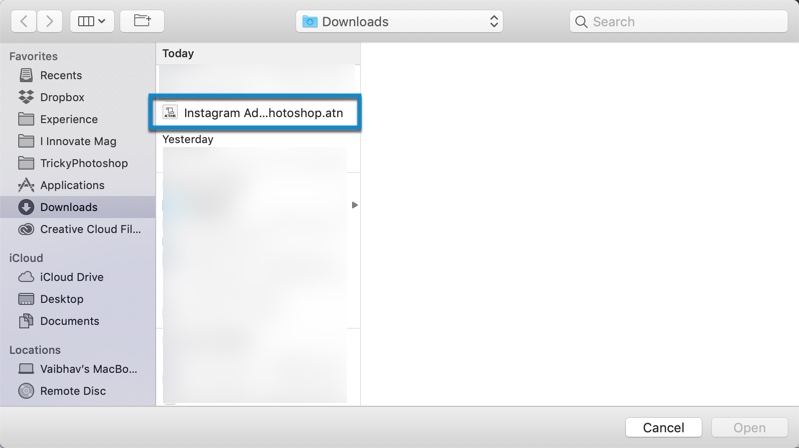
Download the action – click here to download the action
Before I proceed with the tutorial, let me show you the before and after photos.
After
Before
Strategy
I analyzed that the Instagram Aden filter adds greenish tint to the dark areas and bluish red tint in the light areas. Overall, it also reduces the contrast and decreases the brightness by a few points. Let’s do the same.
Video
If you like watching videos, here’s the video for you.
Step 1 – Add a green tint
Go to Layer > New Adjustment Layer > Photo Filter.
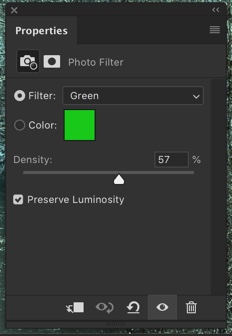
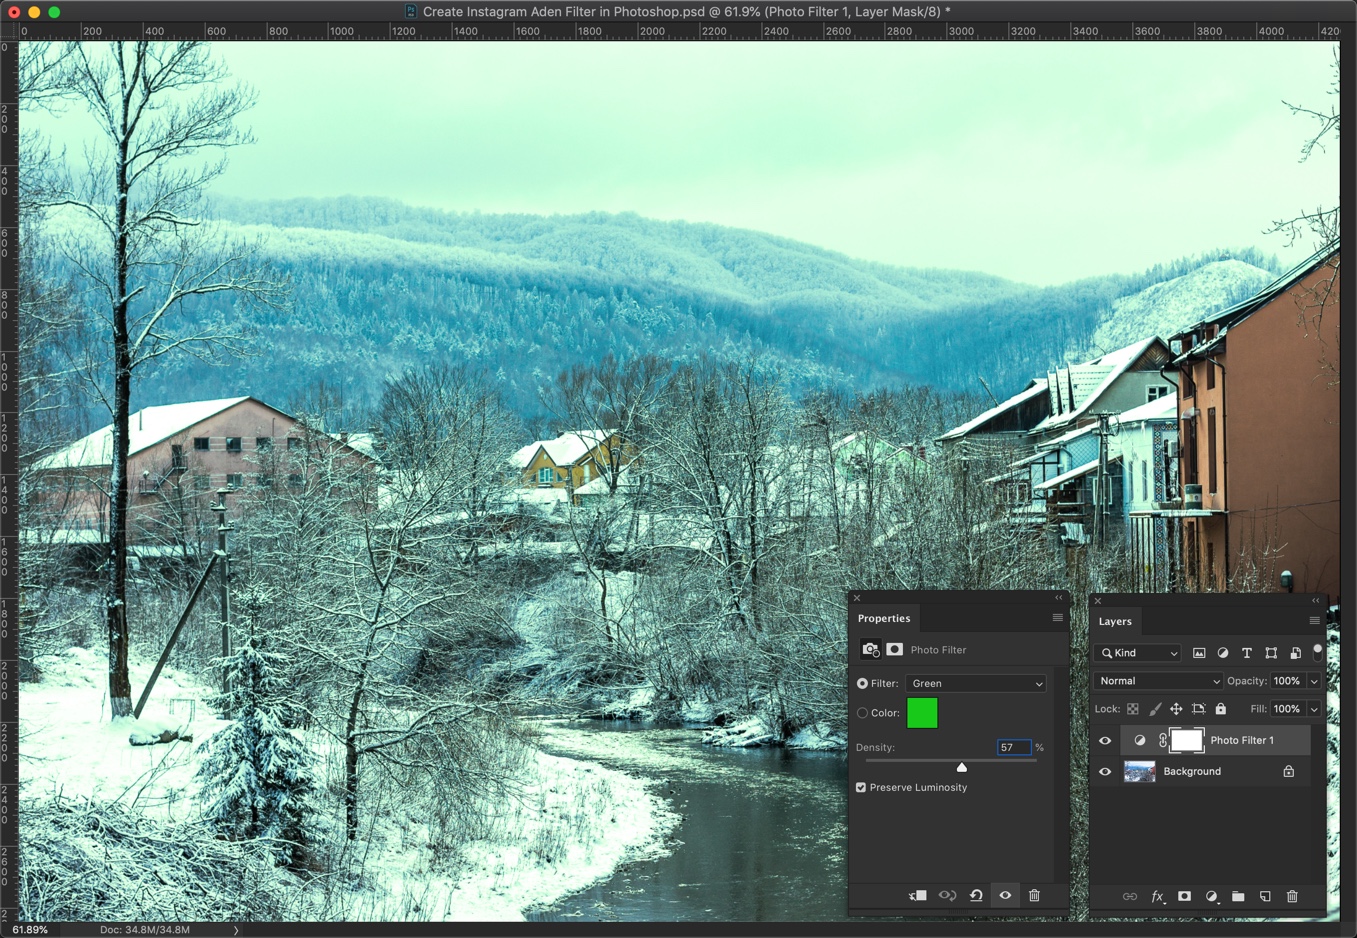
Change the Filter to “Green” and increase the Density to 57%. Make sure that “Preserve Luminosity” is turned on.
This will add a green tint to the image.
Step 2 – Add a faded blue tint
Again, we’re going to add a tint with the Photo Filter.
Go to Layer > New Adjustment Layers > Photo Filter.
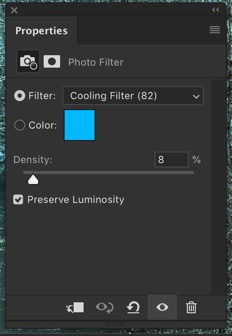
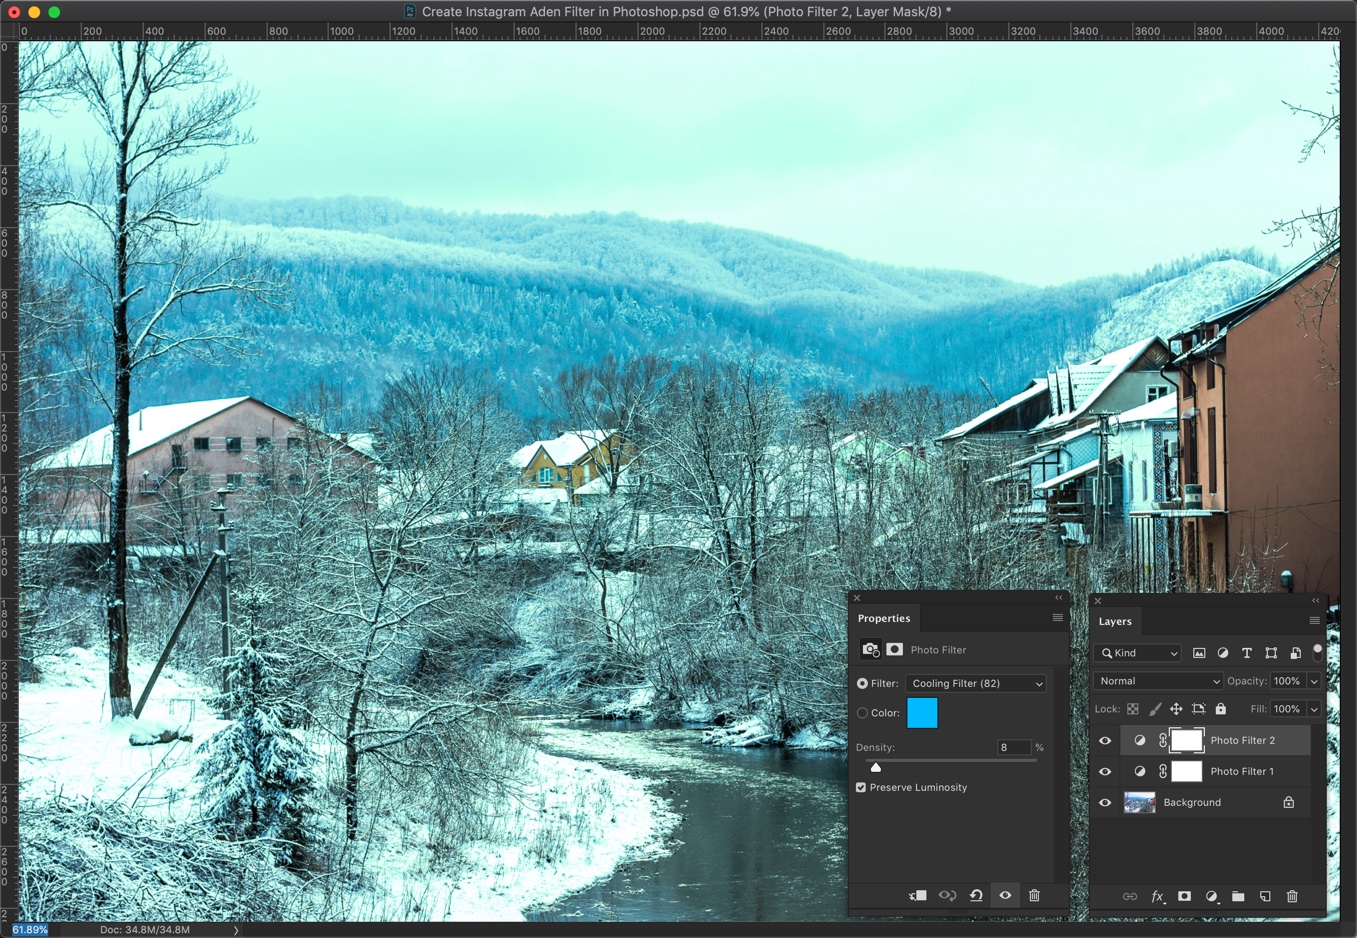
Choose “Cooling Filter (82)” this time, and increase the Density to 8%. Make sure that “Preserve Luminosity” is turned on.
This will add a faded blue tint to the image.
Step 3 – Change the color of highlights and shadows
Time to add green tint to the dark areas and red tint to the light areas.
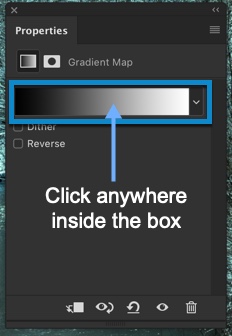
Go to Layer > New Adjustment Layer > Gradient Map. A panel will open. Click anywhere inside the box where a gradient is present. You can refer the below screenshot. There’s a chance that you’re seeing a different than Black and White. It doesn’t matter. Click on the box.
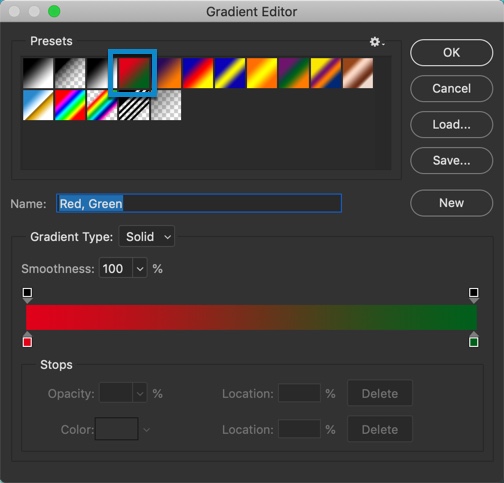
Click on the Red to Green gradient. Now, the red color is present at the left which means that the dark areas of the photo will be colored with the red. Similarly, bright areas will be colored with the green. Press OK.
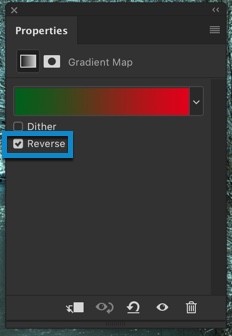
Click on “Reverse”. This will reverse the gradient. Now, dark areas will be colored with green and bright areas will be colored with red.
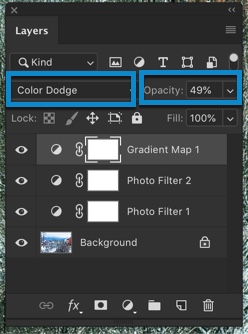
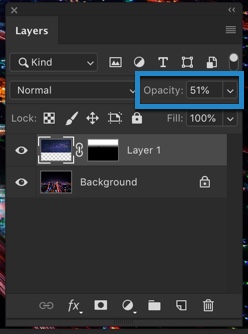
Change the Blend Mode to Color Dodge. Decrease the opacity to 49%. Press F7 to open the layer panel if it’s not opened.
This is how your photo will look.
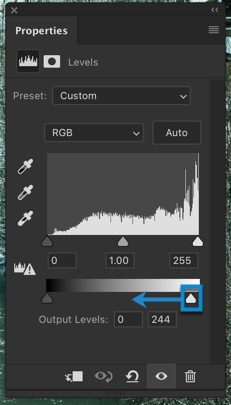
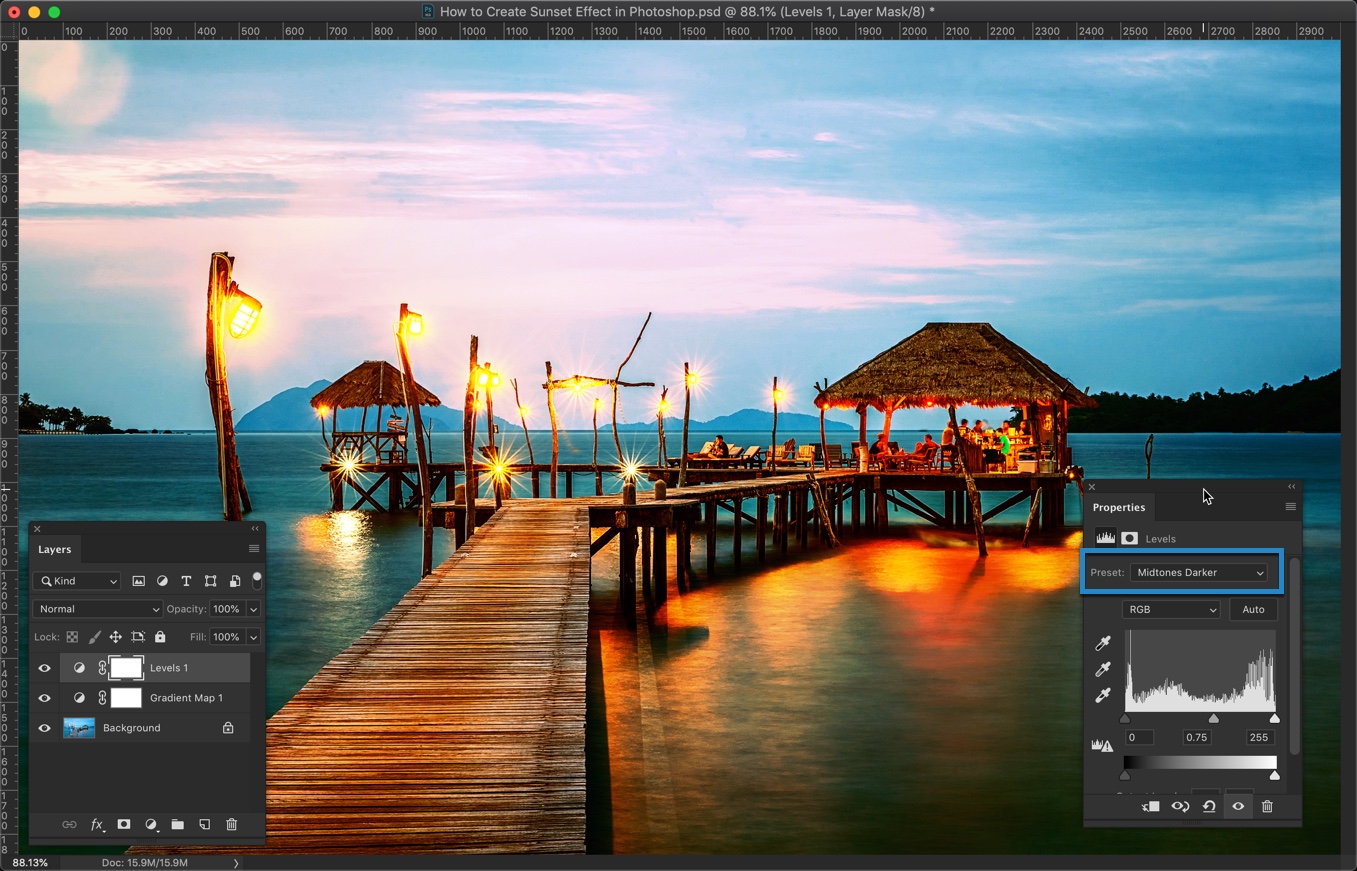
Step 4 – Time to decrease the highlights in the photo
The photo is quite bright. You can see that the sky a bit overexposed than the Instagram Aden Filter standard. We’re going to tone it down.
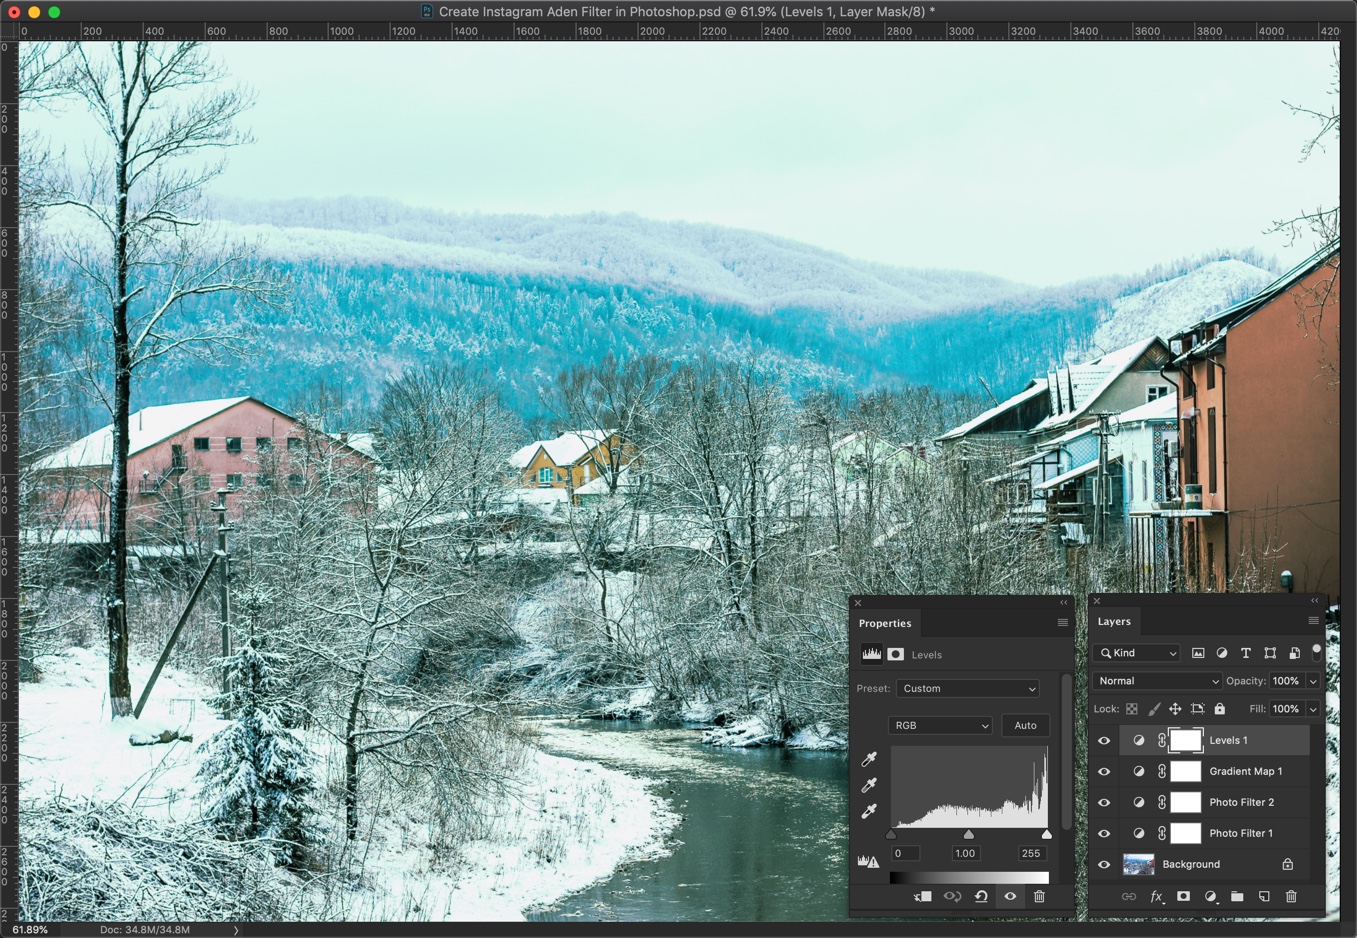
Go to Layer > New Adjustment Layer > Levels. Drag the slider that is highlighted in the below screenshot towards left. I am going to stop at the point where the reading is 244.
The change would be very subtle. Here’s the image.
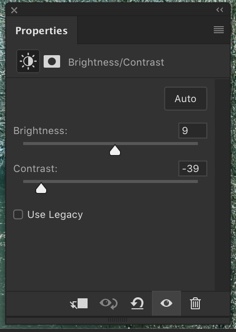
Step 5 – Decrease the contrast
Almost all Instagram filter decreases the contrast. Instagram Aden filter also does.
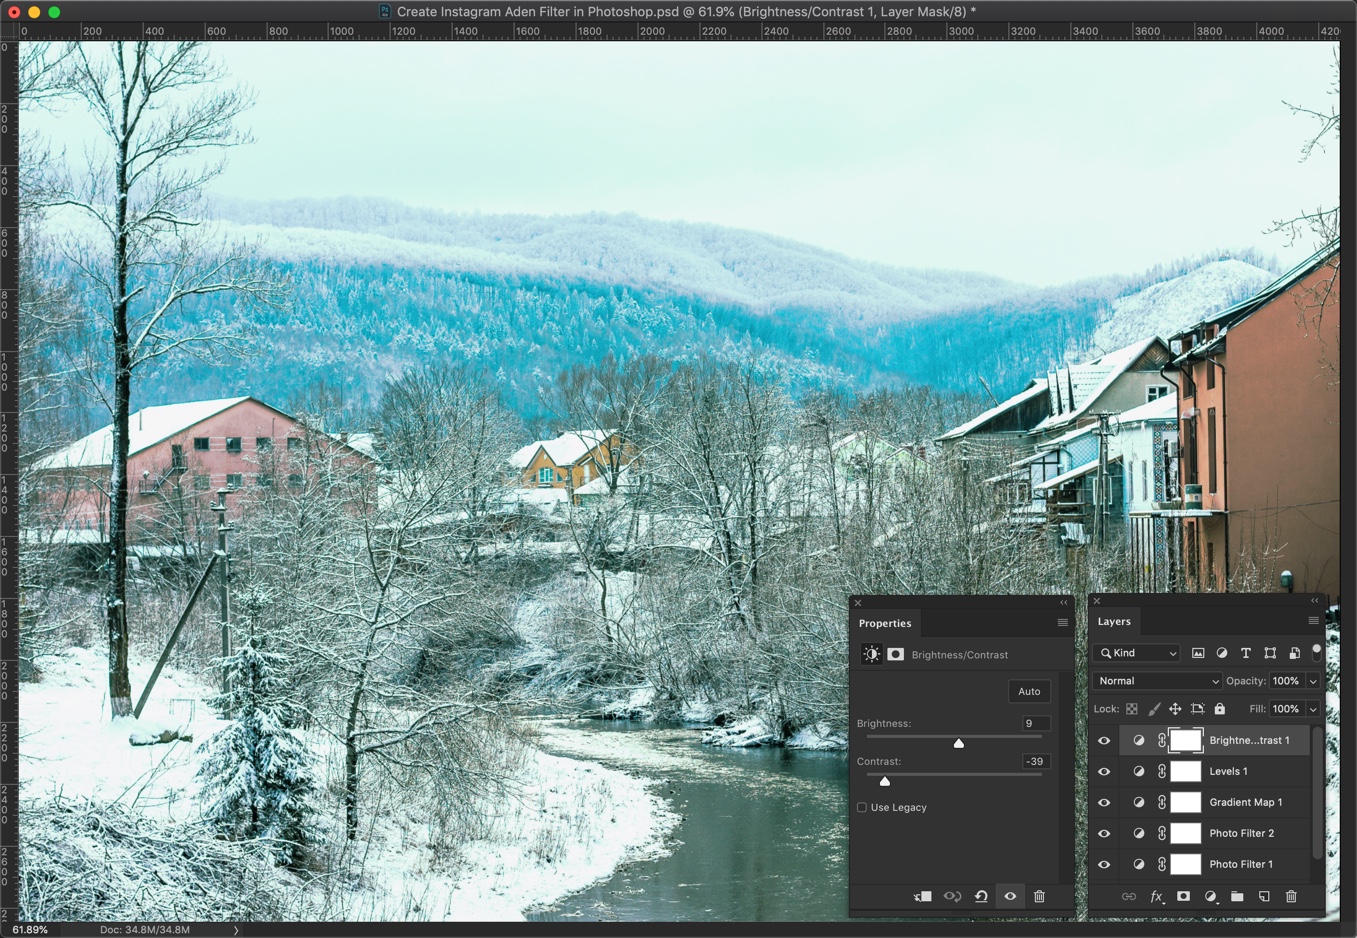
Go to Layer > New Adjustment Layer > Brightness and Contrast. Decrease the contrast to -39 and increase the brightness to 9.
Your photo should look like this.
Step 6 – Add a blue color
Here’s the last step. Time to give a blue tint to the photo.
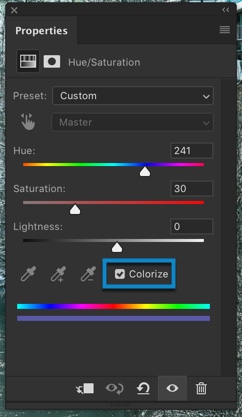
Go to Layers > New Adjustment Layer > Hue and Saturation. Click on the “Colorize”. Increase the Hue to 241 and increase the saturation to 30.
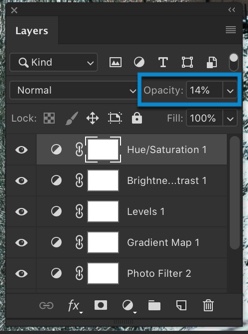
Decrease the opacity in the layer panel to 14%. Press F7 to open the layer panel if it’s not opened.
Your photo will look like this.
This is all guys.
Here’s the Photoshop Action for Instagram Aden Filter
I wrote a similar tutorial back in 2012 (yes, 6 years ago). Today, I received an email that the tutorial is looking old. The screenshots I provided were only 600 pixels wide which was enough for the screens that we used to use six years ago. But, they aren’t enough now. So, here I am writing a new tutorial on how to create a sunset effect in Photoshop.
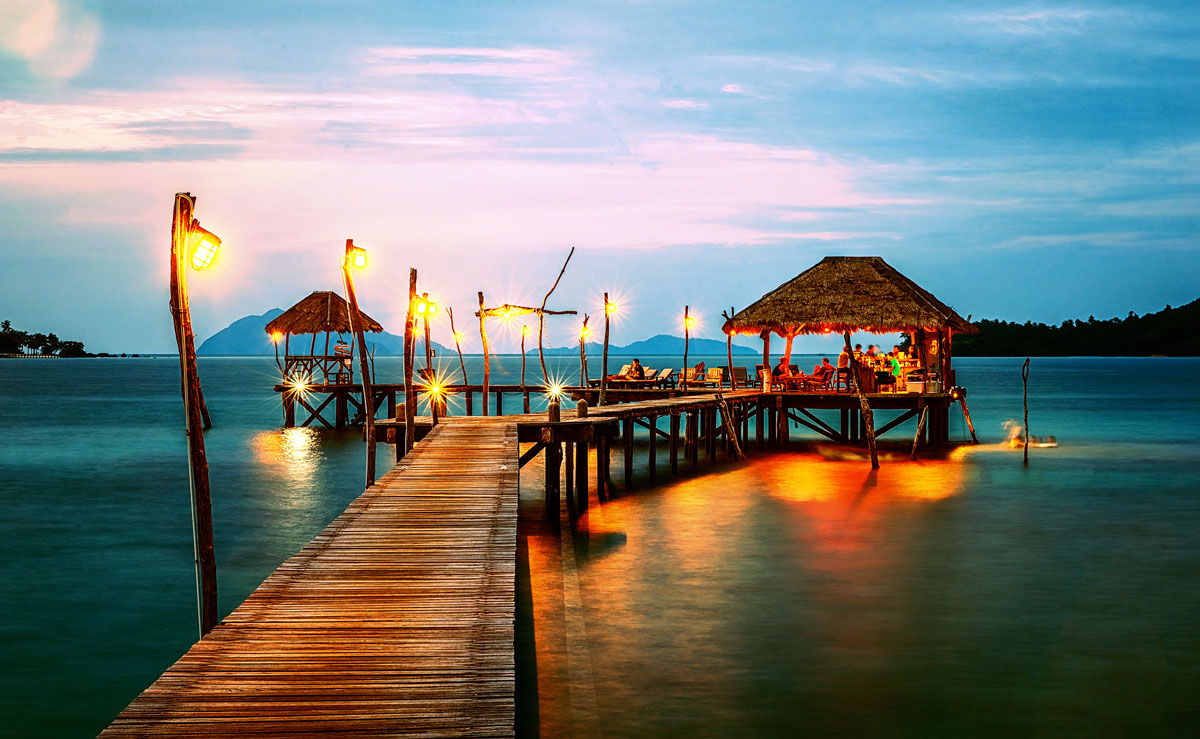
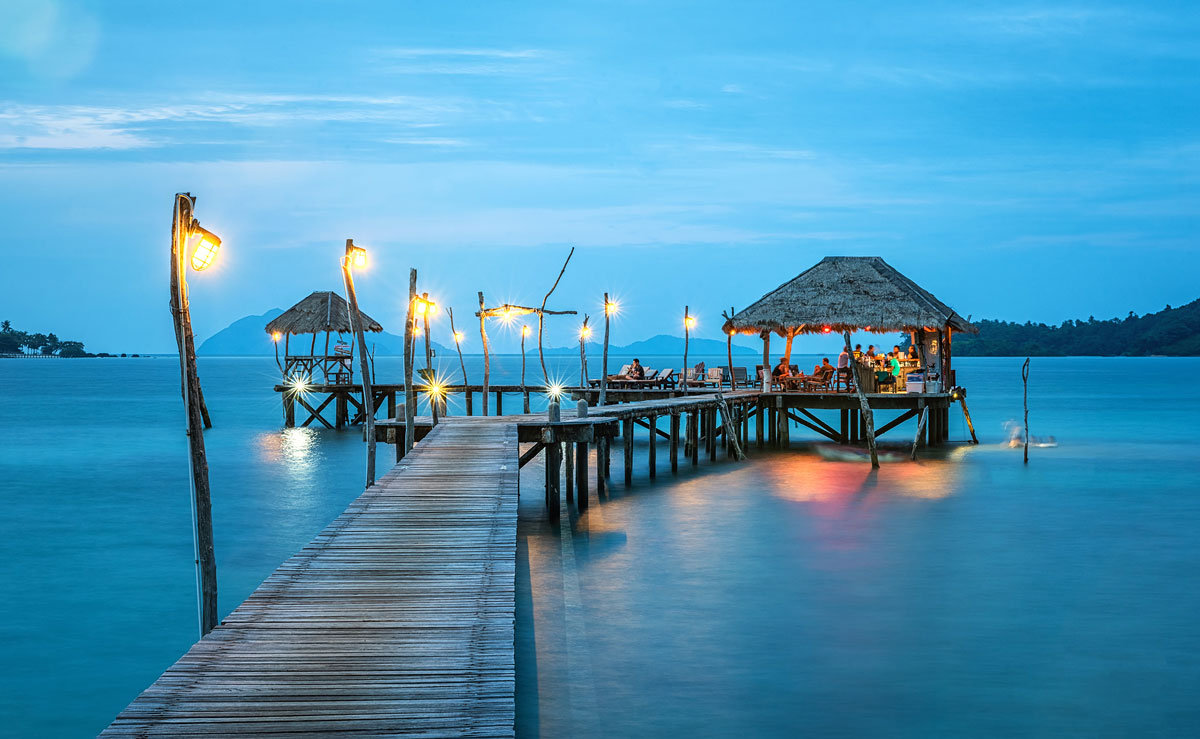
Before we go, I want to show you the final and initial photo.
Final
Initial
So, let’s begin. It’s only two steps tutorial
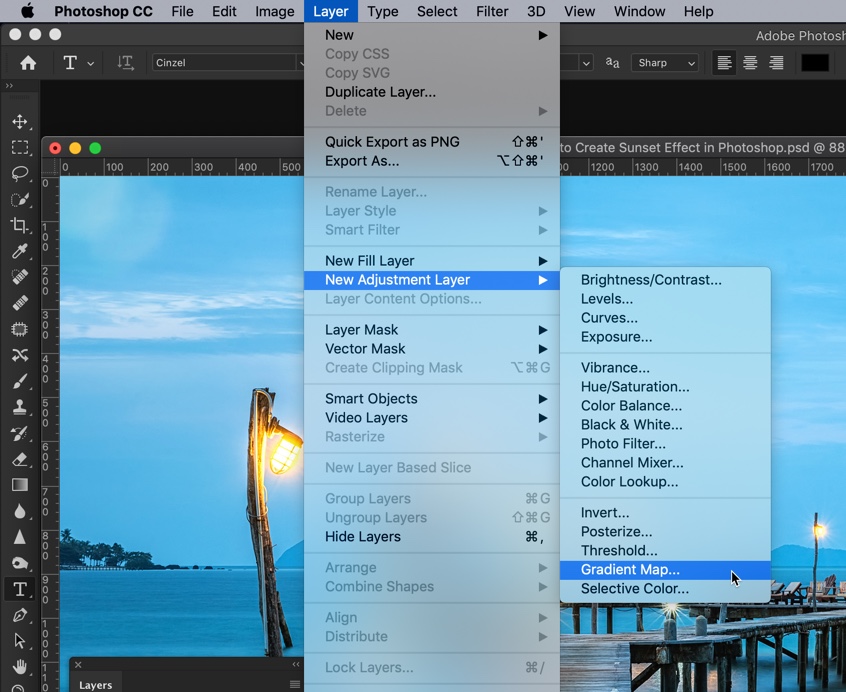
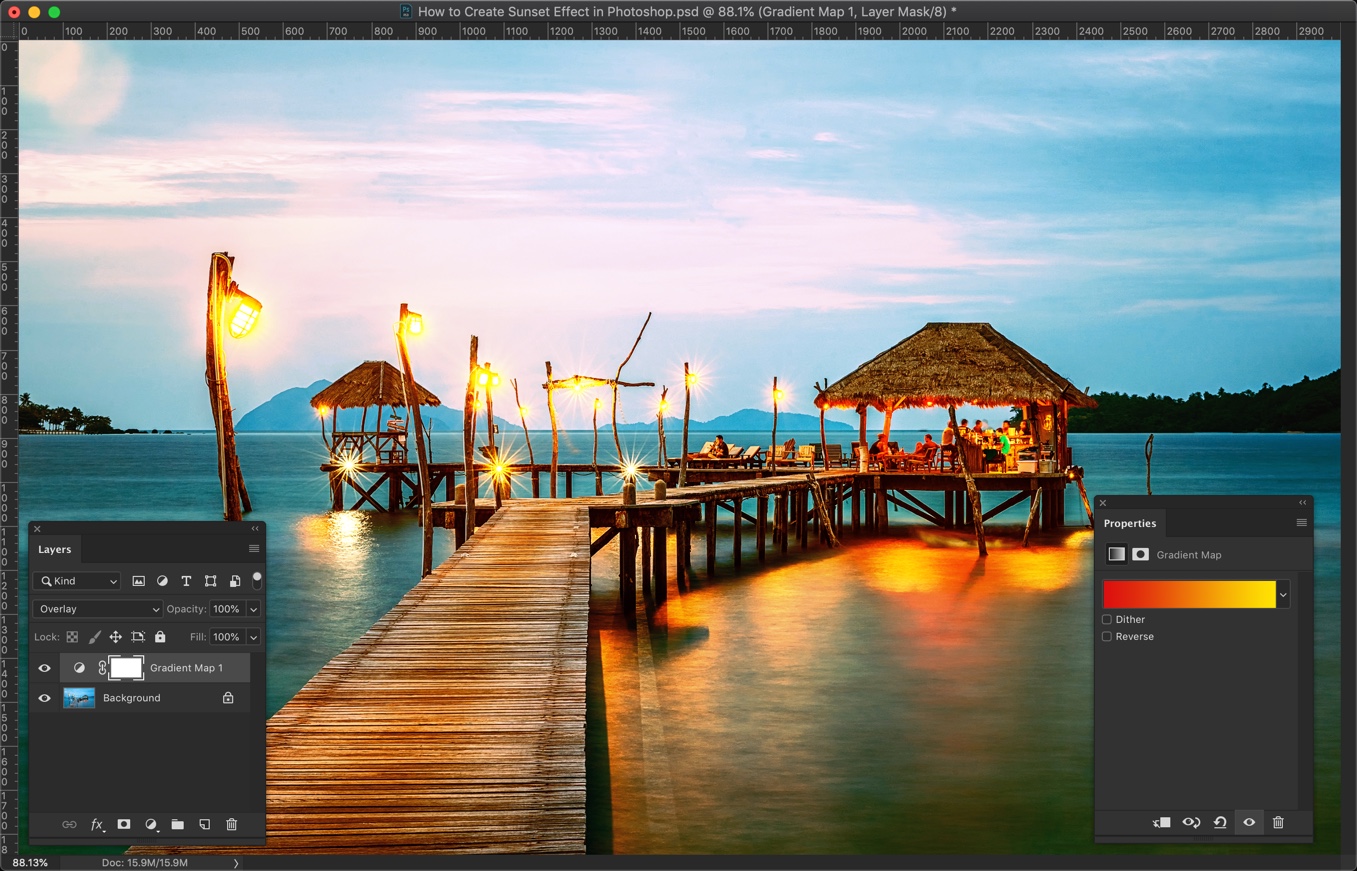
Step 1 – Apply the Gradient Map
Go to Layer > New Adjustment Layer > Gradient Map
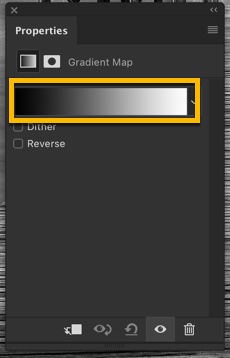
In the Property panel, click on the color box. If the property panel does not open by default, manually open it by going to Window > Properties.
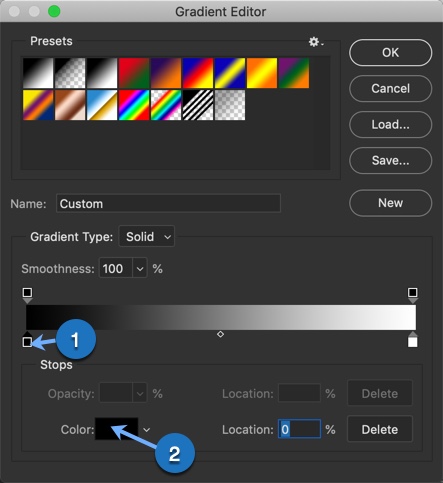
Gradient Editor should be opened now.
In the gradient editor, first, click on the bottom left handlebar (1) that I have shown below. Then click on the color (2).
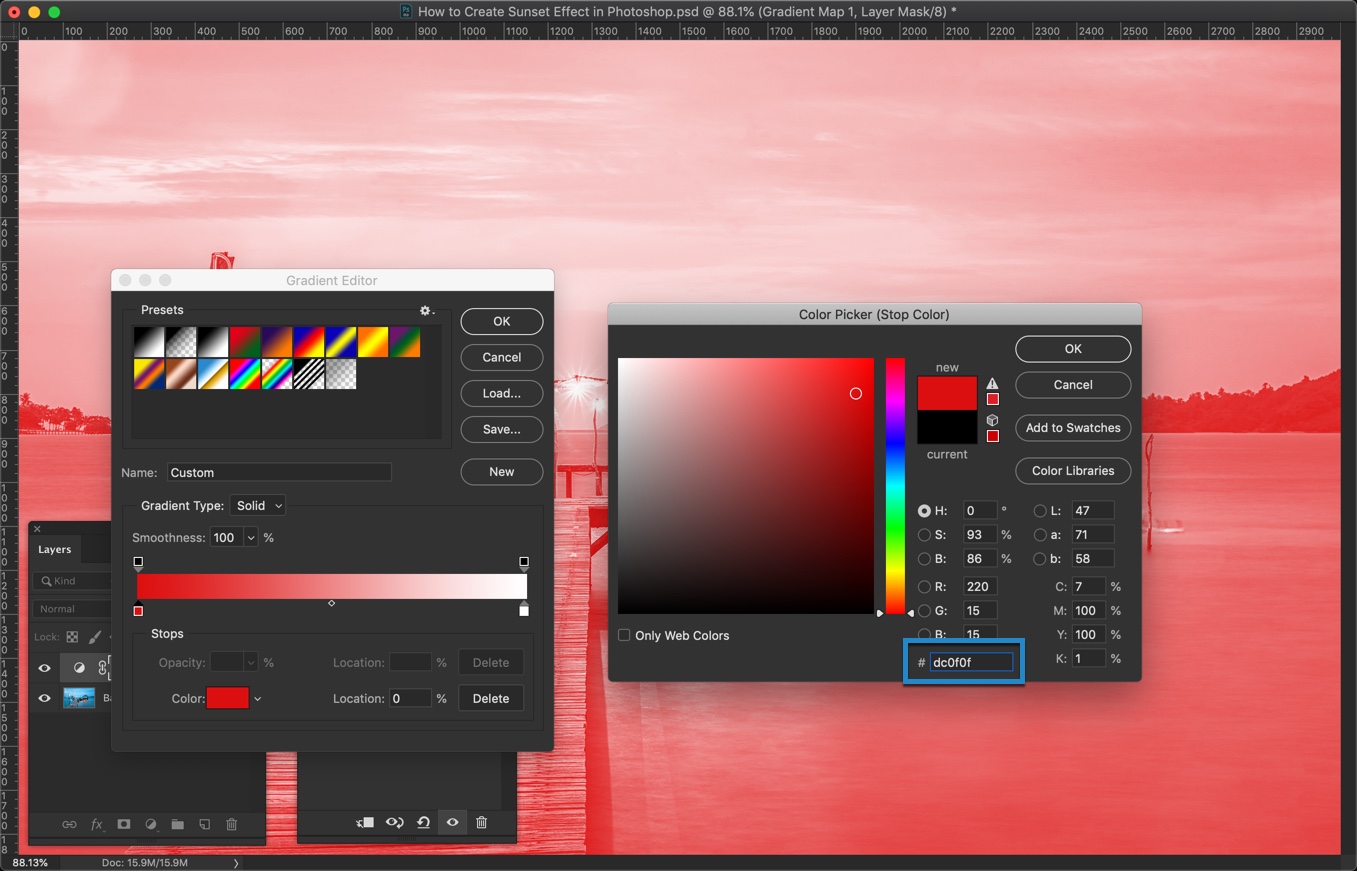
In the HEX value, write #dc0f0f. Press OK.
This will convert all the highlights in your image (bright areas) into red color. I know that it’s looking messy but hold on for a few more seconds. We’ll fix it.
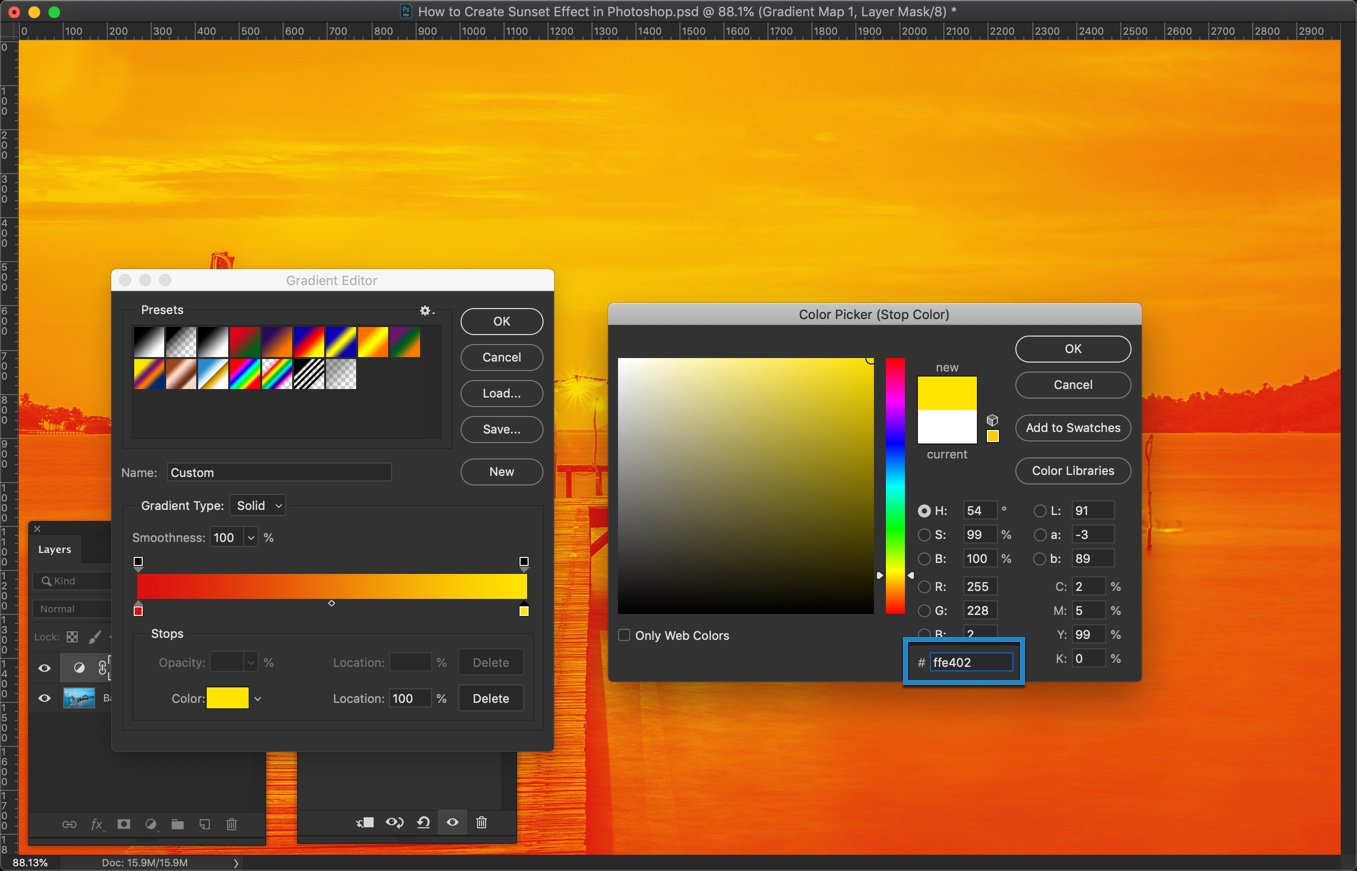
In the gradient editor, click on the bottom right handlebar (1) and then on the color (2). I have provided a screenshot below for your reference.
Write #ffe402 in the HEX value. Press OK.
The photo is looking a bit better now, right? We’ll make it even better.
This article is submitted by Terence Murray. He is a journalist and an editor from London. He loves to meet new people and talks with them about literature, photography and jazz music. Join him on Facebook and Google+.
One question that comes from our readers what is the best photo editing software to choose between Photoshop and Lightroom. To the beginner, it’s hard to choose between these two Adobe products.
Noel Anderson, The Senior UI Designer of Essay on timesaid,
If you are a UI designer, you would love to pick Adobe Photoshop. It’s a powerful design tool to create the UI of a website, mobile app, and desktop app.
By using Photoshop, the UI designer can design any custom graphics for websites that include logos, patterns or custom background images.
The creators of Photoshop then created a new app for the photographer to edit photos called Lightroom. Though both of the applications are related to photo editing, there are some factors on which they can be different. It’s becoming a burning question what form you should learn and use? In this article, I am going to show you the main differences between Adobe Photoshop and Adobe Lightroom.
The Main Differences between Photoshop and Lightroom
Adobe always tries to improve user experiences. To provide excellent opportunities to edit photos, they created Photoshop and Lightroom one after another. Both of their photo editing apps offer the users to edit and manipulate photos. Still, there are some differences between these applications.
Price: You can use Adobe Creative Cloud to get both of the software buying the subscription. The cost is as low as $10 a month.
Keep Historical Changes: If there are no layers created in Photoshop, you can not go back to the previous settings as Photoshop cannot keep historical changes. On the other hand, using Lightroom, you can go back to your last settings and restore it.
Advanced Retouching: Both Photoshop and Lightroom can do retouching using the retouching tools. But, for advanced retouching, you’ll love to pick Photoshop as there are some great options to patch and remove the blemish.
Compositing Multiple Images: If you want to combine multiple images and their elements into a single one, Photoshop is the best option. You can mix, manipulate and save the composition in Photoshop whereas using Lightroom it’s difficult.
Display Image Metadata: Lightroom can display the image metadata to make an overlay to the image where Photoshop cannot display image metadata. You cannot show image metadata when an image is opened.
Batch Process Multiple Images: Lightroom is way better than Photoshop when it comes to batch process multiple images. Though you can batch process with Photoshop using Actions, the presets and the smooth workflows of Lightroom is more straightforward than Photoshop.
Layer Management: In Photoshop, you can use layer managementto add effects and modifications. On the other hand, there is no layer management option in Lightroom. You can store multiple layers within a master file and modify or enhance the layers separately.
In The End, Both Programs Are Great Depending On Your Needs
Based on the differences and features of both Adobe programs, we can say that both apps are great photo editing tools. It’s a draw between both apps as you can use it for different purposes. If you want to use photo editing software to edit or tweak your images only, then Lightroom can be your best choice. But, if you’re going to do more with photo editing software, Photoshop is the best choice for having extra options that boost your task.
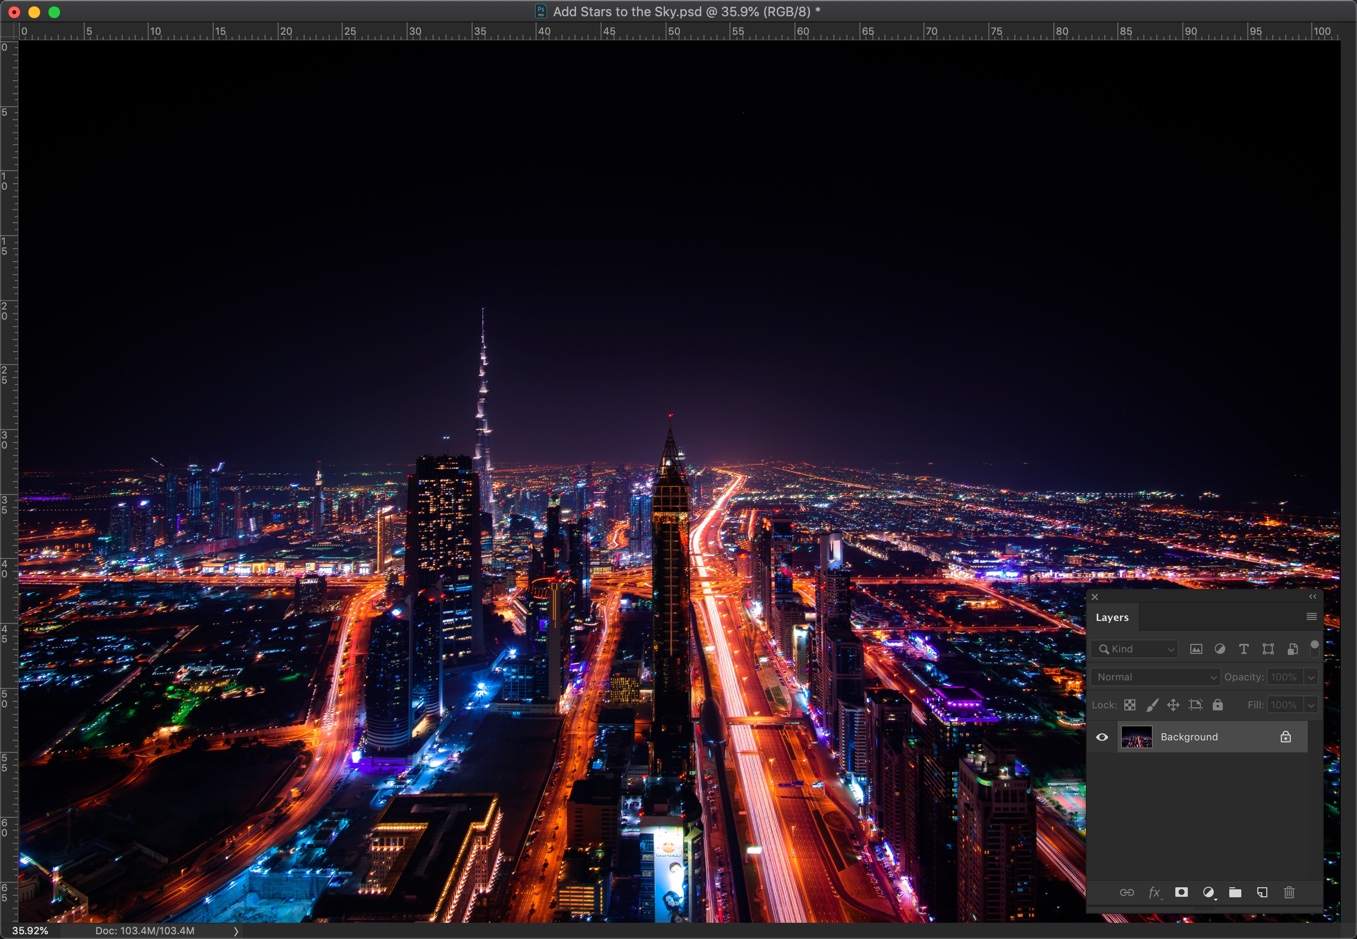
Today, I am going to show you how to add stars to the sky in Photoshop. I remember that I wrote a similar tutorial back in 2013 but I used a very old version of Photoshop (probably CS5) and the images were not optimized for today’s browsers.
I thought that I should modify that old tutorial and optimize the images for today’s browsers. But, then I decided that I should write a new one. So, here we go.
For this project, we’re going to make use of Blend Modes to add stars. There are lots of tutorials out there in the market where you add stars using “Add noise” filter but this one is much simpler than those.
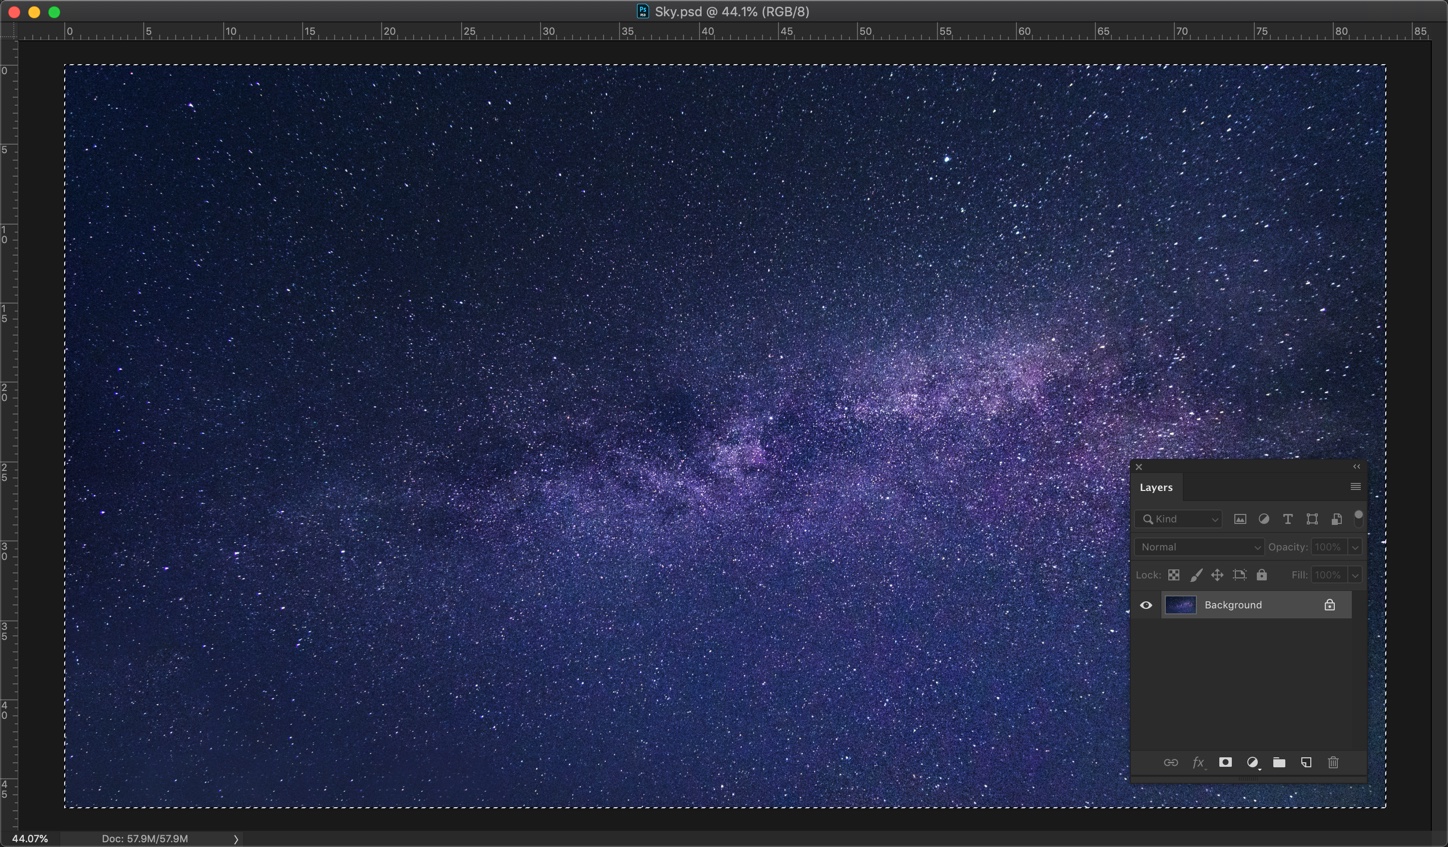
The next thing would be to open the sky image. We’re going to put this image onto the city image. Press Cmd + A/Ctrl + A to select the entire image.
Copy the image by pressing Cmd + C/Ctrl + C.
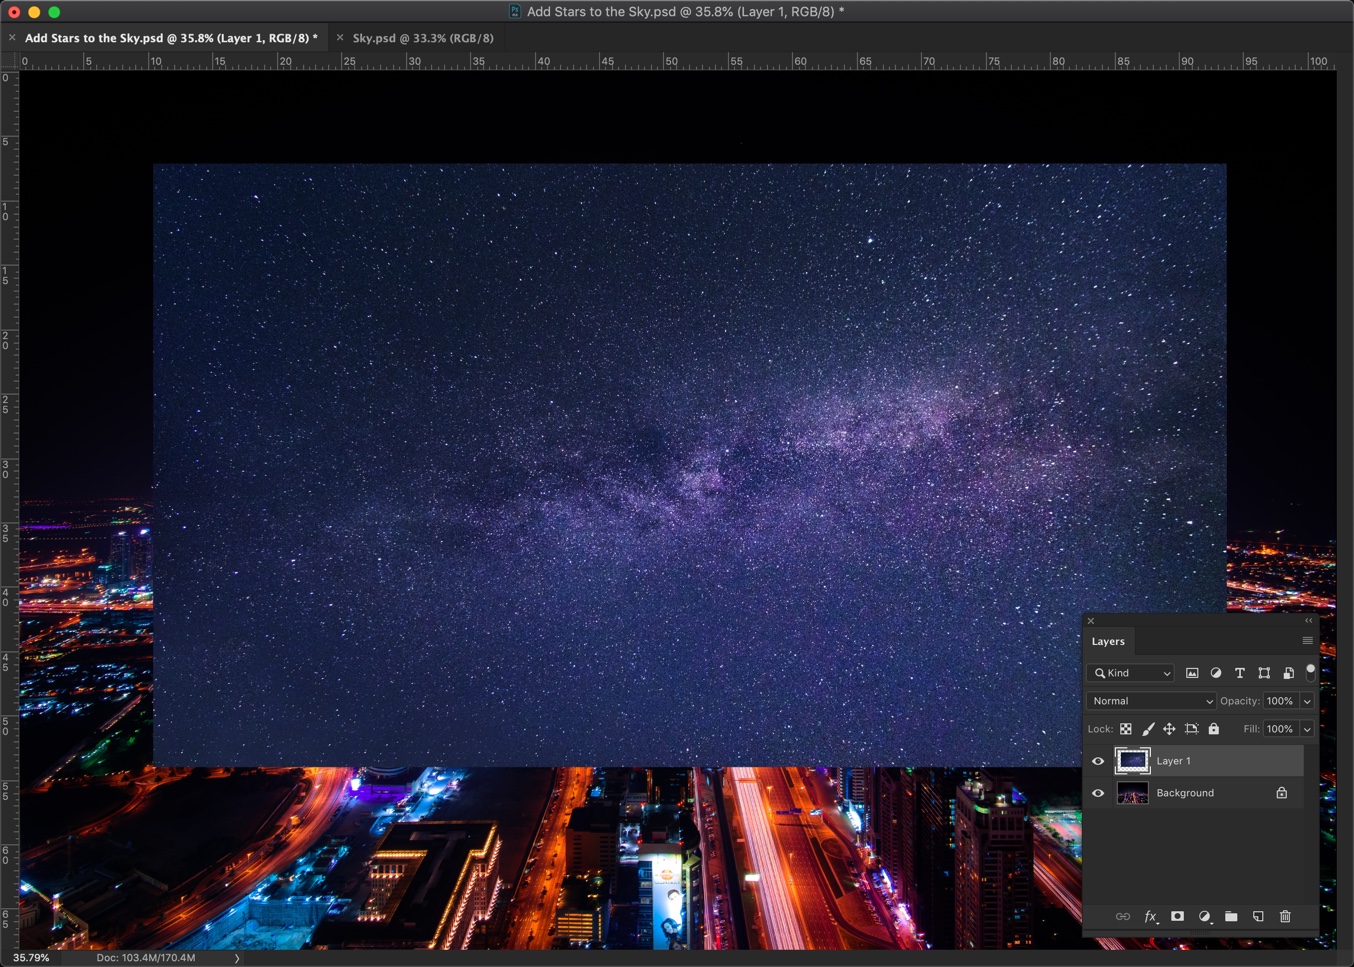
Now, go back to the city image and paste it by pressing Cmd + V/Ctrl + V.
Step 2 – Align the sky image
Time to align the sky image so that it fills the sky of the city.
Activate the Free Transform Tool by pressing Cmd + T/Ctrl + T. Now drag the handlebars so that it covers the sky of the city image.
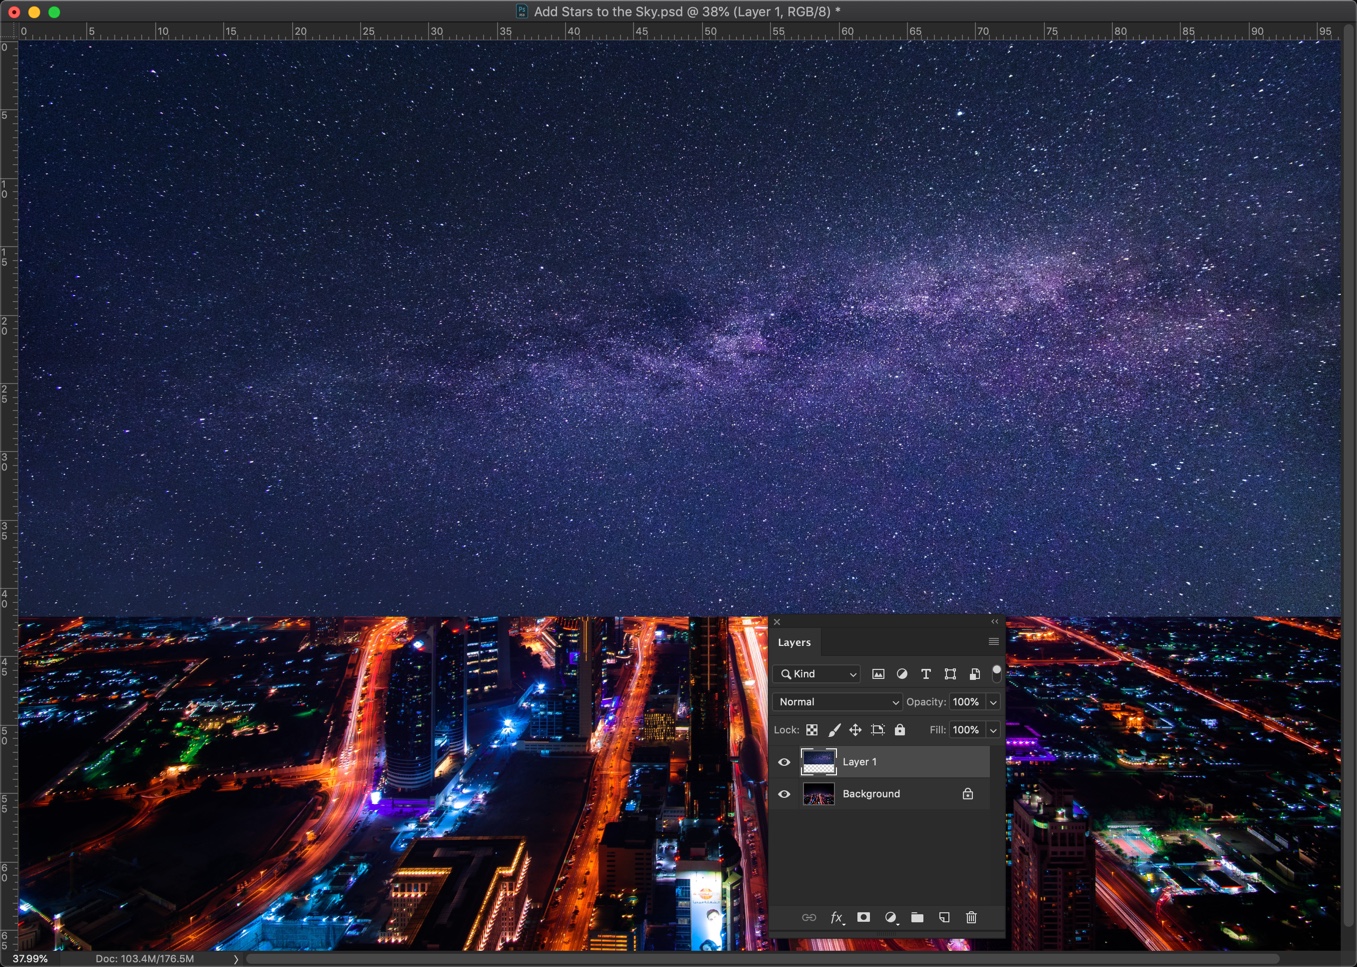
Step 3 – Hide the stars near the horizon
We need to determine from which point to which point should we use the gradient tool.
Open the layer panel by pressing F7 or by going to Windows > Layers.
In my image, I am going to start the gradient right at the horizon and end it slightly above the tallest building.
The starting point is at the horizon because we don’t want any stars below the horizon. The ending point is just above the tallest building because we want stars to show up from that point.
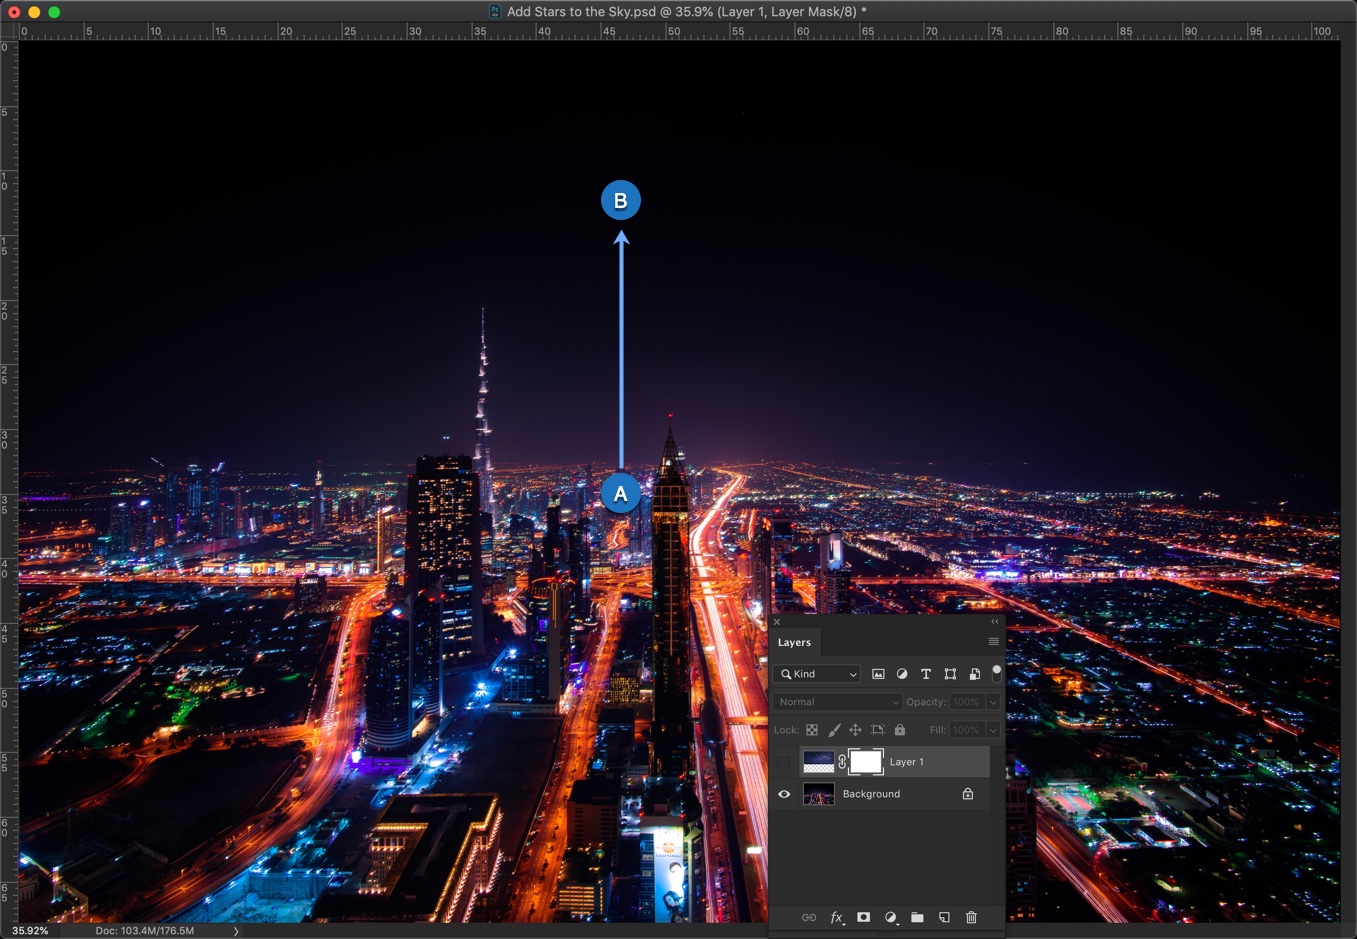
Grab the Gradient tool from the tool panel or press Shift + G again and again until it comes.
Change the foreground color to Black.
In the option bar, use Foreground to Transparent effect and choose the gradient type as the liner. I have highlighted both in the below screenshot.
Add a layer mask to the sky image in the tool panel.
Drag and drop the gradient from the starting point to the end point.
Drag and drop it multiple times to get an even better result.
Here’s the GIF for you.
Step 4 – Give the stars a realistic effect
Reduce the opacity of the sky in the layer panel.
And, here you go.
This is all.
Make sure that you make the most out of the offer below.
This article is written by Jennifer Sanders. She has been working as an editor and a copywriter at a journalistic company in London for 3 years. She is also a professional content writer in such topics as inspiration, productivity, education, and technologies. Feel free to connect with her Twitter or Facebook.
There are tons of options to enhance the quality of your photography by using Adobe Photoshop. In most cases, Photoshop is the standard to measure all other image-editing software programs. You can be, however, dithering on which one to choose out of numerous options, as it is a vast area to explore and master all of the tools and techniques.
Gregory Wright, the Head of Creative Design at essaygeeks.co.uk.said,
You can be overwhelmed or lost by the tools of Adobe Photoshop which you can use to beautify the objects of your photos, but to be professional in this field you need to know the secrets of Photoshop.
Don’t worry; we have chosen the top 10 Photoshop secrets you need to know to save your time and make your ordinary shots into stunning artworks.
Repeat Transformations to A Layer
If you want to step and repeat your previously made object or layer, you can repeat the transformation very quickly in Photoshop. It saves time as you don’t need to put extra effort to recreate the layer or object. The entire process is known as Step and Repeat Transformation. To do this, you need to click the Control + Alt + T and Control + Alt + Shift + T to make a repeated transformation in Photoshop.
Design Space Preview
To explore simplified designs and have fun with it you go to Photoshop >Preferences (Edit>Preferences on Windows OS) select “Technology Previews” from the left side menu and tick on “Enable Design Space (Preview).” Press “OK” and go to Window>Design Space (Preview) to enable this stunning design view.
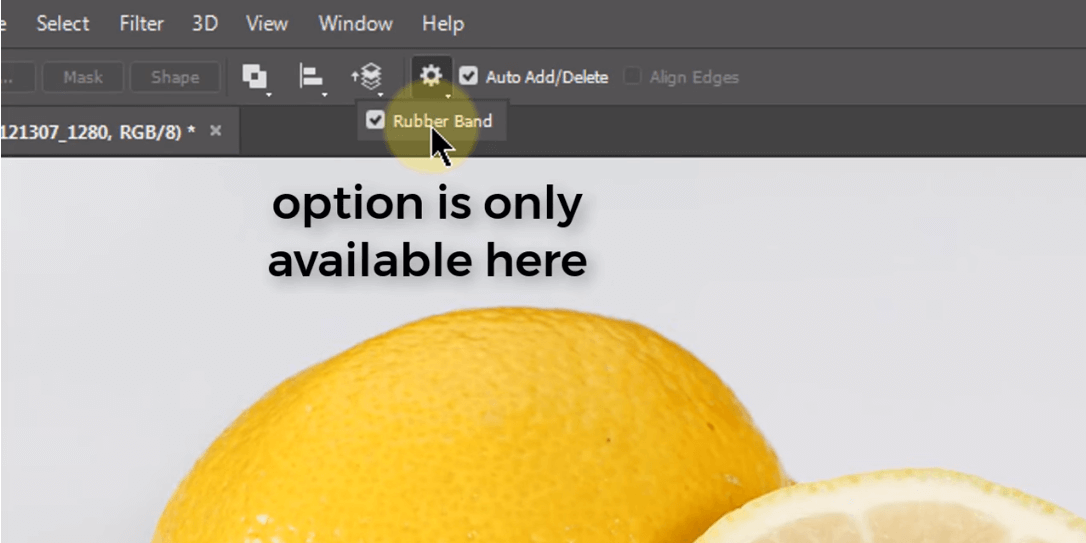
Using the Rubber Band to Draw a Path
When you are drawing a path using the pen tool, you cannot see the exact location of the path. In that case, you can use Rubber Band to know where you are drawing the path. To do this, you need to select theRubber Band option from the control bar. Now you’re able to see the path like as Illustrator.
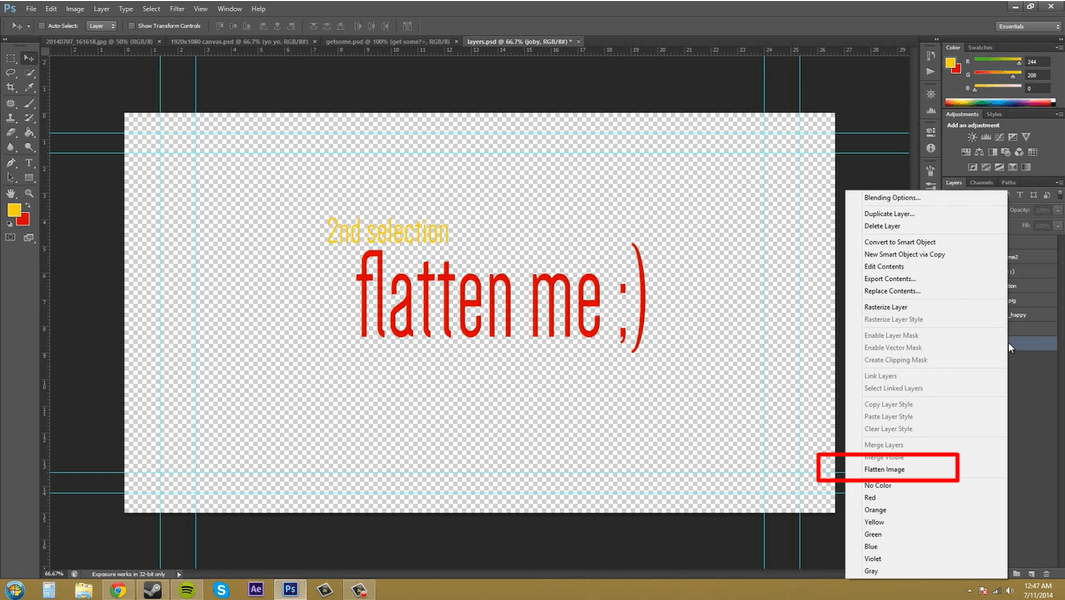
Flattened PSD for saving time:
When it is time to save your valuable time, you can create flatPSD. When you are working with a large PSD, it is better to stick with flattened images by clicking on the layer and select Flatten Image.
Transparency in Background Image:
If you want to make transparent background images with Photoshop, then you need to use the Magic Wand Tool or press “W”.Then, you need to select your desired area to preserve transparency. When you are done choosing the areas to be transparent, you need to click on save or press Ctrl+Shift+S. Save the image as PNG to have the transparent background.
Adjust Global Light:
To any layer or object in Photoshop, you can give live effects. And, these are called the drop shadow, bevel and emboss, inner shadow and more, and they rely on “direction” that tells where the artificial light source would be. Click on Layer>Layer Style>Global Light and set the Global Light to 40 degrees and see as every effect that uses Global Light will update instantly in your document.
Spring Loaded Tools:
The hotkeys found in every tool of Photoshop and temporarily can be switched between the tools in Photoshop. That makes the task easier to perform in Photoshop. For instance, hold the letter “J” to bring up the Spot Healing Brush tool. And when you are done with it, you can switch back to the Brush tool by releasing the hotkey.
Precise Painting Mode:
To jump into “Precise Painting Mode” that changes your cursor to a crosshair for a different and more elegant look, press Caps Lock key anytime while using the Brush tool.
Add Shallow Depth of Field:
Most common techniques used to make photos look more exciting and professional is the depth of field. By this the distance between the nearest and farthest parts of an image that appear sharp or in focus. That is why, only a small portion is focused, while the rest is blurry.
If you want to give your photographs the appearance of shallow depth of field, the quickest way is the Iris Blur tool. But this technique offers less customization as the other methods; however, you can do pretty good jobs in less than 2 minutes. Just Right-click the layer “Background” in the Layer’s box. Select “Duplicate Layer” and name the new layer “Blur Effect.”
Bird’s Eye View:
You can quickly navigate any document at any zoom level. This is called Bird’s eye view. To do this, you need to hold “H” and drag your cursor to zoom in your desired area. By this way, you can have an idea where you are working on the document and get a clear view of the image.
Final Words
As Photoshop has excellent features, we couldn’t cover all of them. However, We hope these secrets will be conducive for you when you use Adobe Photoshopnext time, especially, to save your time and better your tasks as a professional one. As mentioned earlier, it is a massive area to explore; you will always have the chances to tweak the caveats while playing with the tools.
If you have enjoyed this article on our website, please share it on social media so that all of your friends can have fun too.

appears to the right of the layer’s name in the Layers panel. You can expand the style in the Layers panel to view or edit the effects that compose the style.