This article is written by Jennifer Sanders. She has been working as an editor and a copywriter at a journalistic company in London for 3 years. She is also a professional content writer in such topics as inspiration, productivity, education, and technologies. Feel free to connect with her Twitter or Facebook.
There are tons of options to enhance the quality of your photography by using Adobe Photoshop. In most cases, Photoshop is the standard to measure all other image-editing software programs. You can be, however, dithering on which one to choose out of numerous options, as it is a vast area to explore and master all of the tools and techniques.
Gregory Wright, the Head of Creative Design at essaygeeks.co.uk. said,
You can be overwhelmed or lost by the tools of Adobe Photoshop which you can use to beautify the objects of your photos, but to be professional in this field you need to know the secrets of Photoshop.
Don’t worry; we have chosen the top 10 Photoshop secrets you need to know to save your time and make your ordinary shots into stunning artworks.
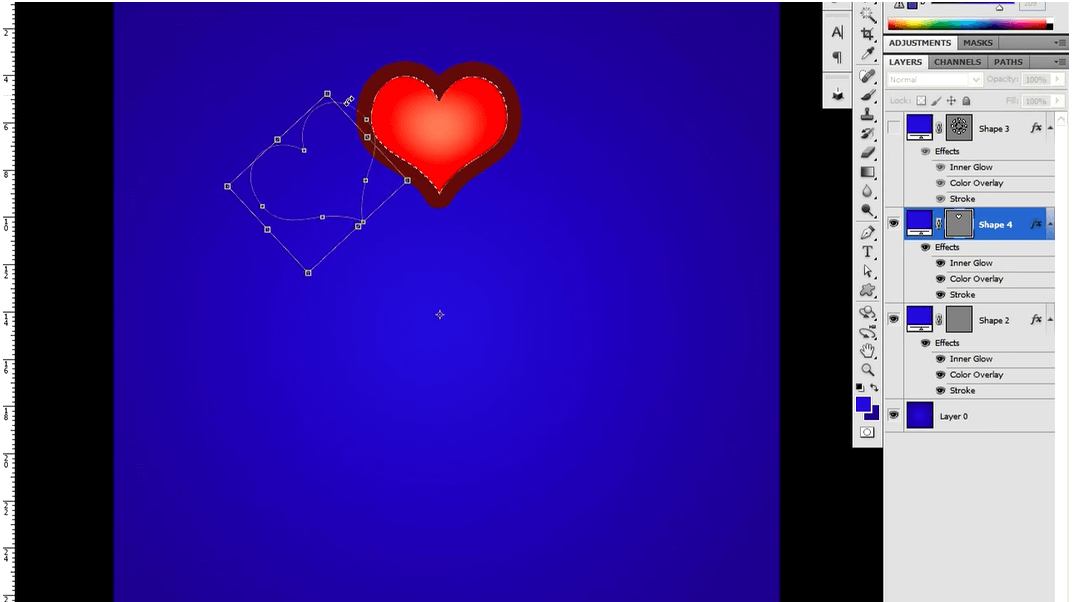
Repeat Transformations to A Layer
If you want to step and repeat your previously made object or layer, you can repeat the transformation very quickly in Photoshop. It saves time as you don’t need to put extra effort to recreate the layer or object. The entire process is known as Step and Repeat Transformation. To do this, you need to click the Control + Alt + T and Control + Alt + Shift + T to make a repeated transformation in Photoshop.

Design Space Preview
To explore simplified designs and have fun with it you go to Photoshop >Preferences (Edit>Preferences on Windows OS) select “Technology Previews” from the left side menu and tick on “Enable Design Space (Preview).” Press “OK” and go to Window>Design Space (Preview) to enable this stunning design view.
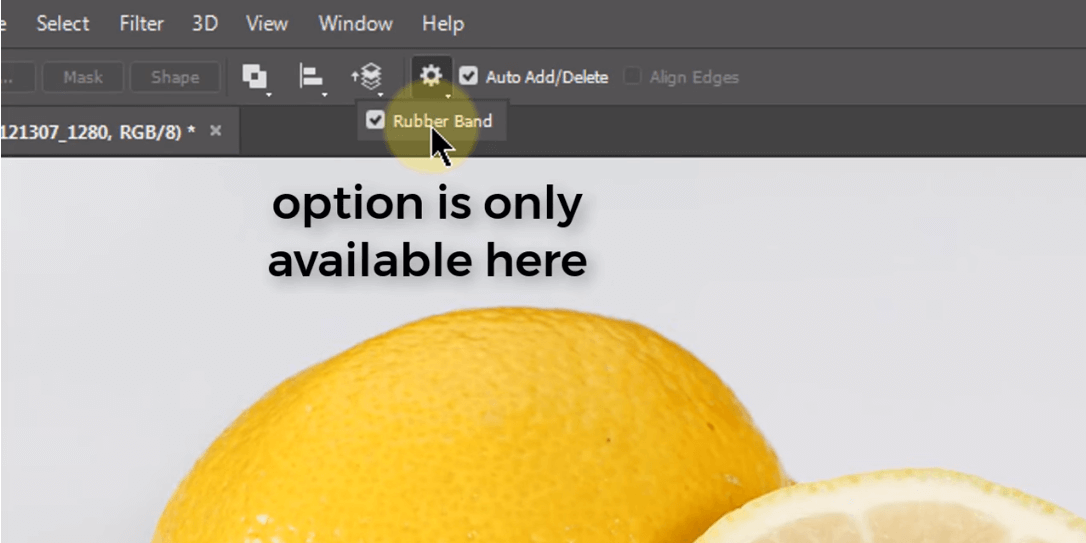
Using the Rubber Band to Draw a Path
When you are drawing a path using the pen tool, you cannot see the exact location of the path. In that case, you can use Rubber Band to know where you are drawing the path. To do this, you need to select theRubber Band option from the control bar. Now you’re able to see the path like as Illustrator.
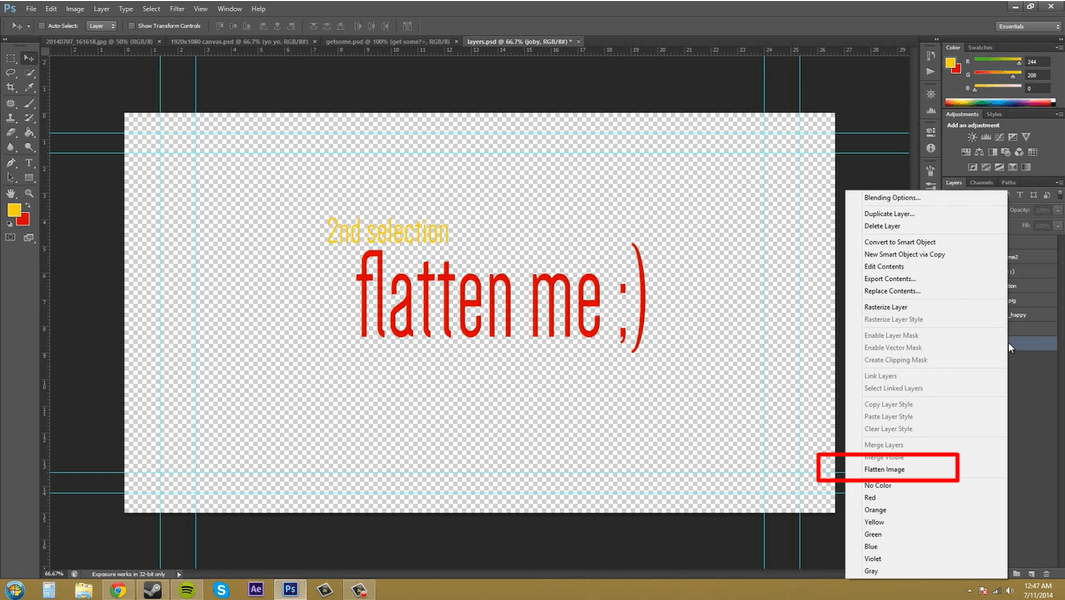
Flattened PSD for saving time:
When it is time to save your valuable time, you can create flatPSD. When you are working with a large PSD, it is better to stick with flattened images by clicking on the layer and select Flatten Image.
Transparency in Background Image:
If you want to make transparent background images with Photoshop, then you need to use the Magic Wand Tool or press “W”.Then, you need to select your desired area to preserve transparency. When you are done choosing the areas to be transparent, you need to click on save or press Ctrl+Shift+S. Save the image as PNG to have the transparent background.

Adjust Global Light:
To any layer or object in Photoshop, you can give live effects. And, these are called the drop shadow, bevel and emboss, inner shadow and more, and they rely on “direction” that tells where the artificial light source would be. Click on Layer>Layer Style>Global Light and set the Global Light to 40 degrees and see as every effect that uses Global Light will update instantly in your document.
Spring Loaded Tools:
The hotkeys found in every tool of Photoshop and temporarily can be switched between the tools in Photoshop. That makes the task easier to perform in Photoshop. For instance, hold the letter “J” to bring up the Spot Healing Brush tool. And when you are done with it, you can switch back to the Brush tool by releasing the hotkey.
Precise Painting Mode:
To jump into “Precise Painting Mode” that changes your cursor to a crosshair for a different and more elegant look, press Caps Lock key anytime while using the Brush tool.
Add Shallow Depth of Field:
Most common techniques used to make photos look more exciting and professional is the depth of field. By this the distance between the nearest and farthest parts of an image that appear sharp or in focus. That is why, only a small portion is focused, while the rest is blurry.
If you want to give your photographs the appearance of shallow depth of field, the quickest way is the Iris Blur tool. But this technique offers less customization as the other methods; however, you can do pretty good jobs in less than 2 minutes. Just Right-click the layer “Background” in the Layer’s box. Select “Duplicate Layer” and name the new layer “Blur Effect.”
Bird’s Eye View:
You can quickly navigate any document at any zoom level. This is called Bird’s eye view. To do this, you need to hold “H” and drag your cursor to zoom in your desired area. By this way, you can have an idea where you are working on the document and get a clear view of the image.
Final Words
As Photoshop has excellent features, we couldn’t cover all of them. However, We hope these secrets will be conducive for you when you use Adobe Photoshop next time, especially, to save your time and better your tasks as a professional one. As mentioned earlier, it is a massive area to explore; you will always have the chances to tweak the caveats while playing with the tools.
If you have enjoyed this article on our website, please share it on social media so that all of your friends can have fun too.


