How to Add Lens Flare in Photoshop

I wrote a tutorial on how to add lens flare in Photoshop back in 2012. It has been around 7 years and I thought that I should write a new one. I was using Photoshop CS5 and the Photoshop interface in the screenshots looked like I was using software that was developed in the 1800s.

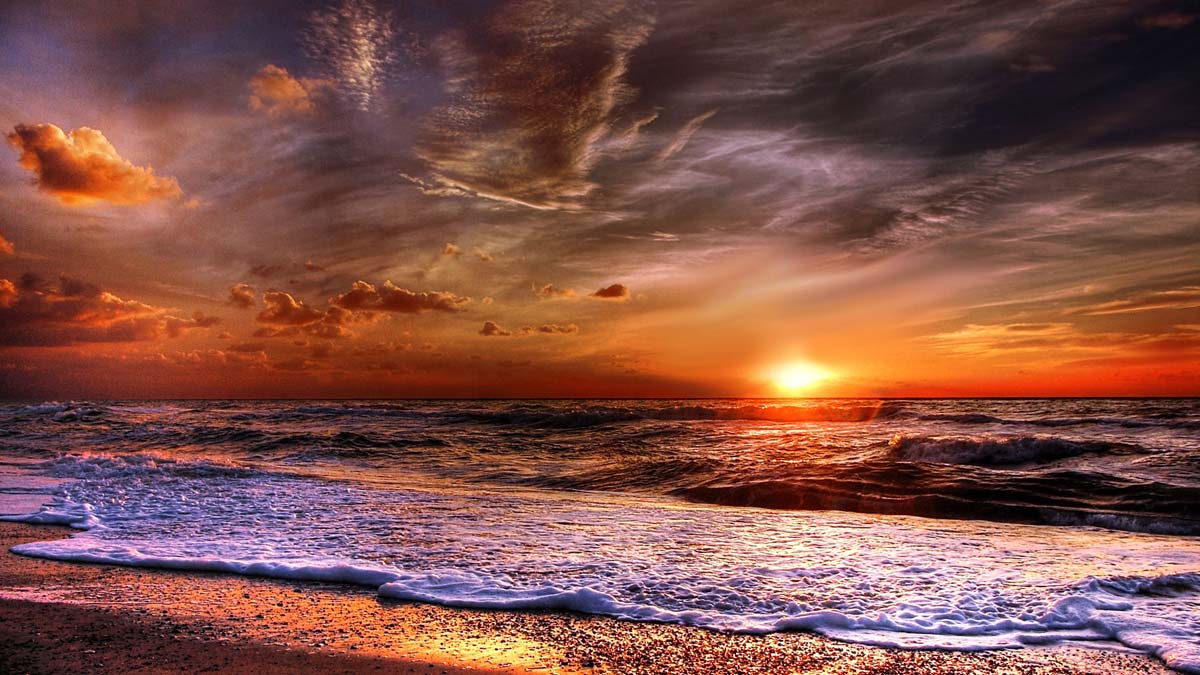
So, I am writing a new one now. Before I show you how to do it, here’s a peek to the final photo.

Final

Final.jpg

Initial

Initial

Let’s begin the tutorial.

Step 1 – Create a New Layer for the Lens Flare

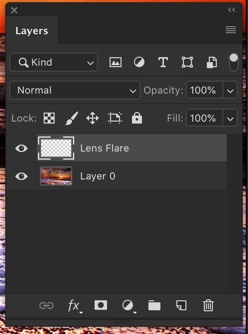
Create a new layer by pressing Cmd + Shift + N/Ctrl + Shift + N. Name that layer anything. I am going to write as Lens Flare.
1.jpg

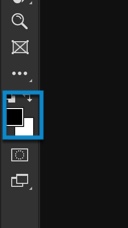
Press to make black as your foreground color. If pressing D is not changing the foreground color to black, click on the below icon and manually change it.
2.jpg

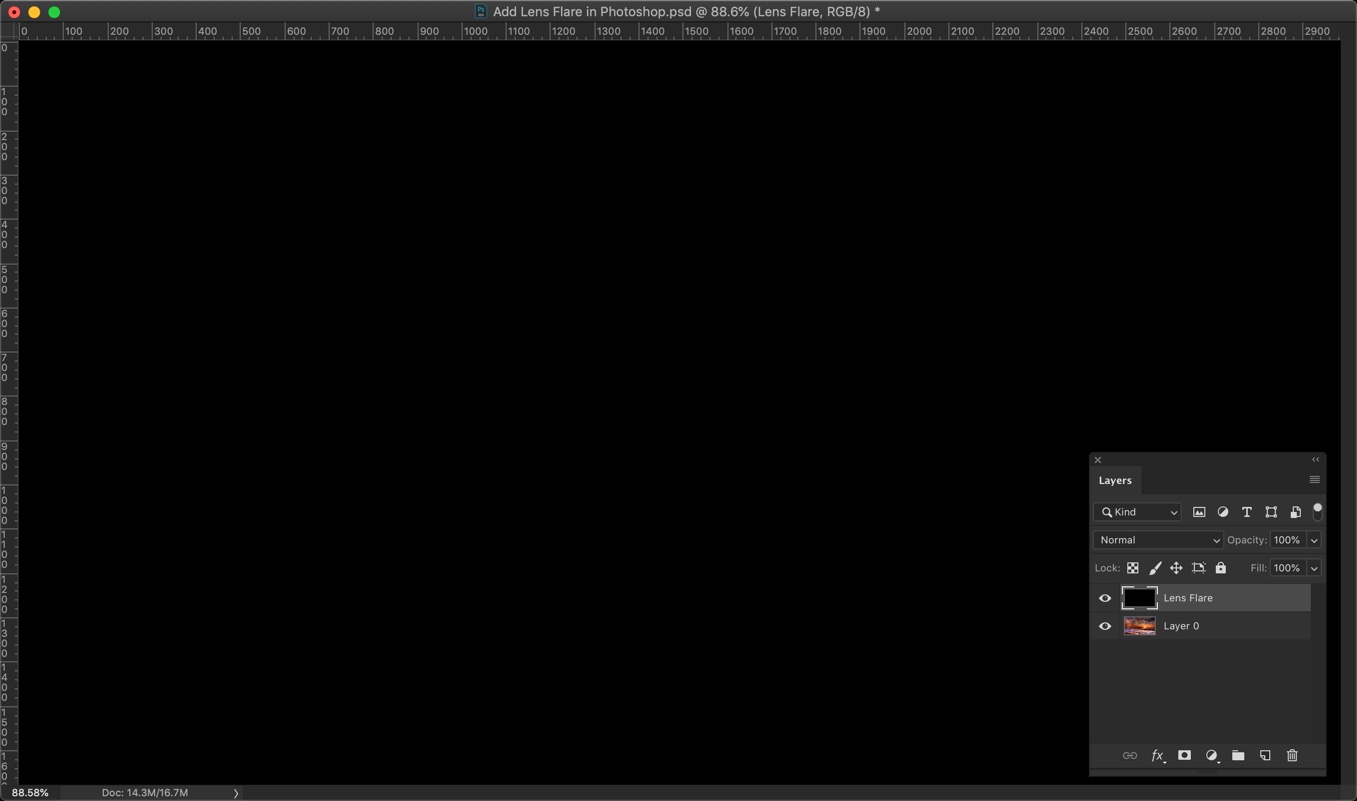
Fill the Lens Flare layer with the black color by pressing Opt + Delete / Alt + Backspace. This shortcut lets you fill the layer with the foreground color which is black in this case.
3.jpg

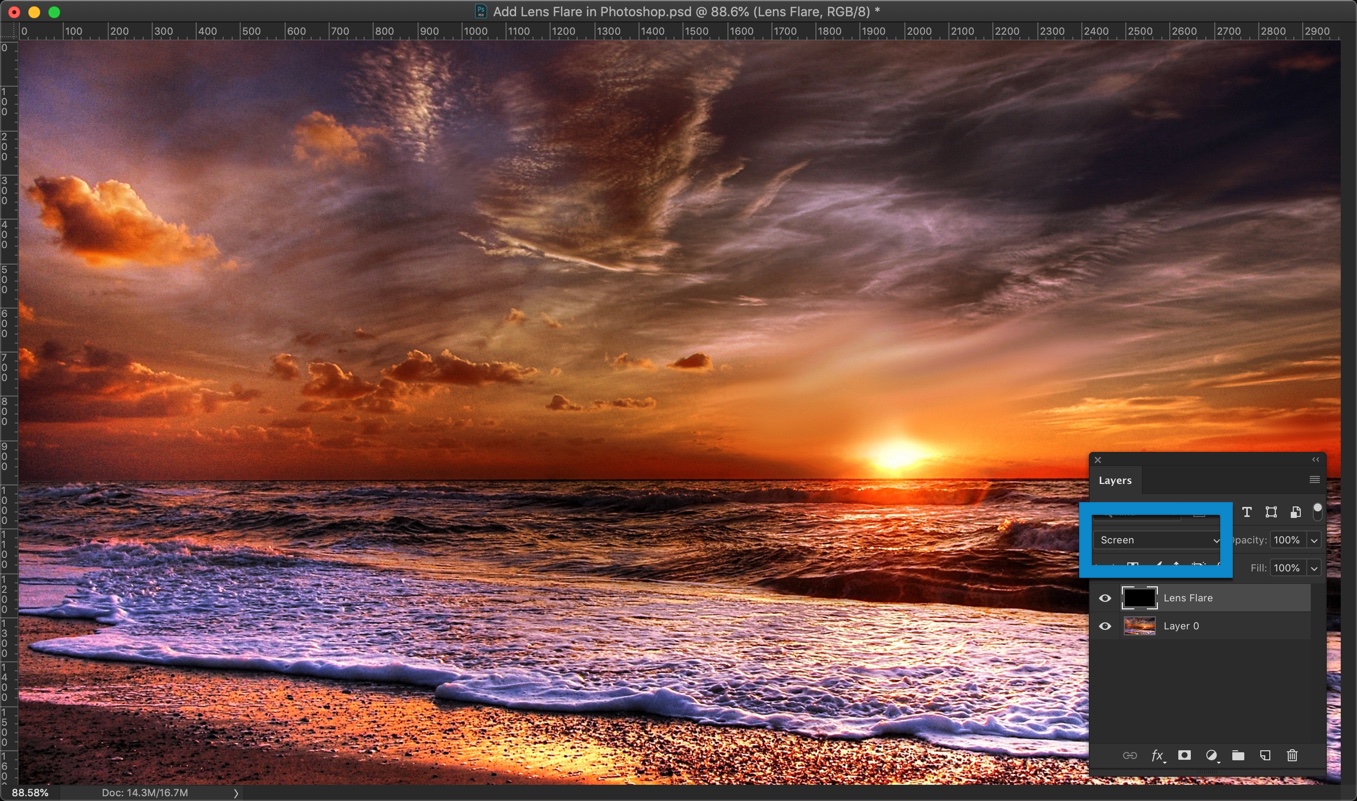
Change the Blend Mode to Screen.

4.jpg

Step 2 – Add Lens Flare in Photoshop

Go to Filter > Render > Lens Flare
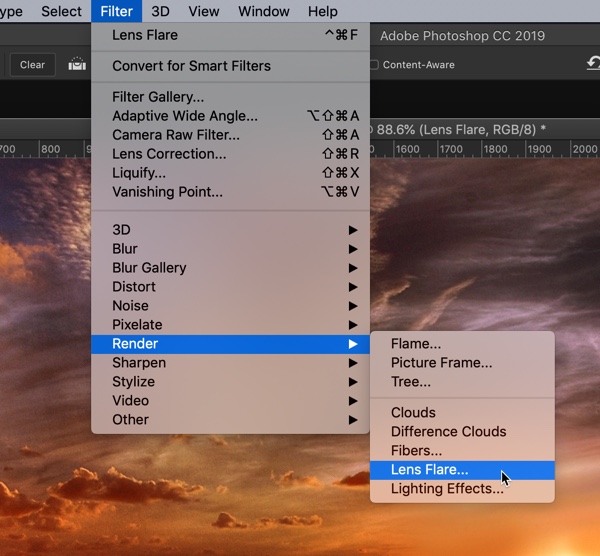
5.jpg

Roughly put the center of the lens flare at the place where the light source is in the photo. The light source in our photo is the sun.

Choose the brightness and Lens Type. Press OK. I am going to set my brightness as 121% and Lens Type as 50-300mm Zoom because this lens is what most photographers use.
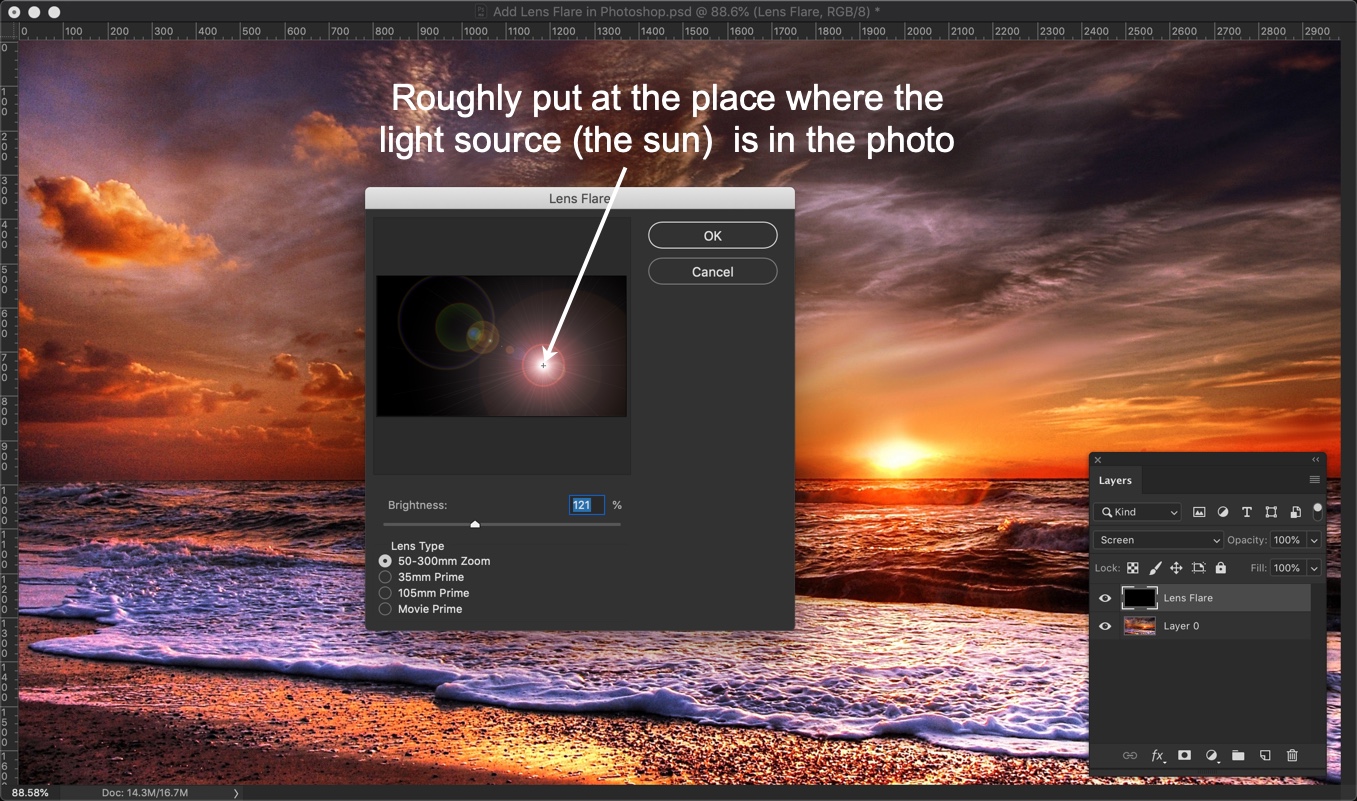
6.jpg

This will add the lens flare. But the positioning may be a bit off.
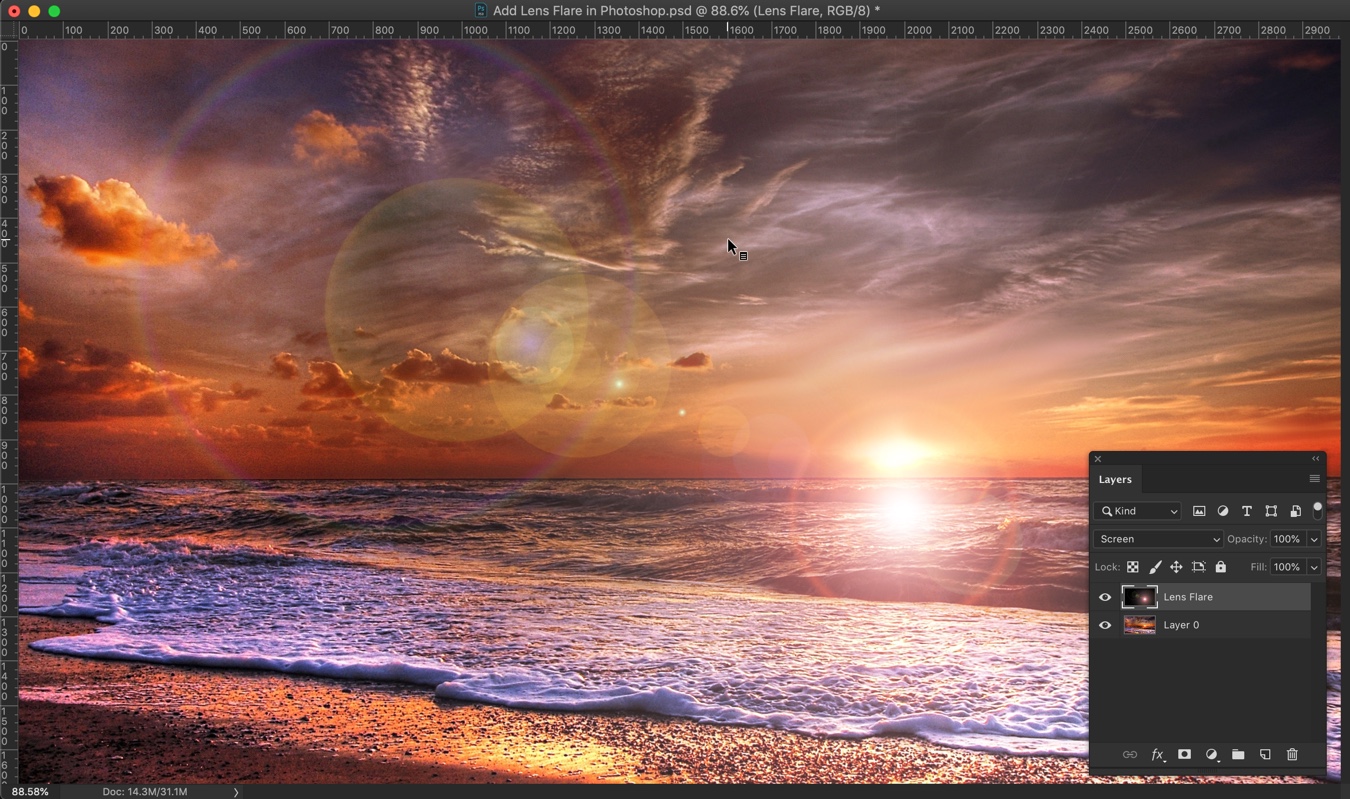
7.jpg

Step 3 – Move the lens flare

Activate the Free Transform Tool by pressing Cmd + T / Ctrl + T. You’ll see eight handlebars at the corners and center of the image.

Move the lens flare so that it overlaps the light source. The light source, in this case, is the sun. Press Return/Enter once done.
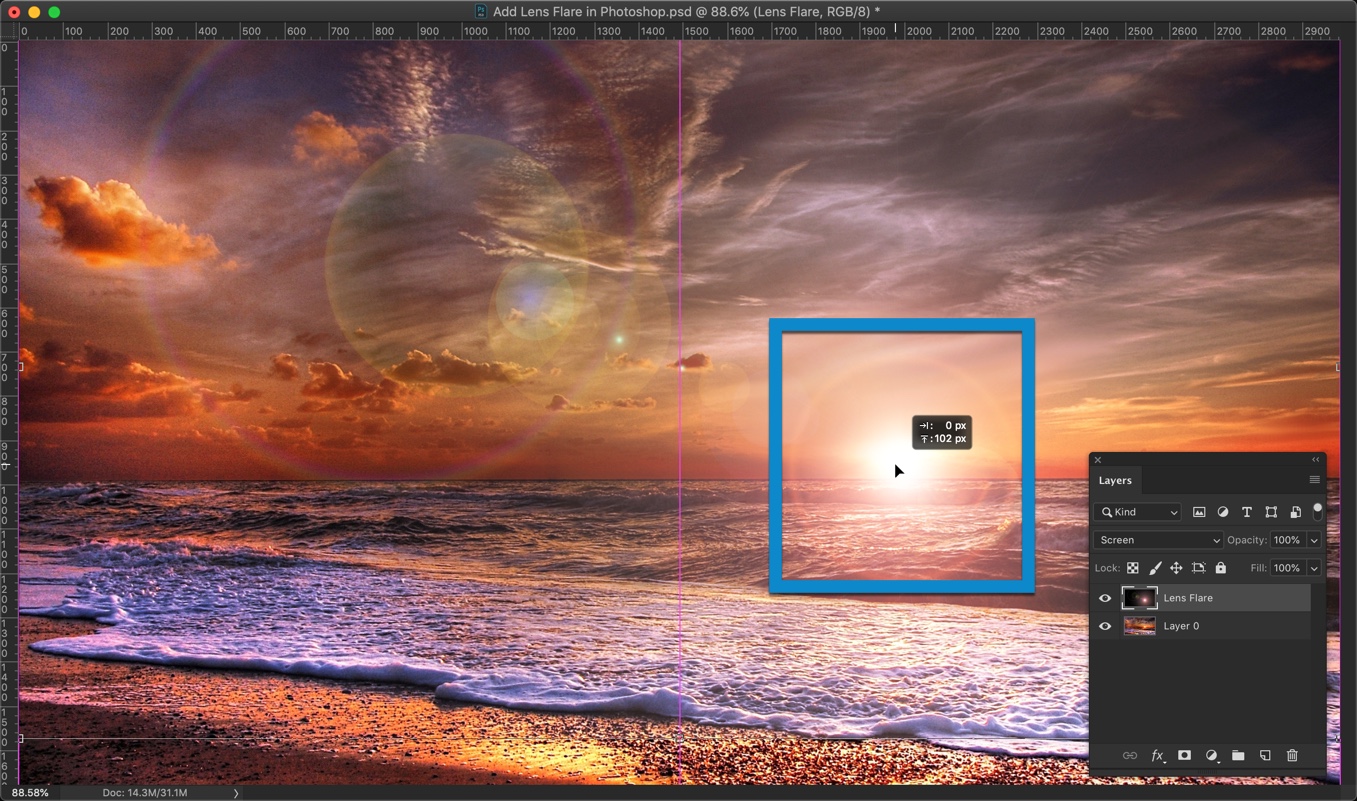
8.jpg

That’s all.

Here’s the final photo again.

Final

Make sure that you make the most out of the offer below.
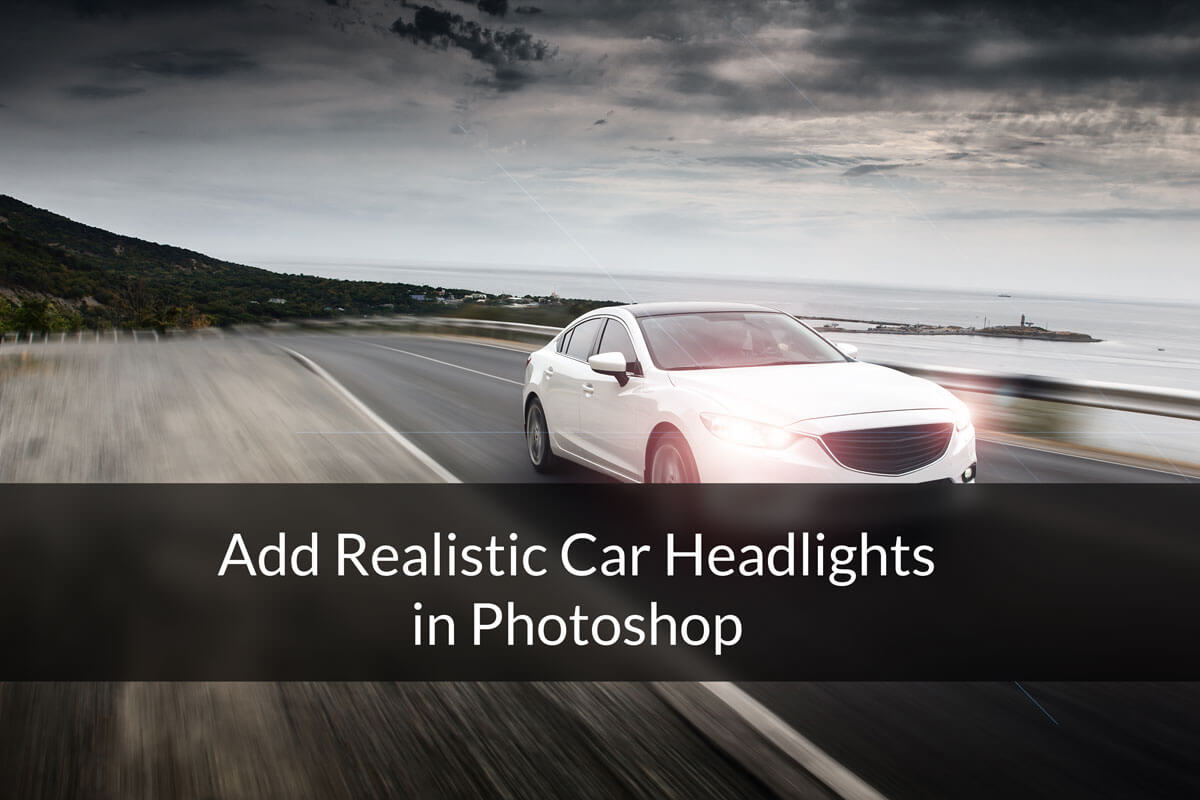
Add Realistic Headlights in Car using Photoshop

Hey, guys! It’s been two weeks since I wrote the last tutorial, and I am sorry for that. To make up your sad faces, I bring to you an awesome tutorial. I am going to add realistic headlights in a car using Photoshop. Guess what’s the bonus point is? Guess it! It just takes 5 minutes to add them No, I am not kidding.

Last Tutorial: Photoshop Mac or Windows: Which One is Better?

Forget about all those long procedures of choosing a brush, using countless blend modes, and applying various filters to get what you want. With this tutorial, you’re just going to use one filter and one blend mode. That’s it. Of course, you need to use Free Transform tool, new layer etc. to place the headlight at the desired position but how much time do they take? Yes, almost zero.

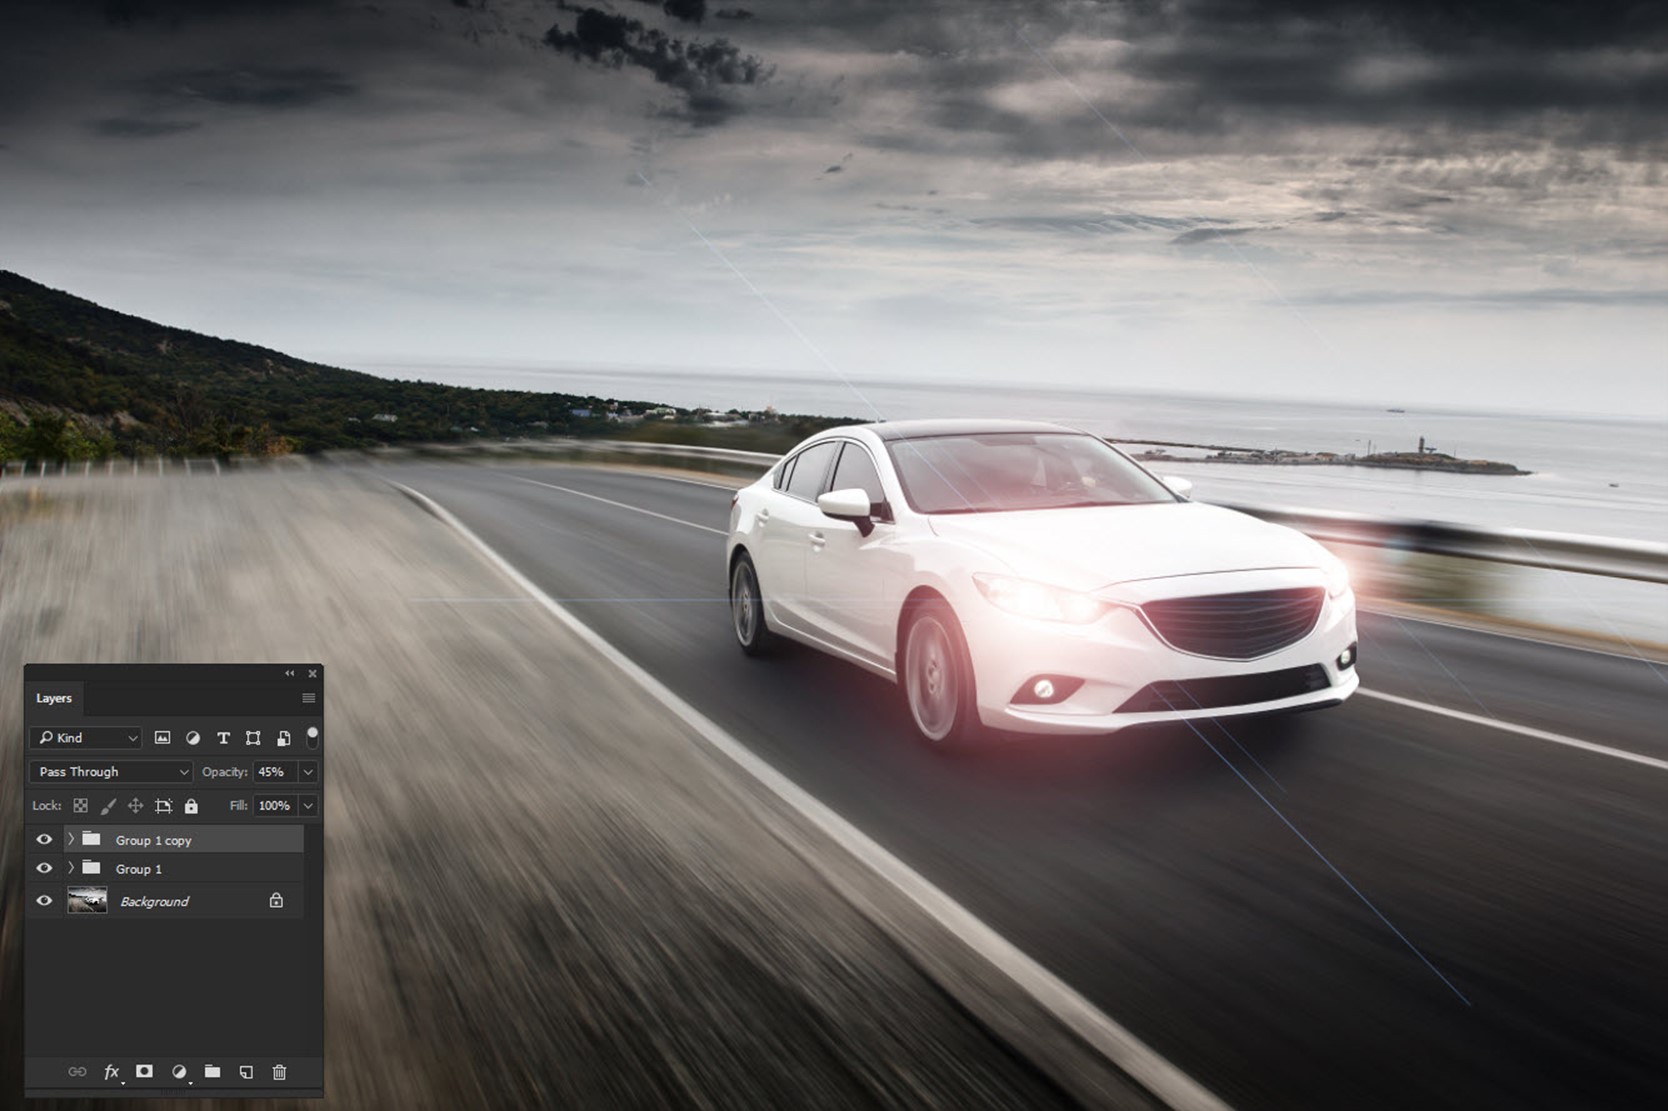
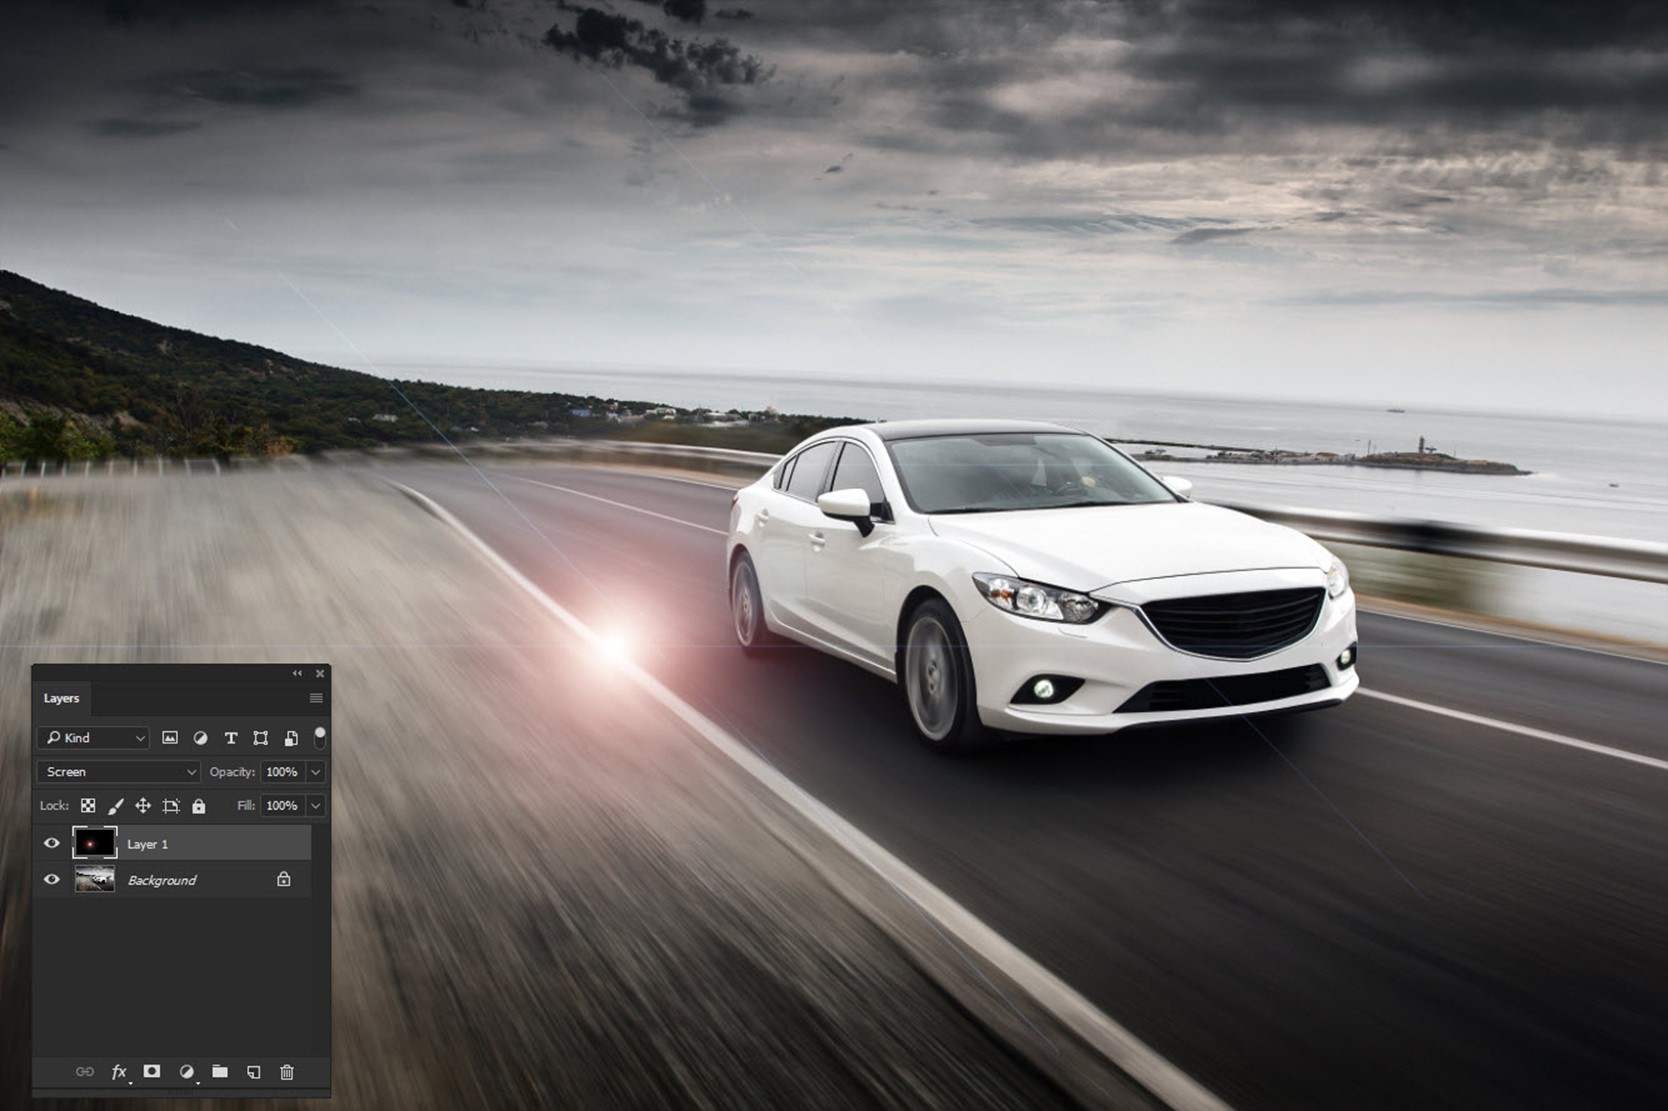
I would like to show you the before and after image before I proceed. Here you go.

Before

After

Now that you have seen the pictures, let’s proceed with the tutorial.

Step 1: Create a New Layer with Black Color

We are going to Lens Flare filter but the filter needs to be placed on a layer which is not blank. So, we’re going to create a layer and fill that with Black color.

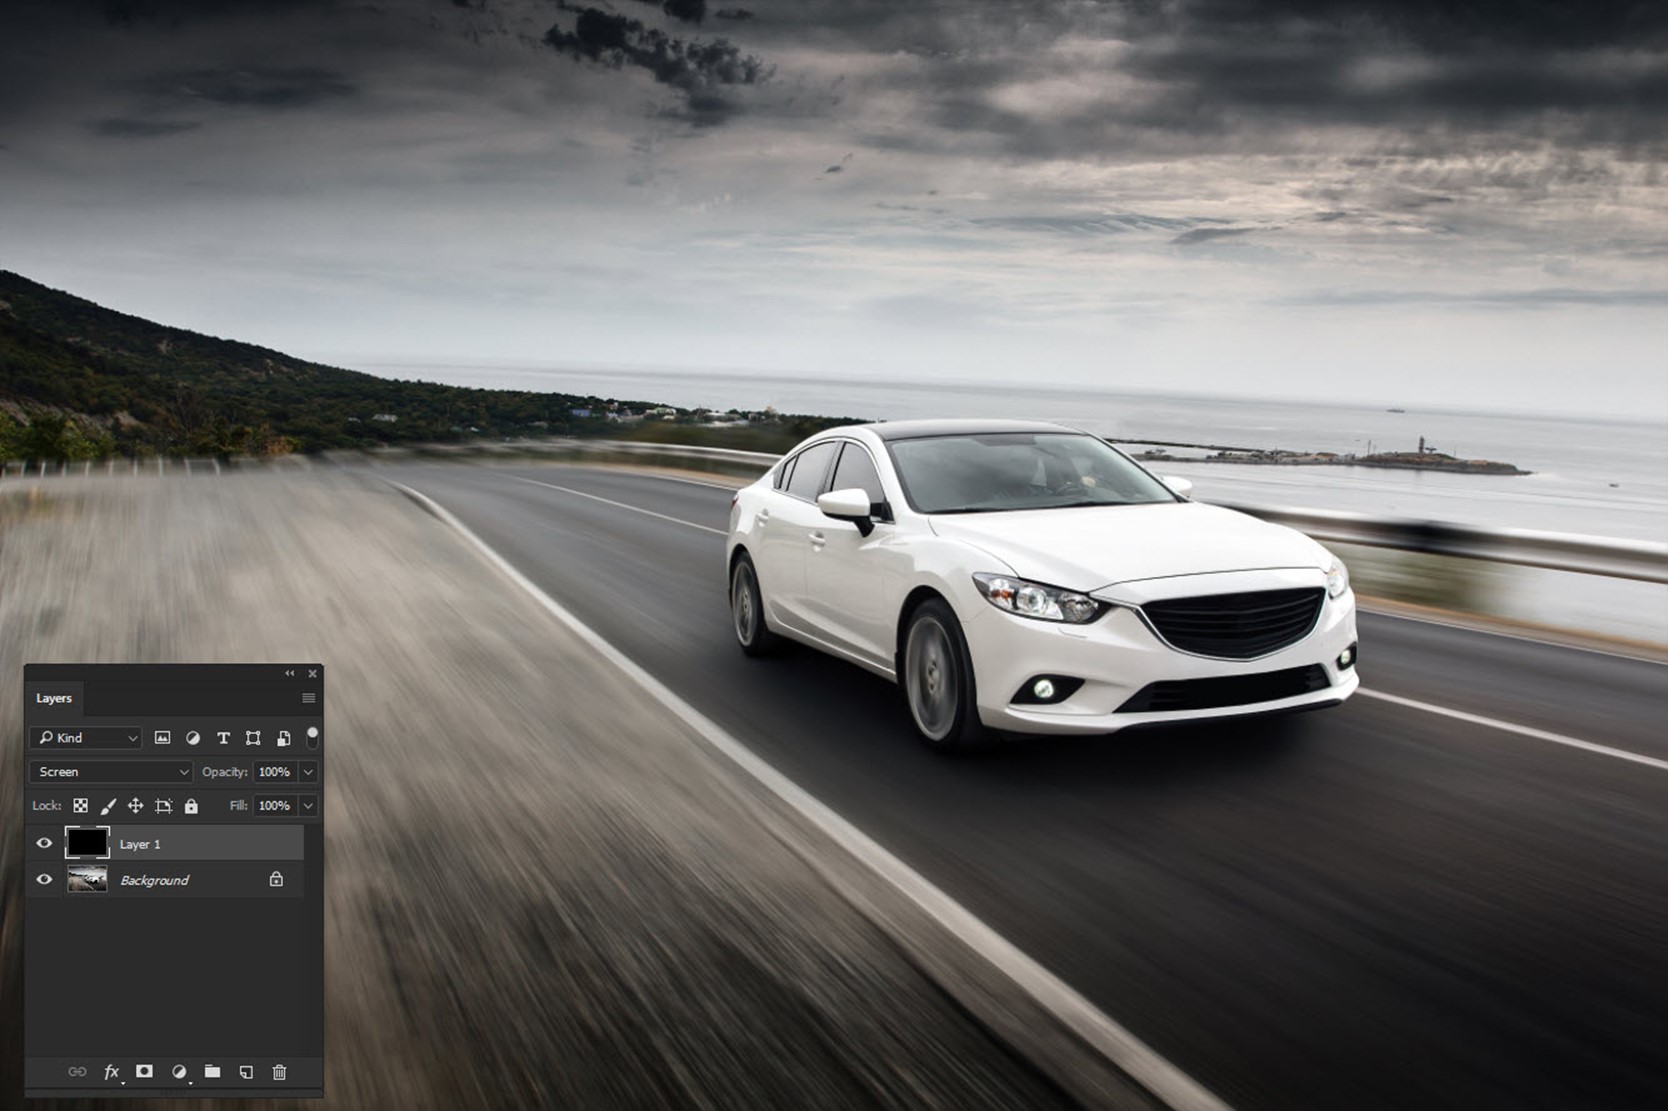
Press Ctrl+Shift+N/Cmd+Shift+N to create a new layer. Press D to make black as your foreground color and press Alt+Backspace/Opt+Delete to fill the layer with black color (foreground color).

After that, change the blend mode to screen. You’ll see that the black layer will become transparent. This is because “screen” blend mode shows the lighter pixel between the current layer and the layer just below it. As everything is lighter than black, so everything below the black pixels will be visible.

Sidebar: Read my tutorial on Screen Blend Mode

Step 2: Add Lens Flare Filter

Now, we’re going to add the headlights.

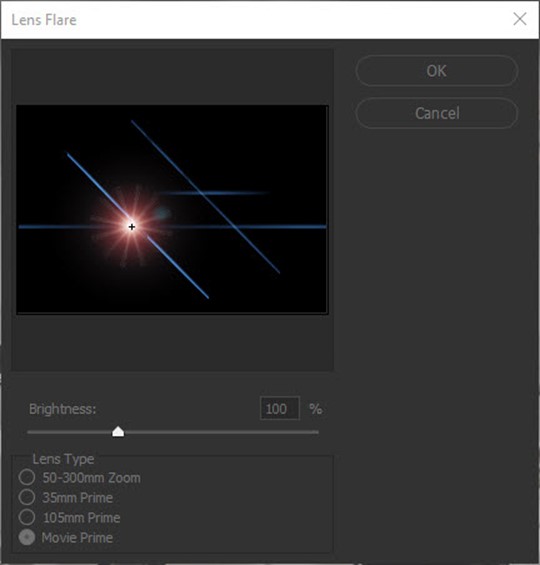
Go to Filter>Render>Lens Flare. Keep the brightness to 100% and change the Lens Type to Movie Prime. This bright ball will be our headlights. Press OK.


It will add a nice-looking lens flare to your image.

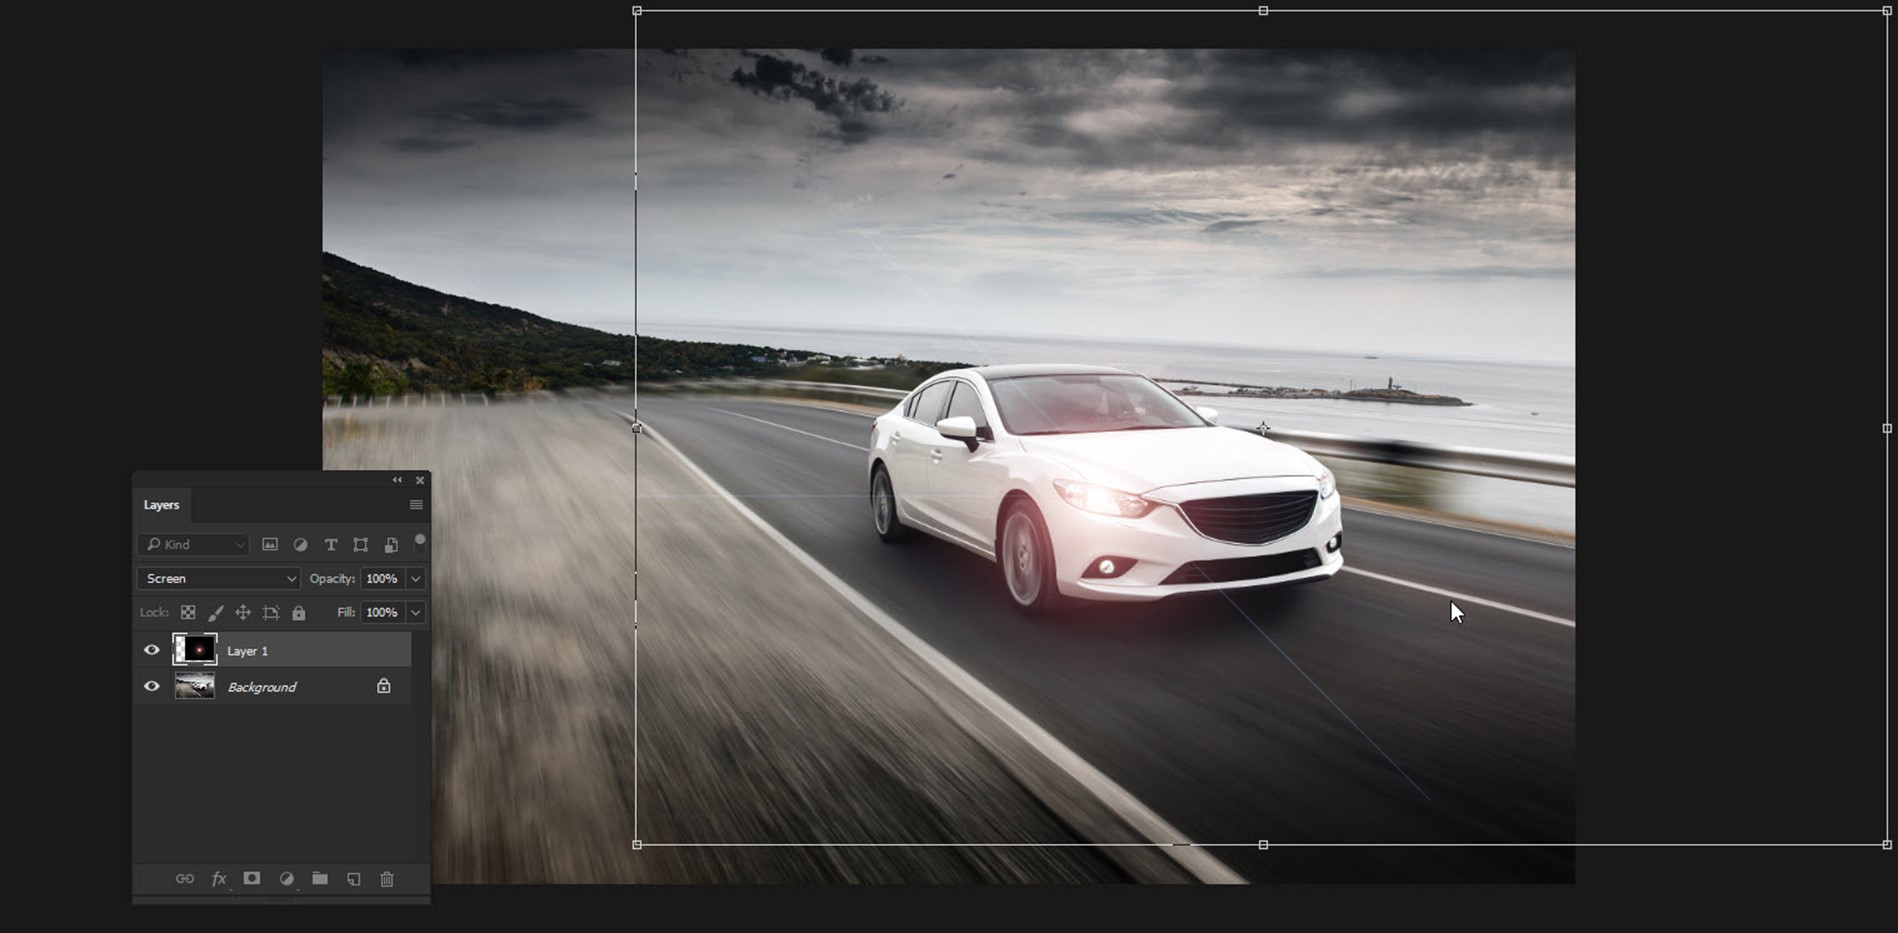
Let’s use Free Transform tool to move the flare to the desired position. I am going to fill the right headlight (your left) first.

Press Ctrl+T/Cmd+T to activate the Free Transform tool. Zoom out the image by pressing Ctrl+(-) and place the flare at the correct spot.

Step 3: Duplicate the Layer for Another Side

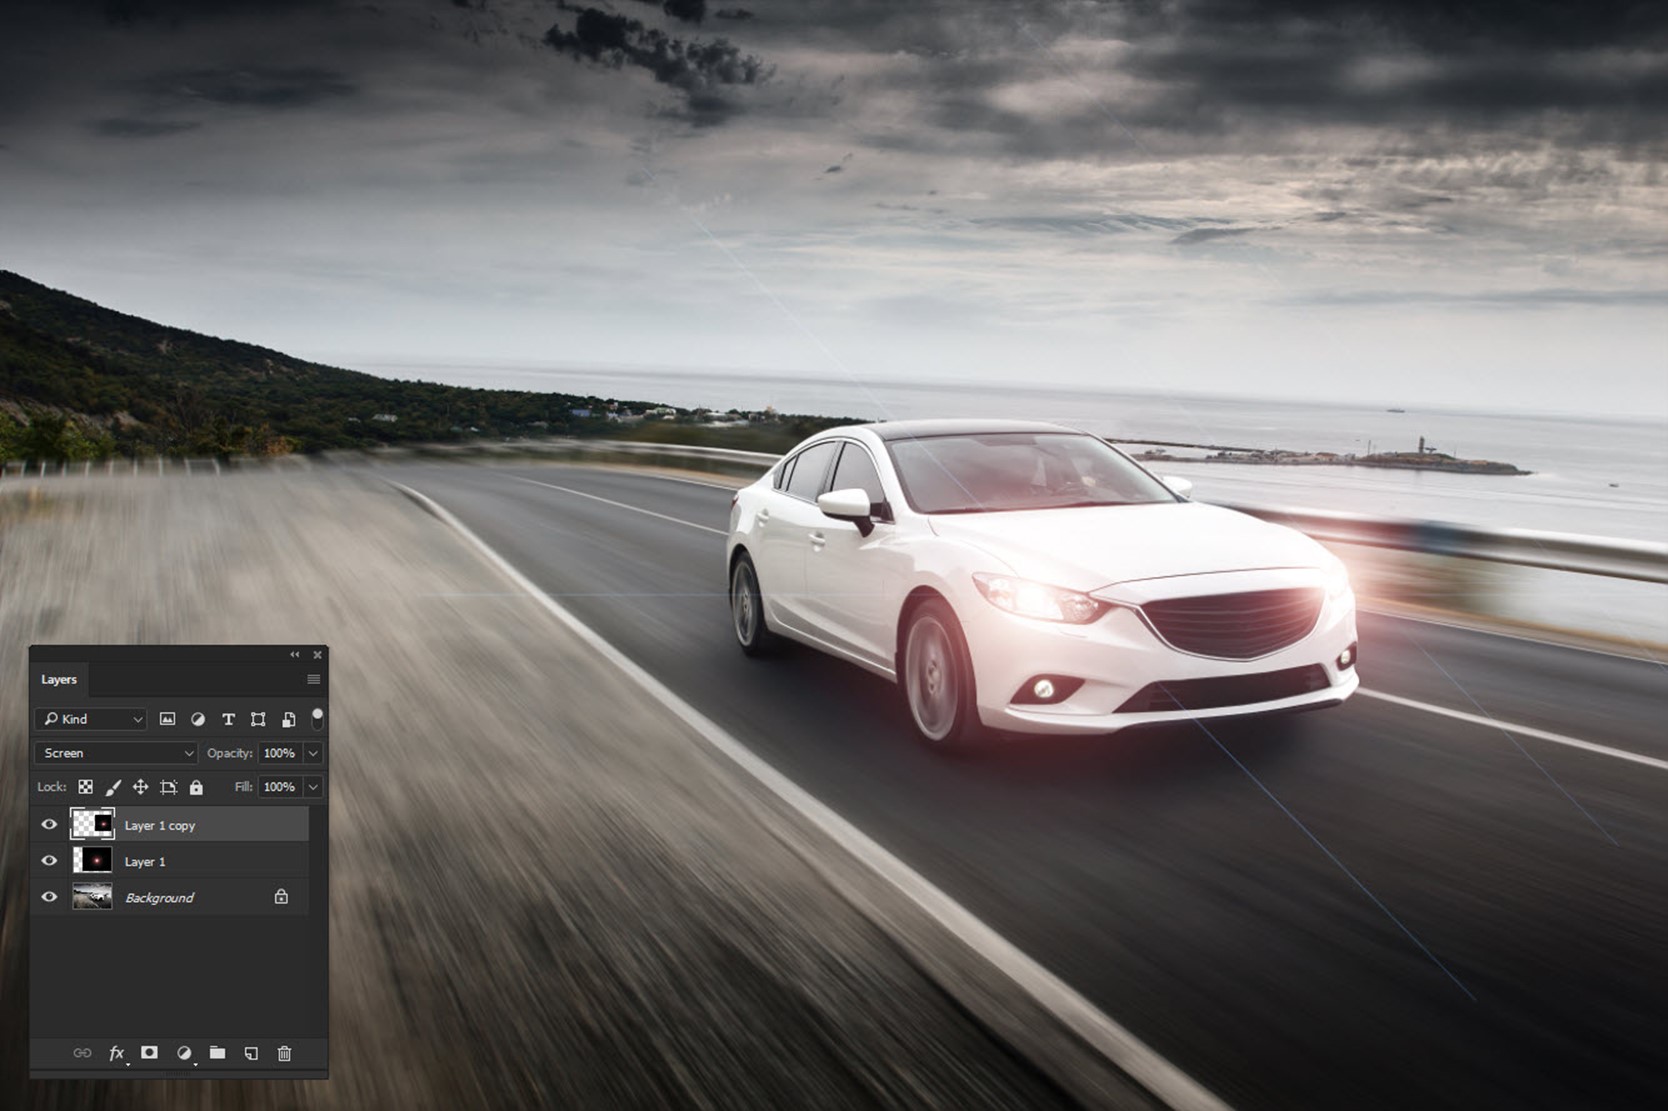
Duplicate the layer for another side. Press Ctrl+J/Cmd+J to duplicate.

Again, use Free Transform tool to place the flare to the correct spot.

Go to the next page for the bonus step. 🙂

Bonus Step

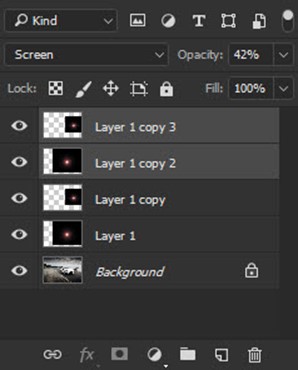
If you think that light is very bright, you can reduce the opacity. If you think that light needs to be brighter, you can duplicate the two layers.

To duplicate both layers, hold down Ctrl/Cmd and click on both layers. Press Ctrl+J/Cmd+J to duplicate both layers. Now, you can reduce the opacity also if you want to reduce the brightness. I reduced it to 42%.

Here’s the image.

Enjoyed this tutorial, right? Share it with your friends and family and show them that adding a headlight in 2 minutes is possible in Photoshop.

Head over to my home page for more awesome tutorials.

Peace.

Create Amazing Car Headlight in Photoshop

Since the past few days I am uploading basic tutorials to my website. So I decided to break the sequence and upload a slightly advance tutorial.

Last time I talked about Elliptical Marquee Tool in Photoshop, and you should check that out if you want to learn some cool Elliptical Marquee Tool tricks.

Today you’ll learn how to create car headlights in Photoshop. We’re going to use one filter and few adjustment layers. Although I said in the beginning that this tutorial is lightly advance but the difficulty of this tutorial is between easy to moderate.

AFTER

BEFORE

STEP 1

The first thing that we need do to is to create a new layer. Press Ctrl+Shift+N/Cmd+Shift+N to create a new layer.


STEP 2

Now search out an image that has good lens flare. Download it.

Now open that image on Photoshop. Select the whole image by pressing Ctrl+A, and then copy the image by pressing Ctrl+C.


STEP 3

Go back to the original image, and paste the image by pressing Ctrl+V/Cmd+V.


Change the blend mode to Screen to remove the black. If you want to know what actually happened when I changed the blend mode to Screen, check out the tutorial on Blend Modes in Photoshop.

STEP 4

Activate the Free Transform Tool by pressing Ctrl+T/Cmd+T. Enlarge the image and place the flare on the headlight. Press Enter/Return when done.

STEP 5

Go to Layer>New Adjustment Layer>Level. The first thing that you need to do is to click on the area that is encircled in the below screenshot.

Now increase the blacks and whites according to your requirement.

STEP 6

Go to Layer>New Adjustment Layer>Brightness/Contrast. Increase the brightness as well as contrast.

And we’re done now. Here’s the final image for you.

FINAL

I hope that you like the tutorial.

Please support TrickyPhotoshop by sharing this tutorial with your family and friends on Facebook, Twitter, or Google+.