You might have never heard about bleed and crop if you post your photos online and never bothered about printing them. But, you might head bleed and crop a lot if you print your photos or design. Today, we’re going to see how to add bleed and crop in Photoshop.
Photoshop has not given any standalone feature to add bleed and crop but has given some features that you can use to add bleed and crop. Let’s see how to use it.
Let’s start with the bleed first because we use it more than the crop.
1. How to add bleed in Photoshop?
Before we begin with how to add bleed, let’s understand what is bleed first.
1.1 What is bleed in printing?
Wikipedia has given a very nice and clean definition of bleed.
In printing, bleed is printing that goes beyond the edge of where the sheet will be trimmed. In other words, the bleed is the area to be trimmed off. – Wikipedia
Many economical printers are not capable enough to print edge to edge. So, they left a small piece of an area on the left and right. This left out area is called as bleed.
1.2 How much bleed should I add?
Many printing sites specify the exact bleed size you need to put on your document. If they don’t, a rule of thumb is to go for 0.25 inches on all the four sides.
Now, let’s add bleed in Photoshop
1.3.1 Step 1 – Adding the ruler
Text editing software like Microsoft Word, Apple Pages, and Adobe InDesign, etc. have a dedicated menu bar for this. But, in Photoshop, we need to use Guides to add bleed.
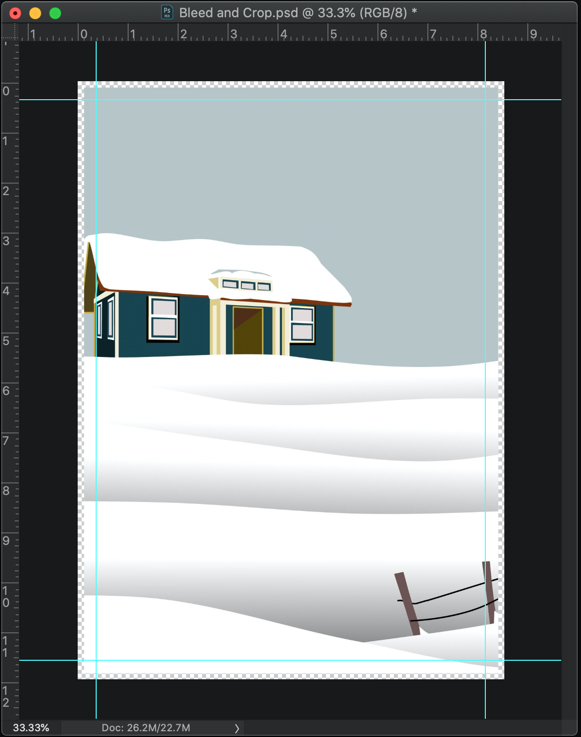
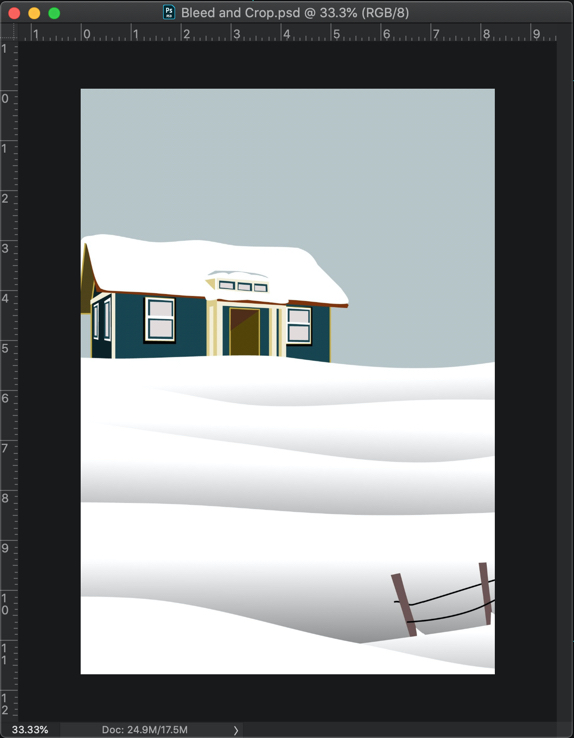
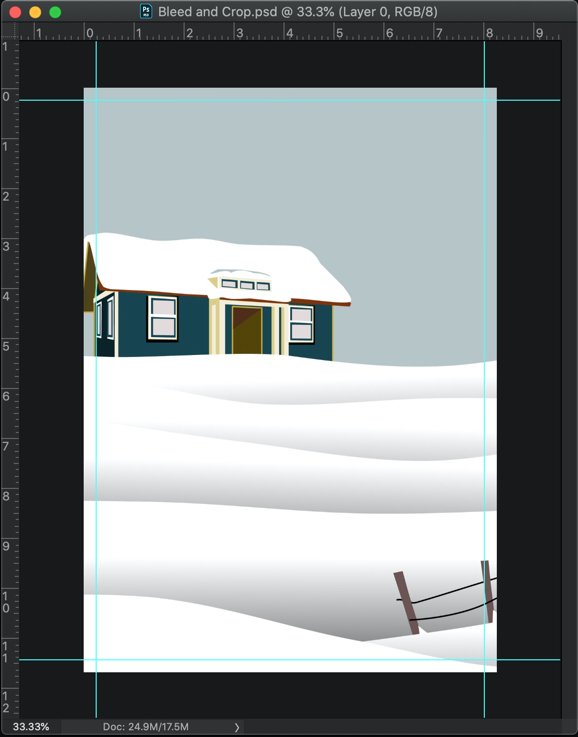
The below photo is A4 in size. It has a width of 8.2 inches and has a height of 11.6 inches, and has a resolution of 300 pixels per inch. Let’s add a bleed of 0.25 inches.
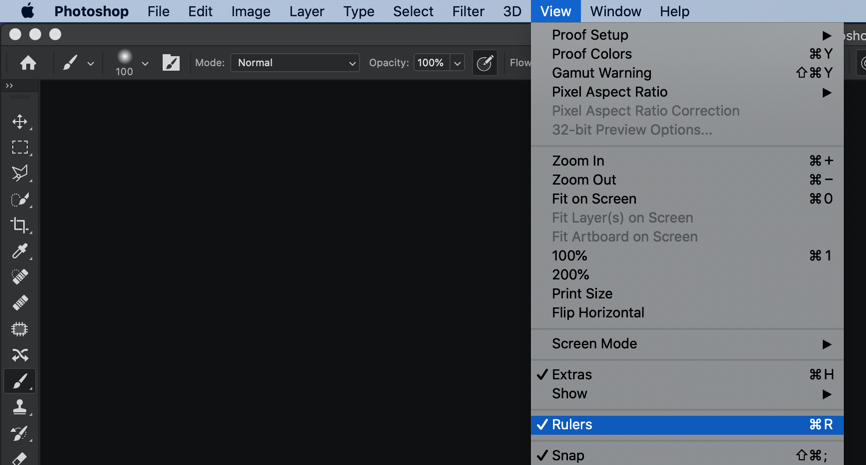
The first thing we need to do is that we need to add Ruler. Go to View > Ruler or press Cmd + R / Ctrl + R.
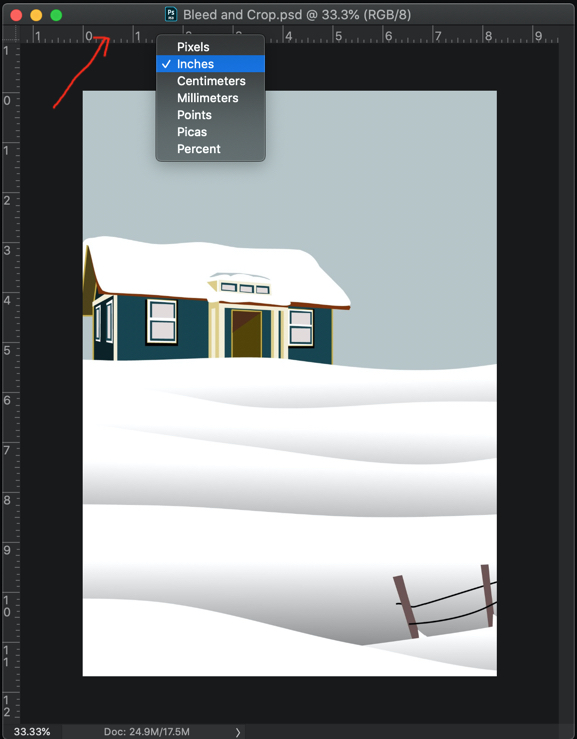
Now, right-click on the Ruler and select Inches.
1.3.2 Step 2 – Adding the guide for the bleed in Photoshop
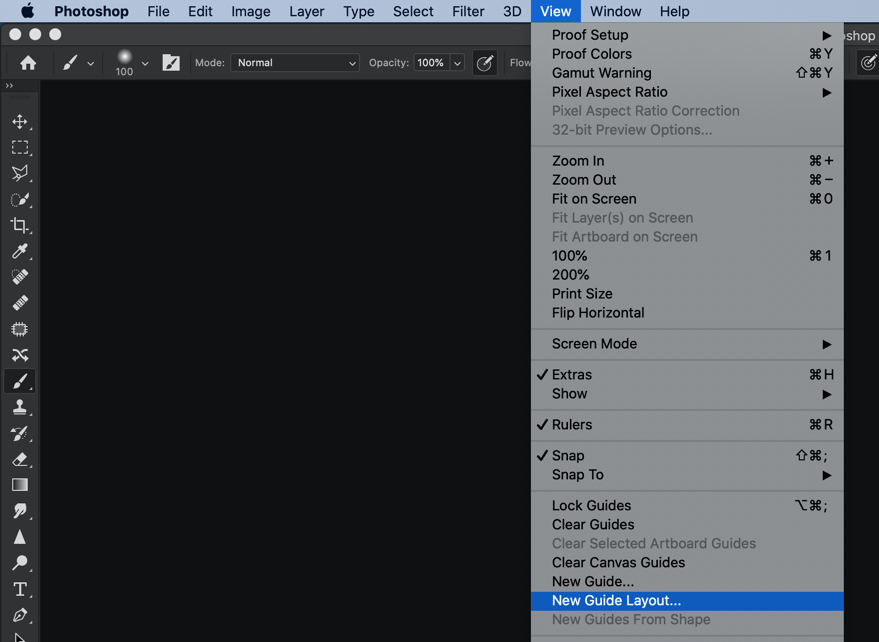
Go to View > New Guide Layout.
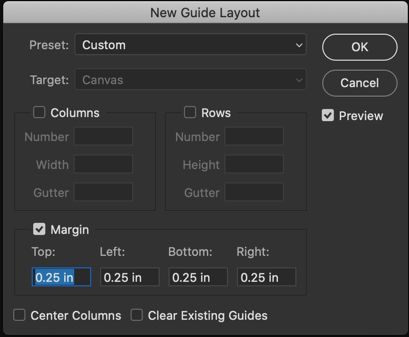
Now, write 0.25 in all the four fields of the Margin. Press OK.
This will add a guide that has a width of 0.25 inches. It’s better to keep all your designs and photo inside this guide.
2. How to add crop in Photoshop?
Before we begin with how to add a crop, let’s understand what is crop first.
2.1 What is the crop in printing?
This is not the cropping that you hear a lot. This is different than cutting out the unwanted part of a photo that we usually do with photos before uploading them on social media sites.
Crop marks, also known as trim marks, are lines printed in the corners of your publication’s sheet or sheets of paper to show the printer where to trim the paper. – Microsoft
2.2 How much crop should I add?
Printing sites specify the exact crop size you need to put on your document. If they don’t, a rule of thumb is to again go for 0.25 inches on all the four sides.
Now, let’s add crop in Photoshop.
2.3.1 Step 1 – Increasing the canvas
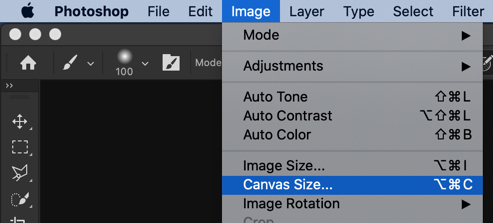
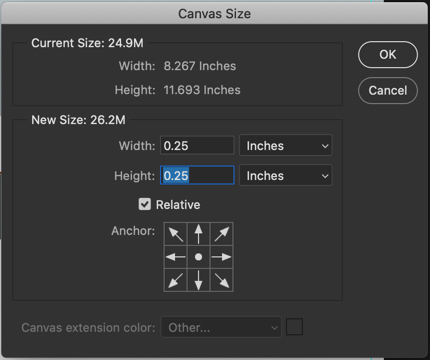
Go to Image > Canvas Size or press Cmd + Opt + C / Ctrl + Alt + C.
While making sure that the unit is inches, write 0.25. Keep the Anchor at the center and make sure that Relative is turned on.
Press OK.
This will increase the size of the document by 0.25 inches.
The square boxes you’re seeing on the edges are actually the transparent area. It’s included in the document but not painted with any color.
If somehow you print this transparent area, then nothing will be printed. A pink paper will come out as pink, a yellow paper would come out a yellow, and white will come out as a white.
This is all, guys. This is how you add bleed and crop in Photoshop.
Adobe is a household name to professionals and hobbyists of all kinds. Adobe software can handle many things, whether it is image editing, management, graphic design or countless other utilities. Let’s discuss Lightroom vs Photoshop today.
Now, when it comes to their most widely used software – Photoshop and Lightroom, there is bound to be a comparison. Both are equally capable pieces of software but excel at different functions.
Adobe Lightroom:
Lightroom is more of a starter’s tool to use for image editing, fixing, and management. It is capable enough to fix and change the smallest details in RAW and other formats in images. And at the same time, it is an easy to use software, which one can learn fast. You can use Adobe Lightroom easily and make your edits quickly. Lightroom is an all in one package to batch edit your photos down to the last detail.
Adobe Photoshop:
Photoshop is a general creation and designing tool that can also do the same things that Lightroom can do. But, its functionality to use as a substitute for Lightroom is incredibly limited in terms of ease of use. Its unique functionality makes it possible to do millions of things like background swap, painting, web design, something that Lightroom cannot do. You have to master all the basics to be able to apply presets, modify images, create from scratch as well as tune images.
Photo by creativelive.com
Lightroom vs Photoshop
Since each of them has its benefits and unique features, it is not a competition. Both are part of the Adobe Suite and in a photographer’s workflow, both are quality essential.
You start with applying color and other fixes on Lightroom. Then, you move to Adobe Photoshop to further edit and add any more changes. After all, photoshop is the Swiss Army knife for graphic design! Whether it is removing, adding or modifying elements, you can do it all with Photoshop.
You can play wit layers, lighting, artificial effects, elements, and a lot of artificial edits in Photoshop. Whereas, in Adobe Lightroom, you cannot add elements and artificial external elements or modify the image’s elements.
Surely, you can remove blemishes, spots, change colors, that too at an advanced level. Whereas you can easily edit and add images to Lightroom, Photoshop is as its name suggests. Photoshop lets you play around with photos and add layers of edits and edit each layer differently. You can even stitch images, and make panoramas, something that Lightroom cannot do. It is kind of like a garage for photos; Lightroom’s name also gives it purpose away clearly.
Much like a photographer’s darkroom, its main purpose is to process images into a fair level of the usable final product. You can show the output of a digital camera’s raw file into a natural-looking image with the tuning tools of Lightroom.
Conclusion:
Both are capable at their own functions and tend to different users. When it comes to ease of use, Lightroom takes the leading position. On the other hand, if it is graphic design or advanced image editing you are looking for, you should learn Adobe Photoshop.
You can edit photos down to the pixel level in Photoshop, and in Lightroom, you can edit everything which looks appealing to a layman looking at a photograph with perfect colors and removing all imperfections in lighting. You can even add multiple images into one image with Photoshop whereas Lightroom lets you apply your desired settings to a batch of your photos.
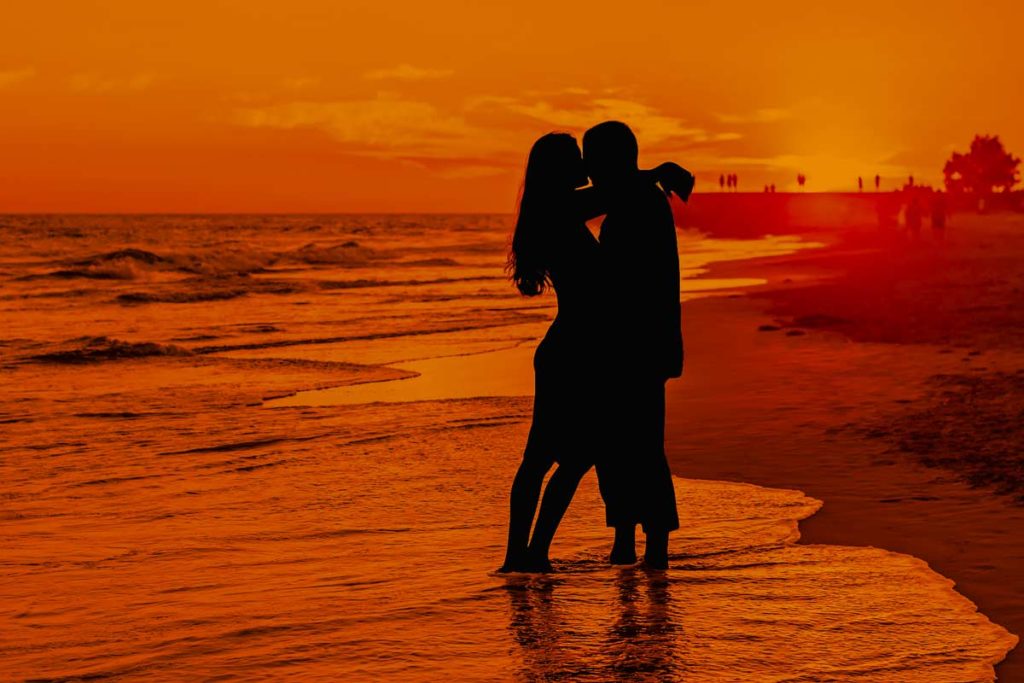
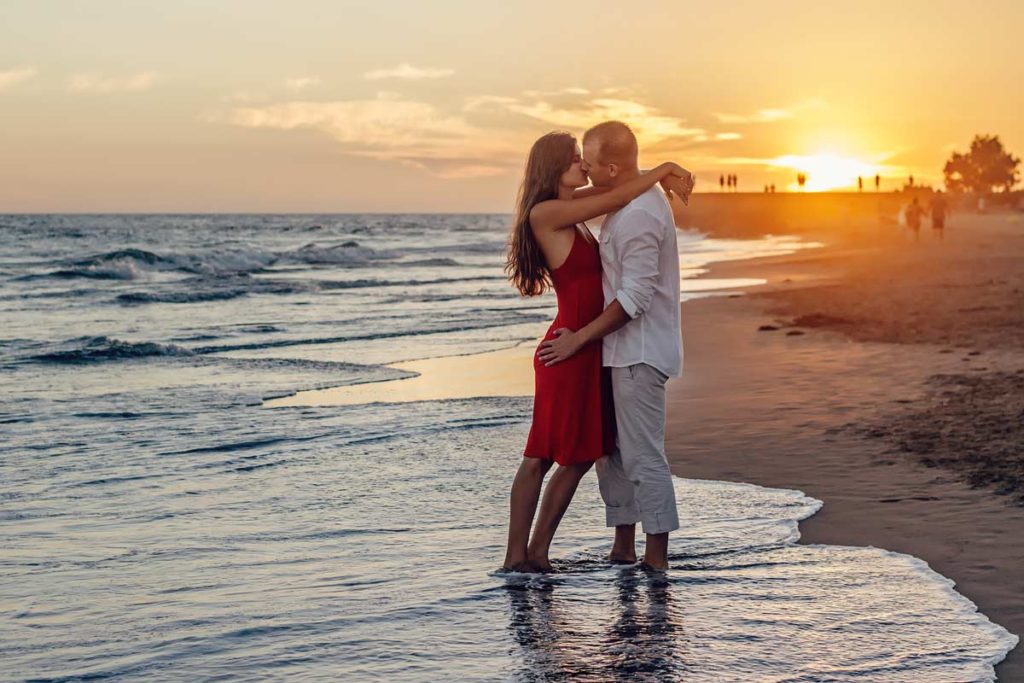
Here comes the awaited tutorial. Many of the people demanded me to write a tutorial on creating a silhouette effect in Photoshop. So, here you go.
This is a short tutorial. I’ll be showing you how to create a silhouette effect in Photoshop. I’ll just be using a selection tool and adjustment layers.
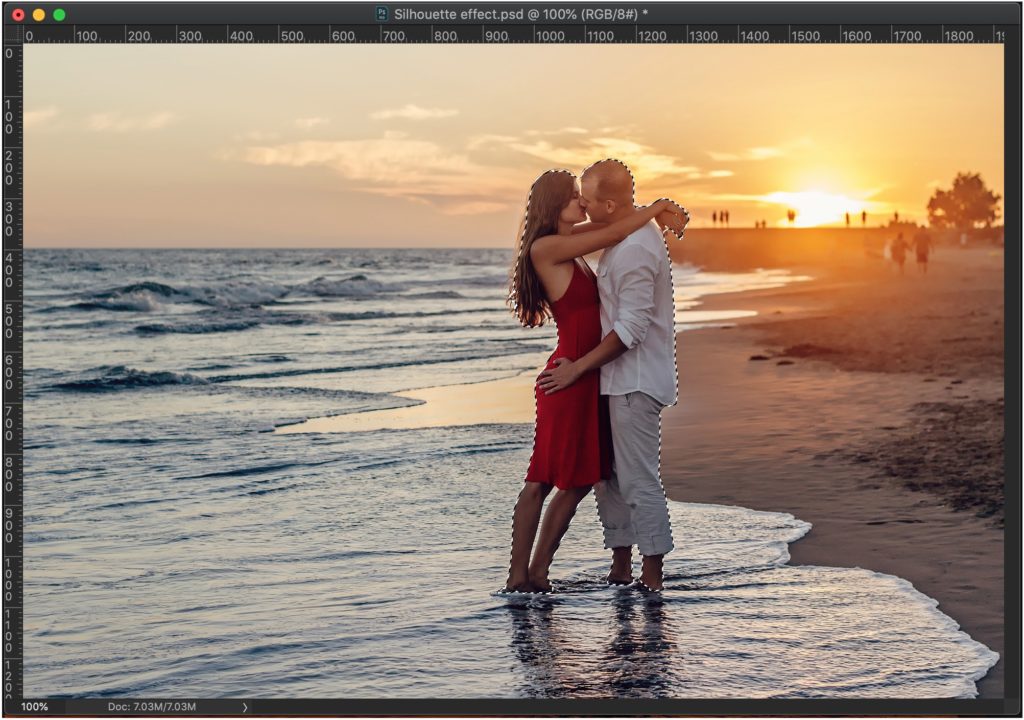
Before we begin, let me show you the before and after photos.
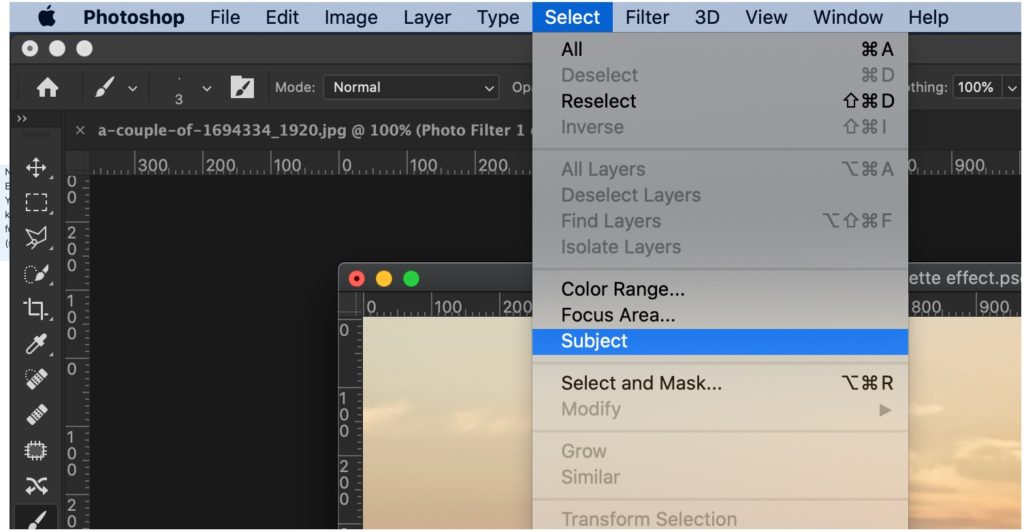
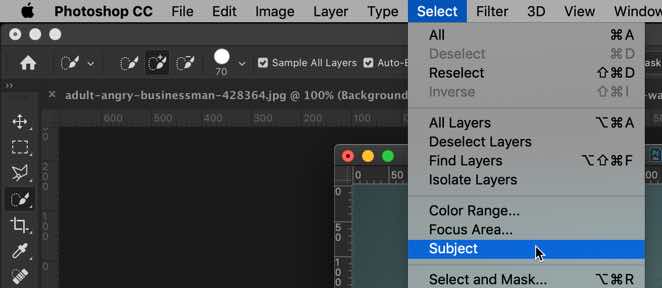
We’re going to use Select Subject to quickly select the people. If you’re using old Photoshop and don’t have Select Subject then you can use the Quick Selection Tool to select the people.
Go to Select > Subject.
This will roughly select the people. The selection is not at all perfect. See the ocean between their chins, chest, and between her legs. Those areas should not have been selected.
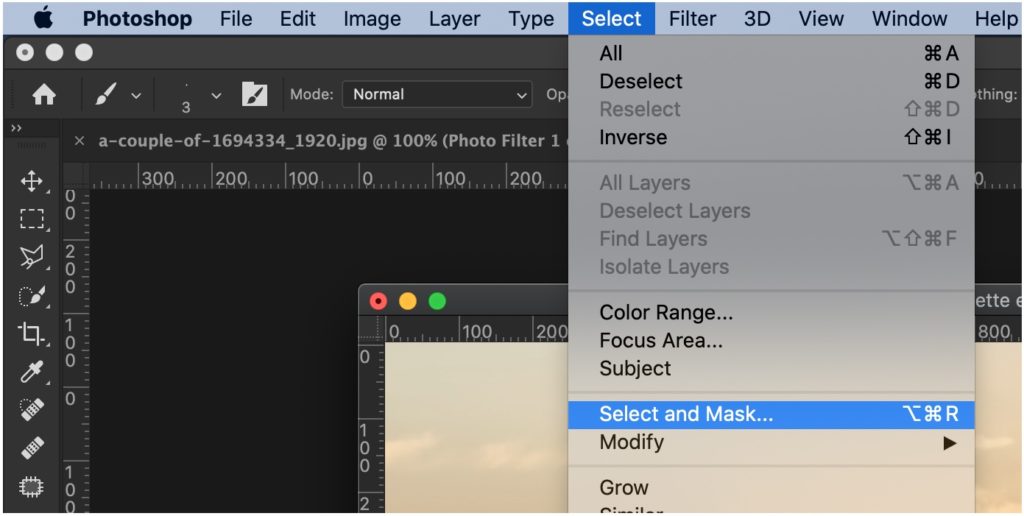
Step 2 – Refine the selection in Photoshop
We’re going to refine the selection to deselect the unwanted areas and select the wanted areas. We’re going to do with the help of the Select and Mask tool.
Go to Select > Select and Mask.
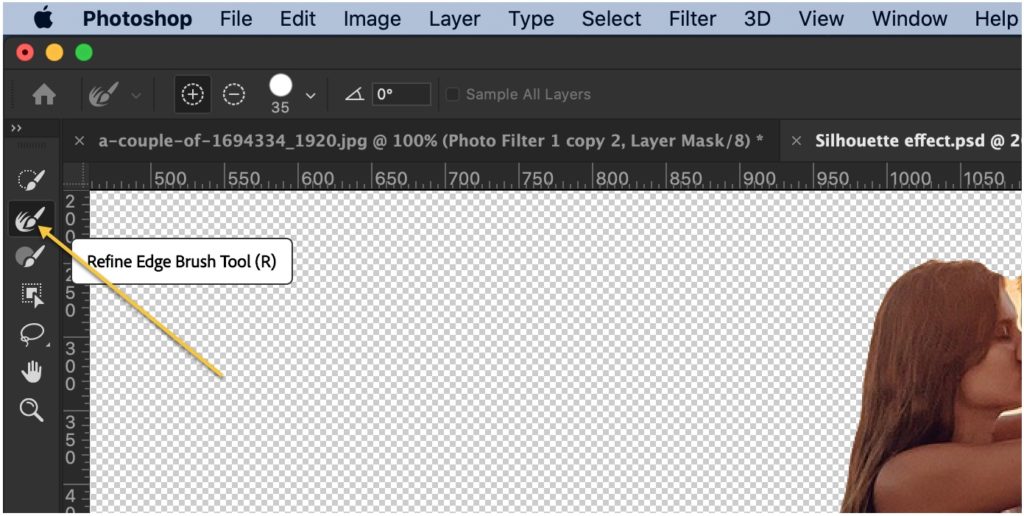
Grab the Refine edge brush from the panel. This will show up once Select and Mask is turned on.
Now, start brushing on the edges. See the GIF below. GIF is of 4 MB in size. Give it some time of load. Also, I have increased the speed to two times.
Once that is done, you’ll see the photo without the background.
Step 3 – Give a nice dark effect to the background
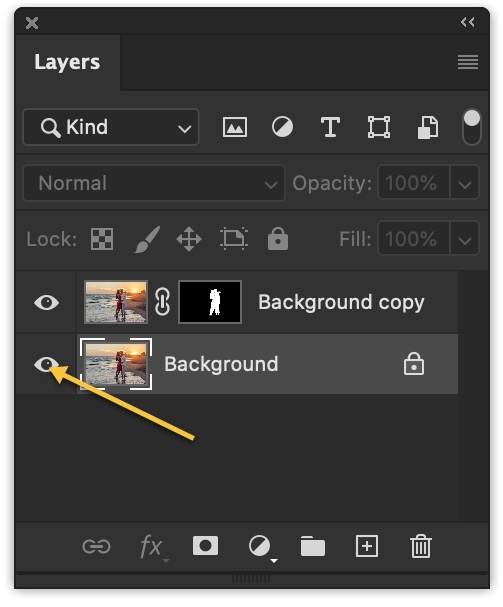
Open the layer panel by going to Window > Layer.
Activate the background layer by clicking on the eye icon.
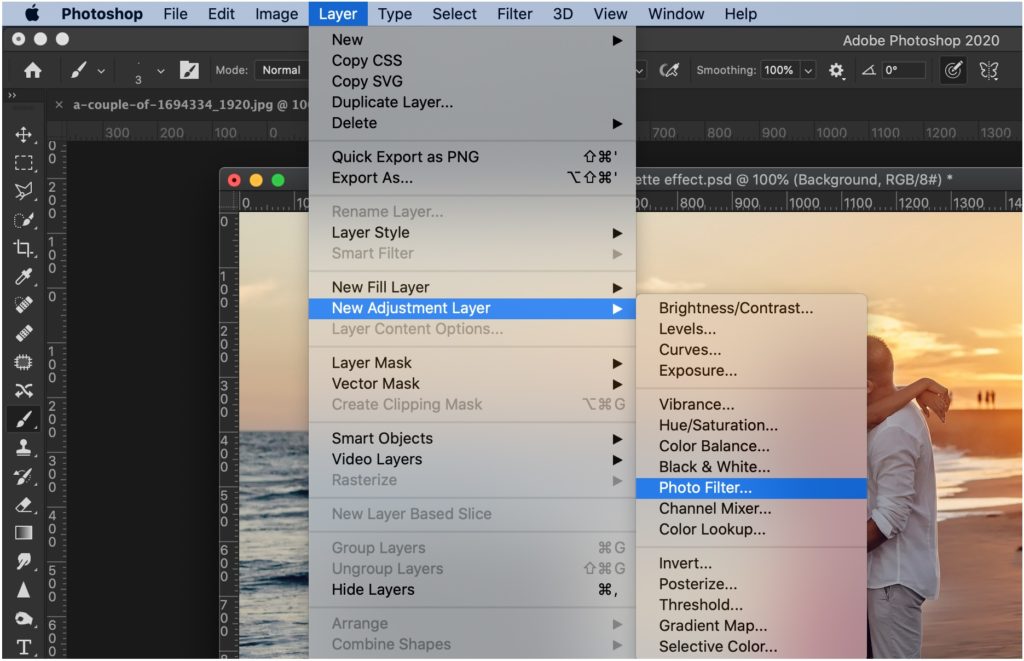
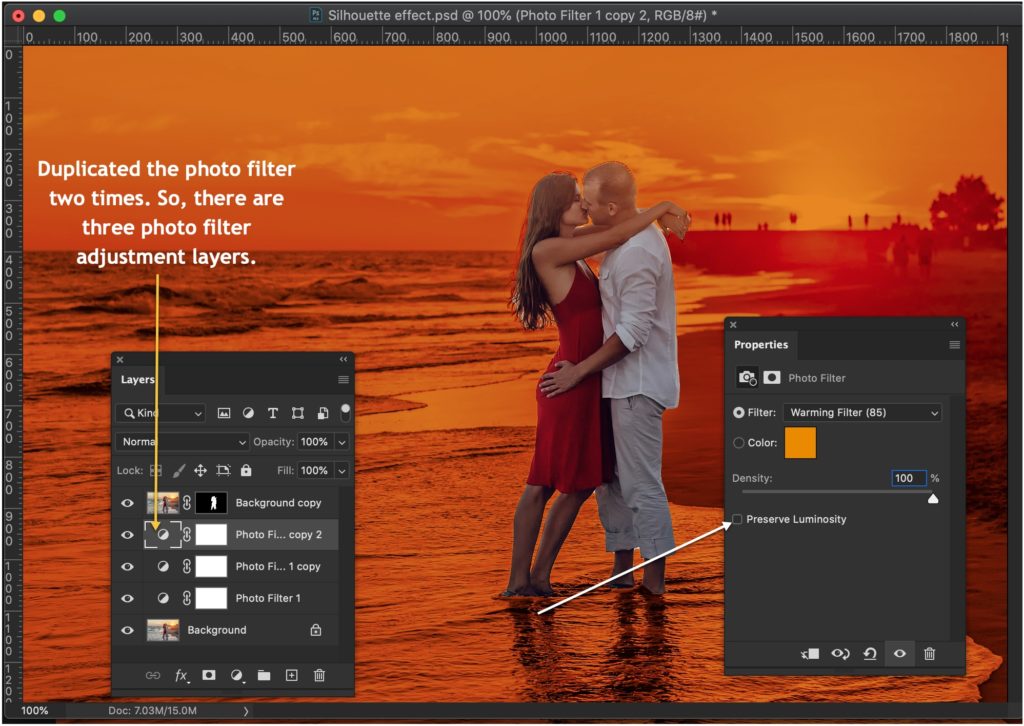
Go to Layer > New Adjustment Layer > Photo Filter
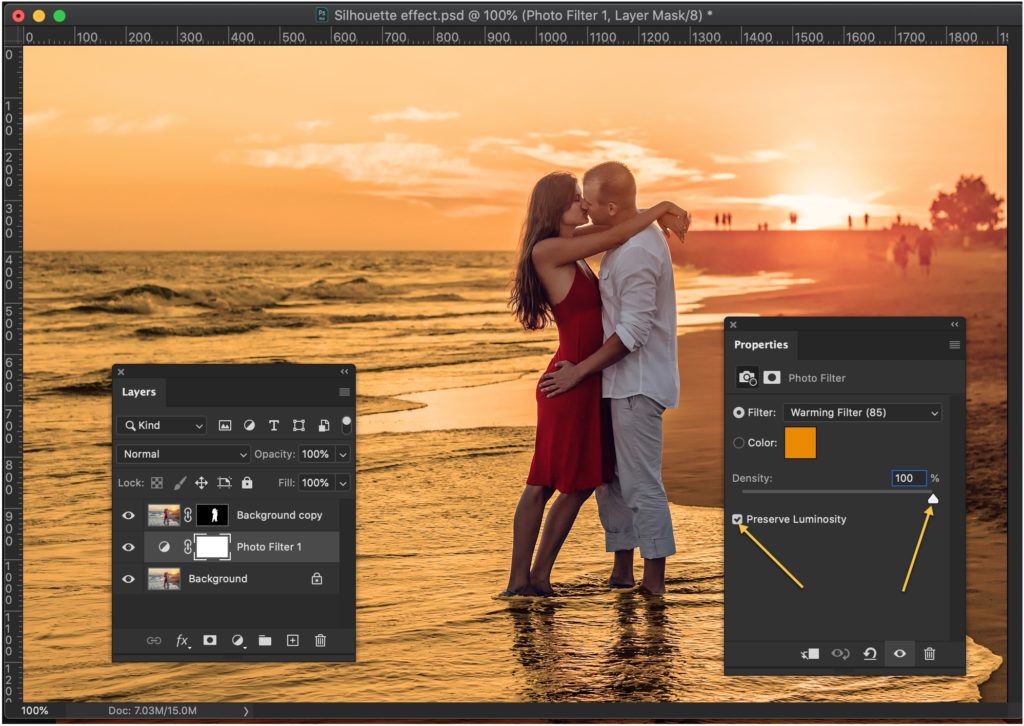
Click on Preserve Luminosity and drag the slider all the way to the right.
Now, duplicate the photo filter adjustment layer 2 times by pressing Cmd + J / Ctrl + J. In the topmost photo filter layer, turn off the preserve luminosity.
Step 4 – Create a silhouette effect in Photoshop
Time to make the people black.
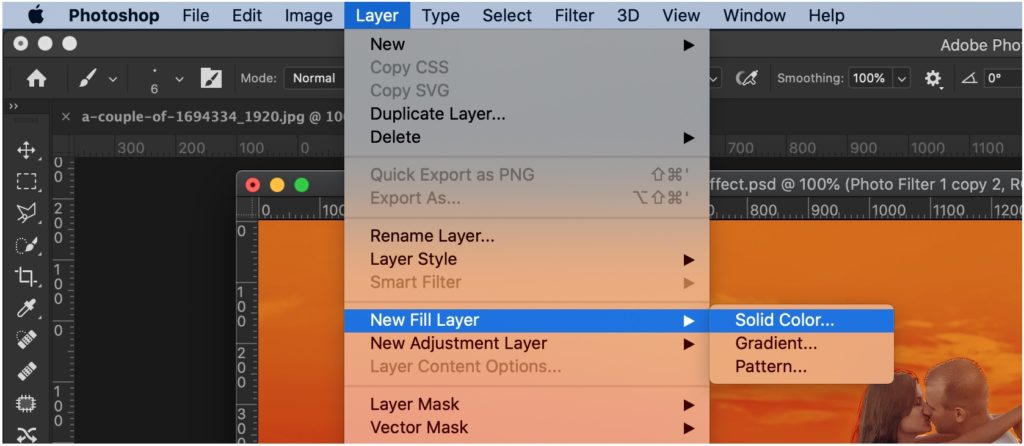
Go to Layer > New Fill Layer > Solid.
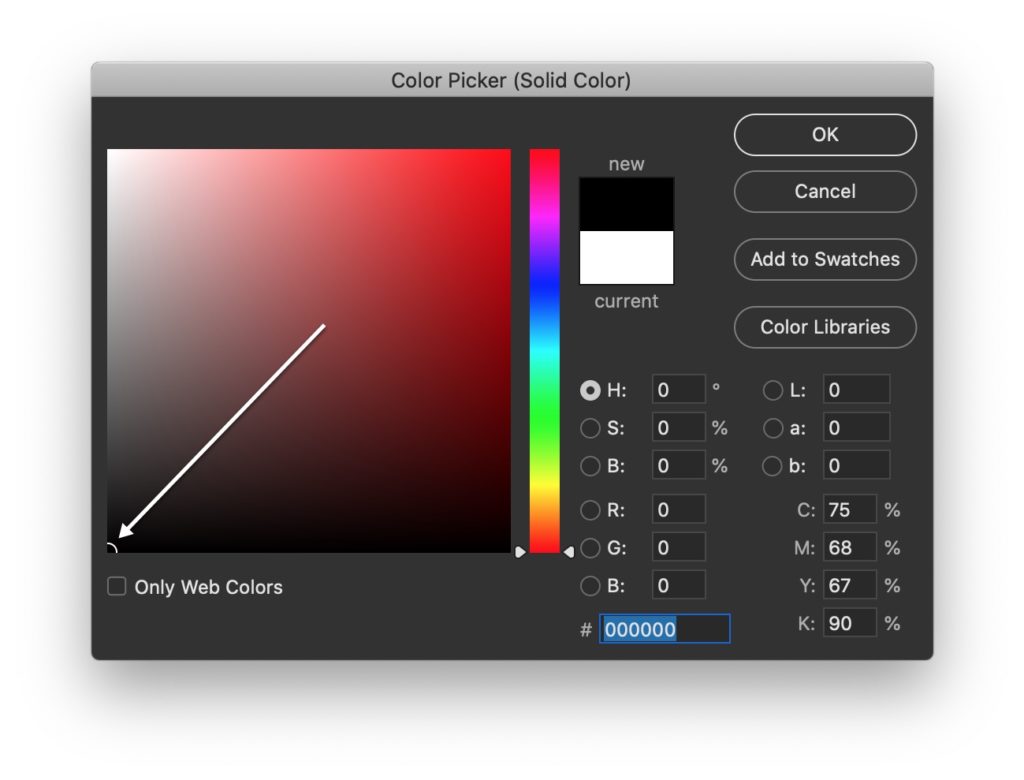
In the next window, choose the black color. Press OK.
In the layer panel, drag the solid color fill layer to the top. Now, hold down Opt / Alt and place the cursor between the Solid Color fill layer and the people layer. The cursor will change to an arrow. Click as soon as the cursor changes. See the below GIF.
Adobe Photoshop 2020 is out. With it, Adobe has launched so many new features and one of them is the brand new Object Selection Tool. Let’s see what we have got in this brand new Object Selection Tool in Photoshop.
Let’s begin the tutorial.
What is the Object Selection Tool in Photoshop?
The Object Selection Tool in Photoshop is a tool to select anything in Photoshop. It can be a face, car, tree, house, or basically anything. As of November 2019, the accuracy of the selection is not that perfect for complex edges like hair, but it works pretty well for sharp edges like a house, car, etc.
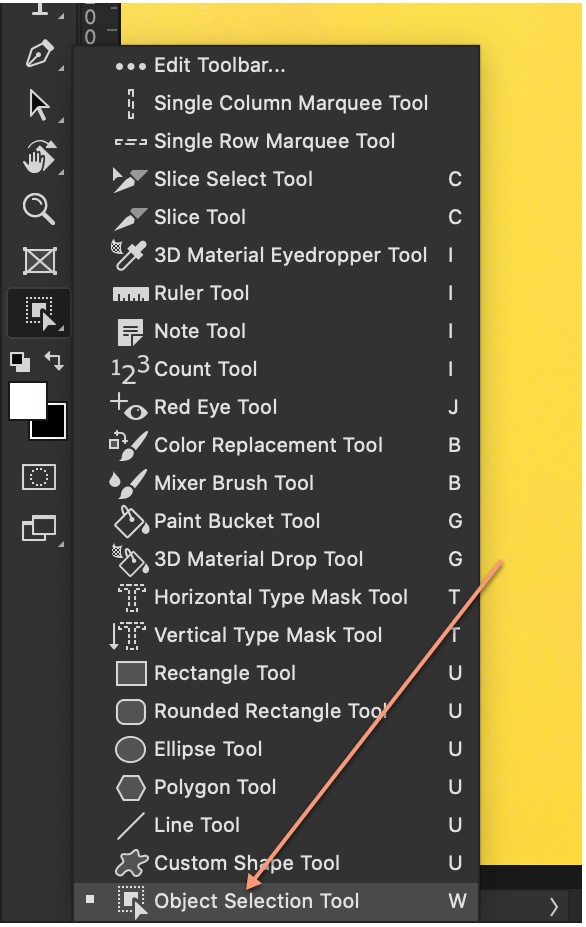
Where do I find the Object Selection Tool in Photoshop?
You can find it on the tool panel. It’s present along with the Quick Selection Tool or press Shift + W again and again until it activates.
How to use the Object Selection Tool in Photoshop?
The Object Selection tool in Photoshop is easy to use. Though it’s not as easy to use as the Select Subject, but it gives better results than the Select Subject.
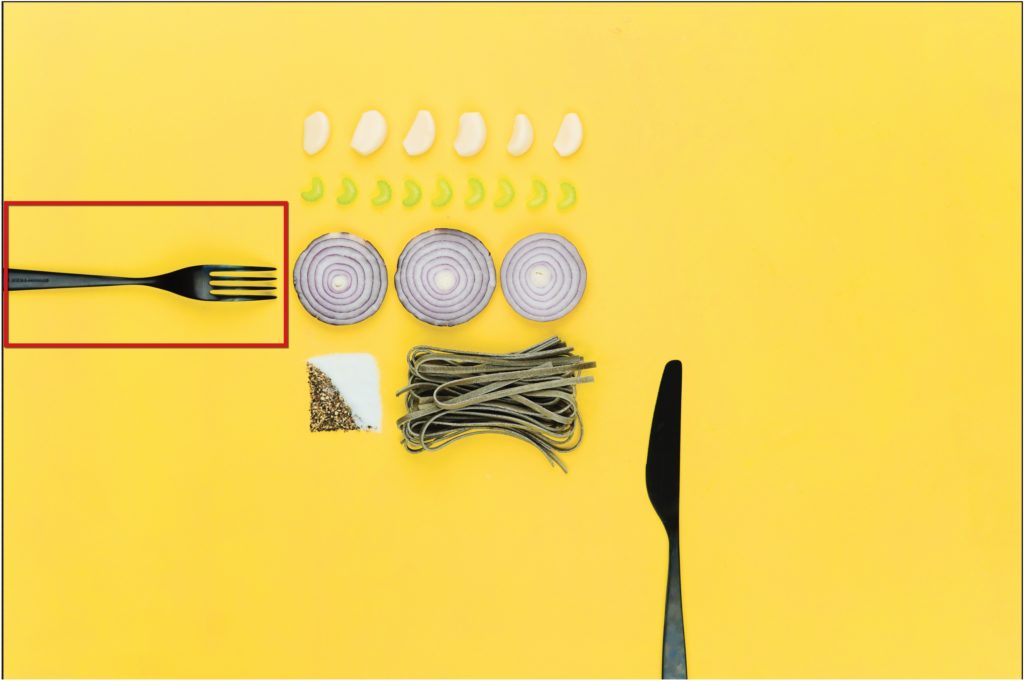
In the below photo, I am going to select the fork.
Step 1 – Select the Object Selection Tool in Photoshop
Either press Shift + W or grab the Object Selection Tool from the tool panel.
Select the rectangle from the option panel. I’ll explain the rest of the features in the option panel later.
Now, draw a rectangle around the fork.
This is the result. You can see that it’s nowhere perfect.
Step 2 – Refine the selection using the Object Selection Tool in Photoshop
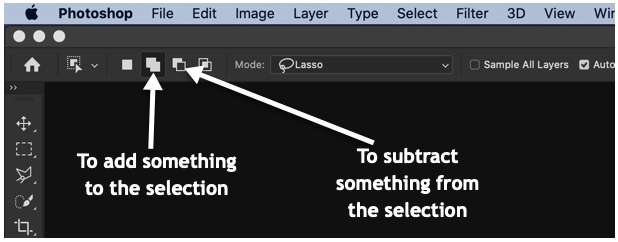
It seems that Adobe knows that the result doesn’t give perfect results always. So, it has added one more feature in this tool. You can add or subtract something to or from a selection using the same Object Selection Tool.
I am going to show you how you can do it.
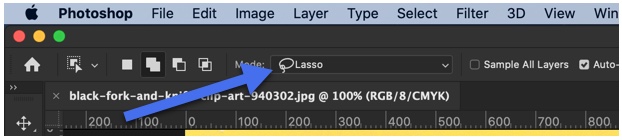
Firstly, change the mode to Lasso.
In the option panel, you’ll see four icons on the left side. These icons come handy now.
If you look at the screenshot below, you’ll see that I have marked the things that we want to add to the selection or subtract from the selection.
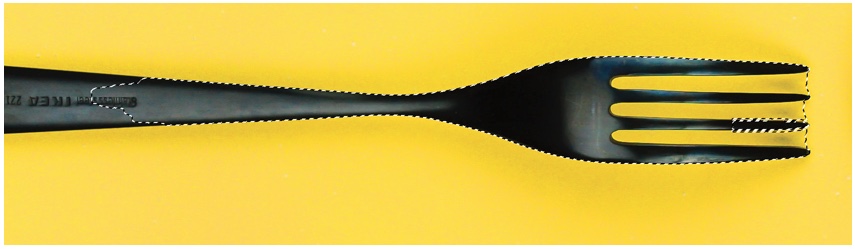
Fixing the handle
The handle of the fork needs to be added and the slots between the points need to be subtracted from the selection.
We’ll first add the handle to the selection. Click on the second icon in the option panel. See the below screenshot.
When refining the selection, I found it really hard to use the Object Selection Tool because of its inaccuracy. I needed to use it multiple times and had to spend a lot of time which could easily be saved using the Quick Selection Tool.
So I decided to use the Quick Selection Tool instead.
Fixing the slots
Again make use of the Add to Selection and Subtract from Selection icon to do this.
See the below GIF. Yes, you could do the same work in probably half of the time using the Quick Selection Tool. But, I stuck with the Object Selection Tool because this tutorial is on it. Give some time to Adobe and I know that it’ll optimize this tool.
Some of us have puffy eyes or eye bags. Some of us grow as we get older and some of us have it since our birth. Today, I am going to show you how you can reduce puffy eyes or eye bags in Photoshop.
You can also remove it but that’d look too much photoshopped. So, it’s better to reduce it.
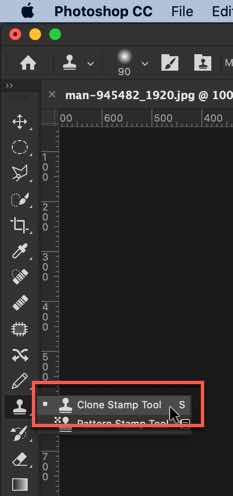
Grab the Clone Stamp Tool from the tool panel or keep on pressing Shift + S again and again until it comes.
Step 2 – Reduce puffy eyes or eye bags in Photoshop
The next thing we need to do is to remove the eye bags or puffy eyes.
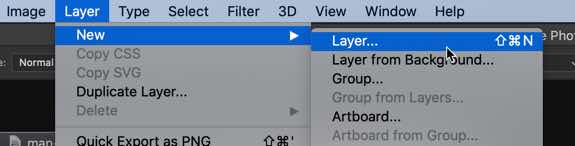
Create a new layer by going to Layer > New > Layer or by pressing Cmd + Shift + N / Ctrl + Shift + N.
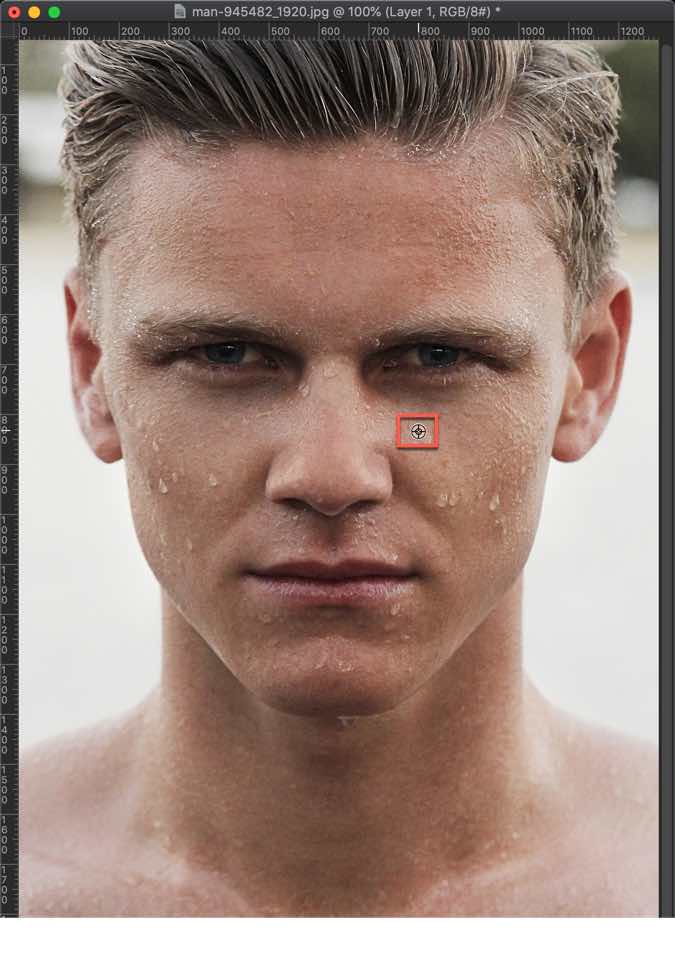
Step 2.1: Define the Source
The Clone Stamp Tool is used to copy pixels from one part of the image and paste them on another part. To use the Clone Stamp Tool, you first need to define the source pixels. This will be pixels that are going to be copied. You can do them by holding down the Opt/Alt key.
Once you hold it down, the cursor will change to a sniper cursor.
I’ll paint the skin from this location on the eye bags.
Step 2.2: Paint the Target
Now that I have selected my source, I am going to paint those pixels onto my target. When you do that, you’ll see a cursor that moves synchronously with your cursor. This cursor denotes the pixels that are being copied.
This GIF is of 7 MB in size. So, give it some time to load.
Simply, do this all over the eye bags.
For the best result, you may need to define your source multiple times as I did in the GIF.
This is how the photo will look.
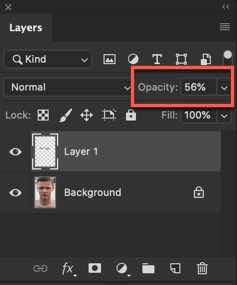
Step 3: Reduce the opacity
Open the layer panel by pressing F7 or going to Window > Layer.
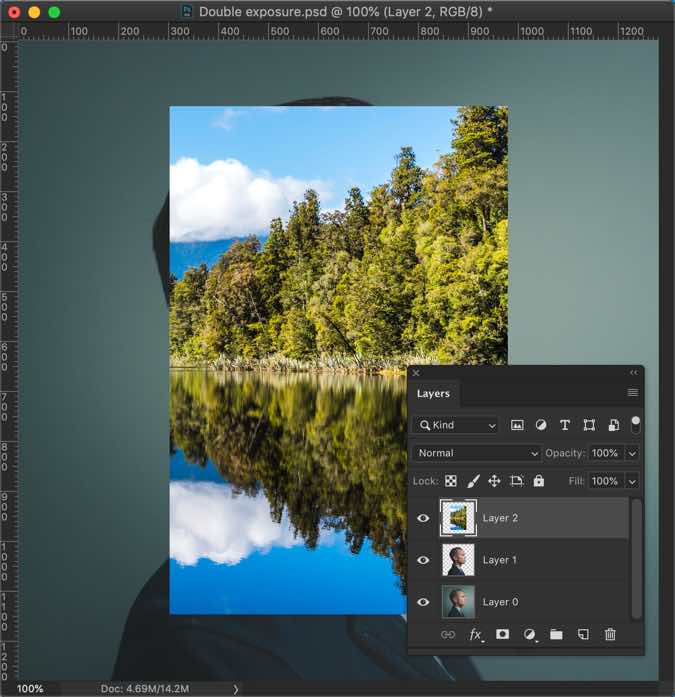
You’ve seen double exposure effect somewhere and now you want to know how to do in Photoshop, right? You’ve wondered how do I do it and that’s why you’re reading this tutorial. Today, I’ll show you how to create a double exposure photo in Photoshop.
Look no further because this is the tutorial where you’ll know everything.
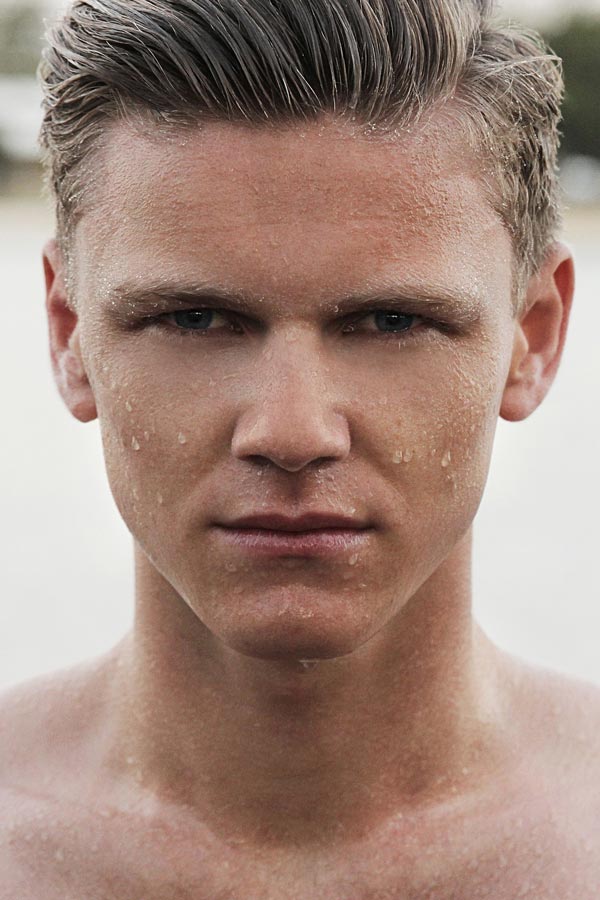
Before we begin, let me show you the after and before.
Press Cmd + J / Ctrl + J to copy the selection to a new layer.
Step 2: Open and select the other photo
Time to open the other photo.
We’ll select the portion which we’d like to use as the double exposure.
Grab the rectangular marquee tool from the tool panel or press Shift + M again and again until it comes.
Draw a rectangle on the part which you want to use for the double exposure. I am going to use this part.
Copy the selection by pressing Cmd + C / Ctrl + C.
Go back to the original photo and paste it by pressing Cmd + V / Ctrl + V.
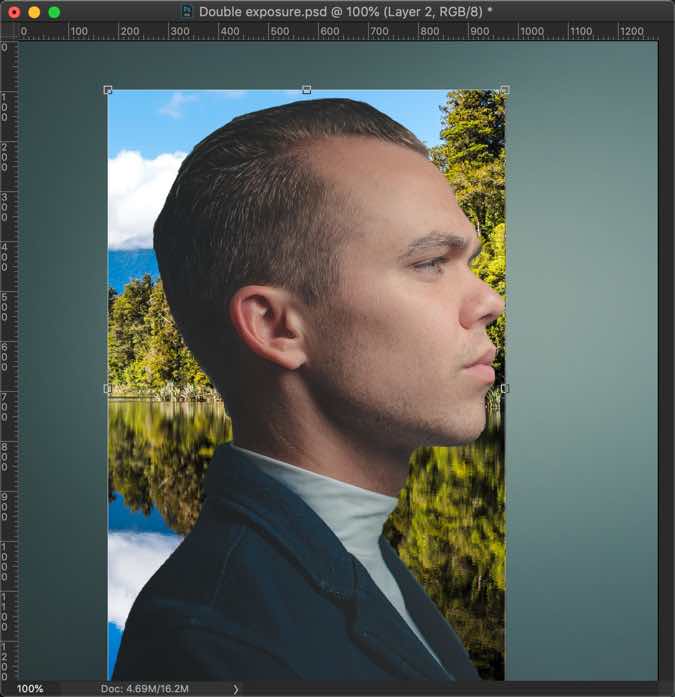
Step 3: Align the landscape photo
Drag the landscape layer below the man’s layer.
Activate the Free Transform Tool and align the landscape photo in such a way that it covers the entire body of the man.
Press Return/Enter.
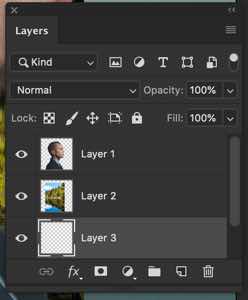
Step 4. Change the background
Create a new layer below the landscape photo by pressing Cmd + Shift + N / Ctrl + Shift + N.
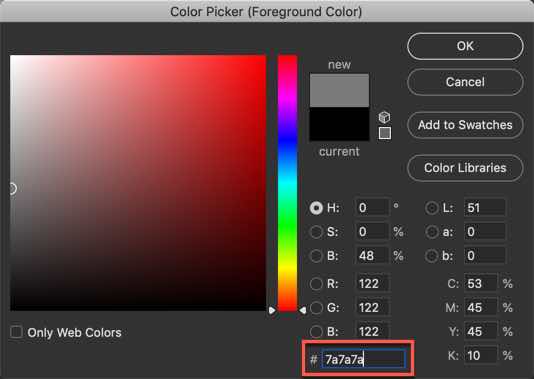
Click on the foreground color.
Write #7a7a7a in the box. Press OK
Press Opt + Delete / Alt + Backspace to fill the layer with the newly selected layer.
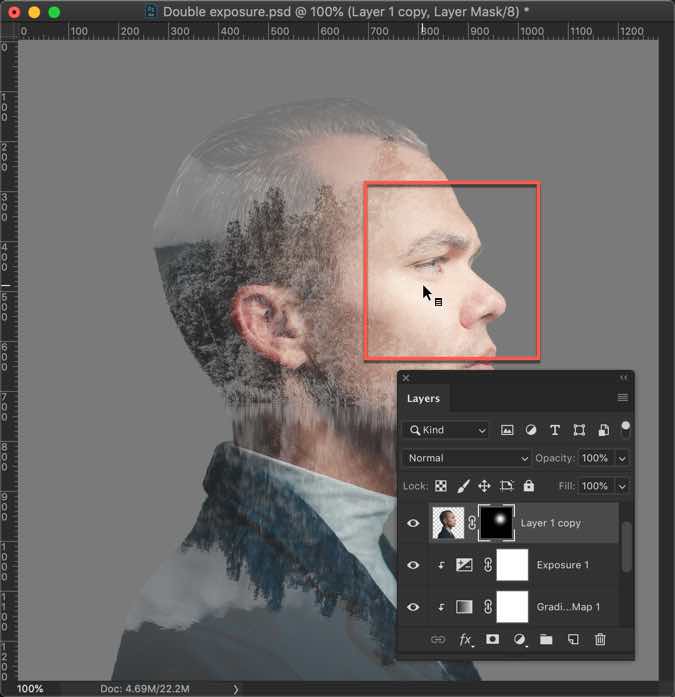
Step 5: Create double exposure photo in Photoshop
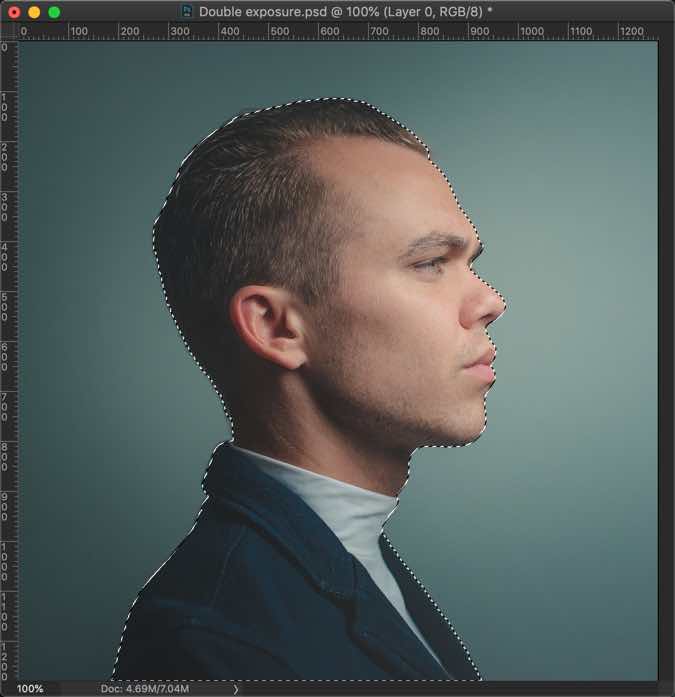
The first need we need to do is to make sure that its edges totally align with the face.
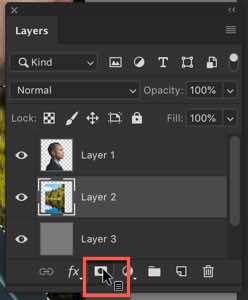
Hold down Cmd/Ctrl and click on the thumbnail of the photo. This will select the man.
Click on the landscape layer and then click on the Layer Mask.
Now, the landscape photo aligns with the man’s photo.
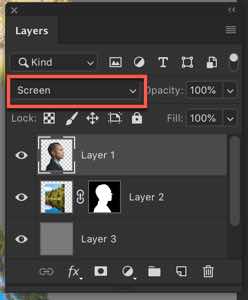
Change the blend mode of the man’s photo to Screen.
Again activate the landscape layer.
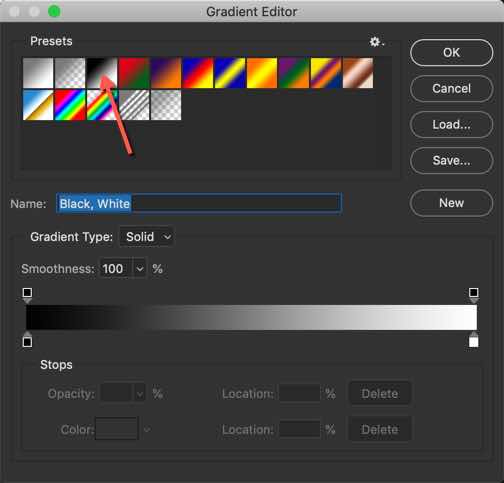
Go to Image > Adjustment > Gradient Map.
Click on the box.
Choose the black to white gradient and press ok.
This will convert the landscape photo to black and white.
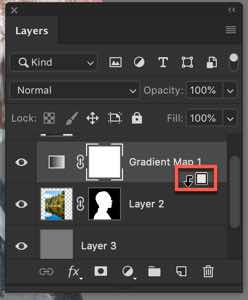
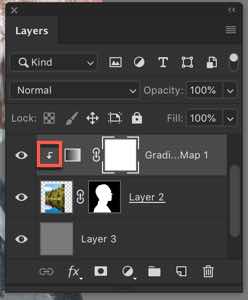
But, there’s a problem. The gradient map is affecting all the layers below it including the background. We need to fix it.
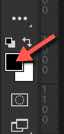
We’ll clip the gradient map layer to the landscape layer. Hold down Alt/Opt and place the cursor just at the edge of the layer. You’ll see that cursor changes. Then click.
This arrow would come up which means that the gradient map is affecting only the layer below it.
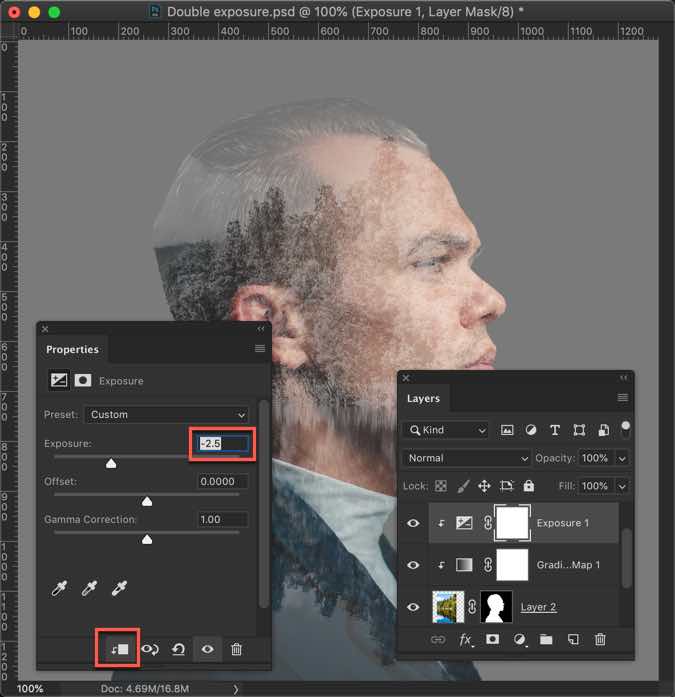
Time to reduce exposure. Click on the adjustment layer button and choose Exposure.
Reduce it to -2.5. Also, click on the clipping mask button.
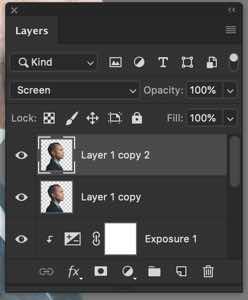
Step 6: Give effect to the man’s photo
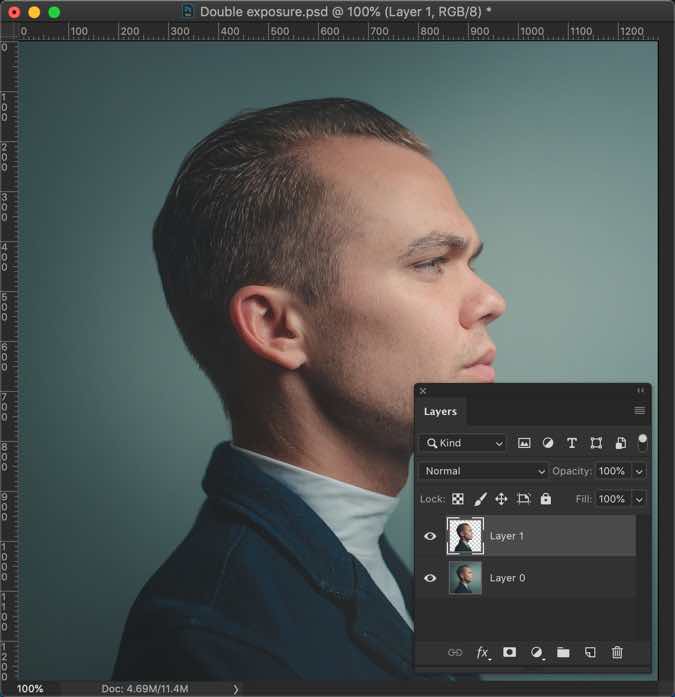
Click on the man’s photo layer. Duplicate it by pressing Cmd + J / Ctrl +J.
Change the blend mode of the below layer to Normal.
Nowadays Instagram is kinda like a portfolio of a person, a modern resume if you will. That is why we are so obsessed to take that amazing photo of yourself and to post it on your feed. However, taking a great shot is no longer enough, filters are what matters right now. Having cool filters means that you kinda have it all in the Instagram world: likes, comments, and popularity.
Of course, there may be negative comments, cause you know, there will always be haters. The worst thing that can happen is that such comments may affect the minor audience and there are few ways to prevent it such as turning off the comments on Instagram or blocking unfriendly users or using the KidSecured app.
This article is not about already known presets, this is about your own vision of a photo, your own filter to show the real you and that what makes you special despite the number of likes on your photos. There is only one thing you need to understand in this life is that you don’t have to be liked by everyone, the only person who should accept you is you.
Anyway, if you are interested in giving the photos a little gloss here are some tips on how to create your own Instagram filter in Photoshop. Get inspired and be that inspiration!
The first step is, of course, to download Adobe Photoshop if you haven’t done it yet. Next, you need to open a photo to start work, you can do this two ways: tap File and then Open or with the help of Photoshop hotkey Ctrl+O.
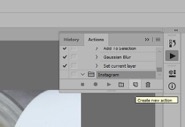
When the photo is into Photoshop go to Window and then tap Actions or use the hotkey Alt+F9 to make sure that your every step will be recorded and saved for your convenience. Later you can use the recorded filter on other photos to get them a makeover with a few seconds.
By hitting the Actions the Actions panel has brought out and now you can press the folder icon to create a new set. Give whatever name you want to this set and press ok. It would be easier if you name it with the word or phrase that refers to your actions, e.g. My own Instagram filter or Presets for Instagram, etc.
Next to the folder icon is the paper icon that you want to select and name it as well to create a new action. After that you hit record and you ready to begin, it will automatically record everything you do. Don’t be afraid to make a mistake, you can always tap the hotkey Ctrl+Z to undo.
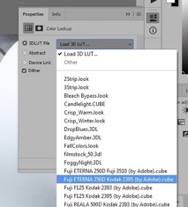
Now we need to create a layer, so your step is to find Layer on the control panel and press New Adjustment Layer and then Color lookup. Once the layer opens you pick the Soft lightmode that will open the Properties panel to select Fuji ETERNA 250D Kodak 2395, it will give more definition to your photo. Obviously you can select any mode you like to change the color and shade of a photo.
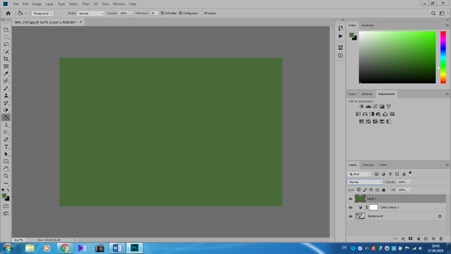
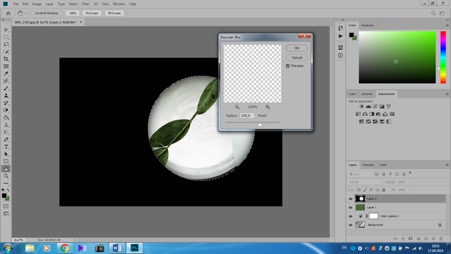
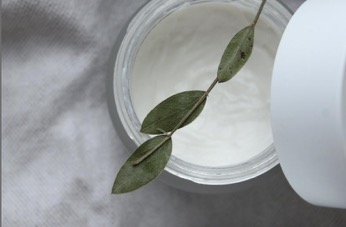
Once again you open a New layer and to do this you can press the paper icon in the right corner and fill it with the green color or whatever color you like using the Paint Bucket Tool. We use green one to make the leaves more vibrant and then set this layer on Hue to soothe a greenish tint and with the 50% Opacity, we lower the saturation.
To give the emphasis to some objects in a photo is easy to create with the help of a slight vignette. Create a New layer, fill it with black color as we did with the green one. Use the Elliptical Marquee Tool to make a circle the size you want it to be and press Delete to remove its center. Try to decide where you want to have a center, then draw a circle on it and there you have a focus on a picked object in a darkened frame around.
Go to Filter to Blur to Gaussian Blur or use the hotkey Alt+Ctrl+F and select the Radius of 100 pixels to make the edges blur so that it won’t look so obvious. There are few things left and your own filter is done.
Get back to the Layers panel where you need to lower the Opacity to 15% and choose Overlay to make it more softer. As soon as you ready with it use the hotkey Ctrl+Shift+Alt+E to create a new layer with all the editing you made and press Stoprecording on the Actions panel. Congratulations, you’ve created your own very first filter in Photoshop.
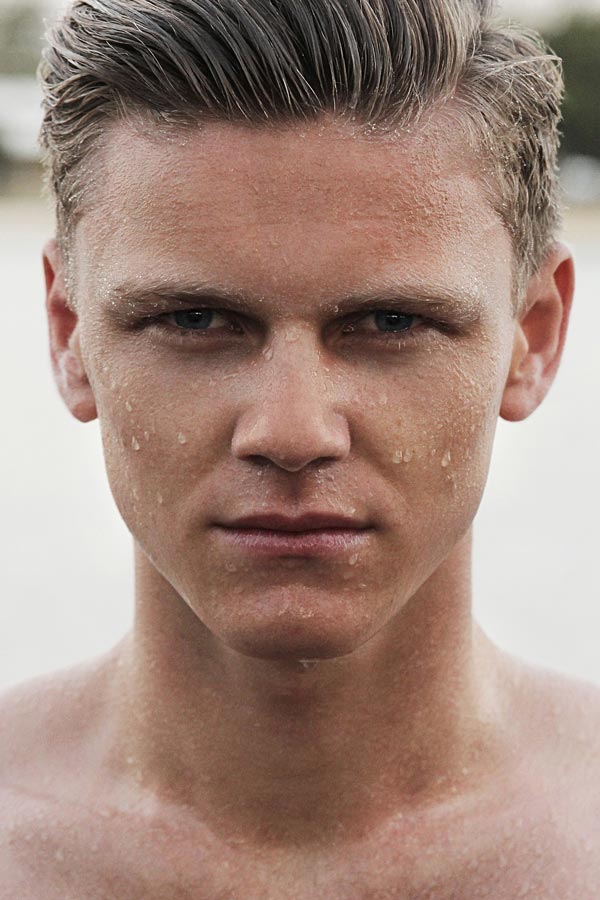
And now, let’s see the before and after a look at the photo we’ve been working with.
See the difference, right? So now you can apply this recorded filter to any photo you like without even editing it. All you need to do is use your imagination and be creative by selecting different settings to make your photos look unique and outstanding.
We think it’s great to have an opportunity to instantly transform your photo from ordinary and plain to almost a piece of art and not just somebody’s but your own piece of art. And what is even greater is that using Photoshop to create filters you can apply and customize the effects the way you like it without repeating ready-made presets on Instagram. Besides, you are not only can download your photos to Instagram but in any other social network as well.
For every craft, there is a different set of tools, each serving their own purpose. Some of these tools could look alike, some serve similar purposes, but there are often essential differences which make each of those tools the best option for a single operation.
In graphic design, the difference between Adobe Photoshop and Illustrator alludes most common user, but those who truly desire to become the masters of the craft should be acquainted with fundamental differences between these two pieces of software. In order to make things clearer, we decided to create this article, which is going to show the main differences between Photoshop and Illustrator.
1. File types
Photoshop uses raster files, as opposed to Illustrator which is manipulating vectors. A raster file is any graphic created by closely arranged blocks of various colors. Another word for raster file is a bitmap, which many people have heard of before. The trouble with raster graphics is that you can zoom in only so much until the image begins to look all squared and losses its original crisp and sharpness.
Vectors, unlike pixels, allow the computer to render images much smoothly. The reason why vector graphics are much easier to scale is that they are constructed via a series of mathematical formulas, instead of colored blocks. Therefore, if you would try to enlarge or make an image smaller, the quality would stay the same.
Raster file types include:
JPEG
PNG
GIF
MPEG4
Vector files include:
SVG
EPS
PDF
2. Use
When it comes to Adobe Photoshop, it’s the best choice you could have for manipulation of already created images. Although changing the scale of the object is not the best thing to do with Photoshop, there are many other features like changing background, adding various other objects, etc. In addition, Photoshop is widely used for web graphics, since these types of projects usually stay the same size.
Illustrator, as we already said, uses vectors – a line connected via two dots through a computer algorithm. This characteristic allows enhanced scaling feature which makes Illustrator the weapon of choice for any graphic designer who wants to design logos or any printable graphics.
Imagine having a client who wishes to print an assignment masters logo on T-shirts and business cards. Instead of creating different graphics for each of these purposes, you can simply use Illustrator to create a single design and then scale it in accordance with the project requirements.
3. Different features
Now let’s take a look at some of the more detailed differences between these two software solutions.
Photoshop zooms up to 300 percent but only to display a messy pixelated image. Illustrator shows a crispy sharp image at 900 percent zoom.
Photoshop provides a single canvas, while Illustrator gives you the chance to design in multiple Artboards. This is another reason why Illustrator is a more optimal choice for web designers, as multiple Artboards allow you to work on multiple design options for various devices or screens.
With Illustrator, layers can contain multiple objects, while Photoshop provides you with a single object per layer. This makes Illustrator a better solution for complex graphics which would require adjusting and editing later.
Both Photoshop and Illustrator can create amazing 3D images, however, Illustrator is a more potent solution due to its vector-based nature.
4. Conclusion
As we can see, the difference between Adobe Photoshop and Illustrator is not in regards which one is better or more useful. What separates these two pieces of Adobe Creative Cloud is their purpose. While Photoshop is an excellent choice for image manipulation and simple web graphics like buttons, Illustrator is a tool you would use for logos and printable media.
This article is provided by Cathy Baylis. She is a freelance content writer specializing in leadership, career development and education. She loves sharing her interests with readers, and she has something to say, for sure. Writing is not only her hobby but the profession at the same time.
I know that you work a lot in Photoshop. Have you ever felt that this task would be a lot simpler if only I could have this type of brush? Don’t lie. I know that you have felt it. Here’s the awesome list of websites to download free Photoshop brushes.
I am going to provide the site name, URL, home page screenshot, and a few lines about the site. I have manually compiled the list and all of the sites in this list are awesome. So, make sure that you’re bookmarking this page.
List of Websites to Download Free Photoshop Brushes
Here’s the list
1. WOW Brushes
WOW Brushes offers the best photoshop brushes. You can find lots of abstract, grunge and decorative brushes for your personal and commercial projects. Simply load it in Photoshop to start using the new Photoshop brush.
Whether you’re a professional graphic designer looking for fresh ways to wow your clients, or you just love experimenting with all that Photoshop has to offer, BrushLovers has got you covered with all the graphics you need for work or play.
Their diverse collection of graphics assets is always growing, making BrushLovers the ideal place to find what you need, whatever the style and scope of your work.
Brusheezy is the place to download free and premium Photoshop brushes and other Photoshop-related resources. Here you can explore and discuss the creations of other artists from around the world, or just find that perfect little freebie for your next Photoshop project. Brusheezy makes it easy to explore thousands of resources created by artists from all over the globe.
The site has 100+ free brushes for you to download. I won’t say that I like the website design a lot, but some of the brushes in this site are very nice so I decided to list BrushKing here.
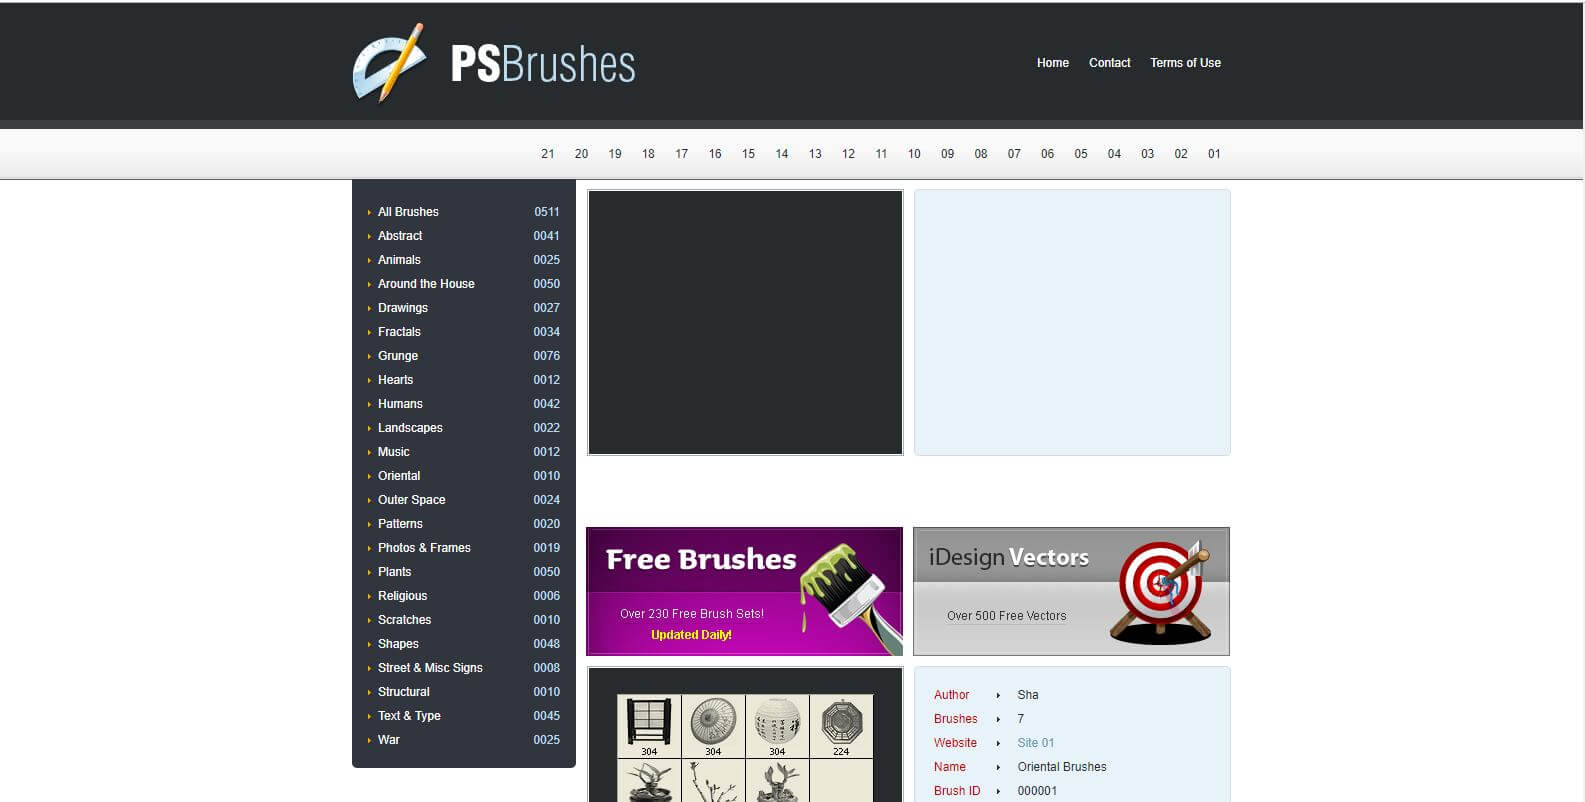
Photoshop Brushes gathers Adobe Photoshop brushes, PSD files, patterns, custom shapes, styles, gradients and tutorials created by artists from all over the world. All of those – free to use. Download for free whatever you need and make your design easier than ever!
Another good website with a poor design. The site has some useful Photoshop brushes but there’s no search option. So, you need to navigate to them with the help of the menu.
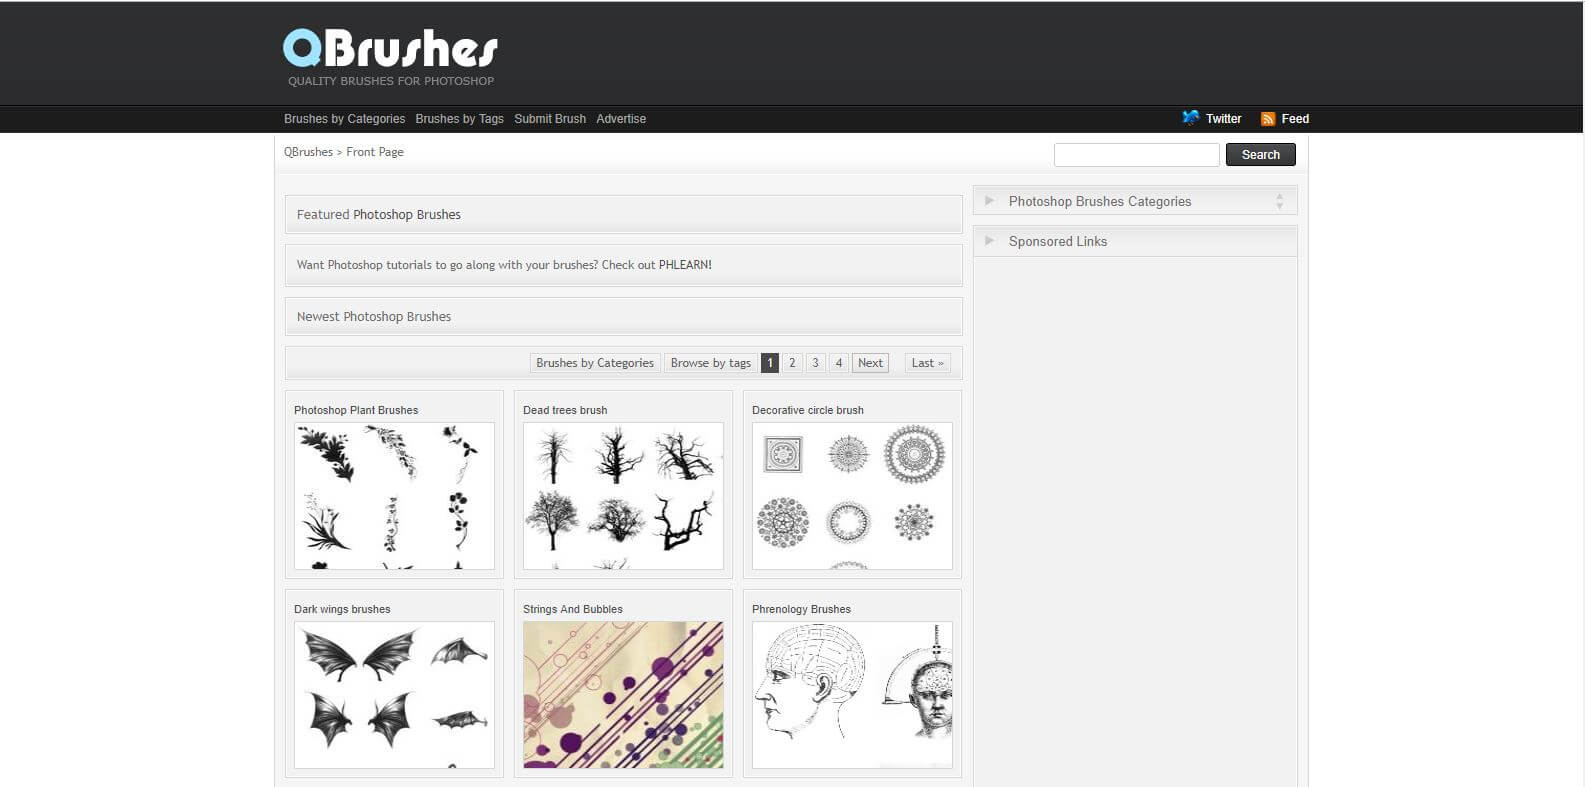
Qbrushes.net is the plce where you can download 2700+ free Quality Photoshop brushes from around the net. The site is updated with fresh ps brushes very often, so be sure to bookmark the site.
FBrushes.com is a collection of high quality free Photoshop Brushes, Illustrator Brushes, Photoshop Patterns and Textures from around the net. All Photoshop Brushes, Photoshop Patterns and Textures featured are copyright of their respective owners unless otherwise noted. FBrushes only acts as a medium to help the designers spread their work.
DeviantArt is the largest online social network for artists and art enthusiasts, and a platform for emerging and established artists to exhibit, promote, and share their works with an enthusiastic, art-centric community. We have over 44 million registered members and attract over 45 million unique visitors per month.
Their members — known as deviants — upload tens of thousands of original pieces of art every day, everything from painting and sculpture to digital art, Photoshop brushes, pixel art, films, and anime.
Obsidian Dawn has been one of the most popular websites for finding free Photoshop brushes for almost 10 years. There’s also patterns, images, tutorials, and Photoshop Custom Shapes available. It is run by just one person — Stephanie. She personally designed and created everything on this website.
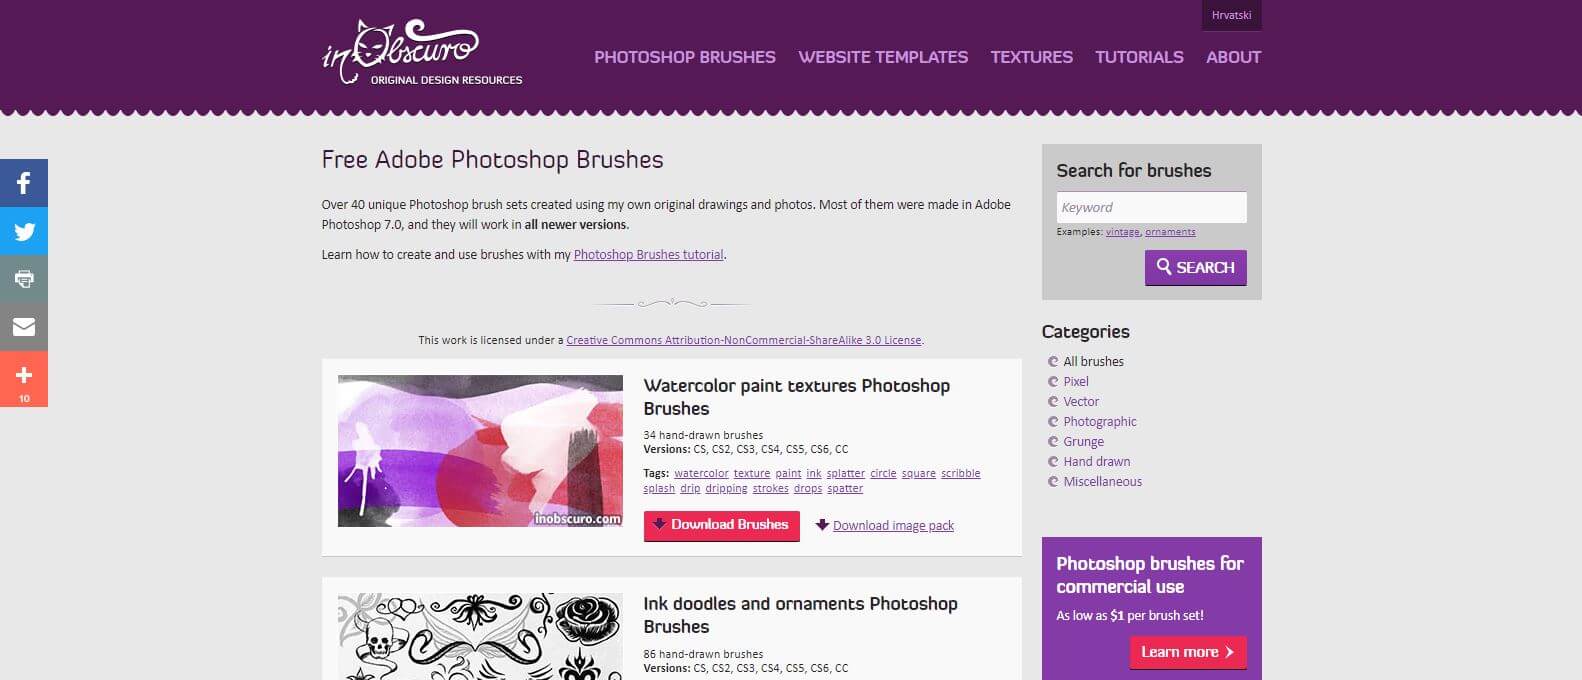
inObscuro is an original design resource site created and maintained by Nela Dunato. It’s been around since April 15, 2005, and it features her original Photoshop brushes, web site designs, textures and tutorials.
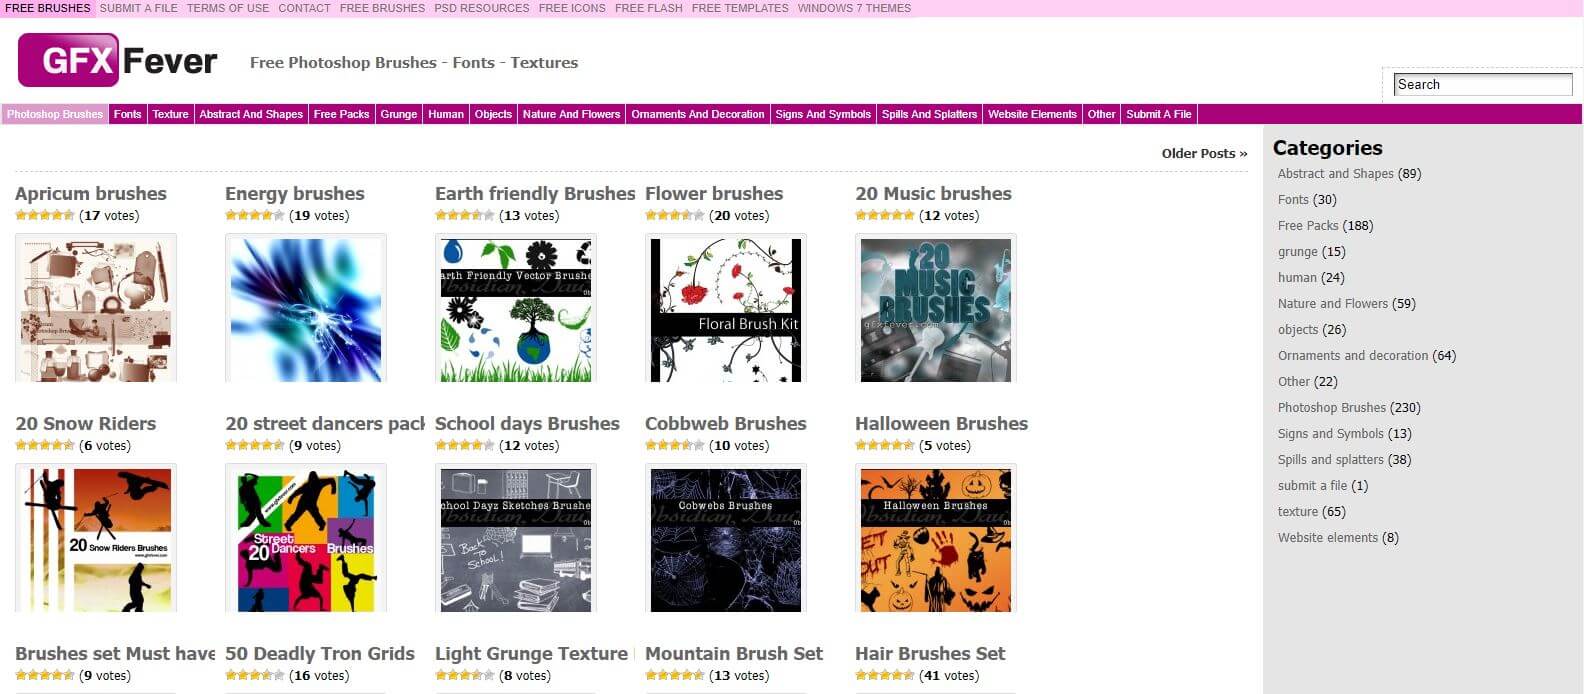
GFXFever is managed by a team of voluntary helping submitters + one french webmaster whose name is Julien. They have just reached 50,000 registered members and 100,000 visitors/month.
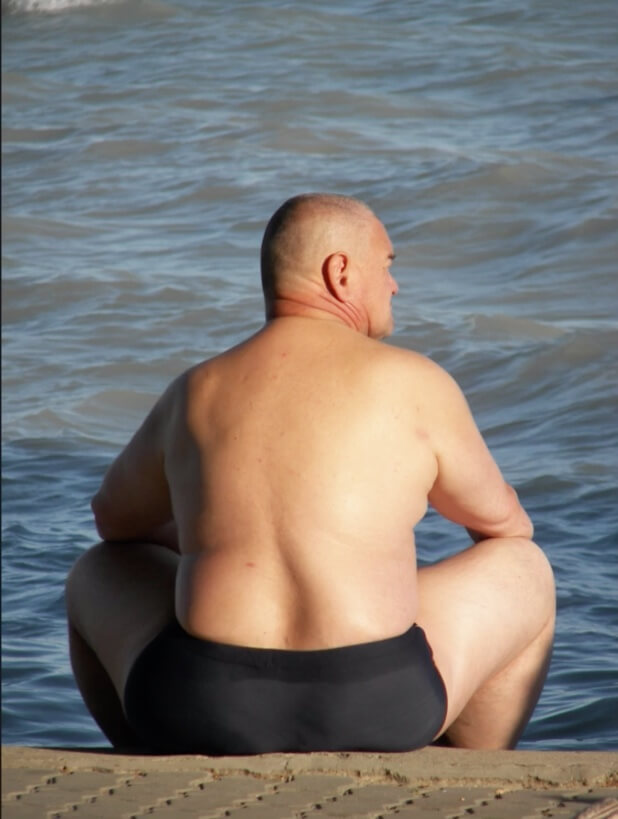
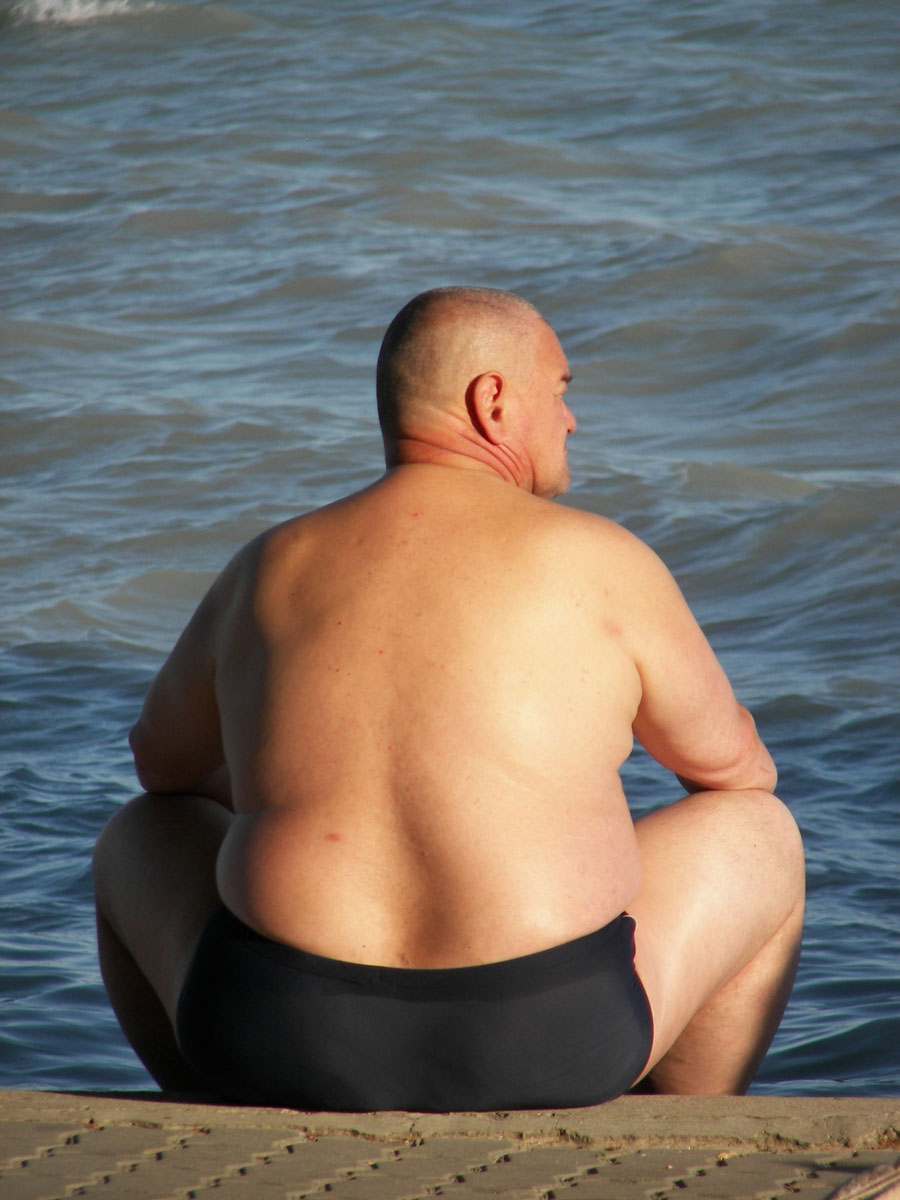
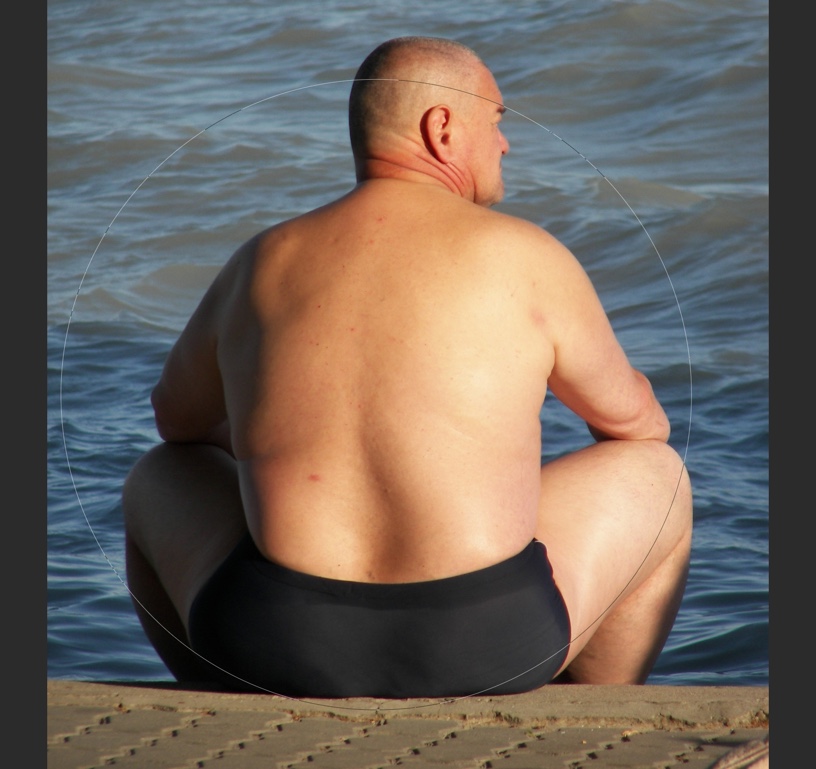
You’ve taken an amazing vacation photo and you realized that you’ve grown bigger and thicker. You badly want to reduce the fat you’ve gained but also know that want to post your vacation photos on Facebook and Instagram. And, this is why you’ve come here to remove fat in Photoshop.
I’m glad to say that we have a workaround for your photos. We can slim you down in Photoshop.
I am going to use the Liquify filter and Clone Stamp tool to remove fat in Photoshop.
Final
Initial
Stock Photo – http://fav.me/d50y5ss
OK, guys! Let’s begin the tutorial.
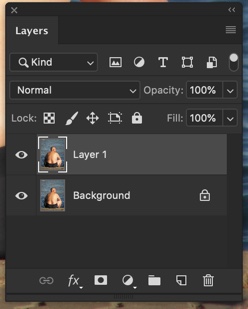
Step 1 – Duplicate the Layer
Go to Window > Layer to open the Layer Panel or press F7.
Press Cmd + J / Ctrl + J to duplicate the original layer. We’re duplicating because we don’t want to touch the original picture. We’re going to make all the adjustments in a duplicated layer. So, in case anything goes wrong, we can delete the duplicated layer and get back our original image.
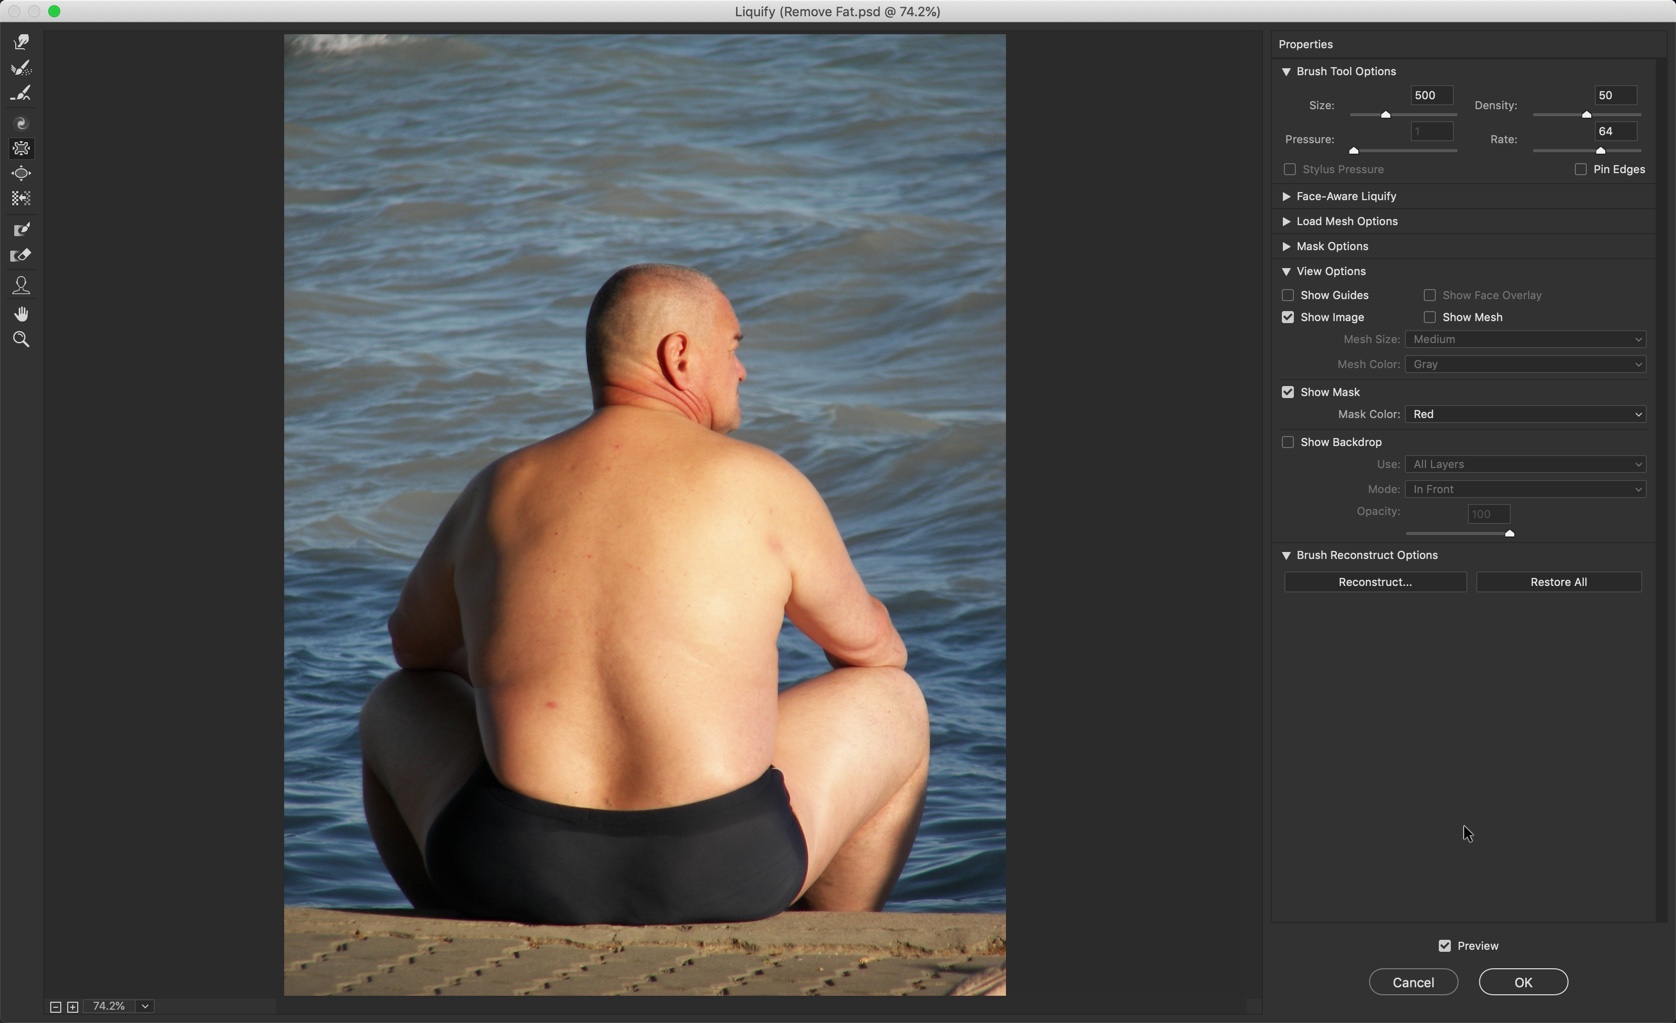
Step 2 – Open the Liquify Filter
Go to Filter > Liaquify or press Cmd + Shift + X / Ctrl + Shift + X or open Liquify filter.
And our Liquify filter will be opened.
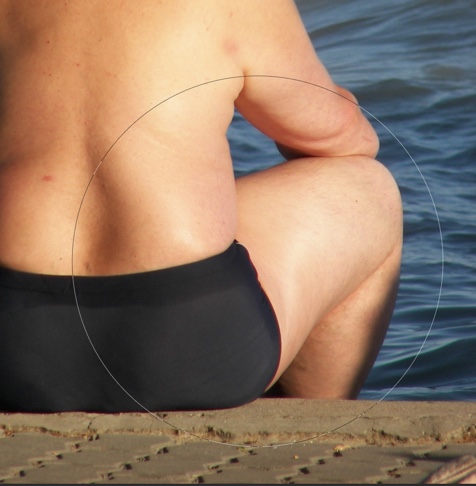
Step 3 – Reduce the Fat in Love Handles in Photoshop
Time to remove fat in Photoshop that is present in his love handles.
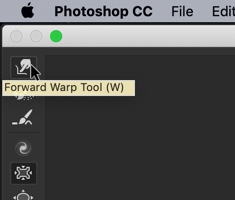
Grab the Forward Wrap tool from the panel or press W.
We’re going to reduce the love handles. Make sure that you set the size fo the brush at least two times larger than the area which you want to slim down. Here, I am keeping the size of the brush approximately two times of the love handle.
Now, gently push the love handle towards the body.
Here’s a GIF for you.
Do this with the other size also.
Looking good, right?
[vc_message message_box_color=”warning” icon_fontawesome=”fa fa-picture-o”]Feeling frustrated? If you’re having some problem and feeling frustrated, you can hand over this task to me. The max-to-max cost is $10 per image. Contact me at hello@tricky-photoshop.com.[/vc_message]
Step 4 – Reduce the fat in arms
Time to remove fat in Photoshop that is present in his arms.
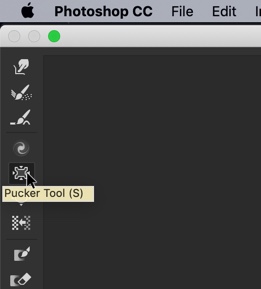
Grab the Pucker Tool from or press S.
This tool deflates the pixels. We’re going to deflate the arms with this tool.
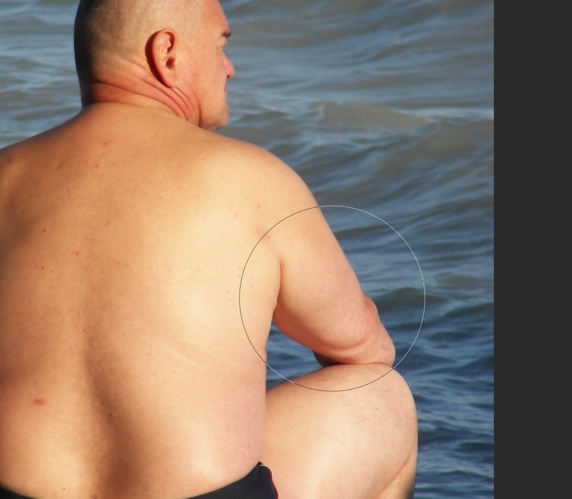
Again make sure that your brush size is twice the size of that particular body part.
Click on the center of the area which you want to deflate. I am going to click on the center of the arm.
Hold down the left mouse button to keep on deflating. You may also need to undo many times because you may deflate the wrong area. Press Cmd + Z / Ctrl + Z to undo.
Here’s the GIF for you.
Do this with his left arm also.
[vc_message message_box_color=”warning” icon_fontawesome=”fa fa-picture-o”]Feeling frustrated? If you’re having some problem and feeling frustrated, you can hand over this task to me. The max-to-max cost is $10 per image. Contact me at hello@tricky-photoshop.com.[/vc_message]
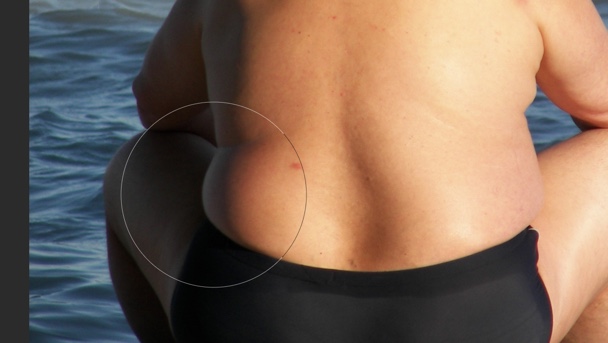
Step 5 – Reduce the width of the back
Time to remove fat in Photoshop that is present in his back.
Increase the size of the brush of the Plucker tool. Make sure that it’s much larger than the back.
Here’s the GIF for you.
Step 6 – Reduce the size of the legs
Time to remove fat in Photoshop that is present in his legs.
You’re going to reduce the size of the legs this time. Decrease the size of the brush of the Plucker tool.
Now click at the center of the leg. Here’s the GIF for you.
Looking good, right?
[vc_message message_box_color=”warning” icon_fontawesome=”fa fa-picture-o”]Feeling frustrated? If you’re having some problem and feeling frustrated, you can hand over this task to me. The max-to-max cost is $10 per image. Contact me at hello@tricky-photoshop.com.[/vc_message]