9 white background alternatives for your eCommerce photos

You’re fed up with seeing the white background in eCommerce photos and you want to try something new. Search no further because I am going to show you 9 alternatives to a white background for your eCommerce photos.

To be honest, white is still the best background if you want to go with the number of sales. eCommerce product photos with white background tend to sell more.

Amazon spends billions of dollars every year on research and it is using a white background then this means that there must be a reason. And I cannot think of any reason other than better sales.

But, there’s a catch. the white background is not always the best background.

The color of the background in eCommerce photos which usually give you better sale results is the one that is the color of your website background.

Amazon’s website background color is white so the white background in eCommerce photos tends to convert better. If your website’s background color is black then black background for your eCommerce photos should convert better.

The goal is to make the product stand out. There should be the least amount of distraction. Having a different background for your eCommerce photos than the website background adds distraction.

In case you’re still not convinced, here are the 9 background that you can use.

1. Marble

When to use: when you sell luxury items that people wear (for example – cosmetic items, skincare items, etc.)

Marble is associated with luxury and gentleness. When people see a marble background in an eCommerce photo, they immediately think that the cost of the product is much more than the market average and the product is soft for the skin.

This background tends to attract females more.
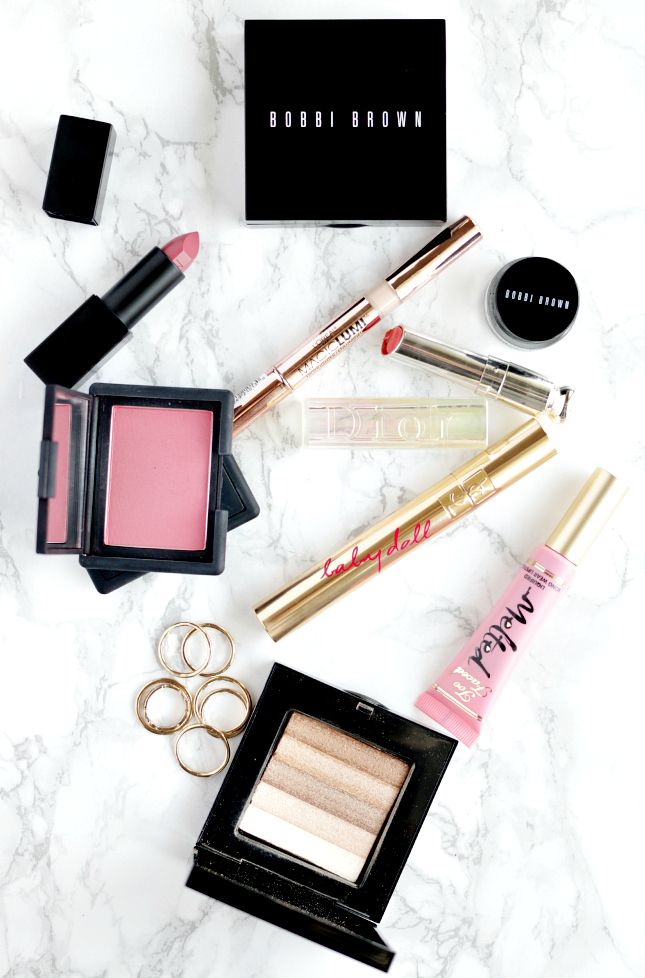


Source – bobbibrowncosmetics.com

How to shoot?

  1. Method 1: – Get a marble slab or sheet. Place your product nicely and shoot it.
  2. Method 2: – Shoot on any regular background and then change the background to marble in Photoshop. The benefit here is that you can use multiple textures of marble here unlike method 1. There are a bunch of free stock photos available on the internet. Use them and your photos will not be monotonous with one texture of marble only.
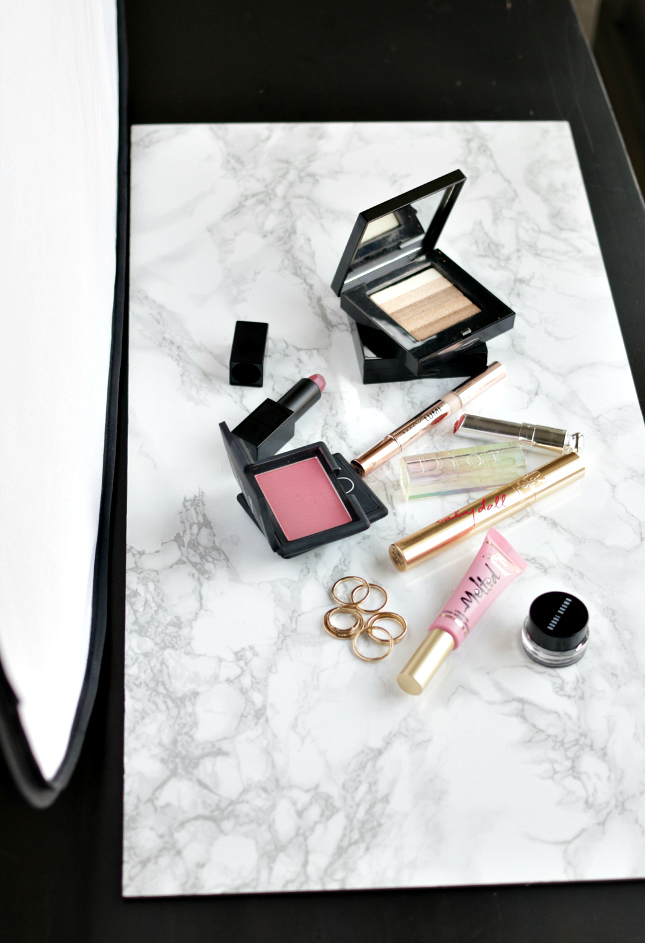
Source: https://www.thirteenthoughts.com/diy-white-marble-photography-background/

2. Lifestyle

When to use: when you want to show how/where to use your product

This is by far is the best background to show your buyers how to use your product. Here you choose the background where a person is actually using your product or your product is being used somewhere. You can show a photo like this.

This type of photos works a lot better if you show your product photos against a white or other solid color backgrounds. Don’t expect a good conversion rate if you only show lifestyle photos.


View this post on Instagram


A post shared by Osprey® Europe (@ospreyeurope) on

Here’s one more example.

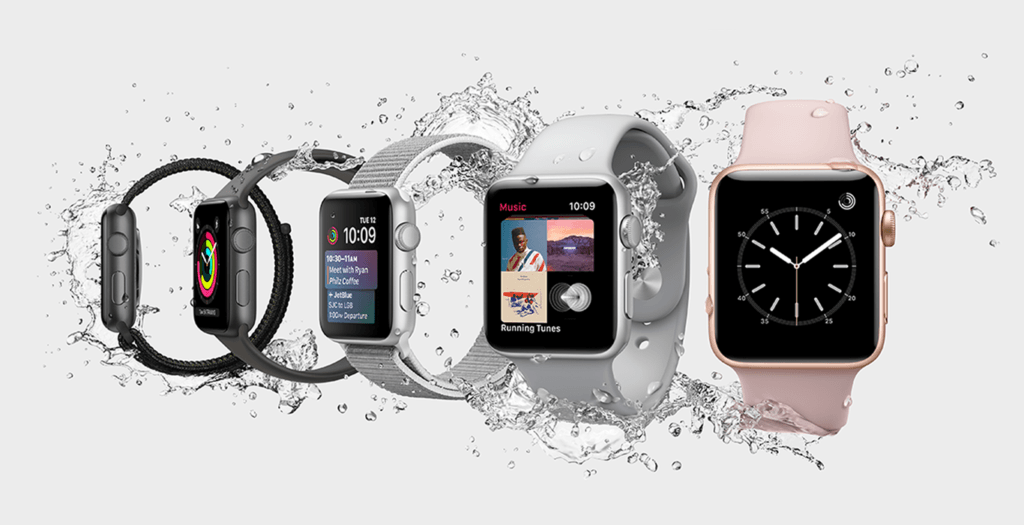
See how good Apple is telling that Apple Watch is waterproof (or basically splash-proof).
How to shoot?

  1. Method 1: – Shoot your product photos while using them. You can take the backpack photo above as an example
  2. Method 2: – Shoot a normal photo and change everything in Photoshop. For example, you cannot shoot the photo of the Apple Watch like the photo you are seeing above. The only way to add water splash is to use Photoshop.

3. Light gray

When to use: when you just want to show any other color than white but still want to have a nice conversion rate.

We’ve seen that this is the second-best background for conversion. Yes, the first is the white background but you’re bored with the white color.

How to shoot?

  • Shoot the photo against a green or any background and then change the background in Photoshop

4. Gradient

When to use: when you just want to show any other color than white but still want to have a nice conversion rate.

Gradient with a light product shadow also looks good. It’s your personal choice whether you want to go with a solid color or a gradient.

Fitbit uses a nice medium to light gray gradient for its Versa 2 smartwatch. The light watch shadow is also adding beauty to this photo. This makes us think that the watch is floating above the ground.

 

source: fitbit.com

How to shoot?

  • Shoot the photo against a green or any background and then change the background in Photoshop

5. Wood

When to use: when your product is antique, hand made, or directly or indirectly related to the trees/plants

You can use the wooden background after showing the close up shots of your products against a solid color background.

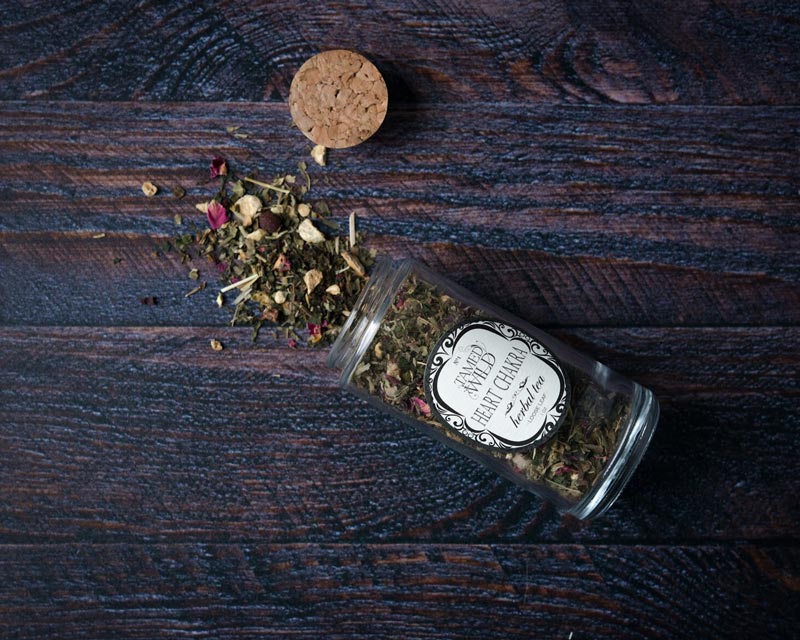
Wooden background gives a perception that your product is handmade.
How to shoot?

  1. Method 1: – Get a wooden slab or sheet. Place your product nicely and shoot it.
  2. Method 2: – Shoot on any regular background and then change the background to marble in Photoshop.This is what we do for our clients.

6. Fur/cotton

When to use: when your product is very soft on the skin

You can use the fur background after showing the close up shots of your products against a solid color background. Fur background gives a perception that your product is something that the users will put or apply on their skin and there’ll be no side effects.

How to shoot?

  1. Method 1: – Get a fur or cotton. Place your product nicely and shoot it.
  2. Method 2: – Shoot on any regular background and then change the background to fur in Photoshop. The benefit here is that you can use multiple textures and colors of fur here unlike method 1. There are a bunch of free stock photos available on the internet. Use them and your photos will not be monotonous with one texture of fur only. This is what we do for our clients.

7. Sepia

When to use: when you just want to show any other color than white and gray, or want to increase customer loyalty.

Sepia background works good for female dresses and your customers tend to feel that your company is friendly. This increases customer loyalty and your customers feel that you’re a small company who care its customers a lot.
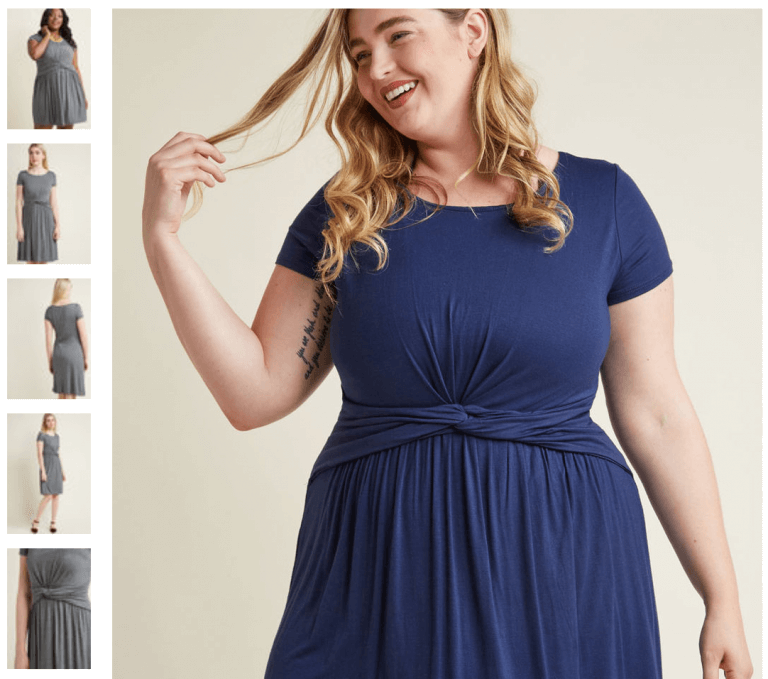
Source: modcloth.com

How to shoot?

  • Method 1: Shoot the photo against a green or any background and then change the background in Photoshop
  • Method 2: Shoot the photo against a sepia wall

8. Color of the product

When to use: when you want to highlight one of your products

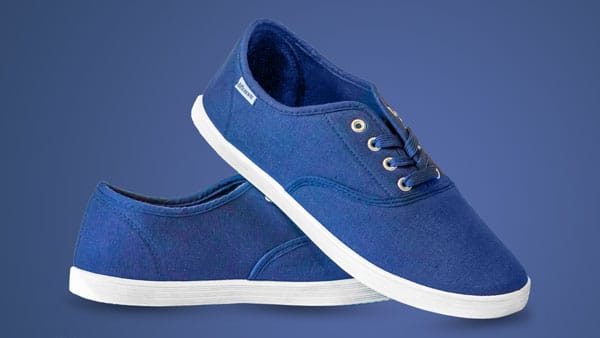
Here you set the background color that is two shade lighter or darker than the product color.

I could not find a good photo to show as an example so I designed this photo in Photoshop for you. Here the background is a gradient and the center of the background is two shade lighter than the color of the shoe.
How to shoot?

  • Shoot the photo against a green or any background and then change the background in Photoshop

9. Black

When to use: only for super luxury items

Black color signifies luxury. If you sell luxury items like watches that cost more than $2,000 then you may want to use the black background.

Don’t use a black background on items that are not at all luxury because your price-sensitive customers may exit your site without making any purchase.

Source: rolex.com

How to shoot?

  • Shoot the photo against a green or any background in a dim light and then change the background in Photoshop

Do you lack the Photoshop skills?

I help the founders or creative directors eCommerce companies to show beautiful product photos by editing the photos for them. My clients are as small as companies with 2 co-founders and as big as ITT with 10,000+ employees.

If you want, I can show you how your product would look like. I can do it for free.
Get my free demo

This is how you change the background in Photoshop

I get a lot of requests to change the background in Photoshop when people approach to hire me. I tell them that I can do it in $10 and they just need to send me the photos. So, after receiving overwhelming number of requests, I decided to write a tutorial by myself on how to change the background in Photoshop.

Difficulty: Moderate
Time required for a first time doer: 15-20 mins (for a beginner)
Total steps: 4
Tools used: Magic Wand Tool, Camera RAW filter, Color Balance Adjustment layer, and Select and Mask

This is going to be a big tutorial. If you want, you can hire me to change the background to you. I can do it in $9.99. Just mail me the photos at hello@tricky-photoshop.com.

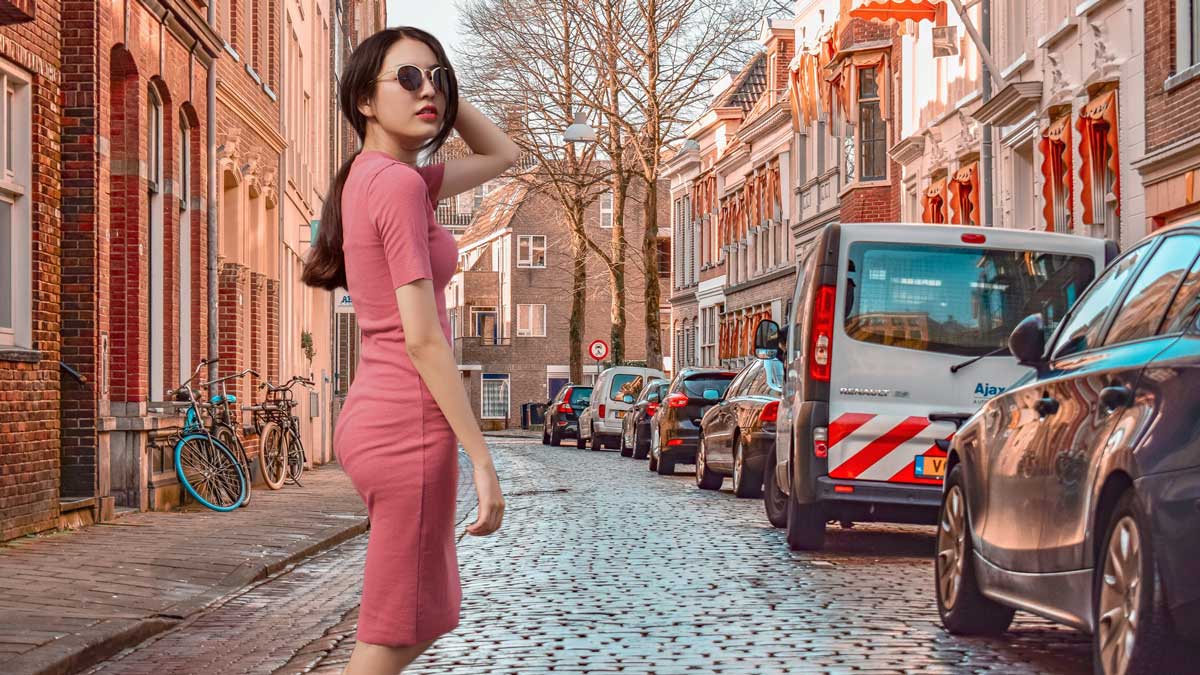
Before we proceed, I want to show you the before and after.

Before

Before.jpg

After

After.jpg

Thanks Pexels for these beautiful photos.

Step 1: Finding the correct background

The first thing that you need to do is to find the correct and beautiful background. There are many sites where you can find beautiful backgrounds.

Some of them are

You don’t need to even sign to download the free photos.

Step 2: Make a selection in Photoshop

Open your photo in Photoshop.

1.jpg

Grab the Quick Selection Tool from the tool panel.

2.jpg

Click on “Select Subject”. Photoshop will used its artificial intelligence to select the most important subject in the photo. In this case, the most important subject will be the photo of you.

3.jpg

See how beautifully Photoshop has selected the person in my photo.

4.jpg

If you can’t fingure out how to do it, I can do it in $9.99. Just mail me the photos at hello@tricky-photoshop.com.

Step 2: Refine the selection

The selection is not perfect. Take a look next to her hair. It’s not properly selected. We’re going to fix that.

Go to Select > Select and Mask.

5.jpg

Grab the Refine Edge brush from the tool panel.

6.jpg

Keep the center of the brush on the hair and perimeter outside the hair. Brush on the hair. See the below GIF.

7.gif

Here’s my version.

8.jpg

Check the right panel. Most of the sliders here are not required. But, if you want then you can copy these. Change “Output To” to New Layer with Layer Mask. Press OK.

9.jpg

This is how your photo would look.

10.jpg

We’re now again going to select the photo. Hold down Cmd/Ctrl and click on the layer mask.

11.jpg

This will select you. Copy yourself by pressing Cmd + C / Ctrl + C.

12.jpg

If you can’t fingure out how to do it, I can do it in $9.99. Just mail me the photos at hello@tricky-photoshop.com.

Step 3: Put the person on a new background

Open the background.

13.jpg

Paste yourself by pressing Cmd + V / Ctrl + V. Photoshop will paste the photo at the center but the photo won’t be aligned.

14.jpg

We’re going to align the photo using the Free Transfrom tool. Grab these handle bars and align the photo. Press Return/Enter when done.

15.jpg

This is how my photo looks now.

16.jpg

If you can’t fingure out how to do it, I can do it in $9.99. Just mail me the photos at hello@tricky-photoshop.com.

Step 4: Fix the colors for better blending

The backgorund is kind of reddish when compared to the girl. Also, the background is a bit dim also.

We’re going to fix it.

First fix the redness.

Go to Layer > New Adjustment Layer > Color Balance

17.jpg

Change the Tone to Shadow and turn on Clipping Mask.

18.jpg

Increase the redness to 10.

19.jpg

Change the Tone to Midtones and increase the red to 9.

20.jpg

Change the Tone to Highlights and increase the Red to 6.

21.jpg

Time to fix the lightness.

Go to Layer > New Adjustment Layer > Levels

22.jpg

Decrease the Outpul level to 245 and turn on the Clipping Mask.

23.jpg

This is how the photo would look now.

24

If you can’t fingure out how to do it, I can do it in $9.99. Just mail me the photos at hello@tricky-photoshop.com.

Background color of e-commerce photos – The Ultimate Guide

We edit thousands of photos daily. White remains the most preferred color for the background but the trend is now changing. Light gray is now emerging but there’s a catch. Let’s see what this guide for the background color of e-commerce photos bring to you.

The ultimate guide for the background color of e-commerce photos

You are thinking that why is background important. Don’t you?

Here’s a fact.

50% of online shoppers think that product photos are more important than product information, reviews, and ratings. Shopify

Your background can make your photo more appealing or can do the opposite.

1. Types of the background color of e-commerce photos

There are mainly three types of background

  1. Lifestyle background – The products are shot in a way that it shows the usage of them. It’s good to build an emotional connection with the product.
  2. Product only – The photos are shot against a neutral color background. It increases the conversion rate.
  3. Pattern background – The background is a pattern. It’s a good option for those who don’t want to have a neutral background.

2. Lifestyle background for e-commerce photos

Let’s see one example

1.jpg

Take a look at the above screenshot. It’s of Dainty Jewells. I think that Charity, founder of Dainty Jewells, like potential customers to build a connection with the dresses.

The main purpose of liefstyle photos is to show where and how to use your products.

Photos with lifestyle background do this.

Its product page also has only lifestyle photos. I could not find any photo with a solid or neutral background.

2.jpg

Lifestyle photos don’t perform well in terms of conversion rate.

Take a look at the above screenshot of Joinery. Aren’t the photos looking beautiful? But, are the photos converting well? I doubt so.

6.png

At first glance, I got confused that what is the actual product they’re selling. Was it the chair or the rug in the first photo? I don’t know and I won’t bother clicking on the photo to find out. Also, the title of the product is written in such a small font that my eyes won’t naturally go there.

Sometimes, lifestyle photos confuse the potential buyers because the customers can’t figure out the actual product in the photo. It further decreases the conversion rate.

According to us, the best way to show lifestyle photos is after showing the product only photo. Here’s an example.

3.jpg

This backpack is on Rom Outdoor. The site is showing the lifestyle photos after showing the product only photos.

It’s also good to add a few lifestyle snaps to your product page, helping to to boost emotional engagement.

3. Product only backgrounds for e-commerce photos

Here you show the product against a neutral background like white color, gray color, or any other color.

These photos describe your product at a glance and are best suited for your catalog and product pages. Their job is to nurture page visitors towards making a purchase.

When consumers view a product page, they are looking for proof of quality and value. A neutral background provides this proof and value.

There are mainly three colors which most of the e-commerce stores owners are using nowadays

  • White color
  • Light gray color
  • Pastel colors

You should make sure that your product covers 85% of the photo in the photos having a neutral color background.

3.1 White color background

Have a look at Amazon. All photos have a white background.

There’s a reason Amazon uses only the white background. The reason is that the white color background gives the highest conversion rate. Amazon invests millions on research and if they’re still using white background means that research supports this color.

4.jpg

But, there’s a change in trend.

Although white color background converts a lot better than other backgrounds but white color backgrounds fails to build an emotional relationship between your products and potential buyers.

3.2 Light gray background

You put a shade of gray in the background.

Here’s a lookbook of Sarah Pacini. Can you see the shade of gray in the background?

5.jpg

The gray background does not give as high conversion rate as the white background.

Gray background adds premiumness to the photos. It does not have a high conversion rate like white backgrounds but it adds an emotional connection with the potential buyers. Your existing buyers are more likely to purchase from you again.

This is what we also advice.

You know that we edit e-commerce photos. We also advise our clients to use a light gray background (usually #eeeeee) for their photos.

3.3 Pastel background

Pastel colors are pale colors that soothe eyes. Here’s a Wikipedia article on pastel color.

Take a look at the screenshot of Flaire Junkie.

8.jpg

Pastel colors are very eye-catchy. Maybe because they soothe the eyes.

Pastel colors tend to work good with colorful dresses. It also works good with fancy items like colorful phones, cloths. iPhone red also has a red pastel background on apple.com.

4. Pattern background for e-commerce photos

You show a pattern in the background.

Here’s a screenshot of a page on Oh Polly.

7.jpg

The photo has neither a neutral background nor a lifestyle background.

The conversion rate of pattern background is between the lifestyle background and neutral color background.

The choice of pattern plays a crucial role in the perception of the product in the potential buyers’ minds.

Black color signifies luxury and this dress has a black pattern background. The photo is also edited in such a way that it signifies the luxuriousness of the dress. But, the dress costs only 40 pounds. Guess what? It’s cheap.

The buyer will think that it’s a luxury dress but costs only 40 pounds. She won’t think twice before making the purchase.