Create a Beautiful Sunset Effect in Lightroom [Presets Included]

It’s difficult to capture the actual golden sunset in a photo. First of all, it’s rare to find a golden sunset. Even if you find it, your camera’s auto WB messes up everything. It reduces all the yellow tint from the photo. Even if you turn off Auto WB, the camera still doesn’t capture the actual golden sunset. But, you and I have Lightroom where we can create a sunset effect. So, I bring to you the best tutorial on creating beautiful sunset effect in Lightroom.

Let’s start with the basics. A golden sunset photo has a golden or yellowish tint. This tint basically covers the Highlight region. The shadow part is covered by a blue tint. We’re going to do the same. The main game changer is going to be the Split Toning and White Balance.

I wrote a tutorial on creating a sunset in Lightroom back in 2013 but it’s 2019 now. Who cares about 2013?

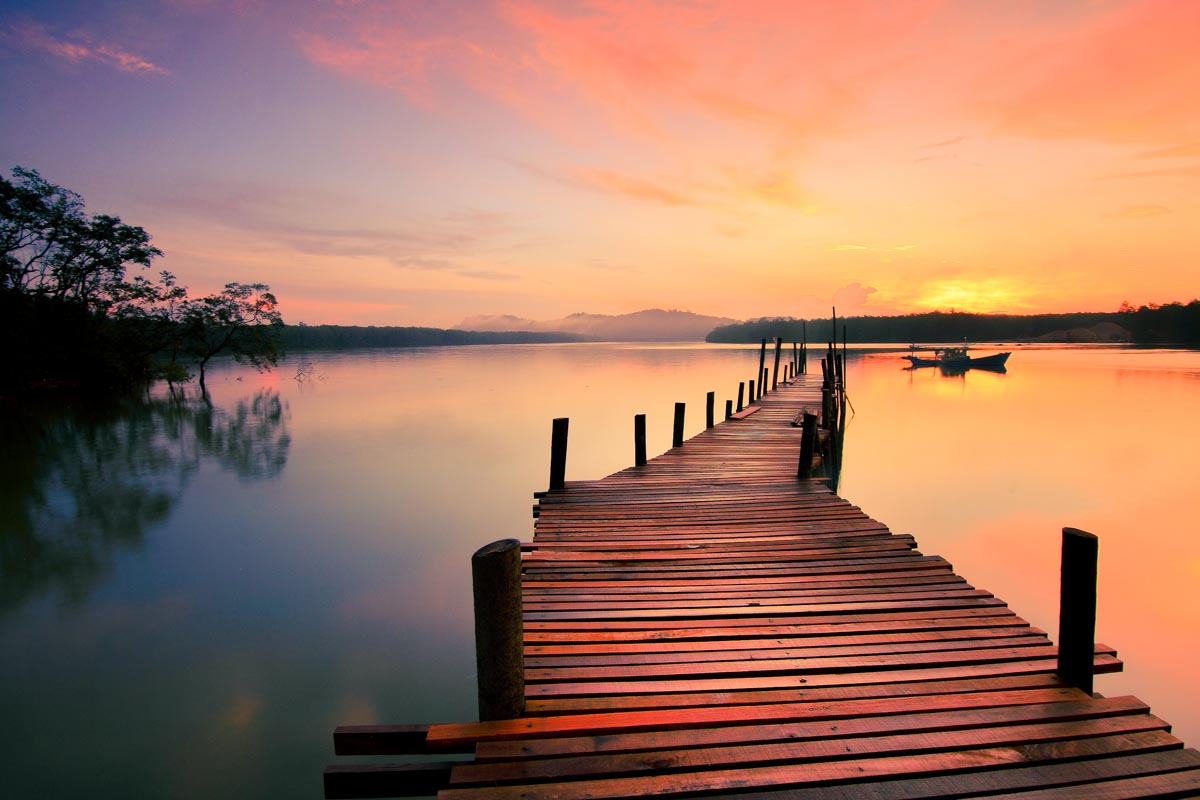
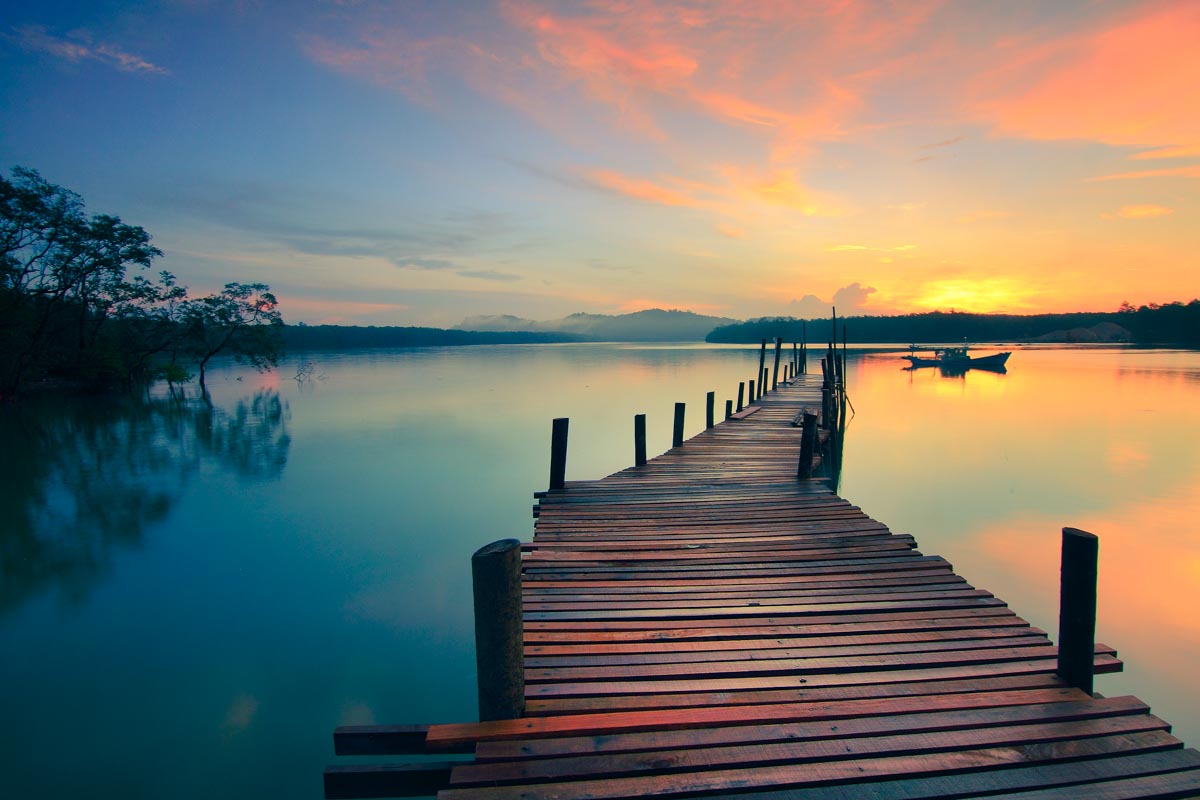
Let’s begin the tutorial. But, before we begin, I want to show you the before and after.

Before
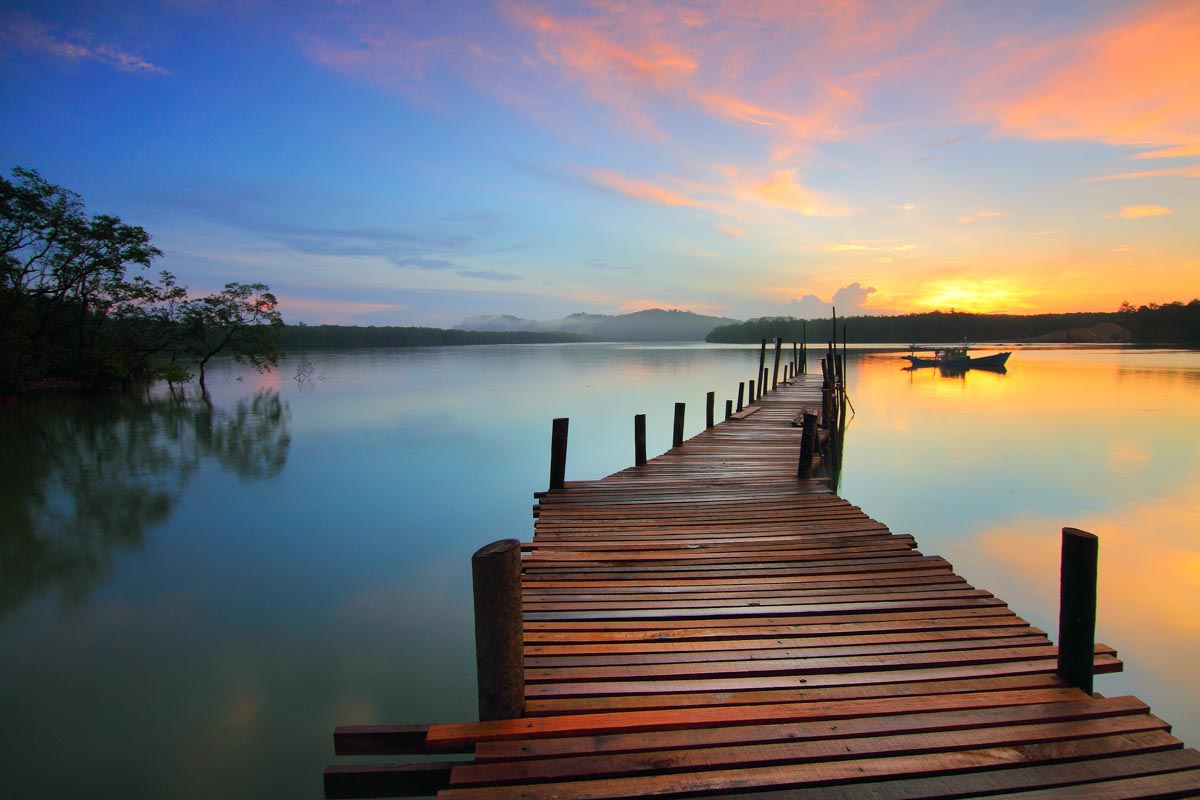
Before.jpg

After 1

6.jpg

After 2

Final 2

Video

If you like watching videos, here’s the video tutorial for you.


Step 1: Create a Sunset Effect in Lightroom using Split Toning

The first thing we need to do is to change the Split Toning. Use below values.
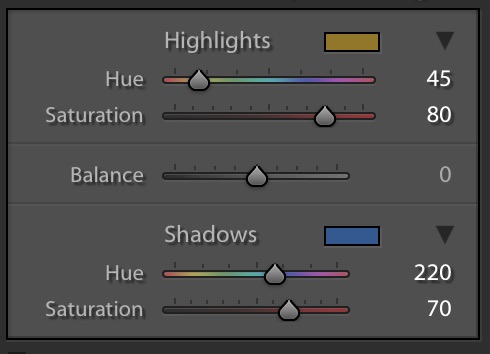
1.jpg

This will give a beautiful tint to your photo.
2

Step 2: Enhance the Sunset with White Balance in Lightroom

Now that we have the color we are looking for, time to enhance the sunset effect.

Sunsets have a yellowish magenta tint. We’re going to create the same tint.

Increase temp to 41 and tint to 56.

3.jpg

This will further enhance the photo and give you a natural looking sunset effect.
4.jpg

Step 3: Adjust the Tone

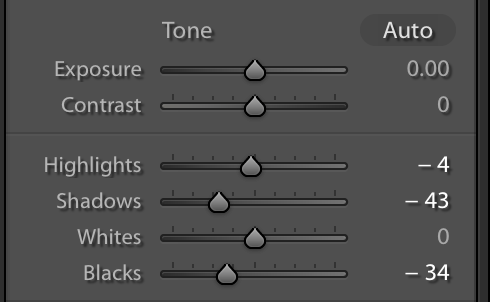
Time to change the tone. I am going to change the tone according to my image. The values of the tone sliders may be different for yours.

You don’t need to copy my values if you understand what you’re trying to achieve. Your goal is to reduce the highlights by a small fraction and shadow by a big fraction. This is because the photo is not properly exposed during a sunset. You don’t want the shadowy region to be properly exposed.

I am going to use these values because they suit my image. These may or may not suit yours.
5.png

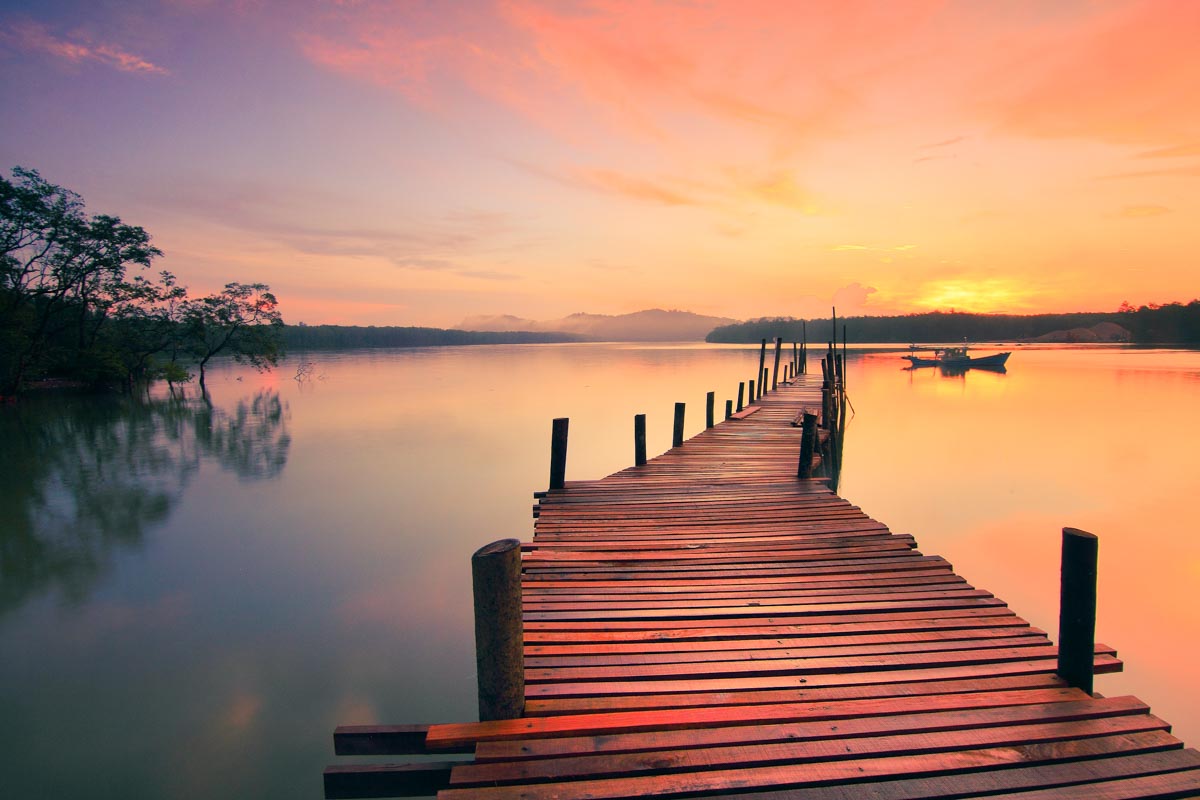
Here’s the image.

6.jpg

Bonus Step

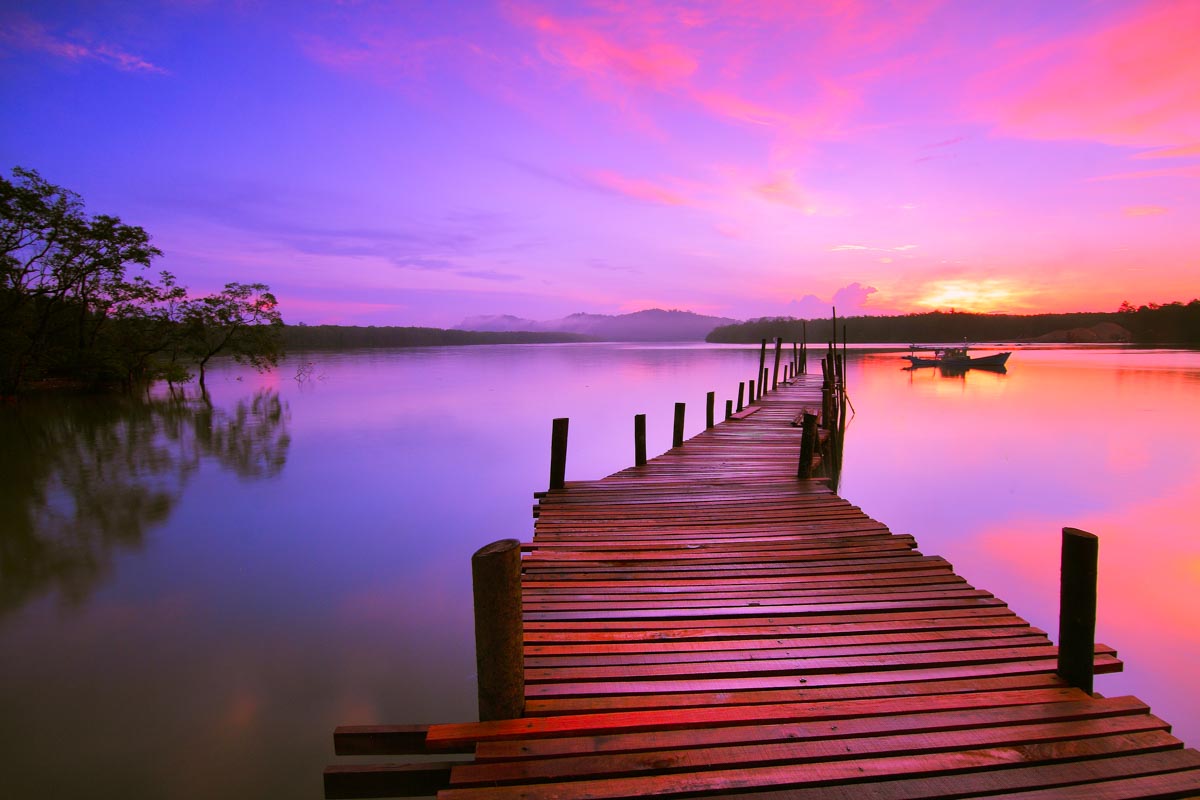
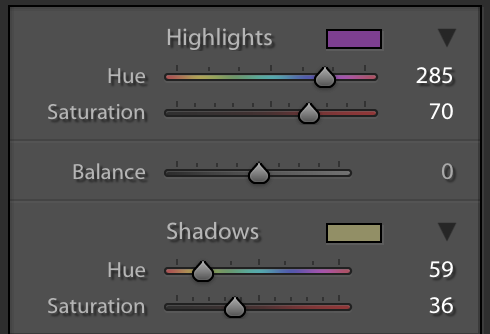
I also have split toning values for a purple sunset.
7.png

and here’s the White Balance value

8.png

And here’s the image that you get.
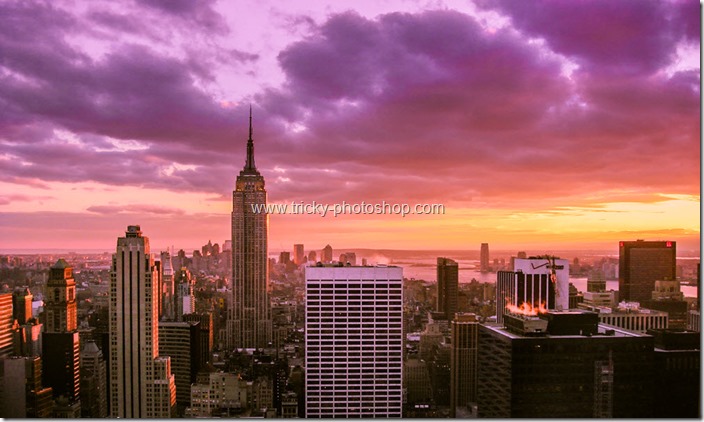
Final 2.jpg

How to Add Lens Flare in Photoshop

I wrote a tutorial on how to add lens flare in Photoshop back in 2012. It has been around 7 years and I thought that I should write a new one. I was using Photoshop CS5 and the Photoshop interface in the screenshots looked like I was using software that was developed in the 1800s.

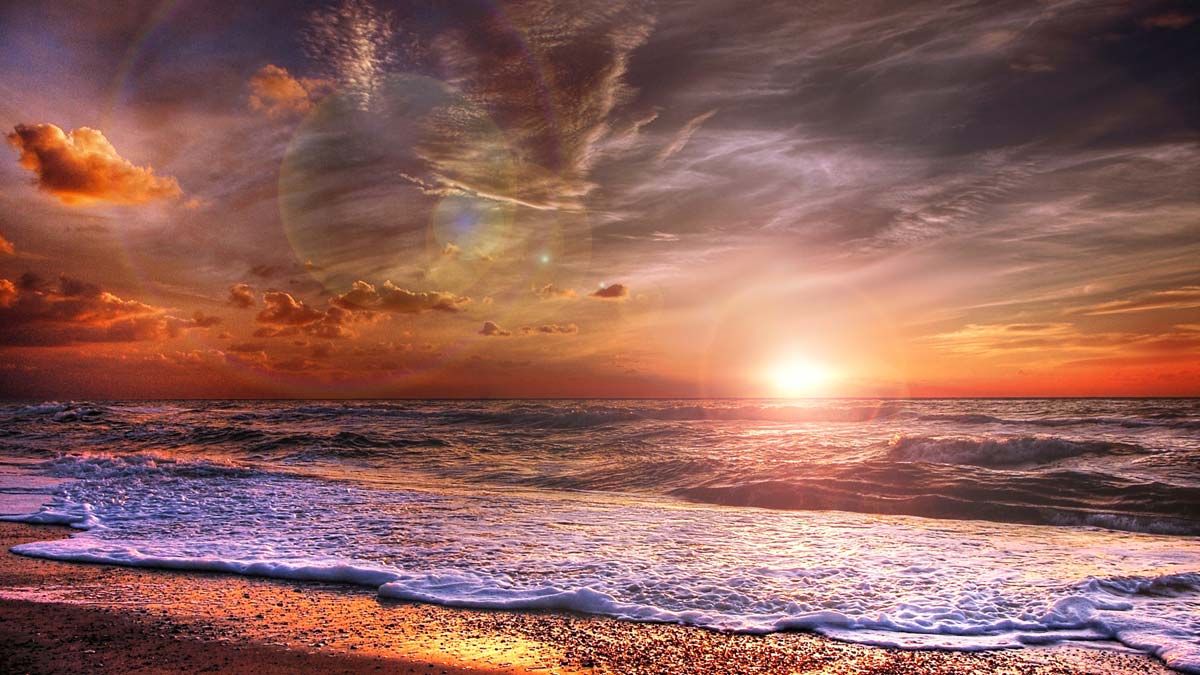
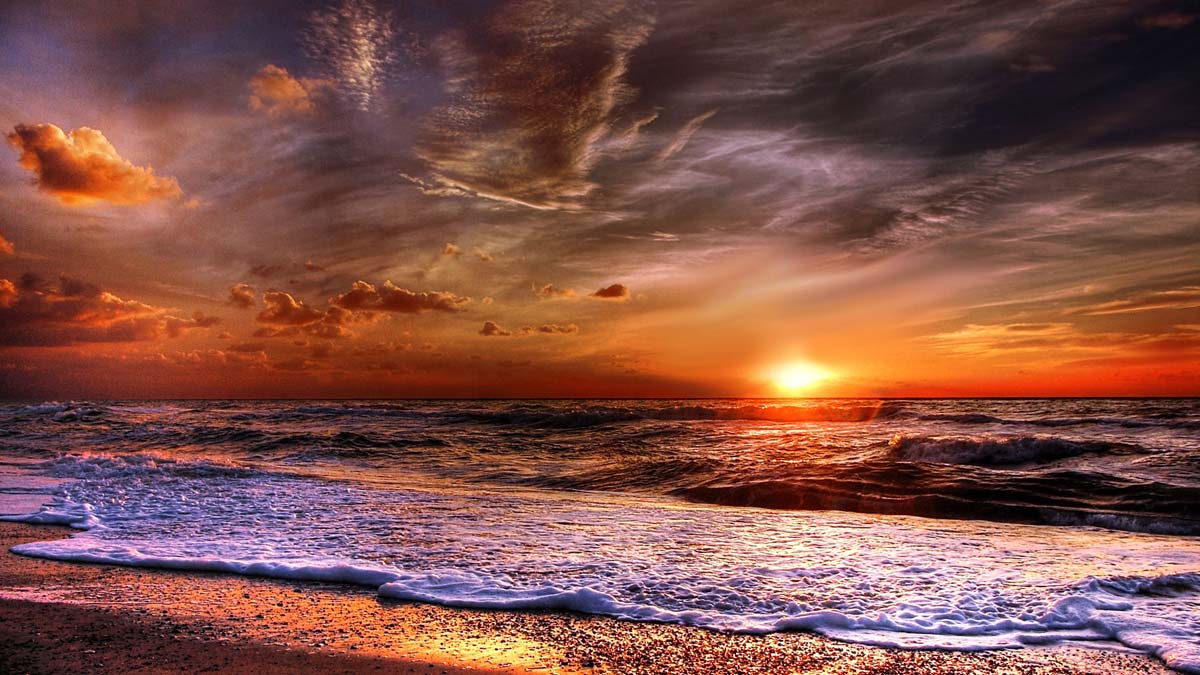
So, I am writing a new one now. Before I show you how to do it, here’s a peek to the final photo.

Final

Final.jpg

Initial

Initial

Let’s begin the tutorial.

Step 1 – Create a New Layer for the Lens Flare

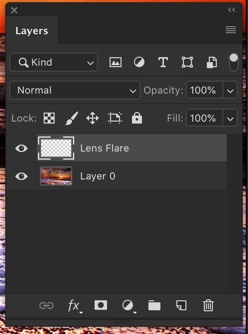
Create a new layer by pressing Cmd + Shift + N/Ctrl + Shift + N. Name that layer anything. I am going to write as Lens Flare.

1.jpg

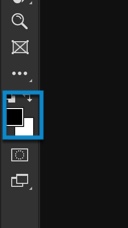
Press to make black as your foreground color. If pressing D is not changing the foreground color to black, click on the below icon and manually change it.

2.jpg

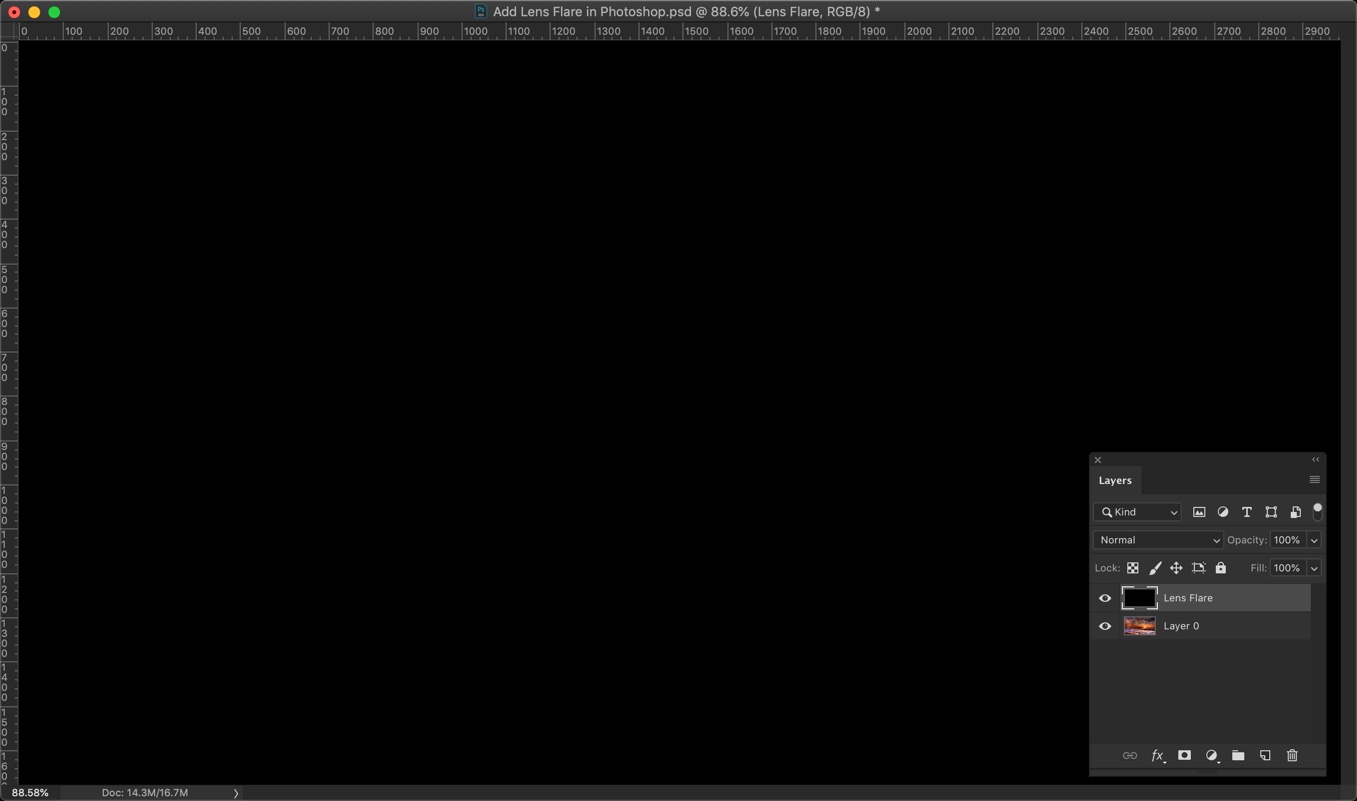
Fill the Lens Flare layer with the black color by pressing Opt + Delete / Alt + Backspace. This shortcut lets you fill the layer with the foreground color which is black in this case.

3.jpg

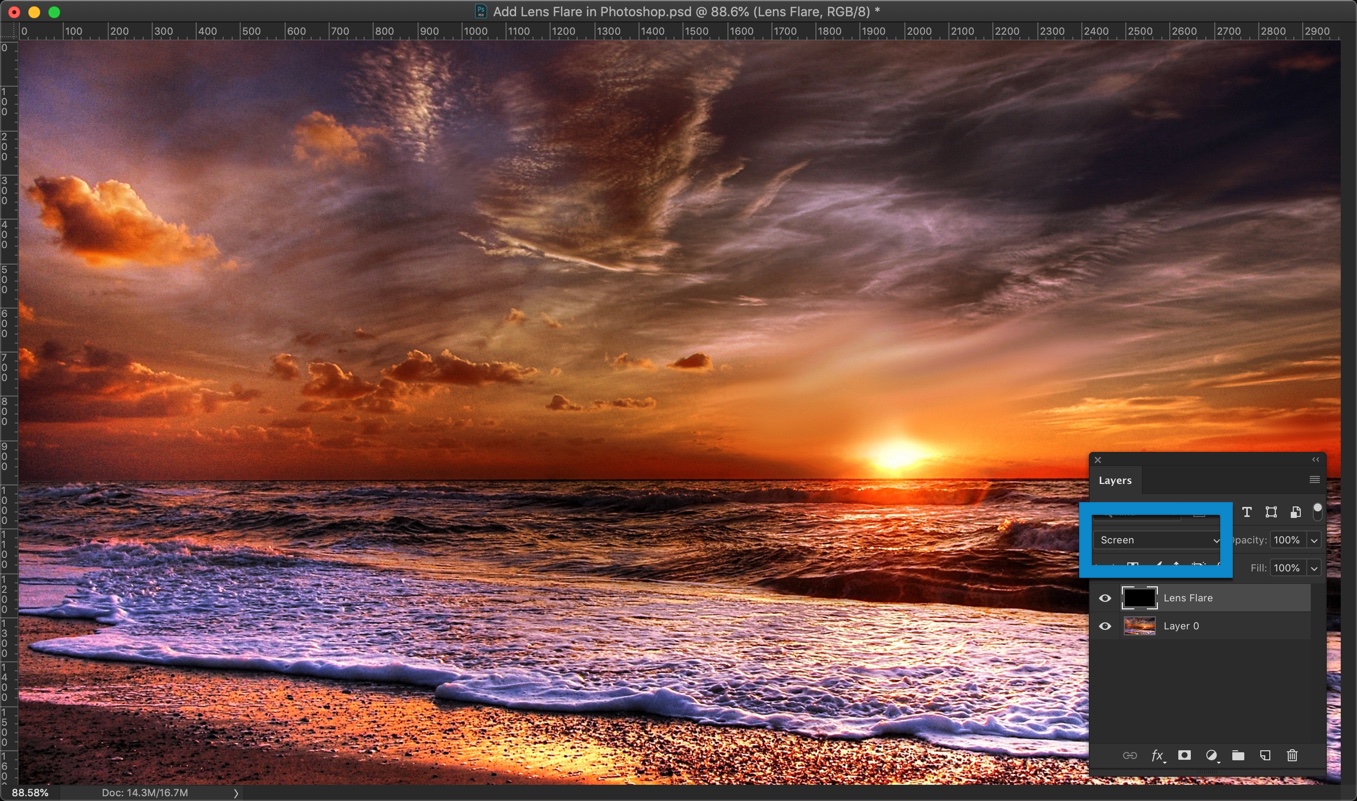
Change the Blend Mode to Screen.

4.jpg

Step 2 – Add Lens Flare in Photoshop

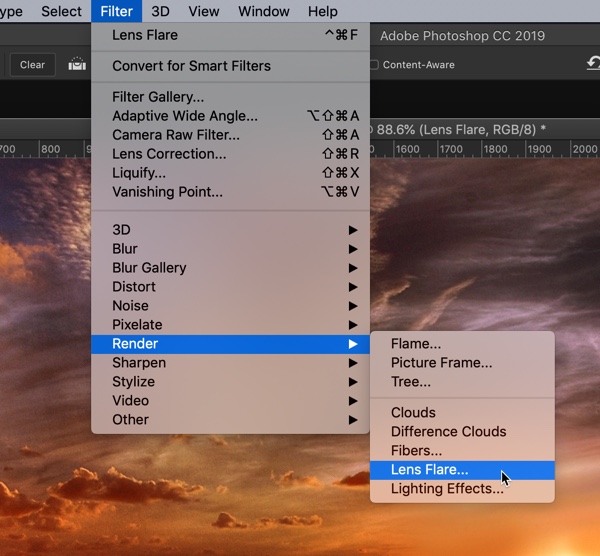
Go to Filter > Render > Lens Flare

5.jpg

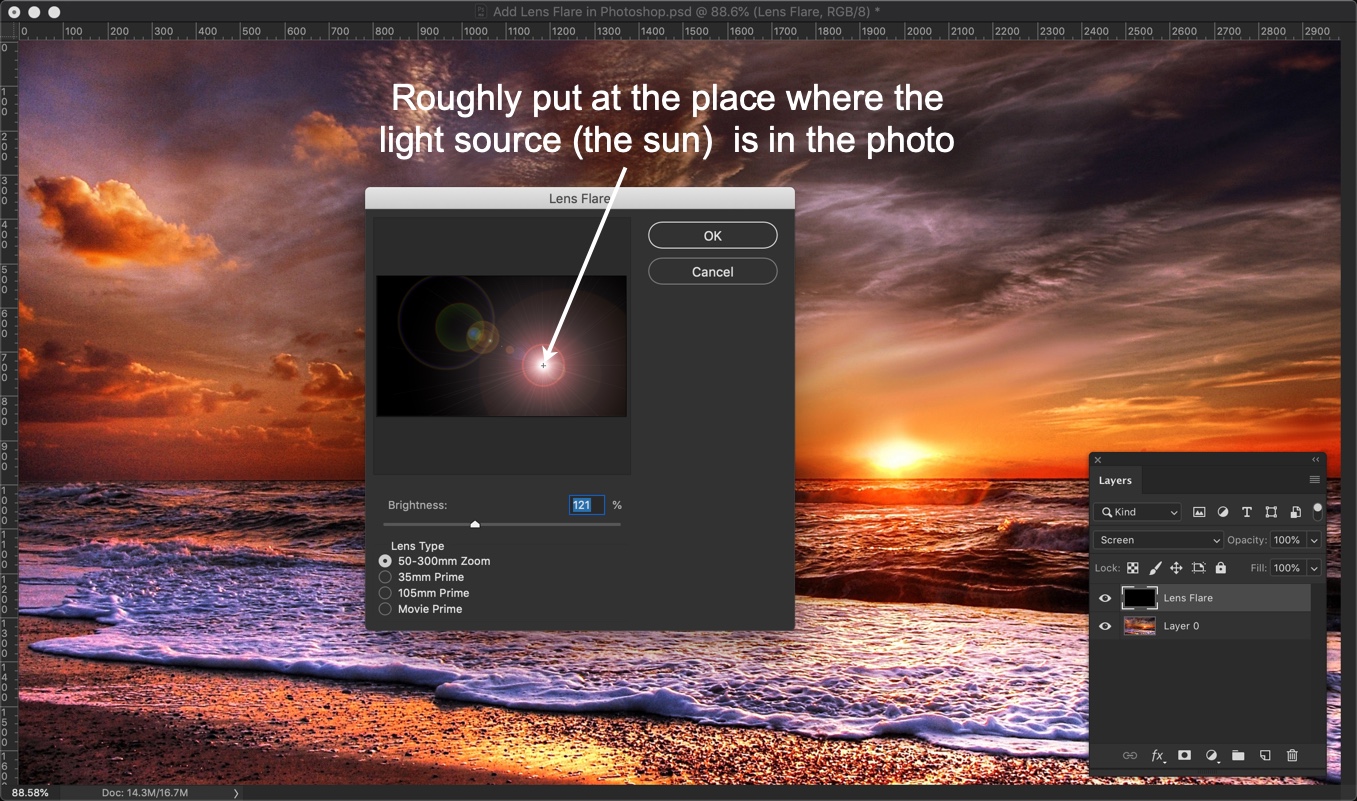
Roughly put the center of the lens flare at the place where the light source is in the photo. The light source in our photo is the sun.

Choose the brightness and Lens Type. Press OK. I am going to set my brightness as 121% and Lens Type as 50-300mm Zoom because this lens is what most photographers use.

6.jpg

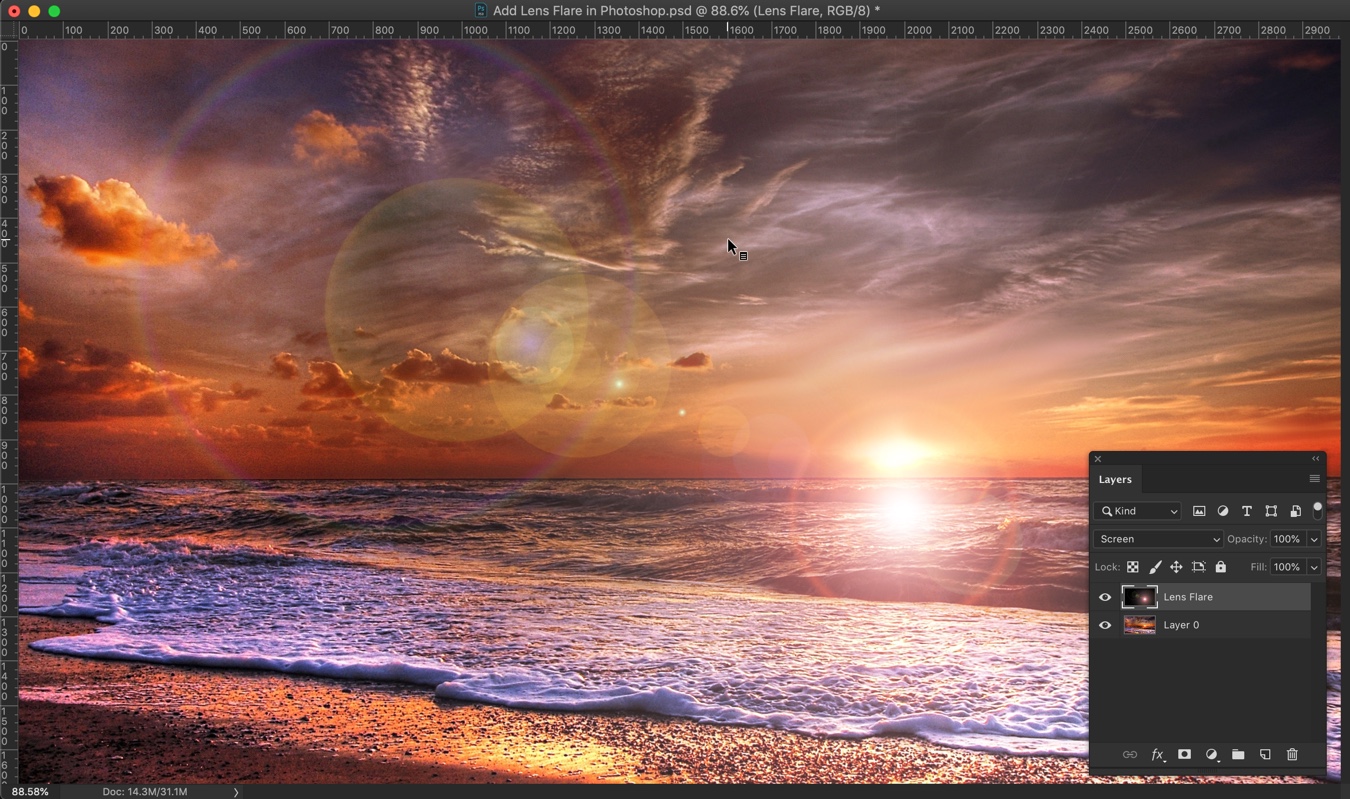
This will add the lens flare. But the positioning may be a bit off.

7.jpg

Step 3 – Move the lens flare

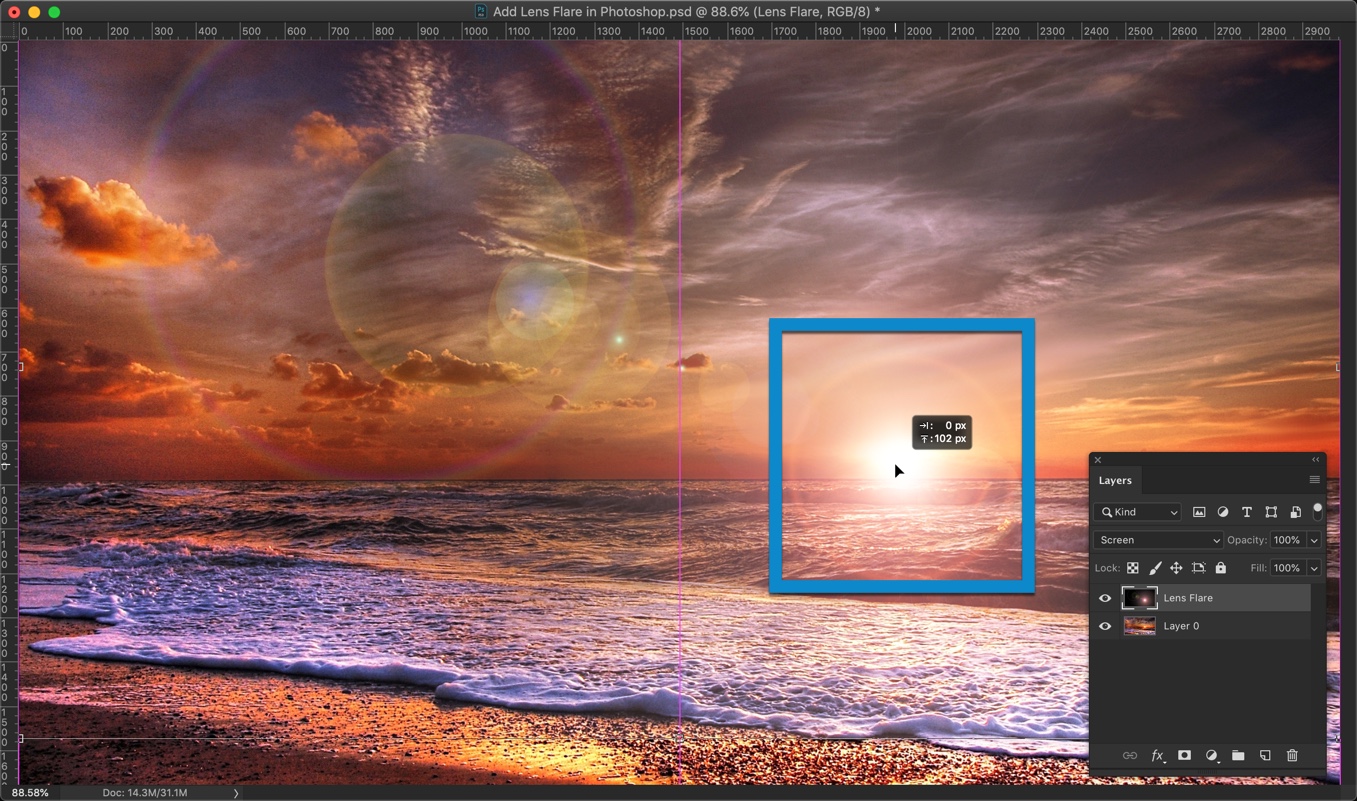
Activate the Free Transform Tool by pressing Cmd + T / Ctrl + T. You’ll see eight handlebars at the corners and center of the image.

Move the lens flare so that it overlaps the light source. The light source, in this case, is the sun. Press Return/Enter once done.

8.jpg

That’s all.

Here’s the final photo again.

Final

Make sure that you make the most out of the offer below.

How to Create a Sunset Effect in Photoshop?

I wrote a similar tutorial back in 2012 (yes, 6 years ago). Today, I received an email that the tutorial is looking old. The screenshots I provided were only 600 pixels wide which was enough for the screens that we used to use six years ago. But, they aren’t enough now. So, here I am writing a new tutorial on how to create a sunset effect in Photoshop.

Before we go, I want to show you the final and initial photo.

Final

Final.jpg

Initial

Initial.jpg

So, let’s begin. It’s only two steps tutorial

Step 1 – Apply the Gradient Map

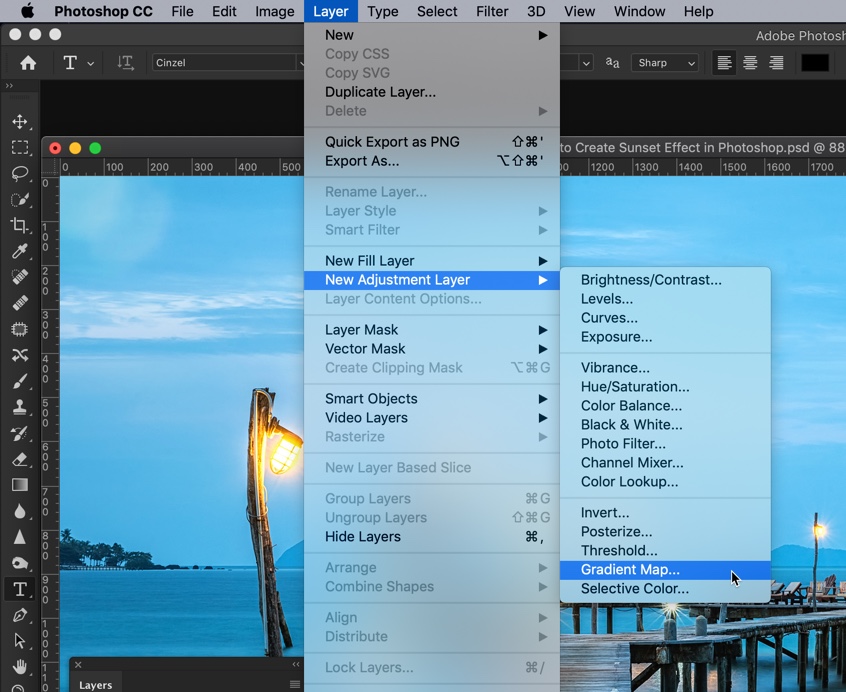
Go to Layer > New Adjustment Layer > Gradient Map

1.jpg

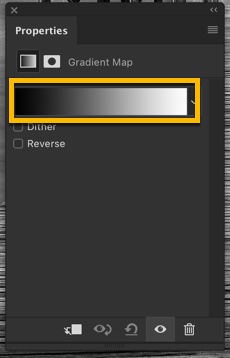
In the Property panel, click on the color box. If the property panel does not open by default, manually open it by going to Window > Properties.

2.jpg

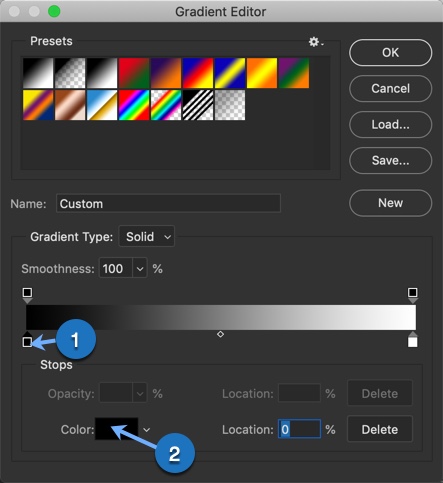
Gradient Editor should be opened now.

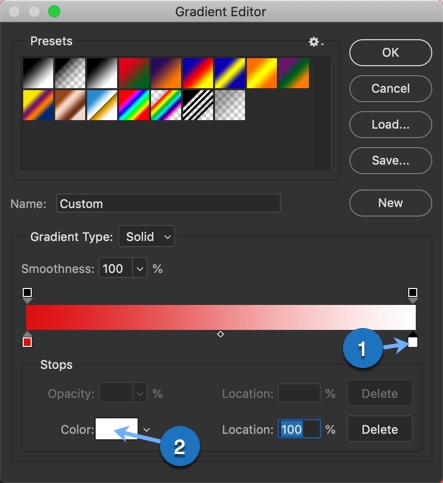
In the gradient editor, first, click on the bottom left handlebar (1) that I have shown below. Then click on the color (2).

3.jpg

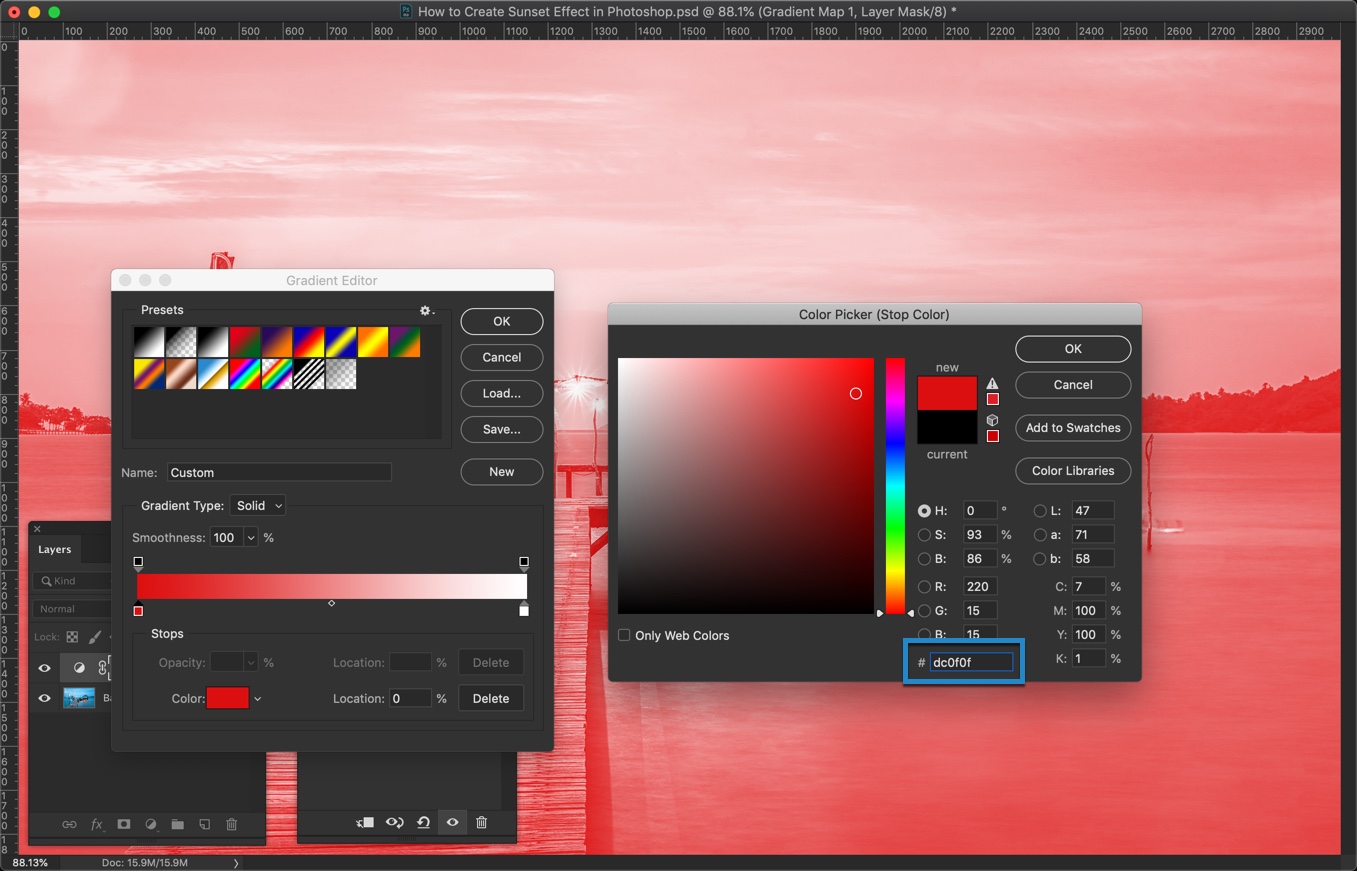
In the HEX value, write #dc0f0f. Press OK.

This will convert all the highlights in your image (bright areas) into red color. I know that it’s looking messy but hold on for a few more seconds. We’ll fix it.

4.jpg

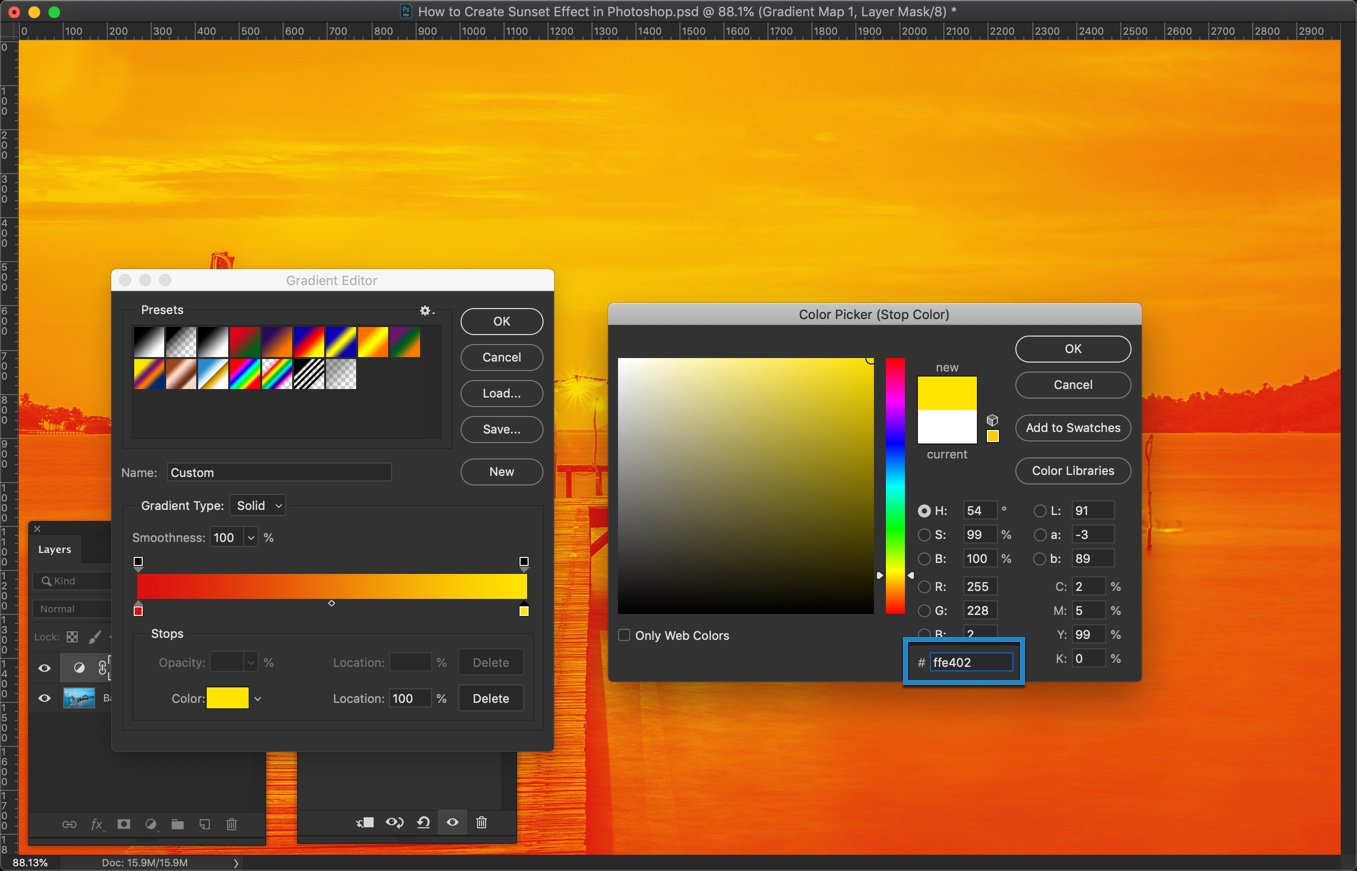
In the gradient editor, click on the bottom right handlebar (1) and then on the color (2). I have provided a screenshot below for your reference.

5.jpg


Write #ffe402 in the HEX value. Press OK.

The photo is looking a bit better now, right? We’ll make it even better.

6.jpg

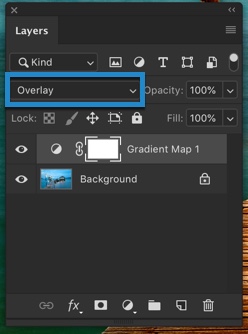
Time to change the blend mode to Overlay.

Open the Layer Panel by going to Window > Layers or by pressing F7. Change the blend mode to Overlay.

7.jpg

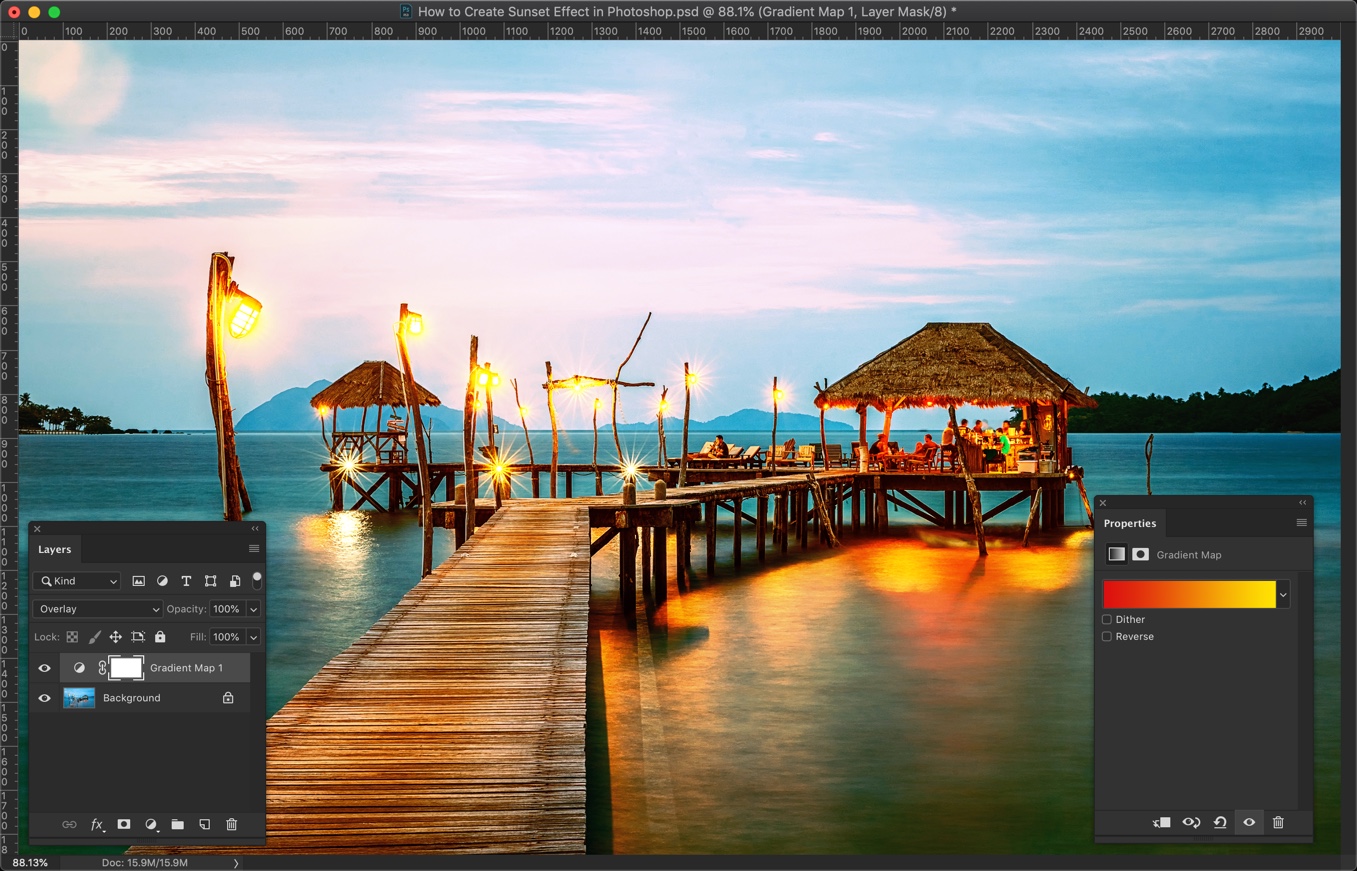
Now, the beauty should start appearing. Here’s my photo after changing the blend mode to Overlay.

8.jpg

Step 2 – Darken the image

I believe that the image is a bit bright. Let’s darken it.

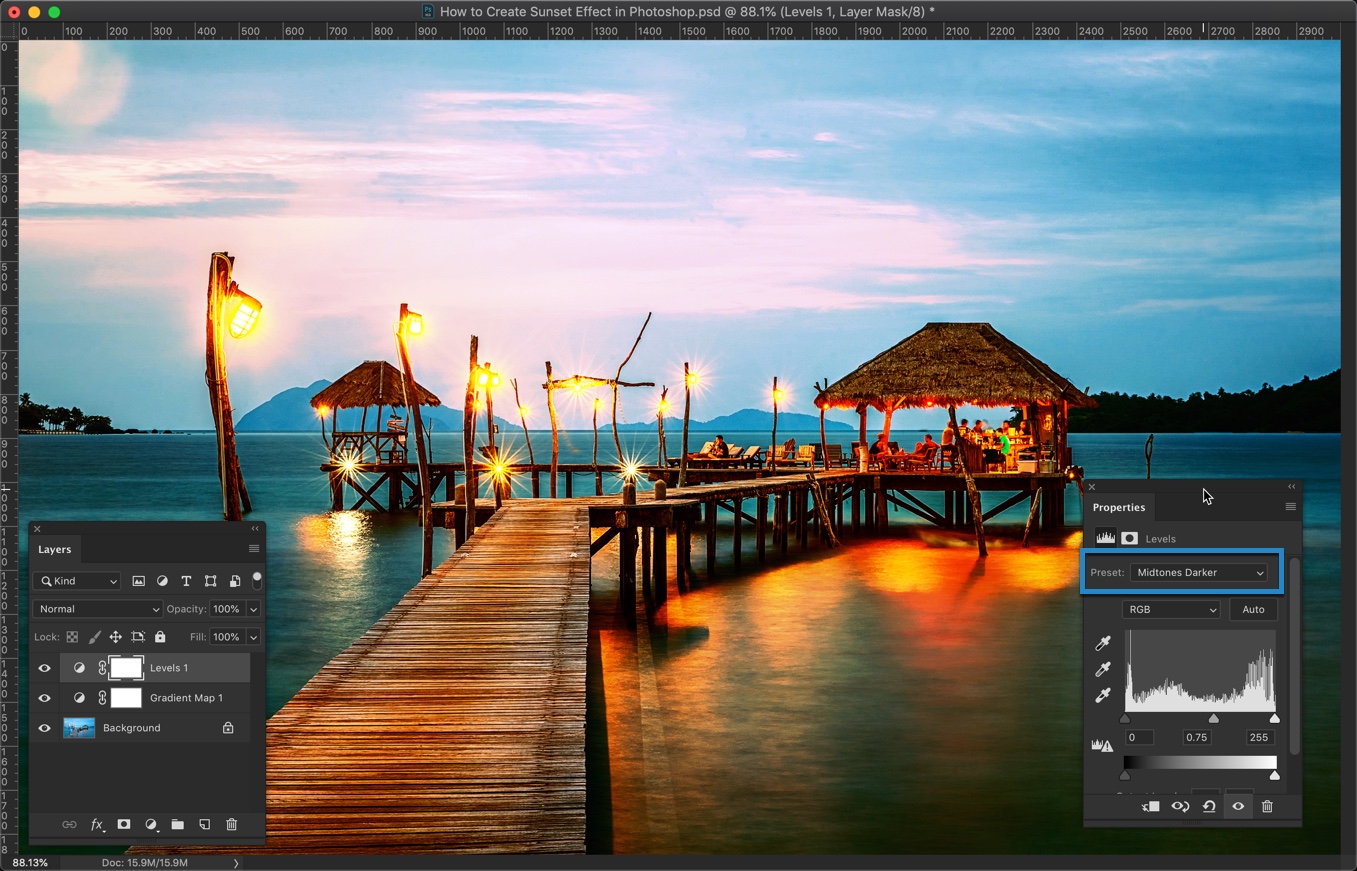
Go to Layers > New Adjustment Layer > Levels. In the Preset, choose “Midtones darker”.

9.jpg

Forget about all those lengthy YouTube videos to create sunset effect in Photoshop. It’s really this simple. Just a 2 steps tutorial.

Here you go with the final image one more time.

Final

That’s all.

Make sure that make the most out of the offer below.