Difference Between Adobe Photoshop and Lightroom

One of the hottest queries that keep beginners awake is regarding the software that should be used to edit photos professionally. While the free options have Picasa and iPhoto among other commercial software like Pixelmator, the most popular ones are the Adobe Photoshop and Lightroom. They have a lot in common but they still possess a few unique features sufficient to boost “What’s the actual difference between Adobe Photoshop and Lightroom?” query.

Today, I am going to share few of the differences between Adobe Photoshop and Lightroom. So, let’s begin.

1: File Handling Varies

The first case where the Lightroom differs from the Adobe Photoshop is the way it handles the file fed to it. It neither edits your photos nor can be used to transfer them between multiple locations. The changes you make in a photo via Lightroom gets stored in a separate file named “Catalogue”. This means that while you are altering or modifying any pic, Lightroom will record this sequence of alterations into the Catalogue. It leaves the original file intact.

Photoshop on the other hand has no Catalogue and does edits on the same image. The original image is altered without any scope of re-modifying it from the initial state again. There is a way called as “non-destructive” editing where you get to preserve your image.

2: Workflow

Lightroom offers end-to-end workflow solutions to the photographers stepping newly into this profession. From importing pictures from your storage to organising, editing, sharing and finally printing them, Lightroom takes care of almost everything that you expect from it. It even has virtual folders to track the images being edited and organised.

Photoshop, however, fails to transfer files and doesn’t even organize them into slide shows or photo books. It’s editing is still better and powerful than the Lightroom. Photoshop Bridge is something which is can be engaged to import and organize photos in Photoshop (if urgently required). The workflow is not as streamlined as in Lightroom, but Photoshop is undoubtedly a great deal to compromise with a few points.

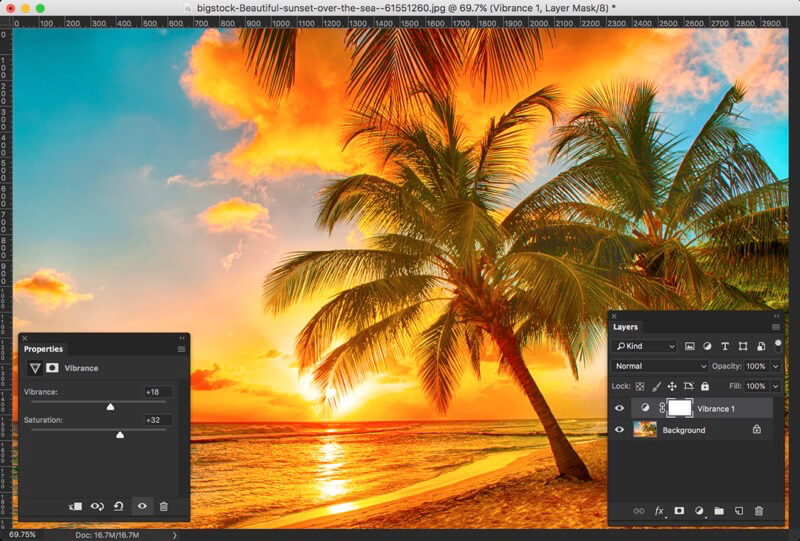
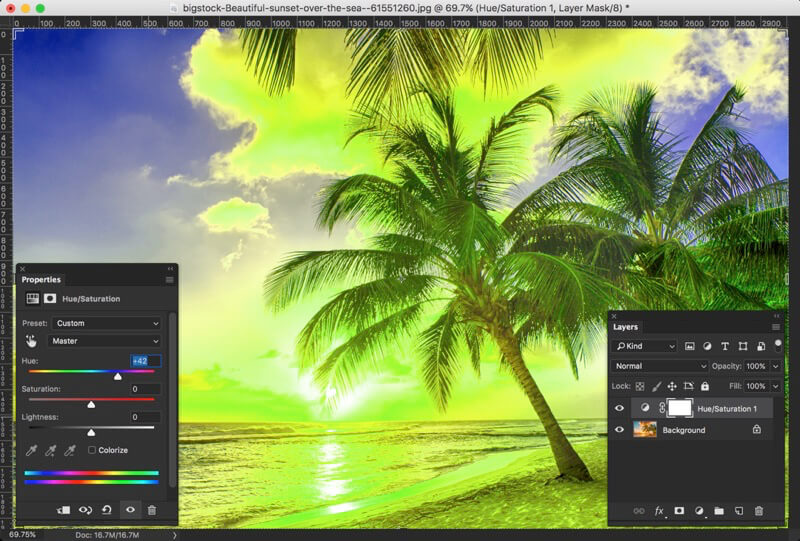
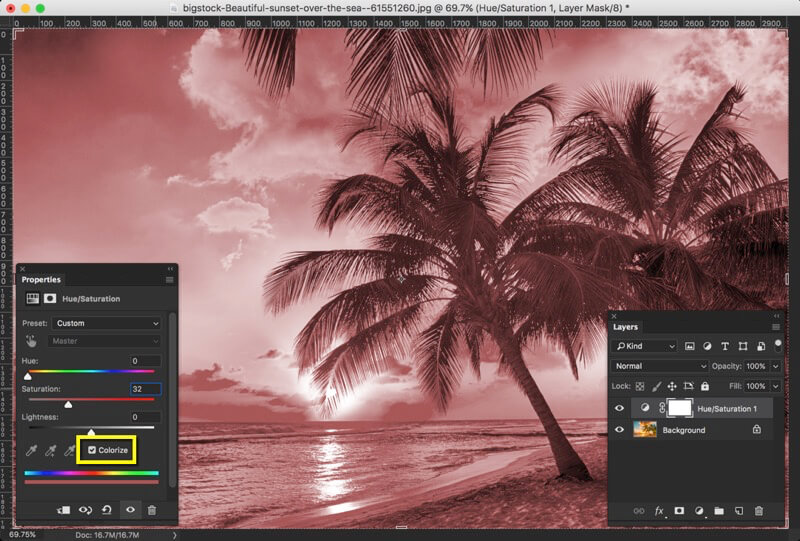
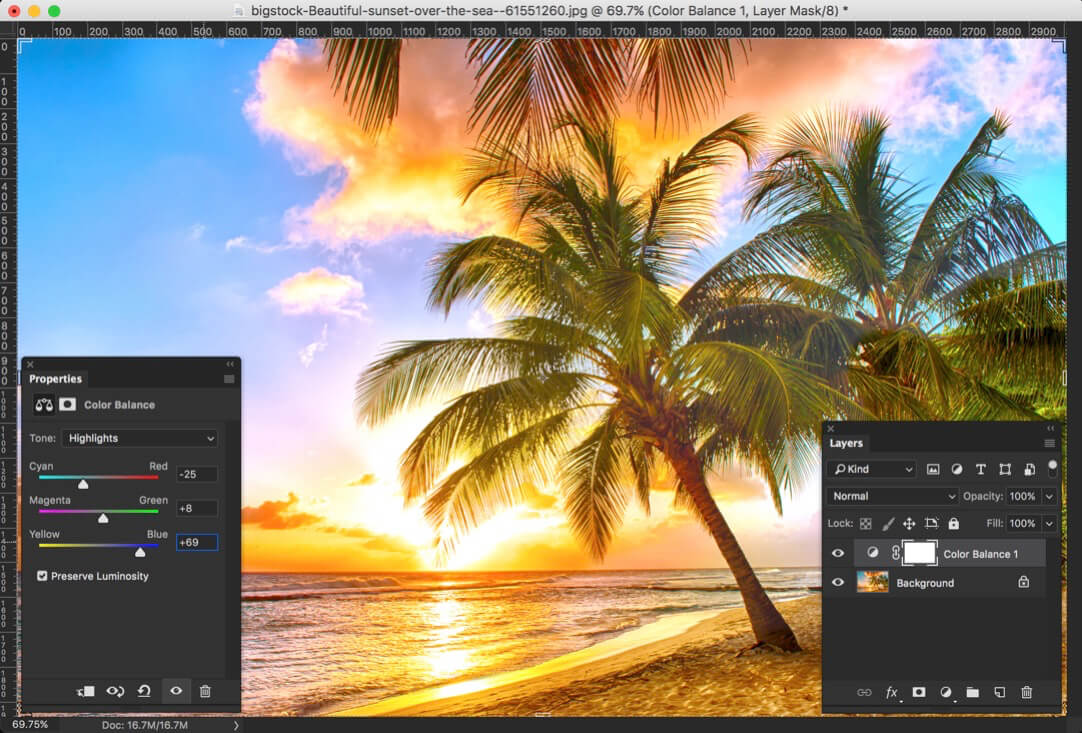
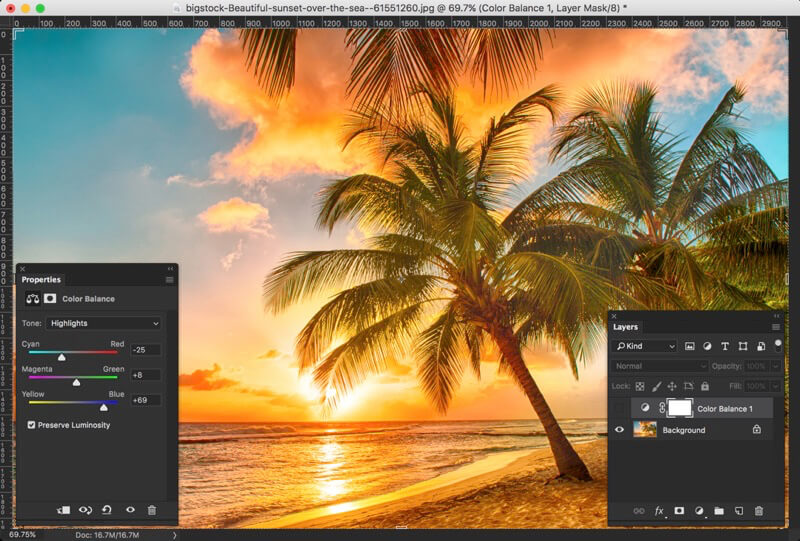
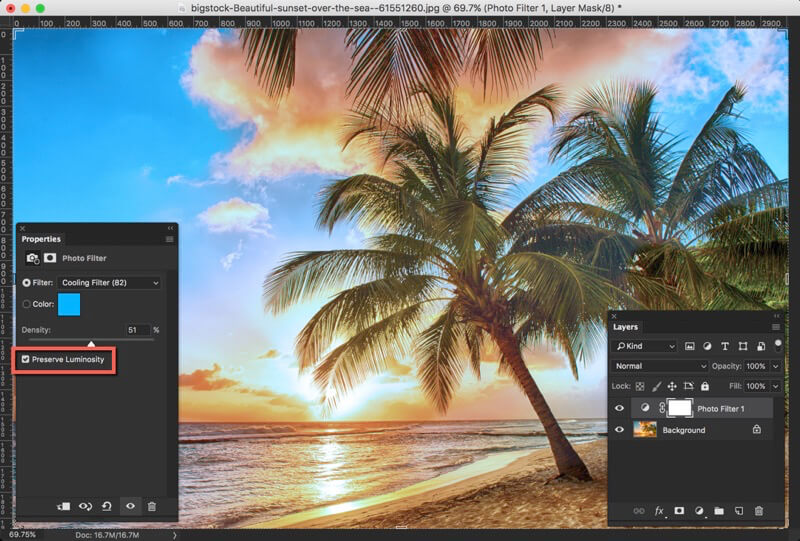
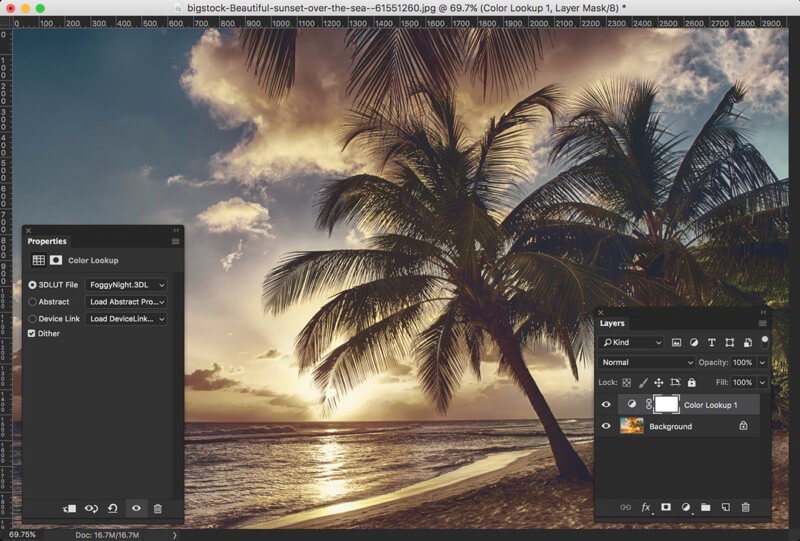
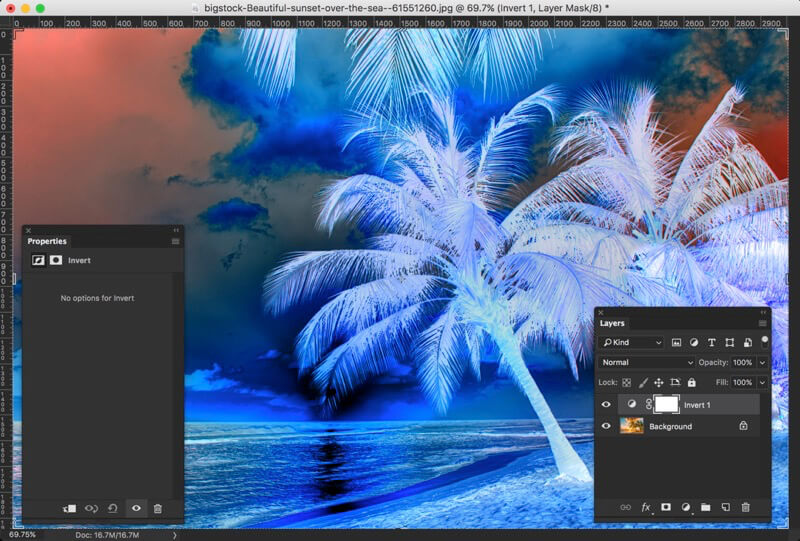
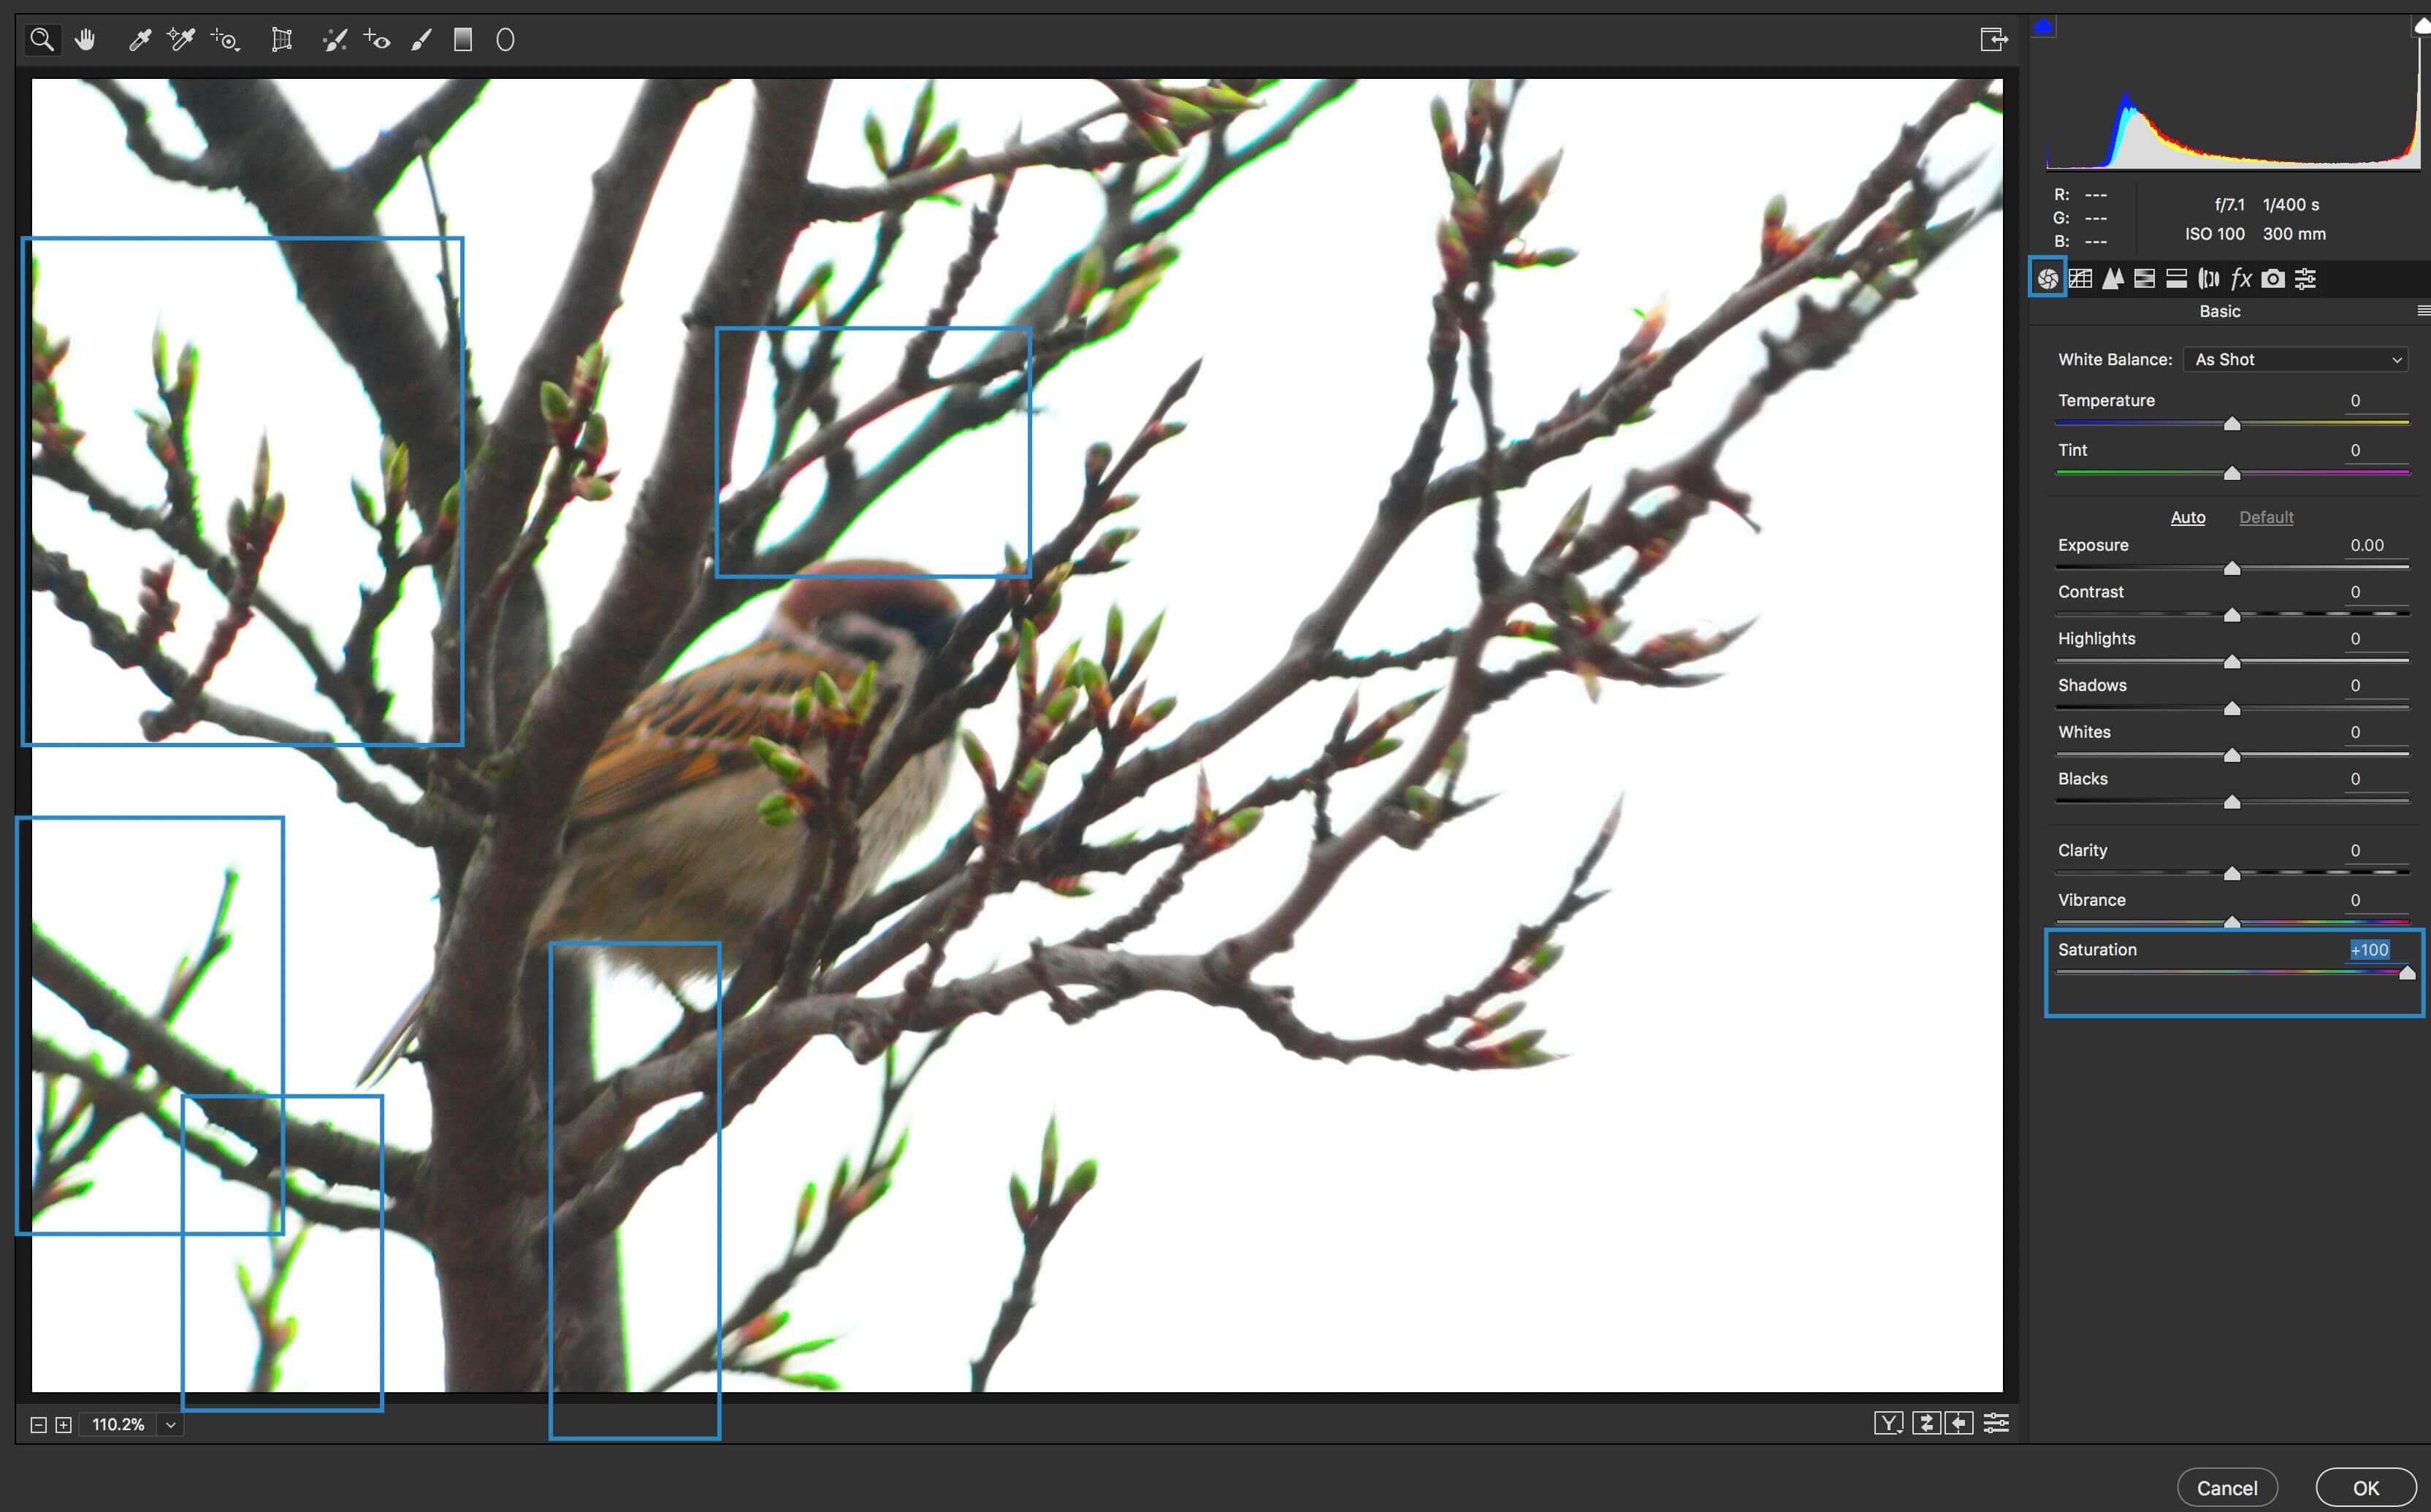
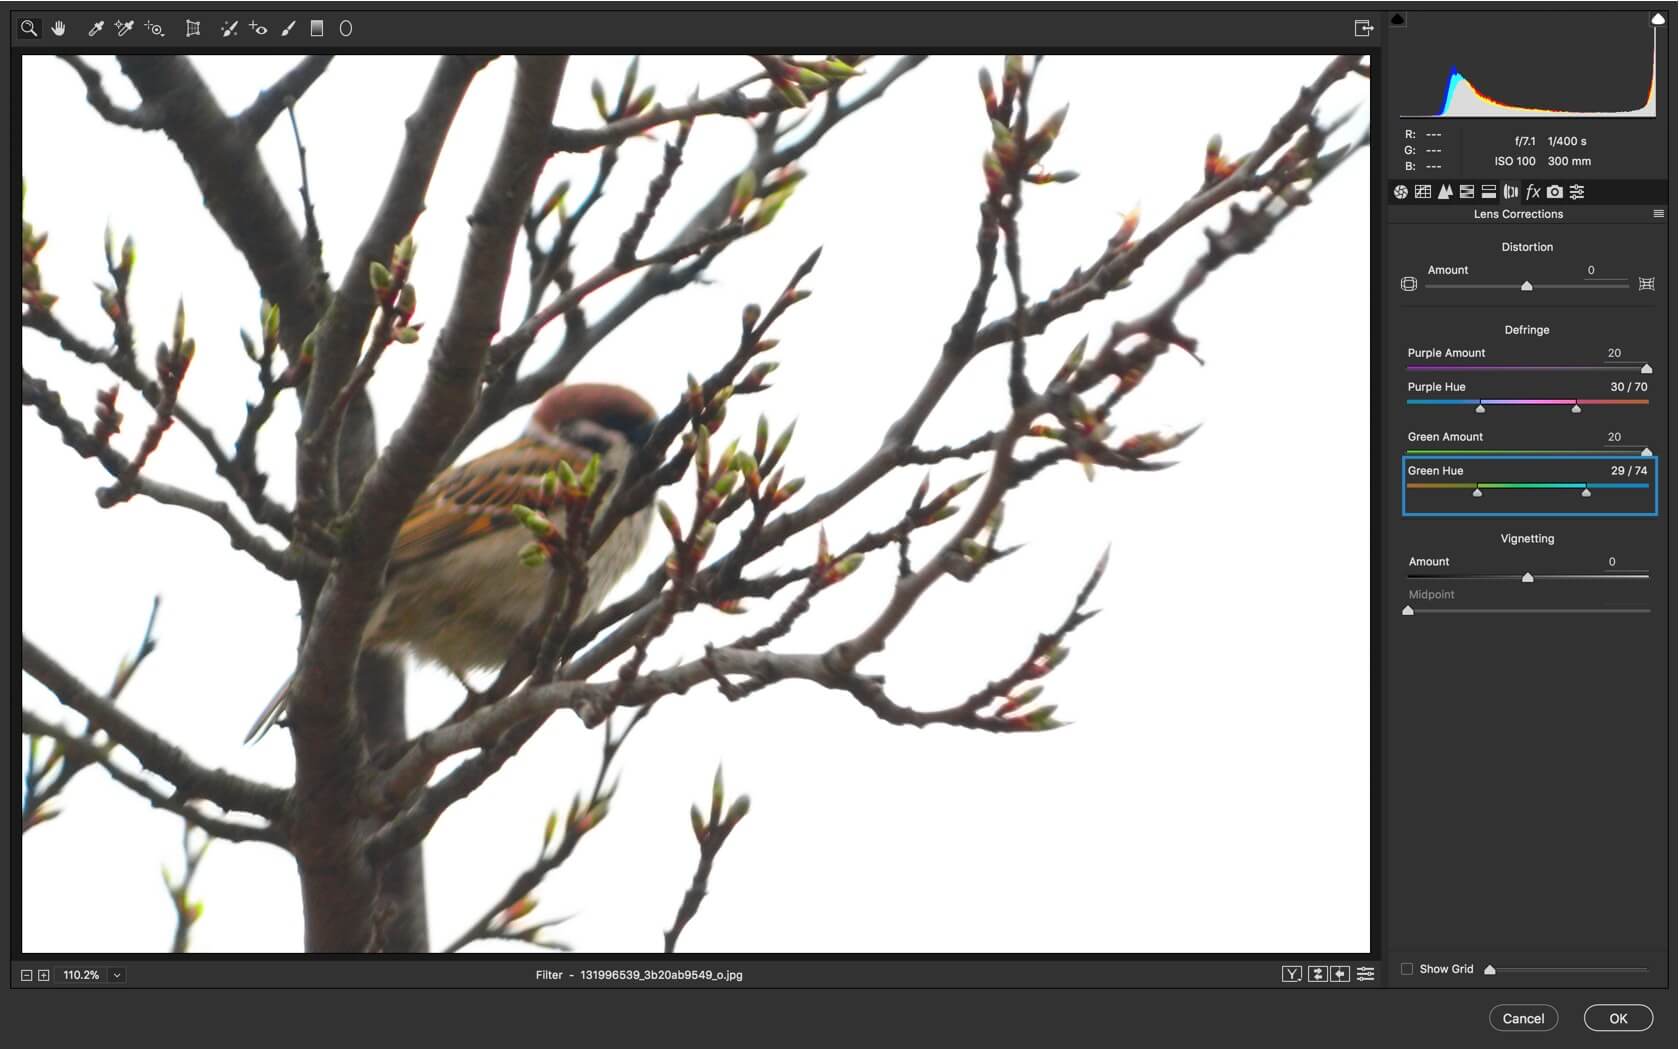
3: Variety in the Tools

Lightroom’s quickly editing feature helped it gain a major popularity over Photoshop. It was specifically designed for editing hundreds of pictures in one-go. Lightroom basically has all the tools from Photoshop bundled together in an easy to handle package.

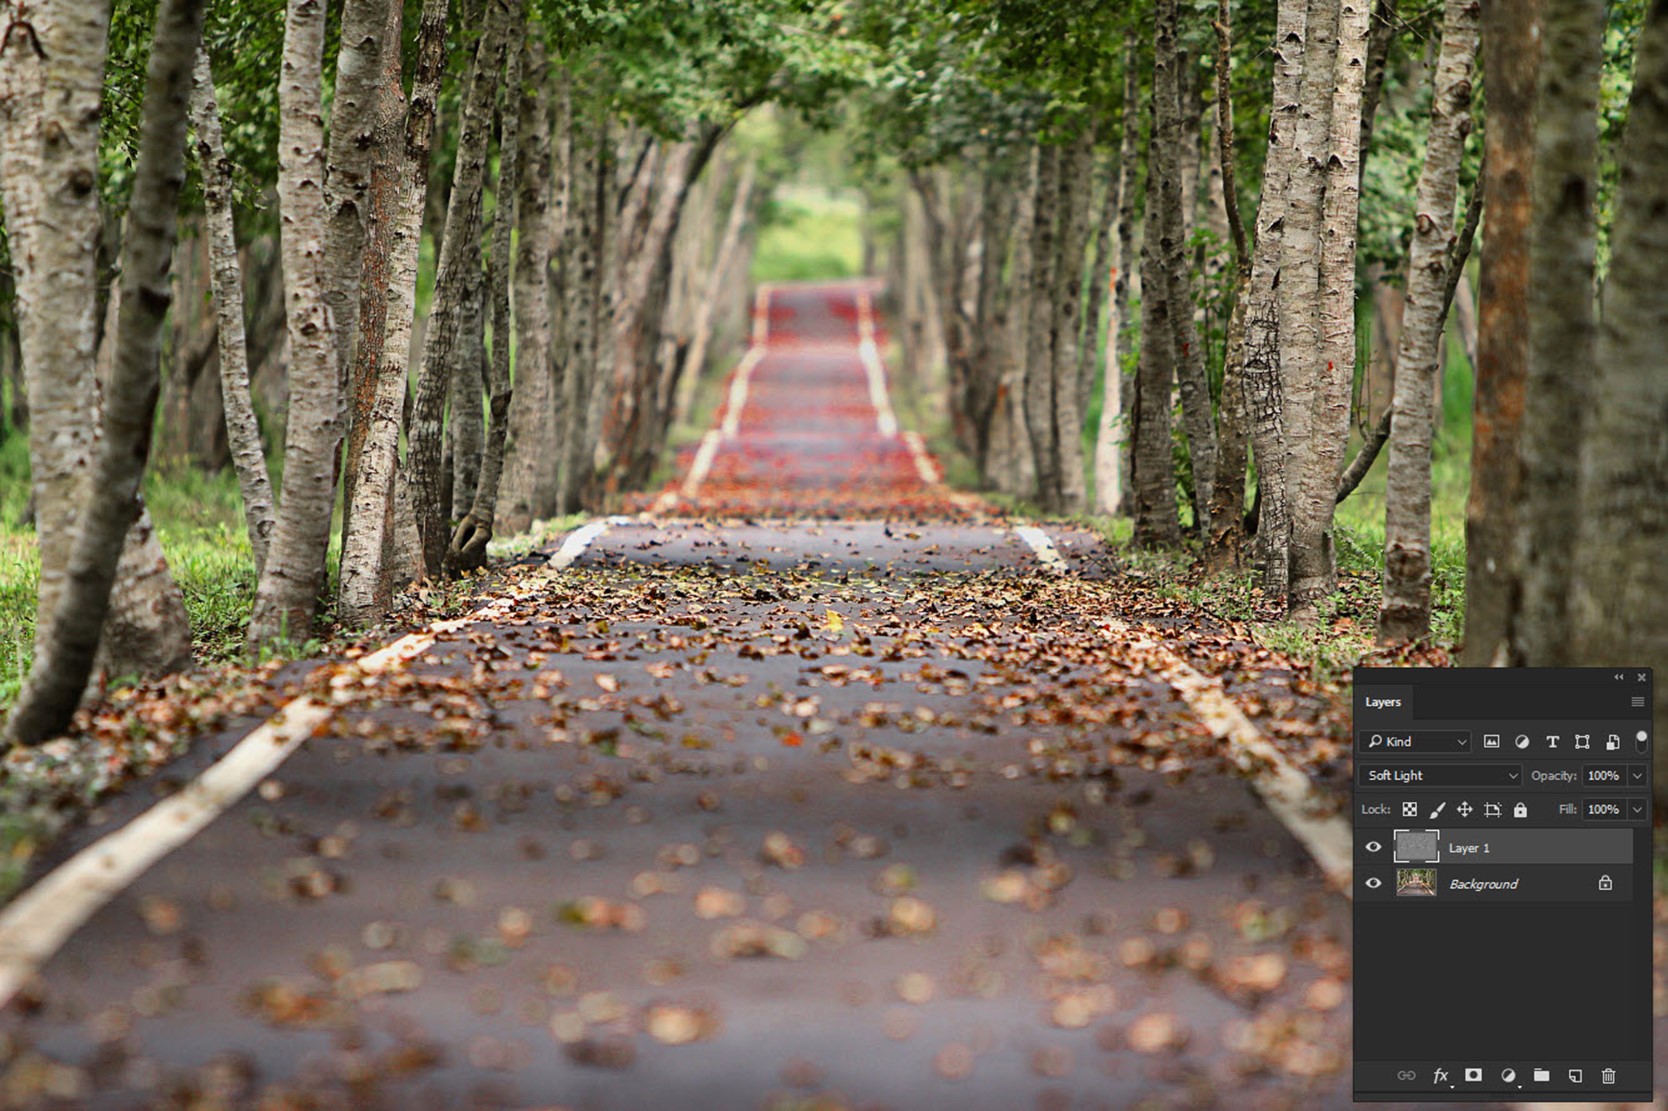
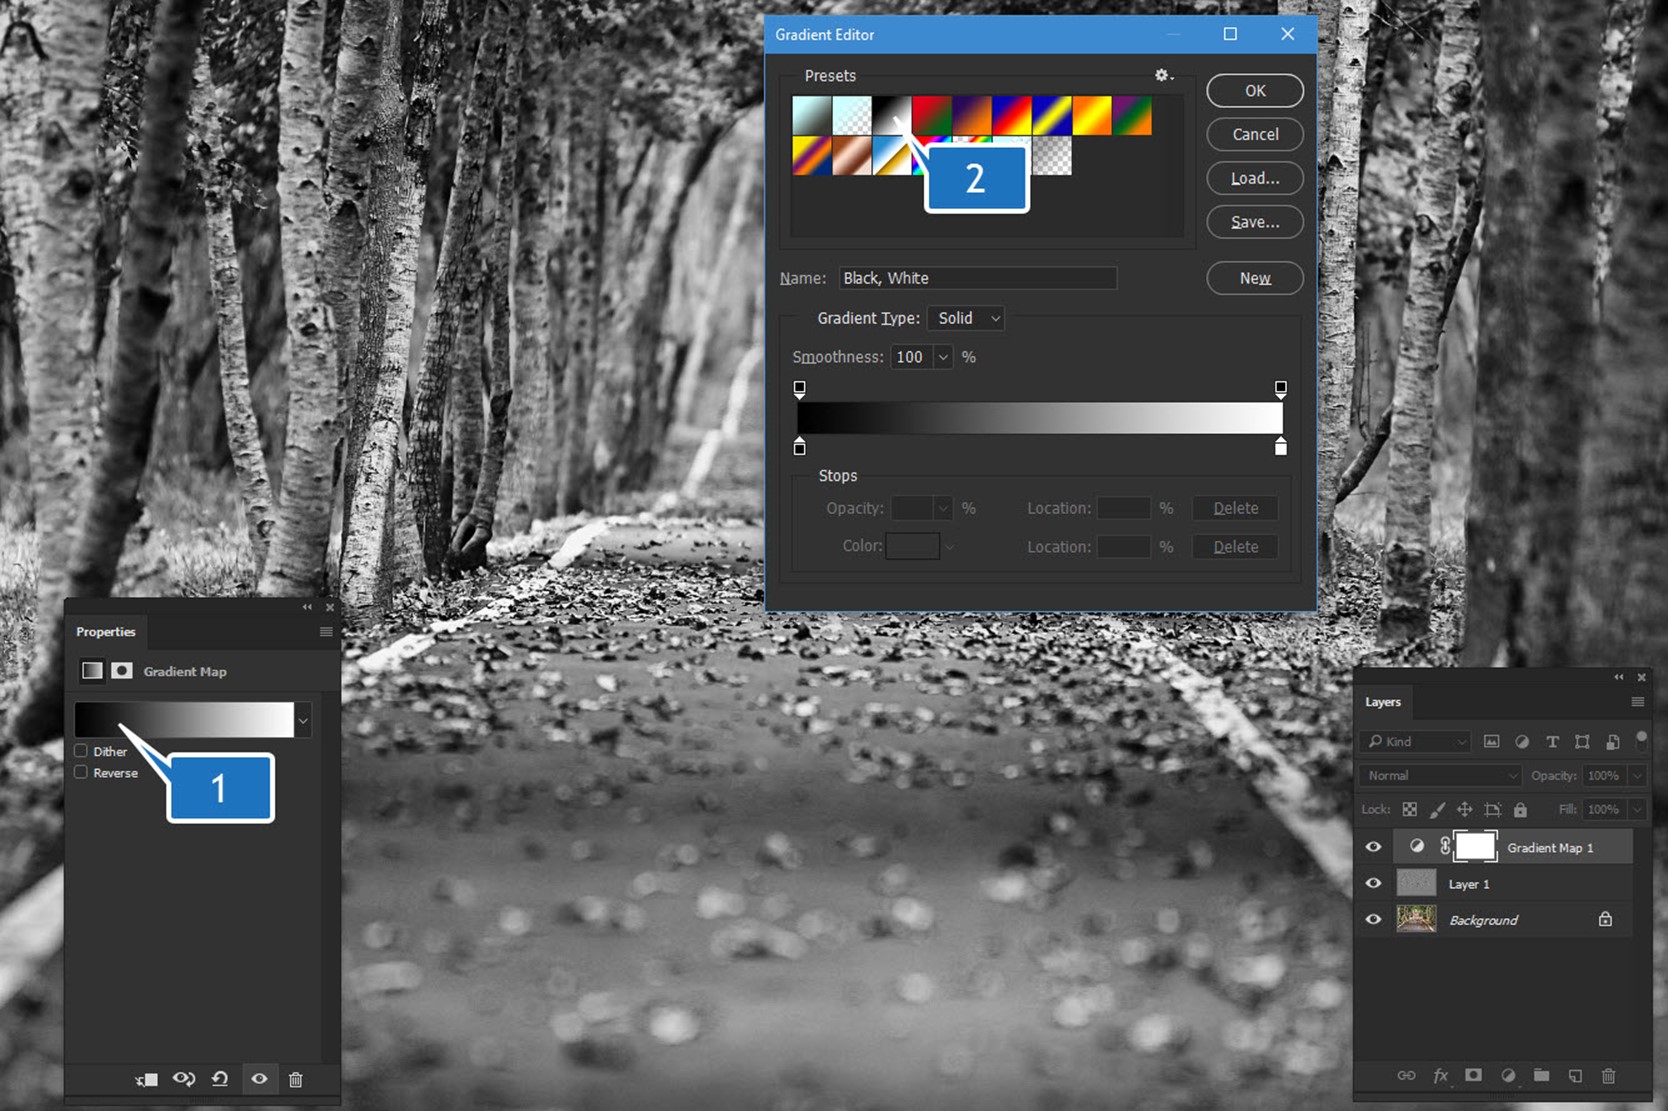
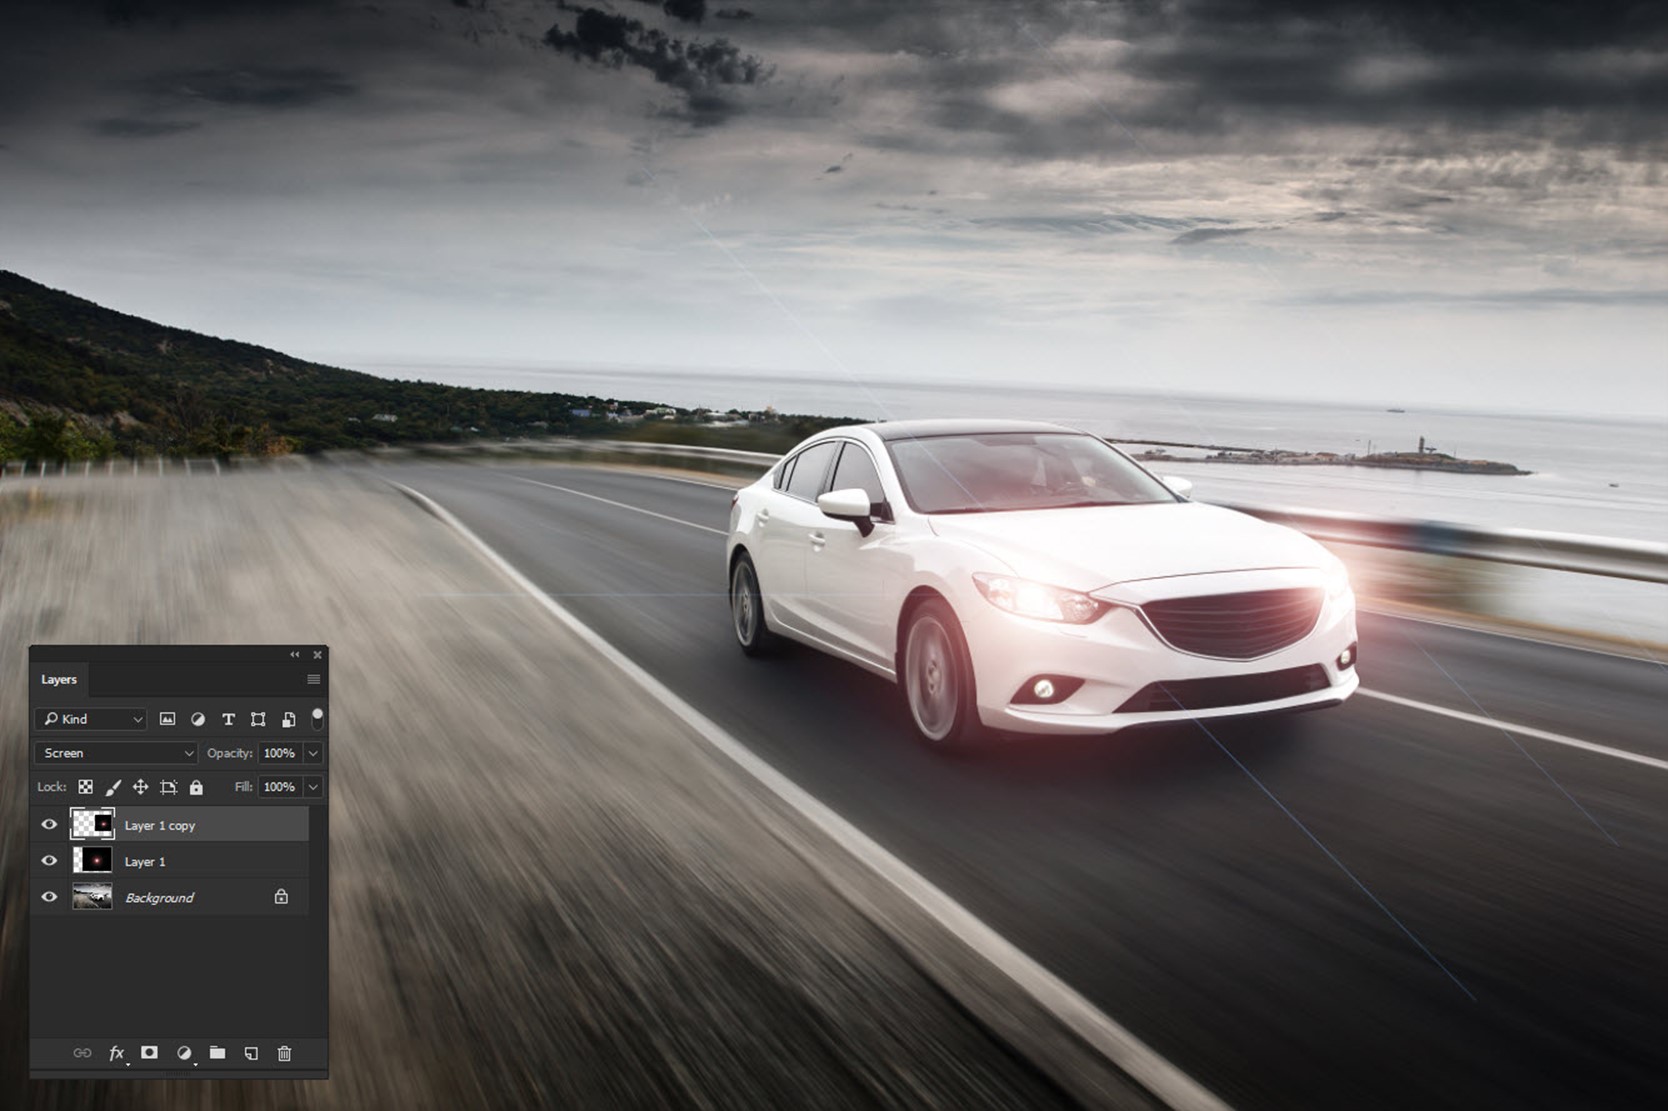
From adding Adjustment Layer to the Blend Mode and Dodge Layer, Photoshop truly has made real editing possible. Lightroom however has a few features less than the Advanced Photoshop program. Photoshop also supports adding 3D support and text to your pictures. This is why it is ideal for every editing situation. Lightroom is a collection of only those editing tools which shutterbugs or professionals utilize the most.

Wrapping Up

So this was all about the difference between Adobe Photoshop and Adobe Lightroom. Thanks to the Adobe’s Creative Cloud Option under which you can own these two at $10 monthly subscription.

Both the programs have a lot to offer. The choice depends upon the type of modifications you want to implement to your snaps. If you too are familiar with these two programs, do share your feedback with us. There might be more differences which we need to spread. I hope you guys enjoyed this. Share this piece with as many as you can. We’ll be back with more such articles. Till then, good luck and stay tuned.

What is Histogram in Lightroom – A Simple Guide

If you are new to photography or photo editing, there may have been times when you were editing a photo and decided to bring down the highlights slider as they were completely blown out in some areas. While doing so, you realized that even though the image looks better than before, you’re not sure if you should continue to work on it. Where should you stop to make sure that the image looks… normal? or you may wonder what is histogram in Lightroom.

What is Histogram?

What if there was a way that Lightroom could show you that you have extremely overexposed areas in your image that need to be adjusted or an indicator that could tell you that the shadows (or highlights) aren’t clipping anymore so you can stop moving the slider?
Well, Lightroom does have such a tool and it’s called a histogram. In simple words, a histogram is a graph on which every single pixel of the image has been plotted. Being familiar with a histogram helps you edit images in a way that you don’t lose any details in it.

Where Is Histogram Located in Lightroom?

The histogram can be found in both the library and develop modules at the top of the panels on the right. The version in the develop module is more interactive than the one in the library module because it lets you adjust your images directly from the histogram and also shows you any clipped pixels that the image might have. If you open Lightroom and cannot see the histogram for some reason, you can view it by going to Window> Panels> Histogram or by pressing Ctrl+O/Cmd+O.

What Does Histogram in Lightroom Show?

The histogram is a graph of all the pixels in your image and typically, the pixels are spread over the whole width of the histogram where the left side shows the shadows and the area on the right shows the highlights. So, if the histogram is concentrated in the middle with barely any pixels on the far right or left, it means that it has hardly any strong highlights or shadows and mostly contains mid-tones resulting in a dull image with low contrast.

The histogram also show if you have any clipped pixels; clipping is the loss of detail in pixels which means the shadow is so dark that it has no detail and is completely black or the highlight is so bright that it is completely white.

Right above the histogram, there is a triangle in a small square on the left, which is the shadow clipping indicator while the triangle on the right indicates highlight clipping. Whenever you have any clipping in either the shadows or highlights, the respective indicator becomes white. Then, you can either click on the indicator or hover your mouse pointer over it and it will show you the clipped pixels in the image.

Is There a Right Histogram?

There are no perfect right or wrong histograms and it all depends on the kind of picture that you’re working with. Typically, if your histogram has a gap on either the left or right side, it means that most of the pixels in your image are either white/highlights or blacks/shadows. In this case, you may check for clipping and adjust it but you can’t say that it is a bad picture or that the picture has problems just because most of the pixels are concentrated on one side.

Let’s say that you have taken a picture of a black dog in front of a black gate. If you look at the histogram, most of the pixels will be on the left with a gap on the right. You don’t really need to worry about fixing it because that’s just how the image is and it is not a wrong histogram. All you need to do is make sure that the image is exposed correctly and that there aren’t a lot of pixels getting clipped; adjust for that (and for the contrast if you want) and you’ll be good to go.

Moreover, you might not need to adjust every single pixel for clipping if it’s not feasible. Again, it all depends on the kind of picture and where the clipping is occurring. So, for example, if your subject is a little boy and most of the frame is occupied by him with only a tiny area of the background getting clipped, you don’t need to sacrifice on the quality of the editing of the boy’s face just to save those few irrelevant clipped pixels. In the end, it’s up to you to decide whether you want to adjust the pixels or leave them as they are, depending on the image.

Using the Histogram Directly to Adjust Photos

The histogram is divided into five different sections which correspond to either one of the following characteristics of the image: blacks, shadows, exposure, highlights and whites. Normally, the area right below the histogram displays information about your image but if you hover your mouse pointer over it, this information will be replaced by the name of the section depending on where the pointer is hovering. The slider corresponding to that section will also be highlighted in the Basic panel. Moreover, the mouse pointer will turn into a two-directional arrowhead indicating that you can move it either way by clicking.


There are two ways to adjust any of the five characteristics; you can either use the sliders, or you can click on the section on the histogram and move the mouse left or right to change the values. If you’re using the histogram to adjust your photos, you will notice that as you move the mouse, the slider corresponding to the section also moves. So, in short, you are just moving the sliders directly from the histogram instead of scrolling down and moving them.

Color Histograms

If you’re working with a colored photograph, there will be parts in your histogram with various colors. These correspond to the red, green and blue channels of your image. So, there is a red histogram, then on top of it is a green histogram, and over it is the blue histogram. The other colors that you see are the overlapping of two colored channels. Then, there is a gray histogram right at the front which is like an average or a composite of all the channels. These colored histograms have pixels of the respective color plotted on it.

Moreover, you’ll notice that sometimes the highlight and shadow indicators above the histogram also turn into different colors which shows that there is clipping only in that specific channel. For example, if the shadow clipping indicator has turned blue, it means that there is clipping in the shadows but only in the blue channel.

To Sum It Up…

The histogram has many uses; it is a graph that tells you whether your image majorly consists of highlights, shadows or mid-tones. You can also use it to see if the image is well-balanced or if it has high or low contrast. It is most commonly used to check if you have any clipped pixels in your image and it helps you decide if you need to make adjustments to your photographs or correct any problems with it. If you are someone who regularly edits images, familiarity with the histogram and knowing how to read it can be extremely helpful in identifying problems and making quick fixes to your photographs.

Day 26 – Adjustment Layers in Photoshop – Vibrance, Hue, Color Balance, Black and White, Photo Filter, Color Lookup, and Invert

Hey Guys – It’s time for the next tutorial from 30 Days to Learn Photoshop Series. Last time we discussed on Adjustment layers of Solid Color, Gradient, Pattern, Brightness, Levels, Curves, and Exposure. This is the next and the last part of the series where I’ll be discussing Adjustment layers of Vibrance, Hue, Color Balance, Black and White, Photo Filter, Color Lookup, and Invert. There are few more but you are never going to use them.

Part 1 – Everything about Adjustment Layer in Photoshop
Part 2- Solid Color, Gradient, Pattern, Brightness, Levels, Curves, and Exposure in Photoshop

Before we begin, I want to explain two things again (in case you missed any of the last two parts).

WHAT’S ADJUSTMENT LAYER IN PHOTOSHOP?

The Adjustment Layers in Photoshop are a group of some useful, non-destructive image editing tools that add color and tonal adjustments to your image. Did you read the word “non-destructive”? Yeah, all of the changes will be done without harming the original image. Means that you can go back to any point in time without any loss. It’s like a Time Machine in macOS and Win7 backup in Windows.

WHERE ARE ADJUSTMENT LAYERS LOCATED IN PHOTOSHOP?

Adjustment layers are located at the bottom of layer panel (press F7 to open).

1-1 - Day 24 - Adjustment Layers in Photoshop - Solid Color, Gradient, Pattern, Brightness, Levels, Curves, and Exposure

All the things that you’d use daily are present here. Be it Brightness, Color Balance, Photo Filter, Gradient, or even Invert are present here.

Now that you what and where of the Adjustment layer, let’s explore it. I am going to explain each layer in a two separate tutorial. In the tutorial, I’ll cover Solid Color, Gradient, Pattern, Brightness, Levels, Curves, and Exposure. The rest of the things will be covered in the next tutorial.

What is Vibrance and Saturation in Photoshop?

No photo looks worse than a washed out photo. To give life to a washed out photo, these two adjustment layers come into action.

You may feel that both of them works in the same way if you’re new to Photoshop. If you’re not new, you may feel that they work differently but you don’t know how. So, let me quickly differentiate between these two.

Vibrance – This slider only deals with the colors that are saturated. So if you drag this slider to the right, only less saturated colors will pop up. If you drag it to the left, only saturated colors will fade away.

Saturation – This slider does not work smartly. It doesn’t differentiate between less saturated color and more saturated color. If you drag this slider to the right, the entire image will become saturated.

What is Hue/Saturation in Photoshop?

This adjustment layer lets you change the hue of the image. The Hue is basically the wavelength of the image and each color has a different wavelength.

Saturation slider does the same job here.

Lightness increases the white of the color. If you drag the slider to the right, the photo will become lighter.

You can also click on the “Colorize” box to add a tint to your image.

What is Color Balance in Photoshop?

Color balance is the most advanced adjustment layer to remove the tint from an image. Here you can increase or decrease the intensity of Red, Green, or Blue in an image.

For example, I have corrected the slightly yellow tint in the demo image.


Below is the original image.

Color Balance layer has three tones. One is Highlights, one is Midtones, and the last is Shadows.

Highlights – If this tone is set, whatever modification you do in the image will be changed only in the highlights part. Highlights part of an image is the part which is overexposed as per the histogram. Sun and sky are the highlight parts of the image.
Midtones – If this tone is set, whatever modification you do in the image will be changed only in the midtones part. Midtones parts are neither bright nor dark. Sea is the midtone here.
Shadows – If this tone is set, whatever modification you do in the image will be changed only in the dark part. Leaves and branches are the shadow parts here.

What is Black and White Adjustment Layer in Photoshop?

This adjustment layer converts an image to Black and White. Although this method is not the one which I prefer to convert my images (I prefer Gradient Map because that gives crispier black and white) but this layer gives a good amount of flexibility.

You can also select the amount of luminosity of each primary color.

What is Photo Filter in Photoshop?

Photo Filter adds tint to the image.

You can choose the Filter (basically color) and start tinting your image. If your color is not listed, you can also choose some custom color by clicking on the “color” and then choose the color.

You can also smartly use this layer to remove the tint. For example – the original image has a yellow tint. Now we all know that the opposite of yellow is blue. So, if we choose the filter as Blue and increase the intensity then we can remove the yellow tint.

One thing I always recommend is to keep “Preserve Luminosity” turned on. This tool keeps the whites of the image white so that your highlights don’t get tinted.

What is Color Lookup in Photoshop?

I have never used this layer much but this gives some cool filters to your image. Below is an example. There’s not much to share about this layer.

What is Invert in Photoshop?

Invert adjustment layer inverts the image. The Invert command inverts all the pixel colors and brightness values in the current layer as if the image were converted into a negative. Dark areas become bright and bright areas become dark. Hues are replaced by their complementary colors.

This is all for today guys. Check out the rest of the tutorials from 30 Days to Learn Photoshop series.

Remove Chromatic Aberration in Photoshop

I have been receiving a lot of requests on how to remove chromatic aberration in Photoshop. People are saying that they’re trying to remove it but cannot remove it completely. I totally understand them. Removing it completely is really tough. You need to understand the colors of your image, but it’s not that tough. I’ll show one hack that you can use to easily remove the chromatic aberration. I have been using this hack for quite some time and it works like a charm.

I am going to use Camera RAW for this tutorial. If you’re using newer versions of Photoshop then Camera RAW is integrated into your Photoshop. If you’re using older versions of Photoshop then you need to download Camera RAW as a standalone software from adobe.com.

Before we begin, I want to show you the before and after. The photo credit goes to Reinhold Brezovszky.

Final

Initial

So, let’s begin the tutorial.

Step 1: Open the Image in Camera RAW

The first thing is to open the image in Camera RAW. Go to Filter > Camera RAW Filter. Go to Lens Correction Tab. Drag the Purple amount and green amount to all the way to the right.

You will see that almost all of the Chromatic Aberration has faded away just by doing this. But don’t trust your eyes.  😉

Step 2: Increase the Saturation

Go to Basic tab and increase the saturation all the way to 100. You’ll see that there are lots of chromatic aberration is still left.

Don’t worry. We can remove it too.

Step 3: Remove Chromatic Aberration in Photoshop

Now, again go back to Lens Correction Tab. Increase the range of Green Hue till the time you see that the chromatic aberration is gone.

Change the range of Purple if you’re facing this issue with Purple color.

Step 4: Reset the Saturation

Now, go back again to Basic Tab and reset the saturation.

That’s all!

Here’s the final photo again.

Share this tutorial with your friends and family on Facebook and Twitter and show them that it’s not tough to remove Chromatic Aberration.

I have even better tutorials on TickyPhotoshop. Check them out.

Create Instagram Clarendon Effect in Photoshop

Hey, guys! It’s been few months since I wrote about Instagram effects. Since then, Instagram has introduced tons of new filters. One of them is Clarendon. So, let me present you my new tutorial on how to create Instagram Clarendon effect in Photoshop.

Related: Create Instagram Lo-Fi Effect in Photoshop

I must say that all these Instagram effects are easy to replicate in Photoshop. You just need to know which adjustment layer to use and when to use. For this tutorial, I am going to use three unique adjustment layers which are photo filter, levels, and brightness/contrast.

Without further ado, let me bring to you the tutorial. But before that, let me show you the before and after photo.

Final

Initial

Step 1: Bring the Blue Effect with Photo Filter.

Go to Layer>New Adjustment Layer>Photo Filter.

Change the filter to Cooling Filter (82) and increase the Density to 10%. Please keep the Luminosity turned on.

Step 2: Increase the Whites with Levels

Clarendon effect overexposes a photo. Your highlight turns into something extraordinarily white. We’re going to do the same thing here. We can either use Levels or use Curves. But I think that Levels is better for this job because you get better control of your settings.

Related: Create Instagram Effects in Photoshop

Go to Layer>New Adjustment Layer>Levels

Slide the white bar to the left such that its value is 198. Please refer the screenshot below for better understanding.

Step 3: Again, Use Filter for Aqua Color

Now, we’re going to use Filter again. But this time we’re going to give some aqua color effect to the photo.

Go to Layer>New Adjustment Layer>Photo Filter.

Change the Filter to Underwater and increase the density to 55%. Make sure that the luminosity is turned on.

Unfortunately, we don’t have any aqua filter so we should be satisfied with the Underwater. Yes, we can choose a custom color but underwater serves our purpose.

Step 4: Increase the Brightness to Finally Create the Instagram Clarendon Effect in Photoshop

Now, we’re going to brighten the photo to give it the final touch.

Go to Layer>New Adjustment Layer>Brightness/Contrast.

Increase both brightness and contrast to 16.

Now, this all you need to do to create the Instagram Clarendon Effect in Photoshop.

I hope that you enjoyed the tutorial. Please share this tutorial with your friends on Facebook and show them that they can create Instagram Effects in Photoshop also.

Here’s the final photo again.

Create Motion Blur in Photoshop

Hey, guys! I posted a tutorial two weeks ago which involves a car and I showed how to create headlights. Since then I am getting a lot of requests to show how to create motion blur in Photoshop. So, I present you a tutorial on creating motion blur in Photoshop. The best part of my tutorials is that they all are short and simple. Whenever I see something which is complex to create in Photoshop, I use my mind to think how to create it in the simplest way. I know that this is what you also want to see.

Today’s tutorial won’t take much of your time and should complete in 10 minutes if you’re not a beginner. If you are, add 5-10 more minutes. I am going to use Clone Stamp Tool and a filter.

Let me show you the initial and final photo before I proceed. You can easily see that adding motion blue adds life to the photo.

Final

Initial

Step 1: Select the Moving Subject

There will always be a moving subject against which motion blur needs to be added. In my case, it’s the running man.

I am grabbing Quick Selection Tool to select the subject.

Related: How to Use Quick Selection Tool in Photoshop

Then I am going to use Select and Mask to refine the selection. Make sure that the output is a “New Layer”. Press OK.

Related: Learn how to use Select and Mask Tool in Photoshop

Step 2: Use Clone Stamp Tool to Remove the Subject

Hide the newly created layer and activate the “Background” layer.

Grab Clone Stamp tool from the tool panel or press Shift + S again and again until it comes. We need to remove the subject. So, I am going to use the trees as my source and I am going to brush the man.

Related: Learn how to use Clone Stamp Tool in Photoshop

Your photo should look like this.

Step 3: Apply Motion Blur in Photoshop

Go to Filter>Blur>Motion Blur.

The angle depends on the motion on the subject. It is horizontal in my case so I am putting the angle as 0. I am keeping the distance as 110 pixels because it suits me the best. You can change as per your preference. Press OK.


Step 4: Unhide the Subject

Now, unhide the subject and here you go.

Here is the final photo one more time.

I hope that you like the tutorial. Check out our homepage where you’ll get even more exciting tutorials.

Dragan Effect in Photoshop

Hey guys – What’s up? I received a request from Mariya and she wants to create something like the one shown below. She saw something like this on Instagram and shoot me an email to ask if I can write a tutorial to create this effect. I said “Yes”. I don’t know what’s the name of this effect but this kind of manipulation is usually called as Dragan effect in Photoshop. This is basically used for portraits but I’d like to try it for landscape.

Related: Create Grunge Portrait in Photoshop

I am going to use few adjustment layers in this tutorial and one filter. This tutorial is easy to follow and suitable for beginners.

Final

Initial

Step 1: Create Grunge Effect

The first thing that I am going to do is to create a grunge effect. The best way to add grunginess is by using High Pass filter. Duplicate the layer by pressing Ctrl+J/Cmd+J to duplicate the layer.

Now we’re going to High Pass filter. Go to Filter > Other > High Pass. Set the radius to somewhere where you can see the edges like the one you’re seeing below. Click OK.


Change the Blend mode to Soft Light.

Related: What is Blend Mode in Photoshop.


Step 2: Reduce the Color

You can use Vibrance adjustment layer to reduce the color but that wouldn’t make the effect that we’d like to achieve. Instead, we’re going to use Gradient Map. Go to Layer > New Adjustment Layer > Gradient Map. Click on the place which is named as 1. This will help you change the color. Click on the Black and White gradient is named as 2. Press OK.

Reduce the opacity to 50%.

Step 3: Change Brightness and Contrast

Go to Layer > New Adjustment Layer > Brightness/Contrast. Reduce the brightness to -24 and increase the contrast to 28.

Step 4: Give Final Grunge Effect in Photoshop

We’re going to use Curves to give the final grunge effect. Go to Layer > New Adjustment Layer > Curves. Set the line to a point where the input is 196 and output is 255.

This is all we need to create a grunge effect in Photoshop. Here’s the final photo again.

Hope you like the image. Let me know what you think of it.

Head over to the homepage to find out even more exciting tutorials.

Add Realistic Headlights in Car using Photoshop

Hey, guys! It’s been two weeks since I wrote the last tutorial, and I am sorry for that. To make up your sad faces, I bring to you an awesome tutorial. I am going to add realistic headlights in a car using Photoshop. Guess what’s the bonus point is? Guess it! It just takes 5 minutes to add them No, I am not kidding.

Last Tutorial: Photoshop Mac or Windows: Which One is Better?

Forget about all those long procedures of choosing a brush, using countless blend modes, and applying various filters to get what you want. With this tutorial, you’re just going to use one filter and one blend mode. That’s it. Of course, you need to use Free Transform tool, new layer etc. to place the headlight at the desired position but how much time do they take? Yes, almost zero.

I would like to show you the before and after image before I proceed. Here you go.

Before

After

Now that you have seen the pictures, let’s proceed with the tutorial.

Step 1: Create a New Layer with Black Color

We are going to Lens Flare filter but the filter needs to be placed on a layer which is not blank. So, we’re going to create a layer and fill that with Black color.

Press Ctrl+Shift+N/Cmd+Shift+N to create a new layer. Press D to make black as your foreground color and press Alt+Backspace/Opt+Delete to fill the layer with black color (foreground color).

After that, change the blend mode to screen. You’ll see that the black layer will become transparent. This is because “screen” blend mode shows the lighter pixel between the current layer and the layer just below it. As everything is lighter than black, so everything below the black pixels will be visible.

Sidebar: Read my tutorial on Screen Blend Mode

Step 2: Add Lens Flare Filter

Now, we’re going to add the headlights.

Go to Filter>Render>Lens Flare. Keep the brightness to 100% and change the Lens Type to Movie Prime. This bright ball will be our headlights. Press OK.


It will add a nice-looking lens flare to your image.

Let’s use Free Transform tool to move the flare to the desired position. I am going to fill the right headlight (your left) first.

Press Ctrl+T/Cmd+T to activate the Free Transform tool. Zoom out the image by pressing Ctrl+(-) and place the flare at the correct spot.

Step 3: Duplicate the Layer for Another Side

Duplicate the layer for another side. Press Ctrl+J/Cmd+J to duplicate.

Again, use Free Transform tool to place the flare to the correct spot.

Go to the next page for the bonus step. 🙂

Bonus Step

If you think that light is very bright, you can reduce the opacity. If you think that light needs to be brighter, you can duplicate the two layers.

To duplicate both layers, hold down Ctrl/Cmd and click on both layers. Press Ctrl+J/Cmd+J to duplicate both layers. Now, you can reduce the opacity also if you want to reduce the brightness. I reduced it to 42%.

Here’s the image.

Enjoyed this tutorial, right? Share it with your friends and family and show them that adding a headlight in 2 minutes is possible in Photoshop.

Head over to my home page for more awesome tutorials.

Peace.

Photoshop: Mac or Windows – Which is Better?

Many times people ask them that which one is better for Photoshop – MacBook or Windows? They know that I have used Photoshop for 2 years on my MacBook and around 3 years on Windows. Although, I did not use the Windows for 3 continuous years. I used it for 2 years before the MacBook and then from the past 1 year till today. If you’re thinking that I switched from MacBook to Windows because I think Photoshop is better for Windows than macOS then you are wrong. Or maybe not.  😆

Related: How to Optimize the Performance of Photoshop

The reason I switched to Windows that I do a lot of other stuff for my other businesses and Windows integrate better with my requirements. I still have my MacBook in my drawer and I can use it whenever I want.

Before I proceed, I would like to tell you the configurations of my current windows PC and MacBook Pro 2015 with retina display.

Dell LaptopMacBook Pro 2015
Screen1920 x 1080 pixels2560 x 1600 pixels (winner)
ProcessorIntel i7 (winner)Intel i5
RAM8 GB8 GB
Graphics Memory4 GB (winner)1 GB
Hard Drive1 TB SATA256 GB SSD (winner)
Price$1099 (cheaper)$1299

This is all a software requires to run. You might be wondering that my Dell has 1 TB space then why did it lose against my MacBook’s 256 GB. The reason is that my Dell has SATA hard drive and MacBook has SSD. The SSD drives are much faster than SATA drives. If you want to test, then test the speed of iMac 2013 with iMac 2015. Both desktops are almost same except that iMac 2015 has SSD, but iMac 2015 takes 1/3rd of time to boot up when compared to iMac 2013. This is the power of SSD drive.

If you want to know the recommended system requirements for Photoshop, head over to the Adobe’s site. The link will open in a new tab.

Let me give you my experience with the Help of a Table:

I learned Photoshop on Windows so Windows stay close to my heart. This does not mean that I will be biased towards Windows. The reason I went for MacBook two years later because I saw almost all the Photoshop users use macOS and I want to try that out also. #Curiosity

WindowsMacBook Pro
StartupI honestly feel that Photoshop takes a lot more time to startupI used three different versions of Photoshop and all of them loaded within 5-6 seconds. I must say that 5-6 is good amount of time given that Photoshop is quite a big software
SpeedI don’t see a big difference in speed when compared with MacBook.But some calculation intensive functions like refine edge tool, liquify tool takes a bit more on MacBook. But it’ll be 2-3 seconds more, not 30-40 seconds.
TouchpadNone of Window’s laptop has force touchpad technology which is a big loss.MacBook force touchpad works seamlessly with Photoshop. The ability to click anywhere on the touchpad is the best thing that anyone can have.
Zooming in and Moving an ImageI include this point because this is a vital part. We all zoom in a lot in Photoshop and Windows work smoothly with zoomed in imagesMacBook lags a bit when you zoom in and move your image. The movement is not smooth which is not designer-friendly.
FeaturesBoth Windows and MacBook have equal featuresBoth Windows and MacBook have equal features
Keyboard ShortcutsWindows has “windows” button which MacBook does not have. This button does not do any task in PhotoshopMacBook has “Command” and “Control” button. They both work in Photoshop. So, MacBook has one extra button that windows don’t have and Adobe utilized it for keyboard shortcuts. This is why you have more keyboard shortcuts available on a MacBook.
StabilityWhole world knows that Windows is less stable than macOS and Photoshop cannot escape. In the past one year, my computer got hanged 7 times when I was using Photoshop. Thanks to the Auto Save feature in Photoshop not all of my work got lostMy MacBook never ever got frozen in 2 years. Cheers, Apple!
PricePhotoshop subscription remains same for both OS but machine price varies. Windows laptops are a lot cheaper and you can get one at $200.MacBook is notoriously expensive and everyone cannot afford it. If you go for a 15″ model, you can buy a small car at that price.
Photoshop PluginsThere are a variety of Photoshop plugins for Windows but lesser when compared to macOSAlmost, all plugin manufacturers know that majority of their potential customers use MacBook. So, they generally first launch their plugin for MacBook owners and then for Windows. The smaller firms which don’t have the budget to create a plugin for both OS, satisfies themselves with a plugin for MacBook owners only.

Final Verdict

Back in the 1980s, computers were quite expensive and only rich people could afford them for personal use. When Microsoft first developed Windows, they said that it’s an OS for people who want to use computers in their homes.  Still today, Windows want you to use your PC and a personal computer. Yes, there are few versions which target enterprises, but deep-down windows are meant for personal use.

macOS is also made for day to day use but Apple focuses a lot on creativity. If you see Apple adverts or its website, you will see at least a split-second scene where a designer is designing something on his MacBook, iPad, iMac, etc. Therefore, designers like macOS more and they go for MacBook.

Although Adobe never says that they give preference to one OS more than others, but I personally feel that Adobe support macOS more than windows. You can see that almost all the Adobe tutorials, help guides, or videos are made on macOS. I don’t remember that I saw them using Windows. Even in webinars, they use Apple’s products.

If you ask my opinion that if I must choose one OS, I would choose macOS. I don’t know the main reason but I feel more connected with Photoshop on my MacBook.

I am using Windows nowadays because TrickyPhotoshop is not all of my company, it is one of my company. In my other companies, I need to do a lot more on my laptop (Photoshop does not count here) and windows work better.

How to Crop an Image in a Circle in Photoshop

Nowadays, we are seeing that a lot of apps are asking for circular images for profile pictures. If they’re user-friendly, they crop an image in a circle by themselves. Otherwise, you need to crop an image in a circle in Photoshop and upload to the app. The good thing is that it takes less than a minute in Photoshop to crop an image. The bad thing is that you need to open Photoshop and do the work. 😞

Related: Not a while ago I wrote a tutorial on Crop tool in Photoshop where I explained the entire cropping process. The link will open in a new tab.

Before I proceed, I want to show you the final picture where an image of a guy is cropped in a circle.

So let’s start the tutorial.

Video

If you like watching videos, here’s the video tutorial for you.

Step 1: Draw a Circle with the Marquee Tool

Grab an Elliptical Marquee tool from the tool panel or press Shift+M again and again until it comes.

Sidebar: I have written a tutorial on Elliptical Marquee tool in Photoshop. If you need to learn more on Elliptical Marquee Tool in Photoshop, head over there. The link will open in a new tab.

Step 2: Draw a Circular Selection

Hold down the Shift key and draw a selection around the face. The Shift key will make sure that the selection always stays circular. If you’re using Rectangular Marquee tool, holding down the Shift key will keep the selection square.

Right now, you don’t need to worry about the center of the circle. We’ll adjust it in the next step.

Step 3: Adjust the Center of the Selection

Now move your mouse to the inside of the circle. You will notice that the cursor changes. This shows that you can move your selection.

Now place the circle in a place which suits you. The area inside the circle will be the area which remains once the cropping is done.

Step 4: Copy the Selection to a New Layer

Now we’re going to copy the selected area to a new layer.

Press Ctrl+J/Cmd+J to duplicate the selection to a new layer. Open the Layer Panel by pressing F7 and you will see a new layer.

Hide the “Background Layer” by clicking on the button that is highlighted with the red rectangle. Once it is done, all the image is gone except the selected area and you will see the background which is shown above. This kind of Photoshop background tells that there’s actually no background present in the image. The area is transparent.

Step 5: Crop an Image in a Circle in Photoshop

After this, we are going to trim all the transparent pixels so that the selection stays. This is the most important step in this tutorial of crop an image in a circle in Photoshop.

Go to Image>Trim and choose Transparent Pixels. Press OK.


Once it is done, Photoshop will crop every single thing except the face.

Step 6: Don’t Save it in JPG

If you don’t want the background, don’t save it in JPG. JPG doesn’t support transparency and adds white background automatically. Save in PNG as PNG supports the transparent background.

Go to File>Save As or press Ctrl+Shift+S/Cmd+Shift+S and choose the format as PNG and save. That’s it. This is how you crop an image in a circle in Photoshop.