How to add bleed and crop in Photoshop

photoshop image editor

You might have never heard about bleed and crop if you post your photos online and never bothered about printing them. But, you might head bleed and crop a lot if you print your photos or design. Today, we’re going to see how to add bleed and crop in Photoshop.

Photoshop has not given any standalone feature to add bleed and crop but has given some features that you can use to add bleed and crop. Let’s see how to use it.

Let’s start with the bleed first because we use it more than the crop.
1. How to add bleed in Photoshop?

Before we begin with how to add bleed, let’s understand what is bleed first.

1.1 What is bleed in printing?

Wikipedia has given a very nice and clean definition of bleed.

In printing, bleed is printing that goes beyond the edge of where the sheet will be trimmed. In other words, the bleed is the area to be trimmed off. – Wikipedia

Many economical printers are not capable enough to print edge to edge. So, they left a small piece of an area on the left and right. This left out area is called as bleed.

1.2 How much bleed should I add?

Many printing sites specify the exact bleed size you need to put on your document. If they don’t, a rule of thumb is to go for 0.25 inches on all the four sides.

Now, let’s add bleed in Photoshop

1.3.1 Step 1 – Adding the ruler

Text editing software like Microsoft Word, Apple Pages, and Adobe InDesign, etc. have a dedicated menu bar for this. But, in Photoshop, we need to use Guides to add bleed.

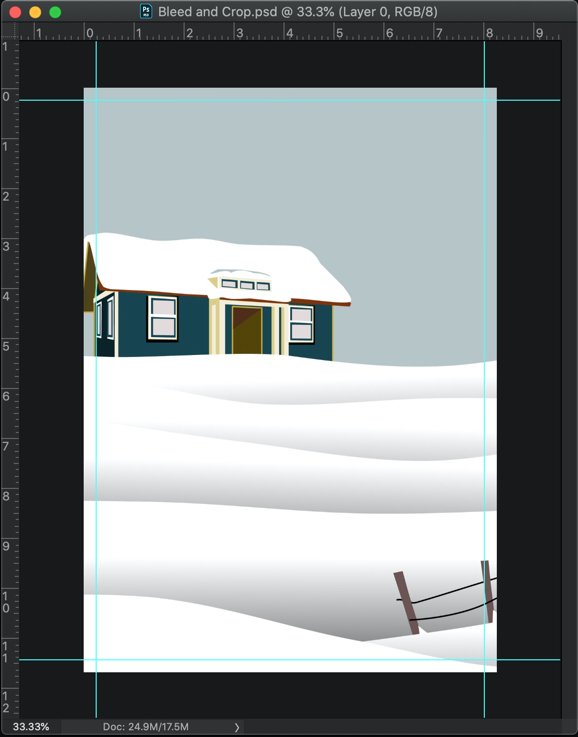
The below photo is A4 in size. It has a width of 8.2 inches and has a height of 11.6 inches, and has a resolution of 300 pixels per inch. Let’s add a bleed of 0.25 inches.
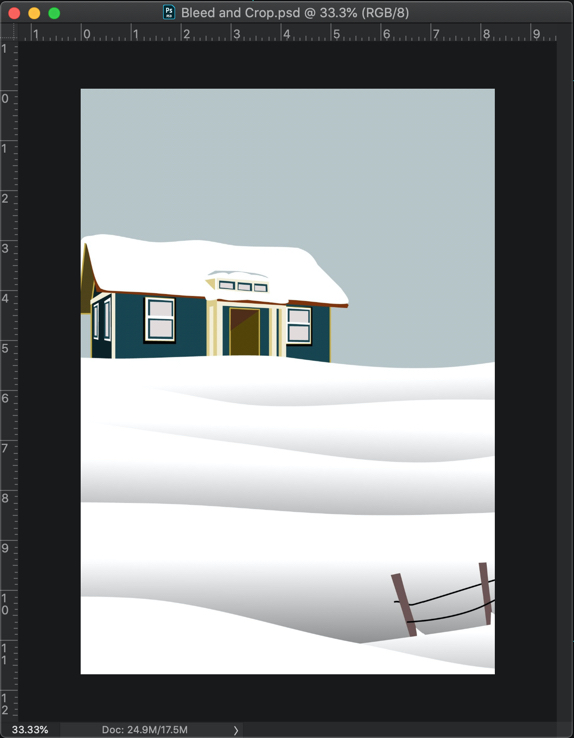
Credit – Image by naobim from Pixabay

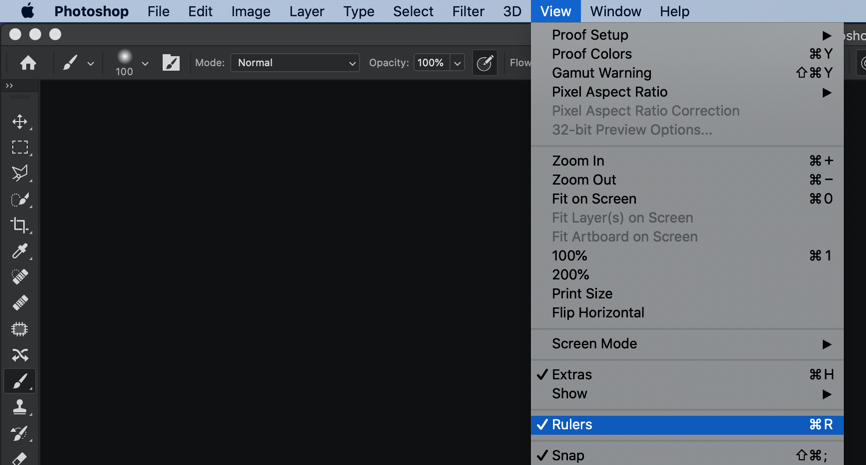
The first thing we need to do is that we need to add Ruler. Go to View > Ruler or press Cmd + R / Ctrl + R.
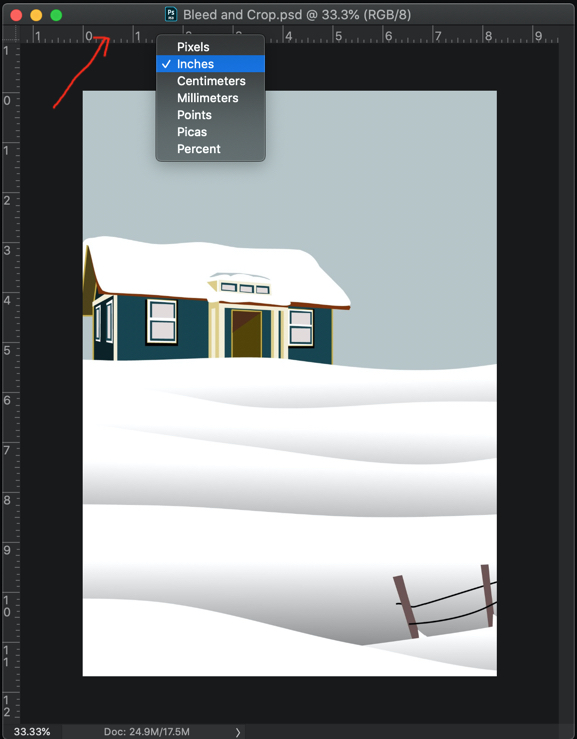
Now, right-click on the Ruler and select Inches.
1.3.2 Step 2 – Adding the guide for the bleed in Photoshop

Go to View > New Guide Layout.
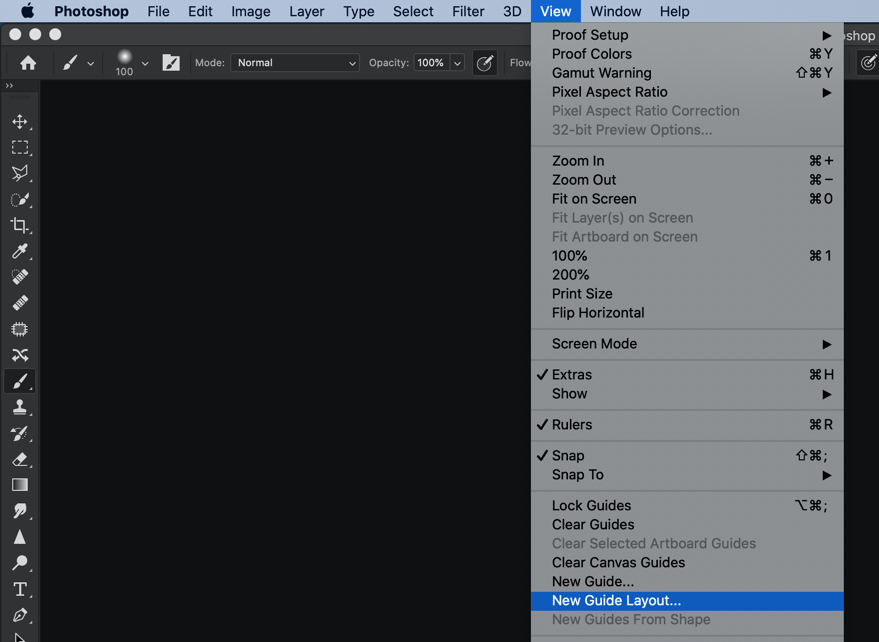
Now, write 0.25 in all the four fields of the Margin. Press OK.
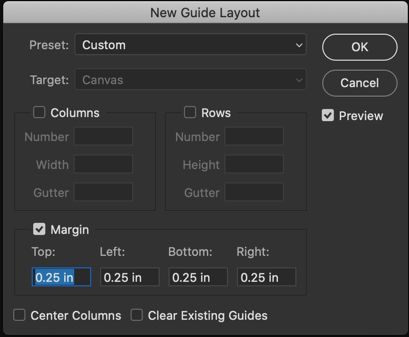
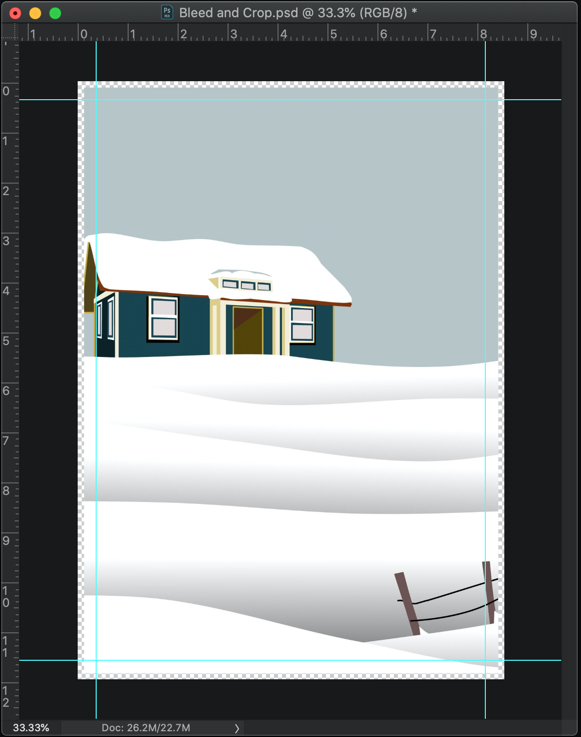
This will add a guide that has a width of 0.25 inches. It’s better to keep all your designs and photo inside this guide.
2. How to add crop in Photoshop?

Before we begin with how to add a crop, let’s understand what is crop first.

2.1 What is the crop in printing?

This is not the cropping that you hear a lot. This is different than cutting out the unwanted part of a photo that we usually do with photos before uploading them on social media sites.

Crop marks, also known as trim marks, are lines printed in the corners of your publication’s sheet or sheets of paper to show the printer where to trim the paper. – Microsoft

2.2 How much crop should I add?

Printing sites specify the exact crop size you need to put on your document. If they don’t, a rule of thumb is to again go for 0.25 inches on all the four sides.

Now, let’s add crop in Photoshop.

2.3.1 Step 1 – Increasing the canvas

Go to Image > Canvas Size or press Cmd + Opt + C / Ctrl + Alt + C.
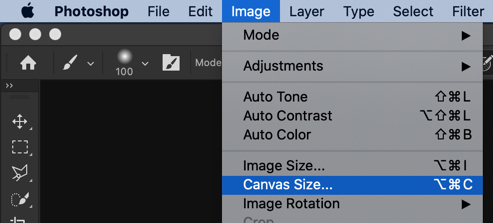
While making sure that the unit is inches, write 0.25. Keep the Anchor at the center and make sure that Relative is turned on.

Press OK.
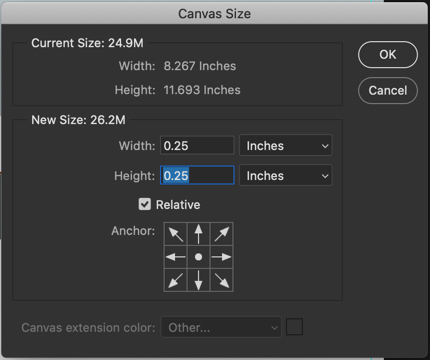
This will increase the size of the document by 0.25 inches.

The square boxes you’re seeing on the edges are actually the transparent area. It’s included in the document but not painted with any color.

If somehow you print this transparent area, then nothing will be printed. A pink paper will come out as pink, a yellow paper would come out a yellow, and white will come out as a white.

This is all, guys. This is how you add bleed and crop in Photoshop.

How to place two photos side by side in Photoshop?

Placing two similar photos side by side looks beautiful. In the world of Instagram, this thing has become a trend and so many influencers are doing this. I thought that why should I not write a tutorial on how to place two photos side by side in Photoshop.

You’re recommend you to use photos which has more height than the width (basically portrait mode) because you don’t want the final photo to be too wide.

I am going to use

  • Crop Tool
  • Layer panel
  • Free Transform tool

to achieve this effect.

This is how the final photo would look like.

Final.jpg

Let’s start

Step 1: Crop both photos

Open both photos in Photoshop.

Grab the Crop Tool from the tool panel or press Shift + C again and again until it comes.

1.jpg

Now, crop the photos to the same width and height.

Don’t know how to crop a photo in Photoshop? I have written a tutorial on how to crop a photo in Photoshop which you can see.

Here are my photos. They both are 800 pixels wide and 1200 pixels high.

2.jpg

3.jpg

Step 2: Increase the canvas size

Decide the photo which you want to put on the left. Go to that photo.

I decided that this photo would be the photo that I’d put on the left side.

2

Go to Image > Canvas Size or press Cmd + Opt + C / Ctrl + Alt + C.

4.jpg

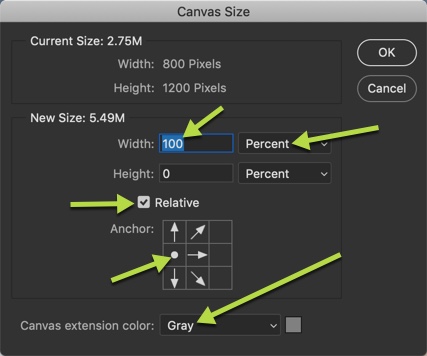
Change the measurement to Percent.

Write the Width as 100.

Make sure that Relative box is checked.

Change the Anchor to the mid-left box.

Change the Canvas extension color to Gray.

Press OK

5.jpg

Photoshop will add a gray background to the right.

6.jpg

Step 3: Place two photos side by side in Photoshop

Go to the second photo.

We’re going to select the entire photo to copy. Press Cmd + A / Ctrl + A to select the entire photo. Press Cmd + C / Ctrl + C to copy the photo.

7.jpg

Do you see that dashed line along the edges of the photo? That means that I have selected the entire photo.

Go back to the first photo. Press Cmd + V / Ctrl + V to paste the photo.

Photoshop will place the photo at the center.

8.jpg

Step 4: Align the second photo

Time to align the pasted photo. We’ll do it with the help of the Free Transform Tool.

Go to Edit > Free Transform or press Cmd + T / Ctrl + T.

9.jpg

Now drag the second photo till its right edge aligns with the canvas. Press Return/Enter to deactivate the Free Transform.

Pro Tip: To move the photo in a straight line, hold down Shift while dragging.

10.jpg

This is how the photo would look like.

11.jpg

How to Crop an Image in a Circle in Photoshop

Nowadays, we are seeing that a lot of apps are asking for circular images for profile pictures. If they’re user-friendly, they crop an image in a circle by themselves. Otherwise, you need to crop an image in a circle in Photoshop and upload to the app. The good thing is that it takes less than a minute in Photoshop to crop an image. The bad thing is that you need to open Photoshop and do the work. 😞

Related: Not a while ago I wrote a tutorial on Crop tool in Photoshop where I explained the entire cropping process. The link will open in a new tab.

Before I proceed, I want to show you the final picture where an image of a guy is cropped in a circle.

So let’s start the tutorial.

Video

If you like watching videos, here’s the video tutorial for you.

Step 1: Draw a Circle with the Marquee Tool

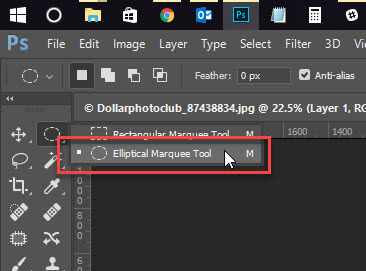
Grab an Elliptical Marquee tool from the tool panel or press Shift+M again and again until it comes.

Sidebar: I have written a tutorial on Elliptical Marquee tool in Photoshop. If you need to learn more on Elliptical Marquee Tool in Photoshop, head over there. The link will open in a new tab.

Step 2: Draw a Circular Selection

Hold down the Shift key and draw a selection around the face. The Shift key will make sure that the selection always stays circular. If you’re using Rectangular Marquee tool, holding down the Shift key will keep the selection square.

Right now, you don’t need to worry about the center of the circle. We’ll adjust it in the next step.

Step 3: Adjust the Center of the Selection

Now move your mouse to the inside of the circle. You will notice that the cursor changes. This shows that you can move your selection.

Now place the circle in a place which suits you. The area inside the circle will be the area which remains once the cropping is done.

Step 4: Copy the Selection to a New Layer

Now we’re going to copy the selected area to a new layer.

Press Ctrl+J/Cmd+J to duplicate the selection to a new layer. Open the Layer Panel by pressing F7 and you will see a new layer.

Hide the “Background Layer” by clicking on the button that is highlighted with the red rectangle. Once it is done, all the image is gone except the selected area and you will see the background which is shown above. This kind of Photoshop background tells that there’s actually no background present in the image. The area is transparent.

Step 5: Crop an Image in a Circle in Photoshop

After this, we are going to trim all the transparent pixels so that the selection stays. This is the most important step in this tutorial of crop an image in a circle in Photoshop.

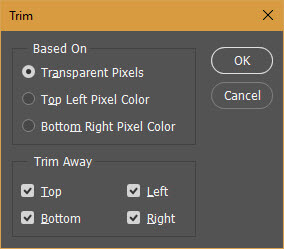
Go to Image>Trim and choose Transparent Pixels. Press OK.


Once it is done, Photoshop will crop every single thing except the face.

Step 6: Don’t Save it in JPG

If you don’t want the background, don’t save it in JPG. JPG doesn’t support transparency and adds white background automatically. Save in PNG as PNG supports the transparent background.

Go to File>Save As or press Ctrl+Shift+S/Cmd+Shift+S and choose the format as PNG and save. That’s it. This is how you crop an image in a circle in Photoshop.