Hey, guys! It’s been few months since I wrote about Instagram effects. Since then, Instagram has introduced tons of new filters. One of them is Clarendon. So, let me present you my new tutorial on how to create Instagram Clarendon effect in Photoshop.
Related: Create Instagram Lo-Fi Effect in Photoshop
I must say that all these Instagram effects are easy to replicate in Photoshop. You just need to know which adjustment layer to use and when to use. For this tutorial, I am going to use three unique adjustment layers which are photo filter, levels, and brightness/contrast.
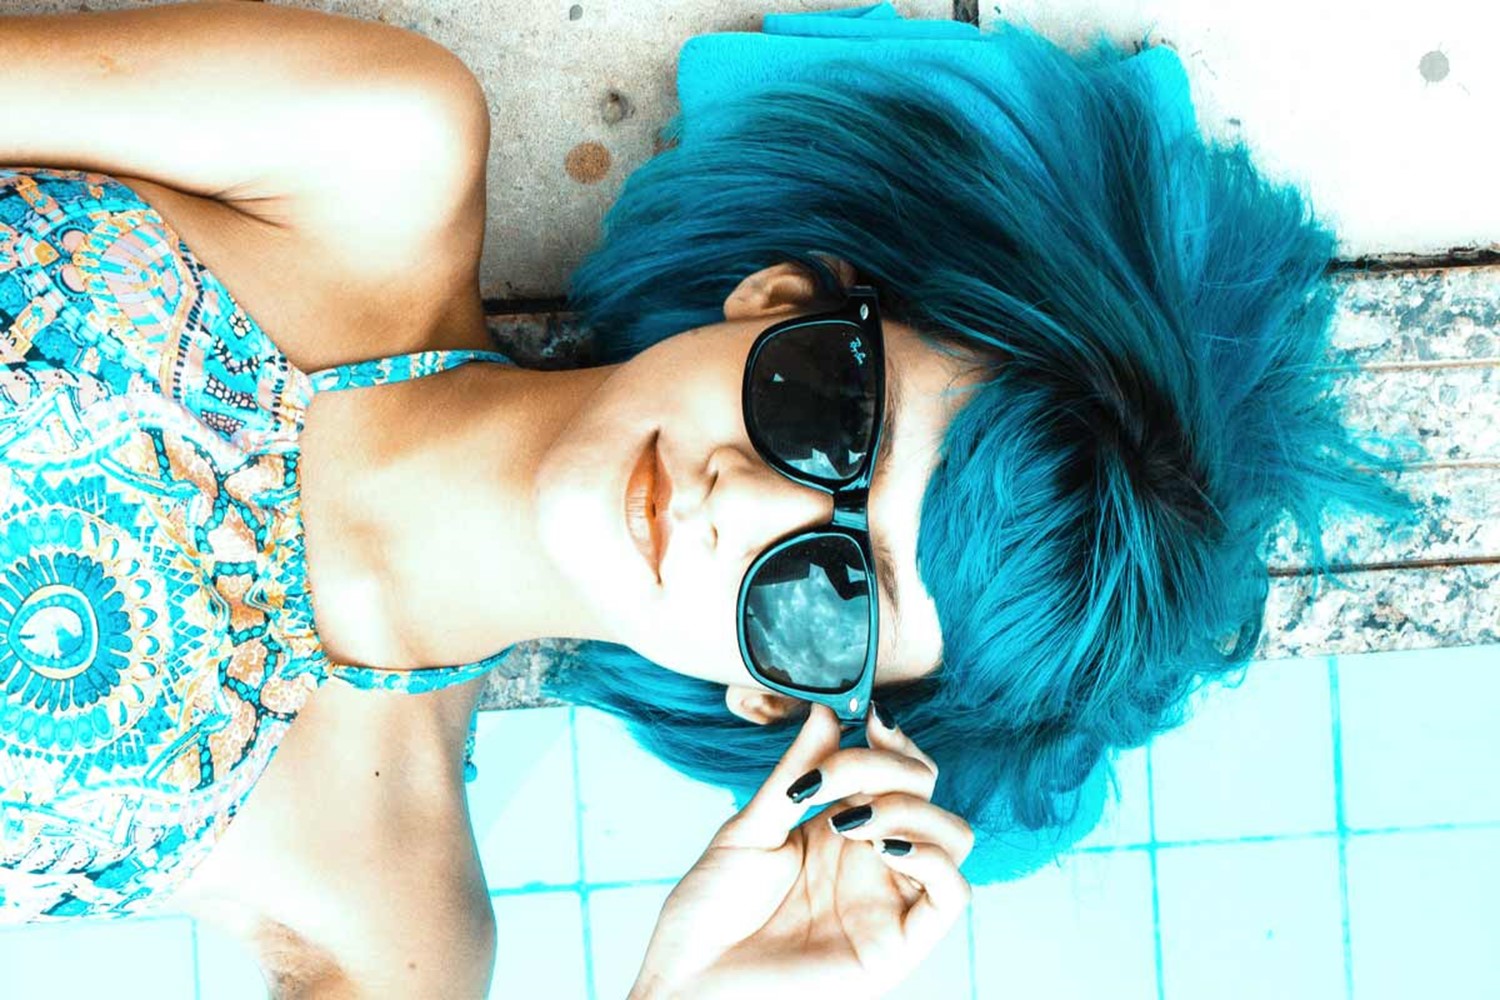
Without further ado, let me bring to you the tutorial. But before that, let me show you the before and after photo.
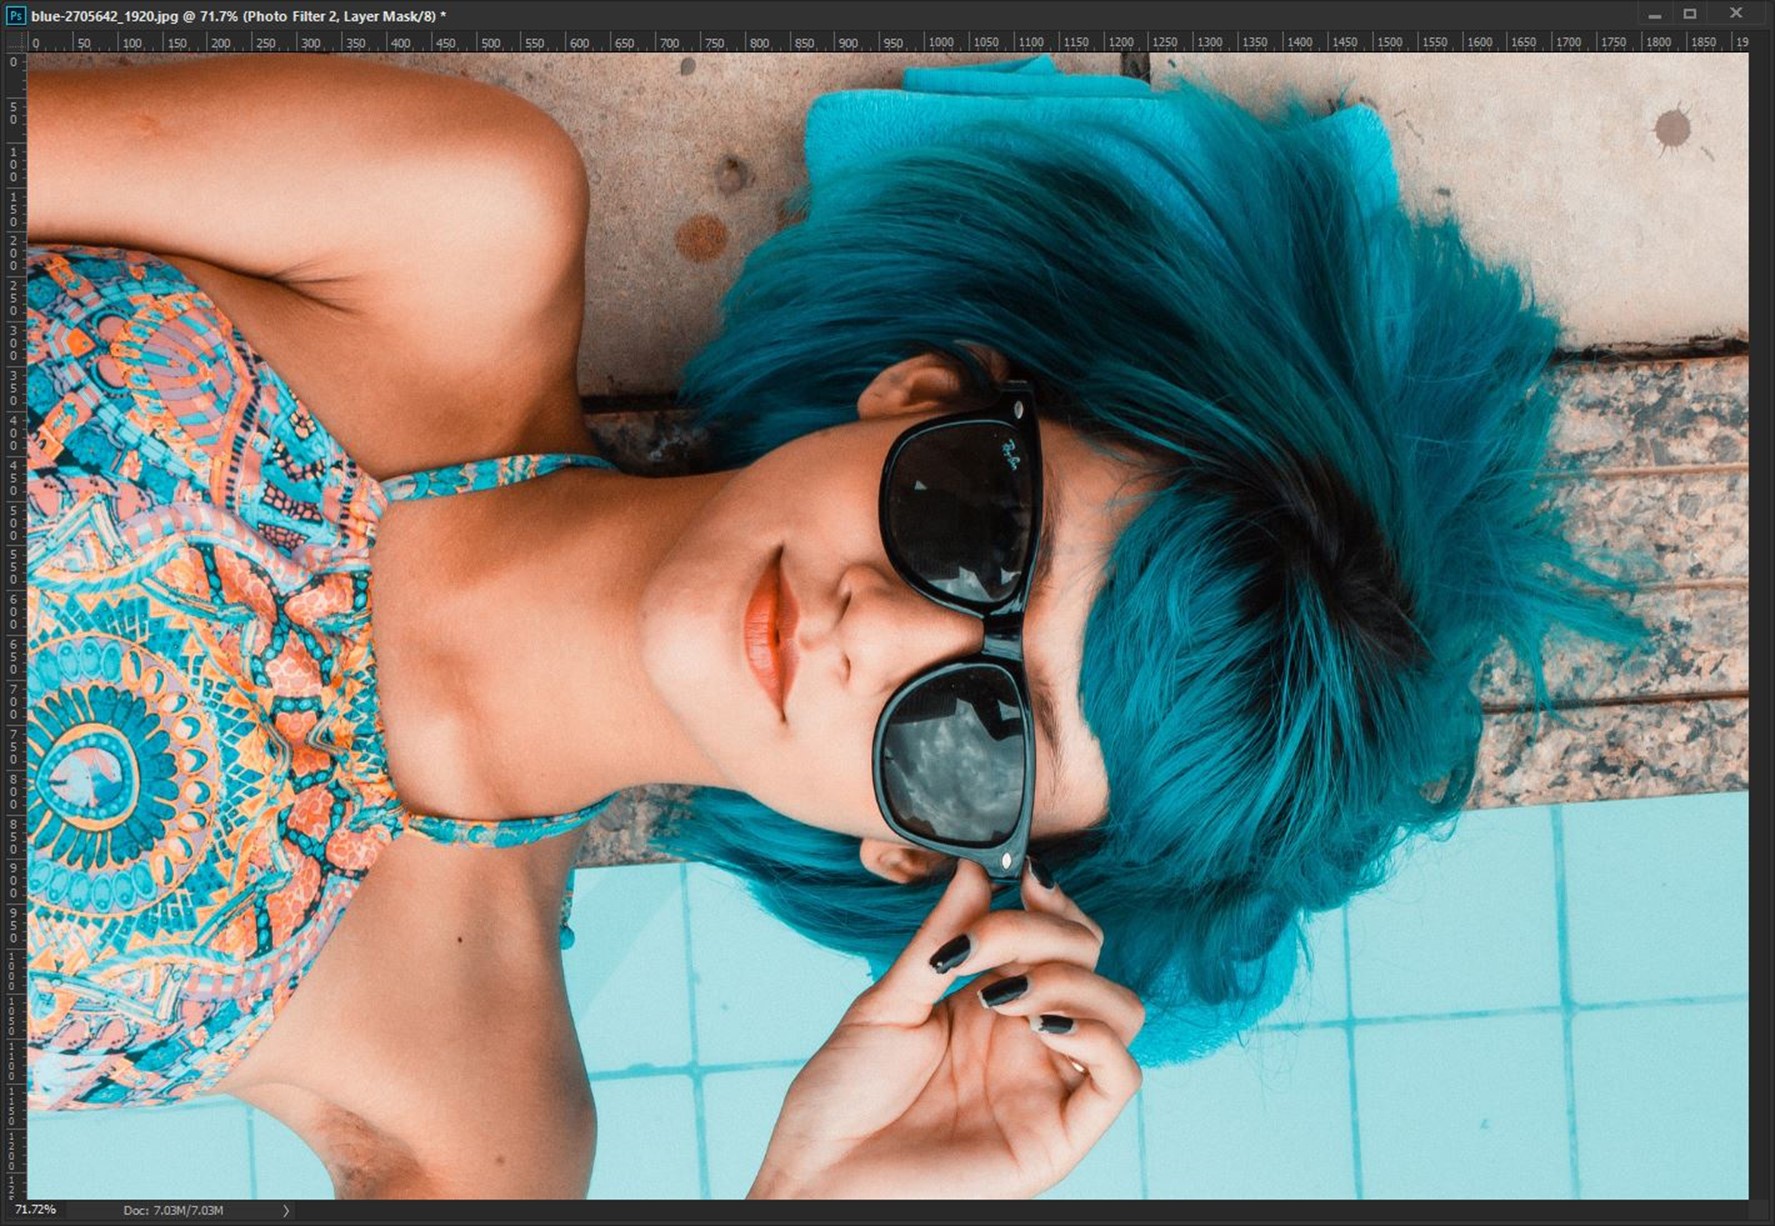
Final

Initial
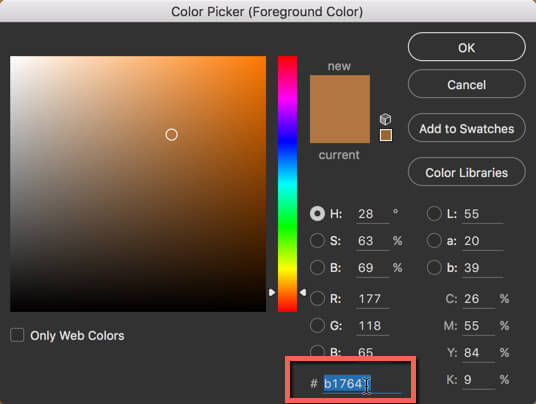
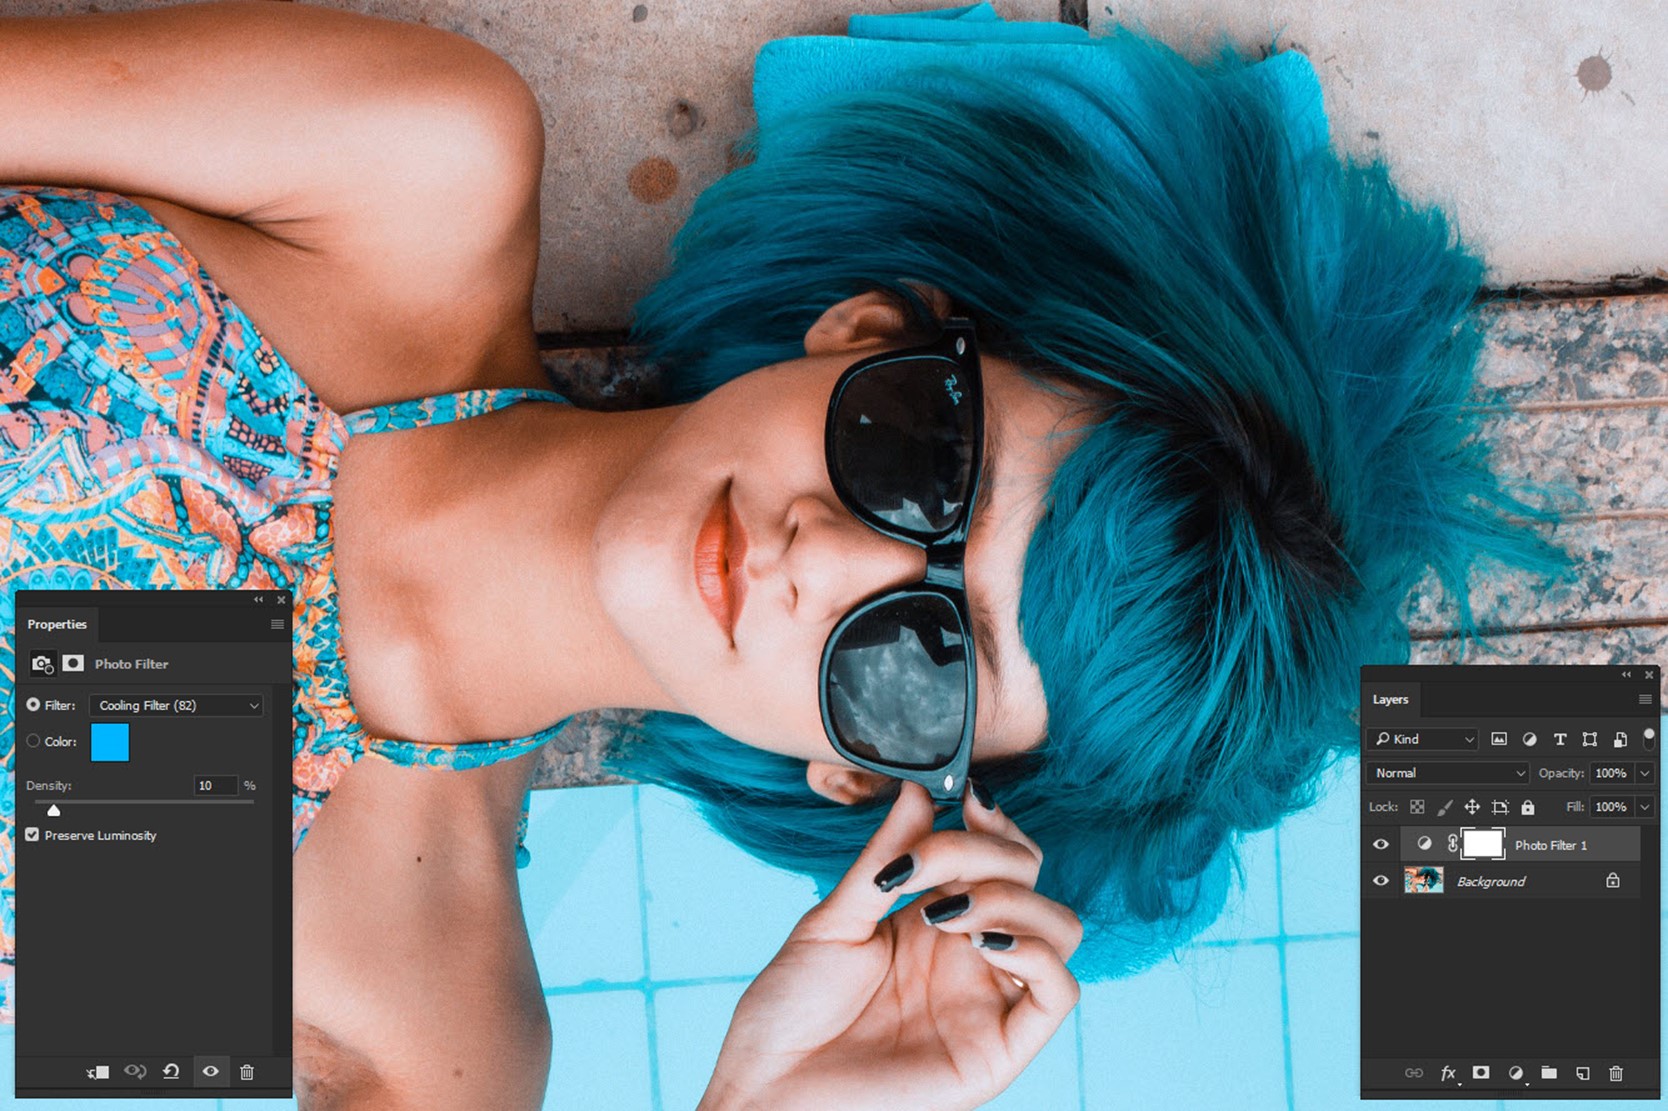
Step 1: Bring the Blue Effect with Photo Filter.
Go to Layer>New Adjustment Layer>Photo Filter.
Change the filter to Cooling Filter (82) and increase the Density to 10%. Please keep the Luminosity turned on.
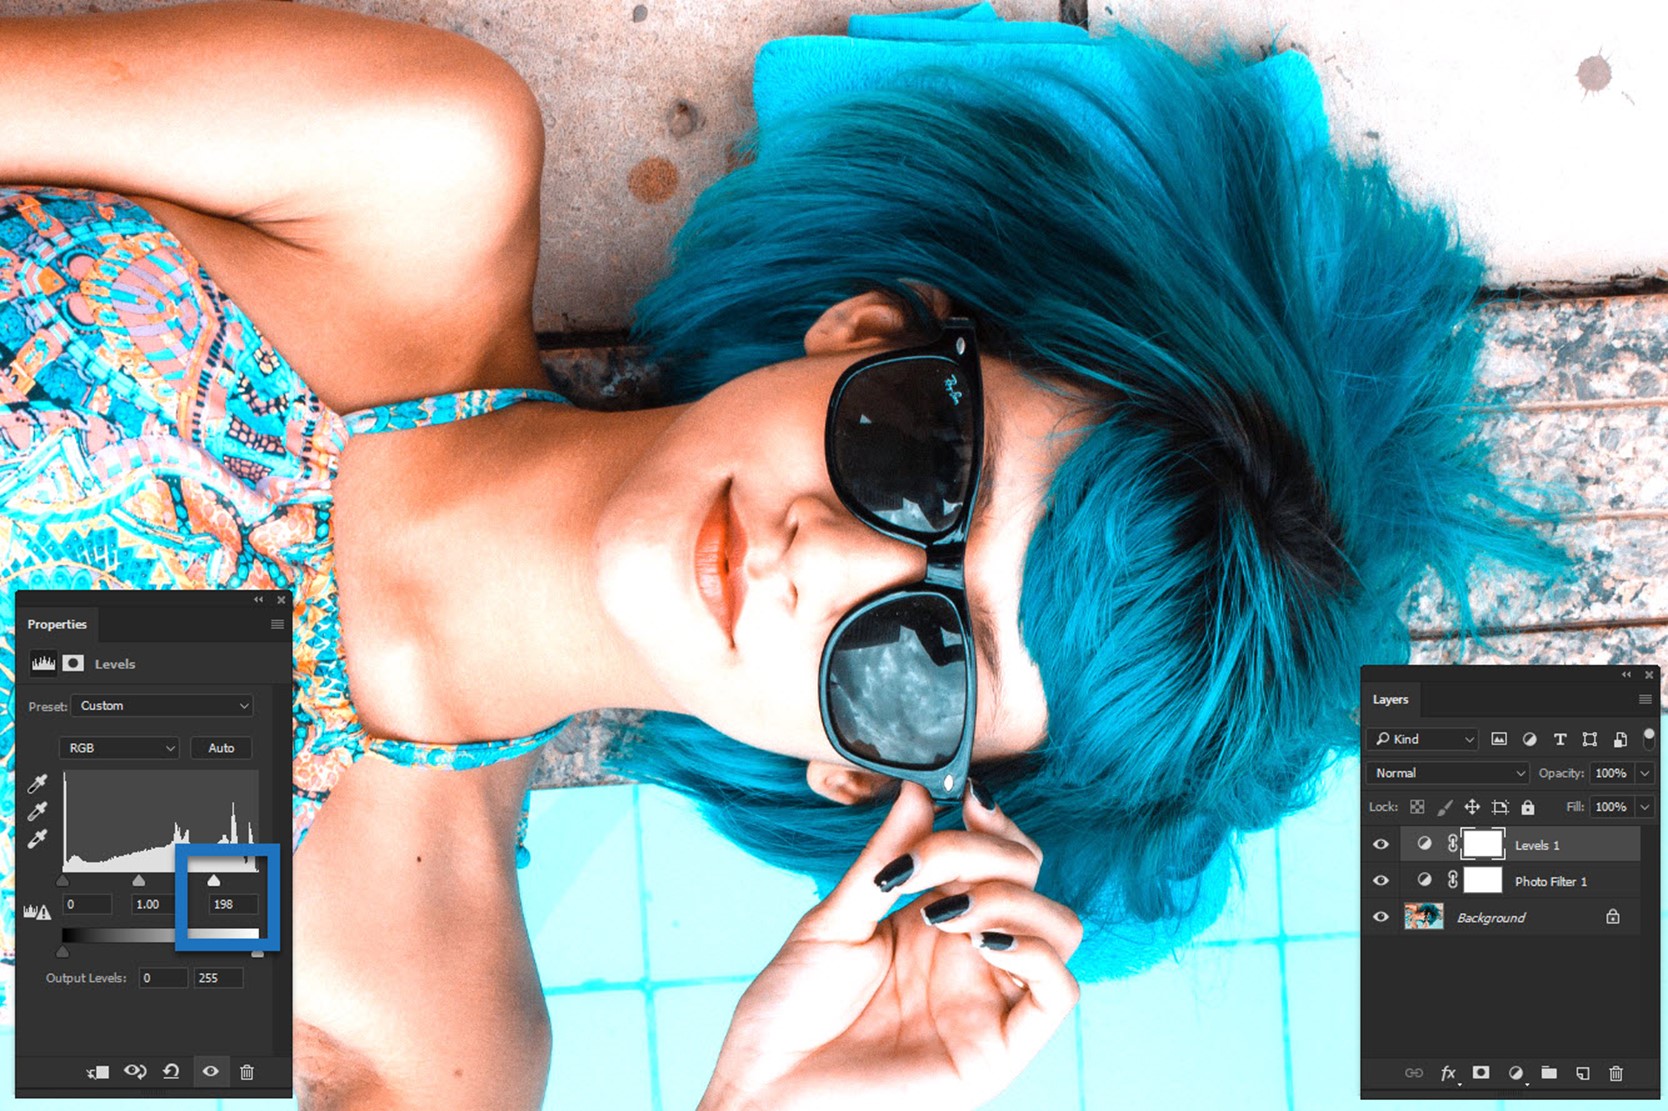
Step 2: Increase the Whites with Levels
Clarendon effect overexposes a photo. Your highlight turns into something extraordinarily white. We’re going to do the same thing here. We can either use Levels or use Curves. But I think that Levels is better for this job because you get better control of your settings.
Related: Create Instagram Effects in Photoshop
Go to Layer>New Adjustment Layer>Levels
Slide the white bar to the left such that its value is 198. Please refer the screenshot below for better understanding.
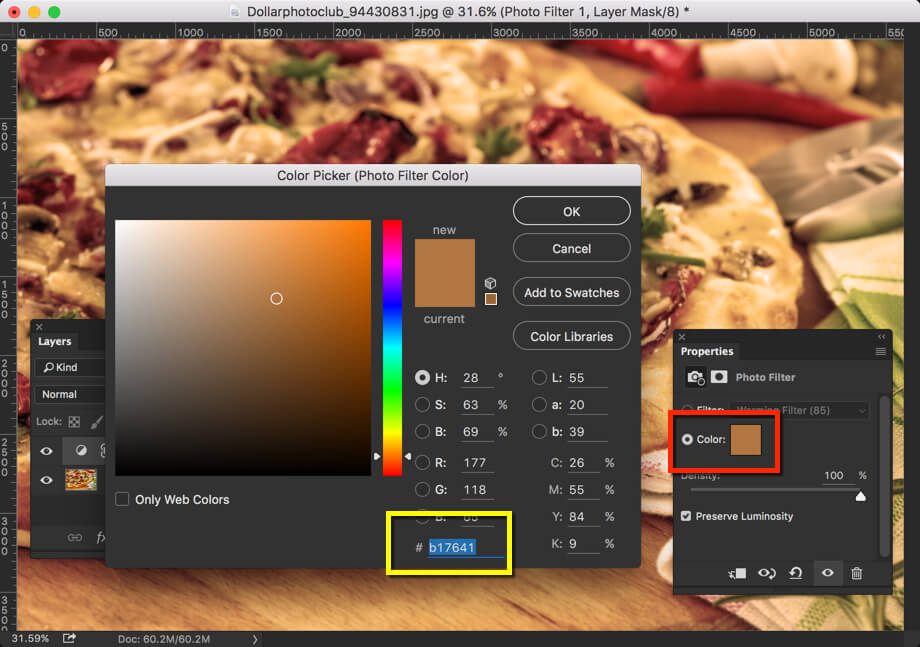
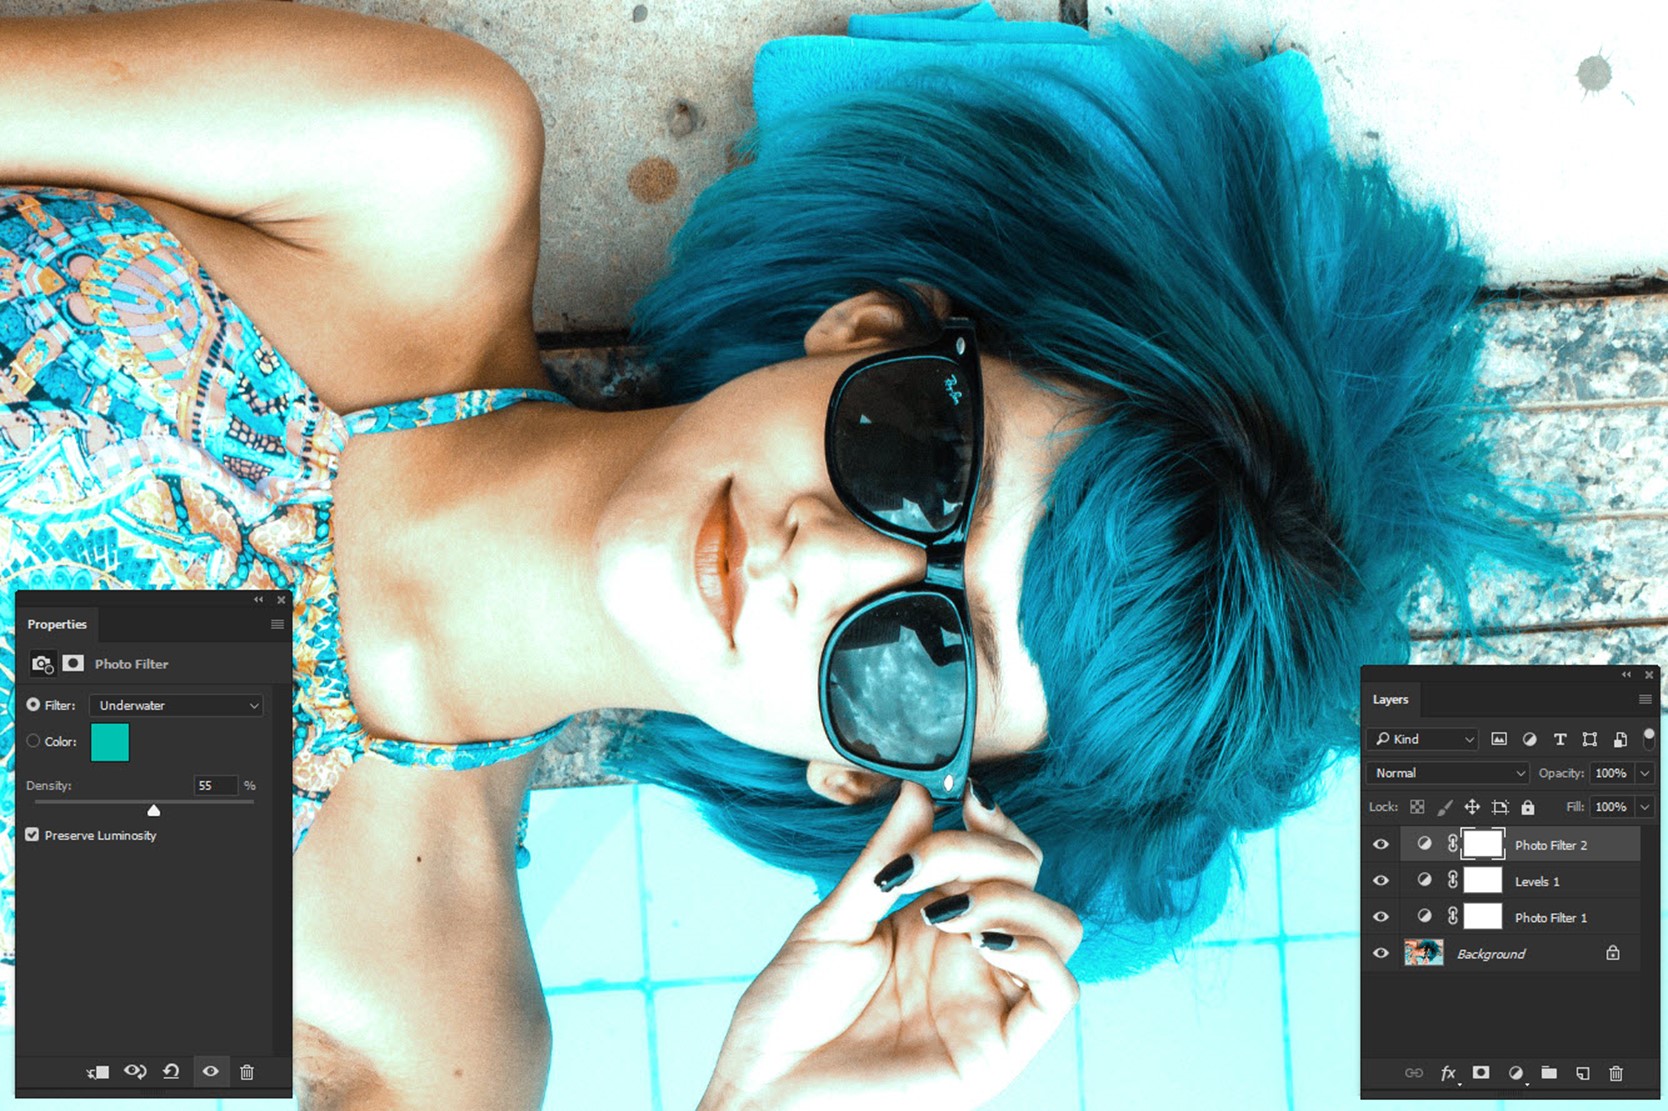
Step 3: Again, Use Filter for Aqua Color
Now, we’re going to use Filter again. But this time we’re going to give some aqua color effect to the photo.
Go to Layer>New Adjustment Layer>Photo Filter.
Change the Filter to Underwater and increase the density to 55%. Make sure that the luminosity is turned on.
Unfortunately, we don’t have any aqua filter so we should be satisfied with the Underwater. Yes, we can choose a custom color but underwater serves our purpose.
Step 4: Increase the Brightness to Finally Create the Instagram Clarendon Effect in Photoshop
Now, we’re going to brighten the photo to give it the final touch.
Go to Layer>New Adjustment Layer>Brightness/Contrast.
Increase both brightness and contrast to 16.
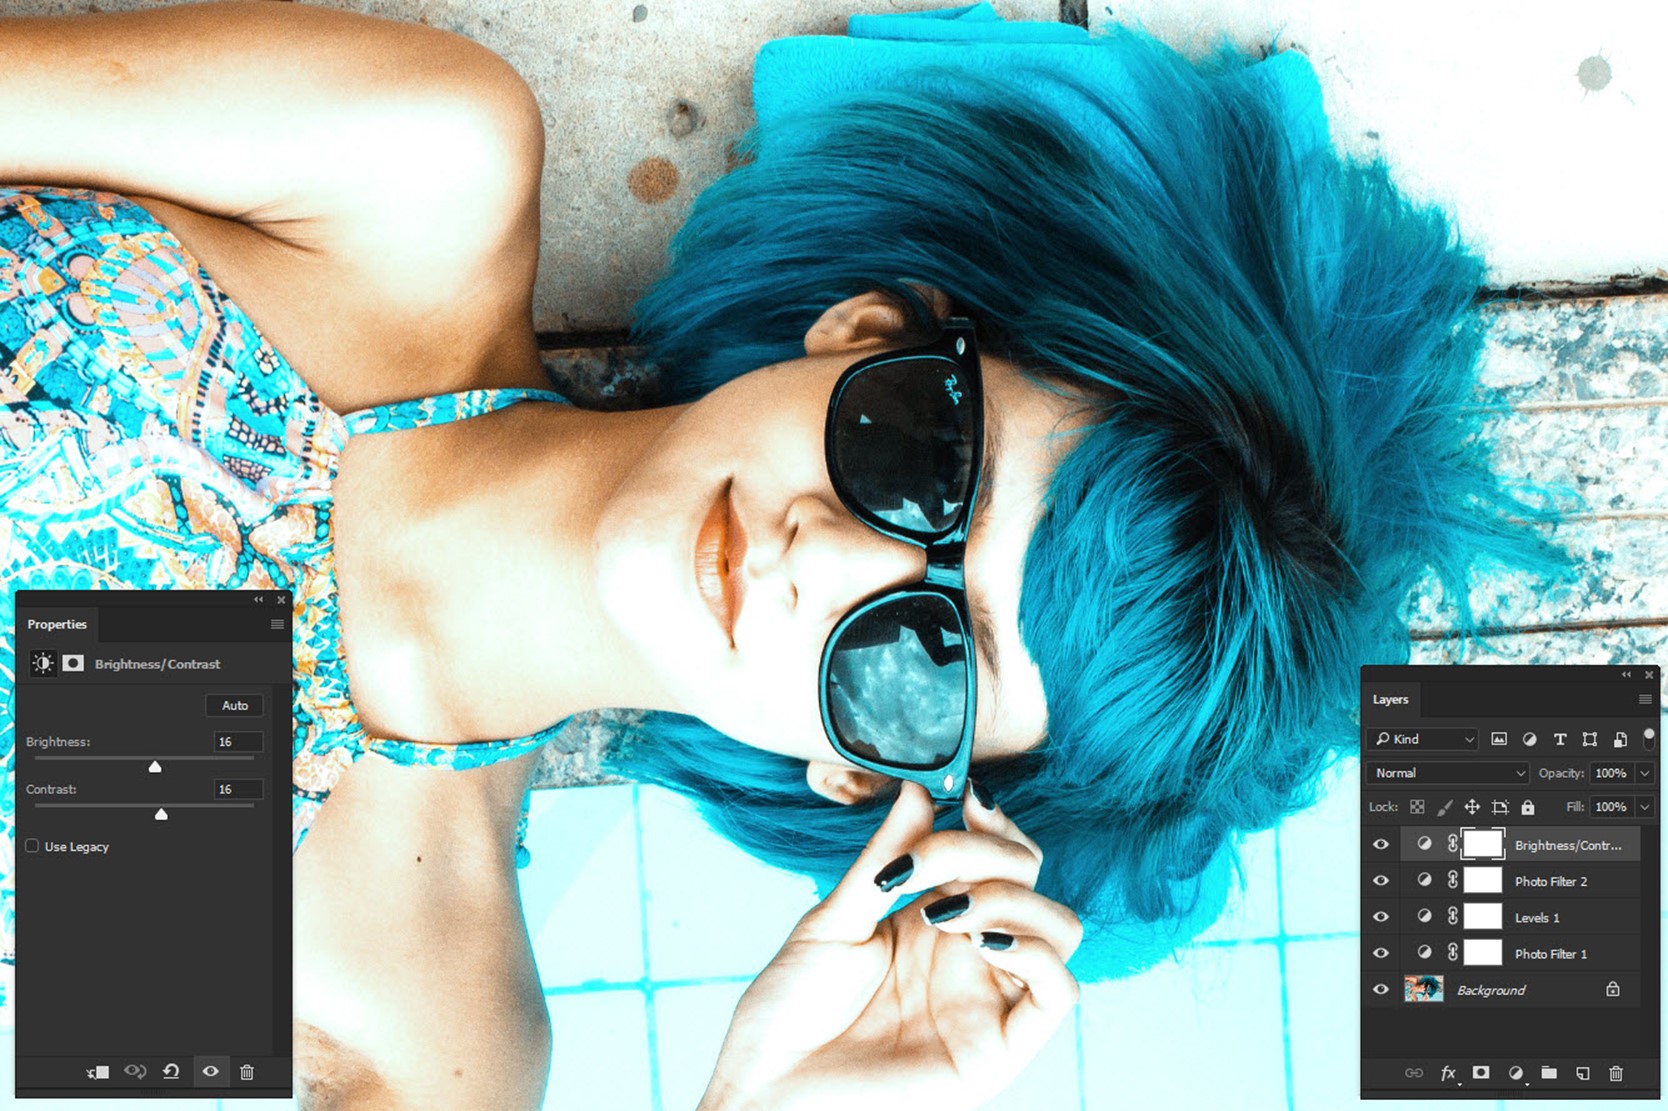
Now, this all you need to do to create the Instagram Clarendon Effect in Photoshop.
I hope that you enjoyed the tutorial. Please share this tutorial with your friends on Facebook and show them that they can create Instagram Effects in Photoshop also.
Here’s the final photo again.