What’s new in Photoshop CC 2019 for you?

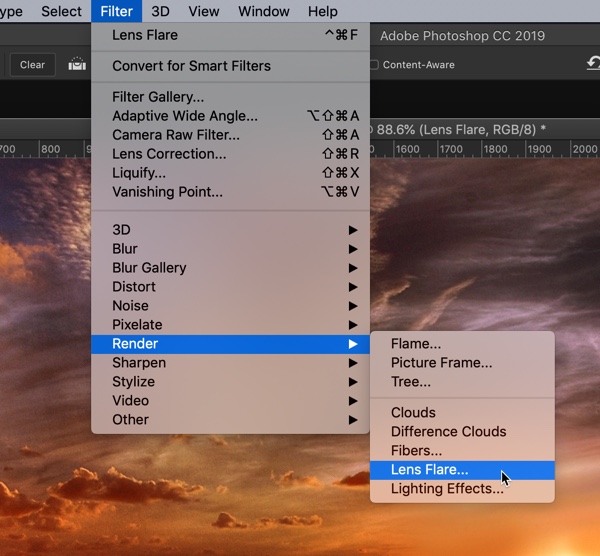
Photoshop is perhaps the most popular tool in the entire world. This iconic software by Adobe gives everyone the opportunity to become an artist and touch up photos.

Photoshop is so popular that people buy laptops specifically to run it. Every graphic designer, artist or any creative soul can benefit from Photoshop and its myriad of features. Adobe is well aware of that and, as a reason, they have started improving their upgrades.

The most recent one, Photoshop CC, from October 2018, has more upgrades for creative-minded individuals than ever. With the sheer number of new features, it’s hard to try them all and use them to your advantage.

To help you find the latest Photoshop upgrades for creative people and use them, we’ve decided to cover all the novelties in this article. Study them thoroughly and you will be able to Harness the true capabilities of this iconic graphics software.

Use the Frame Tool to mask easily

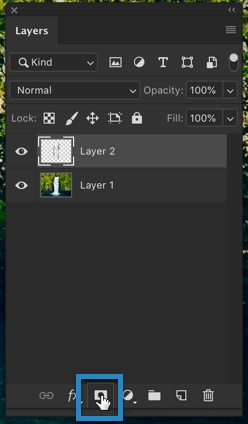
One of the best newer Photoshop tools is, of course, the Frame Tool. You can use it to mask images and place any form into frames and insert images of your choice.

Masking images has often been a difficulty for many Photoshop users, so this comes as a welcome addition to the already abundant arsenal of features. This time, you can convert text and other shapes into frames and add images of differing sizes, which wasn’t possible before.

How to use the Frame Tool?

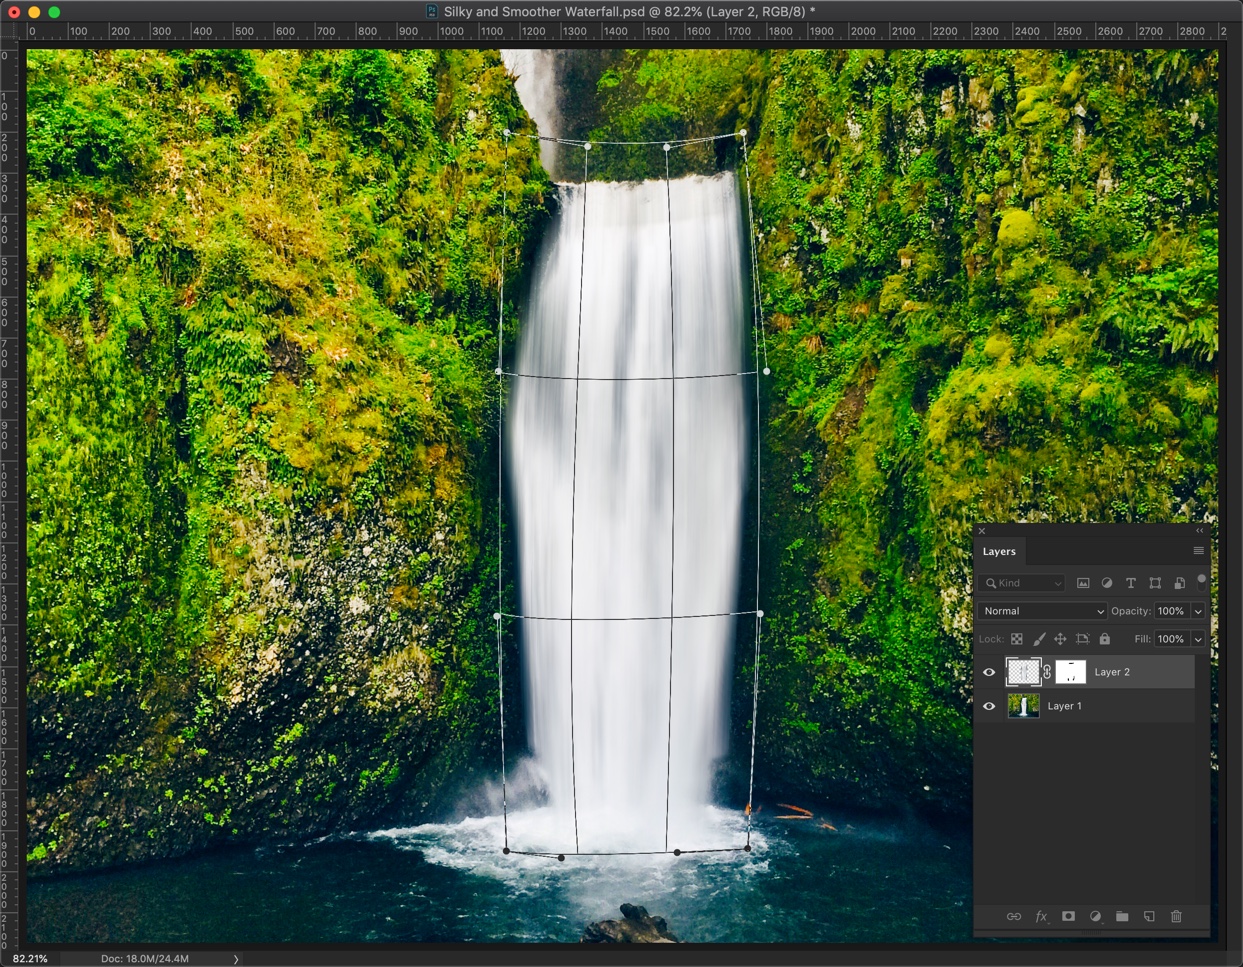
To insert an image into a frame, you can just drag any Adobe Stock asset or an asset from the Libraries panel and the image is automatically scaled to fit the frame.

An important thing to consider, when you’re processing the image, the content in frames is categorized in Smart Objects. This means it can be scaled non-destructively, without any alterations during the editing process.

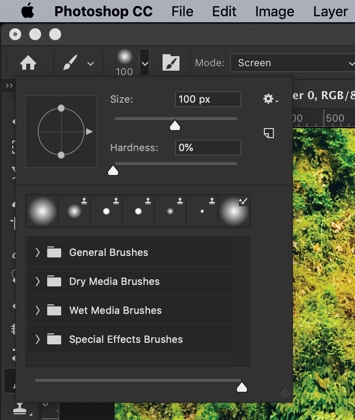
The new Content-Aware Fill workspace

With the new Adobe Sensei technology, you can use AI principles when you’re editing your photos. The goal of this new upgrade allows you to get the best fill results when you’re editing images. Out of all the details in this particular upgrade, the most amazing is the fact that you can choose the exact pixels you want to use, scale or rotate.

Moreover, you can even mirror source pixels to get a seamless and natural fill. If that’s not enough for you, you can get a full-resolution version of your edit before it’s done. In case you like it, there is an option to save the new work as a different layer.

How to use the Content-Aware Fill?

Adobe’s Content-Aware Fill workspace is very easy to use and you can understand its basics relatively quickly. All you have to do is open an image in Photoshop and select an initial area you want to fill. You can use any selection tool and, once you’re done, just click on Edit and then proceed to Content-Aware Fill.

It’s important to know that the document window plays the role of an overlaying mask on the image. The Tools panel has everything you need to customize the sampling area and change your selection.

Pay attention to fill settings, sampling and output settings and the rest of the tools on the Preview Panel. Content-Aware Fill is excellent for edits in a hurry and to appease beginners.

You can now undo multiple times at once

Ctrl + Z (Windows) or Cmd + Z (macOS) now gives you the opportunity to undo multiple steps during the photo editing process. A lot of users were complaining about the absence of this feature, with arguments that it would greatly accelerate every editing session.

Adobe gladly complied and added this long-awaited upgrade to the Photoshop interface. Keep in mind that you can also do this in other Creative Cloud apps and that the option is enabled by default, meaning that you can choose to turn it off at any given time.

How to use it?

  • Undo – You are automatically moved one step back in the entire chain. Ctrl + Z / Cmd +Z are still the control you have to use to accomplish this.
  • Redo – In contrast with the Undo feature, you can accomplish a move one step forward. Press Shift + Ctrl + Z / Shift + Cmd + Z.
  • Toggle Last State – This option works the same as in the typical, legacy undo mode. Ctrl + Alt +Z / Cmd + Option + Z are they you have to press.

The absence of the Reference Point

Amongst the top complaints against Photoshop features, the always-visible Reference Point was amongst the most notorious facets of the software that users complained about. Now, things have changed with Photoshop CC 2019.

You can transform items and easily move them anywhere on the canvas. The Reference Point won’t bother you anymore, which is a welcome sight for anyone who has had trouble with this.

Additionally, this is an indication that Adobe cares about beginners, deciding to make the default settings as simple as possible. We haven’t seen such things in previous Photoshop versions, but this is a great sign for future upgrades and versions.

How to use it?

If you need the Reference Point for some reason, during a project, you can select the checkbox in the Options panel and the point will appear again. Adobe has also provided users with a detailed guide about the use of the Reference Point and how can you operate both with and without it. You can read it here.

No more accidental panel moves

One thing that drives every Photoshop user crazy is the accidental movement of panels. Hours of hard work can be potentially ruined if you’re not careful with your hand movement.

Tablet users have been particularly affected by this. However, Adobe decided to upgrade this facet of their program and include a feature that’s called Lock Workspace. When you’re using a tablet device, you can easily rest assured and make any changes without the fear of your work being compromised.

How to it?

To lock your panel, all you have to do is choose Window > Workspace and Lock Workspace. The feature is turned on unless you turn it off manually. It might take a while to get used to this, but it’s one of the options we’ve been waiting for.

It looks like Adobe is optimizing Photoshop for mobile and tablet users. This is one of the theories that users have developed, especially due to the improved and more responsive UI.

Live Blend Mode preview

Now, when you decide to pick a blend mode, you can immediately see how your image will look. This means there is no more annoying clicks and undoings, especially when you’re deep into a project.

When you’re scrolling down the list of blend options, Photoshop will display a live preview as long as you’re hovering over the option. It’s yet another aspect that’s been simplified and we have to take our hats off to Photoshop.

How to use it?

Go to the Layers Panel and open the Layer Style dialogue. If you’ve already applied new layers and you’re not sure which one is “disruptive,” you can combine this feature with the new Undo/Redo system to make the best possible choice.

Perhaps the biggest advantage of these new features is the fact that they can be used together for maximum efficiency. Photoshop lacked this interconnectivity between features and we’re seeing the change with the Live Blend Mode combination options.

Concluding thoughts

Most of the upgrades for Photoshop CC 2019 have been devoted to long-time complaints and features that were announced a long time ago. It’s also refreshing to see Adobe show that they care about their beginner users, which is evident in upgrades that have removed excess features. The interface is much better than before and we might be looking at one of the best versions ever by Adobe. Use all the upgrades to your advantage.

About Author: Michael Gorman is an experienced marketer and content writer who has developed the best essay writing service UK. With his knowledge, Michael has managed to educate many young artists and brand managers on how to combine excellent content with visual tools. In his spare time, he enjoys 3D modeling, jogging and Italian cuisine.


The Ultimate Guide to Remove Fat in Photoshop

You’ve taken an amazing vacation photo and you realized that you’ve grown bigger and thicker. You badly want to reduce the fat you’ve gained but also know that want to post your vacation photos on Facebook and Instagram. And, this is why you’ve come here to remove fat in Photoshop.

I’m glad to say that we have a workaround for your photos. We can slim you down in Photoshop.

I am going to use the Liquify filter and Clone Stamp tool to remove fat in Photoshop.

Final


Initial

Initial.jpg

Stock Photo – http://fav.me/d50y5ss

OK, guys! Let’s begin the tutorial.

Step 1 – Duplicate the Layer

Go to Window > Layer to open the Layer Panel or press F7.

Press Cmd + J / Ctrl + J to duplicate the original layer. We’re duplicating because we don’t want to touch the original picture. We’re going to make all the adjustments in a duplicated layer. So, in case anything goes wrong, we can delete the duplicated layer and get back our original image.

1.jpg

Step 2 – Open the Liquify Filter

Go to Filter > Liaquify or press Cmd + Shift + X / Ctrl + Shift + X or open Liquify filter.

2.jpg

And our Liquify filter will be opened.

3.jpg

Step 3 – Reduce the Fat in Love Handles in Photoshop

Time to remove fat in Photoshop that is present in his love handles.

Grab the Forward Wrap tool from the panel or press W. 

4.jpg

We’re going to reduce the love handles. Make sure that you set the size fo the brush at least two times larger than the area which you want to slim down. Here, I am keeping the size of the brush approximately two times of the love handle.

5.jpg

Now, gently push the love handle towards the body.

Here’s a GIF for you.

6.gif

Do this with the other size also.

7.jpg

Looking good, right?

[vc_message message_box_color=”warning” icon_fontawesome=”fa fa-picture-o”]Feeling frustrated? If you’re having some problem and feeling frustrated, you can hand over this task to me. The max-to-max cost is $10 per image. Contact me at hello@tricky-photoshop.com.[/vc_message]

Step 4 – Reduce the fat in arms

Time to remove fat in Photoshop that is present in his arms.

Grab the Pucker Tool from or press S.

This tool deflates the pixels. We’re going to deflate the arms with this tool.

8.jpg

Again make sure that your brush size is twice the size of that particular body part.

9.jpg

Click on the center of the area which you want to deflate. I am going to click on the center of the arm.

Hold down the left mouse button to keep on deflating. You may also need to undo many times because you may deflate the wrong area. Press Cmd + Z / Ctrl + Z to undo.

Here’s the GIF for you.

10.gif

Do this with his left arm also.

[vc_message message_box_color=”warning” icon_fontawesome=”fa fa-picture-o”]Feeling frustrated? If you’re having some problem and feeling frustrated, you can hand over this task to me. The max-to-max cost is $10 per image. Contact me at hello@tricky-photoshop.com.[/vc_message]

11.jpg

Step 5 – Reduce the width of the back

Time to remove fat in Photoshop that is present in his back.

Increase the size of the brush of the Plucker tool. Make sure that it’s much larger than the back.

12.jpg

Here’s the GIF for you.

13.gif

Step 6 – Reduce the size of the legs

Time to remove fat in Photoshop that is present in his legs.

You’re going to reduce the size of the legs this time. Decrease the size of the brush of the Plucker tool.

14.jpg

Now click at the center of the leg. Here’s the GIF for you.

15.gif

Looking good, right?

[vc_message message_box_color=”warning” icon_fontawesome=”fa fa-picture-o”]Feeling frustrated? If you’re having some problem and feeling frustrated, you can hand over this task to me. The max-to-max cost is $10 per image. Contact me at hello@tricky-photoshop.com.[/vc_message]

Best 3 Laptops for Photoshop in 2019

I get asked a lot that which laptop do I use for Photoshop. The answer in MacBook Pro. Yes, I use Macbook pro and I love ❤️ it. But, it does not mean that you’ll also love Macbook pro. I personally know some people who like Windows-powered laptop more than Apple laptops. So, here I go with a list of the best laptops for Photoshop in 2019.

So, I am going to list down the 3 best laptops in 2019 for Photoshop. These are my personal favorites. I have listed the name, major specifications, and pros and cons. I have also provided an Amazon link at the end of the laptops.

The Amazon links in this article are sponsored links. So, if you click on the links and buy, I’ll get a small commission.

1: Apple MacBook Pro with Touch Bar

TitleSpecification
Display13.3-inch (diagonal) LED-backlit Retina display with IPS technology; 2560-by-1600 native resolution at 227 pixels per inch with support for millions of colors, 16:10 aspect ratio
Processor2.3GHz quad-core Intel Core i5, Turbo Boost up to 3.8GHz, with 128MB of eDRAM
Graphics and Video SupportIntel Iris Plus Graphics 655


  1. Fantastic build
  2. Stunning screen
  3. Fast Performance
  4. Expensive

Buy on Amazon

2: Dell XPS 15

TitleSpecification
Display15.6-inch (diagonal) ; 3840 x 2160 native resolution
Processor4.1 GHz Intel Core i7
Graphics and Video SupportNVIDIA GeForce GTX 1050 Ti


  1. Amazing power
  2. Great build
  3. Nice screen
  4. Awkward webcam position

Buy on Amazon

3: Razer Blade 14

TitleSpecification
Display14-inch (diagonal) ; 3200 x 1800 pixels native resolution
ProcessorIntel Core i7
Graphics and Video SupportNVIDIA GeForce 6GB VRAM


  1. Powerful and slim
  2. Attractive keyboard
  3. Powerful (basically designed for high-end gaming
  4. Support is not as good as Dell and Apple

Buy on Amazon

This is all, guys, These three are the best laptops for Photoshop in 2019.

Create a Silky and Smooth Waterfall in Photoshop

I know that pain of not slowing down the shutter speed to capture the moving waterfall. I went to a national park to capture a waterfall and forgot to slow down the shutter speed. I felt so bad, but I am glad that I have Photoshop. I can create a silky and smooth waterfall in Photoshop.

I am going to use a filter and a selection tool to turn a regular waterfall into a silky and smooth waterfall.

Let’s start the tutorial. Before that, let me show you the before and after photo.

After

Final.jpg

Before

Initial.jpg

Let’s begin the tutorial

Step 1 – Select the waterfall roughly

Grab the Polygonal Lasso tool from the tool panel or press Shift + L again and again until it activates.

1.jpg

Select the waterfall roughly. You don’t need to be accurate.

2.jpg

Duplicate the layer by pressing Cmd + J / Ctrl + J. This will create a new layer of the waterfall.

Press F7 to open Layer Panel to check the newly created layer.

3.jpg

Step 2 – Blur the Waterfall in Photoshop

Go to Filter > Blur > Motion Blur.

Choose the Angle and Distance this way.

  • Angle – This is along with the flow of the water. In my case, water is flowing at a 90 degree from the ground. So, I chose 90 degree
  • Distance – This sets the amount of motion blur. More the value, the more the blur. In my case, 179 pixels in giving the correct amount of blur.

4.jpg

Press OK once done.

Press Cmd + D / Ctrl + D to deselect.

Step 3 – Mask the unwanted parts

Motion blur has created some unwanted area that is filled with water. Have a look at the below image where I have highlighted three areas which look photoshopped. We’re going to

5.jpg


We’re going to hide these parts using a layer mask.

Press F7 if the layer panel is not opened. You can also open the layer panel from Window > Layers.

Click on the Add Layer Mask to add a layer mask.

6.jpg

Make black as your foreground color.

7.jpg

Grab the Brush tool from the tool panel or press Shift + B again and again until it activates.

8.jpg

Make the Hardness 0%. Choose the size you’re comfortable with. I am going with 100 pixels.

9.jpg

Brush the area that I highlighted with the blue rectangles.

10.jpg

Step 4 – Warp the waterfall

Time to warp the waterfall.

Activate the waterfall layer by clicking on it.

11.jpg

Press Cmd + T / Ctrl + T to activate the Free Transform Tool. After that, click on the below button to activate the warp mode.

12.jpg

Look at the below GIF to watch how to transform a waterfall.

13.gif

This is how my final waterfall looks.

14.jpg

This is all, guys.

Here’s the final photo.

Final

Quick Tip: Copy Layer Styles in Photoshop

Welcome to this quick tip where I’ll be showing you how to copy layer styles in Photoshop. Unlike my Photoshop tutorials, this is going to be a short one.

Before we begin, let’s understand what is layer style. I know that some of my readers are very new to Photoshop.

What is Layer Style in Photoshop

A layer style is one or more effects applied to a layer or layer group. You can apply one of the preset styles provided with Photoshop or create a custom style using the Layer Style dialog box. The layer effects icon  appears to the right of the layer’s name in the Layers panel. You can expand the style in the Layers panel to view or edit the effects that compose the style.

-Adobe

Photoshop is referring to this button with  icon.

1.jpg

Copy Single Layer Style

I have made a Photoshop document for this tutorial. I colored my background with off-orange color, added two identical texts. One of them has a layer style and another has not.

In the below screenshot, I highlighted the layers styles with a blue rectangle. Top Text layer has layer styles and Bottom Text layer has not.

2.jpg

I am going to copy the one layer style which would be Bevel and Emboss from the Top Text.

To do this, hold down Opt/Alt and drag the Bevel and Emboss layer style to the Bottom Text.

Your screen would look like this while dragging.

3.jpg

Release the Opt/Alt after that.

4.jpg

Here’s a GIF for you. Make sure that you have held down the Alt/Opt key.

5
Make sure that you have held down the Opt/Alt key

Copy Multiple Layer Styles

There’s no shortcut for this. You need to copy each layer style one by one using the way which I have you shown you above.

Copy All Layer Styles

This is the easiest one. Right click on the layer of which layer styles you want to copy. Click on “Copy Layer Styles”.

6.jpg

Now, right click on the layer on which you want to paste this.

7.jpg

Here you go.

8.jpg

Copy Layer Styles to a Different Photo

We have been copying and pasting the layer styles in the same photo. What if you need to copy one layer style from one photo and add it to another.

You can also do this. But you can only do this by copying all layer styles and pasting them on another image. You cannot drag and drop a layer style.

Right click on the layer of which layer styles you want to copy. Click on “Copy Layer Styles”.

6.jpg

Now, right click on the layer on which you want to paste this.

9.jpg

This is all, guys.

Make sure that you make the most out of the offer below.

[Action Included] Create Instagram Perpetua Filter in Photoshop

This tutorial is going to be a short one. I used only three adjustment layers to create Instagram Perpetua filter in Photoshop.

Last time I wrote on creating Instagram Aden filter in Photoshop. You may want to check that out also. And, here are all the tutorials on Instagram filters that I have written till now.

Perpetua filter reduces the Red color and increases the Cyan color in the photo. It also increases the highlights and shadows which ultimately decreases the contrast. We’re going to do the same thing with Photoshop.

If you want to download the action in Photoshop, you can do it with the below link.

Download the action – click here to download the action. It will scroll you down to the bottom of the page.

Before

Initial.jpg

Photo by Đàm Tướng Quân from Pexels

After

Final.jpg

So, let’s begin with today’s tutorial.

Step 1 – Reduce the Redness

We’re going to reduce the redness with the Color Balance Adjustment Layer

Go to Layer > New Adjustment Layer > Color Balance.

Change the Tone to Midtones. Drag the first slider towards the left to -46.

1.jpg

Change the Tone to Highlights. Drag the first slider to -23.

2.jpg

Step 2 – Reduce the Darkness

Time to reduce the darkness. We’re going to use Levels for this.

Go to Layers > New Adjustment Layers > Levels. Drag the bottommost slider from the left towards the right till the number 23.

3.jpg

Step 3 – Brighten the Shadows

Now, we’re going to brighten the shadows with the Curves adjustment layer.

Go to Layers > New Adjustment Layers > Curves. Make the curve look like the below screenshot.

4.jpg

And, we’re done with this tutorial.

Here’s The Photoshop Action For Instagram Perpetua Filter

If you’re interested in the Photoshop action for the Instagram Aden filter, download it from the below link.

Download Instagram Perpetua Filter Action for Photoshop

Here you go again with the final photo.

Final

Final

How to Add Lens Flare in Photoshop

I wrote a tutorial on how to add lens flare in Photoshop back in 2012. It has been around 7 years and I thought that I should write a new one. I was using Photoshop CS5 and the Photoshop interface in the screenshots looked like I was using software that was developed in the 1800s.

So, I am writing a new one now. Before I show you how to do it, here’s a peek to the final photo.

Final

Final.jpg

Initial

Initial

Let’s begin the tutorial.

Step 1 – Create a New Layer for the Lens Flare

Create a new layer by pressing Cmd + Shift + N/Ctrl + Shift + N. Name that layer anything. I am going to write as Lens Flare.

1.jpg

Press to make black as your foreground color. If pressing D is not changing the foreground color to black, click on the below icon and manually change it.

2.jpg

Fill the Lens Flare layer with the black color by pressing Opt + Delete / Alt + Backspace. This shortcut lets you fill the layer with the foreground color which is black in this case.

3.jpg

Change the Blend Mode to Screen.

4.jpg

Step 2 – Add Lens Flare in Photoshop

Go to Filter > Render > Lens Flare

5.jpg

Roughly put the center of the lens flare at the place where the light source is in the photo. The light source in our photo is the sun.

Choose the brightness and Lens Type. Press OK. I am going to set my brightness as 121% and Lens Type as 50-300mm Zoom because this lens is what most photographers use.

6.jpg

This will add the lens flare. But the positioning may be a bit off.

7.jpg

Step 3 – Move the lens flare

Activate the Free Transform Tool by pressing Cmd + T / Ctrl + T. You’ll see eight handlebars at the corners and center of the image.

Move the lens flare so that it overlaps the light source. The light source, in this case, is the sun. Press Return/Enter once done.

8.jpg

That’s all.

Here’s the final photo again.

Final

Make sure that you make the most out of the offer below.

[Action Included] Create Instagram Aden Filter in Photoshop

Instagram has secretly launched new filters for your posts. I didn’t receive any notification in my app. I saw a few new filters when I was posting a photo. So, guess what? We’re going to write a tutorial on achieving those filters in Photoshop. Today, we’re going to learn how to create Instagram Aden filter in Photoshop.

Achieving Instagram effects are very easy in Photoshop. You don’t need to use any brush. Just a few adjustment layers will do the job.

I am also going to use just a few adjustment layers to achieve Instagram Aden filter in Photoshop. These will be basics like Brightness, Photoshop Filter, Hue and Saturation, and Gradient Map.

Download the action – click here to download the action

Before I proceed with the tutorial, let me show you the before and after photos.

After

Final.jpg

Before

Initial.jpg

Strategy

I analyzed that the Instagram Aden filter adds greenish tint to the dark areas and bluish red tint in the light areas. Overall, it also reduces the contrast and decreases the brightness by a few points. Let’s do the same.

Video

If you like watching videos, here’s the video for you.

Step 1 – Add a green tint

Go to Layer > New Adjustment Layer > Photo Filter.

Change the Filter to “Green” and increase the Density to 57%. Make sure that “Preserve Luminosity” is turned on.

1.jpg

This will add a green tint to the image.

2.jpg

Step 2 – Add a faded blue tint

Again, we’re going to add a tint with the Photo Filter.

Go to Layer > New Adjustment Layers > Photo Filter.

Choose “Cooling Filter (82)” this time, and increase the Density to 8%. Make sure that “Preserve Luminosity” is turned on.

3.jpg

This will add a faded blue tint to the image.

4.jpg

Step 3 – Change the color of highlights and shadows

Time to add green tint to the dark areas and red tint to the light areas.

Go to Layer > New Adjustment Layer > Gradient Map. A panel will open. Click anywhere inside the box where a gradient is present. You can refer the below screenshot. There’s a chance that you’re seeing a different than Black and White. It doesn’t matter. Click on the box.

5.jpg

Click on the Red to Green gradient. Now, the red color is present at the left which means that the dark areas of the photo will be colored with the red. Similarly, bright areas will be colored with the green. Press OK.

6.jpg

Click on “Reverse”. This will reverse the gradient. Now, dark areas will be colored with green and bright areas will be colored with red.

7.jpg

Change the Blend Mode to Color Dodge. Decrease the opacity to 49%. Press F7 to open the layer panel if it’s not opened.

8.jpg

This is how your photo will look.

9.jpg

Step 4 – Time to decrease the highlights in the photo

The photo is quite bright. You can see that the sky a bit overexposed than the Instagram Aden Filter standard. We’re going to tone it down.

Go to Layer > New Adjustment Layer > Levels. Drag the slider that is highlighted in the below screenshot towards left. I am going to stop at the point where the reading is 244.

10.jpg

The change would be very subtle. Here’s the image.

11.jpg

Step 5 – Decrease the contrast

Almost all Instagram filter decreases the contrast. Instagram Aden filter also does.

Go to Layer > New Adjustment Layer > Brightness and Contrast. Decrease the contrast to -39 and increase the brightness to 9.

12.jpg

Your photo should look like this.

13.jpg

Step 6 – Add a blue color

Here’s the last step. Time to give a blue tint to the photo.

Go to Layers > New Adjustment Layer > Hue and Saturation. Click on the “Colorize”. Increase the Hue to 241 and increase the saturation to 30.

14.jpg

Decrease the opacity in the layer panel to 14%. Press F7 to open the layer panel if it’s not opened.

15.jpg

Your photo will look like this.

16.jpg

This is all guys.

Here’s the Photoshop Action for Instagram Aden Filter

If you’re interested in the Photoshop action for the Instagram Aden filter, download it from the below link.
Download Instagram Aden Filter Action for Photoshop

Final

Here’s the final photo again for you.

Final