Hey, guys! It’s been a while since I wrote any tutorial, and your patience has paid off because of the introduction of brand new Photoshop 2015.5. Yes, it’s 2016 and I am also wondering why Adobe didn’t go with 2016 in its name. But let’s not go deep into it. It’s a multi-billion dollar company, and I know there must be some reason behind this name. Let’s get directly into the brand new Face Liquify Tool in Photoshop.
Before we go further, let me show you the Before and After photo.

Step 1: Open Liquify Tool
After opening your photo, the first thing you need to do is to open the Liquify tool. You can do it by either going to Filter>Liquify or by pressing Cmd+Shift+X/Ctrl+Shift+X.
The first thing that you need to do after that is to choose Face Tool or press A.
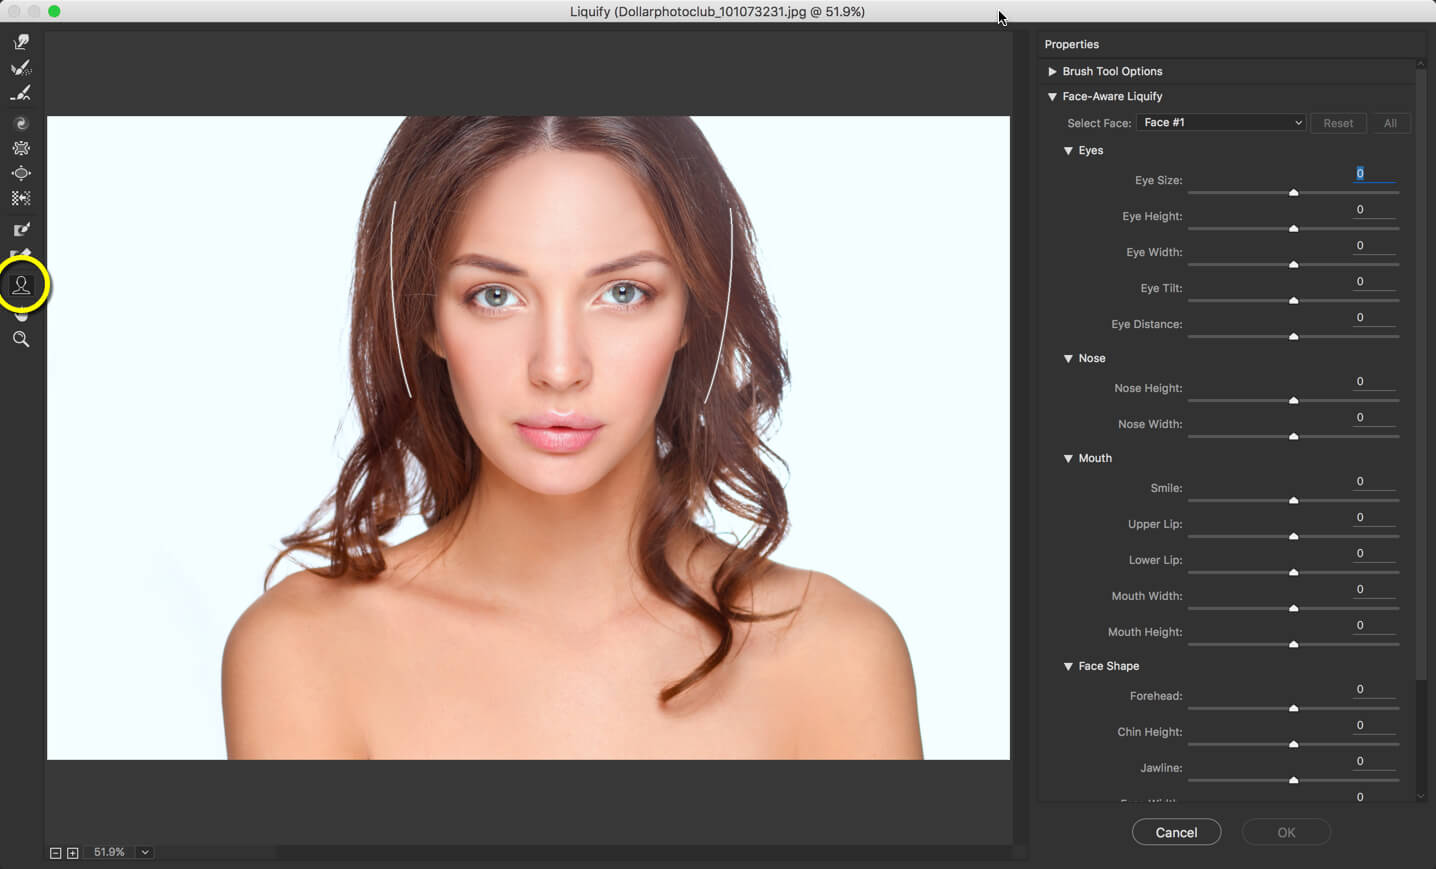
You’ll notice two beautiful lines surrounding the face.
Step 2: Get to Know the Properties
Now let’s get into the properties of Face Liquify Tool in Photoshop.
1: Face Shape
The best thing is that you don’t have to look at the right-hand side of your screen to deal with those sliders. Every single thing can be done within the image itself.
Simply hover your mouse over the edge of the face and Photoshop will automatically pop up the line to change the face shape.
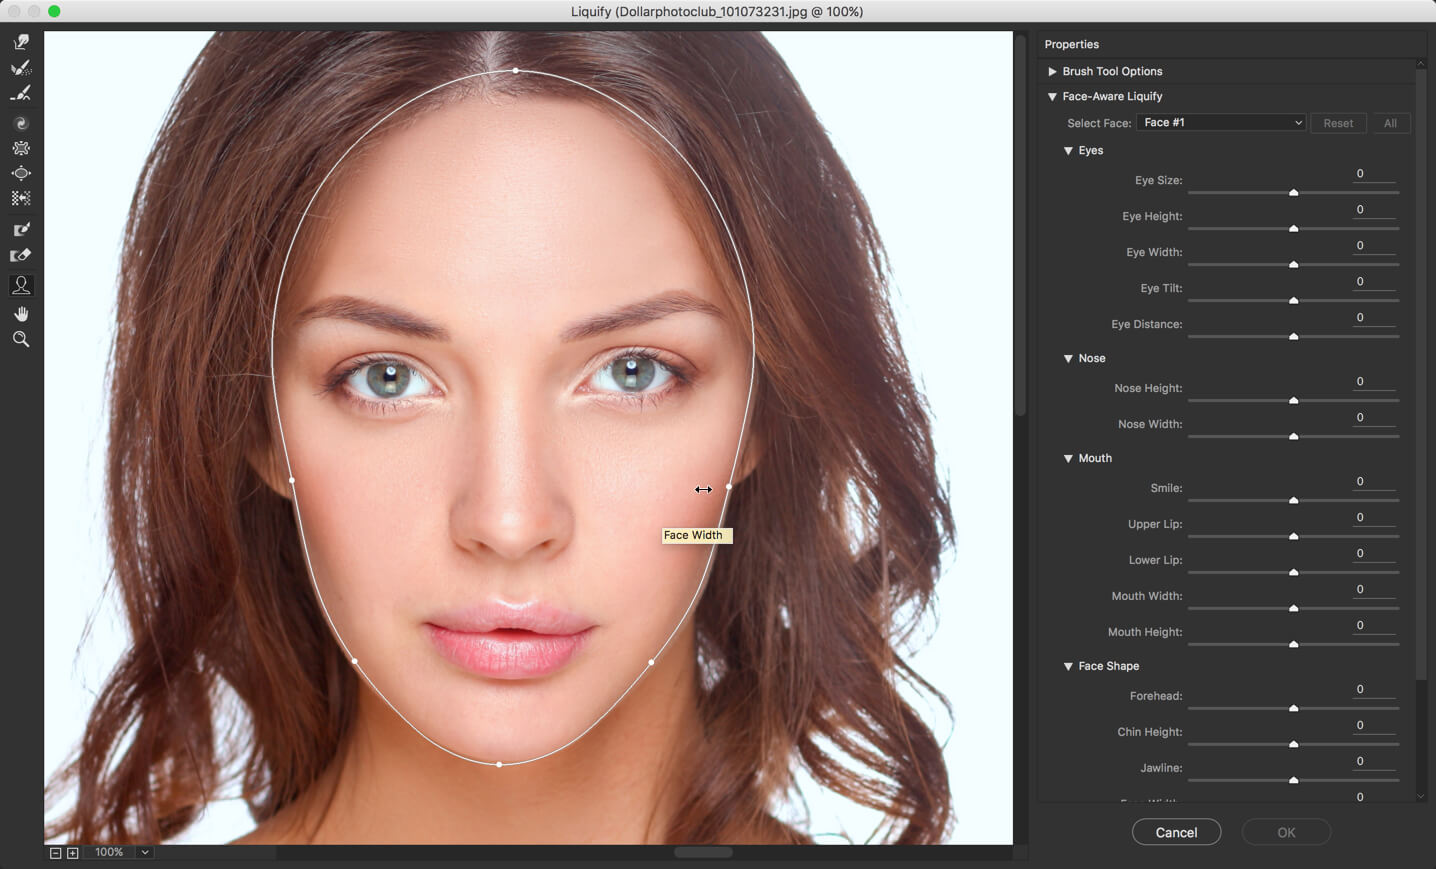
You’ll find four points associated with face shape:
Forehead: Used to increase or decrease the size of the forehead

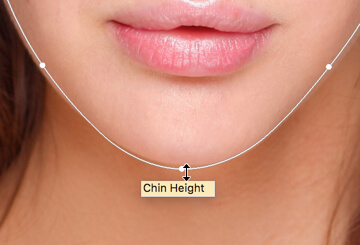
Chin Height: Used to increase or decrease the size of the chin
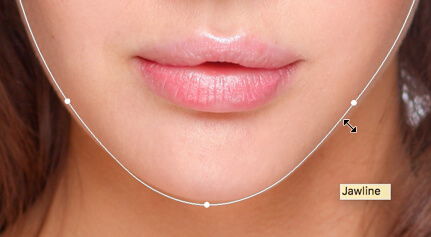
Jawline: Pretty cool feature. Can alter jawline of a face
Face Width: Changes the width of a face

2: Enhance Your Eyes with Face Liquify Tool in Photoshop
Time to learn how to make beautiful eyes even more beautiful. Simply hover your mouse over the eyes. You can do with either of the eyes, and the same result will reflect in another eye as well.
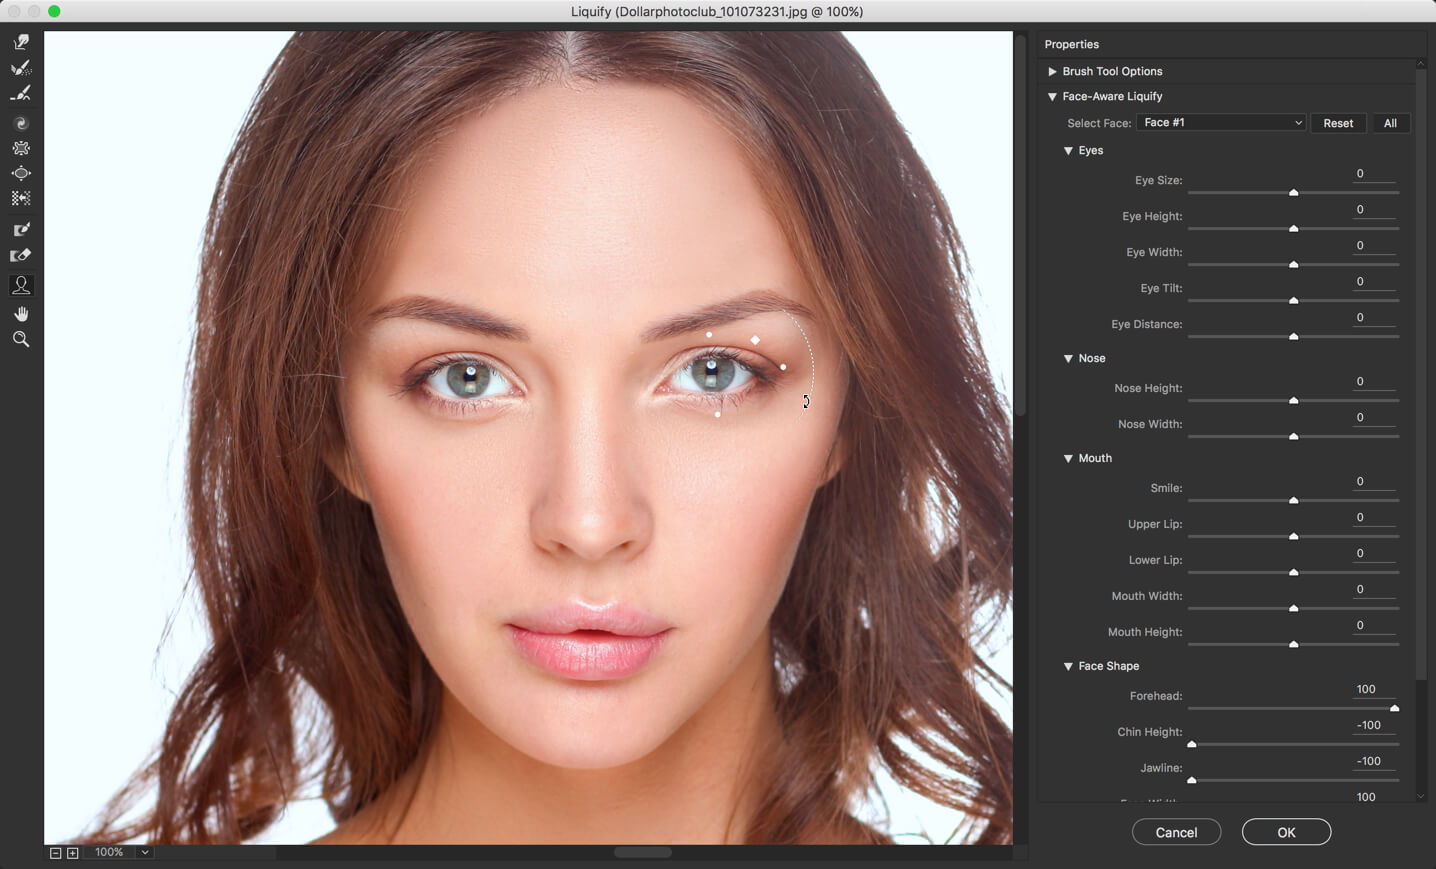
Eye Size: Used to increase or decrease the size of eyes
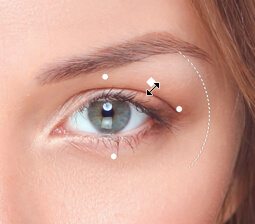
Eye Height: Used to increase or decrease the height of eyes
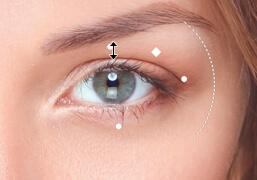
Eye Width: Used to increase or decrease the width of eyes
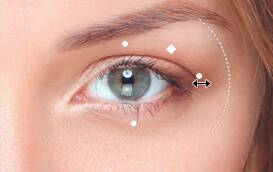
Eye Tilt: Used to tilt eyes
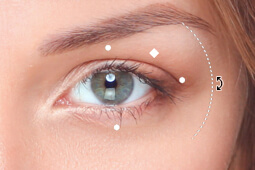
Eye Distance: Used to increase or decrease the distance between the two eyes. You need to use the slider for this option. 🙁
![]()
![]()
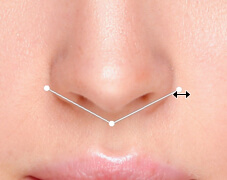
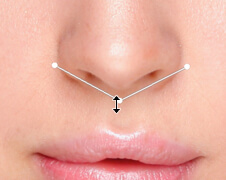
3. Nose – Now You Don’t Have to Pay $45k for Your Nose Job
Time to make the nose better.

Nose Width: Used to increase or decrease the width of the nose
Nose Height: Used to increase or decrease the height of the nose
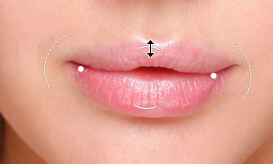
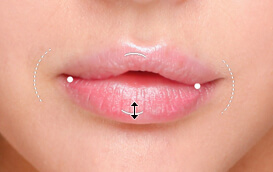
4. Mouth – Make Your Smile Better
You know that Face Liquify tool can’t get any better when it comes with a feature to enhance your smile. You can even make a dull person smile with this feature. Of course, it does much more to your mouth than a smile.
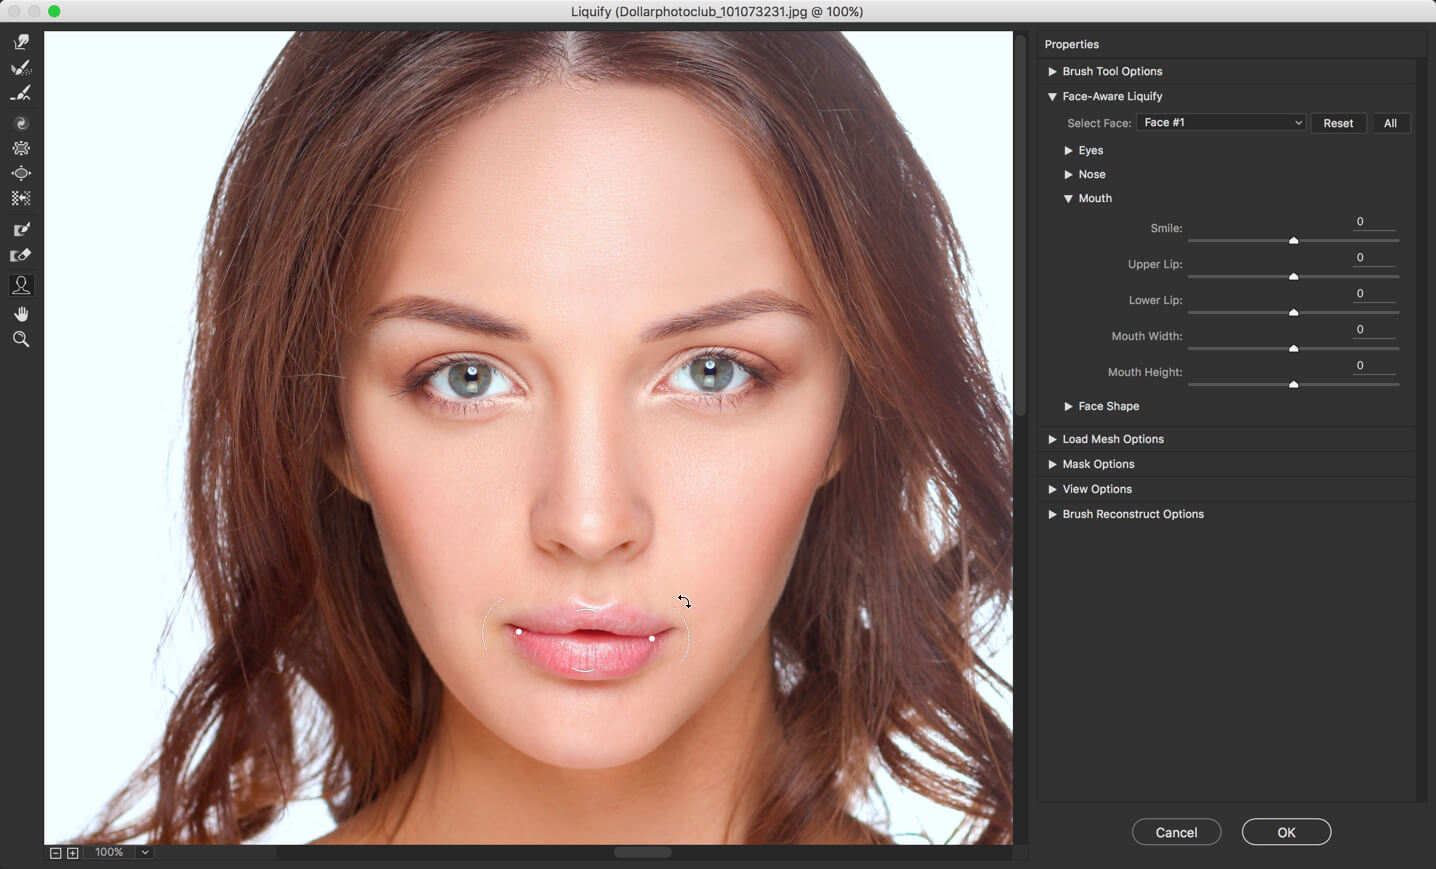
Smile: Increase or decrease your smile
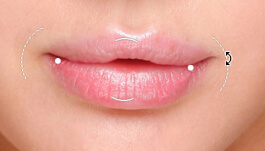
Upper Lip: Increase or decrease your upper lip
Lower Lip: Increase or decrease your lower lip
Mouth Width: Increase or decrease your mouth width

Mouth Height: Increase or decrease your mouth height
![]()
![]()
And with this said, we’re concluding our tutorial. I hope that you’ve enjoyed it.
Please support TrickyPhotoshop by sharing this tutorial with your friends and family of Facebook, Twitter, and Google+.


