
You might have never heard about bleed and crop if you post your photos online and never bothered about printing them. But, you might head bleed and crop a lot if you print your photos or design. Today, we’re going to see how to add bleed and crop in Photoshop.
Photoshop has not given any standalone feature to add bleed and crop but has given some features that you can use to add bleed and crop. Let’s see how to use it.
Let’s start with the bleed first because we use it more than the crop.
1. How to add bleed in Photoshop?
Before we begin with how to add bleed, let’s understand what is bleed first.
1.1 What is bleed in printing?
Wikipedia has given a very nice and clean definition of bleed.
In printing, bleed is printing that goes beyond the edge of where the sheet will be trimmed. In other words, the bleed is the area to be trimmed off. – Wikipedia
Many economical printers are not capable enough to print edge to edge. So, they left a small piece of an area on the left and right. This left out area is called as bleed.
1.2 How much bleed should I add?
Many printing sites specify the exact bleed size you need to put on your document. If they don’t, a rule of thumb is to go for 0.25 inches on all the four sides.
Now, let’s add bleed in Photoshop
1.3.1 Step 1 – Adding the ruler
Text editing software like Microsoft Word, Apple Pages, and Adobe InDesign, etc. have a dedicated menu bar for this. But, in Photoshop, we need to use Guides to add bleed.
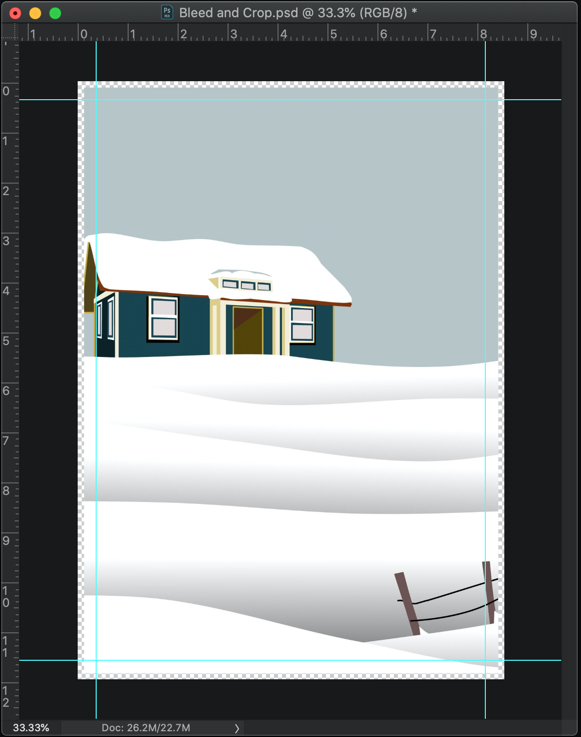
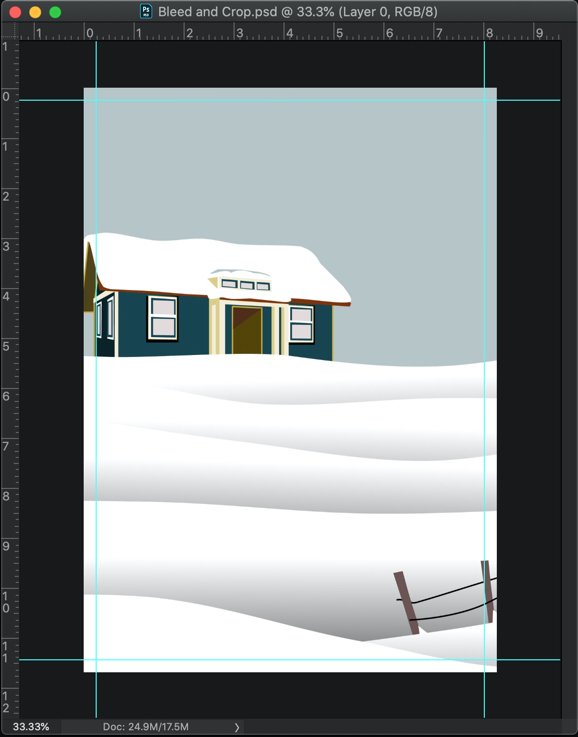
The below photo is A4 in size. It has a width of 8.2 inches and has a height of 11.6 inches, and has a resolution of 300 pixels per inch. Let’s add a bleed of 0.25 inches.
Credit – Image by naobim from Pixabay
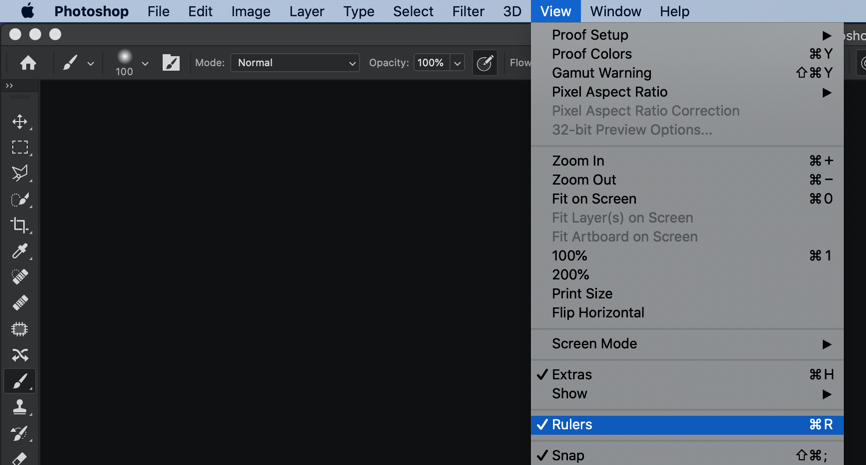
The first thing we need to do is that we need to add Ruler. Go to View > Ruler or press Cmd + R / Ctrl + R.
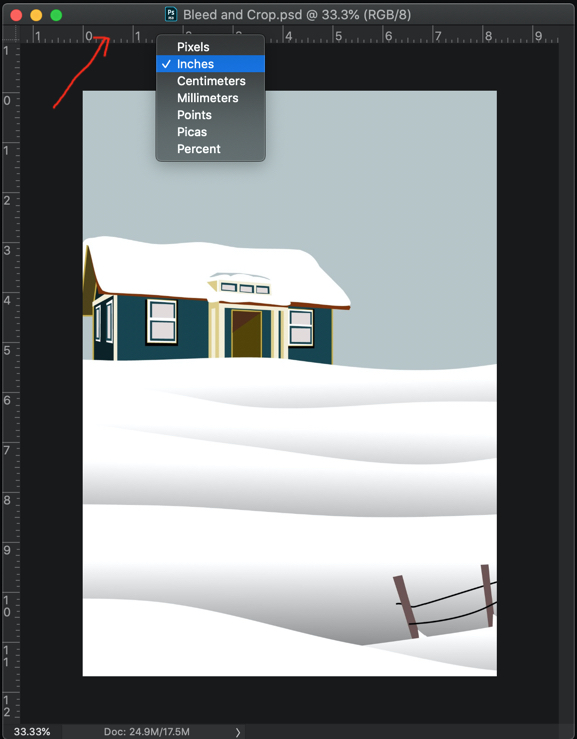
Now, right-click on the Ruler and select Inches.
1.3.2 Step 2 – Adding the guide for the bleed in Photoshop
Go to View > New Guide Layout.
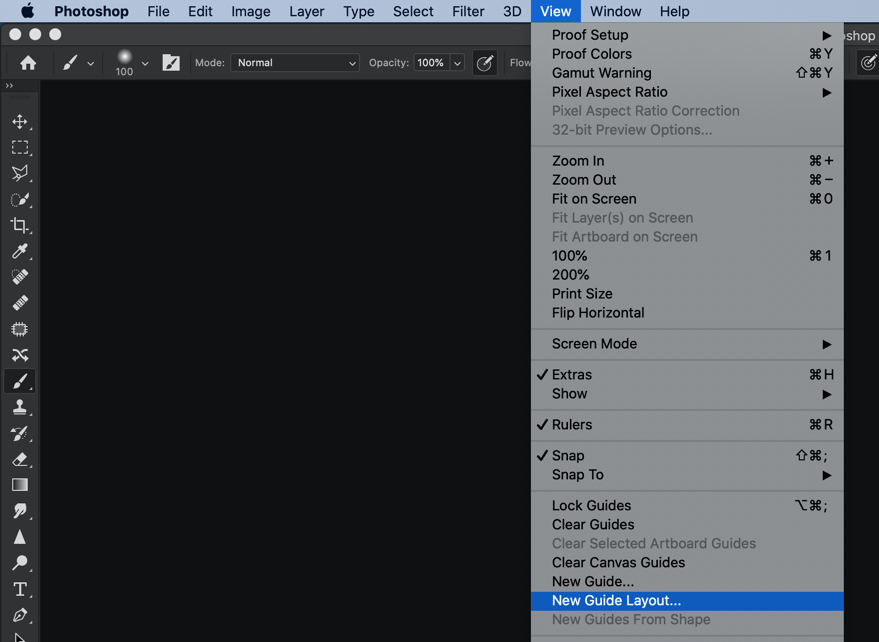
Now, write 0.25 in all the four fields of the Margin. Press OK.
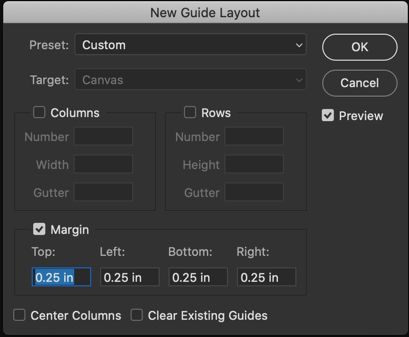
This will add a guide that has a width of 0.25 inches. It’s better to keep all your designs and photo inside this guide.
2. How to add crop in Photoshop?
Before we begin with how to add a crop, let’s understand what is crop first.
2.1 What is the crop in printing?
This is not the cropping that you hear a lot. This is different than cutting out the unwanted part of a photo that we usually do with photos before uploading them on social media sites.
Crop marks, also known as trim marks, are lines printed in the corners of your publication’s sheet or sheets of paper to show the printer where to trim the paper. – Microsoft
2.2 How much crop should I add?
Printing sites specify the exact crop size you need to put on your document. If they don’t, a rule of thumb is to again go for 0.25 inches on all the four sides.
Now, let’s add crop in Photoshop.
2.3.1 Step 1 – Increasing the canvas
Go to Image > Canvas Size or press Cmd + Opt + C / Ctrl + Alt + C.
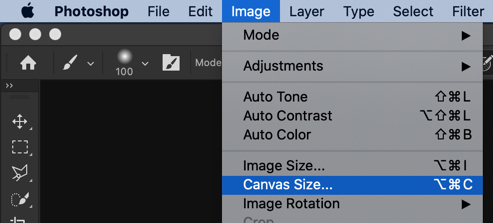
While making sure that the unit is inches, write 0.25. Keep the Anchor at the center and make sure that Relative is turned on.
Press OK.
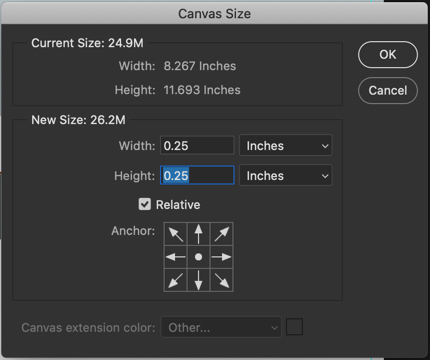
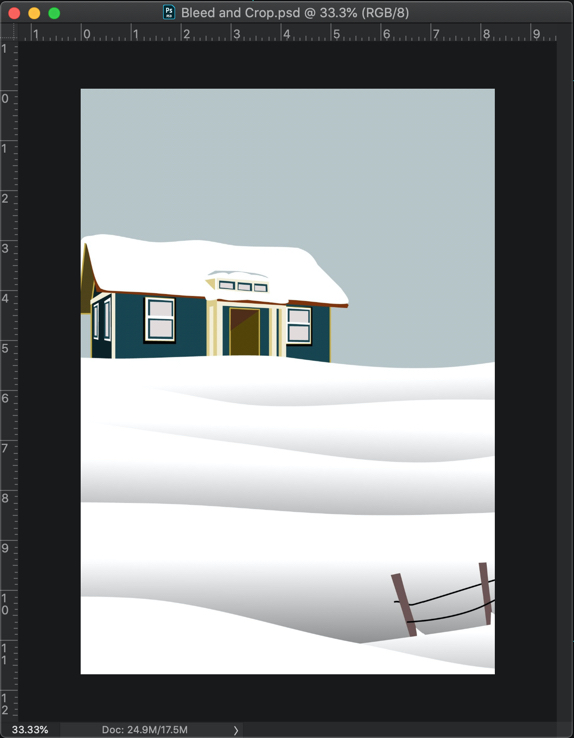
This will increase the size of the document by 0.25 inches.
The square boxes you’re seeing on the edges are actually the transparent area. It’s included in the document but not painted with any color.
If somehow you print this transparent area, then nothing will be printed. A pink paper will come out as pink, a yellow paper would come out a yellow, and white will come out as a white.
This is all, guys. This is how you add bleed and crop in Photoshop.
