Reduce puffy eyes or eye bags in Photoshop

Some of us have puffy eyes or eye bags. Some of us grow as we get older and some of us have it since our birth. Today, I am going to show you how you can reduce puffy eyes or eye bags in Photoshop.

You can also remove it but that’d look too much photoshopped. So, it’s better to reduce it.

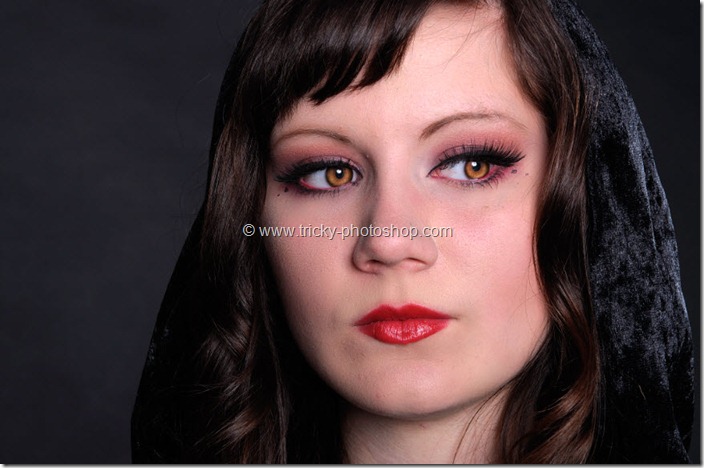
Here is the after and before photos.

After

Before

The photo was taken from Pixabay.

Let’s begin the tutorial.

Step 1 – Grab the Clone Stamp Tool

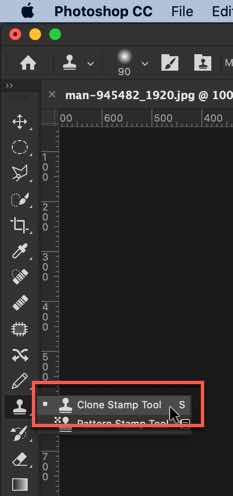
The first thing we need to do is to grab the clone stamp tool from the tool panel.

Related: See how to use the Clone Stamp Tool in Photoshop.

Grab the Clone Stamp Tool from the tool panel or keep on pressing Shift + S again and again until it comes.
Step 2 – Reduce puffy eyes or eye bags in Photoshop

The next thing we need to do is to remove the eye bags or puffy eyes.

Create a new layer by going to Layer > New > Layer or by pressing Cmd + Shift + N / Ctrl + Shift + N.

Step 2.1: Define the Source

The Clone Stamp Tool is used to copy pixels from one part of the image and paste them on another part. To use the Clone Stamp Tool, you first need to define the source pixels. This will be pixels that are going to be copied. You can do them by holding down the Opt/Alt key.

Once you hold it down, the cursor will change to a sniper cursor.
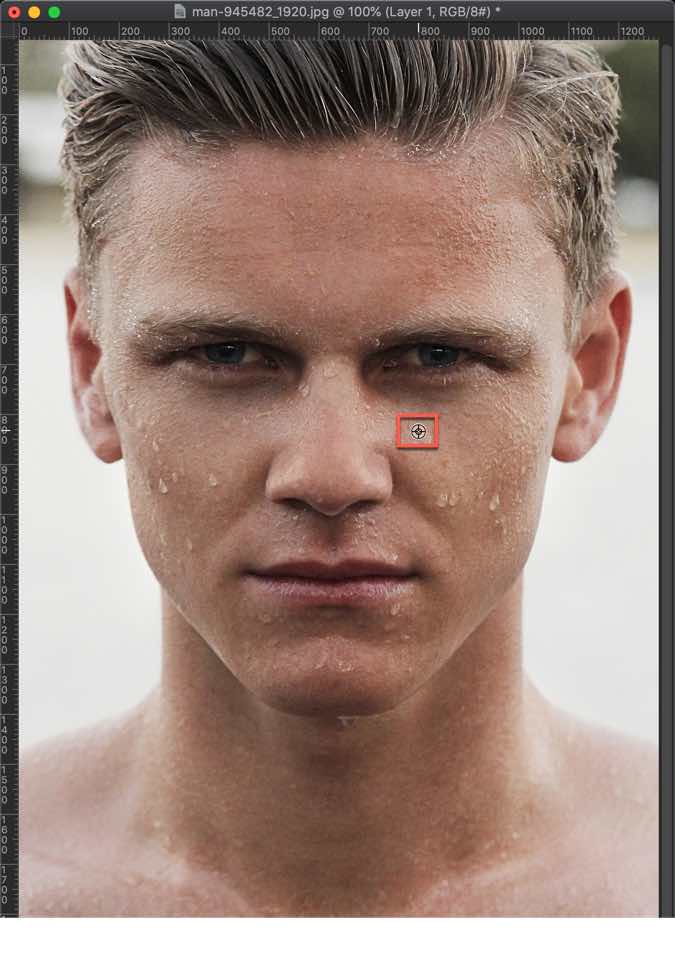
I’ll paint the skin from this location on the eye bags.

Step 2.2: Paint the Target

Now that I have selected my source, I am going to paint those pixels onto my target. When you do that, you’ll see a cursor that moves synchronously with your cursor. This cursor denotes the pixels that are being copied.

This GIF is of 7 MB in size. So, give it some time to load.
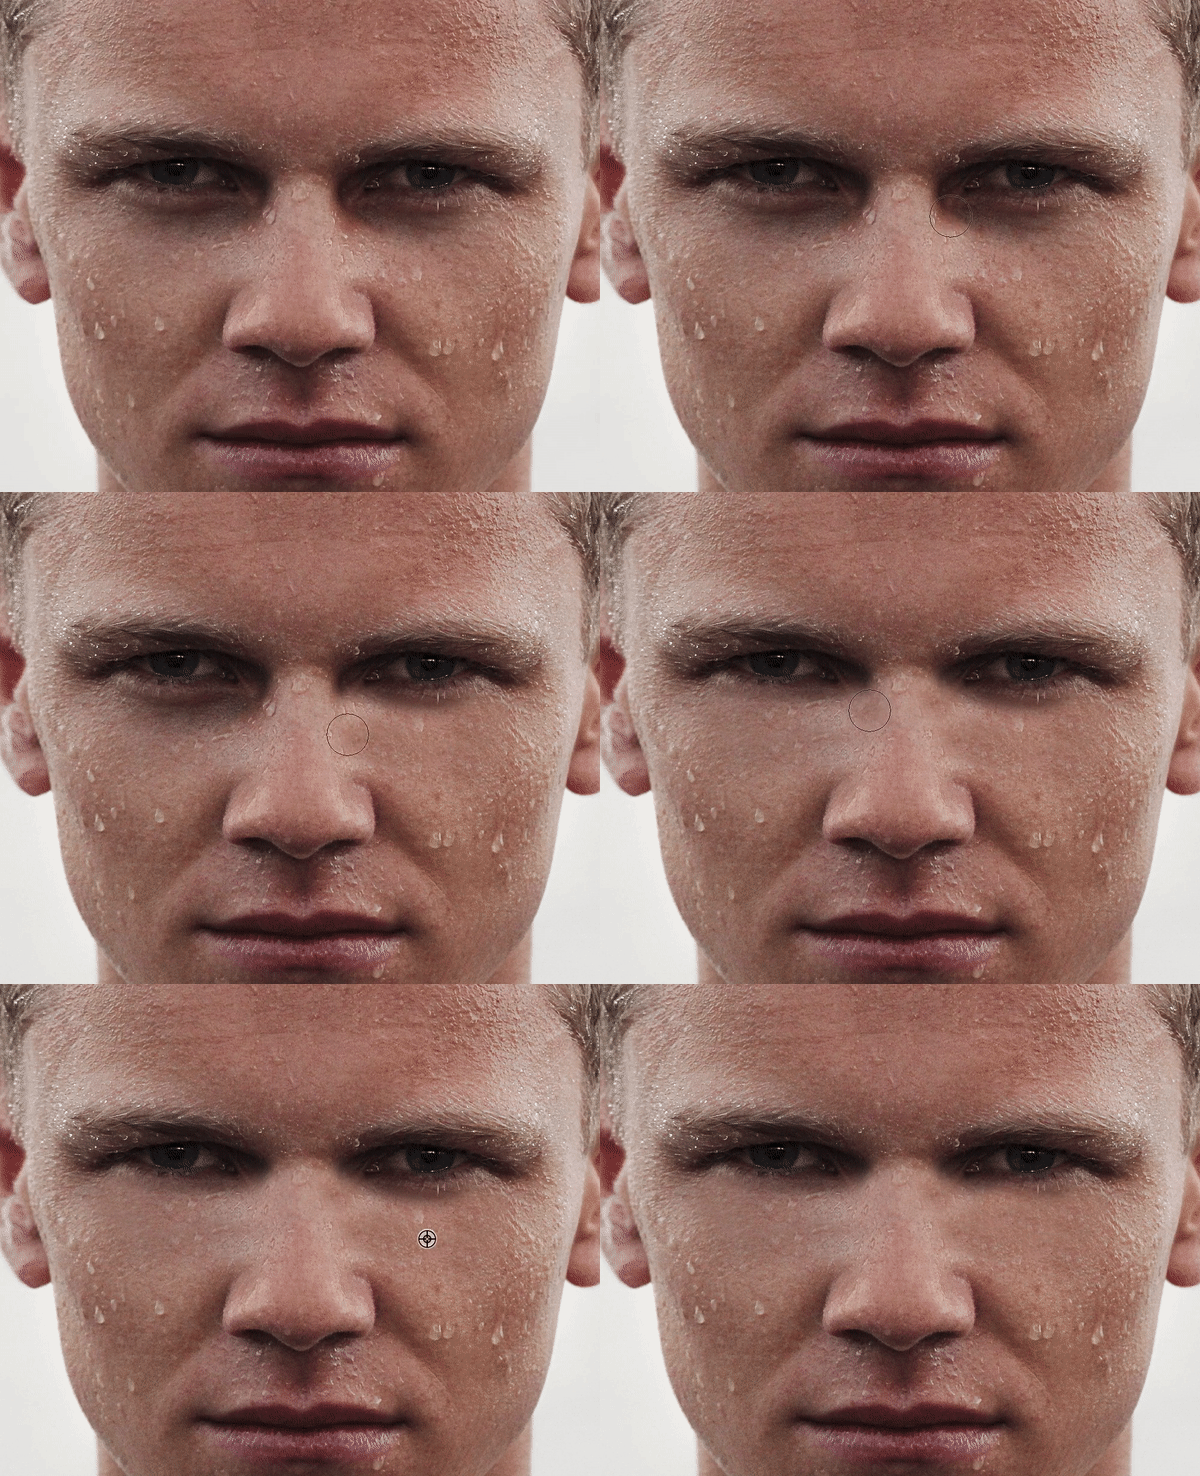
Simply, do this all over the eye bags.

For the best result, you may need to define your source multiple times as I did in the GIF.

This is how the photo will look.
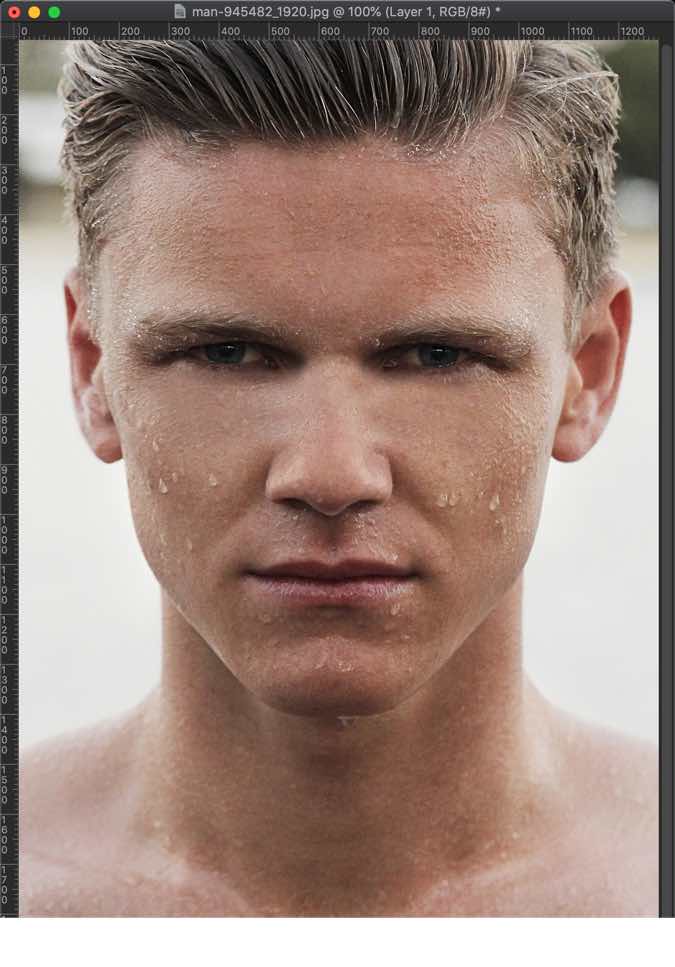
Step 3: Reduce the opacity

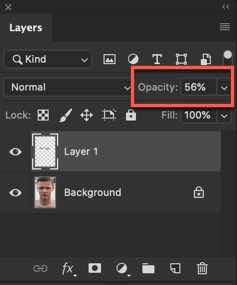
Open the layer panel by pressing F7 or going to Window > Layer.

Reduce the opacity to somewhere around 60%.
This is how the final photo looks.

2 Steps to Change Eye Color in Photoshop

Eyes are one of the most beautiful parts of a human body. Having a beautiful eyes makes the face very attractive. Well, the shape of the eye matters. But, what matters most is the color of the eyes. No wonder that models wear colored contact lenses during photo shoots to look more attractive. And, the workaround of having a beautiful color eye without wearing lenses is Photoshop. In this tutorial, I am going to how to change eye color in Photoshop.

The tutorial is very easy. All we are going to do is to use the Brush tool.

Before I begin, I want to show you the initial and final pictures.

Initial

Initial.jpg

Final

Final

Let’s begin

Step 1 – Grab the Brush tool

There are many ways to change eye color in Photoshop. I am going to show you the fastest and the easiest one.

Grab the brush tool from the tool panel or press Shift+B again and again until it comes. Reduce the hardness to 0%.

Change the foreground color to the color you would the eyes to have. I am going to change it to #0076a3.

1.jpg

Step 2 – Change the Eye Color in Photoshop

Press F7 to open the layer panel. Alternatively, you can also open it by going to Window>Layers.

Create a new layer by pressing Cmd+Shift+N/Ctrl+Shift+N.

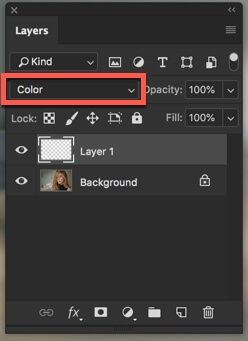
Change the blend mode to Color.

2.jpg

Start brushing the eyes.

If you want, you can first select the iris with the Elliptical Marquee tool and then start brushing. I am skipping that because the end result in my case would be almost same and my hands pretty much know how much should they move the cursor for perfect coloring.

3.jpg

Do it for the second eye also. The second eye is not present in my image so I need to skip that.

Your image should look like this.

4.jpg

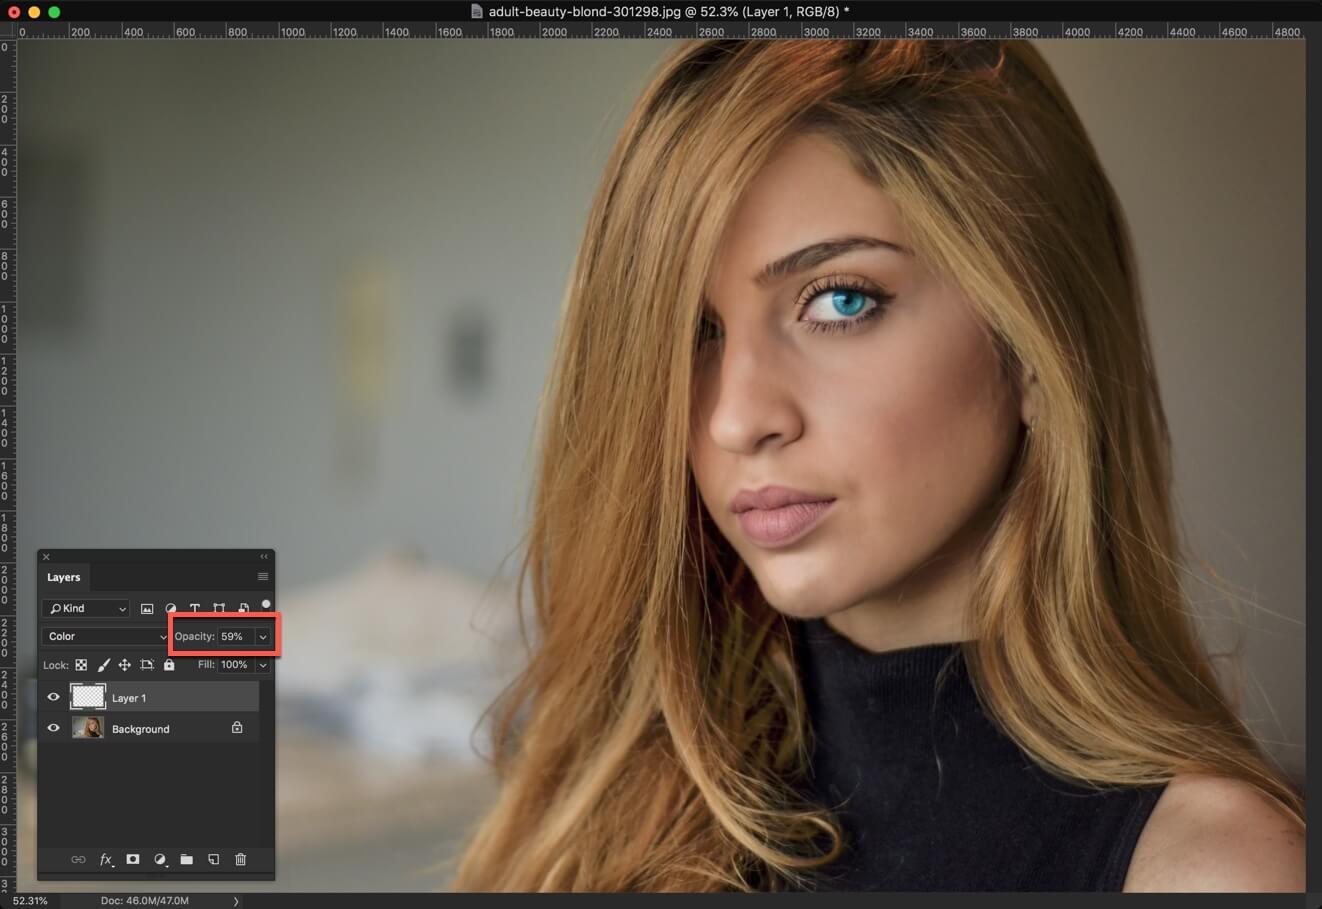
I think that the blue is very vibrant. So, I am going to reduce the opacity to 59% in the layer panel.

5.jpg

That’s it.

Here’s the final picture again.

Final.jpg


1 Step Tutorial to Change Eye Size in Photoshop

Changing eye size has always been difficult in Photoshop before 2015. I needed to go the Liquify tool and then use Wrap tool or Bloat tool to enlarge the eyes. After 2016, life has become easier. Photoshop has given a dedicated Face tool to change the face including eyes, nose, lips, jawline, Mouth, and Face Shape. I know that some of you still use the old version of Photoshop so I am going to show you both ways to change eye size in Photoshop.

Let’s see how would the image look like.

Let me show you how to do it.

For Photoshop Versions that launched after 2016

The process is very simple if you have Photoshop CC that launched in 2016 or later. We will be using the dedicated Face tool for the job.

Step 1 – Go to the Face Tool and Change Eye Size in Photoshop

Go to Filter > Liquify. 

Activate the face tool which is highlighted with the Yellow color.

Now, Photoshop will automatically detect all the faces in the photo. I have only one face in the above photo. If you have multiple faces, you can select which face to modify by selecting the face using the drop-down that is highlighted with the red color.

Now, you have two options. Do you want to adjust both eyes synchronously or you don’t? Let me explain it one more time? If you increase the size of right eye by 20%, do you want the size of the left eye to be increased by 20% automatically? If yes, turn on the link button which is highlighted by the blue rectangle. If not, turn that link button off.

Adjust the eyes using 5 sliders that Photoshop gives you. I have done mine.

That’s it, guys! This is the way you can change eye size in Photoshop.

For Older Version

You are reading this means you own the older verion of Photoshop. Forget everything that you read earlier. That was not for you. I am going to start from the beginning to show you how to do it.

Step 1 – Open Liquify Tool

We need to go to the Liquify tool. This is the only step common between newer versions and older versions. Go to Filter > Liquify.

Choose the Bloat Tool that is highlighted with the Blue rectange in the above image. Now make sure that the Rate is very low (highlighted with red color in the above image). If you keep the rate high then one click will rapidly increase the eye size. By keeping the rate low, you will actually see the eye enlarging.

Now put the cursor the eye (preferably pupil) and start clicking. Don’t hold. If you hold down the mouse button then size will keep on increasing. If you just click then size will increase in a controlled way. Do it with both eyes.

You can always press Cmd + Opt + Z/Ctrl + Alt + Z to repitativly undo if you have made any mistake.

Step 2 – Refine the Enlargement

Chaning the eye with older verion of Photoshop takes time. You need to use undo many times to refine the enlargement. Keep on using Bloat tool and Undo to get the perfect result.

This is all guys, See in you in the next tutorial.