How to create a memorial photo in Photoshop

Losing a person is tough but all of us here are bound to go someday. I know that it’s tough but we must move on. In this tutorial, I am going to show you how to create a memorial photo in Photoshop.

I’ll be using basic tools like the Selection tool, adjustment layers, and filters.

Before we begin, let me show you the before and after photo.

Before

After

Source photos:

Man: pixabay.com/photos/aged-man-elderly-man-old-man-1842327/

Cloud: pixabay.com/photos/blue-cloud-white-landscape-sky-3222534/

Let’s begin with the tutorial.

Step 1 – Open both photos to create memorial photo in Photoshop

Open the sky photo first or any other photo that you want to be put in the background. Go to File > Open and locate the photo.

Now open the person photo. Go to File > Open and locate the photo.

Step 2 – Put the person photo on the sky photo

Time to put the person photo on the sky photo.

Press Cmd + A / Ctrl + A to select the entire photo. Press Cmd + C / Ctrl + C to copy the photo.

Now, go to the sky photo and paste it by pressing Cmd + V / Ctrl + V.

Step 3 – Remove the background of the man in Photoshop

Grab the Quick Selection Tool from the tool panel or press Shift + W again and again until it comes.

Now select the man. See the below GIF where I used the Quick Selection Tool to select the man. It’s 12 MB in size. Give it some time to load if it’s not loaded.

Now use Select and Mask to refine the selection. Go to Select > Select and Mask.

Make sure that Output To: New layer is selected.

Press Cmd + D / Ctrl + D to deselect. This is what the photo now looks like.

Step 4 – Give the portrait an oval shape

Grab the Elliptical Marquee tool in Photoshop from the tool panel or press Shift + M again and again until it comes.

Create an oval shape around his face.

Now we’re going to remove the body that is outside the oval shape so that only face is shown in the final photo.

Invert the selection using Cmd + Shift + I / Ctrl + Shift + I. Open the layer panel and click on the layer mask.

Change the foreground color to Black.

Press Opt + Delete / Alt + Backspace to hide the area outside the selection.

Press Cmd + D / Ctrl + D to deselect. This is what the photo would look like.

Step 5 – Give the faded effect in Photoshop

Grab the Brush tool from the tool panel or press Shift + B again and again until it comes.

Reduce the Hardness of the brush to 0. Now brush on the lower edges of the man.

That’s all. This is what the final photo looks like

Editing for the Perfect Smile in Photoshop

If you can’t get a perfect smile in photos, don’t worry, as you can easily change that with a little bit of effort. Some people were born photogenic. Others weren’t that lucky.

With all the advanced technology around us, it’s possible to edit for the perfect smile using powerful software tools.

One of the best tools that will surely give you the results you’re after is Photoshop. So, let’s see how you can use it to get that perfect smile in every photo.

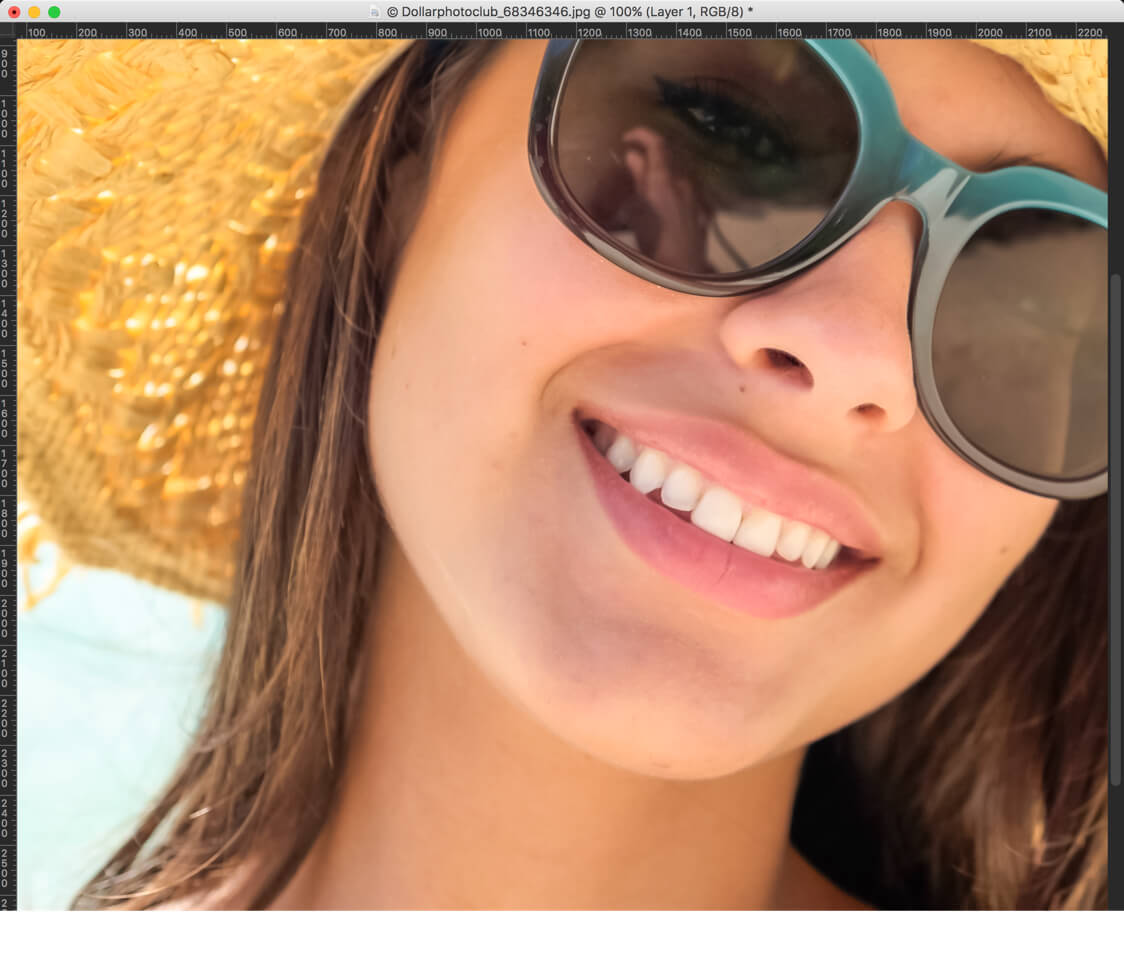
Portrait of a beautiful young woman with a perfect smile. Isolated on white.

Using Photoshop to Edit for the Perfect Smile

Photoshop is probably the most popular software for image editing. People love it because it’s a powerful tool that provides a wide range of effects that you can apply in photos for consistent results.

With so many useful features at your disposal, you can create high-quality photos very quickly.

Here is how this image-editing software can benefit you:

  • Face-Aware Liquify – if you want to add creative character to make an image more fun or enhance a single detail like your smile, the Face-Aware Liquify Photoshop feature is the right tool to do it. It automatically recognizes key facial features and provides options to adjust them.
  • Organization – Adobe Photoshop allows you to import videos and photos into the software, quickly and easily. This allows for a much better workflow as you can handle all files on the screen according to your needs, using features and editing tools.
  • Time efficiency – the most popular effects like red-eye removal, skin tone adjusting, and teeth whitening are just a click away. If you have the skill to use Photoshop, it takes mere minutes to complete these tasks. This makes the software the most favorite editing tool in graphic and web design, marketing, and advertising.

How to Use Liquify Filter for Editing Smile in Photoshop

The following steps will turn you into a professional that uses Photoshop, just like seasoned professionals do when providing graphic design services.

Converting the Background Layer

  1. To convert the background layer into a smart object, open the upper right corner of the Layer panel.
  2. Choose the Convert to Smart Object option to safely place your image inside a smart object.

Renaming the Smart Object

  1. Once the image is inside a smart object, its name will change from Background to Layer 0. You can name it ‘Smile’.
  2. To rename it, highlight the new name by double-clicking on it. This will allow you to change the name to “Smile” and press Enter when you are done.

Selecting the Liquify filter

  1. To adjust the smile, go to the Filter panel and select Liquify to open the image in a separate dialog box for the Liquify filter.
  2. Use the features to zoom in on the detail you want to enhance.
  3. You will notice a toolbar on the left side of the dialog box. Use the features in the toolbar to position the image in the center of the dialogue box.

Selecting the Face Tool

  1. With the face tool, point to the subject’s mouth with your mouse cursor to get additional options. Each of these options represents a different mouth property that you can adjust the way you see fit.
  2. If you want to adjust the upper lip, click and drag on its icon.
  3. As for the smile adjustments, there are two “Smile” icons that you can use to reshape and bend the curve of the mouth. There is also the Smile slider, which allows you to reshape the smile.
  4. You can find it on the right side of the dialog box. By dragging the slider to the left, you reduce the curve of the smile and, to add more curve, drag it to the right. This will make your subject’s smile friendlier and warmer.

Using the Mouth Width Slider to Widen the Smile

  1. Go to the mouth width slider in the Properties panel.
  2. Drag the slider to expand the sides of the mouth outward. It’s important not to overdo it, though, as this can reshape the face of the subject beyond the point of recognition.
  3. You can see your new results on the right side of the preview area.

Using the Lower and Upper Sliders to Adjust the Lip Thickness

  1. Move the upper and lower lip sliders to adjust the lip thickness.
  2. They behave opposite to each other as you will notice if you drag them to the left or right.

Dragging the Cheeks Upward

  1. Just like adjusting the mouth, you need to adjust the cheeks as well. To do this, hover over the cheek.
  2. When your mouse cursor becomes a four-pointed arrow, you’ll get the Move Cheek options.
  3. Move the cheek but follow the natural curve of the mouth. Do the same with both cheeks until you’re satisfied with the result.

Lowering the Height of the Eyes

  1. If you adjust the cheeks, you also must alter the height of the eyes. One goes with the other. By lowering the height, you make a smile look more relaxed. Just like with the cheeks, hover over the eye area to display the Move Eye option and position the eyes to go naturally with the rest of the face.
  2. You can compare your image to the original by pressing P on your keyboard. Keep your adjustments subtle to get the best results. Once you finish your edits, click OK to save your changes.

Conclusion

Editing a smile in Photoshop is an entirely normal thing as not all of us are photogenic. Making photographs is an excellent way to memorize and share all the great moments you had with your friends, family, and loved ones.

If you aren’t happy with how your smile turned out in a photo, you can quickly fix it with the right tool. Change your facial impression with quality software or hire professional graphic design services to do it for you. The choice is yours.

Reduce puffy eyes or eye bags in Photoshop

Some of us have puffy eyes or eye bags. Some of us grow as we get older and some of us have it since our birth. Today, I am going to show you how you can reduce puffy eyes or eye bags in Photoshop.

You can also remove it but that’d look too much photoshopped. So, it’s better to reduce it.

Here is the after and before photos.

After

Before

The photo was taken from Pixabay.

Let’s begin the tutorial.

Step 1 – Grab the Clone Stamp Tool

The first thing we need to do is to grab the clone stamp tool from the tool panel.

Related: See how to use the Clone Stamp Tool in Photoshop.

Grab the Clone Stamp Tool from the tool panel or keep on pressing Shift + S again and again until it comes.

Step 2 – Reduce puffy eyes or eye bags in Photoshop

The next thing we need to do is to remove the eye bags or puffy eyes.

Create a new layer by going to Layer > New > Layer or by pressing Cmd + Shift + N / Ctrl + Shift + N.

Step 2.1: Define the Source

The Clone Stamp Tool is used to copy pixels from one part of the image and paste them on another part. To use the Clone Stamp Tool, you first need to define the source pixels. This will be pixels that are going to be copied. You can do them by holding down the Opt/Alt key.

Once you hold it down, the cursor will change to a sniper cursor.

I’ll paint the skin from this location on the eye bags.

Step 2.2: Paint the Target

Now that I have selected my source, I am going to paint those pixels onto my target. When you do that, you’ll see a cursor that moves synchronously with your cursor. This cursor denotes the pixels that are being copied.

This GIF is of 7 MB in size. So, give it some time to load.

Simply, do this all over the eye bags.

For the best result, you may need to define your source multiple times as I did in the GIF.

This is how the photo will look.

Step 3: Reduce the opacity

Open the layer panel by pressing F7 or going to Window > Layer.

Reduce the opacity to somewhere around 60%.

This is how the final photo looks.

How to create fake iPhone portrait effect in Photoshop

Apple launched portrait mode a few years ago. You can buy an iPhone to shoot portrait photos. But what if you don’t have iPhone but want to shoot portrait mode? Also, what if you have an iPhone but you shoot photos with your DSLR. Let’s see how can you create a fake iPhone portrait effect in Photoshop.

This is going to be a short tutorial because this effect is quite easy to achieve. All, I’ll be doing is to put the human on a separate layer and blur the background. Let’s do it.

But before we begin, I want to show you the after and before

After

Before

Photo from Needpix.

What’s the actual name if iPhone portrait effect?

iPhone portrait effect is not new. It has been in DSLRs for years. The actual name is Shallow Depth of Fields.

So, if you ever come across a DSLR photographer and don’t want them to laugh on you, never say that you want to capture iPhone portrait effect from your DSLR. Say them how can I achieve beautiful shallow depth of field from my DSLR.

Yep, that’s the correct term

Now, let’s start the tutorial.

Step 1: Select the person in Photoshop

The first thing we need to do is to select the person in Photoshop.

I am going to use Select Subject in the Quick Selection Tool. Grab the Quick Selection Tool from the tool panel or press Shift + W again and again until it activates.

Click on the Select Subject.

This will select the person.

Note: you can use Select and Mask and to refine the selection and make the selection perfect. Go to Select > Select and Mask to activate it.

Step 2: Copy the person to a new layer

Press Cmd + J / Ctrl + J to copy the person to a new layer.

Step 3: Blur the background

Time to blur the background. But before that, we need to duplicate the background layer so that we can revert in case we mess up.

Click on the background layer and press Cmd + J / Ctrl + J.

Go to Filter > Blur > Lens Blur.

Tweak the sliders in such a way that it gives a nice looking blur effect. Press OK.

Here’s the photo.

Step 4: Finalize the iPhone portrait effect in Photoshop

You’ll see that there are some impressions of the blurred background that are leaking from the edges of the person. See the below screenshot.

This is happening because we blurred the background and the edges are no sharper. They are (kind of) fused with one another.

We’ll fix this with the Clone Stamp Tool.

Create a new layer by pressing Cmd + Shift + N / Ctrl + Shift + N and drag it to the second position.

Grab the Clone Stamp Tool from the tool panel or press Shift + S again and again until it comes.

Hold down Opt/Alt to select the source and start brushing on the edges. See the below GIF.

Below GIF is of 3.5 MB. Give it some time to load.

That’s all.

2 Steps to Change Eye Color in Photoshop

Eyes are one of the most beautiful parts of a human body. Having a beautiful eyes makes the face very attractive. Well, the shape of the eye matters. But, what matters most is the color of the eyes. No wonder that models wear colored contact lenses during photo shoots to look more attractive. And, the workaround of having a beautiful color eye without wearing lenses is Photoshop. In this tutorial, I am going to how to change eye color in Photoshop.

The tutorial is very easy. All we are going to do is to use the Brush tool.

Before I begin, I want to show you the initial and final pictures.

Initial

Initial.jpg

Final

Final

Let’s begin

Step 1 – Grab the Brush tool

There are many ways to change eye color in Photoshop. I am going to show you the fastest and the easiest one.

Grab the brush tool from the tool panel or press Shift+B again and again until it comes. Reduce the hardness to 0%.

Change the foreground color to the color you would the eyes to have. I am going to change it to #0076a3.

1.jpg

Step 2 – Change the Eye Color in Photoshop

Press F7 to open the layer panel. Alternatively, you can also open it by going to Window>Layers.

Create a new layer by pressing Cmd+Shift+N/Ctrl+Shift+N.

Change the blend mode to Color.

2.jpg

Start brushing the eyes.

If you want, you can first select the iris with the Elliptical Marquee tool and then start brushing. I am skipping that because the end result in my case would be almost same and my hands pretty much know how much should they move the cursor for perfect coloring.

3.jpg

Do it for the second eye also. The second eye is not present in my image so I need to skip that.

Your image should look like this.

4.jpg

I think that the blue is very vibrant. So, I am going to reduce the opacity to 59% in the layer panel.

5.jpg

That’s it.

Here’s the final picture again.

Final.jpg


3 Steps to Darken Iris Rim in Photoshop

Hey, guys! Welcome to my another tutorial from the portrait series. Today, I am going to show you a tutorial on eyes again. Yayy! This time I am gonna show you how to darken iris rim in Photoshop.

You know that I don’t like long tutorials. This one is also going to be a short one again. I am going to use the Marquee tool and layer styles.

But, before I begin, I want to show you the before and after photo.

Before

After

Step 1 – Select One Eye

We need to create a circle around the iris first. Grab elliptical marquee tool from the tool panel or press Shift+M until it comes.

We’re going with the left eye first. Create a circle around the iris. You can hold down the spacebar to move the selection from one point to another.

Now, we need to copy the iris to a new layer. Press Cmd + J/ Ctrl + J for that.

Step 2 – Darken Iris Rim in Photoshop

Time to darken iris rim in Photoshop. We’re going to do this with the help of layer styles. Go to Layer > Layer Style > Inner Glow. 

Change the settings to the one shown below.

Your photo will look something like this.

Step 3 – Finetune the Layer Style

Rather than darkening the iris rim, we have darkened the entire eye. Of course, you and I don’t want that. Time to fix it using the layer mask.

Go to Layer > Layer Mask > Reveal All.

Grab the Brush Tool from the tool panel. Increase the hardness to somewhere around 90%. Now start brushing the area which is blocked by eyelids.

Your photo should look like this.

Change the foreground color to black. Reduce the brush hardness to 0. Put it in the center. Set the size in such a way that it covers roughly around 70% of the iris. Now click 7-8 times.

Now, we have completed one eye.

Repeat the steps for the second eye. This is all.

Here you go with the final image again.

1 Step Tutorial to Change Eye Size in Photoshop

Changing eye size has always been difficult in Photoshop before 2015. I needed to go the Liquify tool and then use Wrap tool or Bloat tool to enlarge the eyes. After 2016, life has become easier. Photoshop has given a dedicated Face tool to change the face including eyes, nose, lips, jawline, Mouth, and Face Shape. I know that some of you still use the old version of Photoshop so I am going to show you both ways to change eye size in Photoshop.

Let’s see how would the image look like.

Let me show you how to do it.

For Photoshop Versions that launched after 2016

The process is very simple if you have Photoshop CC that launched in 2016 or later. We will be using the dedicated Face tool for the job.

Step 1 – Go to the Face Tool and Change Eye Size in Photoshop

Go to Filter > Liquify. 

Activate the face tool which is highlighted with the Yellow color.

Now, Photoshop will automatically detect all the faces in the photo. I have only one face in the above photo. If you have multiple faces, you can select which face to modify by selecting the face using the drop-down that is highlighted with the red color.

Now, you have two options. Do you want to adjust both eyes synchronously or you don’t? Let me explain it one more time? If you increase the size of right eye by 20%, do you want the size of the left eye to be increased by 20% automatically? If yes, turn on the link button which is highlighted by the blue rectangle. If not, turn that link button off.

Adjust the eyes using 5 sliders that Photoshop gives you. I have done mine.

That’s it, guys! This is the way you can change eye size in Photoshop.

For Older Version

You are reading this means you own the older verion of Photoshop. Forget everything that you read earlier. That was not for you. I am going to start from the beginning to show you how to do it.

Step 1 – Open Liquify Tool

We need to go to the Liquify tool. This is the only step common between newer versions and older versions. Go to Filter > Liquify.

Choose the Bloat Tool that is highlighted with the Blue rectange in the above image. Now make sure that the Rate is very low (highlighted with red color in the above image). If you keep the rate high then one click will rapidly increase the eye size. By keeping the rate low, you will actually see the eye enlarging.

Now put the cursor the eye (preferably pupil) and start clicking. Don’t hold. If you hold down the mouse button then size will keep on increasing. If you just click then size will increase in a controlled way. Do it with both eyes.

You can always press Cmd + Opt + Z/Ctrl + Alt + Z to repitativly undo if you have made any mistake.

Step 2 – Refine the Enlargement

Chaning the eye with older verion of Photoshop takes time. You need to use undo many times to refine the enlargement. Keep on using Bloat tool and Undo to get the perfect result.

This is all guys, See in you in the next tutorial.

Day 16: Patch Tool in Photoshop – How to Use it

Hey, guys! Welcome to my 30 Days to Learn Photoshop series. Last time we discussed Healing Brush Tool which is a pretty awesome tool if compared to Spot Healing Brush Tool. But this time, we’re going to learn even a more awesome tool that is Patch Tool in Photoshop.

If you ask me the algorithm behind the Patch tool, I have no idea. But, I do know that whatever it is, it works like a charm. To prove this, I am going to remove 3 moles from this beautiful lady’s face. I know that those moles are adding beauty to her, but for the sake of this tutorial, let’s remove them.

As usual, before we proceed, let me show you before and after images.

Before

Initial.jpg

After

Final.jpg

Let’s begin the tutorial:

What is Patch Tool in Photoshop?

Patch tool in Photoshop is a tool that creates a pattern on the applied area either by using Photoshop’s Content-Aware technology.

Where is Patch Tool Located in Photoshop?

You can activate Patch tool in Photoshop either by grabbing it from the tool panel or press Shift+J again and again until it comes.

1.jpg

How to Use Patch Tool in Photoshop?

Now, let’s learn how to use the Patch tool.

Step 1: Duplicate the Background Layer

First of all, you don’t want your work to be destructive. You always want to work non-destructively so that you can go back to original image whenever you have made any mistake.

To do so, we need to duplicate the background layer. Press Cmd+J/Ctrl+J to duplicate your background layer.

2.jpg

Note – Unlike Healing Brush, Patch tool doesn’t work in transparent layers. It is yet to have “Choose Layers” functionality.

Step 2: Encircle the Flaw

Now encircle the area you want to remove.

3.jpg

Step 3: Move the Selection

Now, gently move the selection to the area that you want to fill the flaw.

4.jpg

Step 4: Deselect the Selection

Now release the mouse. Press Cmd+D/Ctrl+D to deselect the selection.

5.jpg

Ist’s it looking cool?

Let’s remove other two moles also. One is below her right nostril and another in on her left cheek.

6.jpg

Now that we know how to use Patch Tool, let’s understand this tool a little bit deeper.

Option Bar of Patch Tool in Photoshop

7.jpg

Let’s learn each option one by one.

1. Patch

This defines the technology that Patch Tool use. “Normal” lets Patch Tool use the old technology by matching the source pixels against target pixels and then fills the source pixels. “Content Aware” uses the new Photoshop Content-Aware technology. To be frank, I have faced any situation where I needed to use Content-Aware technology. “Normal” technology has always worked for me.

2. Source/Destination

The demo that I showed you is demoed with the “Source” option. In the option, you can encircle the flaw and move it to the area of where you want the pixels of. In “Destination”, you just do the opposite. You encircle the destination and move it on the flaw. The generally saves time when you want the same pixels to placed in several places.

3. Transparent

This is something you always want to turn off. If your image has transparency, you may want to turn it on. If you don’t know what is transparency in the image, just skip to the next point.

4. Use Pattern

This feature allows you to use pattern along with the blending of pixels.

5. Diffusion

Diffusion slider controls how quickly the pasted region adapts to the surrounding image. As a general guideline, low slider values are good for images with grains or fine details whereas high values are good for smooth images.

That’s all for today.

Check out other tutorials from 30 Days to Learn Photoshop series.

Please support TrickyPhotoshop by sharing this tutorial with your friends on Facebook, Twitter, and Google+.

Face Liquify Tool in Photoshop- Change that Face Structure

Hey, guys! It’s been a while since I wrote any tutorial, and your patience has paid off because of the introduction of brand new Photoshop 2015.5. Yes, it’s 2016 and I am also wondering why Adobe didn’t go with 2016 in its name. But let’s not go deep into it. It’s a multi-billion dollar company, and I know there must be some reason behind this name. Let’s get directly into the brand new Face Liquify Tool in Photoshop.

Before we go further, let me show you the Before and After photo.

Before-and-After.gif

Step 1: Open Liquify Tool

After opening your photo, the first thing you need to do is to open the Liquify tool. You can do it by either going to Filter>Liquify or by pressing Cmd+Shift+X/Ctrl+Shift+X. 

The first thing that you need to do after that is to choose Face Tool or press A.

1.jpg

You’ll notice two beautiful lines surrounding the face.

Step 2: Get to Know the Properties

Now let’s get into the properties of Face Liquify Tool in Photoshop.

1: Face Shape

The best thing is that you don’t have to look at the right-hand side of your screen to deal with those sliders. Every single thing can be done within the image itself.

Simply hover your mouse over the edge of the face and Photoshop will automatically pop up the line to change the face shape.

2.jpg

You’ll find four points associated with face shape:

Forehead: Used to increase or decrease the size of the forehead

3

Chin Height: Used to increase or decrease the size of the chin

4

Jawline: Pretty cool feature. Can alter jawline of a face

5

Face Width: Changes the width of a face

6

2: Enhance Your Eyes with Face Liquify Tool in Photoshop

Time to learn how to make beautiful eyes even more beautiful. Simply hover your mouse over the eyes. You can do with either of the eyes, and the same result will reflect in another eye as well.

7.jpg

Eye Size: Used to increase or decrease the size of eyes

8

Eye Height: Used to increase or decrease the height of eyes

9

Eye Width: Used to increase or decrease the width of eyes

10

Eye Tilt: Used to tilt eyes

11

Eye Distance: Used to increase or decrease the distance between the two eyes. You need to use the slider for this option. 🙁

12

3. Nose – Now You Don’t Have to Pay $45k for Your Nose Job

Time to make the nose better.

13.jpg

Nose Width: Used to increase or decrease the width of the nose

14.jpg

Nose Height: Used to increase or decrease the height of the nose

15.jpg

4. Mouth – Make Your Smile Better

You know that Face Liquify tool can’t get any better when it comes with a feature to enhance your smile. You can even make a dull person smile with this feature. Of course, it does much more to your mouth than a smile.

16.jpg

Smile: Increase or decrease your smile

17.jpg

Upper Lip: Increase or decrease your upper lip

18.jpg

Lower Lip: Increase or decrease your lower lip

21.jpg

Mouth Width: Increase or decrease your mouth width

19.jpg

Mouth Height: Increase or decrease your mouth height

20.jpg

And with this said, we’re concluding our tutorial. I hope that you’ve enjoyed it.

Please support TrickyPhotoshop by sharing this tutorial with your friends and family of Facebook, Twitter, and Google+.

Add Eyeliner in Photoshop

Hey guys, welcome to my another tutorial on Photoshop. You went to a party and your wife forgot to put on eyeliner. After looking at the images, she realized that she had made a terrible mistake. Her eyes are looking completely plain in the photos. Now she can’t upload those adorable photos on Instagram because of one small mistake. Fortunately, we have something in Photoshop that can save her soul. So let’s begin our today’s tutorial on How to Add Eyeliner in Photoshop.

Before we begin, I’d like to show you how our final image will look like.

Now that you’ve seen the final image, let’s begin with the tutorial.

Step 1: Download Eyeliner

Download a PNG image of eyeliner.

eyeliner_001_o
Download it

You need to save the above image in order to proceed. Right click on the image and save it.

Step 2: Copy Eyeliner

Open the image in Photoshop. Open the Layer Panel by pressing F7. Hold down Cmd/Ctrl key and click on the icon shown on the layer panel.

1.jpg

Now press Cmd+C/Ctrl+C to copy the image.

Step 3: Add Eyeliner in Photoshop

Open the image where eyeliner needs to be added.

2.jpg

We need to move the eyeliner to the desired place. We could use any type of move tool but I am using my favrouite, Free Transform Tool. Press Cmd+T/Ctrl+T to activate it. Resize and place the image on her eye. You don’t have to be accurate here. Placing it perfectly will be done in the next step.

3.jpg

Step 4: Transform Eyeliner

To make the eyeliner skewer, hold down Cmd/Ctrl key. Make sure that Free Transform Tool in still activated. You’ll notice that cursor will change to white. Now drag middle right point to make the eyeliner skewer.

4.jpg

You need to do it couple of times to get a perfect picture.

Step 5: Duplicate Eyeliner

Duplicate the layer by pressing Cmd+J/Ctrl+J.

Go to Edit>Transform>Flip Horizontal.

5.jpg

Step 6: Complete the Image

Once again use Free Transform Tool and place the flipped eyeliner on the other eye.

6.jpg

And now you’re done with the image.

FINAL

Final.jpg

I hope that you like the image.

Please support TrickyPhotoshop by sharing this image with your family and friends on Facebook, Twitter, and Google+.

See you in my next tutorial.