Creating a sepia effect in Lightroom does not only mean to drag the Temp slider. You also need to take care of the Shadows, Highlights, Contrast, and HSL. I am going to show you exactly the same. Let’s see how to create a sepia effect in Lightroom.
This is going to be a short tutorial. Almost all Lightroom tutorials are the short one you only play with sliders.
Oh yes, if you want to download the preset, I have it here for you. No sign up is required.
This link will scroll you to the bottom of the tutorial. If it doesn’t, scroll to the bottom. You can see more Lightroom presets here.
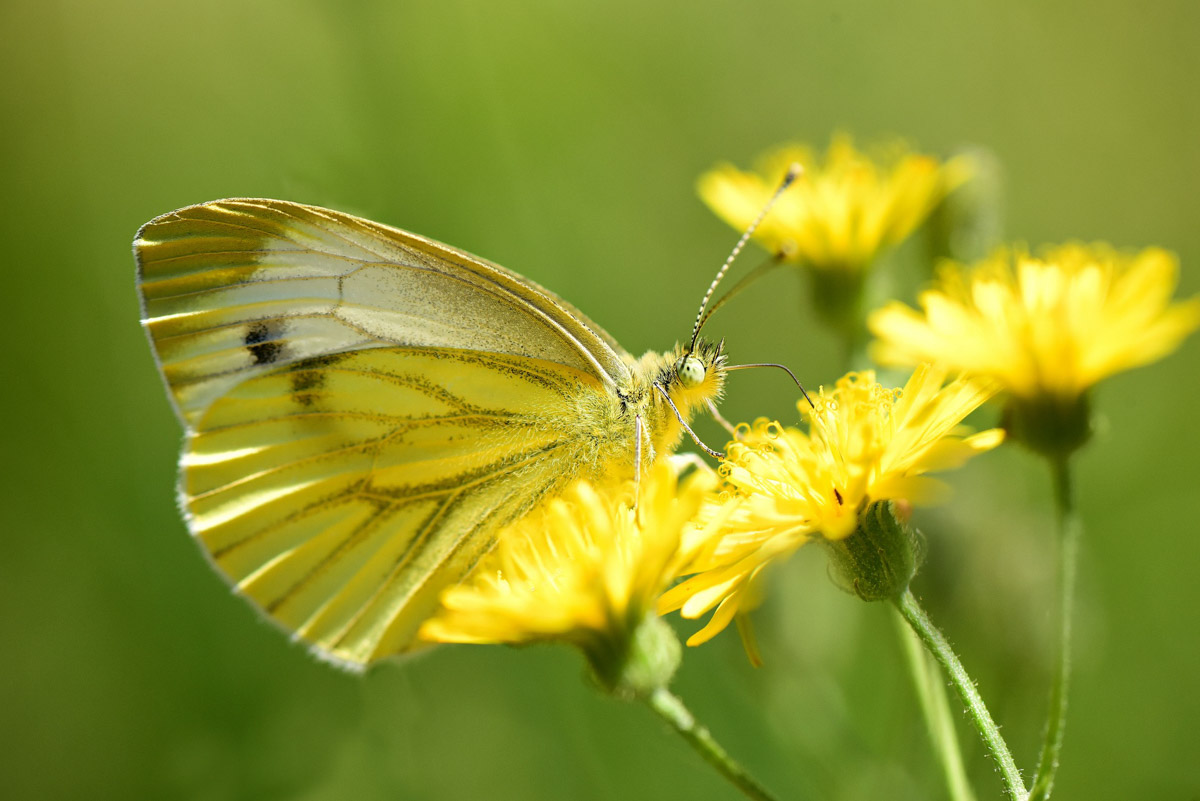
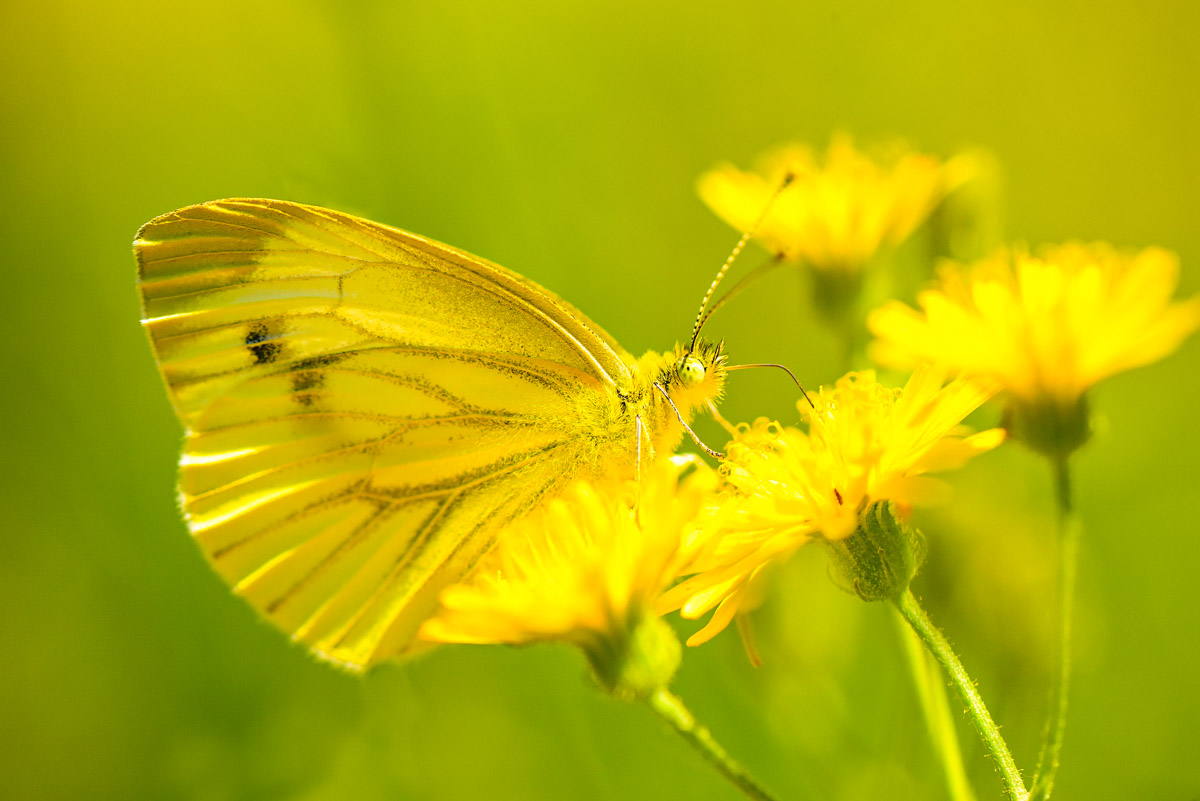
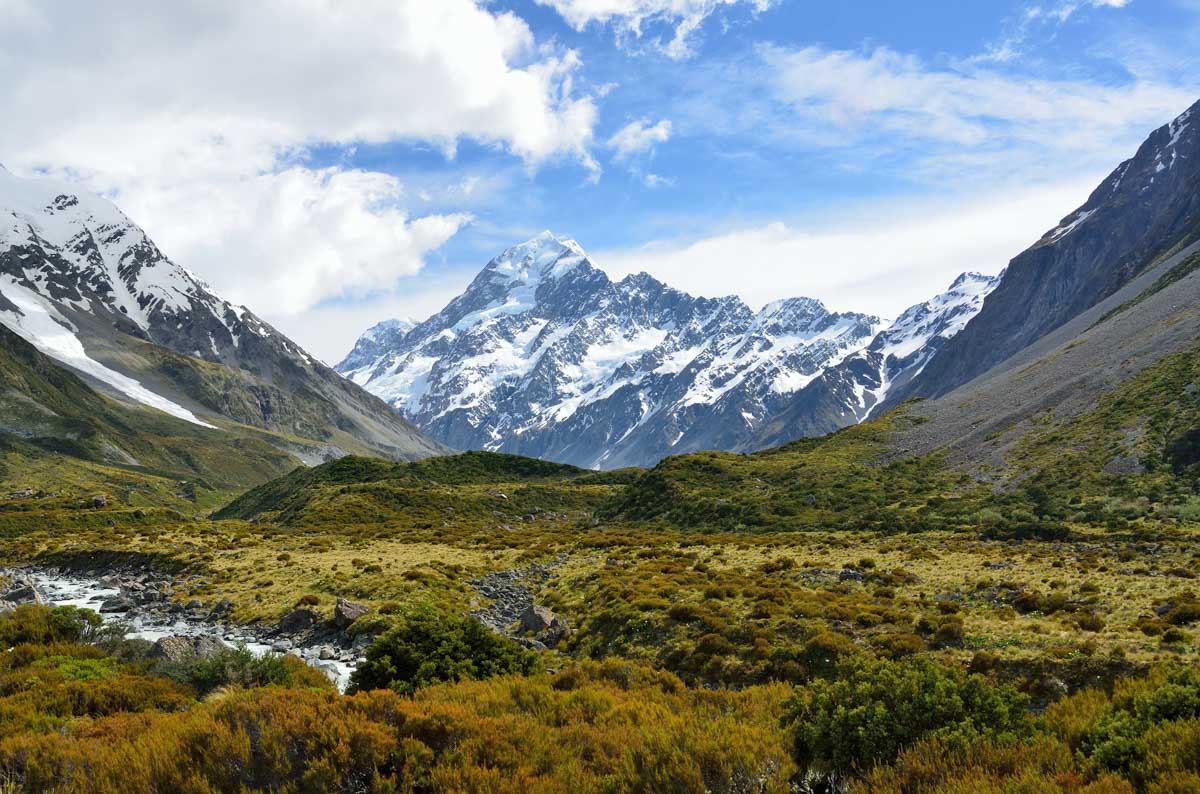
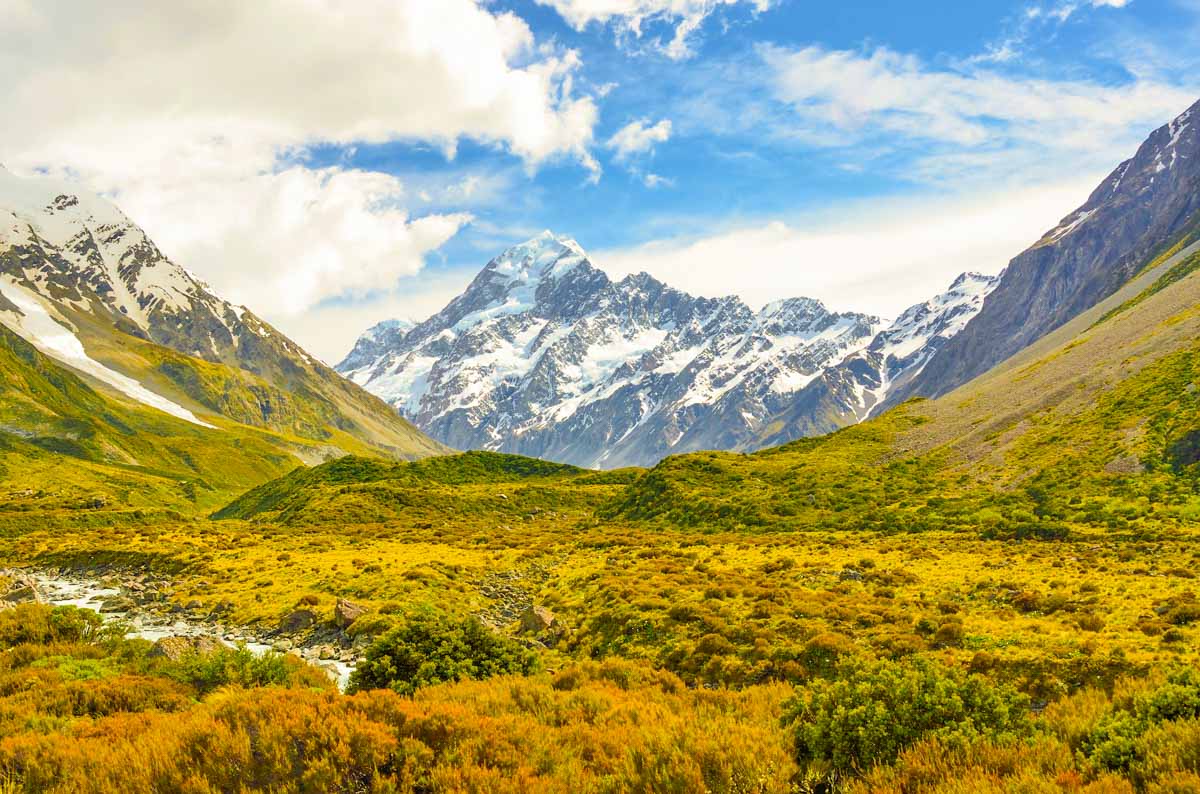
Let’s see the before and after.
Before
After
Let’s begin.
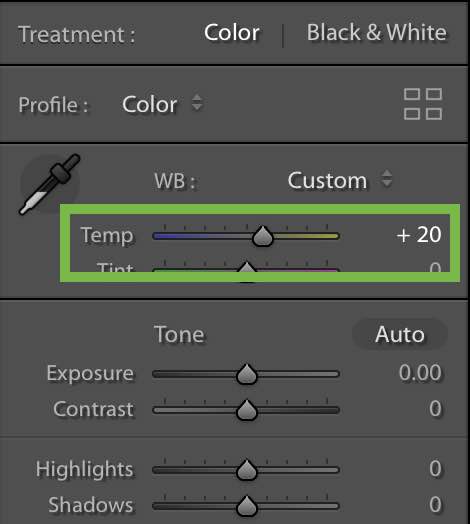
Step 1: Increase the temp
This is the first step and the most important one. Sepia effect basically means that your photo should have a yellowish tint.
Increase the temp slider to +20.
This will add a yellowish effect to your photo. This is not everything. We need to do a lot more things.
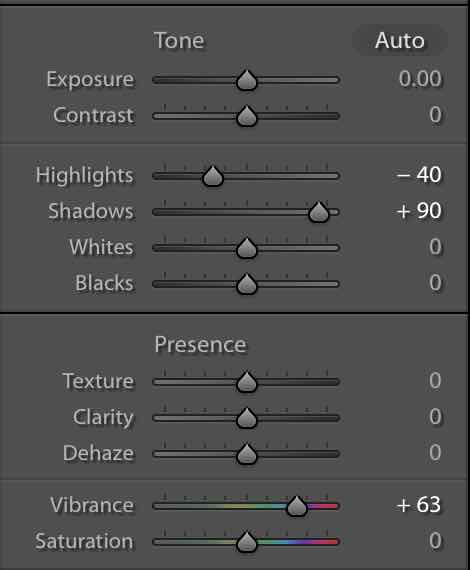
Step 2: Adjust the tone
Time to adjust the tone.
The goal is to make the shadows bright and dim the highlights. Also, increase the colors in the photo.
Decrease the Highlights to -40
Increase the Shadows to +90
Increase the vibrance to +63
This will make the photo brighter.
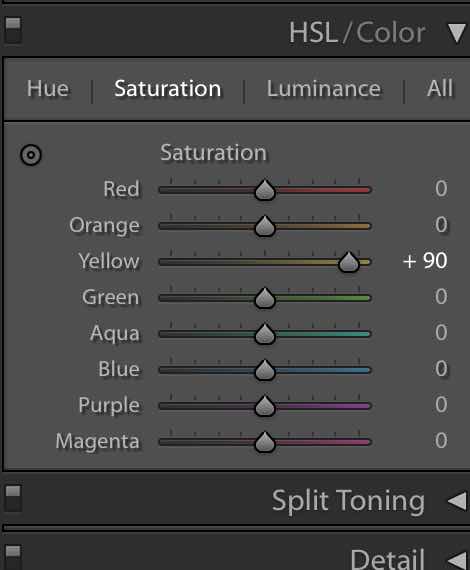
Go to the HSL panel.
I am asked by some of you that they don’t see the Hue, Saturation, and Luminance tab. This is because you’re in the “Color” panel. Click on the “HSL” in the title and you’ll see them.
Increase the saturation of the Yellow color to +90
This will slightly increase the yellowness in your photo.
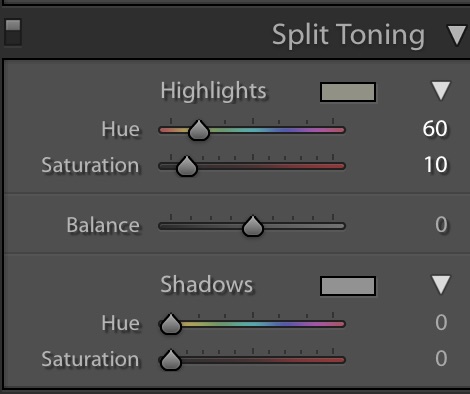
Step 3: Adjust the split toning to create a sepia effect in Lightroom
The shadow is already having the sepia tint. We need to give the highlights a sepia tint.
Go to the Split Toning panel.
Increase the Hue to 60
Increase the Saturation to 10
Your photo should look like this.
Download the Lightroom sepia preset
As I promised at the starting of this tutorial, here’s your preset.
Hey guys, welcome to my another Photoshop 1 minute tutorial. This time I am going to show you how to create Photoshop Sepia effect in just 1 minute. If you’re an intermediate or advanced user, you can create it in even lesser than 1 minute. Oh! I forgot to tell this is another tutorial for my 1-minute Photoshop series.
You are seeing many tutorials on Google for Photoshop sepia effect. All of them are great but they are very-very big tutorials. I believe that you should not spend more time in a task that can be completed in a comparatively lesser time. Some tutorials will ask you to open Camera RAW, some will ask you to play with duotone, and some will ask you to use Photoshop filters. All of them will get you the result but will take a good amount of time to achieve the result.
This is why I bring you the Photoshop sepia effect tutorial that you can create in just 1 minute.
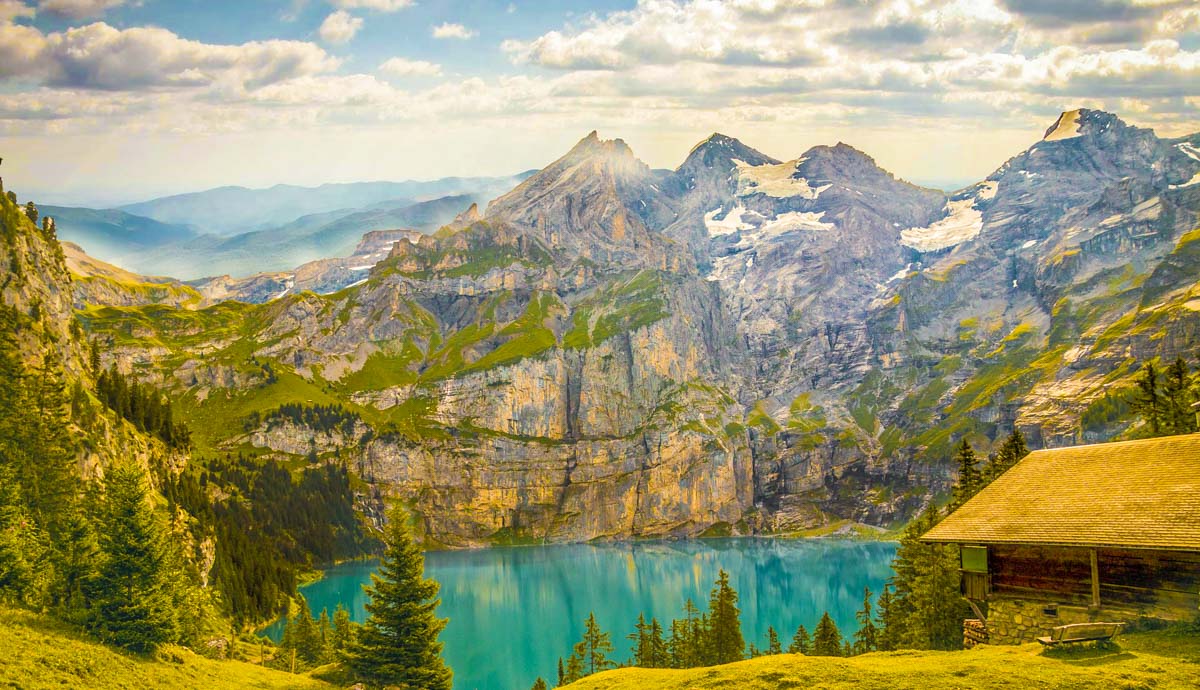
Here you go with the final image.
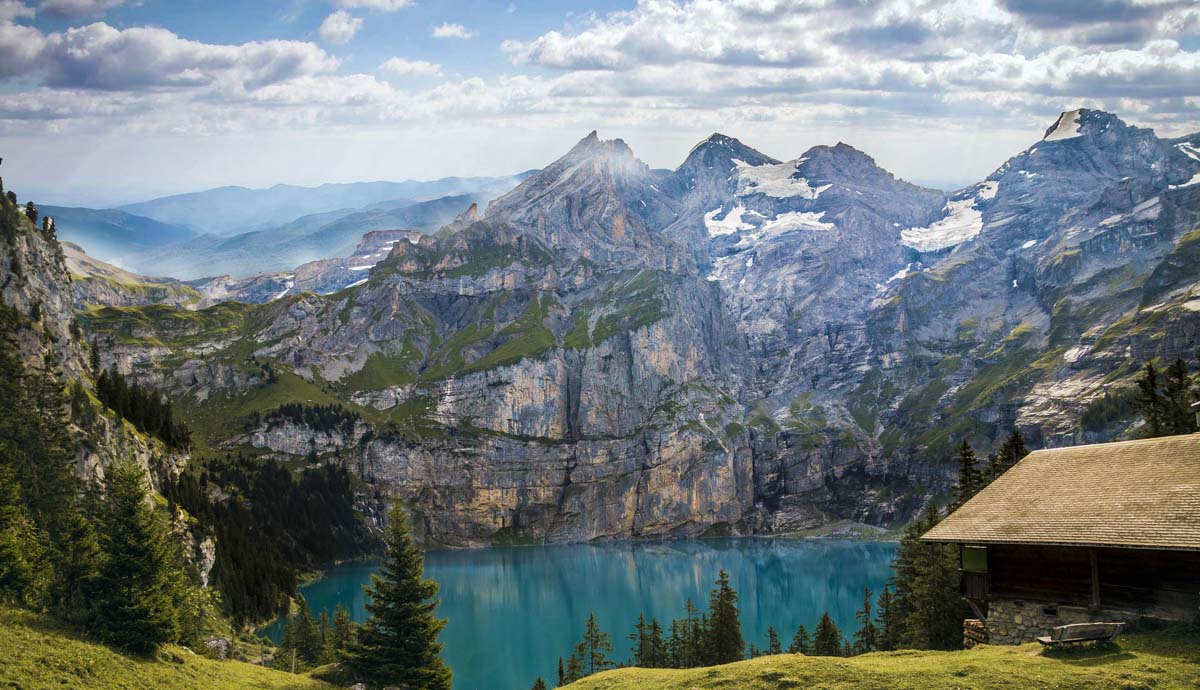
Here’s the initial image.
Let’s start the tutorial.
Step 1 – Set the Foreground Color for Photoshop Sepia Effect
Click on the foreground color and set #704214 as the color. #704214 is the HEX color code of Sepia.
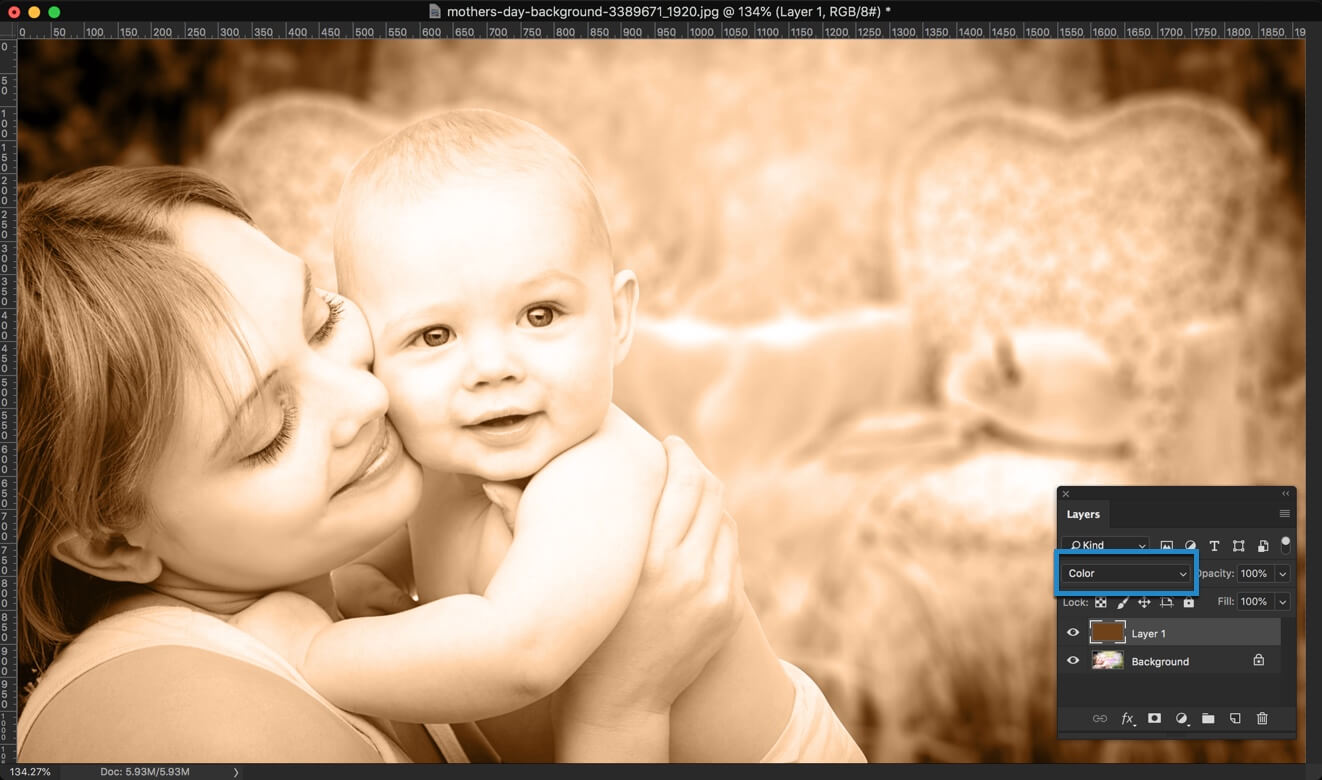
Step 2 – Create a New Layer
Create a new layer by pressing Cmd+Shift+N/Ctrl+Shift+N. You can also go to Layer>New>Layer to create a new layer. There’s another way to create a new layer. Open Layer Panel by pressing F7 and click on the Create New Layer icon.
Step 3 – Fill the New Layer with the Sepia Color
Time to fill the new layer with the sepia color. Press Opt+Delete/Alt+Backspace to fill the layer with the foreground color.
Change the blend mode to “Color”.
That’s all.
Congrats! You now know how to achieve Photoshop sepia effect in just 1 minute. Share this tutorial with your friends and show them that they’ve been adding sepia effect wrongly since birth.