Hey, guys! Welcome to my another tutorial from the portrait series. Today, I am going to show you a tutorial on eyes again. Yayy! This time I am gonna show you how to darken iris rim in Photoshop.
You know that I don’t like long tutorials. This one is also going to be a short one again. I am going to use the Marquee tool and layer styles.
But, before I begin, I want to show you the before and after photo.
Before
After
Step 1 – Select One Eye
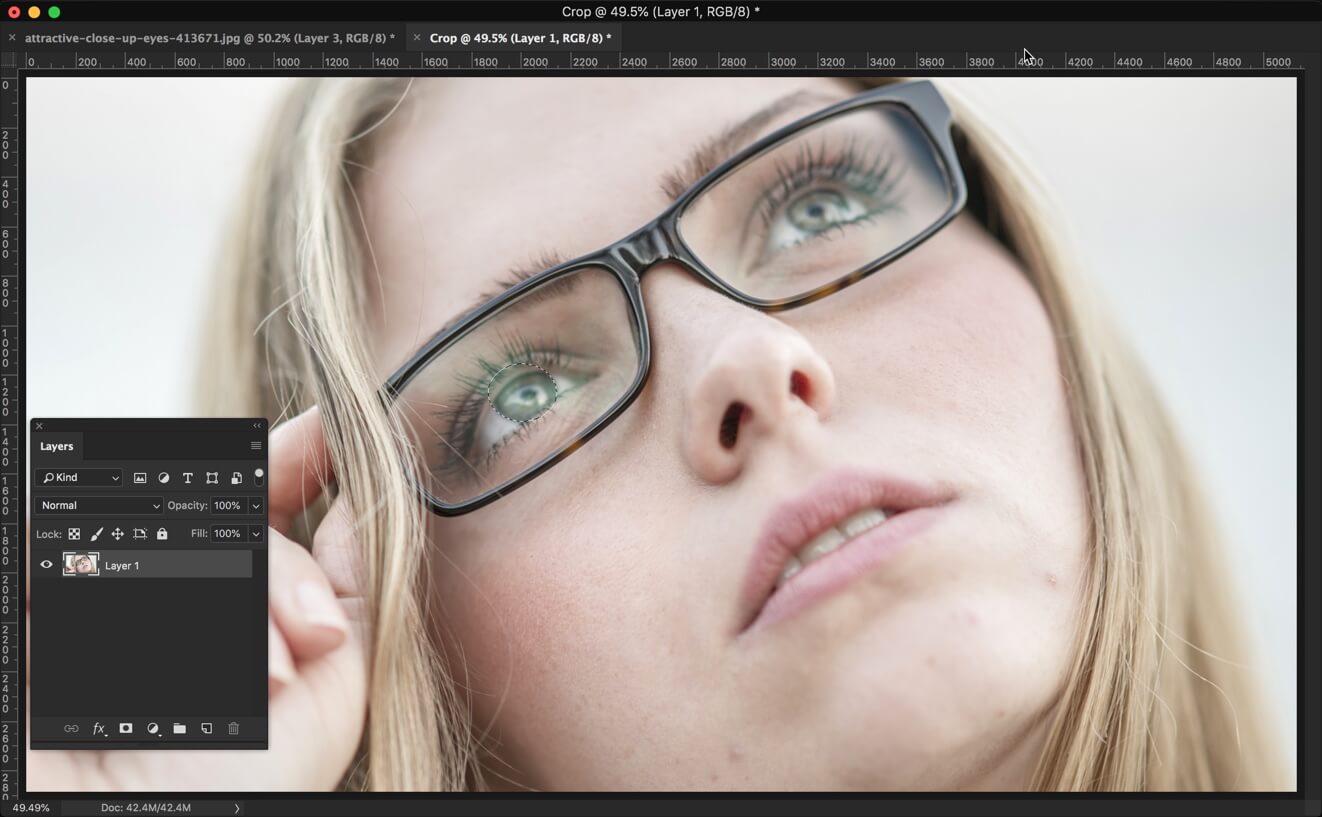
We need to create a circle around the iris first. Grab elliptical marquee tool from the tool panel or press Shift+M until it comes.
We’re going with the left eye first. Create a circle around the iris. You can hold down the spacebar to move the selection from one point to another.
Now, we need to copy the iris to a new layer. Press Cmd + J/ Ctrl + J for that.
Step 2 – Darken Iris Rim in Photoshop
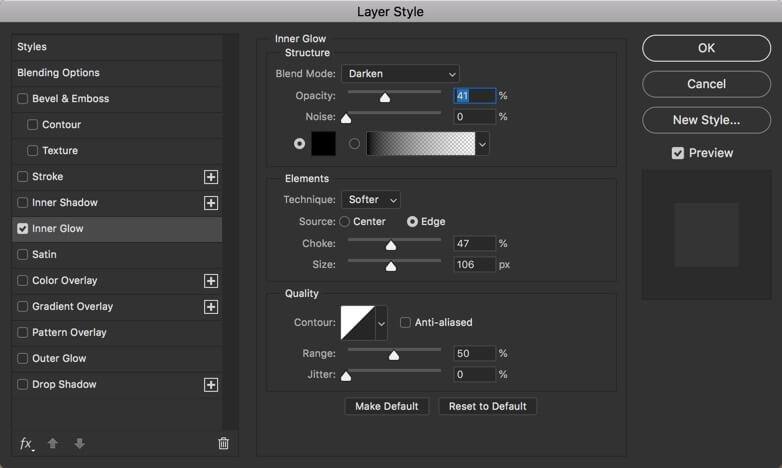
Time to darken iris rim in Photoshop. We’re going to do this with the help of layer styles. Go to Layer > Layer Style > Inner Glow.
Change the settings to the one shown below.
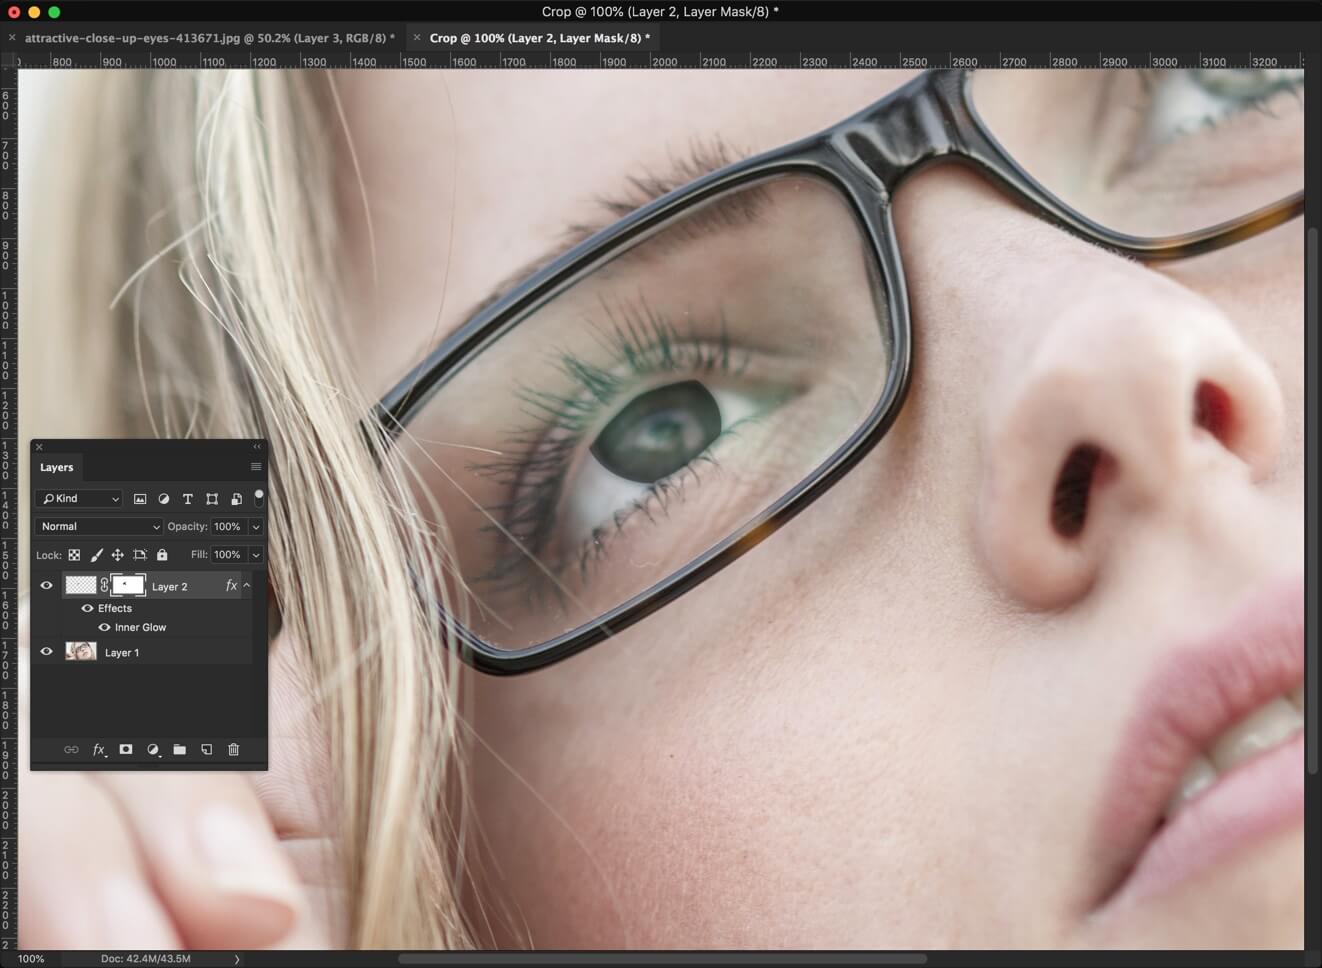
Your photo will look something like this.
Step 3 – Finetune the Layer Style
Rather than darkening the iris rim, we have darkened the entire eye. Of course, you and I don’t want that. Time to fix it using the layer mask.
Go to Layer > Layer Mask > Reveal All.
Grab the Brush Tool from the tool panel. Increase the hardness to somewhere around 90%. Now start brushing the area which is blocked by eyelids.
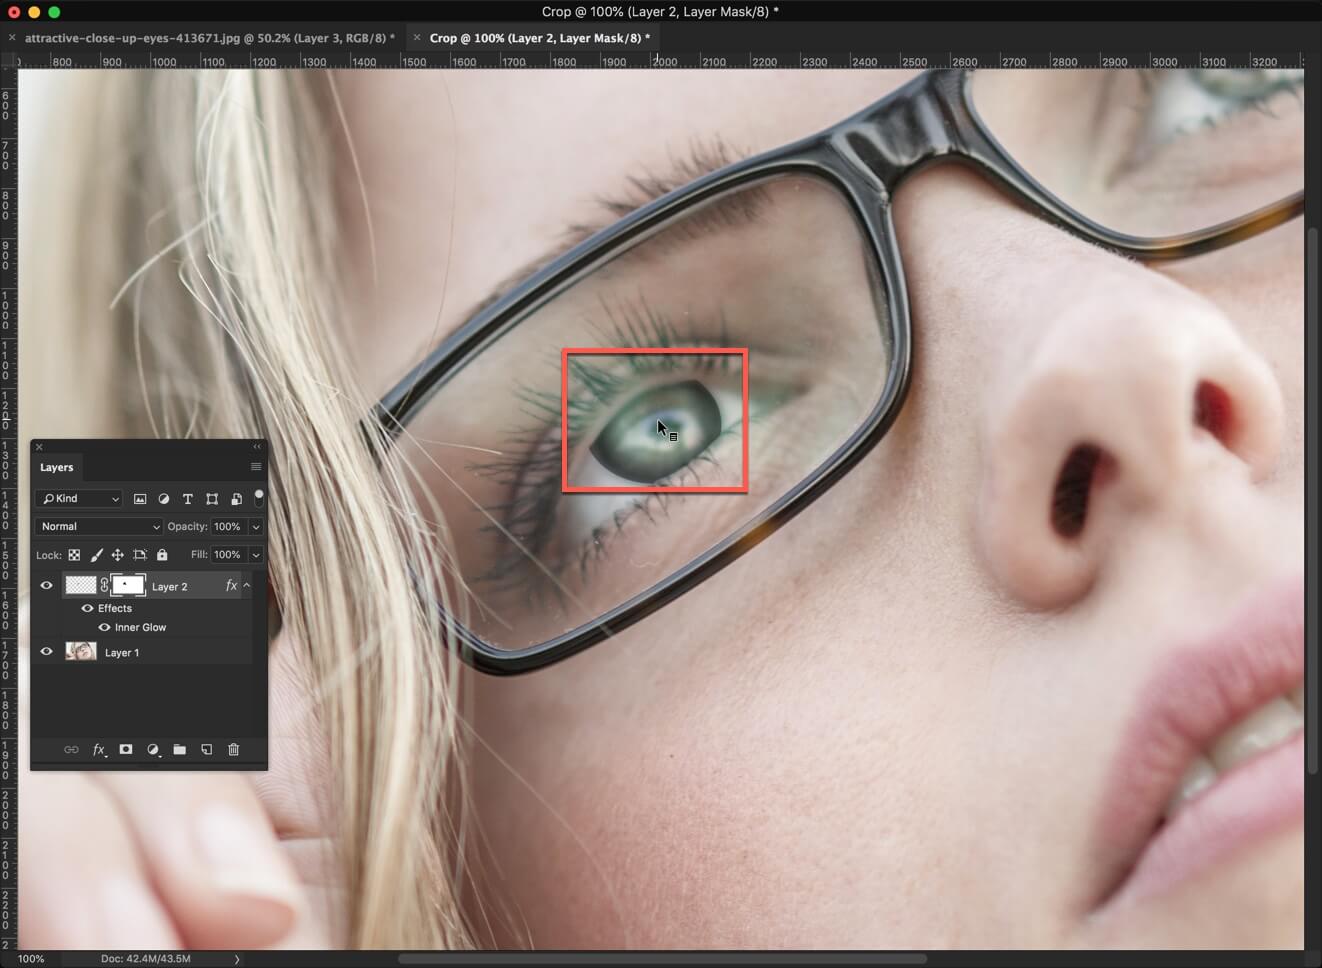
Your photo should look like this.
Change the foreground color to black. Reduce the brush hardness to 0. Put it in the center. Set the size in such a way that it covers roughly around 70% of the iris. Now click 7-8 times.
Changing eye size has always been difficult in Photoshop before 2015. I needed to go the Liquify tool and then use Wrap tool or Bloat tool to enlarge the eyes. After 2016, life has become easier. Photoshop has given a dedicated Face tool to change the face including eyes, nose, lips, jawline, Mouth, and Face Shape. I know that some of you still use the old version of Photoshop so I am going to show you both ways to change eye size in Photoshop.
Let’s see how would the image look like.
Let me show you how to do it.
For Photoshop Versions that launched after 2016
The process is very simple if you have Photoshop CC that launched in 2016 or later. We will be using the dedicated Face tool for the job.
Step 1 – Go to the Face Tool and Change Eye Size in Photoshop
Go to Filter > Liquify.
Activate the face tool which is highlighted with the Yellow color.
Now, Photoshop will automatically detect all the faces in the photo. I have only one face in the above photo. If you have multiple faces, you can select which face to modify by selecting the face using the drop-down that is highlighted with the red color.
Now, you have two options. Do you want to adjust both eyes synchronously or you don’t? Let me explain it one more time? If you increase the size of right eye by 20%, do you want the size of the left eye to be increased by 20% automatically? If yes, turn on the link button which is highlighted by the blue rectangle. If not, turn that link button off.
Adjust the eyes using 5 sliders that Photoshop gives you. I have done mine.
That’s it, guys! This is the way you can change eye size in Photoshop.
For Older Version
You are reading this means you own the older verion of Photoshop. Forget everything that you read earlier. That was not for you. I am going to start from the beginning to show you how to do it.
Step 1 – Open Liquify Tool
We need to go to the Liquify tool. This is the only step common between newer versions and older versions. Go to Filter > Liquify.
Choose the Bloat Tool that is highlighted with the Blue rectange in the above image. Now make sure that the Rate is very low (highlighted with red color in the above image). If you keep the rate high then one click will rapidly increase the eye size. By keeping the rate low, you will actually see the eye enlarging.
Now put the cursor the eye (preferably pupil) and start clicking. Don’t hold. If you hold down the mouse button then size will keep on increasing. If you just click then size will increase in a controlled way. Do it with both eyes.
You can always press Cmd + Opt + Z/Ctrl + Alt + Z to repitativly undo if you have made any mistake.
Step 2 – Refine the Enlargement
Chaning the eye with older verion of Photoshop takes time. You need to use undo many times to refine the enlargement. Keep on using Bloat tool and Undo to get the perfect result.
This is all guys, See in you in the next tutorial.
Hey guys, I had written a tutorial on the same topic in 2013. The tutorial is now old and many of you are asking me to write a fresh one. So, let’s begin to talk about our today’s tutorial which is to change the hair color in Photoshop.
You and I are getting to know the fashion trends much sooner now with the rise of Instagram. You follow a fashion model and you like her hair color. You badly want that color but you don’t know how would you look. You can check it in Photoshop simply. Change the hair color in Photoshop and look by yourself.
If you’re a photographer then you can also use this to change the hair color in Photoshop of your models.
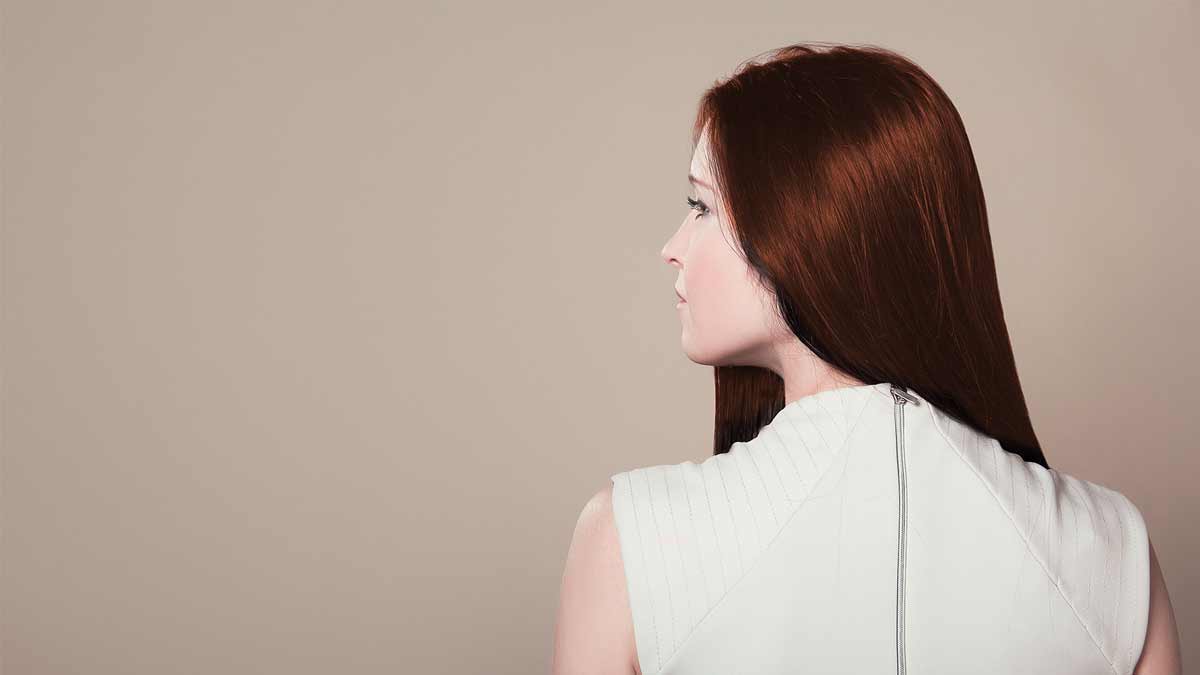
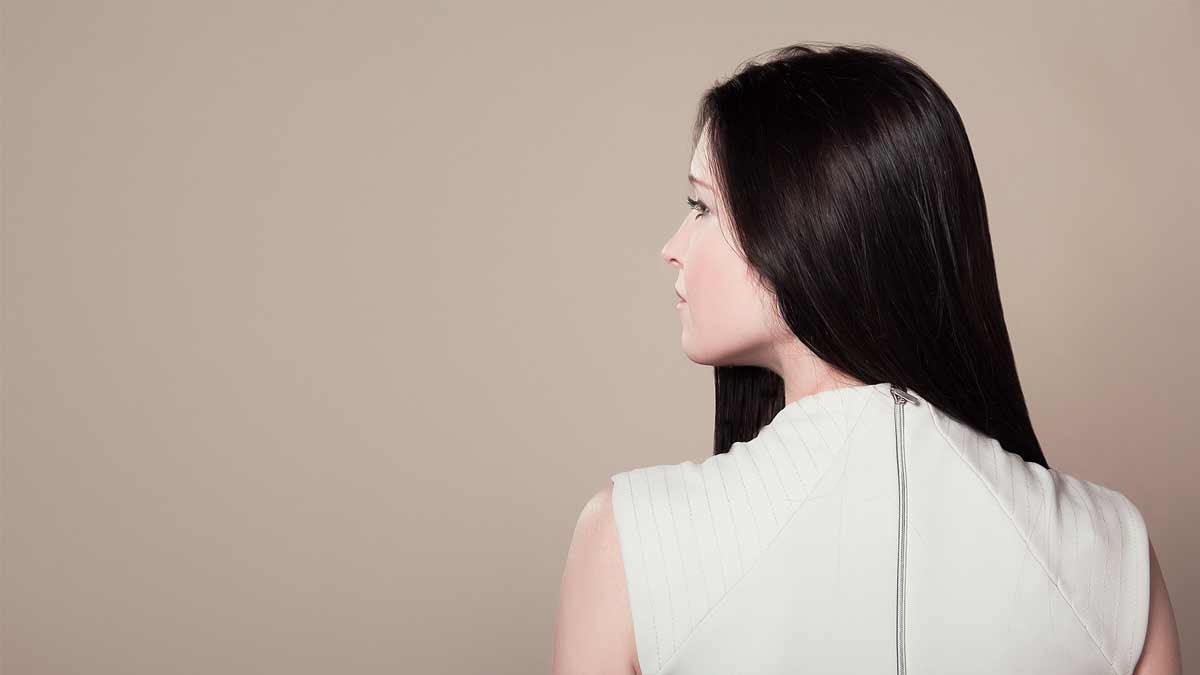
Before I begin, I would like to show you the before and after picture.
After
Before
With this said, let’s begin this tutorial.
Step 1 – Select the Model
We are going to use an adjustment layer to change the hair color in Photoshop. So, you want to make sure that adjustment layer only affects the hair, not anything else. Selecting hair is one of the most difficult things in Photoshop. So, we’re going to select the model and then use Layer Mask to isolate the hair.
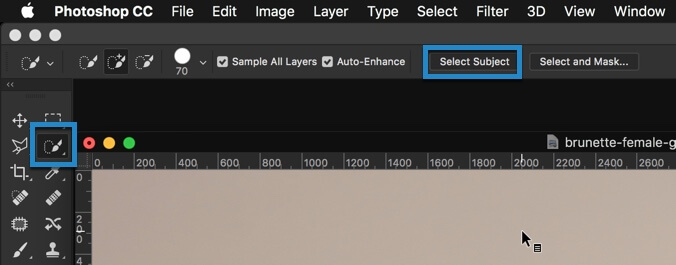
If you’re using Photoshop CC 2018 then you have a perfect tool to do that which is Select Subject. We’re going to use this to select the model.
Go to Quick Selection Tool and then click on Select Subject in the option bar.
If you don’t have Select Subject feature then you need to manually select the model using tools like Quick Selection Tool, Pen Tool, etc.
Go to Select>Select and Mask. Choose the Refine Edge brush and start painting.
Step 2 – Change the Hair Color in Photoshop
Go to Layer>New Adjustment Layer>Hue/Saturation. Make sure that you have turned on clipping and colorize. Both are highlighted in the below image.
Adding clipping will make sure that whatever you do will affect only the layer below it. This is the layer which contains only the model. So, we would like to ensure that only model color gets changed.
Turning on colorize will colorize the entire color. Now, you can choose whatever color you want. I am going with the brunette.
Step 3 – Remove the Color from the Model
Make Black as your foreground color. Activate Brush tool by pressing B.
Now start painting on model except her hair. This will remove the color from everywhere but her hair.
And here you go. You can play with the colors in Hue/Saturation adjustment layer.
Eyes are the most beautiful part of our face. People fall in love after looking at eyes. Their shape, movement, or even color make all the differences. Today, I am going to show to make the most beautiful part of a face even more beautiful. I am going to show you how to add eyeliner in Photoshop.
There are two ways you can add eyeliner in Photoshop. One is to create one in Photoshop and another is to download the image of an eyeliner and paste. We’re going with the second option because that’s much easier and time saver.
You need to download the image of the eyeliner before you proceed. I have attached it for you to make your life simpler. The best thing is that it’s a PNG image with no background. So, you won’t see the not-so-beautiful white background whenever you paste it in Photoshop.
Step 1 – Open the Eyeliner Image in Photoshop
We need to copy the eyeliner image so that we can use it on other images. Open it on Photoshop.
We’re going to copy the eyeliner. Open the layer panel by pressing F7. Hold down Cmd/Ctrl and click on the layer thumbnail. This will select the eyeliner and then press Cmd+C/Ctrl+C to copy.
Step 2 – Add Eyeliner in Photoshop
Press Cmd+V/Ctrl+V to paste the eyeliner on another image.
Step 3 – Align the image according to the eyes
It’s better to zoom in the image so that you can align the eyeliner better. Press Cmd+”+”/Ctrl+”+” to zoom in.
Time to align the eyelinerPress Cmd+T/Ctrl+T to activate the free transform tool. Now drag the eyeliner and align it with the eyes. It doesn’t have to be perfect. Look at the below screenshot. I have aligned it from viewer’s left but it’s not aligned from the viewer’s right. We’re going to fix it now.
Hold down Cmd/Ctrl and put the cursor on the adjustment handle which is not aligned. Look at the screenshot below to understand things better. The cursor will change to white.
Now, only that part of the eyeliner will move which is associated with the cursor.
Step 4 – Duplicate the Layer
I think that the eyeliner is not looking much visible. It’s translucent. Let’s duplicate the layer. Press Cmd+J/Ctrl+J to duplicate it. Now, it’s looking good.
Step 5 – Duplicate and Flip for the Another Eye
Time to proceed with the next eye. Again duplicate the layer by pressing Cmd+J/Ctrl+J. Now, we’re going to flip it. Go to Edit>Tranform>Flip Horizontal. This will flip the layer horizontally.
Align the eyeliner like we did in step 3 and step 4.
I have done it in my image.
With this, we can wrap up this tutorial.
I know that you like this tutorial. Share it with your friends.
This article is contributed by Clarence J. Tilford from essayservices.org. Head out to the website for cheap essay writing service.
Photo is something very special and precious one. We capture some beautiful moments and emotions in photo. People call photographers in special occasions to make it more special and capture the special events special moments. It’s natural that we always love to remember special events and some beautiful smiley and happy days of our life.
Still everyone could not be photographers. Photography is an art and a passion. Every one could not be expert in photography. Photography is not like other professions. It needs special talent and skill to make the moment more enjoyable and more happening. Now a day’s youngsters choose photography field and take it as a passion. It needs extra talent and skill to understand the photographic angle and the photographic tools and techniques.
After the new invention of Photoshop, the photographers got a new way and new technique to make their photo and image more beautiful and more attractive. Photoshop brought new version of photography and gave a new image and made a simple picture to more attractive and different. Photoshop is a instrument, not a support. A bad photo is a bad photo it can’t be made good by editing or by doing extra processing or adjustments. But by overusing Photoshop and editing a good photo will be turning to bad. So we have to be very careful while using Photoshop.
By using Photoshop neatly and carefully we can make a photo more attractive and photographers must know basic techniques of using Photoshop. Photoshop makes your most excellent photo into a remarkable masterpiece. There are essential skills that photographers must know and they should adopt those skills in their photos.
Use of brush
In Photoshop brush is an elementary and foundational tool. It’s not easy to use it has its own way and method. A perfect photographer must know how to use the brush in Photoshop. If he understands that the photographer will be able to understand the related tools. There is fundamental equipment beginners should learn about the brush tool.
The photographer must know how to use a different brush and when which brush should be used. There is also an adjustment in brush size. So the photographer must understand the usage of brush in a different size. Not only that, those beginners are not able to understand the brush dullness. So he must understand the brush cloudiness and brush flow.
Tool selection
In Photoshop there is a number of ways to select tools. Some are simple and some are a complicated one. There are two selection tools which every beginner photographer must know. The marquee tool and another is lasso tool.
The marquee tool gives you the option of different shapes and size by selecting the particular size you have to do work or edit in that size. Lasso tool is a freehand tool. You have to draw the area which you want to work it out. It has no limitation of size and shape. Selection of particular area helps you to work within a specific area without affecting other parts of the image. It’s up to you which one you want to select and which will make your photo more attractive.
Using filter tool
Some photographers rarely use the filter tool in Photoshop. But every beginner should have the knowledge about filtering in Photoshop then only he can understand the basics of Photoshop. Pick an image and use your techniques of filtering in it. Then you will be able to understand the real use of filtering in Photoshop.
Vignette technique
Vignette is technique basically used to high light the real picture in the frame. Without diverting your mind you can focus on the picture. It’s basically darkening and giving extra blackish colour to the edge of the frame so that you can concentrate on the subject. As a result of the vignette, there will be a dark shade around the subject.
Sharpening the picture
It’s another tool in Photoshop that every beginner must be aware of. In its word itself, we can get the idea that it’s used to make the picture sharper and more detailed. I will suggest using this tool while photo shopping your image but never use it too much. When you make the picture more detailed may be at one point it will lose the attribute of attraction so photographers must use it but for limited.
Brightening and contrast
It’s another very important tool in Photoshop. It’s very easy to make an adjustment so one must be very careful by using it. We have to apply them very carefully. When the photo session was done in Light room the photographer must use brightening tool to make it clearer and adjust it to correct flow of exposure. One must be very care full while using brightening and contrasting tool because it goes hand in hand. It must complement each other.
Curves and level
Curves and level tools are one of the advanced approaches of brightening and contrasting tool. We use brightening and contrast tool in Photoshop at the same time Photoshop gives another tool called curves and levels its use also the same but we can same that it’s somewhat more advanced than other. It makes subject targeted. It’s not easy to use at first but later you will use it and you can handle it easily and you will wonder about its result.
Photoshop content aware fill
It’s very useful and very advanced tool in Photoshop. By using this tool you can make your picture more attractive and beautiful. You can avoid the unwanted area by selecting from the frame and delete it. You just select an unwanted area from the frame and apply this tool. This tool carefully reads the frame and without much effort removes the selected area.
Colour balancing tool
Colour balancing tool always helps you to look into your picture from a different angle. Colour balancing helps you to understand how the existing colours interact or complement each other. Colour is the very important part which you can try while ornament ling your photographs.
Cropping tool
The cropping tool is easy to apply and its use must be known to the photographers while they are photo shopping. It helps the photographer to drag the photo and select it as he wants. It gives a more accurate look at your image and helps to focus on your subject matter.
So these are some Photoshop skills which every beginner photographers should adopt in their picture. Some are easy to handle and some are difficult in the beginning later on you can use it. It’s all about new creativity and new thoughts.
Hey, welcome to another 1-minute series. Today, I’ll show you how can you change eye color in Photoshop in 1 minute. Yes, I have written a tutorial on this topic a few years ago. The tutorial was quite big and you cannot use that tutorial to change the eye color in just 1-minute. This is why I am bringing you this tutorial.
There has been a good demand for the 1-minute series and many people are asking me to create several 1-minute series. Some of them asked me to write one on how to change eye color in Photoshop. Others are swapping the sky, change skin tone, etc. in just 1-minute. I have written some of them in my 1-minute series. I still need to write many of them. So, bookmark the page so that you come back later.
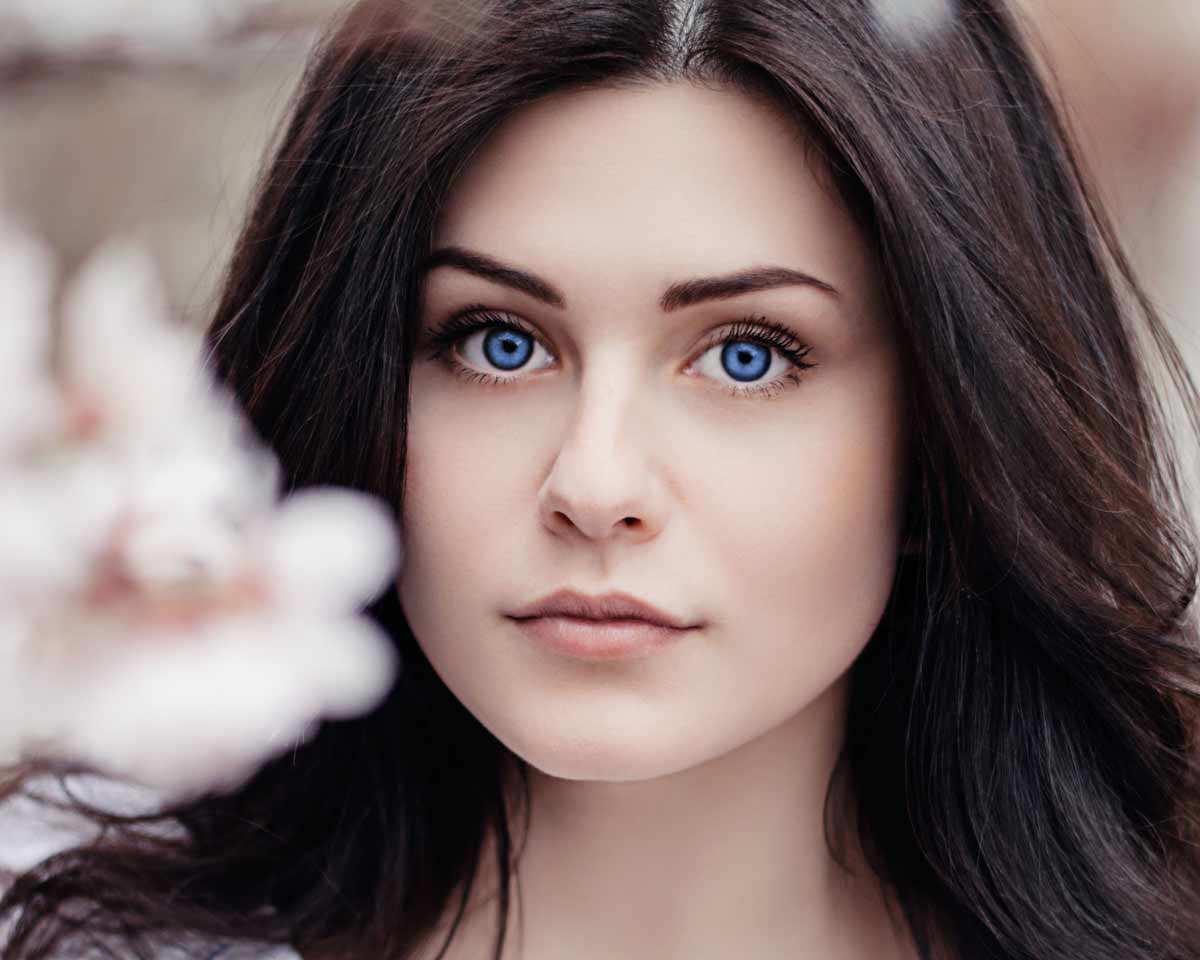
Before I begin the tutorial, let me show you the final and initial image.
Before
After
Step 1 – Select the Eyes
The very first step is to select the eyes. I am going to use Elliptical Marquee tool. I am using Elliptical Marquee tool because eyes are circular and which tool is better than Elliptical Marquee tool. But, if you’re not comfortable then you can use other tools like Quick Selection tool.
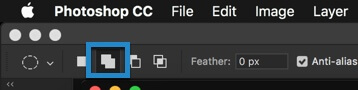
Please Shift + M again and again until Elliptical Marquee tool activates. We’re going to select both eyes at the same time. So, we need to activate “Add to Selection” tool which means that your old selection doesn’t get deselected as soon as you make a new selection.
Hold down Shift and start making a selection across one eye at a time. You can hold down Space if you want to move the selection. Select both eyes.
Step 2 – Change Eye Color in Photoshop
Now, we’re going to change the eye color.
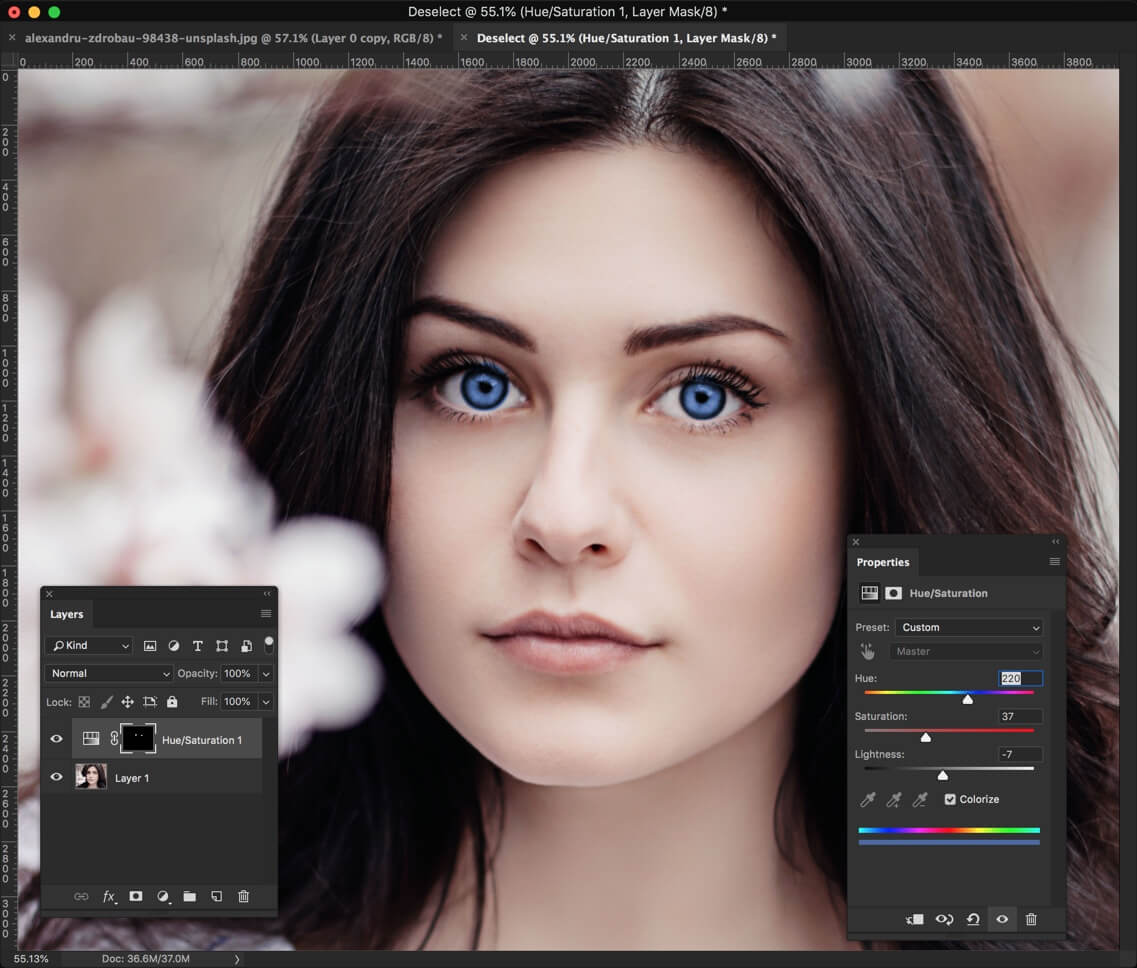
Go to Layer>New Adjustment Layer>Hue/Saturation.
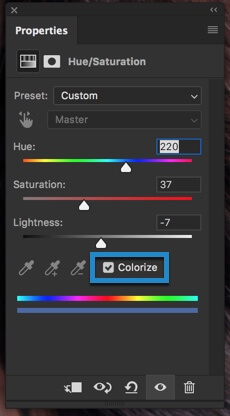
First, click on “Colorize”. It will colorize the image (in our case, it’ll colorize the selection).
Now, play with the sliders to get the desired color.
Hue – It will change the color Saturation – It will increase the saturation of the color i.e. more vivid or less vivid Lightness – It brightness or darkens the color
With these three sliders, you can make any color.
Step 3 – Finetune the Selection
We made some mistakes in step 1 while making the selection. The selection was not perfect. Now, we’re going to fix it.
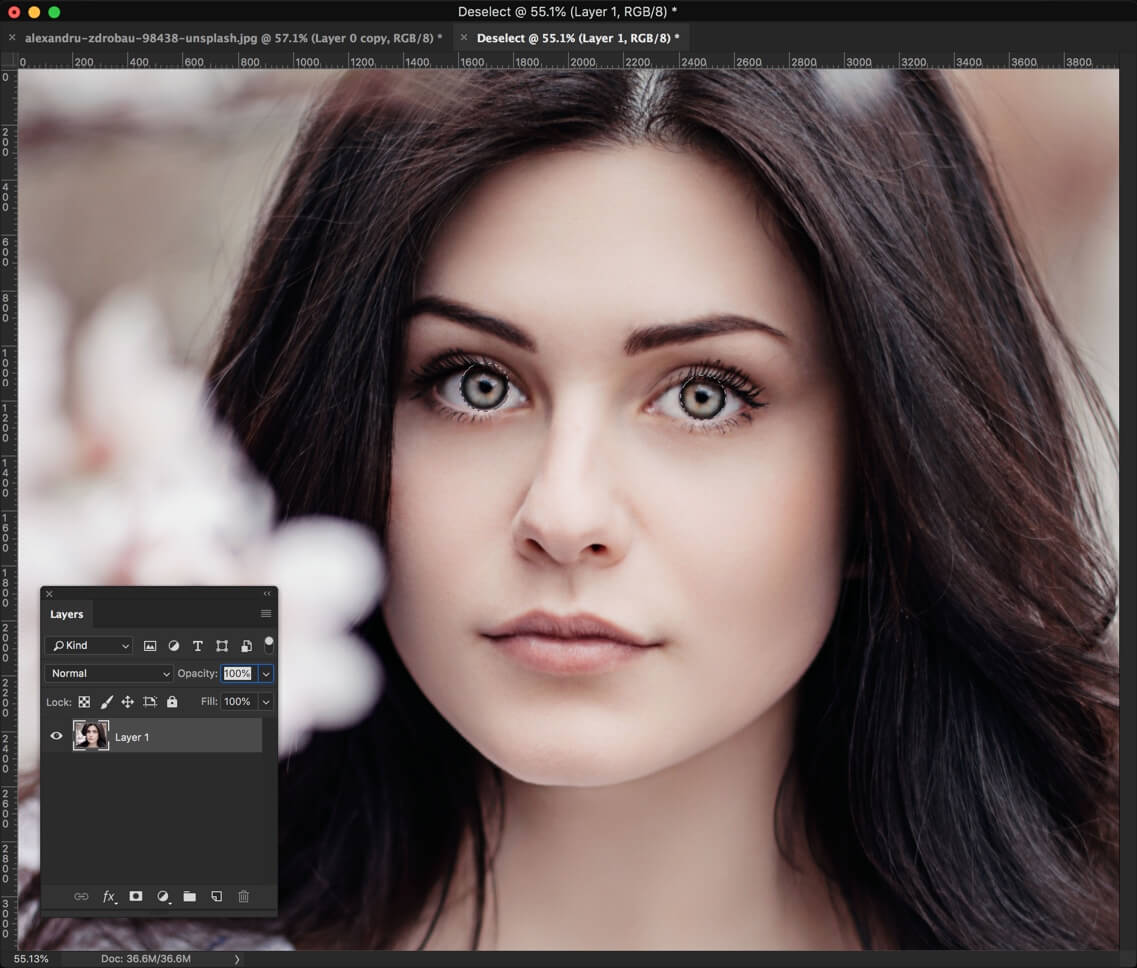
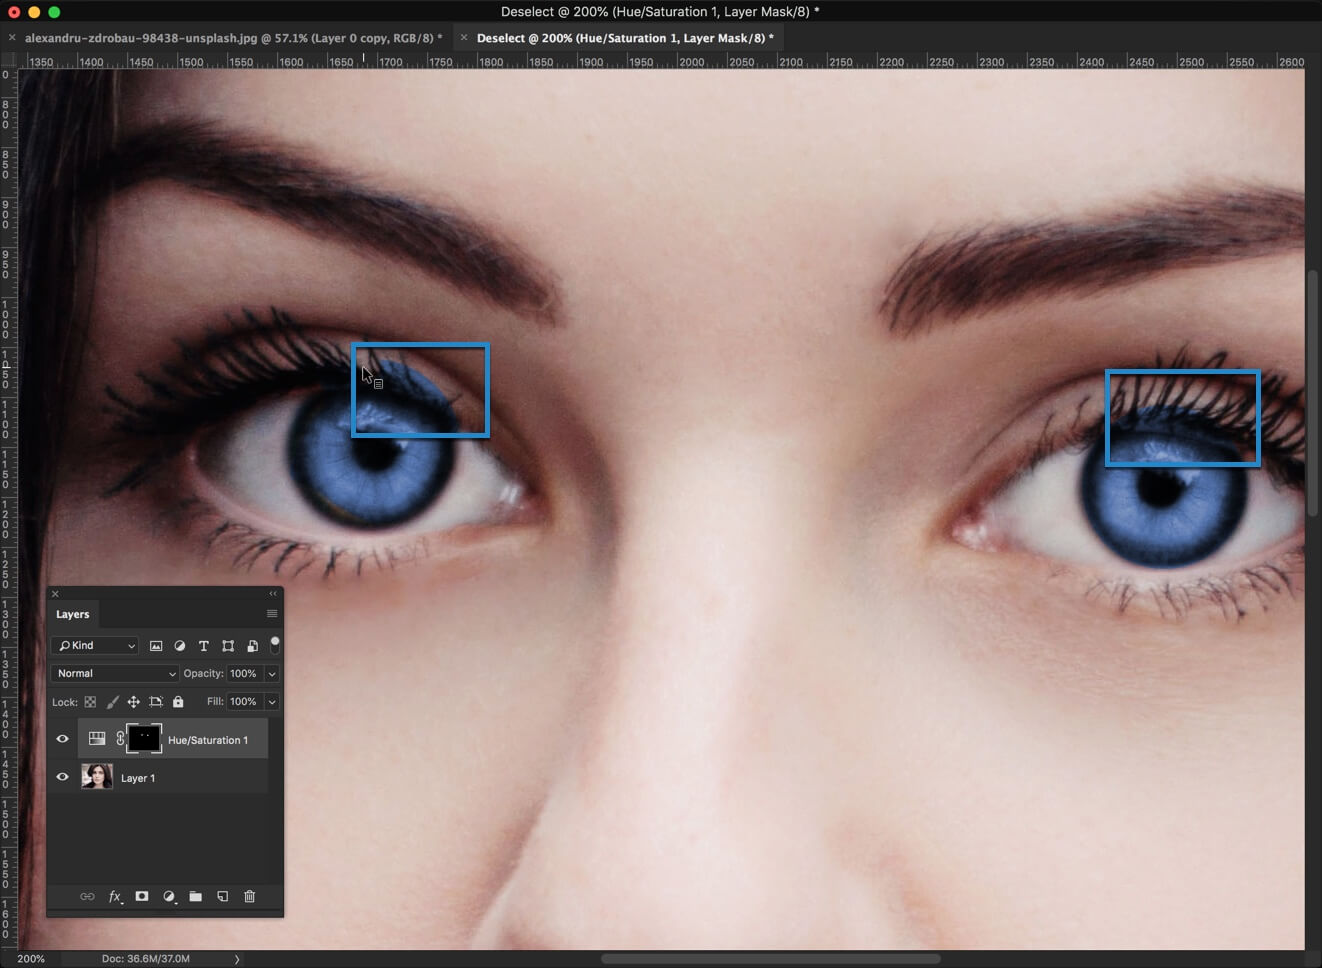
Zoom in the image so that you can see the eye clearly.
Activate Brush tool. Click on the layer mask. Make the foreground color as black. Now, start painting the area where you don’t want the blue color. I have highlighted some of the areas in the below image.
This is a guest post by Taher from huntingfrog.com. The author is a freelance writer, outdoor enthusiast, traveler, a mother and hamburger addict! She is a writer by day and reader by night who lives in the Rocky Mountains with her husband and her twin kids.
Photography is an amazing hobby to pick. There is nothing like capturing a gorgeous sunset just at the right time from the right angle. If shooting photographs is the true passion you can consider taking the leap of faith to turn it into a full-time profession. There are plenty of things to be aware of before taking the plunge. If you want to make a mark on your craft, you can earn big money in photography as much as establishing your niche by marketing yourself. It is about putting your mark among one of those people who have an eye for artistic photography and the skills in capturing an image.
While our photographing can be a brilliant way to make some extra cash. There are a whole lot more to it if you plan to set up a studio thus making a business and get into photography as your line of expertise without the tension of a full time in the background. While the idea of taking this leap of faith could be big but there are few challenges in this field. Many have tried and failed as there’s no exact formula.
But by following a few simple guidelines you can succeed in making your hobby to something you love, turn your photos into cash and make yourself a Professional!
Finding a Niche
When you are aiming to become a professional you are obviously tempted to take all the photography jobs that may come on your way. Instead of indulging yourself in a chunk of jobs, focus on a strategy that will put you ahead in the long-term goal – which is to be a professional and of course your value in the market.
You may be a landscape photographer, a wedding photographer, portrait specialist or a new photographer but you need to know about your strengths – the area you specialize in. There are many genres, and sub-genres but picking one genre gives a lead to define yourself as a brand.
It doesn’t matter how much you love to take photos of your pet or your car or taking photos for real-estate or sports. Do all you can to research the genre in which you are interested. Then, you’ll want to build up your portfolio.
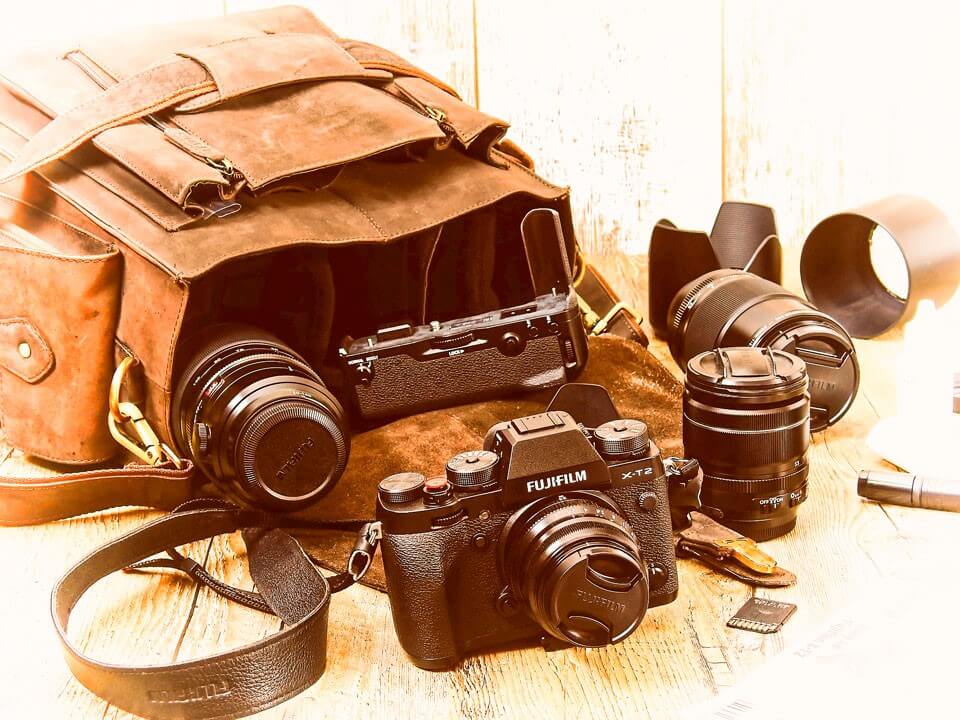
Upgrade your Gear
In recent times smartphone camera technology has gotten impressive but that is not good enough for your work to get into the photograph business. It does not mean you have to empty your pocket to get the best camera. There are a fantastic photography equipment’s in the market which you can now find over the internet on amazon or eBay.
Know your gadgets and determine what you really need to grow in your photography to be considered as a professional. A tip from Photographers is to invest in lens quality and not to worry about the lighting technology.
Build Photography Portfolio
Building a strong portfolio based on your niche is an advantage for attracting the right type of clientele. In the era of internet, social media platforms are reigning in every edge of the world. Creating dedicated Instagram, Twitter and Facebook account for your work is convenient and most of all it is free.
Careful displaying of your best work gives an extra edge. Focus on your work with the same critical eye that client would look at. Don’t just upload the raw photos, do require image editing to give your work a professional look. Always remember, your work is your brand and your work will be judged based on your portfolio. This is important because your portfolio shows off the quality of your work. Your audiences are unlikely to pay attention for a shoot unless you wow them with your photography skills on your portfolio.
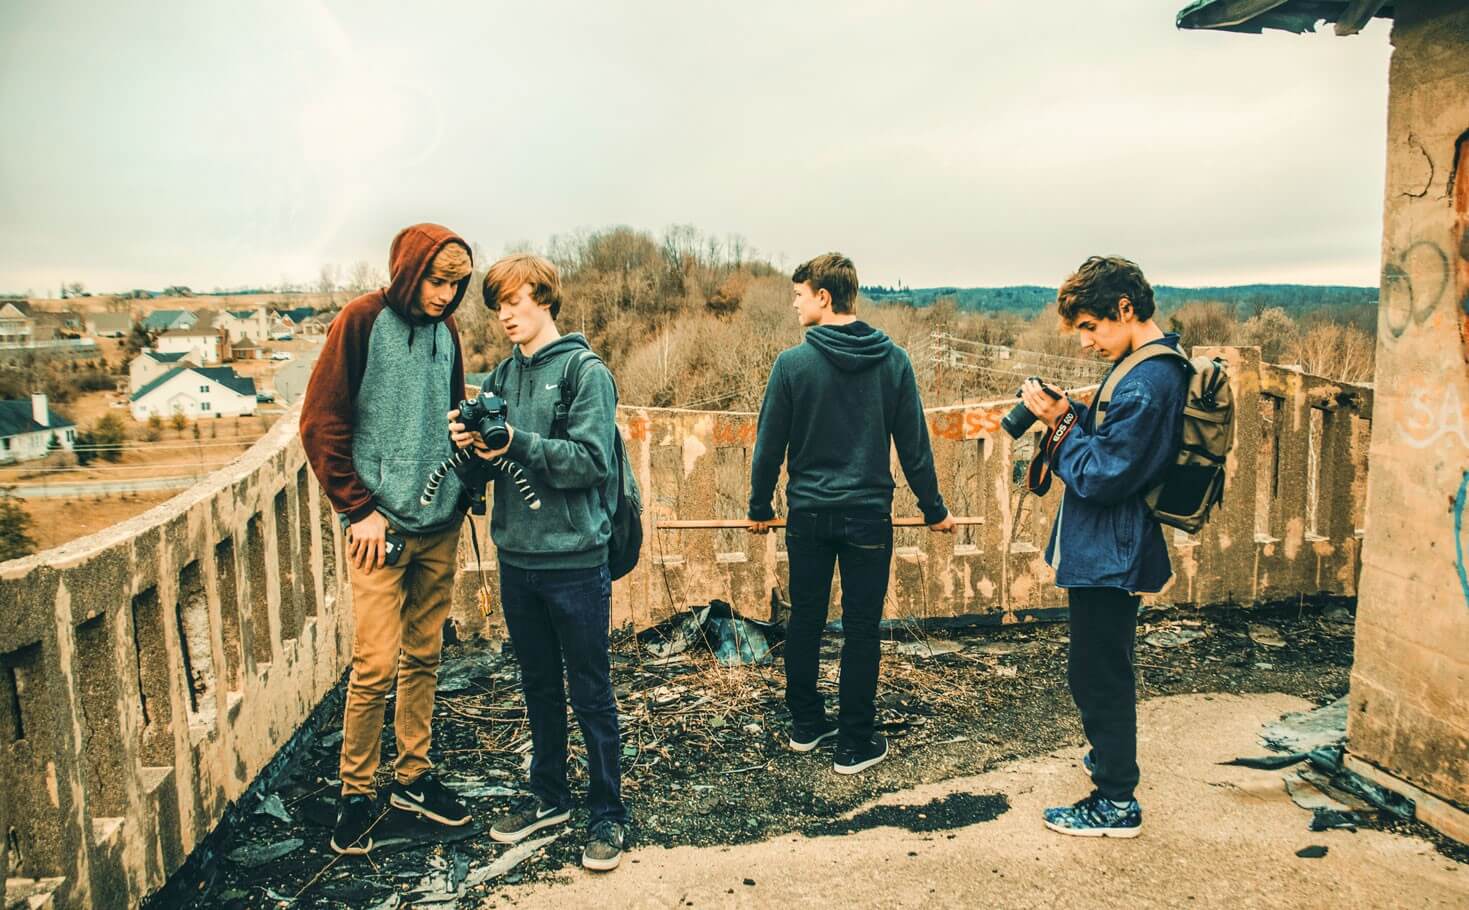
Making Networks
Making valuable network with purpose is crucial, as it helps to approach brands that you want to work with even if they are far superior to you. This helps you to identify your opportunities in your photographic remit wherever they may be.
If you are meeting new people, always keep an ear out for where you might of use to some. To keep in mind ruling yourself out of poorly paid jobs in areas you are not interested in is as empowering as accepting work in areas that are.
There is always something to learn from. It is an addition to your experience which helps you envision what you want to be doing for your next prospects utilizing these networks.
Showcase your work
Now you can sign up and advertise your work to people as a photographer. You will need to start pounding the pavement and look for work as it won’t just come to you without a little bit of effort and quite a bit of luck.
While it can be fine to wait for the work to come in when you have photography as a hobby, it is important to ensure you have a regular work and inquiries for your photographic profession.
Whether you approach your local institutes, clubs, schools, art galleries, event companies, bridal shows or anything happening in and around your local area. It is important you put your hand up for as many works as you can and set up a range different options for the lead generation so that you have a wide range of options available to get work.
Conclusion
Some people have jobs some people have careers, and if you have photography as a hobby and you want to exploit your career opportunities in photography then it is a good excuse to get paid for your hobby. In this digital world, everything on the internet is quite visual and content-based, and so photography is captivating to all.
While the dream of taking your photography hobby to be a fulltime job is a wonderful idea. Make sure you have everything set up and your gears ready before you resign from your current and engage your photography business full on. However, if you have the dedication and determination to push through the hard times, you will be able to create a business out of what you love to do, photography. In the end, happy photographing.
Hey guys, welcome to my another Photoshop 1 minute tutorial. This time I am going to show you how to create Photoshop Sepia effect in just 1 minute. If you’re an intermediate or advanced user, you can create it in even lesser than 1 minute. Oh! I forgot to tell this is another tutorial for my 1-minute Photoshop series.
You are seeing many tutorials on Google for Photoshop sepia effect. All of them are great but they are very-very big tutorials. I believe that you should not spend more time in a task that can be completed in a comparatively lesser time. Some tutorials will ask you to open Camera RAW, some will ask you to play with duotone, and some will ask you to use Photoshop filters. All of them will get you the result but will take a good amount of time to achieve the result.
This is why I bring you the Photoshop sepia effect tutorial that you can create in just 1 minute.
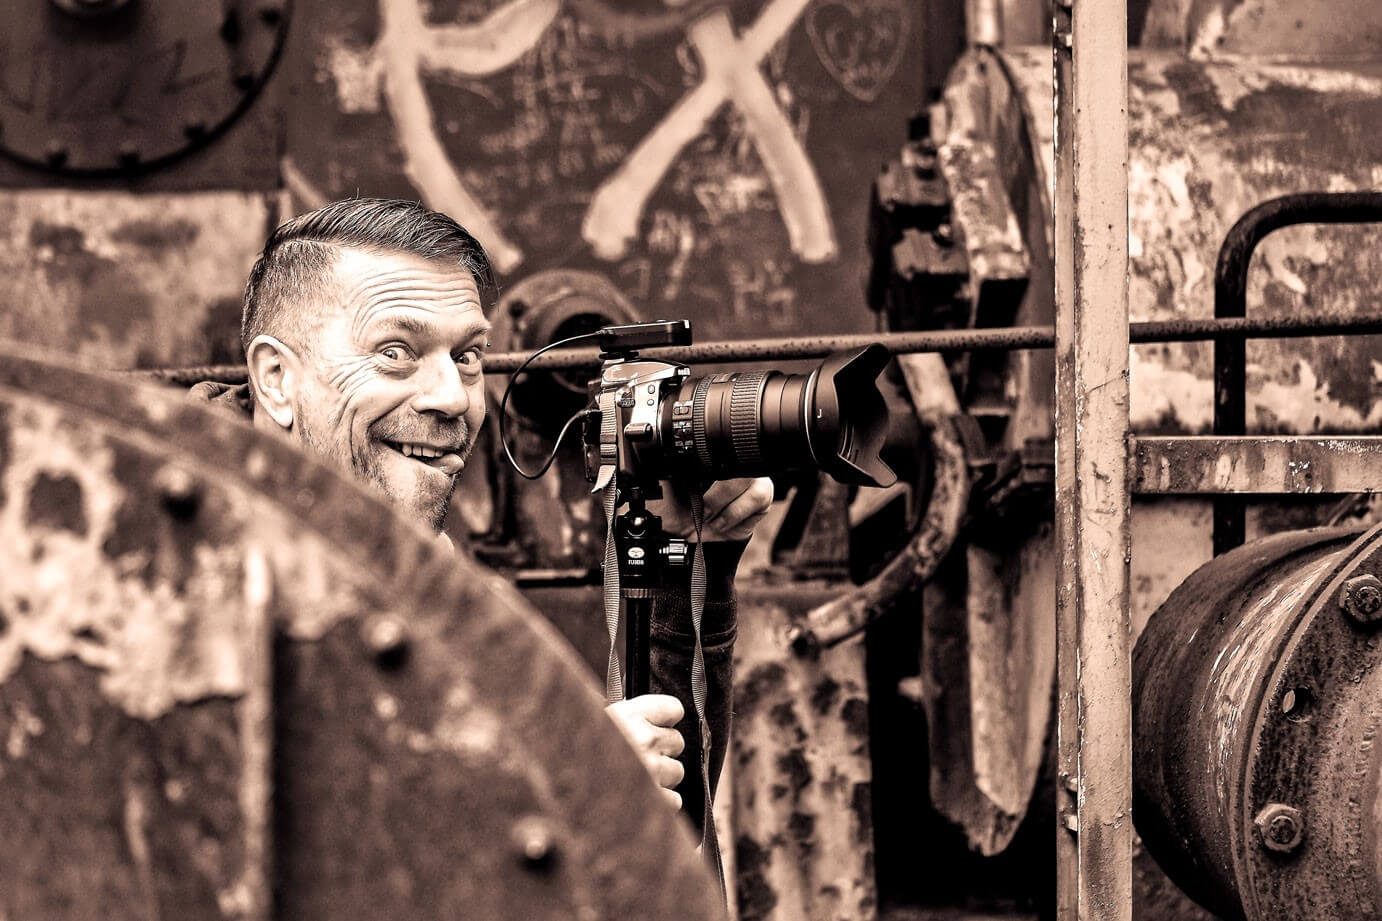
Here you go with the final image.
Here’s the initial image.
Let’s start the tutorial.
Step 1 – Set the Foreground Color for Photoshop Sepia Effect
Click on the foreground color and set #704214 as the color. #704214 is the HEX color code of Sepia.
Step 2 – Create a New Layer
Create a new layer by pressing Cmd+Shift+N/Ctrl+Shift+N. You can also go to Layer>New>Layer to create a new layer. There’s another way to create a new layer. Open Layer Panel by pressing F7 and click on the Create New Layer icon.
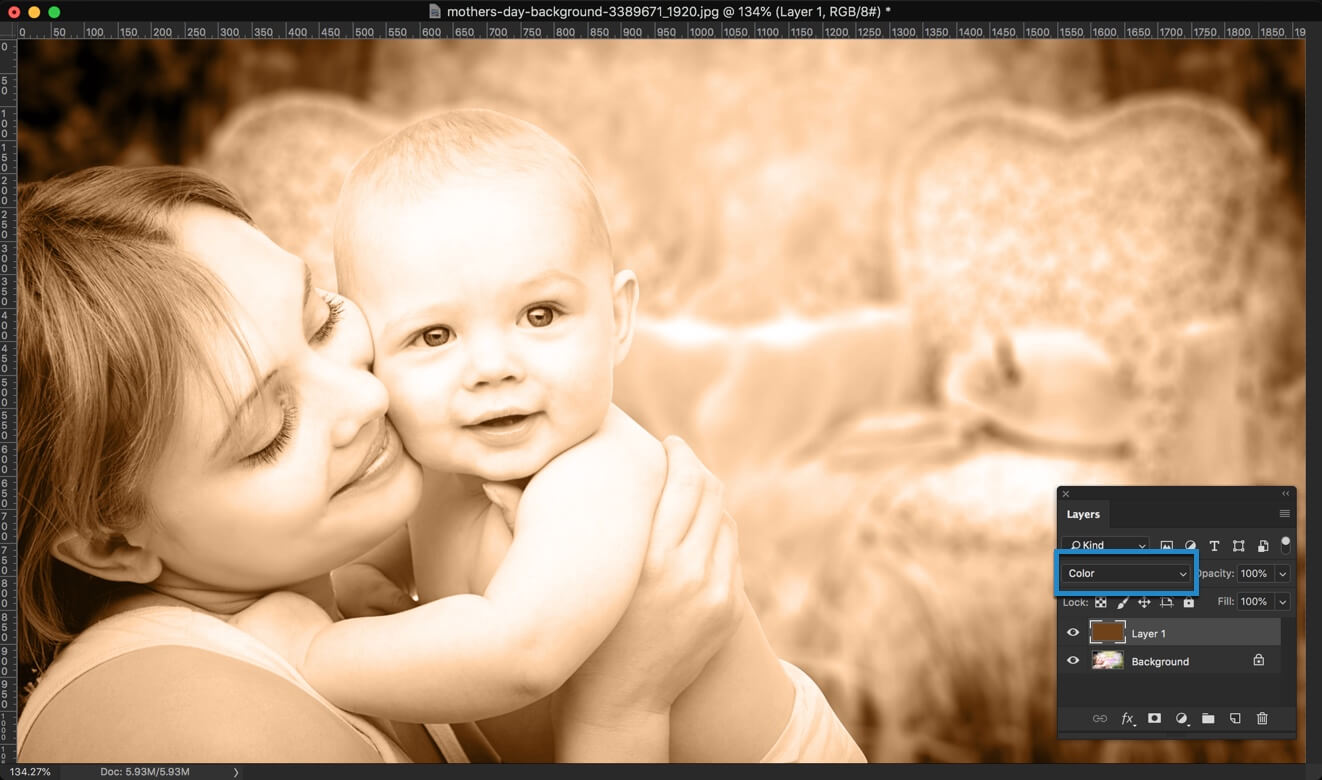
Step 3 – Fill the New Layer with the Sepia Color
Time to fill the new layer with the sepia color. Press Opt+Delete/Alt+Backspace to fill the layer with the foreground color.
Change the blend mode to “Color”.
That’s all.
Congrats! You now know how to achieve Photoshop sepia effect in just 1 minute. Share this tutorial with your friends and show them that they’ve been adding sepia effect wrongly since birth.
In a world where marketing is driven by the high-quality visual content, Photoshop can help you in so many ways to get more business and overcome competition in a crowded niche. The knowledge of essential features and functionalities of Photoshop is enough to turn a boring stock image into professional and share-worthy visual illustrations. From entrepreneurs and startups to SMEs and freelancers, it does not matter which type of business you are in, Photoshop will help you get more reach and leads. Starting from eye-catching social media images to professional product photography, the following are the top five ways Photoshop will help you get more business than usual.
Social Media Images – There is no doubt that social media is the best marketing platform for all local and global businesses. Most of the businesses post general photos that are taken from the internet which the targeted audiences have already seen before or they use the boring stock images that are way too professional to grab attention. Instead, you can use Photoshop to design stunning custom images that are absolutely new to everyone and promote your brand. They are the ones that get shared the most and grab the eyeball instantly. You can also make your social media profiles super attractive with mind-blowing cover photos, banners, and other visual illustrations wherever required. Naturally, your targeted audiences will be interested in checking out your products and land on your website.
Website Images – When online users land on your website, it is up to you to impress them immensely and convert them into customers and clients. The first thing any user checks out on a website is its visual content. Therefore, your visual illustrations have to be top-notch to hook the attention of the user and they should consider your brand premium. Your images should have originality, creativity, and the x-factor that will make you stand out easily. Photoshop is the only tool that has all the required features to create amazing sliders, exceptional product photography, and even high-quality website layouts. This will increase your conversion rate and get you more sales.
Ad Banners – Paid advertisement campaign is one of the best ways to get potential customers easily. But most of the people on the internet ignore ad banners that they come across as they fail to attract attention. This is where Photoshop can help to design that most creative and innovative ad banners that are extremely eye-catching and the online users will check them out in details to understand the creativity and hence, you are going to get more clicks. This is a super way to outshine your competitors and drive relevant traffics who are likely to be your repeat or permanent customers.
Flyers and Brochures – Not only online marketing, Photoshop is highly essential for offline marketing as well. Flyers and brochures are popular marketing items that companies give out to the targeted audiences to let them know about their brands and products. But people come across so many such flyers and brochures every day from different companies and those items eventually end up in the trash bin without people checking them out. This is where Photoshop can help you design flyers and brochures that can intrigue people and force them to check them out instantly. There are so many awesome flyer and brochure templates available that you can customize and get your business flyer and brochure ready like a pro. You can impress your targeted audiences immensely and generate more leads effortlessly.
Infographics – The reason why email marketing fails for most of the companies is not due to the popularity of social media but lack of innovative ideas for writing such promotional emails. Instead of just promoting your product and brand, you should include some cool infographics that not only promote your product indirectly but also educate your targeted audiences so that they start considering you a trustable brand. Embedding stunning informative graphics in the email body makes it exigent otherwise your emails will end up in the trash bin and spam box just like others. Photoshop has so many graphics templates available that you can customize and create outstanding infographics and innovative illustrations like never before.
There are so many tutorials available on the internet to learn Photoshop and make exceptional designs for marketing. You can also hire Photoshop experts to do it for you so that your business can grow exponentially.
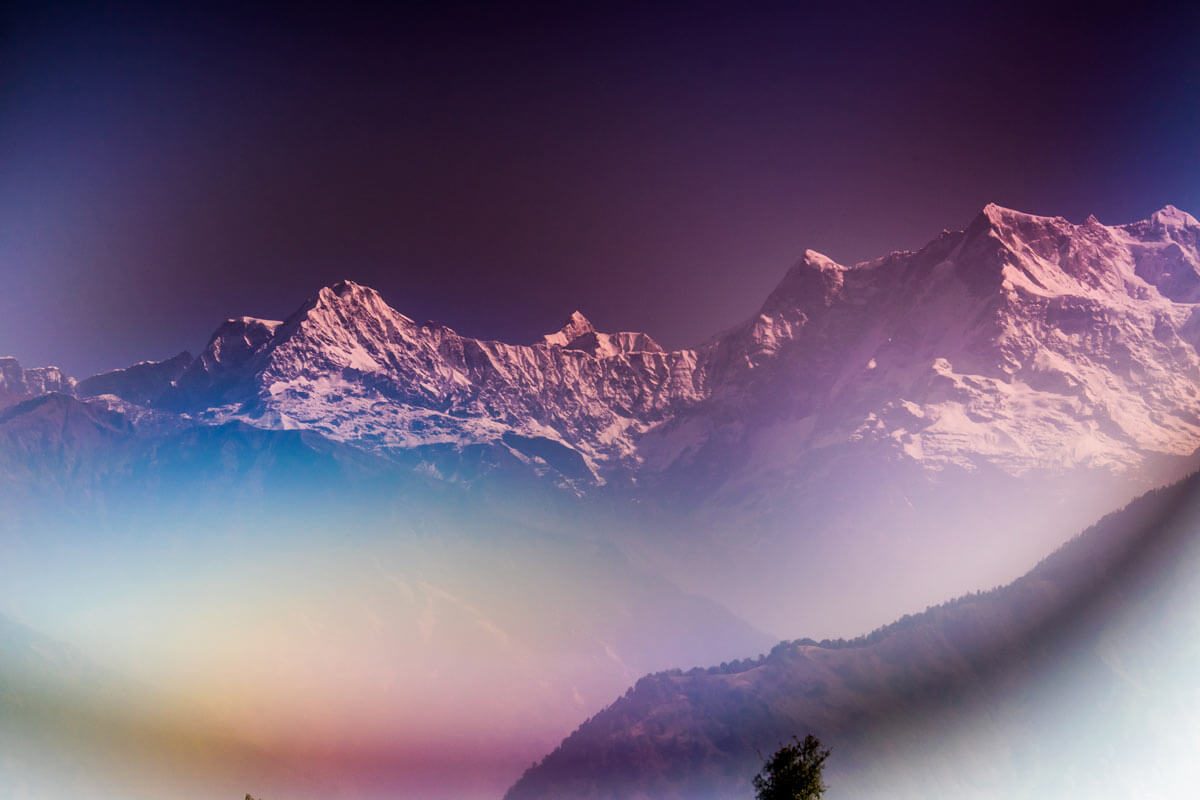
Bokeh is a common word used in photography that describes the blurry areas in a photo, or basically the area which are out of focus. Some people find it as a mistake but for most, they find bokeh as an attractive effect that gives more drama on the photo.
Credit – Photo by Anton Atanasov from Pexels https://www.pexels.com/photo/pink-peach-blossoms-close-up-photogrpahy-211451/
If you’re interested to do bokeh, you probably have this question in mind. The answer lies in the 5 tips below:
1 – Get close to your object
Distance is one key to achieve a nice bokeh. The closer your camera lens gets to your subject, the more the background will be blurred. So, it’s ideal to know the right distance between your camera lens and subject.
If you use a fast lens then minimize your distance to your subject to create a uniformly illuminated disk in the background. But if you don’t use a fast lens, it’s all right; just ensure to reduce the distance between your camera lens and your subject.
Doing this will increase the distance between the background and your subject. This is important because the further the background is to the camera lens, the more it’ll be out-of-focus.
2 – Choosing the proper lens
The lens is the main player of creating a beautiful bokeh as it determines bokeh’s size and shape. Though every camera has the capability to create a bokeh, only few can make it virtually appealing.
To know if your camera lens is a good lens for bokeh, check its diaphragm blade. The diaphragm lens is the one that determines bokeh’s shape. A lens with 7-straight blades creates a heptagon-shaped bokeh; while 9-rounded blades create a circular bokeh.
If you have 9 rounded blades, a prime lens is an ideal choice to use. But if you have a zoom lens, it’s advisable to zoom to its maximum focal length (200mm or more) to create an even greater blurred effect.
3 – Judge the depth-of-field
The depth of field is the one that indicates how much is in focus on your subject, front or behind. In determining what’s good for your subject, you need to remember 2 things: the wider your focal length, the deeper the DOF gets; while the longer focal length, the narrower the DOF gets.
The usage of these 2 will depend on the type of photography you’re doing. Choose a longer focal length if you’re shooting landscape or architectural exterior. While, if you want more details to be in focus, choose a shorter focal length.
4 – Relating the foreground with the background
Two types of bokeh are the background and foreground bokeh. These two acts similar, their only difference is its size. We all know that the closer the lights onto the lens, the larger it will look. Since the background details are far from the lens, its bokeh is smaller compared to foreground bokeh.
To add a dramatic appeal to the image, it’s ideal to have both bokeh in it. This is possible by positioning your subjects farther, so you can get some good quality foreground details.
5 – Select the large aperture
Lastly, the secret to creating a stunning bokeh is by using a fast lens with large aperture. Why? This is to decrease the DOF to a narrow area. The ideal lens to use must have an aperture of f1.4, f/1.8 or f/2.
These are the secrets of getting the bokeh effect. Let me know if you have anything else in your mind.


 After
After