How to Add Eyeliner in Photoshop to Make Eyes Look Beautiful

Eyes are the most beautiful part of our face. People fall in love after looking at eyes. Their shape, movement, or even color make all the differences. Today, I am going to show to make the most beautiful part of a face even more beautiful. I am going to show you how to add eyeliner in Photoshop.

There are two ways you can add eyeliner in Photoshop. One is to create one in Photoshop and another is to download the image of an eyeliner and paste. We’re going with the second option because that’s much easier and time saver.

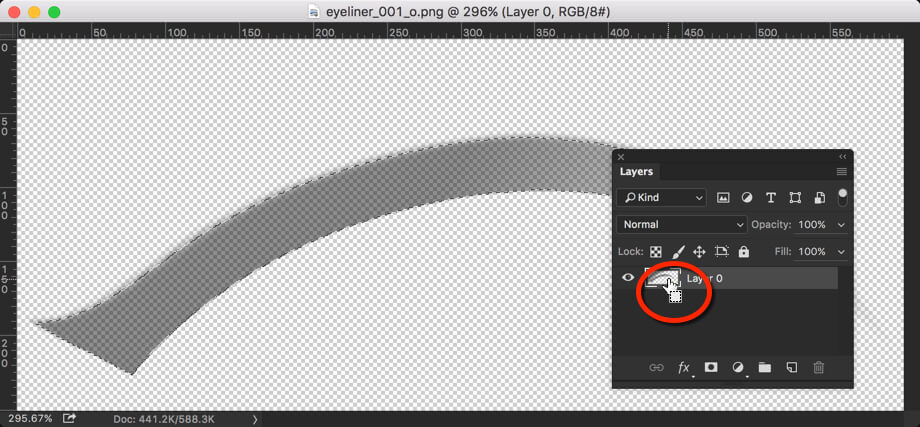
You need to download the image of the eyeliner before you proceed. I have attached it for you to make your life simpler. The best thing is that it’s a PNG image with no background. So, you won’t see the not-so-beautiful white background whenever you paste it in Photoshop.


Step 1 – Open the Eyeliner Image in Photoshop

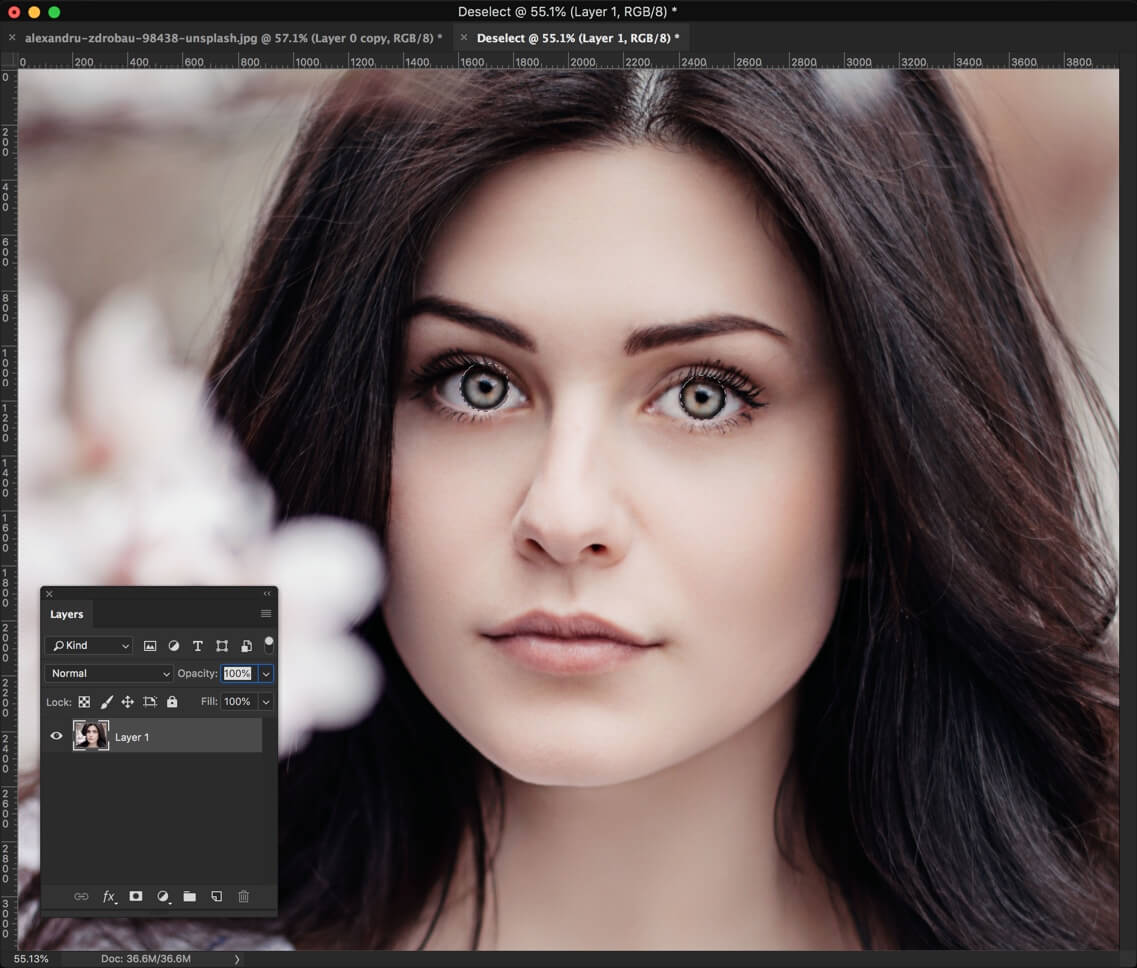
We need to copy the eyeliner image so that we can use it on other images. Open it on Photoshop.

We’re going to copy the eyeliner. Open the layer panel by pressing F7. Hold down Cmd/Ctrl and click on the layer thumbnail. This will select the eyeliner and then press Cmd+C/Ctrl+C to copy.

Step 2 – Add Eyeliner in Photoshop

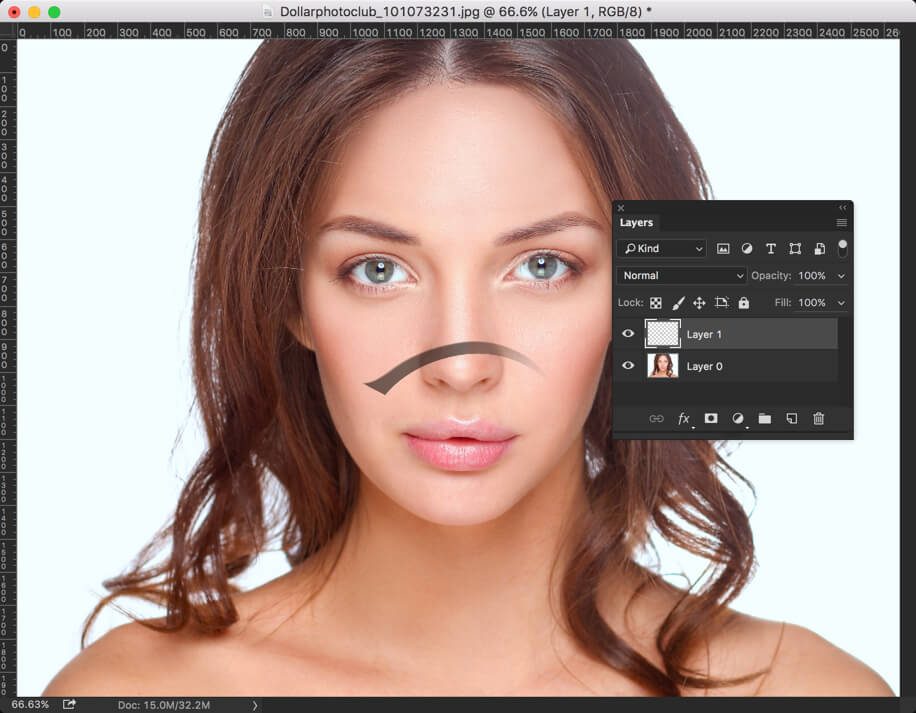
Press Cmd+V/Ctrl+V to paste the eyeliner on another image.

Step 3 – Align the image according to the eyes

It’s better to zoom in the image so that you can align the eyeliner better. Press Cmd+”+”/Ctrl+”+” to zoom in.

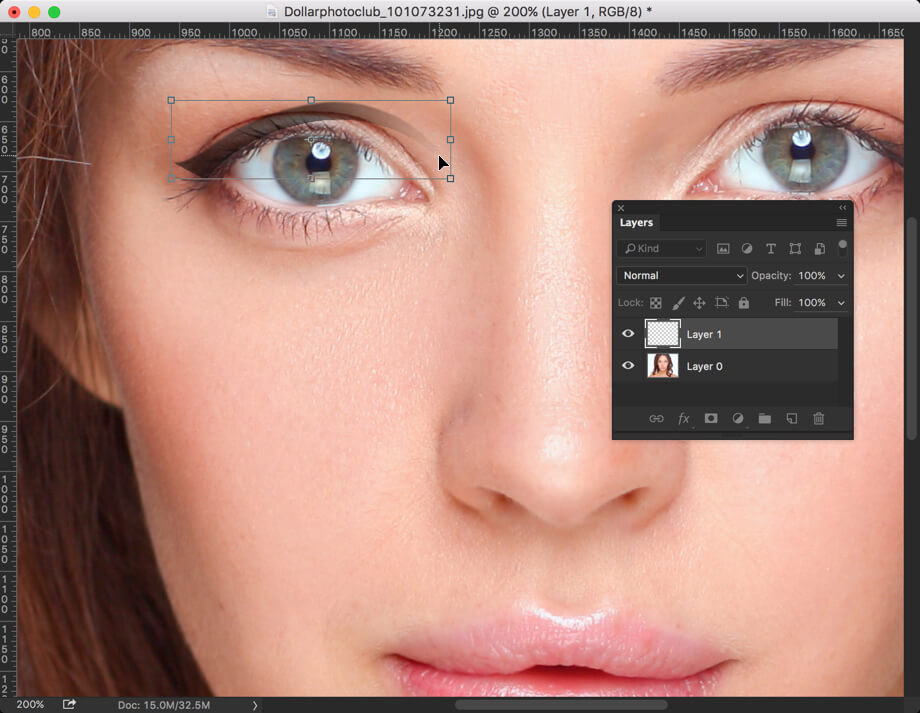
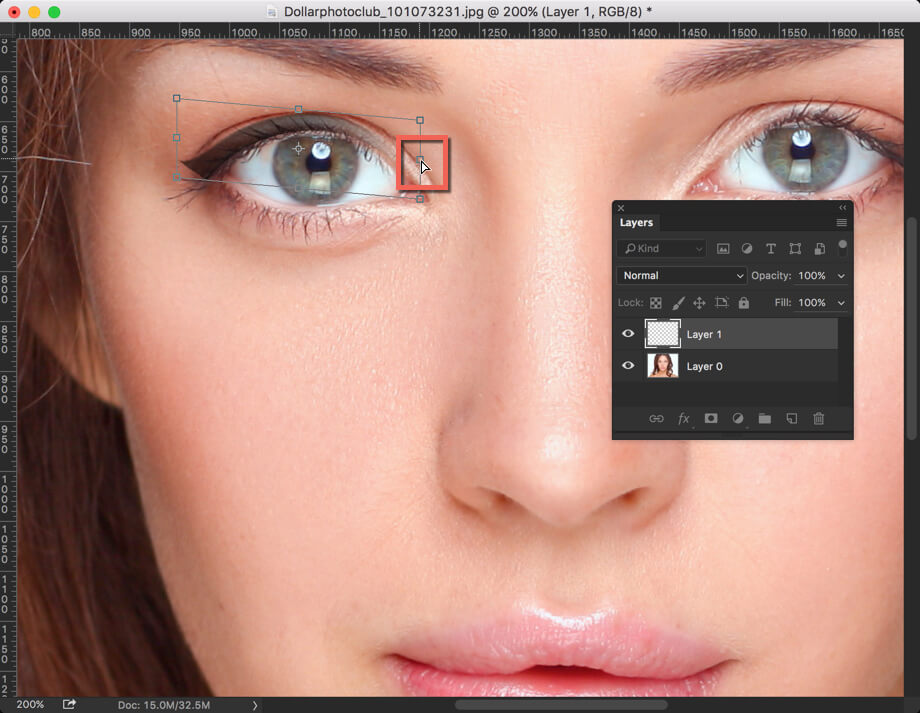
Time to align the eyelinerPress Cmd+T/Ctrl+T to activate the free transform tool. Now drag the eyeliner and align it with the eyes. It doesn’t have to be perfect. Look at the below screenshot. I have aligned it from viewer’s left but it’s not aligned from the viewer’s right. We’re going to fix it now.

Hold down Cmd/Ctrl and put the cursor on the adjustment handle which is not aligned. Look at the screenshot below to understand things better. The cursor will change to white.

Now, only that part of the eyeliner will move which is associated with the cursor.

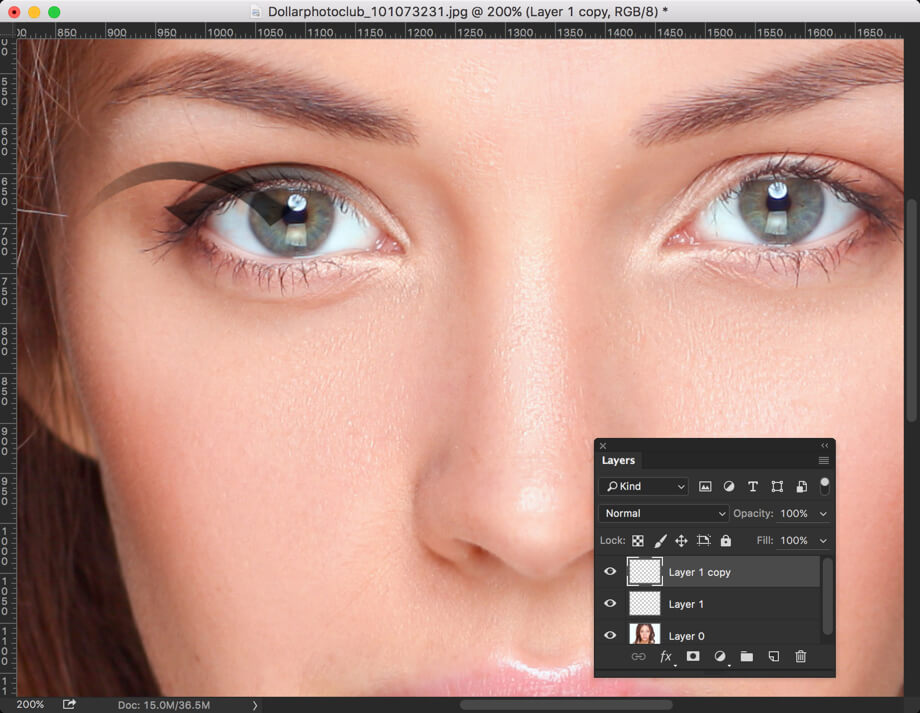
Step 4 – Duplicate the Layer

I think that the eyeliner is not looking much visible. It’s translucent. Let’s duplicate the layer. Press Cmd+J/Ctrl+J to duplicate it. Now, it’s looking good.

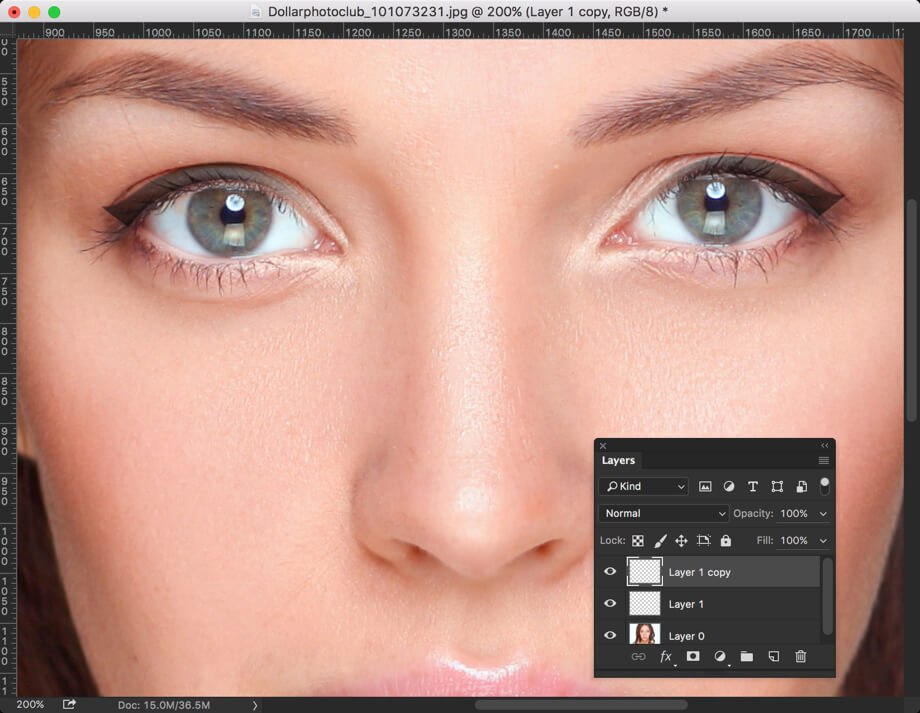
Step 5 – Duplicate and Flip for the Another Eye

Time to proceed with the next eye. Again duplicate the layer by pressing Cmd+J/Ctrl+J. Now, we’re going to flip it. Go to Edit>Tranform>Flip Horizontal. This will flip the layer horizontally.

Align the eyeliner like we did in step 3 and step 4.

I have done it in my image.

With this, we can wrap up this tutorial.

I know that you like this tutorial. Share it with your friends.

Change Eye Color in Photoshop in 1 Minute

Hey, welcome to another 1-minute series. Today, I’ll show you how can you change eye color in Photoshop in 1 minute. Yes, I have written a tutorial on this topic a few years ago. The tutorial was quite big and you cannot use that tutorial to change the eye color in just 1-minute. This is why I am bringing you this tutorial.

There has been a good demand for the 1-minute series and many people are asking me to create several 1-minute series. Some of them asked me to write one on how to change eye color in Photoshop. Others are swapping the sky, change skin tone, etc. in just 1-minute. I have written some of them in my 1-minute series. I still need to write many of them. So, bookmark the page so that you come back later.

Before I begin the tutorial, let me show you the final and initial image.

Before

After

Step 1 – Select the Eyes

The very first step is to select the eyes. I am going to use Elliptical Marquee tool. I am using Elliptical Marquee tool because eyes are circular and which tool is better than Elliptical Marquee tool. But, if you’re not comfortable then you can use other tools like Quick Selection tool.

Please Shift + M again and again until Elliptical Marquee tool activates. We’re going to select both eyes at the same time. So, we need to activate “Add to Selection” tool which means that your old selection doesn’t get deselected as soon as you make a new selection.

Hold down Shift and start making a selection across one eye at a time. You can hold down Space if you want to move the selection. Select both eyes.

Step 2 – Change Eye Color in Photoshop

Now, we’re going to change the eye color.

Go to Layer>New Adjustment Layer>Hue/Saturation.

First, click on “Colorize”. It will colorize the image (in our case, it’ll colorize the selection).

Now, play with the sliders to get the desired color.

Hue – It will change the color
Saturation – It will increase the saturation of the color i.e. more vivid or less vivid
Lightness – It brightness or darkens the color

With these three sliders, you can make any color.

Step 3 – Finetune the Selection

We made some mistakes in step 1 while making the selection. The selection was not perfect. Now, we’re going to fix it.

Zoom in the image so that you can see the eye clearly.

Activate Brush tool. Click on the layer mask. Make the foreground color as black. Now, start painting the area where you don’t want the blue color. I have highlighted some of the areas in the below image.

That’s all, guys!

Make sure that you use the below offer.

Add Eyeliner in Photoshop

Hey guys, welcome to my another tutorial on Photoshop. You went to a party and your wife forgot to put on eyeliner. After looking at the images, she realized that she had made a terrible mistake. Her eyes are looking completely plain in the photos. Now she can’t upload those adorable photos on Instagram because of one small mistake. Fortunately, we have something in Photoshop that can save her soul. So let’s begin our today’s tutorial on How to Add Eyeliner in Photoshop.

Before we begin, I’d like to show you how our final image will look like.

Now that you’ve seen the final image, let’s begin with the tutorial.

Step 1: Download Eyeliner

Download a PNG image of eyeliner.

eyeliner_001_o
Download it

You need to save the above image in order to proceed. Right click on the image and save it.

Step 2: Copy Eyeliner

Open the image in Photoshop. Open the Layer Panel by pressing F7. Hold down Cmd/Ctrl key and click on the icon shown on the layer panel.

1.jpg

Now press Cmd+C/Ctrl+C to copy the image.

Step 3: Add Eyeliner in Photoshop

Open the image where eyeliner needs to be added.

2.jpg

We need to move the eyeliner to the desired place. We could use any type of move tool but I am using my favrouite, Free Transform Tool. Press Cmd+T/Ctrl+T to activate it. Resize and place the image on her eye. You don’t have to be accurate here. Placing it perfectly will be done in the next step.

3.jpg

Step 4: Transform Eyeliner

To make the eyeliner skewer, hold down Cmd/Ctrl key. Make sure that Free Transform Tool in still activated. You’ll notice that cursor will change to white. Now drag middle right point to make the eyeliner skewer.

4.jpg

You need to do it couple of times to get a perfect picture.

Step 5: Duplicate Eyeliner

Duplicate the layer by pressing Cmd+J/Ctrl+J.

Go to Edit>Transform>Flip Horizontal.

5.jpg

Step 6: Complete the Image

Once again use Free Transform Tool and place the flipped eyeliner on the other eye.

6.jpg

And now you’re done with the image.

FINAL

Final.jpg

I hope that you like the image.

Please support TrickyPhotoshop by sharing this image with your family and friends on Facebook, Twitter, and Google+.

See you in my next tutorial.

Add Eyelashes on Photoshop

Last night I was playing with Photoshop, and trying to add eyelashes on Photoshop to a model. Stupidly what I was doing was copying eyelashes from one image and pasting into another. No wonder that took more than an hour as achieving perfect result was near to impossible. Then I googled out a little bit, and I found a one-stop solution that made me feel how much stupid I was. If I had known that thing, what I had done in 80 minutes could’ve been done in 5 minutes.

FINAL

6

The trick I am talking about is “Brush”. Yes, a brush. What we can do is to either create a Photoshop brush out of it or downloda it from internet. I chose the later. Here’s the link to download eyelashes brush. You will find insane amount of eyelashes brushes on internet but for ordinary needs, this one may suits you.

Once downloaded, we need to install the brush. Fortunately I’ve already written an article on installing brush on Photoshop years ago. The article was written August 2013 but will still fulfill your needs.

So let’s start with the tutorial.

Step 1: Download the Brush

The first thing that you need to do is to choose the eyelashes brush. Grab Brush Tool from the tool panel or press Shift+B again and again until it comes. Right click anywhere on the photo and choose Eyelashes Brush (Yours name may be ss-eyelashes).

1.jpg

A popup message will ask you to choose among three options that are Append, Cancel, and OK. Choose OK.

Choose the type of eyelashes you’d like to have.

2.jpg

Step 2: Add Eyelashes on Photoshop

You don’t want your editing to be destructive. Create a new layer by either going to Layer>New>Layer or by pressing Ctrl+Shift+N. Now click on the area where you want to put on eyelashes.

3.jpg

As you can see, the eyelash is very much misaligned. We are going to use Warp Tool to make it aligned.

Step 3: Warp it!

Go to Edit>Transform>Warp. Now align the image accordingly.

4.jpg

This may take few minutes. Please dedicate your time to make eyelash looks as much real as possible.

Reduce the opacity to around 70% to make it looks better.

Step 4: Do it for Another Eye

Do the same with other eye.

5.jpg

And there you’ll get your final result. 🙂

6.jpgAnd we’re done here.

I hope that you like this tutorial.

Please help TrickyPhotoshop by sharing this tutorial on Facebook, Twitter, and Google+.