Photo Skills Need Work? How to Edit Your Photos on iPhone

iOS 13 and iPadOS have made photo editing easy for one and all. But as users of this premium brand, most of us are not aware of the nuances of photo editing. 

There is a step-by-step process to edit photos in the best possible way. This article will walk you through the same. But before that, let’s understand some of the basics.

Using the In-built Photos App

Just as Android comes with Google Photos, iOS has its flagship Photos app. Many of us are guilty of not understanding the different functions and features of this app. Even though companies involved in iPhone app development have come up with other apps, the default app is still good.

It’s now possible to easily view and sort the photos and videos by days, months, and years. You’ll find that the photos are displayed as thumbnails and the important ones are larger than the rest. 

The For You section shows photos related to special events and memories. You can also search for your favorite pictures using keywords. 

We’ll discuss these features in more detail.

Viewing Your Photos and Videos

Viewing the photos properly is important before editing them. Viewing doesn’t mean just tapping on the photo. There’s more to it.

Tap the icon of Photos located on the bottom toolbar. Instead of sorting your photos by date, the app displays everything like thumbnails one row after another. You can swipe up and down the photos. The date is shown at the top and it changes based on the photos being displayed.

Adjusting thumbnail size

This is done by tapping the plus (+) or minus (-) symbol in the upper right. You can zoom in on your photos by tapping the plus sign whereas the minus sign will zoom out the image. Tap the X next to these symbols when the view is set the way you’d like.

Sort Photos by Date

Tap the Years option at the bottom and swipe to switch between different years; follow the same thing for the Months and Days options. In the Days view, you will observe a large thumbnail for certain photos and smaller for others. This is done by the app automatically.

Select Photos and Videos

Selecting particular photos and videos is possible in the Days View or All Photos View. Click on the Select icon at the top and tap on each entry you want to select. You can also click on Select All in Days View to select all the photos for a given day.

Here is an alternate way to select photos and videos: 

  1. Tap the Select icon. 
  2. Drag your finger across the thumbnails you want to select. 
  3. Tap the Delete icon to remove them or the Share icon to share them via email, messaging, or another app.

View For You Page

We live in a world of personalization. The For You feature personalizes everything for you. Tap on the For You icon at the bottom navigation bar to see the featured photos and photographic memories. Tap Play after selecting a specific memory to see an automated slideshow of all the photos for that memory. This slideshow is complemented by music.

View Albums Page

This option present in the bottom navigation bar lets you see the albums of media you have created. After scrolling down the screen, you get to view different media categories such as photos in Portrait Mode, videos using Slo-mo, and much more.

Searching for Photos and Videos

With this option, you can view photos based on specific people, categories, and groups. Tap the Search icon on the bottom navigation bar. Type a name or phrase in the search field to find relevant photos.

These were the basics of the Photos app available on iOS 13 and iPad. Now, it’s time to learn how to edit photos like a pro.

Hone Your Photos Editing Skills in an iPhone

Get started by tapping on Edit in the upper right. The Adjustment option will be selected by default. Clicking the Auto button in the center will automatically adjust your photo’s brilliance, exposure, and other attributes. You can then start adjusting other parameters at once by moving the slider bar to the right or left.

If you want to adjust each attribute separately, tap on the appropriate icon to edit exposure, highlights, brilliance, contrast, shadows, brightness, saturation, vibrancy, black point, warmth, sharpness, tint, definition, noise reduction, and vignette. When you pick an attribute, move the slider bar left or right to adjust it accordingly.

Adding Filters

You will find the Filter icon next to the Adjustment icon. Tap on it and try different options, including Dramatic, Vivid, Mono, Noir, Silvertone, and more. Adjust the slider bar to increase or decrease the intensity of each filter.

Crop Photos

You will find the Crop icon as the last option on the bottom toolbar. Drag the highlighted corners to select your desired portion of the image. Directly below the image, there are three icons with a slider bar. The first icon can tilt the image, the second one can change the vertical perspective, and the last icon will change the horizontal perspective. After selection, drag the slider bar to the left or right.

Changing the Image Orientation

Flip the image horizontally by clicking on the first icon in the top-left corner. Now tap on the second icon to rotate the image. The square icon in the top-left corner is used to change the aspect ratio of the image. You can choose a specific ratio below the image.

Tapping Done will save the changes and Cancel will undo them. Even if you change your mind later, tap on the Edit option and then on Revert to restore the photo back to its original form.

Besides editing photos, you can also crop or trim videos on your iPhone.

Summing it up

Using the features available on the iPhone, you can surprise everyone with your photo editing skills. Once you get a good hand on the basic editing skills, try using a premium app to edit photos. This will make you nothing less than a professional photographer. So grab your iPhone now and start editing right away!

Freya Jacob is a content specialist, worked formally for Brainvire.com. She is an adept content strategist with expertise in curating meaningful content. In addition, she is also an avid reader who loves to binge a variety of books and informative articles. She can amazingly convert boring content into something engaging.

List Of Best 7 Apps For iPhone Photography

Not all of us can become professional photographers; neither can we keep providing every picture to one of the pros out there. The era of smartwatches and iPhones has made lives easier for all of us with emerging technologies and handy apps designed for everyday peeps. Similarly, we iPhone lovelies keep thinking of ways pictures get in control without the involvement of any experts.

The crazy vacation photos you captured with your family are most of the time blurred because of the backstories they carry with them. More probably, you can’t bring a DSLR everywhere, especially when you’re not planning to take any snaps.

Photography is the story I fail to put in words.

Carrying an iPhone in hand is always about photography no matter what you like. The hobby gets interesting every day because we have countless apps that can edit pictures for us. Nonetheless, not every app comes up with all the features possible. For this reason, you need to look into these seven iPhone photography apps that can make you a capture pro in no time.

1. Snapseed (Rating 3.8 out of 5)

Snapseed is one of the best recognized online apps that can entertain iPhone users very effectively. Its latest version is the 2.19.3 and supports iOS 12, iPhone XR, XS and XS Max, iPad Pro 11 and 12.9. With the help of swiping gestures, you can effectively add diversified effects and enhancements to photos anytime.

It lets you rotate, crop, and straighten images for iPhones and also makes it worthy for iPhone users with a free download. It also has brushes and healing tools that can add more to its texture filters. A beginner can quickly get familiar with this app and have fun.


2. VSCO (Rating 4.4 out of 5)

It’s properly pronounced ‘Visco’ and is one of the most utilized apps used by iPhone users for editing photos. The latest version of this app is 136.0 that involves the fix to stop crashes. The app is a favorite among pro photographers and is highly-rated among iPhone users. It also comes with the feature of a classical look filter.

Moreover, it’s a free app that has a subscription fee for additional tools and filters. You’ll be enticed to know its subscription can unlock more than 130 filters for you to use anytime you like. It will always let you fine-tune the pictures and effects you’ve added to the photos.

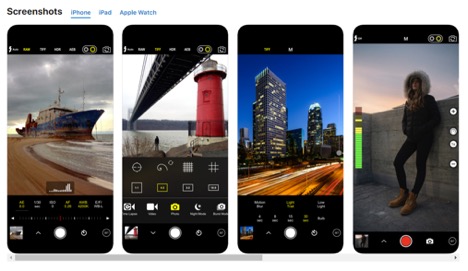
3. Halide Camera (Rating 4.6 out of 5)

Supportive and surprising, the Halide Camera app includes high-tech tools for thoughtful photo capturing. Any user will love to download this must-have app in their sets of latest iPhone models. Appreciably, the app is updated according to trends and has a fast lens switcher in its most recent version 1.15.0 especially designed for the iPhone 11 pro.

It allows you to manually control the white balance, shutter speed, and ISO. You can always review your last few shots quickly with this app and work on live histograms to the peak of excitement. It captures TIFF, HEIC, JPG or RAW for users.

4. ProCam 7 (Rating 4.6 out of 5)

Similar to other advancements and features of photo editing apps, an iPhone user can opt for ProCam 7 with the latest version being 12.1.4. You will be enticed to find out about all the bug fixes and improvements of this app along with its four different photo shutter options like self-timer, anti-shake, screen shutter, and interval.

The app supports seven different shooting mods for adding an excellent touch to your picture and has sixty impossible-to-believe filters. Moreover, the app comes with an attractive feature that adds good background music for you in no time.

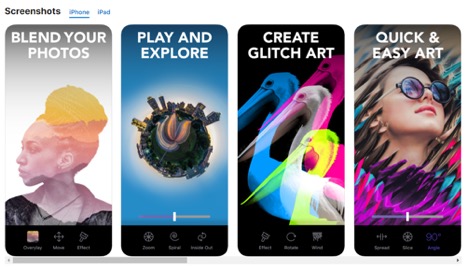
5. Enlight Photofox (Rating 4.7 out of 5)

Of all the iPhone apps, this is one of the most artistic. You’ll always find Enlight Photofox to be one of the most recommended iPhone apps of the year  because it has a feature that can turn a picture into a drawing or painting.

Though it’s a paid app, it has the option for photomontages, double-exposure, and tilt-shift. Its best function involves multi-layer creative editing through which you can find any picture in the transparent and blend mode. You can add a doodle onto your image or create impressive graphic designs to your images anytime.

6. Adobe Lightroom (Rating 4.7 out of 5)

Downloading an app with such good ratings, free of cost, has always been an exciting idea. The latest version of this app is 4.4.1, and it has been adding further advancements for iPhone people on every step. It also has an iPad version for iPad users.

With the help of the premium version of this app, you’ll always find exciting features to edit photos. With a single tap, the app allows you to manage magically striking changes to your profile pictures. Its premium version comes with an AI power that harnesses and sharpens people and objects.

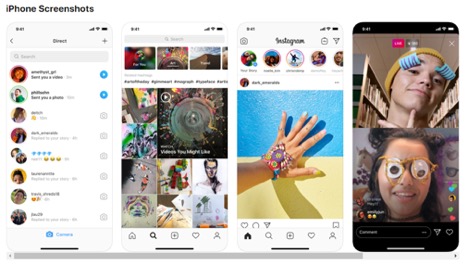
7. Instagram (Rating 4.8 out of 5)

Instagram is one of the most utilized apps for photography nowadays. Of course, who doesn’t know about Instagram and use it one way or the anther? A photographer may know all the types of cameras and their use in photography, but anyone will be familiar with the purposes of Instagram along with its benefits for photo editing.

The latest version of this app (117.0) includes a bunch of black & white filters along with a great selection of colorful filters, plus it has sharpening adjustments and high-quality exposure. You will always add the last edit to your picture before uploading it on Instagram. The option of adding boomerang, canvas, collage, and reposting also exists on Instagram.

Conclusion

Using an iPhone is a luxury in itself but handling it is a harder step. You will always find these apps on the app store whenever you plan to edit pictures. Capturing an image is something everyone wishes to do all day; therefore, such apps have always been useful for everyone around the world. As they say,

Photographs are return tickets to moments otherwise gone.

About Shane

Shane Radcliffe is a passionate blogger who writes for the sake of providing information about everything related to the virtual market of today. He works with Couponado, an online coupon website platform, and lets people save time by writing about everything a customer wants. Reading and gaming are his main hobbies.

How to create fake iPhone portrait effect in Photoshop

Apple launched portrait mode a few years ago. You can buy an iPhone to shoot portrait photos. But what if you don’t have iPhone but want to shoot portrait mode? Also, what if you have an iPhone but you shoot photos with your DSLR. Let’s see how can you create a fake iPhone portrait effect in Photoshop.

This is going to be a short tutorial because this effect is quite easy to achieve. All, I’ll be doing is to put the human on a separate layer and blur the background. Let’s do it.

But before we begin, I want to show you the after and before

After

Before

Photo from Needpix.

What’s the actual name if iPhone portrait effect?

iPhone portrait effect is not new. It has been in DSLRs for years. The actual name is Shallow Depth of Fields.

So, if you ever come across a DSLR photographer and don’t want them to laugh on you, never say that you want to capture iPhone portrait effect from your DSLR. Say them how can I achieve beautiful shallow depth of field from my DSLR.

Yep, that’s the correct term

Now, let’s start the tutorial.

Step 1: Select the person in Photoshop

The first thing we need to do is to select the person in Photoshop.

I am going to use Select Subject in the Quick Selection Tool. Grab the Quick Selection Tool from the tool panel or press Shift + W again and again until it activates.

Click on the Select Subject.

This will select the person.

Note: you can use Select and Mask and to refine the selection and make the selection perfect. Go to Select > Select and Mask to activate it.

Step 2: Copy the person to a new layer

Press Cmd + J / Ctrl + J to copy the person to a new layer.

Step 3: Blur the background

Time to blur the background. But before that, we need to duplicate the background layer so that we can revert in case we mess up.

Click on the background layer and press Cmd + J / Ctrl + J.

Go to Filter > Blur > Lens Blur.

Tweak the sliders in such a way that it gives a nice looking blur effect. Press OK.

Here’s the photo.

Step 4: Finalize the iPhone portrait effect in Photoshop

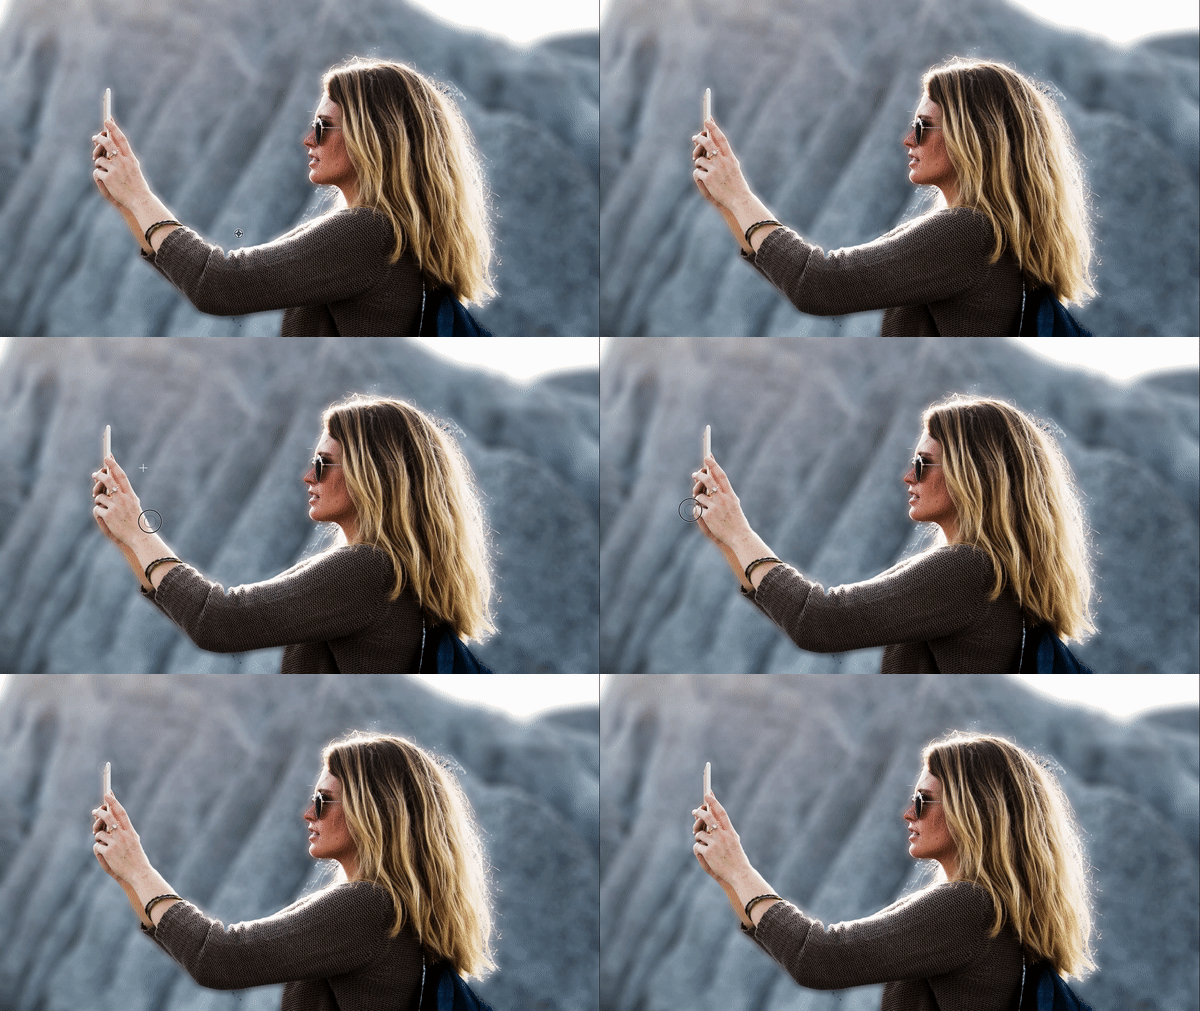
You’ll see that there are some impressions of the blurred background that are leaking from the edges of the person. See the below screenshot.

This is happening because we blurred the background and the edges are no sharper. They are (kind of) fused with one another.

We’ll fix this with the Clone Stamp Tool.

Create a new layer by pressing Cmd + Shift + N / Ctrl + Shift + N and drag it to the second position.

Grab the Clone Stamp Tool from the tool panel or press Shift + S again and again until it comes.

Hold down Opt/Alt to select the source and start brushing on the edges. See the below GIF.

Below GIF is of 3.5 MB. Give it some time to load.

That’s all.