The Ultimate Guide to Layer Mask in Photoshop

TrickyPhotoshop is for beginners and intermediate Photoshop users, and layer mask is one of the most basic things in Photoshop and all users need to know. I wonder why I never wrote an ultimate guide on the layer mask in photoshop ever since I founded TrickyPhotoshop on 23rd July 2012. Shame on me!

So, to make everything up, I am writing the ultimate guide to layer mask in Photoshop. I am going to tell you all the things that you can do with layer masks. Here is the table of content

Table of Content

  1. What is layer mask?
  2. How is layer mask different from Opacity Slider?
  3. Minimum Requirements of a layer mask.
  4. Where to find layer mask?
  5. How to use layer mask?
  6. Why should you choose layer mask instead of the Eraser Tool?
  7. Shortcuts for and in the layer mask

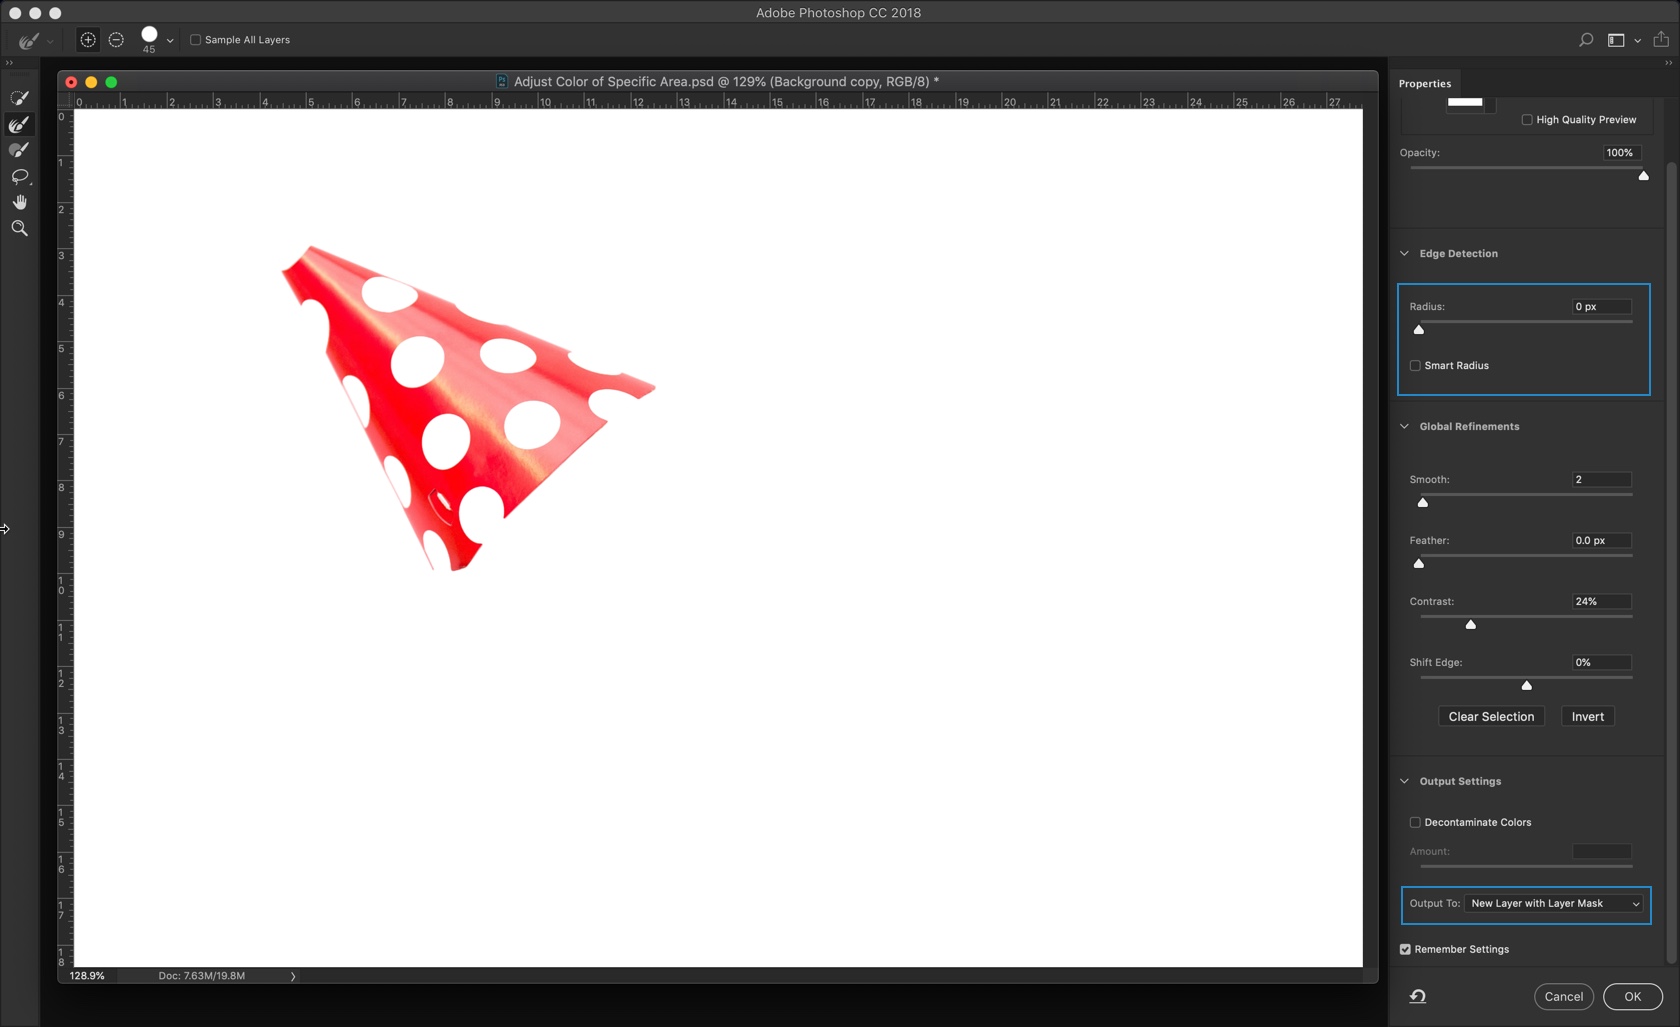
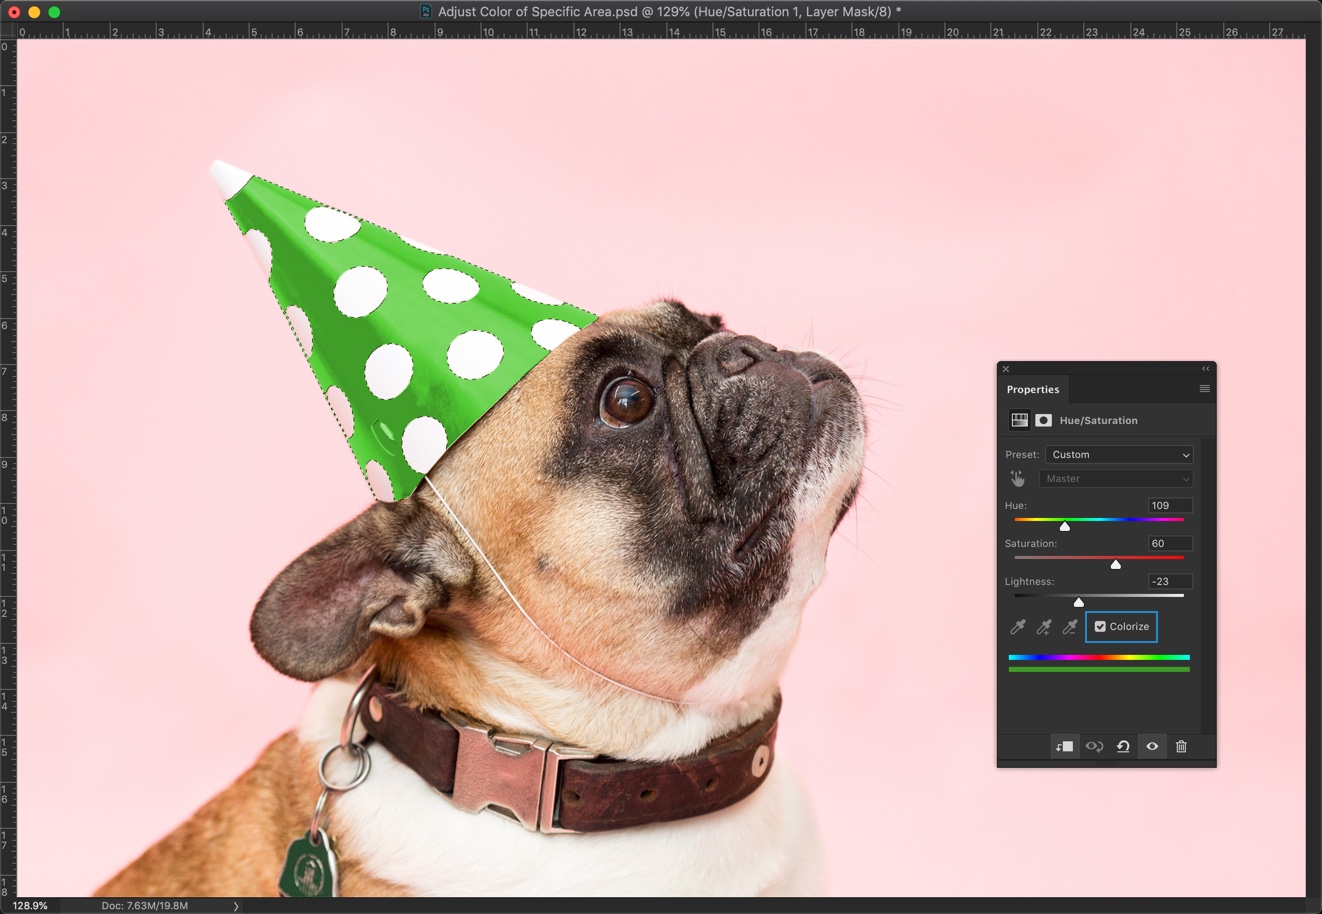
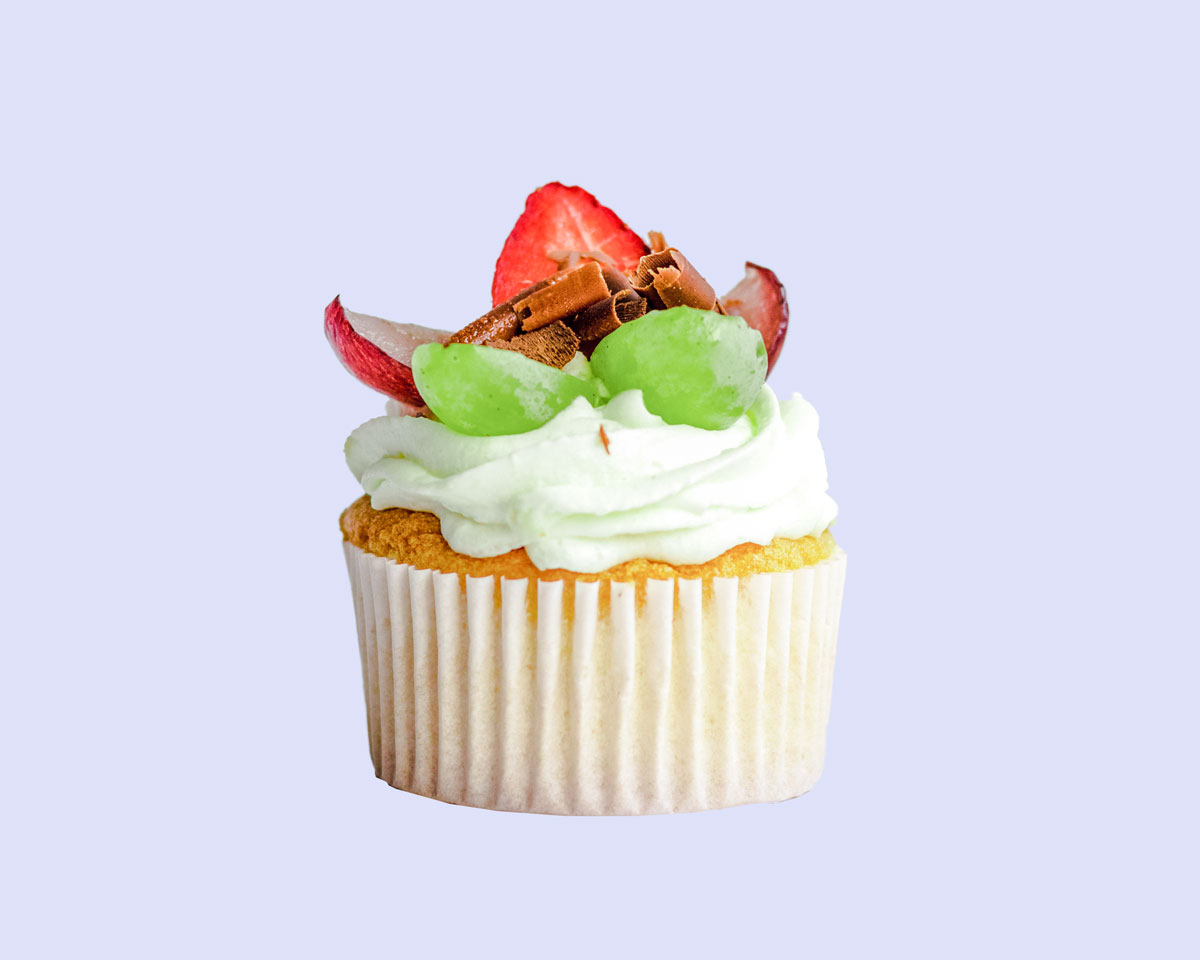
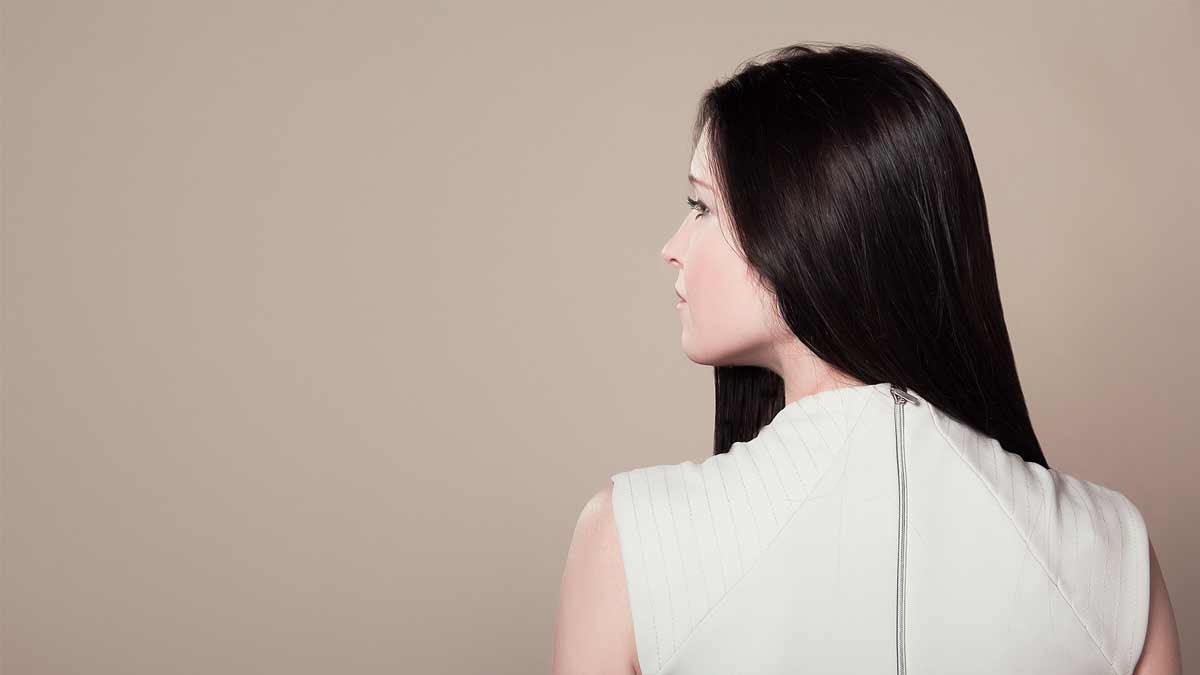
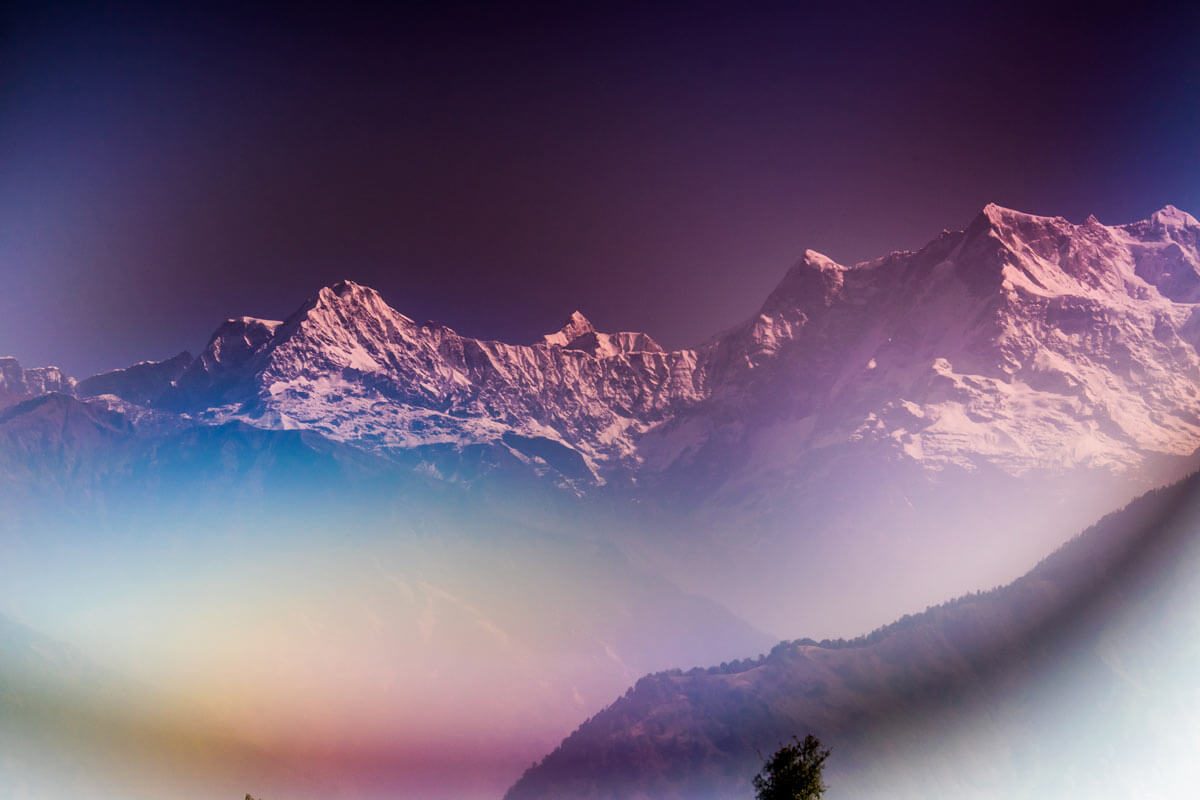
Before I begin with the very first section, I want to show you an image where I hide the original background with the help of Quick Selection tool, Select and Mask, and Layer mask.

After

Final.jpg

Initial

Initial.jpg

1. What is Layer Mask in Photoshop?

The layer mask controls the transparency of a layer.

It is only in shades of gray. 100% black means that the area is completely transparent. 0% Black (100% white) means that the area is completely opaque. Any value of gray between 0 – 100% black means the area is translucent. I’ll explain this thing later when I am going to show you how to use a layer mask.

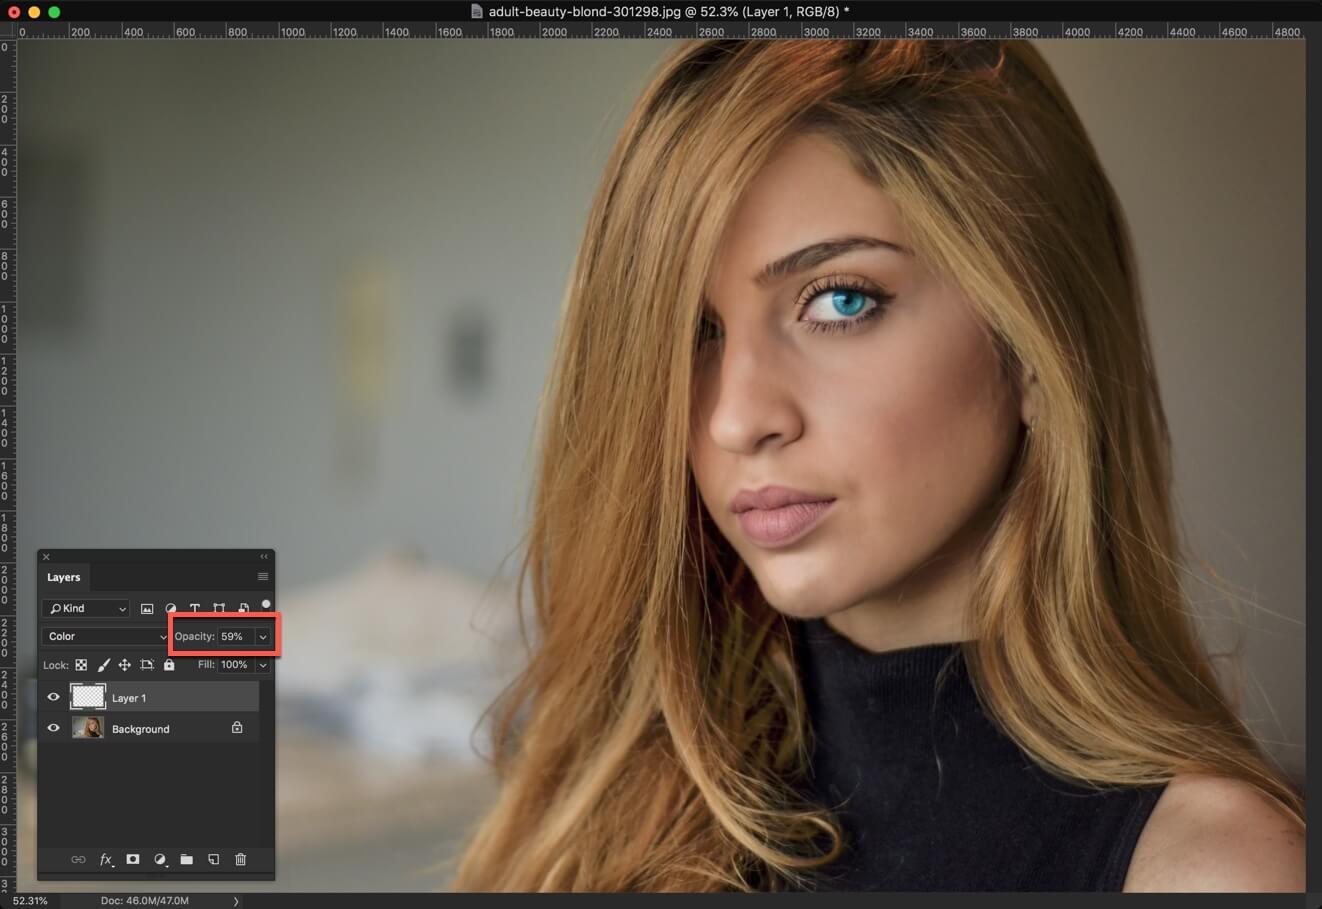
2. How is a layer mask different from the opacity slider?

Opacity slider reduces the opacity of the entire layer. There’s no way you can isolate the area of which you want to reduce the opacity.

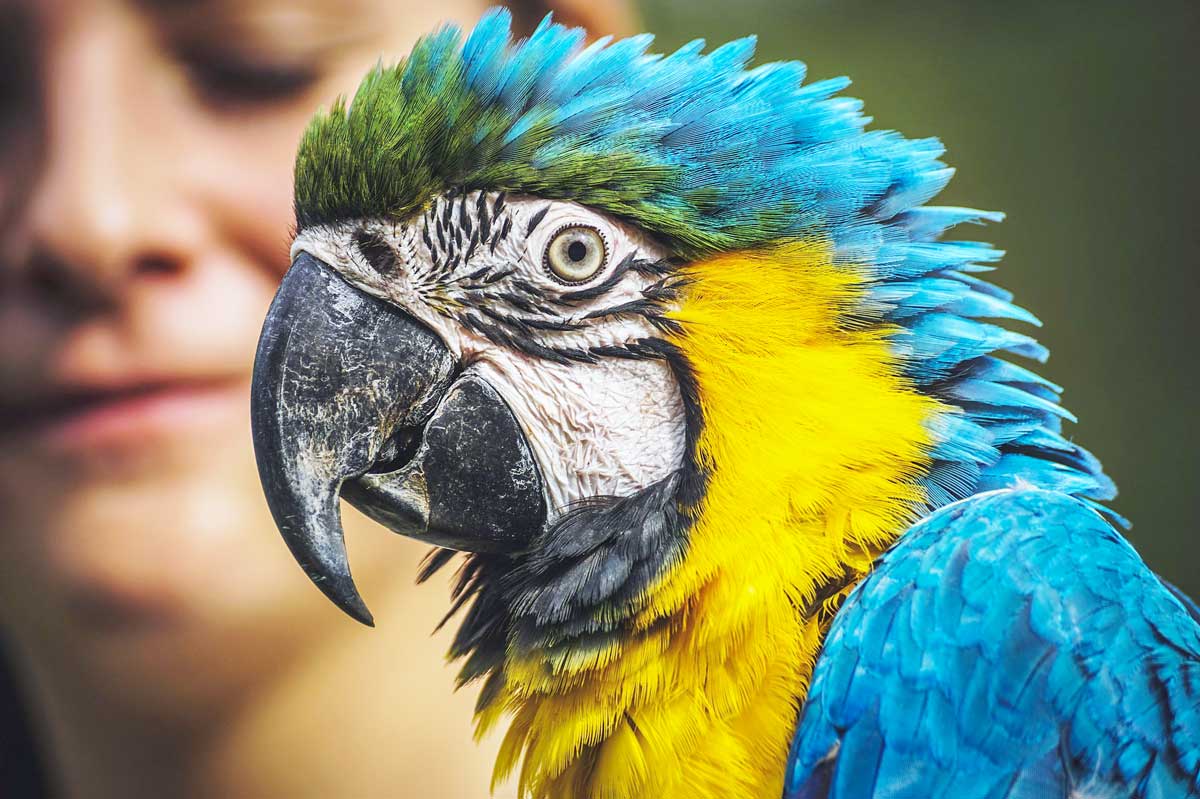
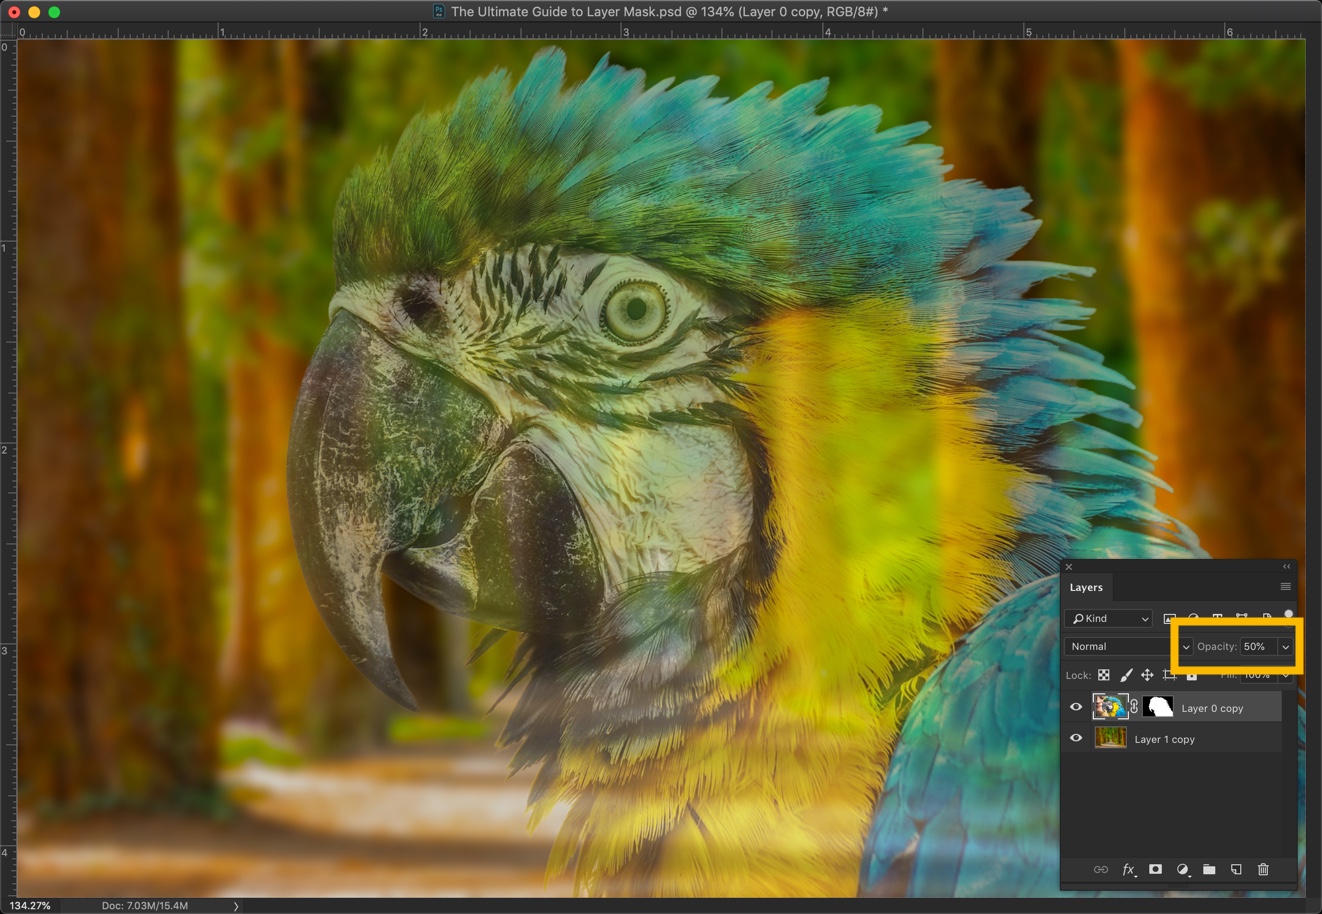
Let’s say I want to reduce the opacity of the parrot’s beak to 50%.

Here’s an example. I reduced the opacity to 50% and the entire image of parrot is now translucent. This is not what I intended to do.

1.jpg

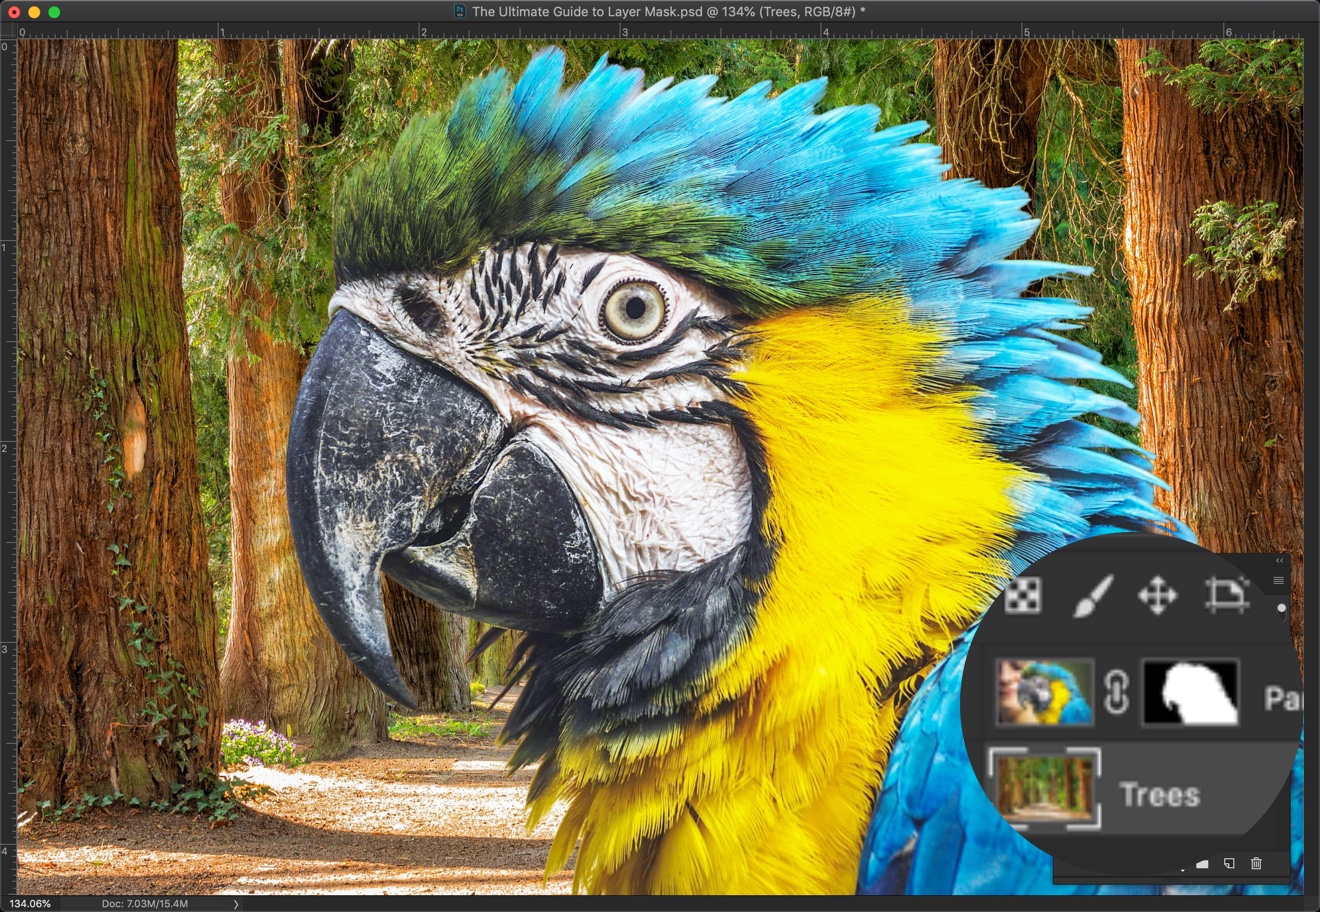
Now, I want to show you the result that I did with the layer mask. I’ll show you how I did it later.

Check the beak. Only it’s 50% opaque. Rest of the photo is 100% opaque. I did it with the help of layer mask.

2.jpg

3. Minimum requirements of a layer mask.

If you go back to the original definition of layer mask that I wrote in section 1 which is that it controls the opacity of a layer.

So, a layer mask has to have a layer to work. Without a layer, layer mask will not have anything to the control the opacity of.

4. Where to find layer mask?

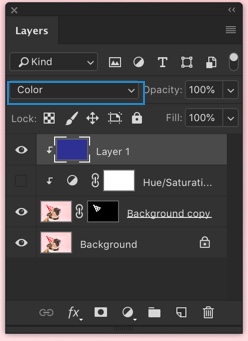
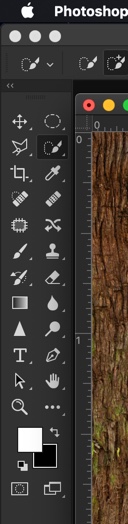
The layer mask is present at two locations. One is in the layer panel and another on the menu.

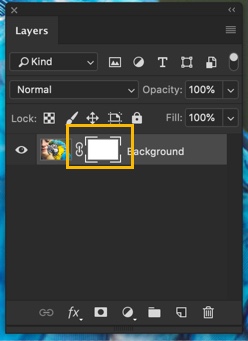
To use it, you need to make sure that the layer is unlocked first in the layer panel. Press F7 is you cannot see the layer panel.

If you see a lock icon next to a layer, it means that the layer is locked and you cannot do anything on this layer unless you unlock it.

3.jpg

Click on the lock icon to unlock it.

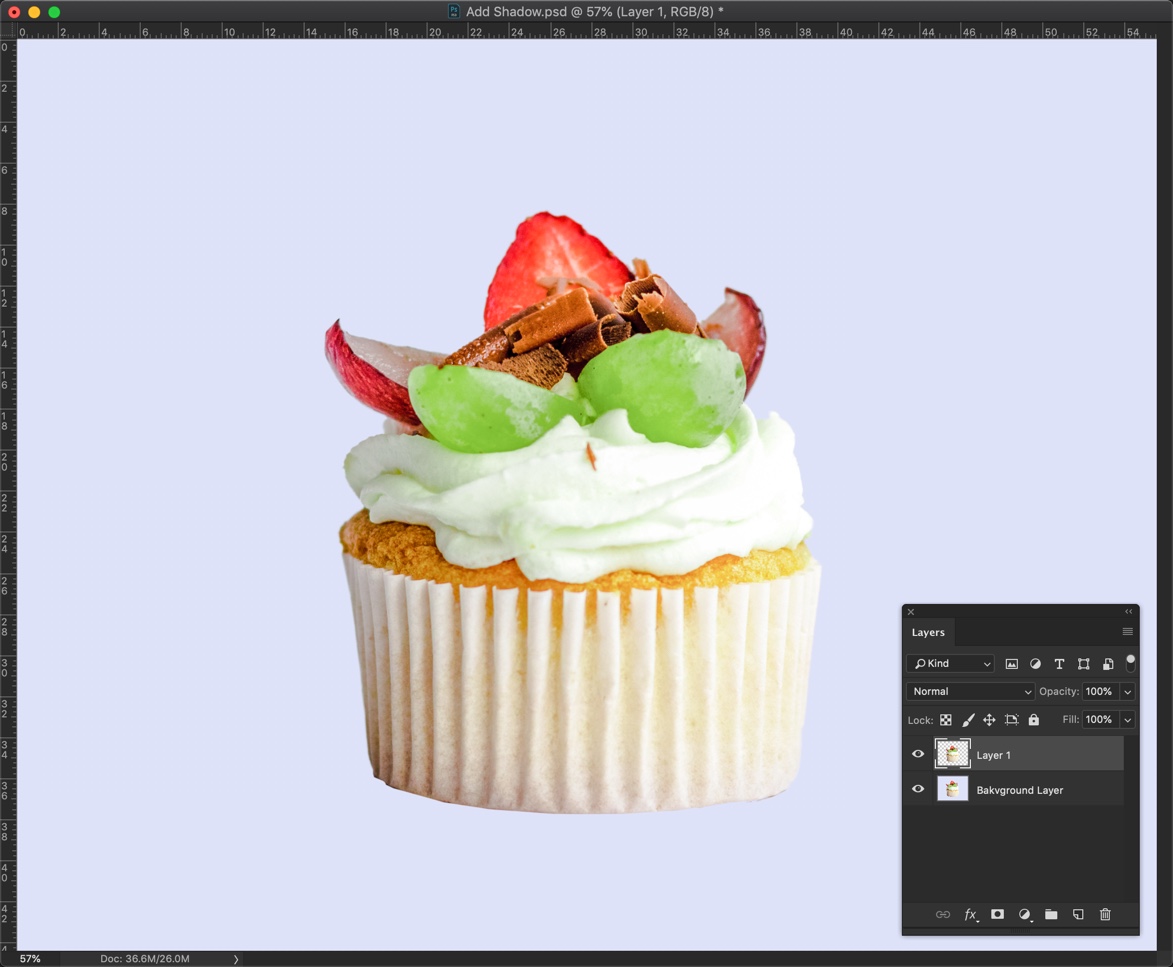
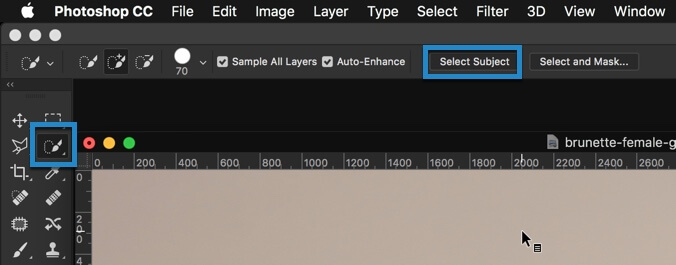
Approach 1 for adding a layer mask

Go to Layer > Layer Mask > Reveal All in the menu to add a layer mask.

Approach 2 for adding a layer mask

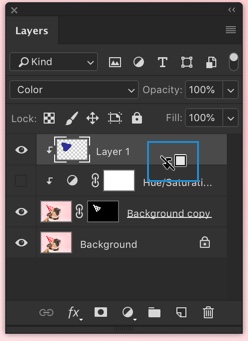
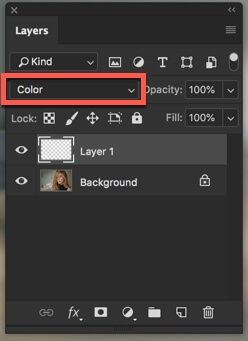
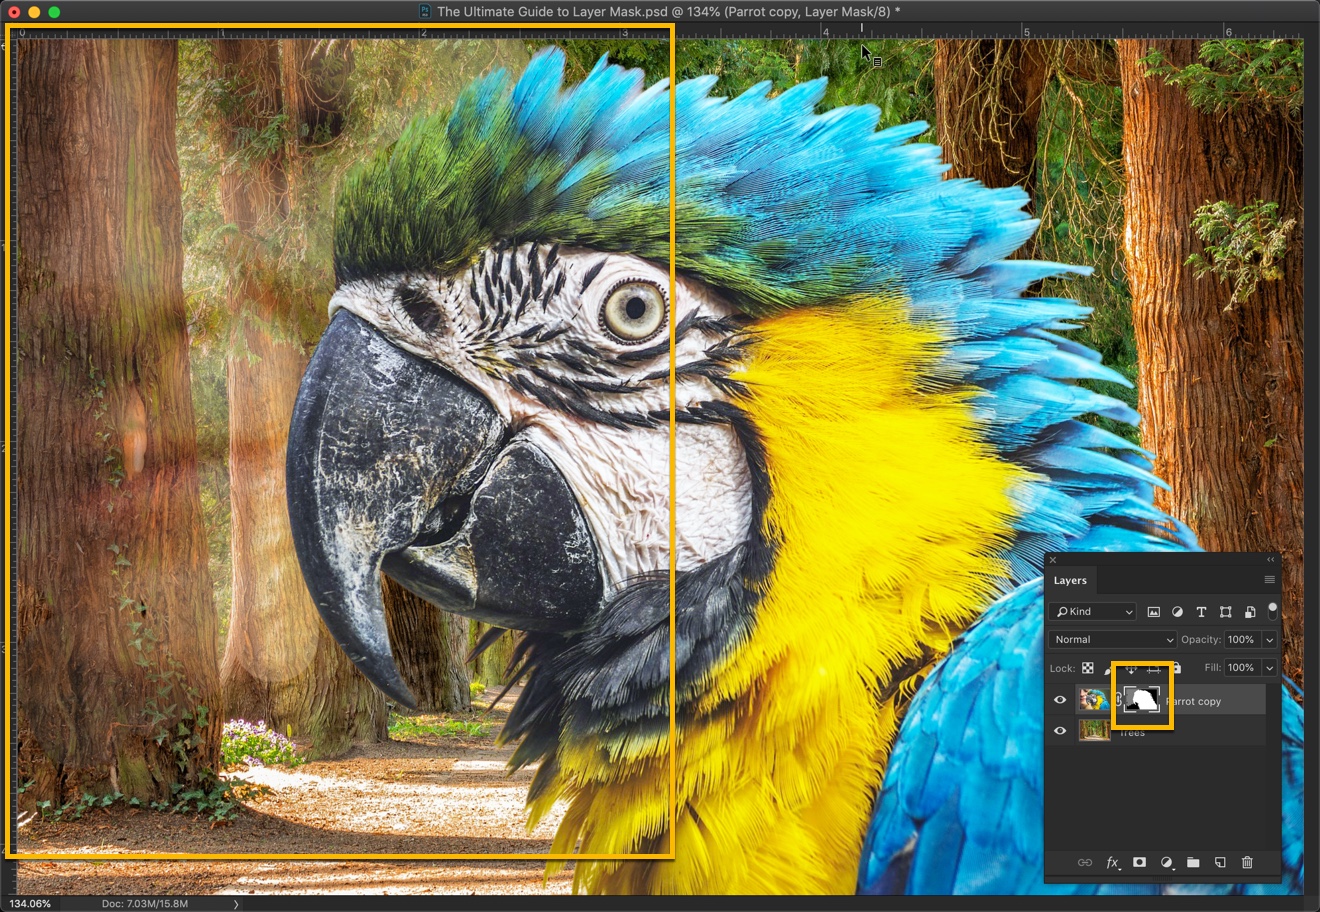
Open layer panel by pressing F7. Click on the icon which is enclosed with the yellow color to add a layer mask.

4.jpg

Once layer mask is added, you will see a rectangular box next to the layer.

5.jpg

5. How to use a layer mask in Photoshop?

The layer mask controls the opacity of a layer.

By now, you know that whenever you add a layer mask, you would see a white rectangular box next to the layer.

Now, let’s understand how to use a layer mask in Photoshop.

Whenever I brush the layer mask with black color, it will hide that part of the layer. Whenever I brush the layer mask with 40% black (a shade of gray) color, it reduces the transparency of that part by 40%. And, whenever I brush the layer with 100% white, it will make that part completely opaque.

Having some difficulty to digest? Read on…

5.1. How to Hide using layer mask?

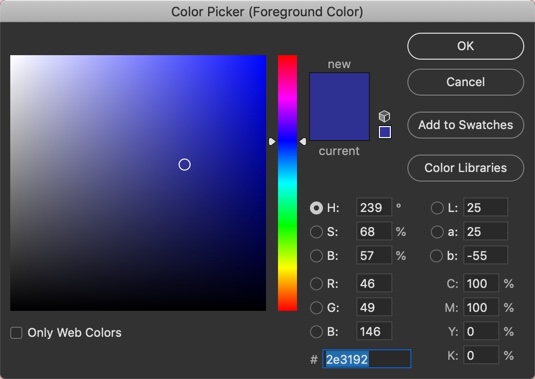
First of all, I am going to select Black as my foreground color.

6.jpg

I’ll brush the layer mask with the black color.

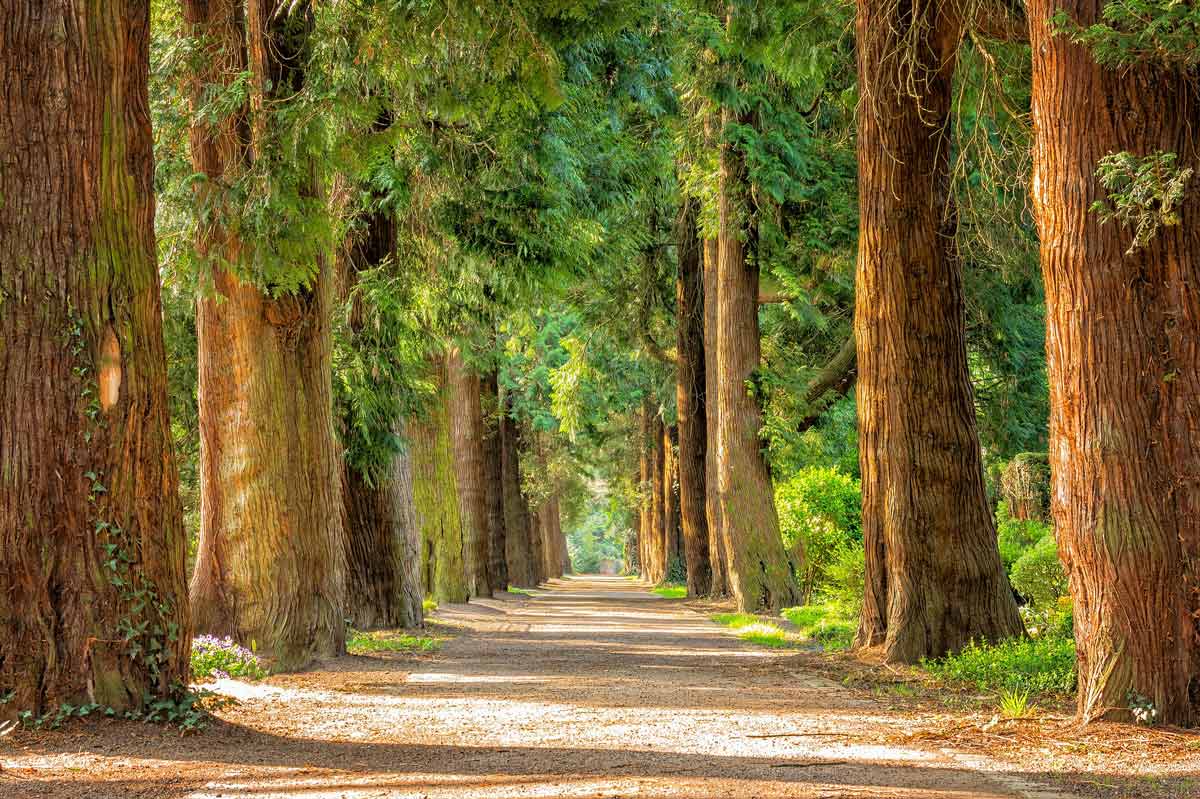
To make things easier for you to understand, I have already copied a layer below the parrot layer. This is the image that I am putting just below the parrot layer.

8.jpg

I am going to grab the Brush tool from the tool panel.

Now, I am going to brush the layer with the black color.

I have brushed randomly and see what happened. I brushed randomly and that part is now hidden. You can the trees from the layer that is present in the below layer.

If you see layer panel, you will also see some black marks in the layer mask. That black mark means that that area is not hidden by the layer mask.

7.jpg

I’ll give a few more examples.

This time I brushed on the right side with the black color. Did you notice what happened? The part where I brushed is now hidden and I can see what’s present in the layer just below to it.

9.jpg

This time I am going to brush on the entire background. Let’s see what happens.

My entire background is now hidden. You can check my layer mask (I magnified it), you will see that the background is of black color and the parrot is of white color.

In a layer mask, Black means that part is hidden and white means that part is visible. So, you can now easily understand that the background is painted with black color and that’s why it’s hidden. Parrot is with a white color that’s why it’s visible.

10.jpg

5.2. How to Reveal using layer mask?

Now, suppose I want to bring back my background. I will simply brush that part with white color.

Time to choose white color as my foreground color.

11.jpg

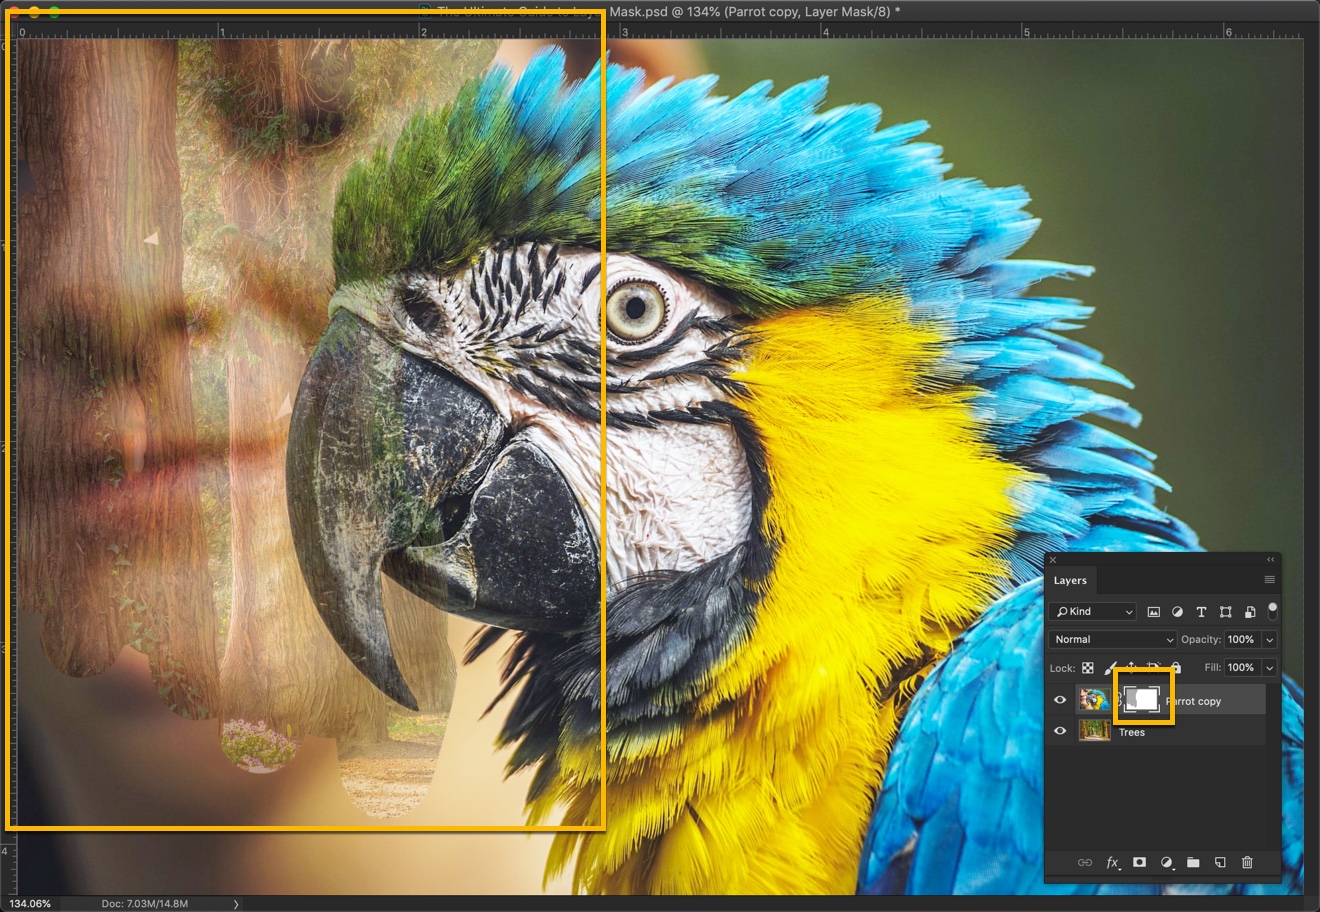
I am going to paint the left side of the image with the white color. It will make that part visible again.

See below. I have brushed the left side with the white color and I can see the background again. If you see my layer mask, you can also see that the corresponding part is in white color.

12.jpg

You see that how easily I brought the background back? I just brushed it with white color and it’s back.

So, working with layer mask makes your editing non-destructive. It means that you can go back at any point of time without worrying about what would happen to the rest of your image.

Now, what should I do to make the background partially visible?

I can simply reduce the opacity of the brush. In the toolbar of the brush tool, I am going to reduce the opacity to 40%.

13.jpg

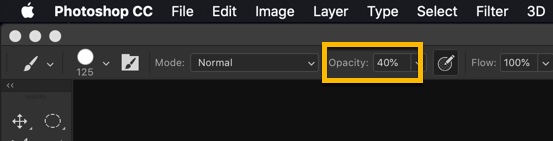
Here I go. I brushed the left side of the image with 40% of the white color. It means that the area is now 40% visible. You can also see that you can see a partially visible face. In the layer panel, you’ll see that area with a gray color.

14.jpg

And yes, this also works the other way round. You can brush with the black color with 40% opacity. It will hide that layer by 40%.

15.jpg

This is how you use a layer mask.

6. Why should you choose layer mask instead of the Eraser Tool?

Eraser tool erases destructively. You cannot go back in time except using History window, but that is so not recommended.

Let’s say that you erased a part of the image and then you made 13 other steps like toned the brightness, fixed the color, corrected the white balance. Now, you realize that you want to bring back what’s erased.

The only way to do it is to use History window (Windows > History)  and go back to that step. That’s good. But the problem is the 13 steps that you did after erasing will also be undone. You need to perform those 13 steps again.

For example, let’s say that I erased some part of the image with the Eraser tool.

16.jpg

Now, I did several other things like adjusting the brightness, contrast, vibrance, etc.

17.jpg

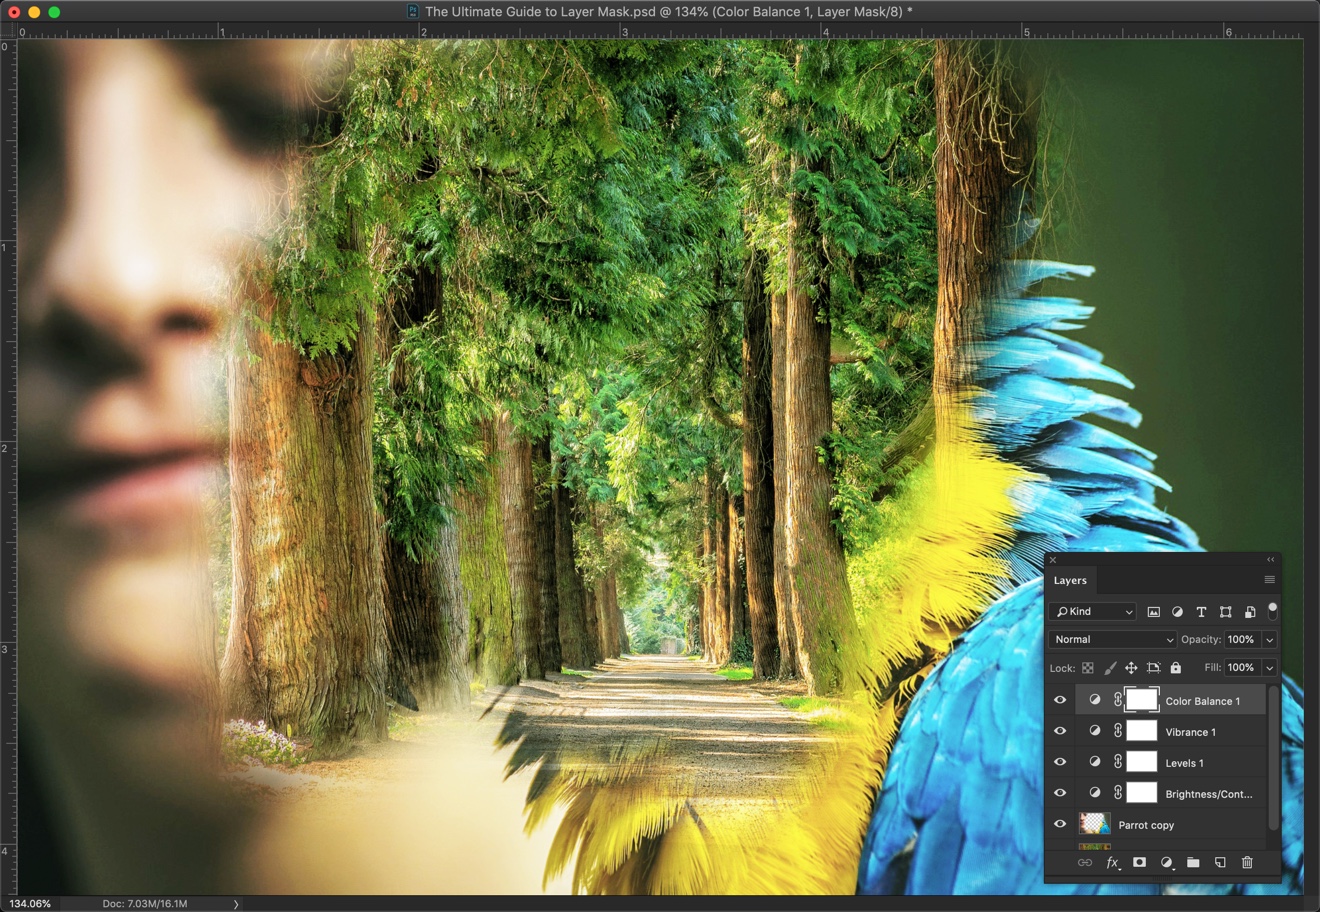
Now, I realized that I made some mistakes while erasing and I need to bring some part of the image back.

To fix this, the only way is to go to the History panel (Windows > History) and click on the step just before when I used the Eraser tool.

And yes, I have my image back. But you know what’s the downside? Whatever steps that I did after erasing (marked with yellow rectangle) are also gone. I need to manually redo those steps again. Things would have become even more complicated if I had performed 100+ steps after using the Eraser tool.

18.jpg

Layer mask fixes this problem. It edits your image non-destructively. It means that you can go back in time at any point of time without worrying about other things.

If you have accidentally hide something by brushing it with the black color, you can unhide it by brushing the same area with the white color.

This is why I always use Layer Mask to hide something.

7. Shortcuts for and in the layer mask

There are few shortcuts for layer mask that will make your life easier.

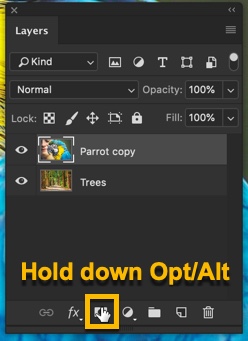
A. A Layer Mask that will hide the entire layer by default.

Hold down Opt/Alt and click on the layer mask. It will hide the entire layer once it’s created.

19.jpg

B. Disable the Layer Mask

Hold down Shift and click on the layer mask. It will disable it.

20.jpg

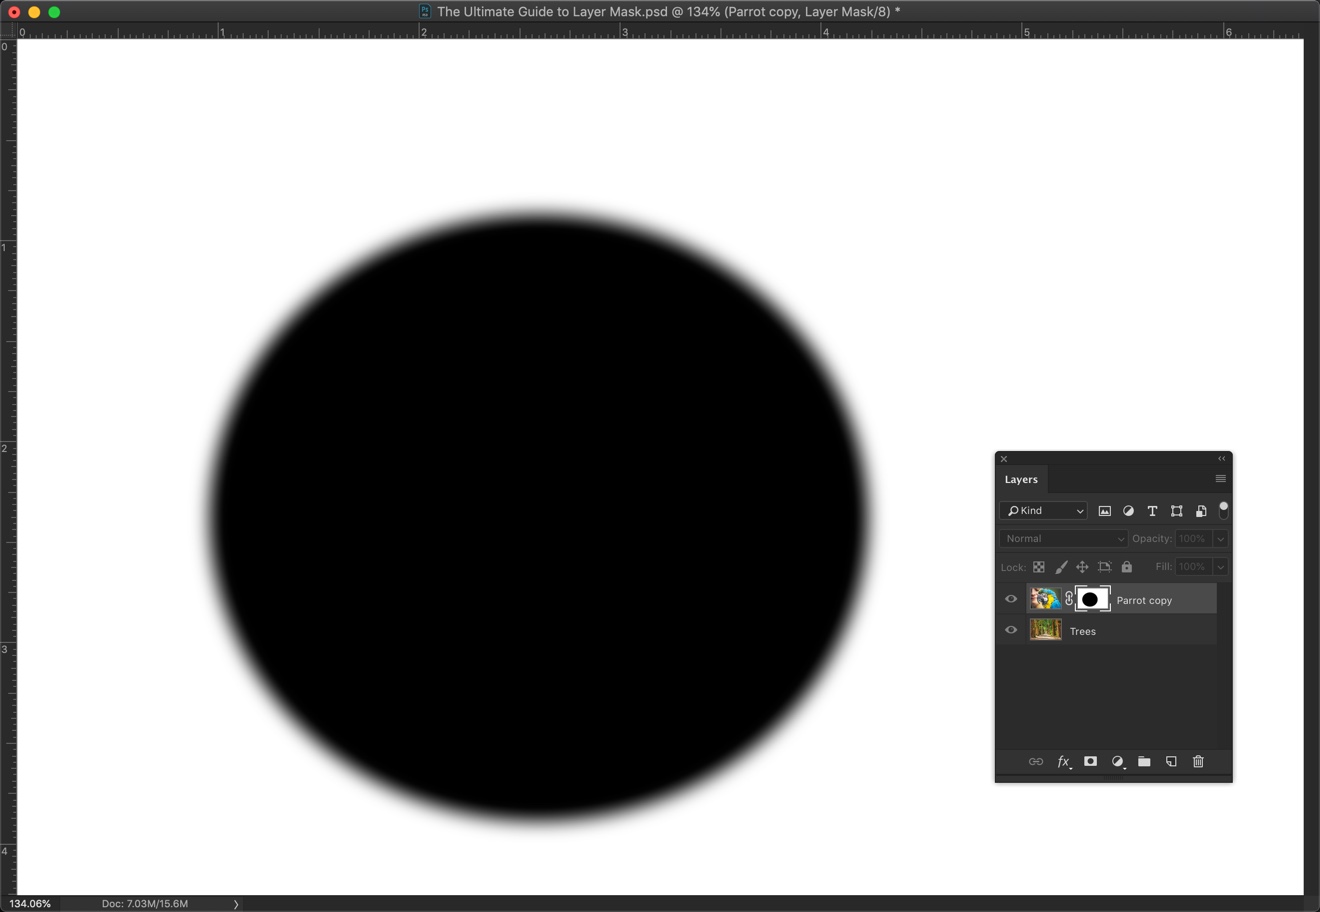
C. To Actually See the Layer mask

You can actually see how it looks like. Hold down Opt/Alt and click on the layer mask.

21.jpg

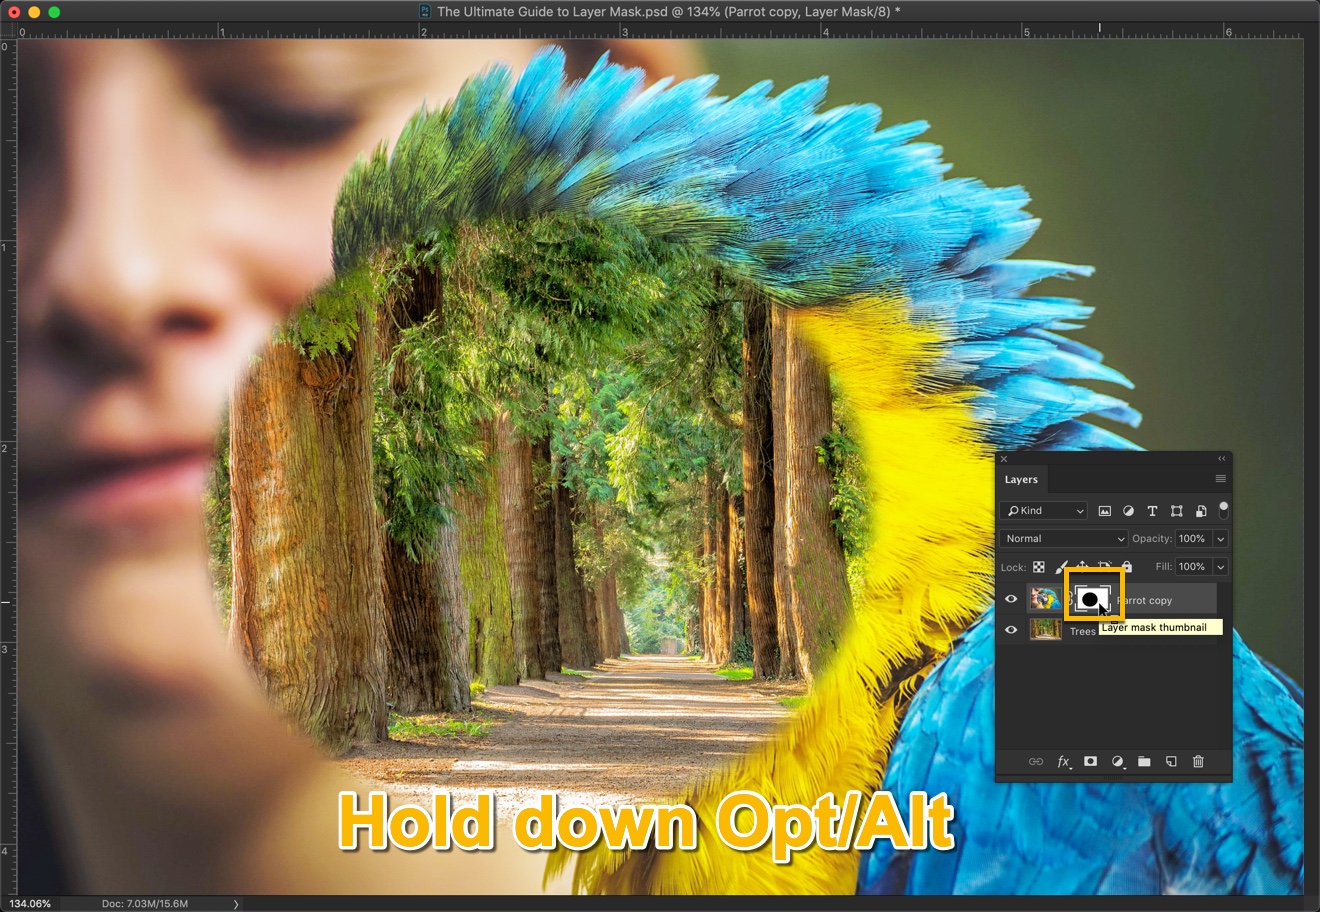
Your image will look like the below one. Here black part represents what is hidden and the white part represents what’s visible. Again, hold down Opt/Alt and click on the layer mask to go back to the original mode.

22.jpg

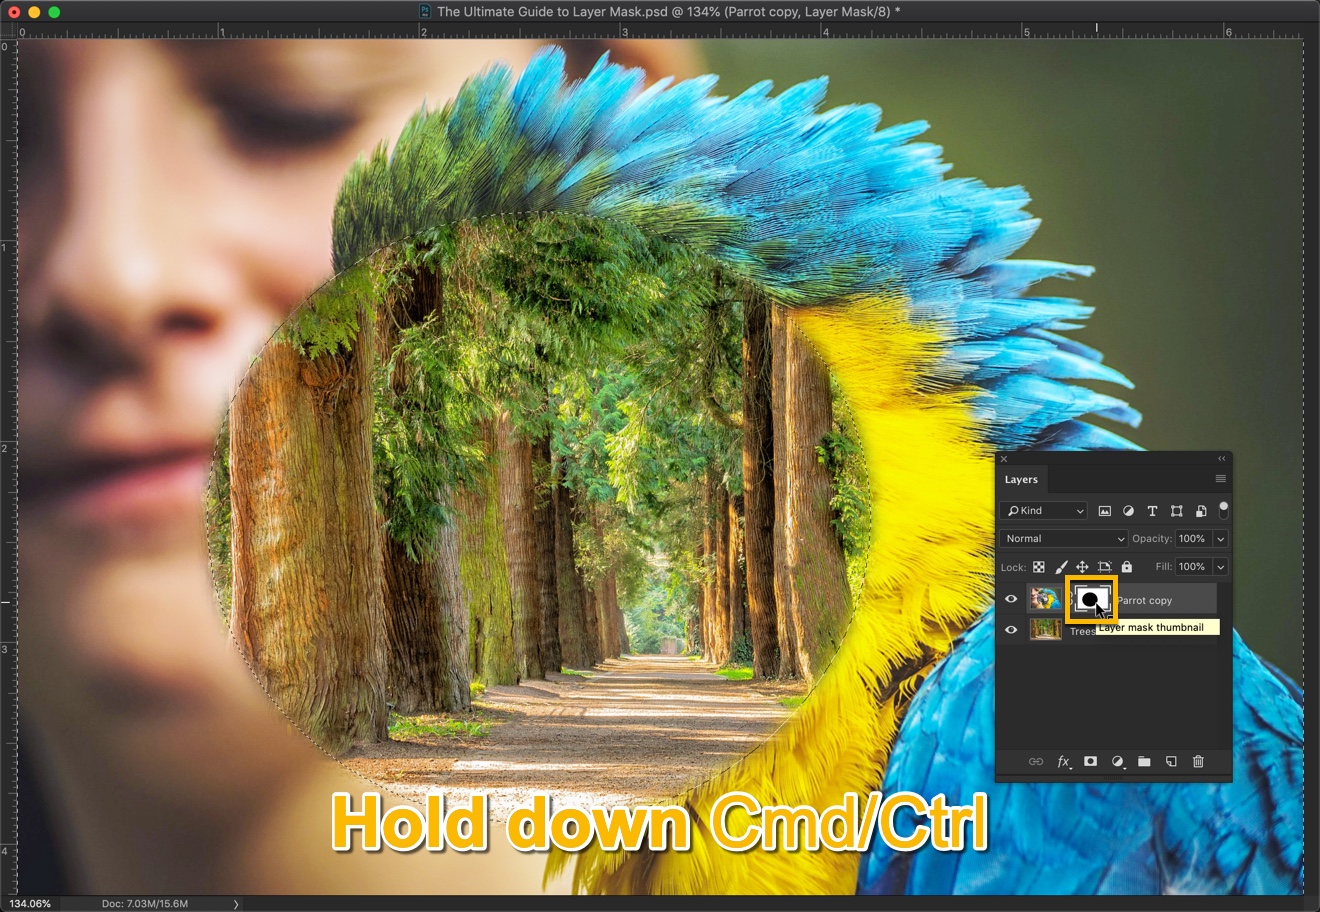
D. To make a selection out of a layer mask

Hold down Cmd/Ctrl and click on the layer mask to make a selection out of a layer mask.

23.jpg

This is all guys. Make sure that you get the most out of the below offer.

Change the Color of Specific Areas in Photoshop

I ran a campaign on my site and asked people the tutorials which they want to read next. And, changing the color of specific areas is on the list. Time to show you how to change the color of specific areas in Photoshop.

The most demanding tutorial was adding shadow in Photoshop and I wrote a tutorial on that 2 days ago.

Here’s the plan for today’s tutorial. First, we’re going to select the area where you want the color to be replaced. We will do it with the help of the Quick Selection tool (because it’s my favorite). Then we’ll use Hue and Saturation to change the color. After that, I’ll show your one bonus technique which you can also use.

Final image

Final.jpg

Initial image

Initial.jpg

Let’s begin the tutorial

Video

If you like watching videos, here’s the video tutorial for you.

Step 1 – Select the area

I am going to change the color of the hat.

Grab the Quick Selection Tool from the toolbar or press Shift + W again and again until it comes.

Start dragging it on the area to select.

1.jpg

Once done, here is my image.

If you have accidentally selected something unwanted, hold down Opt/Alt and brush over the unwanted area. This will deselect that area.

2.jpg

Step 2 – Refine the Selection

Open Select and Mask if you’re using Photoshop CC 2017 and newer. I like to keep the smart radius as 0 as I don’t like its effect. Rather I prefer to use Refine Edge brush for the refined selection. Press OK once done.

This will create a new layer with the selection.

If you’re using older versions of Photoshop, you can use Refine Edge. I cannot show how to do it via Refine Edge because it is not there in Photoshop anymore. But, you can refer the tutorial that I wrote when the tool was present.

3.jpg

Step 3 – Change the Color of Specific Areas in Photoshop

We’re going to use Hue and Saturation to change the color.

Go to Layer > New Adjustment Layer > Hue/Saturation.

The first thing we need to do is to enable Colorize. This will remove the color of the selected area. I have put a rectangle on this box in the below screenshot so that it’ll be easier for you to locate.

4.jpg

Next thing, I am going to do is to play with the Hue, Saturation, and the Lightness sliders to get the color that I want. I really like this green color so I am going to stick with it.

This is all. This is the final image.

Final.jpg

Bonus Step – Change the color via Color Blend Mode

There’s one more way to change the color i.e. Color Blend Mode.

We’re going to create a new layer, fill it with the desired color, and change the color or blend mode. That’s all.

Create a new layer by pressing Cmd + Shift + N/Ctrl + Shift + N. Clip the layer to the layer just below it. This will ensure that it will only affect the layer just below it. Hold down Opt/Alt and put the mouse cursor just in between the two layers. You’ll see that the cursor changes its icon as shown below. Now click the mouse button.

6.jpg

Change the foreground to your desired color. This will be the final color of the area.

5.jpg

Press Opt + Delete/Alt + Backspace to fill the layer with the foreground color. Change the blend mode to Color.

7.jpg

That’s all! But as you’ll see that the layer is clipped to its below layer, it will only affect the selection.

Final-2.jpg

This is all.

Make sure that get the most out of the below offer.

Add Shadow in Photoshop CC

Hey, guys! A few weeks ago, I ran a campaign in Photoshop where I asked people which tutorial should I write next. And guess what, you’re currently reading one of the most asked tutorials which is to add shadow in Photoshop.

Adding shadow in Photoshop is not a one-step tutorial. Yes, I know that Photoshop provides “Drop Shadow” layer style but that works rarely. To make things even more complicated, you first need to cut out the object of which you want a shadow in order to use the layer style.

Today’s tutorial will be a bit longer because I want to show you the best method to add the shadow (not the fastest). This method will take some time to implement but the result would be perfect.

Before I begin, you may want to see the final image.

Final image

Final

Initial image

Initial.jpg

Let’s begin with the tutorial

Step 1 – Extract the subject to a new layer

Shadow comes in between the background and the subject. So, we need to extract the subject to a new layer to make things simpler. You’ll understand in later steps why this step is important.

You can use “Select Subject” if you’re using Photoshop CC 2018 to easily extract the subject. If can use Quick Selection Tool if you’re using an older version of Photoshop. I have written a tutorial on how to select using the Quick Selection Tool. You may want to check out that tutorial if you are having difficulty in selecting the subject.

If I used “Select Subject” in my Photoshop and it selected the cupcake. Later I used “Select and Mask” to refine the selection.

Here is the image where the cupcake is in the new layer.

3.jpg

Step 2 – The basics of shadow

You’ll see that there is an extra dark shadow at the places where the subject is touching the ground and there are light shadows around in whenever you see an image with a real shadow.

I am going to replicate the same thing with my image.

In the below image, the area marked with red color will have a dark shadow and the area marked with green color will have a light shadow.

Screen Shot 2018-09-30 at 09.45.56.png

The next thing you’ll notice by looking at an actual shadow that it’s not completely black. It has a tint of blue.

So, I am going to use a very dark blue color for my shadow. The HEX code of my shadow is #131322.

4.jpg

Step 3 – Add Shadow in Photoshop (Dark Shadow)

Cupcake has a rounded base. So, I need to create a shadow that should be rounded in shape.

Here’s my plan – I am going to use the Elliptical Marquee tool to make a rough rounded selection around the base and then I’ll fill it with the shadow color to add shadow in Photoshop. After that, I’ll adjust the shape of the shadow with the Free Transform tool.

Grab the elliptical tool from the Tool panel or press Shift + M again and again until it comes.

Make a rough rounded selection around the base.

5.jpg

Now, I am going to create a new layer for the shadow. Press Cmd + Shift + N/Ctrl + Shift + N. Drag this layer in between the subject and the background.

Fill the selection with the foreground color that is of our shadow by pressing Opt + Delete/Alt + Backspace.

You can take reference from the below screenshot.

6.jpg

Deselect the selection by pressin Cmd + D/Ctrl + D.

I know that the shadow is not perfect. I am going to show you how to refine it in the next step.

Step 4 – Refine the Dark Shadow

Activate the Free Transform tool by pressing Cmd + T/Ctrl + T.

Now drag the shadow to the edges. You also need to drag the handlebars to change the shape of the shadow.

If you want to skew it, hold down Cmd/Ctrl and then drag any handlebar to skew the shadow.

Once done, press Return/Enter.

Here’s my image.

7.jpg

I think that the shadow is very sharp. It needs to be a bit blurred.

Go to Filter>Blur>Gaussian Blur. 

Enter a value that will make the shadow slightly blurred.

Note – whatever value I am entering may not work for you. The value depends on the size of the image. My image is 4000 pixels wide. So, if your image is less wide, you may want to put lesser than 8.5 pixels as the radius in Gaussian Blur.

Press OK once done.

8.jpg

Step 5 – Add the Light Shadow

Create a new layer below the Dark Shadow layer by pressing Cmd + Shift + N/Ctrl + Shift + N and drag it below to the Dark Shadow layer.

Again grab Elliptical Marquee tool from the tool panel or press Shift + M again and again until it comes.

Draw a wide selection around the subject as shown below.

9.jpg

Fill the layer with the foreground color by pressing Opt + Backspace/Alt + Delete. Reduce the opacity to around 20% as shown in the below screenshot.

Deselect the selction by pressig Cmd + D/Ctrl + D.

10.jpg

This time we don’t need Free Transform tool to refine the shadow because the shadow doesn’t have to edge to edge this time. But, we need to blur it.

Step 6 – Blur the Light Shadow

Go to Blue > Gaussian Blur.

This time we’re going to choose a quite high value. I am going with somewhere around 62 pixels.

Press OK once done.

11.jpg

That’s all.

Make sure that you make the most out of the offer that is present just below the final image.

Final Image

Final.jpg

How to сreate a GIF in Photoshop

This tutorial is written by William Benetton who is a photographer. You can connect with him on his site.

The Graphics Interchange Format, or GIF for short, has risen to become one of the biggest tools in the internet’s arsenal of expressions. You can find these short, looping video clips adorning social media and web forums all over. Their genius lies in their simplicity and power of repetition: in an internet crammed with sparkling high definition assets, the humble GIF has stood the test of time to become a language of reactions and one of the pillars of memedom. If you’re looking to dip your toe in these waters and start making your own GIFs then Photoshop is probably the best choice of software around, so let’s look at the easiest way to use it to put a GIF together.

Step 1 – Pick Your Video

First thing is to find a video you’ll want to derive your GIF from. Ideally, you’ll be looking for a clip that’s only a few seconds long, as brevity is the life and soul of the GIF. Imagine it as a sentence from a novel, or a rhyming couplet in a song: a GIF is just meant to be a small snapshot or amuses bouche, rather than a fully extrapolated idea. Now comes time to get the video into a useable format for Photoshop. A .mov or .mp4 file is the easiest format to handle. If you’re looking to get the source material from an internet video, a free conversion tool like ClipConverter can let you save the video to the desired format so long as you have the right URL.

Step 2 – Import the Video to Photoshop

Open Photoshop and import your chosen video by clicking File> Import> Video Frames To Layers. This will lead to an options window where you can set your document up and pick which part of the video you want to make the GIF from.

Step 3 – Configure Your Document

With your document imported, make sure that you have the animation window up and running by clicking on Window> Animation. Now, before doing anything else, calibrate your image size to 500 pixels in width. The reason this is essential is that GIFs are designed to load quickly, often with multiple GIFS open at once on a single page. If your GIF file is too large then this can become cumbersome and lead to long loading times and have your GIF stuttering, which will take away from its impact. It’s one of the reasons that platforms like Tumblr won’t accept GIFs above a certain size.

Step 4 – Frame Editing

With your document ready and your video of choice imported, you can now start editing the frames you want the GIF to be composed of. These can be located in the aforementioned Animation window. The first thing to do is press play to see how the document runs in its current form. From there you can select the frames you want to keep and delete everything else. By the end of the process, you should end up with something between ten and twenty frames. This might seem like a low amount, but remember, you want to keep things short and sweet. If you do end up with more than twenty frames selected, delete either odd or even numbered frames to cut the frame count in half. This will result in choppier playback, but this is something that can be fixed later on.

Step 5 – Loop Your GIF

Whilst this step isn’t technically necessary, it’s one of the biggest appeals of the GIF format, and helps give the format its repetitious, flick-book quality. Plus, if someone laughs once at your GIF, chances are they’ll want to see it more than once. To do so, copy all frames apart from the first and last ones, then re-paste them back into the animation window and drag them over to the far right. Following this, click on the options panel and click “Reverse Frames”.

Step 6 – Select Your Frame Rates

The frame rate affects how long each frame will be displayed for. The default setting on Photoshop is 0.03 seconds, but this can be a little too fast for the GIF format. The frame rate best for you will invariably come down to personal preference and the nature of the content of the GIF in question, but setting the frame rate between 0.08 and 0.1 seconds can often prove very effective. The frame rate can be altered in the animation window, by clicking on the small arrow shown within each frame. Be sure to have all of your frames highlighted before altering the frame rate. Note that if you deleted half your frame rates previously, the clip will run much faster, so you’re probably going to need to set your frame rate to somewhere between 0.1 and 0.2 seconds. Bear in mind that the speed of your GIF might not be completely accurate in Photoshop. It’s not until you export it that you’ll be able to tell exactly how fast it plays.

Step 7 – Export Your GIF

Your GIF should be finished and ready to export to file by this point. You can do this by clicking File> Save for Web & Devices, and complete the rest of the file saving options. Remember to keep your GIF small (ideally 2 MB or under), which you can help achieve by lowering quality settings as well as reducing frames. Once saved, you’ve successfully made a GIF, and now it’s just a question of finding a suitable destination for it. Good luck!

2 Steps to Change Eye Color in Photoshop

Eyes are one of the most beautiful parts of a human body. Having a beautiful eyes makes the face very attractive. Well, the shape of the eye matters. But, what matters most is the color of the eyes. No wonder that models wear colored contact lenses during photo shoots to look more attractive. And, the workaround of having a beautiful color eye without wearing lenses is Photoshop. In this tutorial, I am going to how to change eye color in Photoshop.

The tutorial is very easy. All we are going to do is to use the Brush tool.

Before I begin, I want to show you the initial and final pictures.

Initial

Initial.jpg

Final

Final

Let’s begin

Step 1 – Grab the Brush tool

There are many ways to change eye color in Photoshop. I am going to show you the fastest and the easiest one.

Grab the brush tool from the tool panel or press Shift+B again and again until it comes. Reduce the hardness to 0%.

Change the foreground color to the color you would the eyes to have. I am going to change it to #0076a3.

1.jpg

Step 2 – Change the Eye Color in Photoshop

Press F7 to open the layer panel. Alternatively, you can also open it by going to Window>Layers.

Create a new layer by pressing Cmd+Shift+N/Ctrl+Shift+N.

Change the blend mode to Color.

2.jpg

Start brushing the eyes.

If you want, you can first select the iris with the Elliptical Marquee tool and then start brushing. I am skipping that because the end result in my case would be almost same and my hands pretty much know how much should they move the cursor for perfect coloring.

3.jpg

Do it for the second eye also. The second eye is not present in my image so I need to skip that.

Your image should look like this.

4.jpg

I think that the blue is very vibrant. So, I am going to reduce the opacity to 59% in the layer panel.

5.jpg

That’s it.

Here’s the final picture again.

Final.jpg


3 Steps to Darken Iris Rim in Photoshop

Hey, guys! Welcome to my another tutorial from the portrait series. Today, I am going to show you a tutorial on eyes again. Yayy! This time I am gonna show you how to darken iris rim in Photoshop.

You know that I don’t like long tutorials. This one is also going to be a short one again. I am going to use the Marquee tool and layer styles.

But, before I begin, I want to show you the before and after photo.

Before

After

Step 1 – Select One Eye

We need to create a circle around the iris first. Grab elliptical marquee tool from the tool panel or press Shift+M until it comes.

We’re going with the left eye first. Create a circle around the iris. You can hold down the spacebar to move the selection from one point to another.

Now, we need to copy the iris to a new layer. Press Cmd + J/ Ctrl + J for that.

Step 2 – Darken Iris Rim in Photoshop

Time to darken iris rim in Photoshop. We’re going to do this with the help of layer styles. Go to Layer > Layer Style > Inner Glow. 

Change the settings to the one shown below.

Your photo will look something like this.

Step 3 – Finetune the Layer Style

Rather than darkening the iris rim, we have darkened the entire eye. Of course, you and I don’t want that. Time to fix it using the layer mask.

Go to Layer > Layer Mask > Reveal All.

Grab the Brush Tool from the tool panel. Increase the hardness to somewhere around 90%. Now start brushing the area which is blocked by eyelids.

Your photo should look like this.

Change the foreground color to black. Reduce the brush hardness to 0. Put it in the center. Set the size in such a way that it covers roughly around 70% of the iris. Now click 7-8 times.

Now, we have completed one eye.

Repeat the steps for the second eye. This is all.

Here you go with the final image again.

1 Step Tutorial to Change Eye Size in Photoshop

Changing eye size has always been difficult in Photoshop before 2015. I needed to go the Liquify tool and then use Wrap tool or Bloat tool to enlarge the eyes. After 2016, life has become easier. Photoshop has given a dedicated Face tool to change the face including eyes, nose, lips, jawline, Mouth, and Face Shape. I know that some of you still use the old version of Photoshop so I am going to show you both ways to change eye size in Photoshop.

Let’s see how would the image look like.

Let me show you how to do it.

For Photoshop Versions that launched after 2016

The process is very simple if you have Photoshop CC that launched in 2016 or later. We will be using the dedicated Face tool for the job.

Step 1 – Go to the Face Tool and Change Eye Size in Photoshop

Go to Filter > Liquify. 

Activate the face tool which is highlighted with the Yellow color.

Now, Photoshop will automatically detect all the faces in the photo. I have only one face in the above photo. If you have multiple faces, you can select which face to modify by selecting the face using the drop-down that is highlighted with the red color.

Now, you have two options. Do you want to adjust both eyes synchronously or you don’t? Let me explain it one more time? If you increase the size of right eye by 20%, do you want the size of the left eye to be increased by 20% automatically? If yes, turn on the link button which is highlighted by the blue rectangle. If not, turn that link button off.

Adjust the eyes using 5 sliders that Photoshop gives you. I have done mine.

That’s it, guys! This is the way you can change eye size in Photoshop.

For Older Version

You are reading this means you own the older verion of Photoshop. Forget everything that you read earlier. That was not for you. I am going to start from the beginning to show you how to do it.

Step 1 – Open Liquify Tool

We need to go to the Liquify tool. This is the only step common between newer versions and older versions. Go to Filter > Liquify.

Choose the Bloat Tool that is highlighted with the Blue rectange in the above image. Now make sure that the Rate is very low (highlighted with red color in the above image). If you keep the rate high then one click will rapidly increase the eye size. By keeping the rate low, you will actually see the eye enlarging.

Now put the cursor the eye (preferably pupil) and start clicking. Don’t hold. If you hold down the mouse button then size will keep on increasing. If you just click then size will increase in a controlled way. Do it with both eyes.

You can always press Cmd + Opt + Z/Ctrl + Alt + Z to repitativly undo if you have made any mistake.

Step 2 – Refine the Enlargement

Chaning the eye with older verion of Photoshop takes time. You need to use undo many times to refine the enlargement. Keep on using Bloat tool and Undo to get the perfect result.

This is all guys, See in you in the next tutorial.

3 Steps to Change the Hair Color in Photoshop and Look Better

Hey guys, I had written a tutorial on the same topic in 2013. The tutorial is now old and many of you are asking me to write a fresh one. So, let’s begin to talk about our today’s tutorial which is to change the hair color in Photoshop.

You and I are getting to know the fashion trends much sooner now with the rise of Instagram. You follow a fashion model and you like her hair color. You badly want that color but you don’t know how would you look. You can check it in Photoshop simply. Change the hair color in Photoshop and look by yourself.

If you’re a photographer then you can also use this to change the hair color in Photoshop of your models.

Before I begin, I would like to show you the before and after picture.

After

Before

With this said, let’s begin this tutorial.

Step 1 – Select the Model

We are going to use an adjustment layer to change the hair color in Photoshop. So, you want to make sure that adjustment layer only affects the hair, not anything else. Selecting hair is one of the most difficult things in Photoshop. So, we’re going to select the model and then use Layer Mask to isolate the hair.

If you’re using Photoshop CC 2018 then you have a perfect tool to do that which is Select Subject. We’re going to use this to select the model.

Go to Quick Selection Tool and then click on Select Subject in the option bar.

If you don’t have Select Subject feature then you need to manually select the model using tools like Quick Selection Tool, Pen Tool, etc.

Here’s the selection.

Let’s refine the selection using Select and Mask.

Go to Select>Select and Mask. Choose the Refine Edge brush and start painting.

Step 2 – Change the Hair Color in Photoshop

Go to Layer>New Adjustment Layer>Hue/Saturation. Make sure that you have turned on clipping and colorize. Both are highlighted in the below image.

Adding clipping will make sure that whatever you do will affect only the layer below it. This is the layer which contains only the model. So, we would like to ensure that only model color gets changed.

Turning on colorize will colorize the entire color. Now, you can choose whatever color you want. I am going with the brunette.

Step 3 – Remove the Color from the Model

Make Black as your foreground color. Activate Brush tool by pressing B. 

Now start painting on model except her hair. This will remove the color from everywhere but her hair.

And here you go. You can play with the colors in Hue/Saturation adjustment layer.

How to Add Eyeliner in Photoshop to Make Eyes Look Beautiful

Eyes are the most beautiful part of our face. People fall in love after looking at eyes. Their shape, movement, or even color make all the differences. Today, I am going to show to make the most beautiful part of a face even more beautiful. I am going to show you how to add eyeliner in Photoshop.

There are two ways you can add eyeliner in Photoshop. One is to create one in Photoshop and another is to download the image of an eyeliner and paste. We’re going with the second option because that’s much easier and time saver.

You need to download the image of the eyeliner before you proceed. I have attached it for you to make your life simpler. The best thing is that it’s a PNG image with no background. So, you won’t see the not-so-beautiful white background whenever you paste it in Photoshop.


Step 1 – Open the Eyeliner Image in Photoshop

We need to copy the eyeliner image so that we can use it on other images. Open it on Photoshop.

We’re going to copy the eyeliner. Open the layer panel by pressing F7. Hold down Cmd/Ctrl and click on the layer thumbnail. This will select the eyeliner and then press Cmd+C/Ctrl+C to copy.

Step 2 – Add Eyeliner in Photoshop

Press Cmd+V/Ctrl+V to paste the eyeliner on another image.

Step 3 – Align the image according to the eyes

It’s better to zoom in the image so that you can align the eyeliner better. Press Cmd+”+”/Ctrl+”+” to zoom in.

Time to align the eyelinerPress Cmd+T/Ctrl+T to activate the free transform tool. Now drag the eyeliner and align it with the eyes. It doesn’t have to be perfect. Look at the below screenshot. I have aligned it from viewer’s left but it’s not aligned from the viewer’s right. We’re going to fix it now.

Hold down Cmd/Ctrl and put the cursor on the adjustment handle which is not aligned. Look at the screenshot below to understand things better. The cursor will change to white.

Now, only that part of the eyeliner will move which is associated with the cursor.

Step 4 – Duplicate the Layer

I think that the eyeliner is not looking much visible. It’s translucent. Let’s duplicate the layer. Press Cmd+J/Ctrl+J to duplicate it. Now, it’s looking good.

Step 5 – Duplicate and Flip for the Another Eye

Time to proceed with the next eye. Again duplicate the layer by pressing Cmd+J/Ctrl+J. Now, we’re going to flip it. Go to Edit>Tranform>Flip Horizontal. This will flip the layer horizontally.

Align the eyeliner like we did in step 3 and step 4.

I have done it in my image.

With this, we can wrap up this tutorial.

I know that you like this tutorial. Share it with your friends.

10 Must Know Photoshop Skills for Beginner to Become Intermediate Users

This article is contributed by Clarence J. Tilford from essayservices.org. Head out to the website for cheap essay writing service.

Photo is something very special and precious one. We capture some beautiful moments and emotions in photo. People call photographers in special occasions to make it more special and capture the special events special moments. It’s natural that we always love to remember special events and some beautiful smiley and happy days of our life.

Still everyone could not be photographers. Photography is an art and a passion. Every one could not be expert in photography. Photography is not like other professions. It needs special talent and skill to make the moment more enjoyable and more happening. Now a day’s youngsters choose photography field and take it as a passion. It needs extra talent and skill to understand the photographic angle and the photographic tools and techniques.

After the new invention of Photoshop, the photographers got a new way and new technique to make their photo and image more beautiful and more attractive. Photoshop brought new version of photography and gave a new image and made a simple picture to more attractive and different. Photoshop is a instrument, not a support. A bad photo is a bad photo it can’t be made good by editing or by doing extra processing or adjustments. But by overusing Photoshop and editing a good photo will be turning to bad. So we have to be very careful while using Photoshop.

By using Photoshop neatly and carefully we can make a photo more attractive and photographers must know basic techniques of using Photoshop. Photoshop makes your most excellent photo into a remarkable masterpiece. There are essential skills that photographers must know and they should adopt those skills in their photos.

Use of brush

In Photoshop brush is an elementary and foundational tool. It’s not easy to use it has its own way and method. A perfect photographer must know how to use the brush in Photoshop. If he understands that the photographer will be able to understand the related tools. There is fundamental equipment beginners should learn about the brush tool.

The photographer must know how to use a different brush and when which brush should be used. There is also an adjustment in brush size. So the photographer must understand the usage of brush in a different size. Not only that, those beginners are not able to understand the brush dullness. So he must understand the brush cloudiness and brush flow.

Tool selection

In Photoshop there is a number of ways to select tools. Some are simple and some are a complicated one. There are two selection tools which every beginner photographer must know. The marquee tool and another is lasso tool.

The marquee tool gives you the option of different shapes and size by selecting the particular size you have to do work or edit in that size. Lasso tool is a freehand tool. You have to draw the area which you want to work it out. It has no limitation of size and shape. Selection of particular area helps you to work within a specific area without affecting other parts of the image. It’s up to you which one you want to select and which will make your photo more attractive.

Using filter tool

Some photographers rarely use the filter tool in Photoshop. But every beginner should have the knowledge about filtering in Photoshop then only he can understand the basics of Photoshop. Pick an image and use your techniques of filtering in it. Then you will be able to understand the real use of filtering in Photoshop.

Vignette technique

Vignette is technique basically used to high light the real picture in the frame. Without diverting your mind you can focus on the picture. It’s basically darkening and giving extra blackish colour to the edge of the frame so that you can concentrate on the subject. As a result of the vignette, there will be a dark shade around the subject.

Sharpening the picture

It’s another tool in Photoshop that every beginner must be aware of. In its word itself, we can get the idea that it’s used to make the picture sharper and more detailed. I will suggest using this tool while photo shopping your image but never use it too much. When you make the picture more detailed may be at one point it will lose the attribute of attraction so photographers must use it but for limited.

Brightening and contrast

It’s another very important tool in Photoshop. It’s very easy to make an adjustment so one must be very careful by using it. We have to apply them very carefully. When the photo session was done in Light room the photographer must use brightening tool to make it clearer and adjust it to correct flow of exposure. One must be very care full while using brightening and contrasting tool because it goes hand in hand. It must complement each other.

Curves and level

Curves and level tools are one of the advanced approaches of brightening and contrasting tool. We use brightening and contrast tool in Photoshop at the same time Photoshop gives another tool called curves and levels its use also the same but we can same that it’s somewhat more advanced than other. It makes subject targeted. It’s not easy to use at first but later you will use it and you can handle it easily and you will wonder about its result.

Photoshop content aware fill

It’s very useful and very advanced tool in Photoshop. By using this tool you can make your picture more attractive and beautiful. You can avoid the unwanted area by selecting from the frame and delete it. You just select an unwanted area from the frame and apply this tool. This tool carefully reads the frame and without much effort removes the selected area.

Colour balancing tool

Colour balancing tool always helps you to look into your picture from a different angle. Colour balancing helps you to understand how the existing colours interact or complement each other. Colour is the very important part which you can try while ornament ling your photographs.

Cropping tool

The cropping tool is easy to apply and its use must be known to the photographers while they are photo shopping. It helps the photographer to drag the photo and select it as he wants. It gives a more accurate look at your image and helps to focus on your subject matter.

So these are some Photoshop skills which every beginner photographers should adopt in their picture. Some are easy to handle and some are difficult in the beginning later on you can use it. It’s all about new creativity and new thoughts.