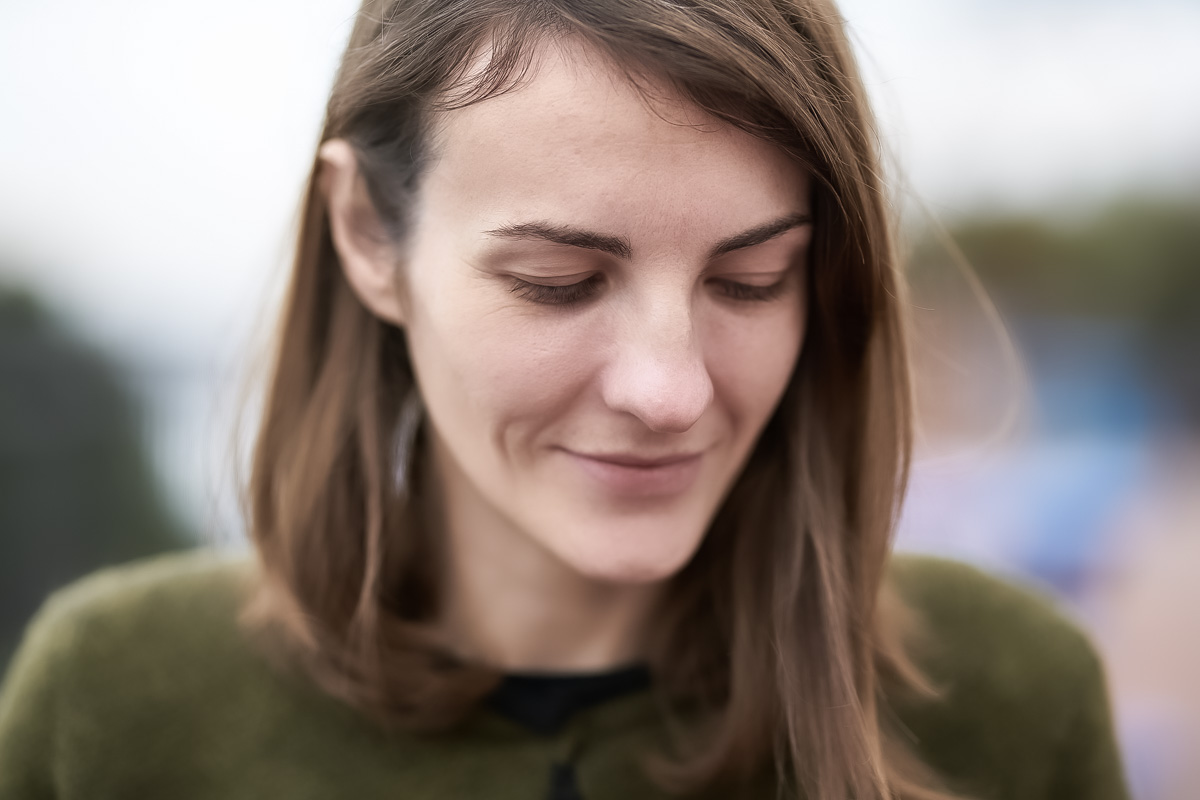
How to create your own Instagram filter in Photoshop

Nowadays Instagram is kinda like a portfolio of a person, a modern resume if you will. That is why we are so obsessed to take that amazing photo of yourself and to post it on your feed. However, taking a great shot is no longer enough, filters are what matters right now. Having cool filters means that you kinda have it all in the Instagram world: likes, comments, and popularity.

Of course, there may be negative comments, cause you know, there will always be haters. The worst thing that can happen is that such comments may affect the minor audience and there are few ways to prevent it such as turning off the comments on Instagram or blocking unfriendly users or using the KidSecured app.

This article is not about already known presets, this is about your own vision of a photo, your own filter to show the real you and that what makes you special despite the number of likes on your photos. There is only one thing you need to understand in this life is that you don’t have to be liked by everyone, the only person who should accept you is you.

Anyway, if you are interested in giving the photos a little gloss here are some tips on how to create your own Instagram filter in Photoshop. Get inspired and be that inspiration!

The first step is, of course, to download Adobe Photoshop if you haven’t done it yet. Next, you need to open a photo to start work, you can do this two ways: tap File and then Open or with the help of Photoshop hotkey Ctrl+O.
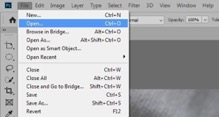
When the photo is into Photoshop go to Window and then tap Actions or use the hotkey Alt+F9 to make sure that your every step will be recorded and saved for your convenience. Later you can use the recorded filter on other photos to get them a makeover with a few seconds.

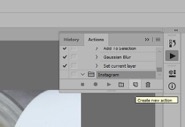
By hitting the Actions the Actions panel has brought out and now you can press the folder icon to create a new set. Give whatever name you want to this set and press ok. It would be easier if you name it with the word or phrase that refers to your actions, e.g. My own Instagram filter or Presets for Instagram, etc.

Next to the folder icon is the paper icon that you want to select and name it as well to create a new action. After that you hit record and you ready to begin, it will automatically record everything you do. Don’t be afraid to make a mistake, you can always tap the hotkey Ctrl+Z to undo.
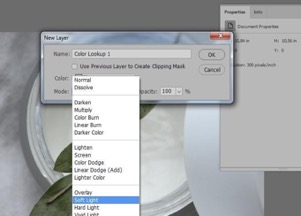
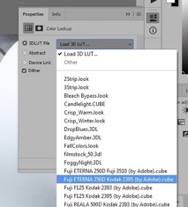
Now we need to create a layer, so your step is to find Layer on the control panel and press New Adjustment Layer and then Color lookup. Once the layer opens you pick the Soft light mode that will open the Properties panel to select Fuji ETERNA 250D Kodak 2395, it will give more definition to your photo. Obviously you can select any mode you like to change the color and shade of a photo.
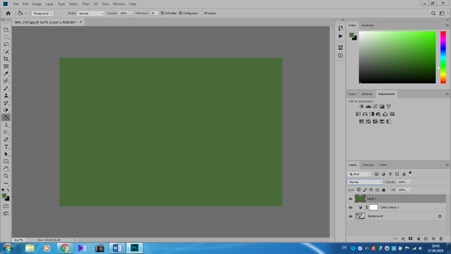
Once again you open a New layer and to do this you can press the paper icon in the right corner and fill it with the green color or whatever color you like using the Paint Bucket Tool. We use green one to make the leaves more vibrant and then set this layer on Hue to soothe a greenish tint and with the 50% Opacity, we lower the saturation.

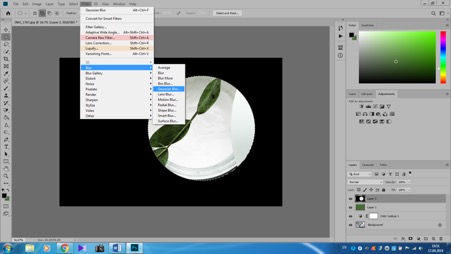
To give the emphasis to some objects in a photo is easy to create with the help of a slight vignette. Create a New layer, fill it with black color as we did with the green one. Use the Elliptical Marquee Tool to make a circle the size you want it to be and press Delete to remove its center. Try to decide where you want to have a center, then draw a circle on it and there you have a focus on a picked object in a darkened frame around.

Go to Filter to Blur to Gaussian Blur or use the hotkey Alt+Ctrl+F and select the Radius of 100 pixels to make the edges blur so that it won’t look so obvious. There are few things left and your own filter is done.
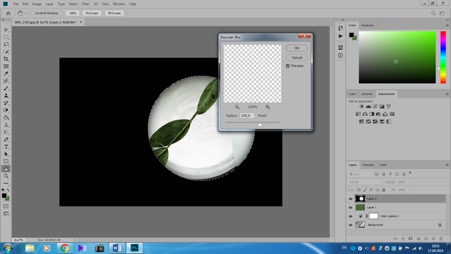
Get back to the Layers panel where you need to lower the Opacity to 15% and choose Overlay to make it more softer. As soon as you ready with it use the hotkey Ctrl+Shift+Alt+E to create a new layer with all the editing you made and press Stop recording on the Actions panel. Congratulations, you’ve created your own very first filter in Photoshop.

And now, let’s see the before and after a look at the photo we’ve been working with.
See the difference, right? So now you can apply this recorded filter to any photo you like without even editing it. All you need to do is use your imagination and be creative by selecting different settings to make your photos look unique and outstanding.

We think it’s great to have an opportunity to instantly transform your photo from ordinary and plain to almost a piece of art and not just somebody’s but your own piece of art. And what is even greater is that using Photoshop to create filters you can apply and customize the effects the way you like it without repeating ready-made presets on Instagram. Besides, you are not only can download your photos to Instagram but in any other social network as well.

Download FREE yellow tone preset for Lightroom

Here is the preset that you’ve been looking for. This preset will give a yellow tone in Lightroom. Download the yellow tone Lightroom Preset.

If you’re looking for a tutorial to yellow tone in Lightroom, here’s the tutorial on yellow tone in Lightroom.

Download the preset to create a yellow tone in Lightroom. No, no email id is required.

Download for FREE

Here’s the tutorial to see how to install presets in Lightroom.

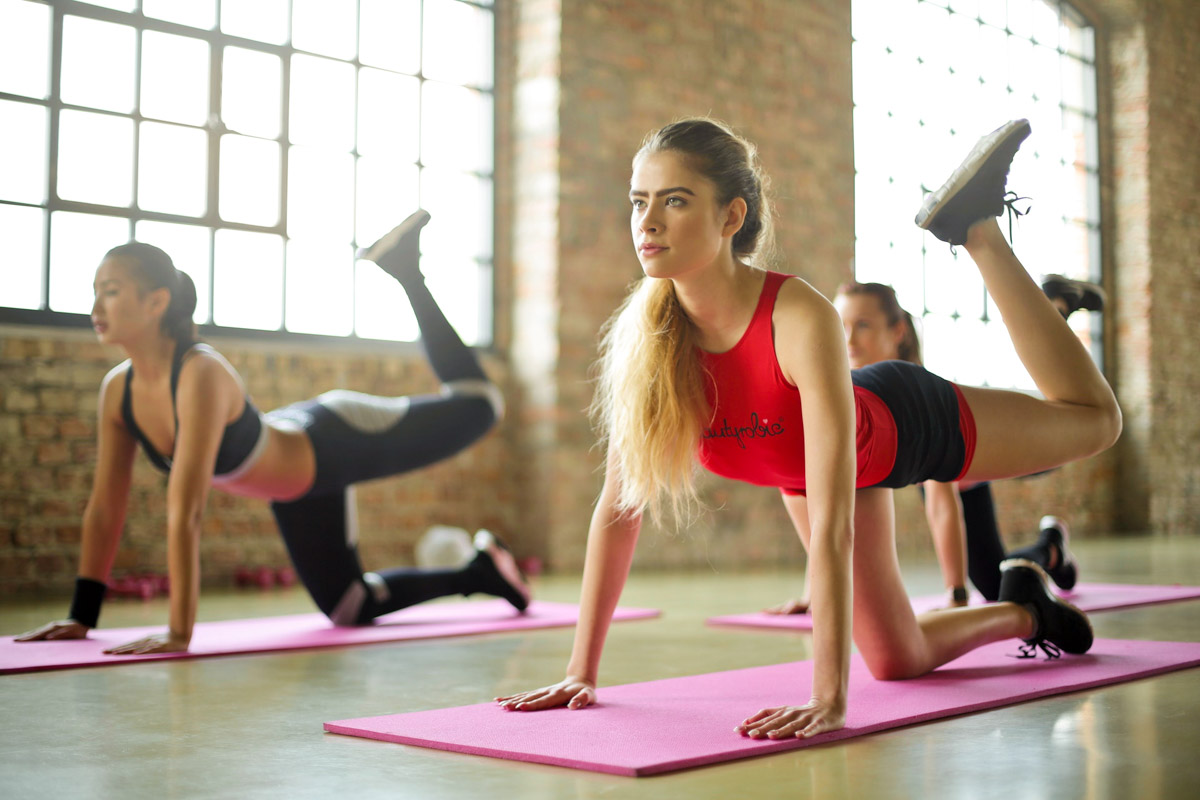
Photo by jimmy teoh from Pexels.

Download for FREE

Create a beautiful yellow tone in Lightroom

Welcome to my another Lightroom tutorial and today we’re going to see how to give a beautiful yellow tone in Lightroom to a photo.

The photo has been long requested by many of you who used the Suggest a tutorial form on my site, TrickyPhotoshop, that I created for you.

Download the free preset

If you’re looking to download the preset to give yellow tone in Lightroom, here’s the page to download the yellow tone preset.

Before we begin, allow me to show you the after and before photo.

After

Before

Photo by bruce mars from Pexels.

Let’s begin

Step 1: Increase the Temp and reduce the Tint

The first basic rule before giving a yellow tone to a photo in Lightroom is to increase the temperature and decrease the tint. Tint should slightly shift towards the green side.

Make the below adjustments in the Basic panel

  • Temp: +10
  • Tint: -10

Step 2: Adjust the whites and blacks

Now we’re going to adjust the whites and blacks in the Basic panel.

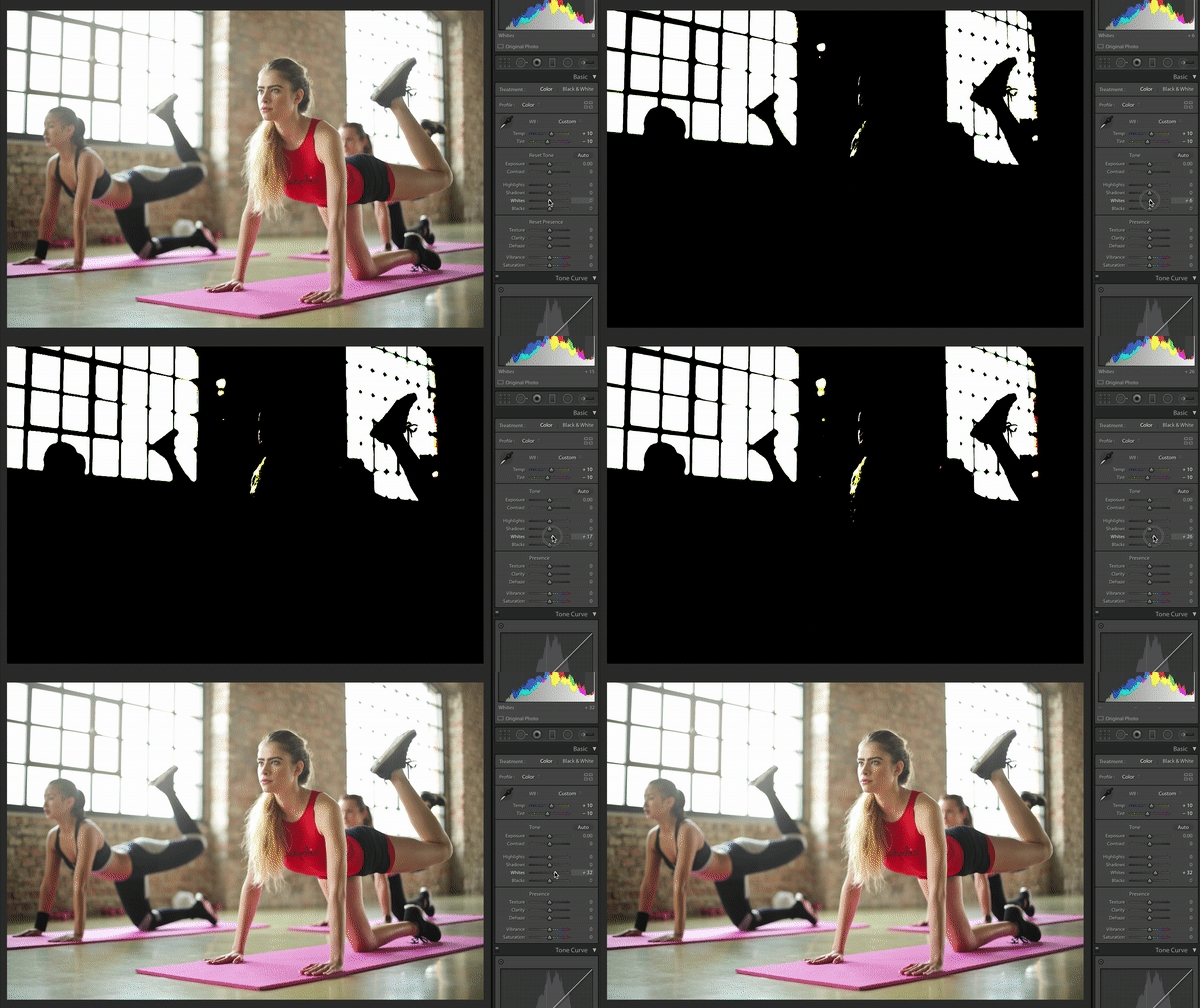
Hold down Opt/Alt key and drag the Whites slider towards the right till you see white hgihlights. Check the below GIF. Here I am ignoring the white because of the window because that area is already super-duper overexposed.

Here’s my value.

  • Whites: +32

Time to do it for the Black. This time move the Black slider towards the left.

Hold down Opt/Alt key and drag the Blacks slider towards the left till you see black shadows. Check the below GIF.

Here’s my value.

  • Blacks: -42

Here’s the photo.

Step 3: Increase the saturation

This is the last step. Time to increase the saturation.

Go the the HSL/Color panel.

Increase the below sliders

  • Orange: +35
  • Yellow: +35

That’s all, guys.

Here’s the final photo.

If you want to download free Lightroom presets, you can download them on my download free Lightroom presets page.

If you want more tutorials on Lightroom, here’s the to the free Lightroom tutorials.

See you again next week. Goodbye!

How to brighten skin in Lightroom in 1 minute?

Lightening skin in Lightroom takes time. You grab Adjustment Brush and then selectively lighten the skin. What if I tell you that you can brighten skin in Lightroom in just 1 minute? Wouldn’t you like it?

This method is super duper fast. But it has a tradeoff. You don’t get super duper flexibility like the Adjustment Brush.

So, let’s start. But I want to show you after and before first.

After

Image by Himanshu Gunaratna from Pixabay

Before

Let’s start.

Video

If you like watching videos then here’s the video for you.

Step 1 – Find the HSL panel

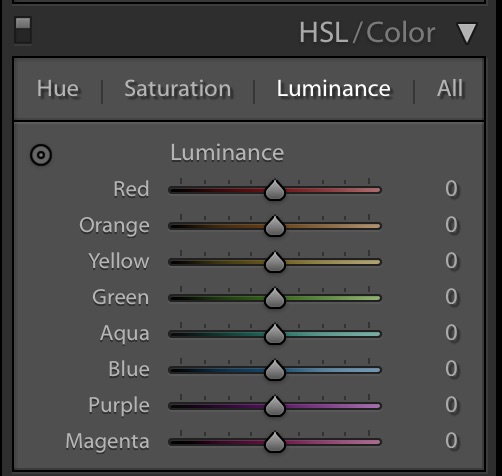
Go to the HSL panel. Click on the Luminance.

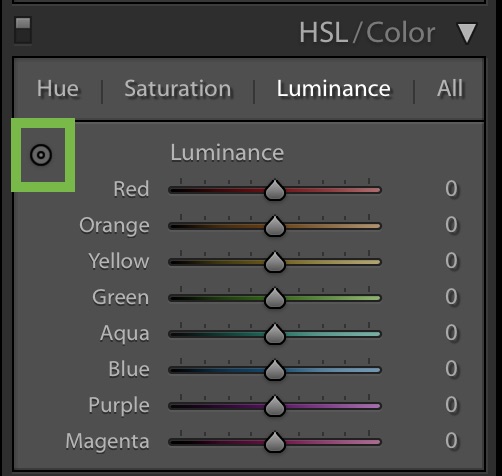
Now, click on the circular icon at the top left.

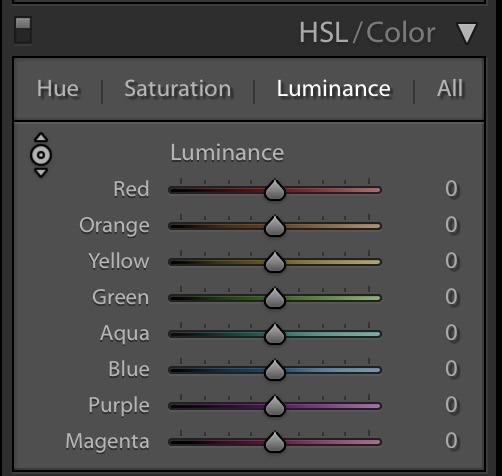
After the click, the icon will change and you’ll see two arrows. One at the top and another at the bottom.

Step 2 – Brighten the skin in Lightroom

Now, place the cursor on the skin. Drag the cursor upwards. This will brighten the skin in Lightroom.

In the panel, you’ll also see that the luminance value of Red, Orange, and Yellow increases because our skin is basically made up of these three colors.

This is all, guys. Didn’t it take just 1 minute?

Summary

  1. Open the photo in Lightroom
  2. Activate the Luminance tab in the HSL panel
  3. Click on the circle icon at the top left
  4. Put the cursor on the skin and drag it upwards
  5. Correspondingly, check the value of the Red, Yellow, and Orange in the Luminance tab.

I have written tons of tutorials on Lightroom. Check that out if you want to see more Lightroom tips like this. I have also made free Lightroom presets. Download them to speed up your work.

If you like to see more tips like this on Photoshop, check out my Photoshop tips. If you want to learn Photoshop in-depth, check out my free course on 30 days to learn Photoshop.

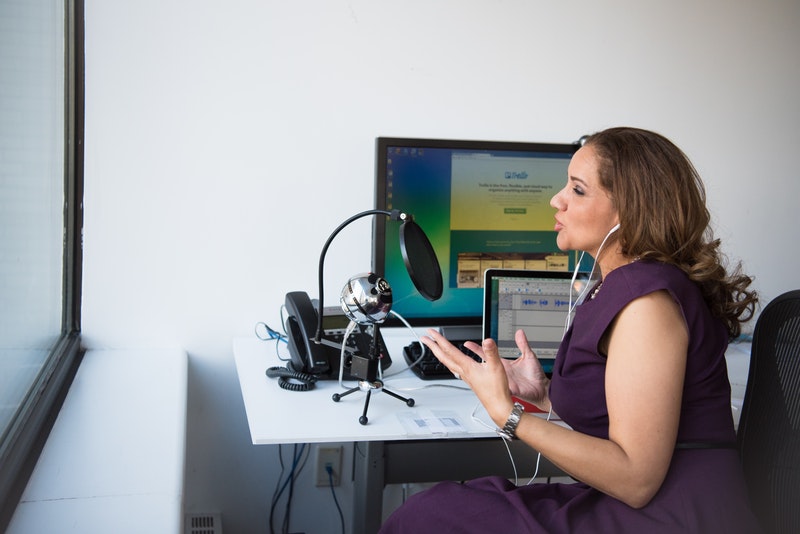
5 Great Photoshop Podcasts to Listen to


If you thought that the headline of this post was some kind of sarcasm, you were wrong.

It’s serious.

Photoshop podcasts do exist, and some of them are absolutely amazing.

Why Would You Listen to Photoshop Podcasts?

The goal of these podcasts is to provide great information about using Photoshop. They are awesome for beginners, but they also work for experienced practitioners.

In a way, they work like online courses on Photoshop.

“But online courses are provided as videos, and include practice.” That’s what you’re thinking, right? Once you get used to the podcast format, you’ll love that there’s no video involved. And you’ll still get inspired to practice.

These podcasts are great to listen while you’re practicing Photoshop. The host gives you instructions and you implement them on the go. A video would be distracting in that process, and it would lead to copying the host instead of exploring your creativity.

Plus, online courses require mandatory assignments that are not always fun to do. Most learners get help from Essay Universe and other homework services, so they get the certificates anyway. The podcast doesn’t grant you a certificate. However, it helps you gain a lot of skill, so you won’t need to get AssignmentGeek essay help when you decide to get certified.

The best thing about podcasts is that they don’t burden you. You don’t have to schedule a class or commit yourself fully to it. You can listen to them whenever you want, wherever you are.

Personally, I love quiet evenings in the backyard, with my dog by my feet, the headphones on and the MacBook in front of me. I listen to the tips and I try everything they suggest.

Top 5 Photoshop Podcasts

1. Talking ‘Shop with Dave Cross

This is a new podcast, with the first episode published in April 2019. That’s why it’s so cool. The host is still very enthusiastic and may release two episodes in a day. There’s always something fresh to listen to.

In addition to giving tips on productivity and work in Photoshop, Dave also interviews members of the Photoshop team and experts we all admire. There’s a lot to learn here, even for advanced users.

2. Photoshop Creative Podcasts

This used to be a highly popular podcast a decade ago, but we haven’t seen any new episodes since 2011. Then why should you listen to it? You’ll access plenty of interviews with talented designers, who share insights from their job and life.

It’s great to compare their tips with the current state of Photoshop, so you’ll realize how much the tool progressed.

3. PetaPixel Photography Podcast

Mike James, the host of this podcast, is a retired award-winning photographer. The PetaPixel was one of the first photography podcasts on Spotify. It’s been going strong for years, and we still get regular bi-weekly updates.

You’ll get tips on how to choose a camera, how to take beautiful photos, how to use Photoshop tools and random talks that inspire you to take and edit cool pictures.

4. Photography 101

Scott Wittenburg, a photography instructor, hosts this podcast that teaches beginners all about the theory and practice of photography. He gives great tips on how to choose the right camera, how to improve composition, and how to set proper lighting. However, he also gives tips on how to use Photoshop.

If you’re a beginner in photography, you’ll love this podcast.

5. A Photographic Life

There’s something behind the process of taking photographs and editing them with Photoshop. It’s called life. A photographer’s engagement is behind camera choices and editing techniques. Photography is a way of life, and that’s exactly the topic that this podcast tackles.

If you don’t like plain tips and tricks via podcasts, you’ll love this one. Each episode is like a documentary in an audio format. You’ll listen to different photographers speaking, and you’ll admire the wisdom behind the work you see.

It’s Time for a Podcast!

Photoshop podcasts are great for inspiring new practices. As you listen, you can take notes or directly work in the software.

Podcasts are also a good choice when you want to relax, but still, need some Photoshop in your life. In that case, you can listen to interviews and inspirational talks from designers and photographers.

The above-listed podcasts cover all those needs!

Cathy Baylis is a freelance content writer specializing in career growth, leadership, and education. She loves sharing her interests with readers, and she has something to say, for sure.

How to Create a YouTube Thumbnail in Photoshop?

Many YouTube content creators and marketers use online tools like Canva to create YouTube thumbnails. Sometimes, I also do. But, what’s there in Photoshop that attracts content creators to create a YouTube thumbnail? Let’s see this on this tutorial of how to create a YouTube thumbnail in Photoshop.

Yes, you guessed it right. The answer is flexibility. You can get some amazing templates on Canva but it’s the flexibility that gives an edge to the Photoshop.

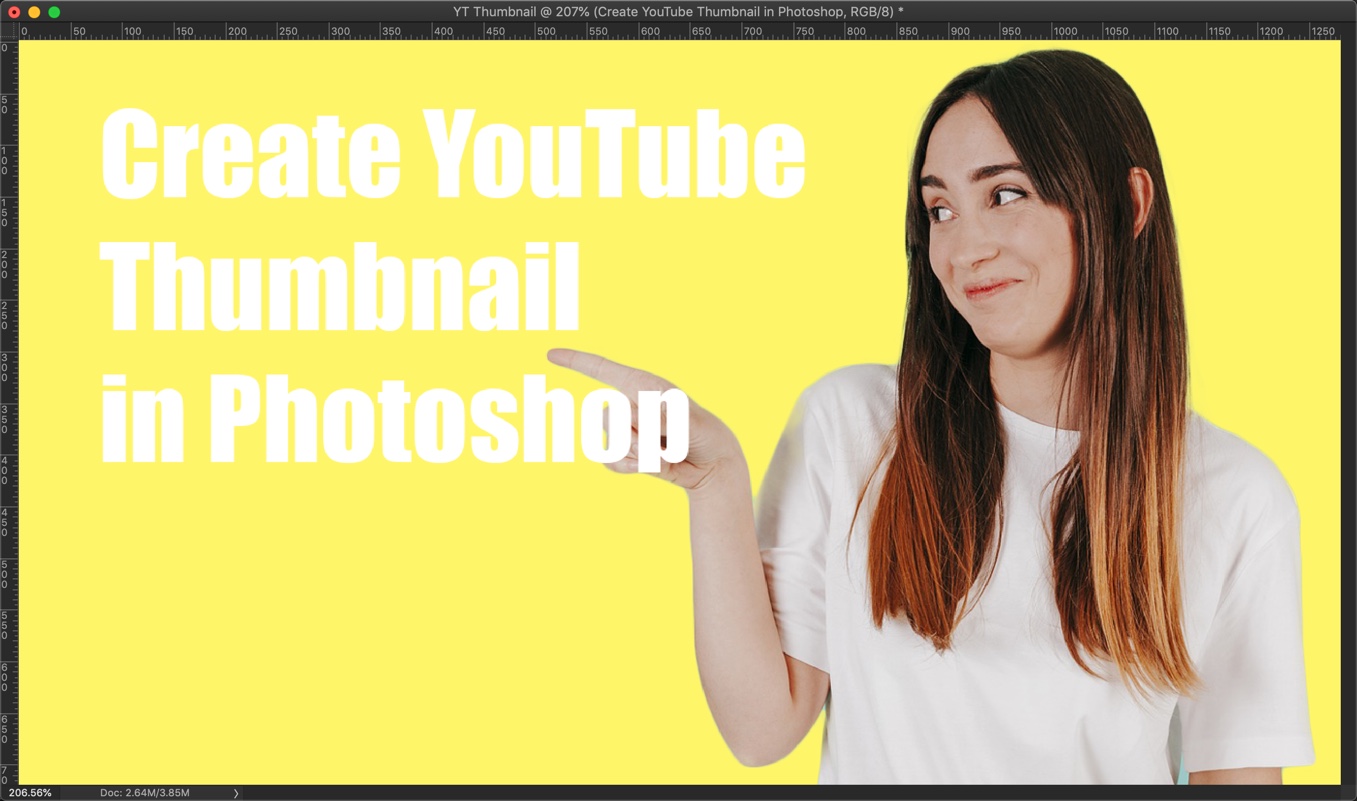
Here’s my thumbnail.

Before we go ahead, I would like to tell you that you need to keep below things in your mind

  • People look at thumbnails and decide whether they should watch a video or not. They rarely look at the title of the videos. So, you need to make sure that you write the title of the video in the thumbnail also.
  • The contrast between the text and the background should be high. But, you need to make sure that thumbnail is looking pleasing also.
  • You’re going to use the same type of thumbnail on all your videos. So, make sure that you design it right.
  • The size of the thumbnail should be 1280 x 720 pixels.

Let’s start.

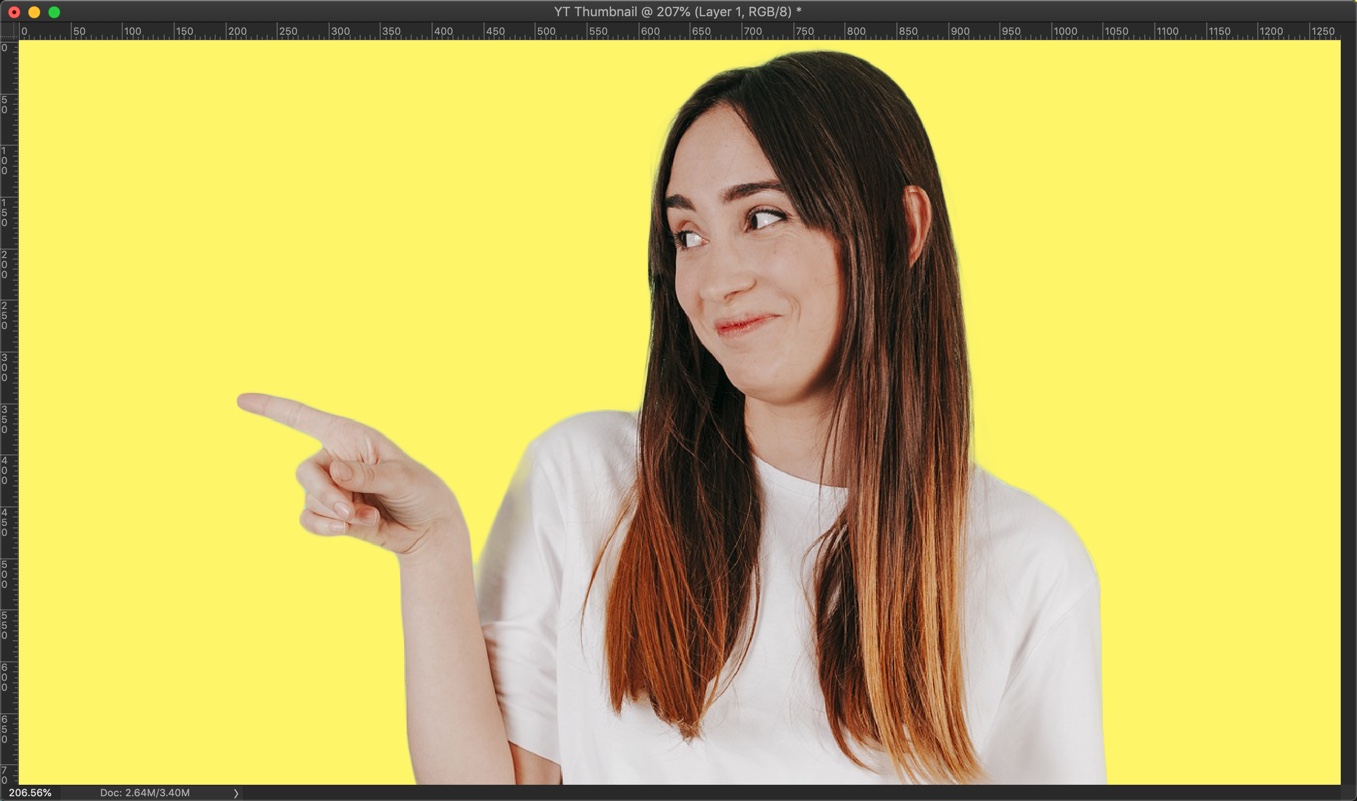
Step 1 – Cut out the background

Open the photo of the person. Thank you for this photo, Pixabay.

1.jpg

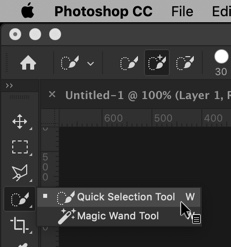
Grab the Quick Selection Tool from the tool panel or press Shift + W again and again until it activates.

2.jpg

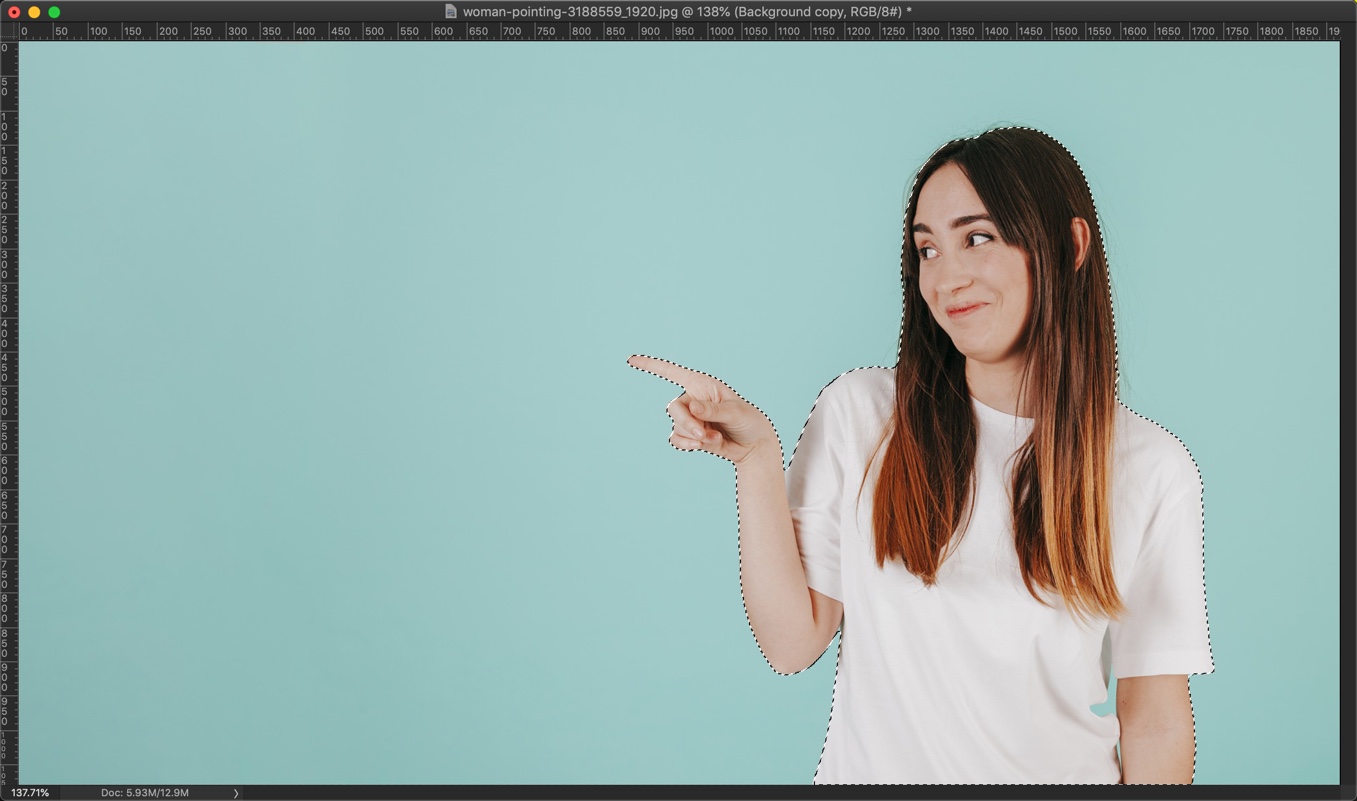
Click on “Select Subject” in the option panel.

This will select the lady.

Press Cmd + C / Ctrl + C to copy the person.

We’ll use her later.

I have also written a detailed tutorial on removing the background in Photoshop. You may want to check that out also.

Step 2 – Create a new document for the thumbnail

Press Cmd + N / Ctrl + N to create a new document.

Put the width and height as 1280 and 720 pixels. Press Create.

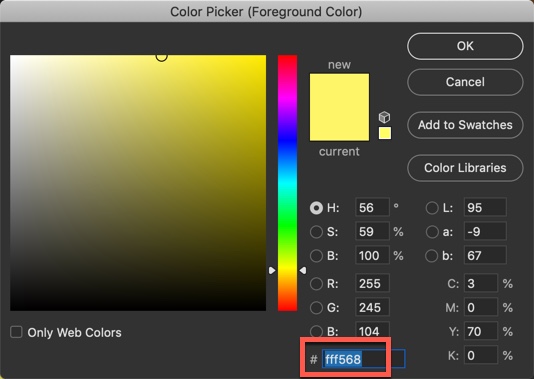
Click on the foreground color.

Write #fff568 in the color code box. Press OK.

Now press Opt + Delete / Alt + Backspace to fill the background with yellow color.

Step 3 – Place the lady

Time to place the lady. You have already copied the lady when you were in step 1. This time we’re going to paste her.

Press Cmd + V / Ctrl + V to paste her. Photoshop will place her at the center.

Time to align her. Activate the Free Transform Tool either by going to Edit > Free Transform or by pressing Cmd + T / Ctrl + T.

Now align her. See the below GIF.

Step 4 – Write the Text

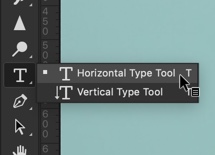
Grab the Horizontal Type Tool.

Change the font and color.

Start writing the text. I am using Impact font.

Don’t worry about the formatting. We’ll fix it.

Activate the Free Transform Tool and align the text. Press Return/Enter when done.

Step 5 – Create the YouTube thumbnail in Photoshop

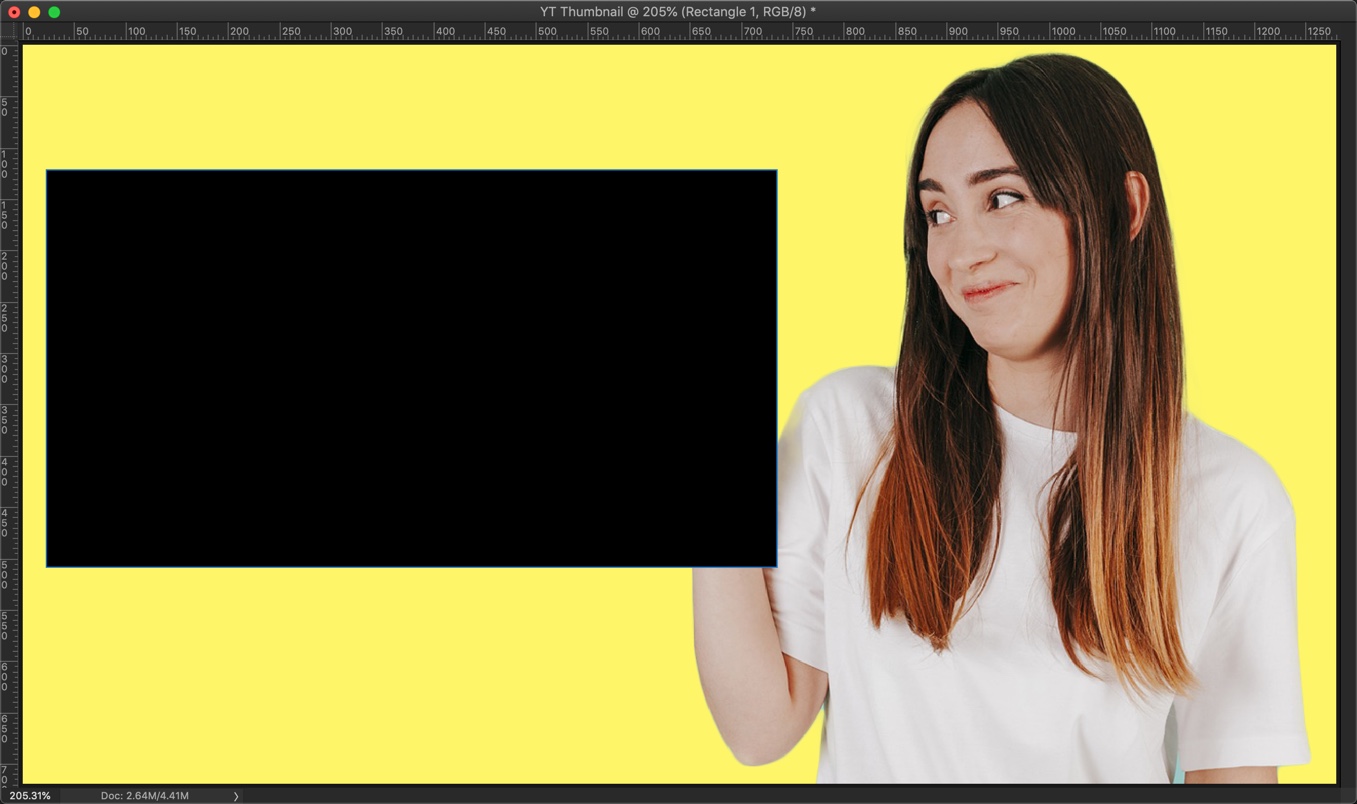
Time to add a black background to the text.

Grab the Rectangle Tool from the tool panel.

Change the Fill to Black and Stroke to null.

Draw a rectangle around the text.

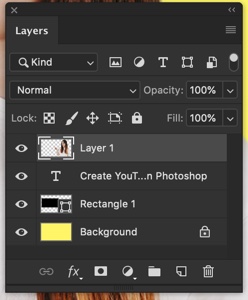
Now, this rectangle will cover the text. This is because the layer of the rectangle tool is above the text.

Reshuffle the layer in the layer panel. Drag the girl layer to the top, then the text, and then the black background.

See the photo now.


Top Five Ways to Edit Pet Photos in Photoshop

People want their pet photos to look nice; photographers must learn how to edit photos nicely to be able to satisfy them. Picture editing errors are many; you should avoid them in order to satisfy the customers. That can also make you look qualified.

This article will show editors ways to edit photos or which mistakes they should avoid when they edit photos. A photo editing mistake can make a wonderful animal look bad. This will make editors lose customers.

Ways to edit photos for pets

1. Remove blue fur

To remove blue fur when you edit photos on Photoshop, use MCP’s Bleach Pen. Editors may additionally use Colour safe bleach actions for Photoshop.

Duplicate the background part by going to:

  • Adjustments and then click Replace color

Edit by clicking on the blue area of the animal. You might require clicking on an eyedropper using a (+) symbol to other places of the animal’s fur. You will also need to edit fuzziness using a slider.

Next, you should move the saturation slider towards the left side until the pet’s fur looks normal. In case many other sections of the photo are also affected, just clear the picture around the pet using a brush. Editors may additionally edit the affected sections by creating a layer mask and adjusting those sections which you mask.

2. Edit Neon colors

When you edit photos, the aim must be to produce a photo that is real and better. This can be fixed through going to picture- Adjustments- Vibrance.

Move a slider for saturation towards the left side and the Vibrance slider towards the right side.

If the above does not fix the issue, go to picture- Adjustments- Saturation or Hue. Pick the odd color from a drop-down menu and balance hue. You should also move the slider for saturation towards the left side.

3. Edit heavy vignettes

If an image gets surrounded by black clouding which affects its beauty, edit photos using software to remove it.

The fixing can be done in photoshop by going to filter and then to lens correction.

On the custom tab and under Vignette, move the amount to the right side and push the midpoint to the left side.

But editors can easily prevent heavy vignettes because they are created by the software. So, when you edit a photo, avoid vignette that is heavy.

4. Remove highly lighted shadows and highlights which are blown out

Shadows which are too lightened can make a photo appear weird. The same applies to highlights which are blown out. But this can be corrected when you edit photos using the software.

For those shadows which have so much light, simply add blacks and midtones by using curves or levels. For the blown-out highlights, you should use MCP’s Photoshop. With just a single click, you will edit it correctly.

Also, whenever you produce a photo whose shadows are over-lighted, ease off the shadows tool. Editors should always selectively light sections such as the ears and the eyes which lack catchlights or details without lightened shadows.

Blown out highlights are normally due to a problem with exposure in a camera. Ensure you use the right metering mode for scenes and avoid high contrast when you edit white pets, bright day and so forth.

5. Crispy sharp

Nobody wants their eye to get poked out in a photo. So, when you edit photos in Photoshop, use MCP HD sharpening. It will edit the photo nicely leaving it looking beautiful. You should avoid using sharpening tools such as Sharpen more and Straight Sharper.

Conclusion

That is how to edit photos for pets. You can also try finding more ways of editing from this website. Did you find our article useful? Feel free to write to us if you have a question or a suggestion.

About the author

Betti Wilson has written several other great articles about how to edit human beings photos using Photoshop. Besides taking photos and writing, she likes traveling, playing with her kids, watching movies and making new friends.

Free Transform Tool in Photoshop: The Ultimate Guide

I never realized that I have not written any guide of the Free Transform Tool in Photoshop.

When I was trying to hyperlink a phrase in my last tutorial to a guide on the Free Transform Tool, I couldn’t find any on this lovely site.

I woke up today morning with a big goal and that is to write an ultimate guide on the Free Transform Tool in Photoshop.

I’ll cover as many features as I can think of. So, brace up. This is going to be a long-long tutorial.

Table of Content

    1. What is the Free Transform Tool
    2. How to activate the Free Transform Tool
    3. How to use the Free Transform tool
      1. Scaling
      2. Skewing
      3. Rotating
      4. Distorting
      5. Changing the perspective
      6. Warping
      7. Flipping
    4. Summary

Let’s start with the basic first.

1. What is the Free Transform Tool in Photoshop?

Let’s see what Adobe (company that owns Photoshop) says.

The Free Transform command lets you apply transformations (rotate, scale, skew, distort, and perspective) in one continuous operation.

-Adobe

If you want to make your photo bigger, smaller, rotate it, distort it, or any related thing then you can use the Free Transfrom Tool.

2. How to activate the Free Transform Tool in Photoshop?

You can activate the Free Transfrom tool using two ways.

Keyboard Shortcut: Press Cmd + T / Ctrl + T.

Menu: Go to Edit > Free Transform to activate the Free Transform tool.

1.jpg

3. How to use the Free Transform tool in Photoshop?

You can use the Free Transform Tool to do below things.

  • Scaling
  • Skewing
  • Rotating
  • Distorting
  • Chaging the perspective
  • Warping
  • Flipping

I am going to show you how can you use each of them effectively.

3.1 Scaling a photo using the Free Transform Tool

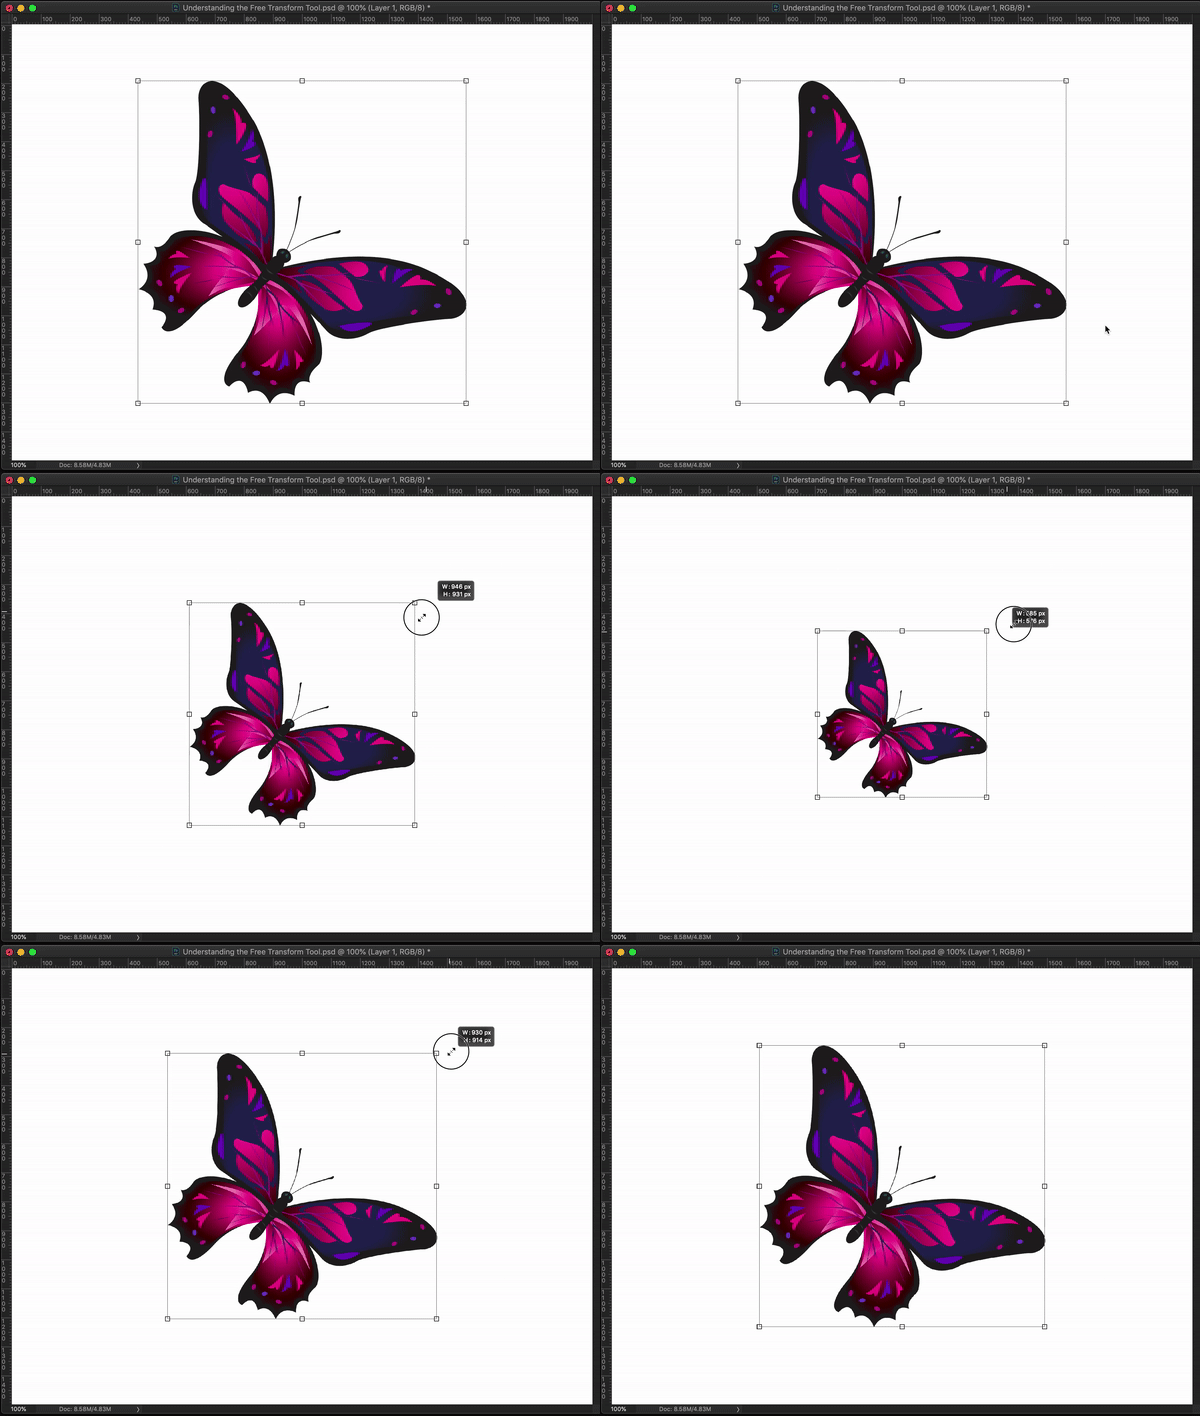
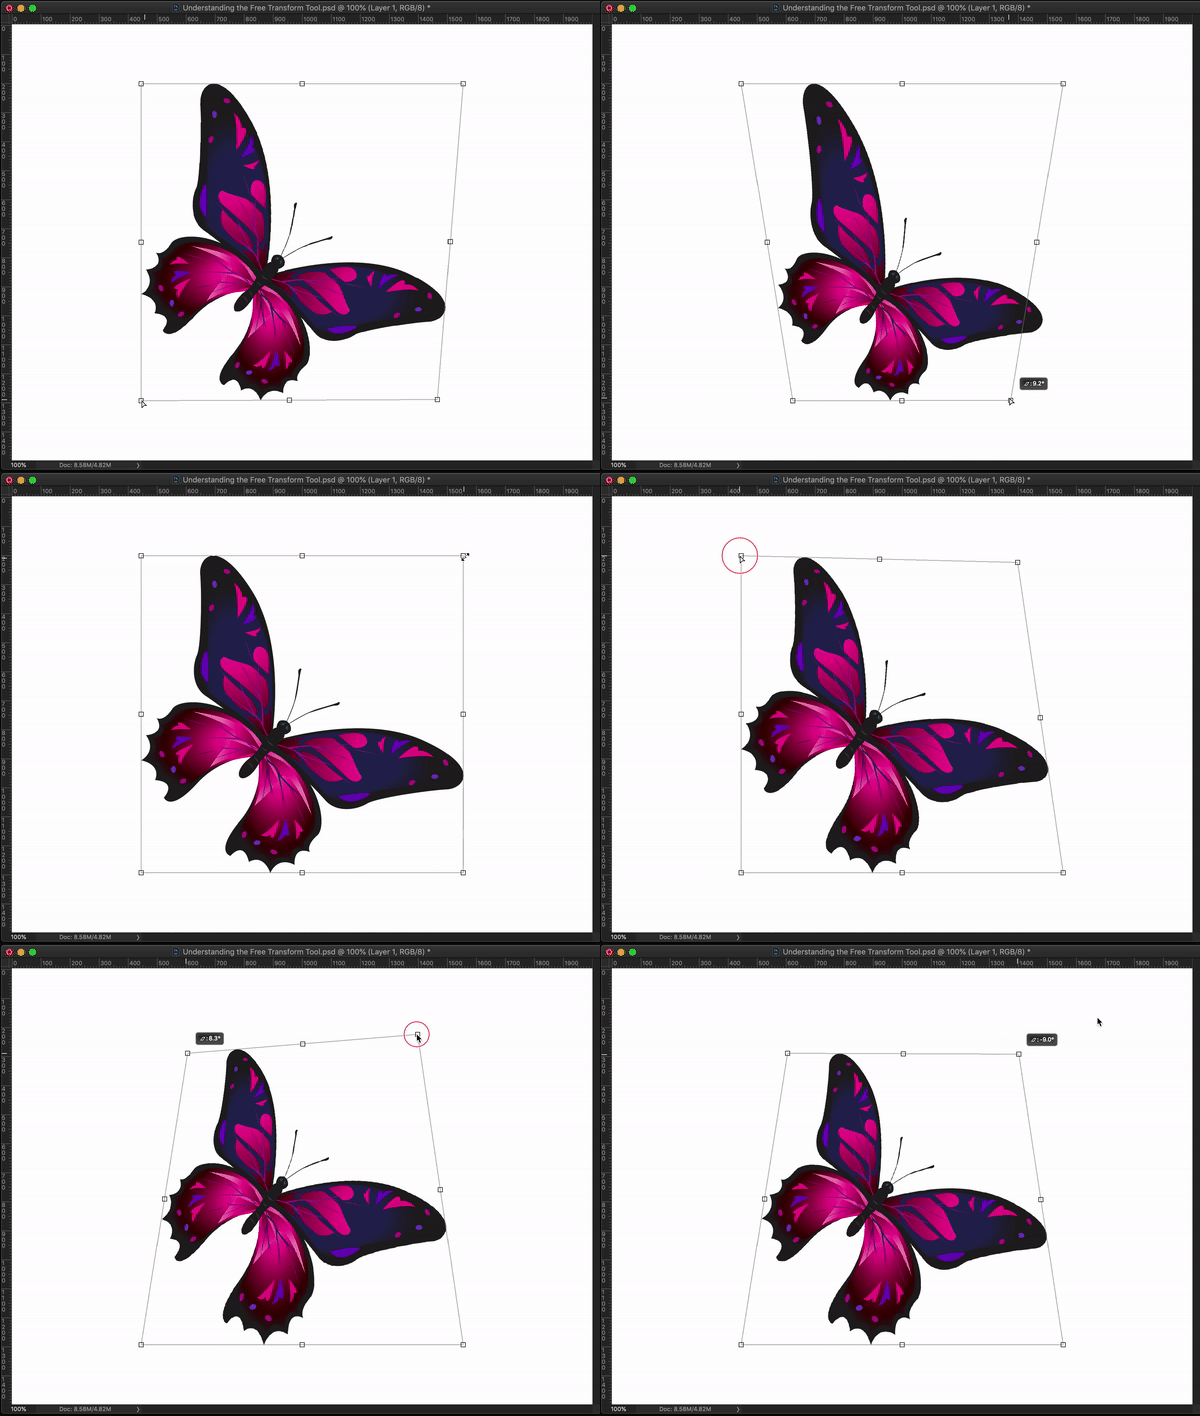
After activating the Free Transform Tool, you’ll see eight handlebars. Four will be on the edges and other four will be on the center.

You can drag any of them to scale the photo. Check the below GIF.

2.gif

Thanks for the photo, Pixabay!

I am scaling the butterfly by dragging the handlebars. You can use any of the eight handlebars to scale the photo.

Scaling the photo from the center

You can scale the photo from the center also.

Hold down Opt/Alt key and drag any of the handlebars.

3.gif

3.2 Skewing a photo using the Free Transform Tool

You can skew a photo using the Free Transform Tool.

For this, you need to use your keyboard and mouse at the same time.

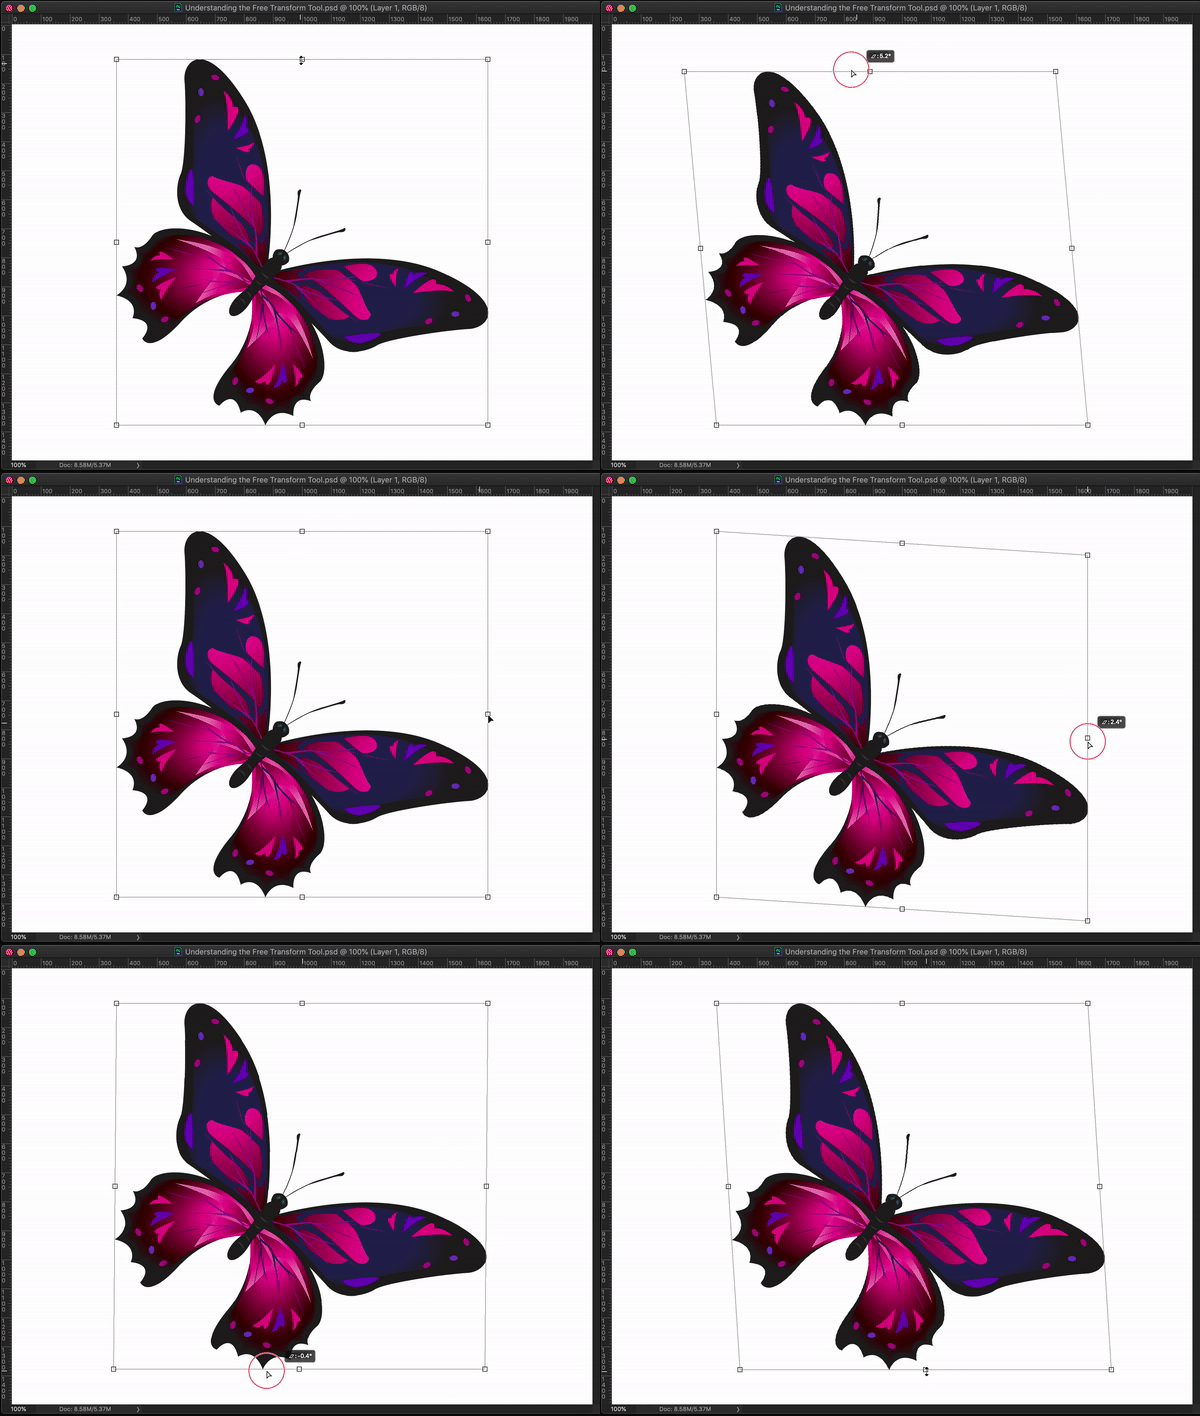
Hold down Cmd/Ctrl. Now drag any of the handlebars that are present in the middle.

Dragging the handlebars that are present on the edges will distort the photo. I’ll talk about the section number 3.4.

4.gif

3.3 Rotate a photo using the Free Transform Tool

You can rotate a photo using the Free Transform Tool.

Bring the mouse cursor next to the handlebar (don’t put it on the handlebar). You’ll see that the cursor is changed to a two-sided curved arrow.

6.jpg

Now drag it to rotate the photo. You can do it using any of the eight handlebars.

5.gif

3.4 Distort a photo using the Free Transform Tool

You can distort a photo using the Free Transform Tool.

For this, you need to use your keyboard and mouse at the same time.

Hold down Cmd/Ctrl. Now drag any of the handlebars that are present on the edges.

Dragging the handlebars that are present in the centers will skew the photo. I had talked about this in the section number 3.2.

7.gif

3.5 Changing the perspective of a photo using the Free Transform Tool

You can change the perspective of a photo using the Free Transform Tool.

For this, you need to use your keyboard and mouse at the same time.

Hold down Cmd/CtrlNow drag any of the handlebars that are present on the edges.

Check the below GIF. You need to drag one handlebar at a time.

8.gif

3.6 Warping photo using the Free Transform Tool

You can warp the photo using the Free Transform Tool.

You need to click on one button before start warping.

After activating the Free Transform Tool, click on the Warp button. I have shown a screenshot below.

Note: This button will show only and only when the Free Transform Tool is activated.

9.jpg

Activating the Warp mode will divide your photo into nine blocks.

10.jpg

Now, start warping.

11.gif

3.7 Flipping the photo using the Free Transform Tool

You can flip the photo using the Free Transform Tool.

Note: This is not the correct way to flip a photo. Because the photo will be flipped both horizontally and vertically. You cannot isolate them. But, I have added this option just to show you that you can flip the photo also.

You can flip a photo by dragging one handlebar all the way to the opposite side.

See the below GIF.

12.gif

4. Summary

I am summarizing all the steps here.

  • Scale: Drag any of the handlebar.
  • Skew: Hold down Cmd/Ctrl and drag any of the four handlebars that are present at the center.
  • Rotate: Put the curson next to the handlebar and drag.
  • Distort: Hold down Cmd/Ctrl and drag any of the four handlebars that are present on the edges.
  • Chaging the perspective: Hold down Cmd/Ctrl and drag any of the four handlebars that are present at the center and do the same to the adjacent edge also.
  • Warp: Turn on the warp mode. Now start dragging with the mouse.
  • Flip: Drag one handlebar all the way to the opposite side.

Download FREE Skin Softening Lightroom Preset

Here is the preset that you’ve been looking for. This preset will create a soften skin in Lightroom. Download the free Skin Softening Lightroom Preset

If you’re looking for a tutorial to soften skin in Lightroom, here’s the tutorial to soften skin in Lightroom.

Download the preset to create a paint effect in Lightroom. Yes, no email id is required.

Download for FREE

Here’s the tutorial to see how to install presets in Lightroom.

Photo from Pixabay.


Download for FREE

How to soften skin in Lightroom (free preset included)?

You shot a photo and the camera captured every single pore in the skin. This is one of the cons of having a good camera. Yes, a good camera captures all the details but sometimes they also capture those details which are not required. I bring you the easiest way to soften skin in Lightroom.

What’s even better? I am also giving you the free preset that you can download to soften the skin.

Level: Easy
Expected time: 5 minutes

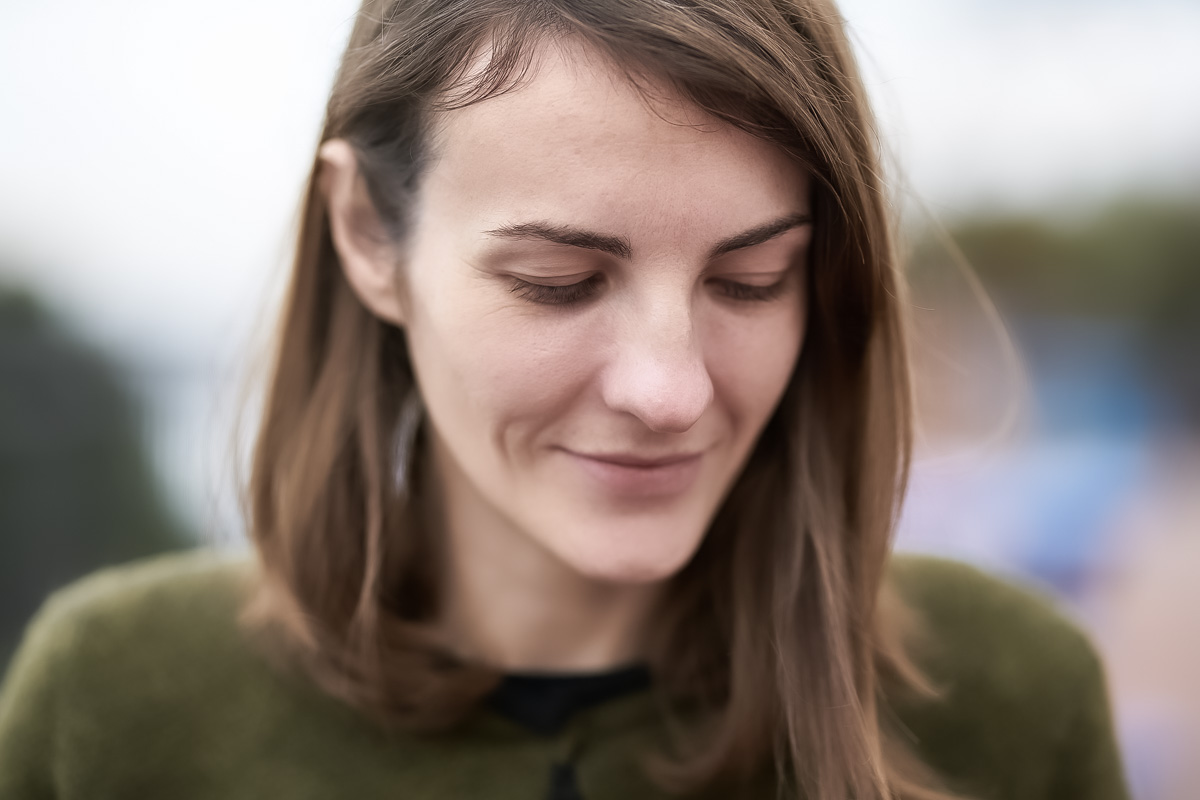
Let’s start the tutorial. But I want to show you the before and after first.

If you want to download the preset, click here. This link

After

Before

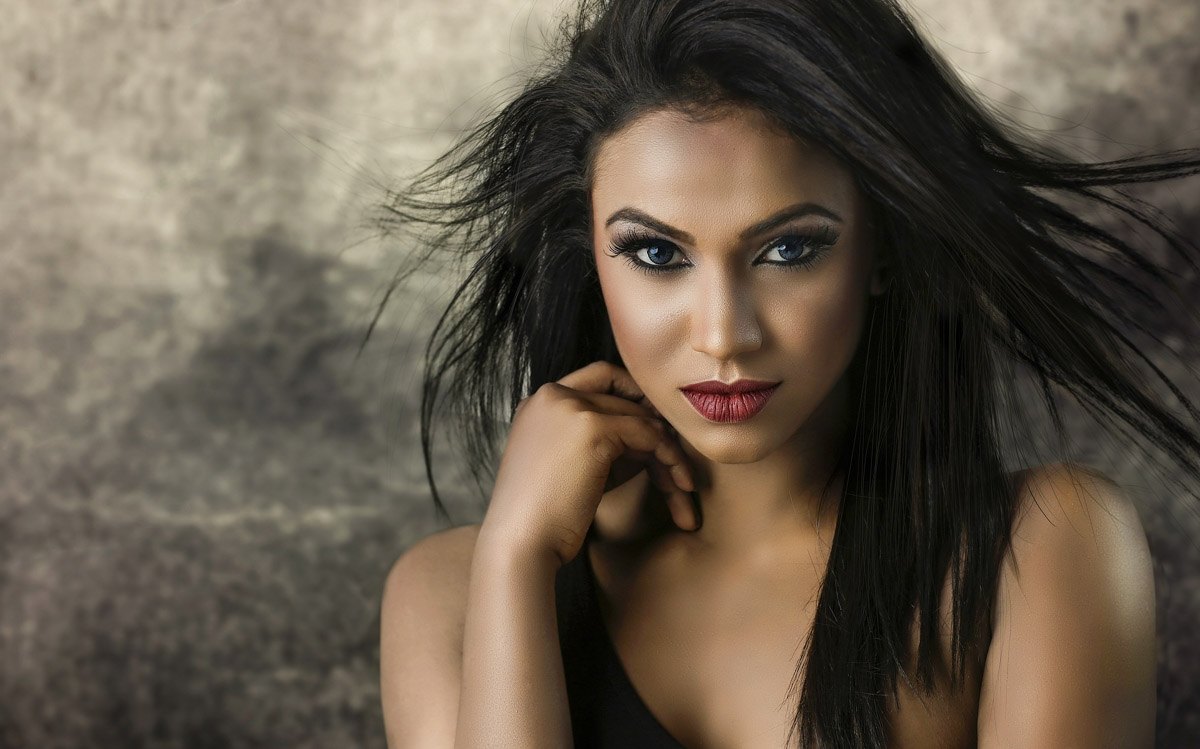
Image by engin akyurt from Pixabay

Let’s start.

Step 1: Edit the texture and clarity to soften skin in Lightroom

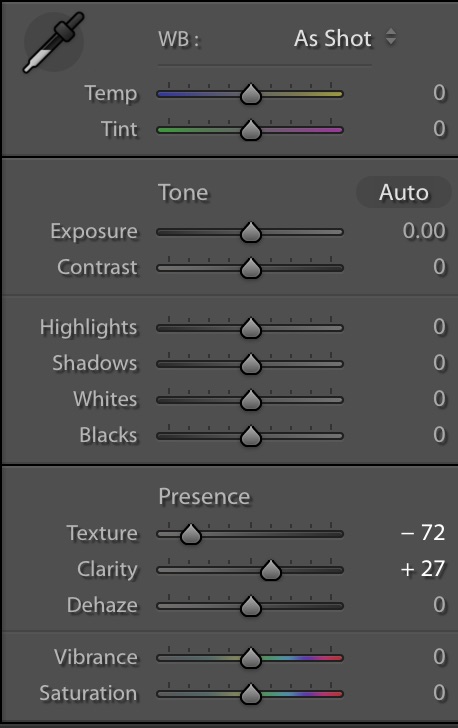
Adobe added Texture in Lightroom 2019. The main purpose of this slider is to adjust the texture in the photo. One of the ways we can use this slider is to soften the skin. We’re going to do the same.

Open the photo.

  • Bring down the texture of -72
  • Increase the clarity to +27.

This is how your photo will look.

Note: You can also play with the Clarity slider here. Sometimes, increasing the Clarity improves the photo.

Step 2: Adjust the Details

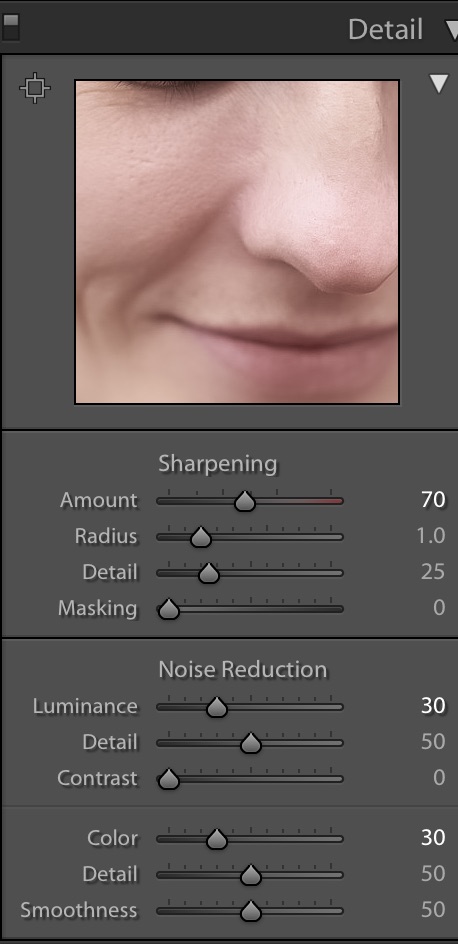
Time to sharpen the edges like eyes, nose, lips, face cut, etc. Head over to the Details panel.

  • Increase the sharpening amount to +70
  • Increase the Luminance to +30
  • Increase the Color to +30
  • Leave other fields as they are

This will sharpen the edges.

This is how the photo is looking. Did you notice that the eyes and nose are sharper now but the skin is still softened? This is the power of the Sharpening slider.

This is all guys.

I remember that I said that you get the free preset also. Here it is.

Download the preset

Download the skin-softening preset and install on Lightroom. Here’s the tutorial to install a Lightroom preset.