How to soften skin in Lightroom (free preset included)?

You shot a photo and the camera captured every single pore in the skin. This is one of the cons of having a good camera. Yes, a good camera captures all the details but sometimes they also capture those details which are not required. I bring you the easiest way to soften skin in Lightroom.

What’s even better? I am also giving you the free preset that you can download to soften the skin.

Level: Easy
Expected time: 5 minutes

Let’s start the tutorial. But I want to show you the before and after first.

If you want to download the preset, click here. This link
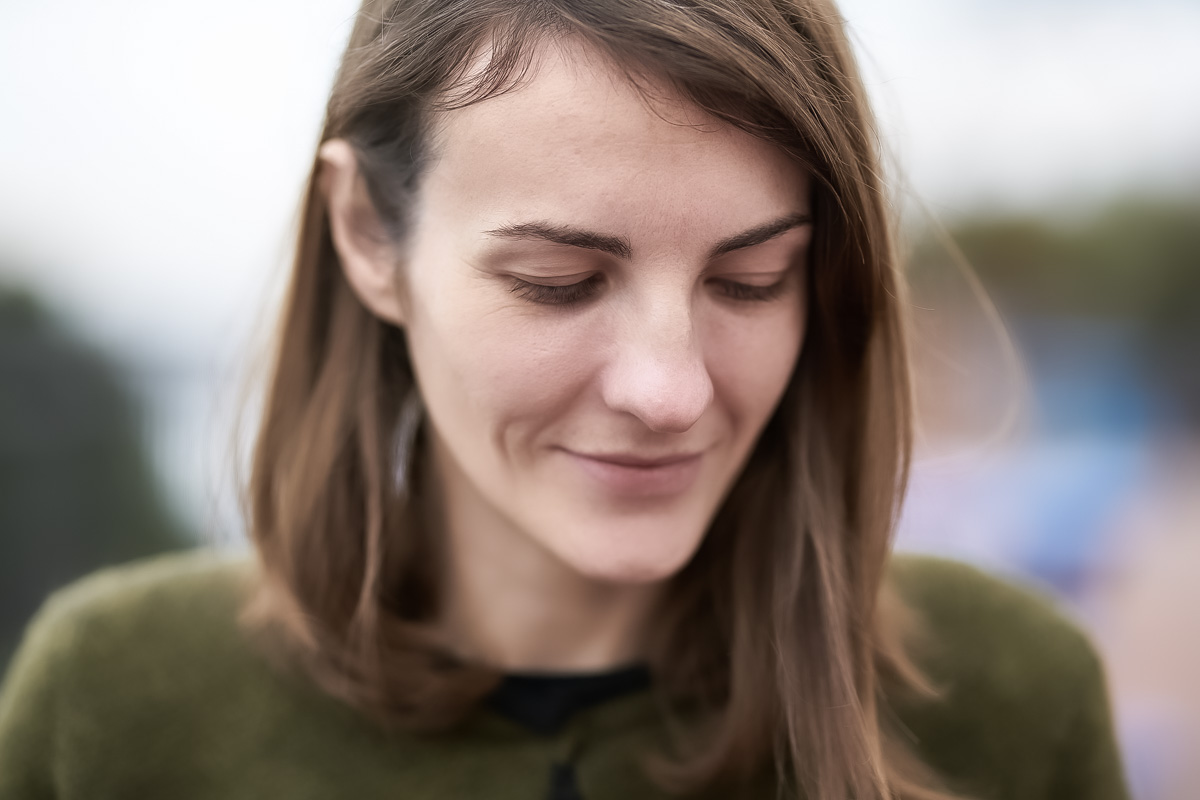
After

Before

Image by engin akyurt from Pixabay

Let’s start.

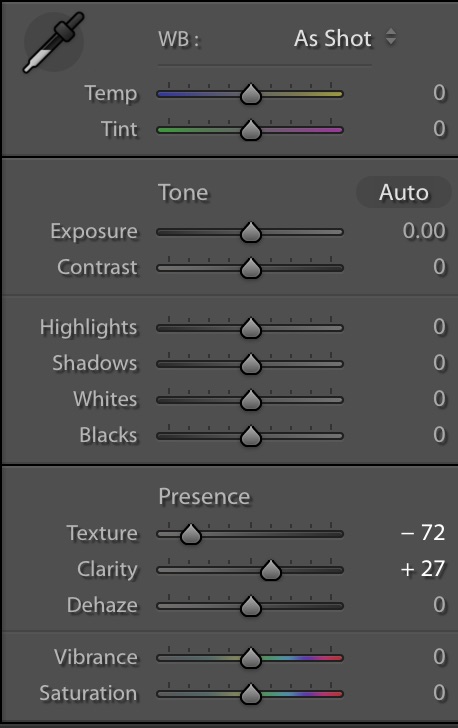
Step 1: Edit the texture and clarity to soften skin in Lightroom

Adobe added Texture in Lightroom 2019. The main purpose of this slider is to adjust the texture in the photo. One of the ways we can use this slider is to soften the skin. We’re going to do the same.

Open the photo.

  • Bring down the texture of -72
  • Increase the clarity to +27.

This is how your photo will look.

Note: You can also play with the Clarity slider here. Sometimes, increasing the Clarity improves the photo.

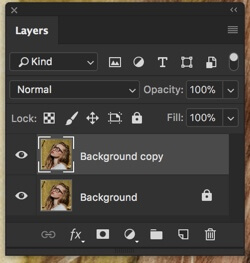
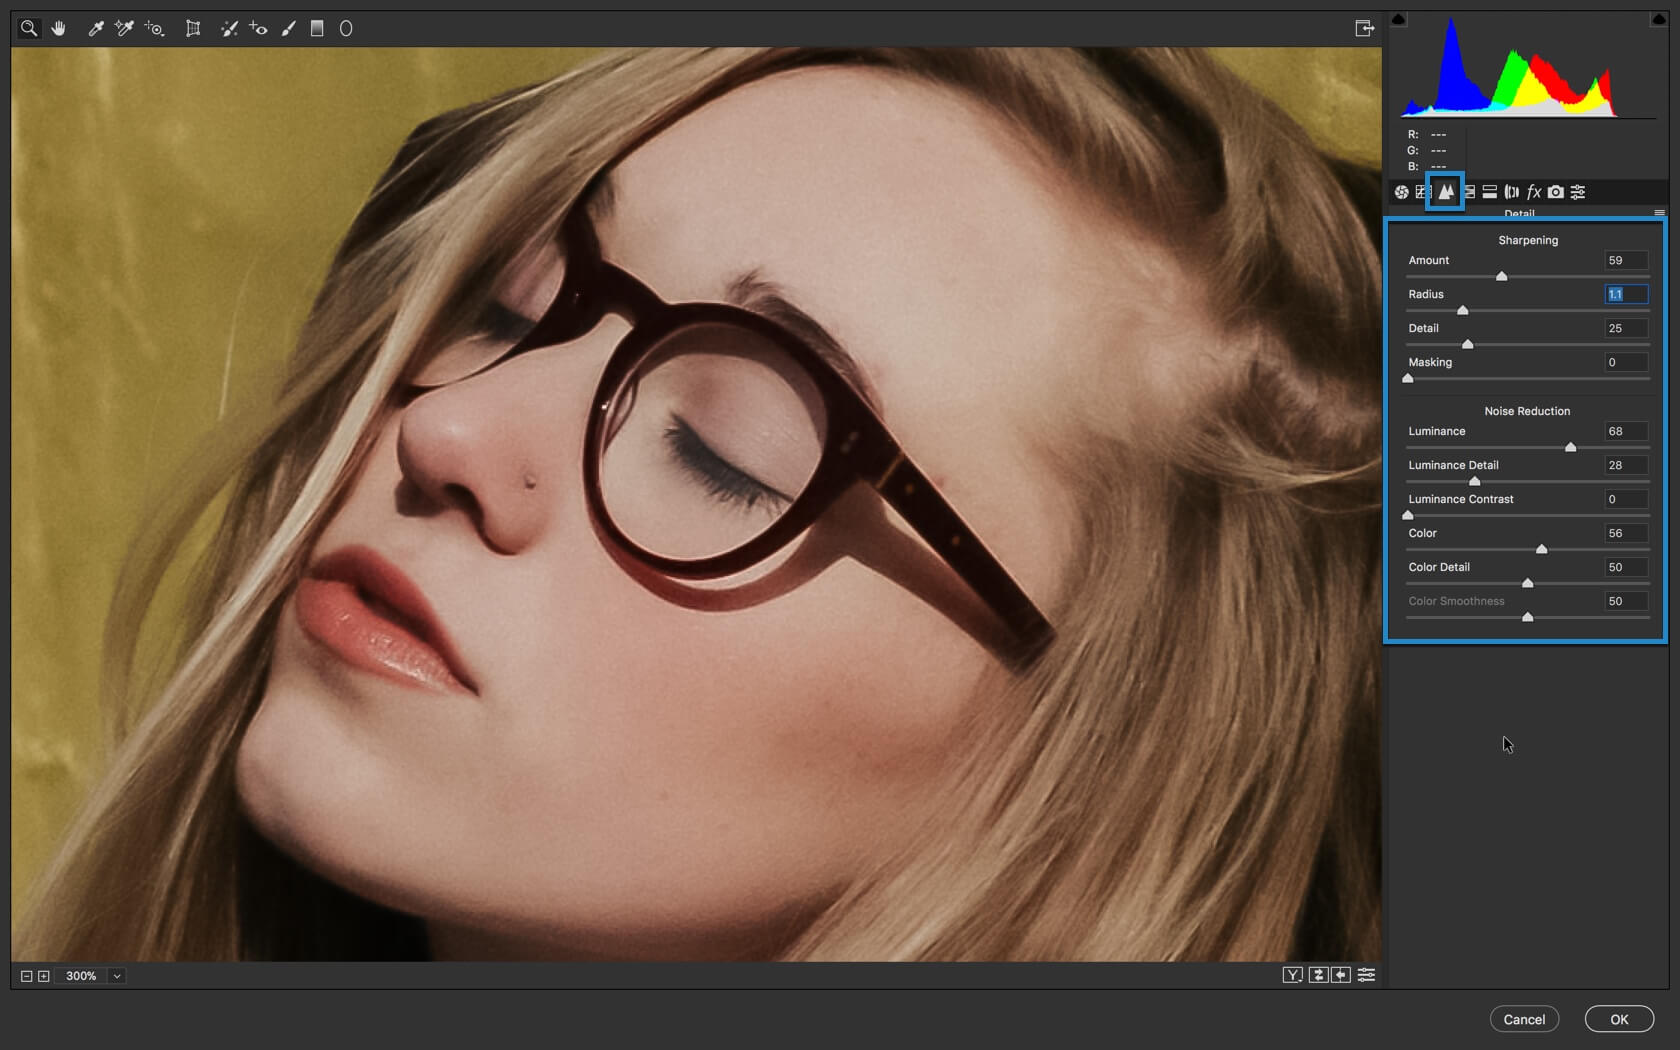
Step 2: Adjust the Details

Time to sharpen the edges like eyes, nose, lips, face cut, etc. Head over to the Details panel.

  • Increase the sharpening amount to +70
  • Increase the Luminance to +30
  • Increase the Color to +30
  • Leave other fields as they are

This will sharpen the edges.

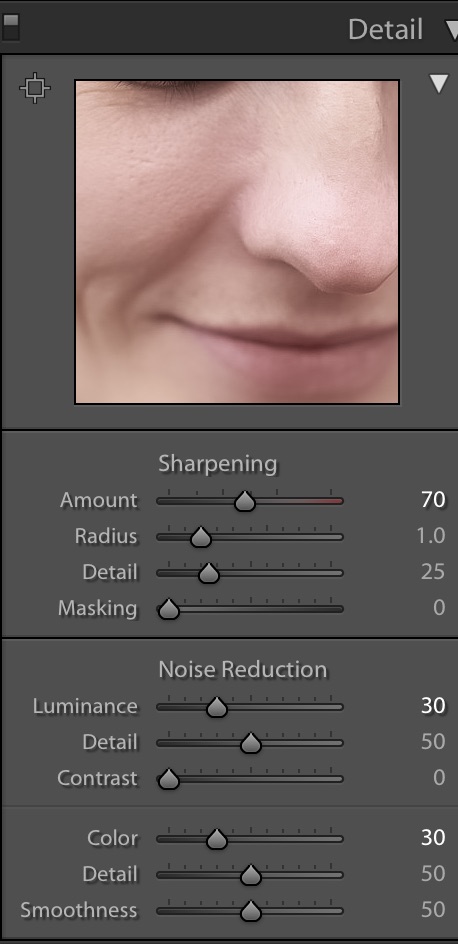
This is how the photo is looking. Did you notice that the eyes and nose are sharper now but the skin is still softened? This is the power of the Sharpening slider.

This is all guys.

I remember that I said that you get the free preset also. Here it is.

Download the preset

Download the skin-softening preset and install on Lightroom. Here’s the tutorial to install a Lightroom preset.

Soften Skin in Photoshop in Less than 1 Minute

You use Photoshop to edit photos. Sometimes you edit landscapes, sometimes party photos, and sometimes your selfies. Whenever you edit selfies, the first thing you do is softening of the skin. Nobody likes rough skin (even on men). You spend around 5-10 mins to use the brush tool, gaussian blur, surface blur etc. to soften the skin, right? What if I tell you that I can give you a hidden feature in Photoshop that will cut down the time to only 1 minute? Yes, you can soften the skin in Photoshop within 1 minute.

Before we begin, I want to show you the before and after photo. Did you see the difference?

Before

Fig. 1

After

Fig. 2

Let’s begin the tutorial.

Step 1 – Duplicate the Layer

You and I need to use the layer mask in later steps so we need to duplicate the layer. Press Cmd+J/Ctrl+J to duplicate the layer. You can also go to Layer>Duplicate Layer to duplicate a layer. Your layer panel should look like Fig. 3.

Fig. 3

Step 2 – Soften Skin in Photoshop using Camera Raw

This is the step that will soften skin in Photoshop. Photoshop has an inbuilt feature that softens the skin but the name isn’t present with the same name. This is why you didn’t know that you could’ve saved an insane amount of time by using Camera Raw filter.

Go to Filter>Camera Raw filter or press Cmd+Shift+A/Ctrl+Shift+A.

Go to the “Details” tab which is marked with blue color in Fig. 4. Increase the Luminance to a high value. This will soften the skin. The problem is that it softens entire photo. You don’t want eyes and nose to soften, right? This is where Sharpening comes to rescue us. Increase the amount in Sharpening field and this will sharpen the edges.

Press OK

Step 3 – Use Layer Mask for Finetuning

Go to Layer>Layer Mask>Hide All. This will bring back the original photo again.

Sidebar – If you’re not familiar with the layer mask, you better check out my Layer Mask in Photoshop tutorial. The link will open in new tab.

Choose the Brush Tool and change the foreground color to White.

Fig. 5

Adjust the size of the brush as per your needs and reduce the hardness to 1-5%. Now start brushing only on the skin. Avoid edges like jawline, nose, eyes, lips, etc. Your photo will start to look like Fig. 6. I have started to brush from the bottom of her face.

Fig. 6

You and I are human and we are bound to make mistakes. This is a certain chance that you might have brushed over the edges also. We’re going to fix that now. Change the foreground color to black and start brushing on the edges like lips, nose etc. Fig. 7 shows how the area where I was brushing just before taking the screenshot. The black arrow represents that area.

Fig. 7

This is all for today. This is how you soften skin in Photoshop. Check out the final image one more time.

Fig. 8