The Secrets of Wedding Photography in 2020

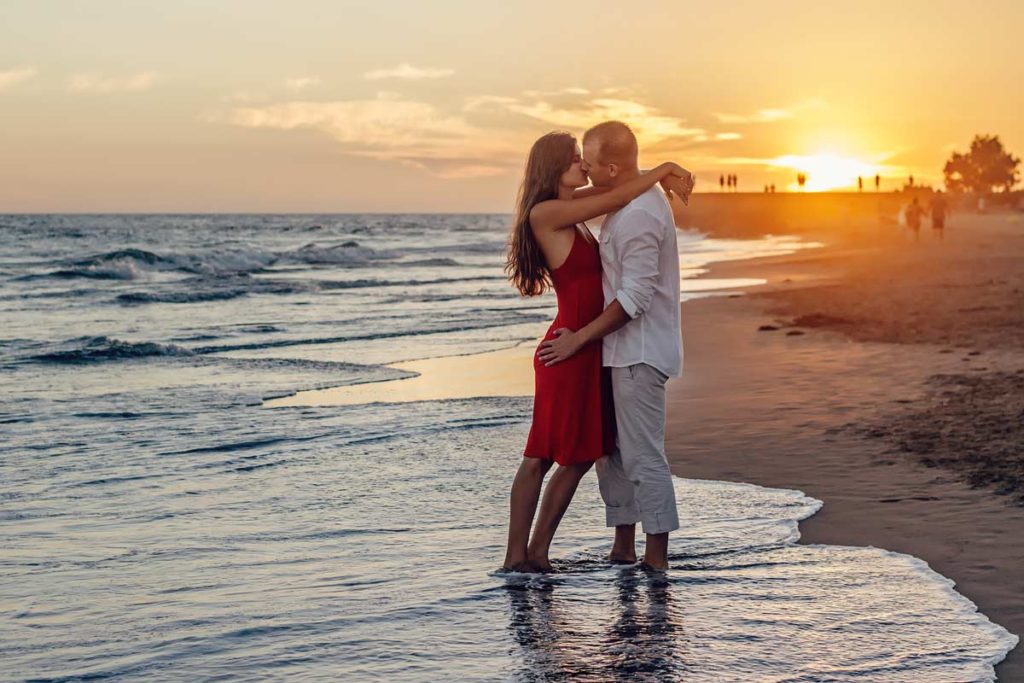
Wedding photography is mostly known as one of the most challenging shoots nowadays. As of 2019, you can witness couples appreciating innovative styles for capturing the moments of their big day. Photography is a susceptible profession when it comes to the eyes of the viewer and the story that will recall with every picture.

Here are some fantastic and exciting secrets that reveal fabulous wedding photography tips. They can assist a cameraperson and also let couples add charm to their wedding day effortlessly. If you are already arranging two photographers for your wedding day, things may be handy for you.

Adding the Best Tips to Wedding Day Photography

Besides focusing on the guests and planning group shots, there is much more that adds sparks to the photos of this adorable occasion. No wonder, your wedding album is one of the most important and worthy photo albums you can ever create.

Always Be Sure Of Capturing the Firsts

Wedding pictures are memorable for many reasons. While planning the bridal photoshoot, make sure of confirming the photographer about some important moments you want pictured.

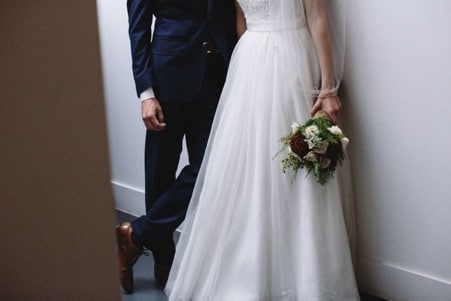
Best wedding photographers always look out for the couples’ firsts on the marriage day. Besides capturing the entry of the bride and groom, some crucial firsts come only once in an individual’s life. The first look of the bridal gown and the first view of the groom’s attire is important.

Everything is recordable about the firsts. From the first touch to the first hold, and later on to the first kiss. Capturing every move matters!

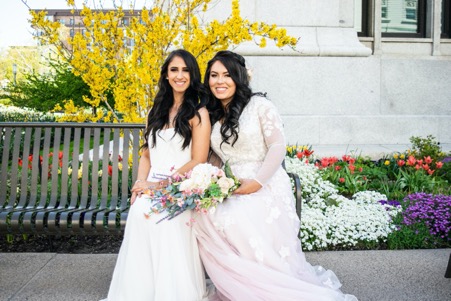
Friends Are Real People Who Add the Zing

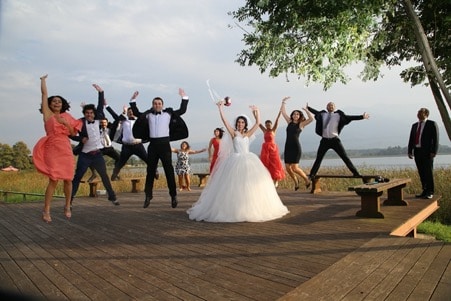
Giving priority to the bride’s girls and groom’s buddies is essential. Do not miss girly poses of the bride with the bridesmaids or the manly looks of the groom and his groomsmen.

Along with emotional hugs and tears, capture the funny teasing moments with pals. Adopt unique ways that can add more laughter to bridal photography. Opt for the hilarious poses that friends plan for wedding day photography.

Do not miss the bride’s picture will all the groomsmen that can add a unique flair in the album. Similarly, let all the chicks gather around the groom and make sure to click the best of photos.

Look Out For the Unseen Precious Smiles

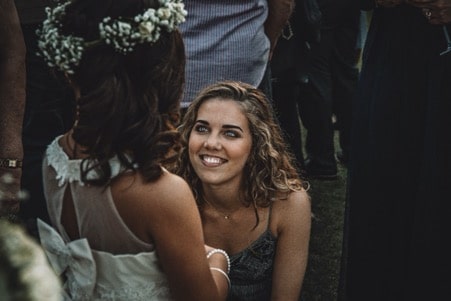
Smiles are an essential glitter for every occasion. You cannot opt even one out if you start noticing. The important smiles that can make others happy are picture worthy ones.

While focusing on the couple is crucial, concentrating on the guests is important too. Along with the shy, intimate, and emotional smiles of the couple; gathering pictures of family members, friends, and kids also glams up the album.

Always mark sudden moments and the important ones in the best wedding photography tips.

Fake It Exact And Make It Perfect

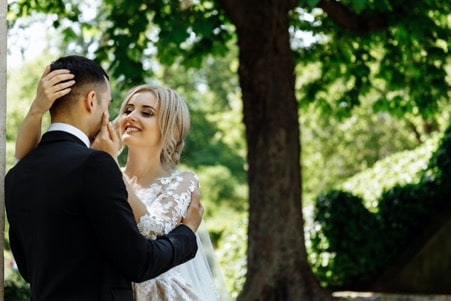
Unless you opt for fake poses, the trending groom photography flairs or bridal photoshoot attitude is impossible to achieve. Nowadays, best wedding photographers have their list of items and pose that highlight the feelings of the couple.

Assure all the fake romantic looks that trend in 2020 and go for the desirable ones. Also, practice a fake wedding shoot before the occasion to look perfect on the big day.

In case the couple wants every move to happen for the first time on marriage day only, get some practice with friends. Ask married couples for the right steps and make the best out of your wedding day photography.

Notice All the Little Unnoticed Moments

Marriage is one of those days when you can notice a lot of small moments that carry deep meaning along with. The mother holding a hand or the father shedding that precious tear. Capture it all!

The moments in a wedding where the couple change vows are made up of enormous intimate poses. Focusing on all of them can result in a heartfelt wedding photography album. Best wedding photographers always concentrate on the couple around the tables.

Leaving the couple alone is essential but taking eyes off them will surely miss the most vital reaction from the album.

Capture Moments before the Wedding

Before the event starts, there are many ideas that must be added to the best wedding photography tips. The groom greeting his important people and the bride dressing up for the big day are some of the most important captures.

The decorative interior set up and the flowers hanging from the table. The final look of the event right before it starts. Some adorable poses that are captured when no one’s around. The glittering silence of the party about to start.

Everything about the wedding day photography is exceptional. For those who know how to make the best of time can bring in the most beautiful of marriage albums.

Do Not Miss Any of the Family Members

The families of the bride and groom are the second most important people to focus on. All the bridal photography moments are incomplete without the bride’s shot with her mom and dad. Photoshoot with siblings is also an important part.

Similarly, the groom photography is incomplete without the groom’s best picture with his father and an emotional capture with his mother.

Every family has some significant members. Locking them in the wedding photography album is essential for the moments to cherish all life even after they are not around.

Wedding Photography Tips as a Challenge

Many people think of wedding photography as the most difficult of jobs for photographers. There may be a point when you can think the same. Yet, it is not such a rocket science if one knows the right tips.

Of course, experience comes with time, and every couple will not always find that highly expert professional way. Opting smart means will help both the ends during a wedding day photography.

The cake cutting ceremony also is an essential time for the bride and groom. Everything about the marriage day is outward; however, all of it depends on how the photographer and the couple put forward their efforts. Just remember,

“The cake gets eaten, the flowers will die, but the wedding photos will last forever.”

Author – Mark Coblin is a content marketer who works for Coupon and discount codes Platform. A writer by day and a reader by night; He is striving to make the most of the new opportunities that come in his way and excels in everything he does.

Impress Your Audience with 5 Instagram Photo Editing Apps

The world is on Instagram and so should your business be. But just being on the app doesn’t help. You need to offer your audience unique, impressive pictures to keep them engaged. Wondering how? Well, the right photo editing apps for Instagram can help you, which, we’ve listed in this blog.

We all have heard the phrase ‘Pictures say a lot’, and this is particularly true in the era of Instagram. Even you must be sharing pictures and stories regularly on this interesting and popular social media platform as an individual, influencer, or a business.

But the question is, are the photos you’re sharing impressive enough? Are your posts creating good engagement? Are you achieving a good conversion rate?

If your answer is “No, not really there” then, it’s time for you to start using Instagram photo editing apps. And no, you don’t need to do a course to be a pro at it!

Why Should You Use an Instagram Photo Editor?

As per the statistics, there are over 1 billion monthly active users on Instagram with more than 500 million Instagram stories every day. Out of those 1 billion+ users, over 25 million accounts belonging to a range of different businesses.

What’s even more interesting is the fact that 60% of people have said they discovered new products on this platform. Moreover, out of the most viewed stories, 1/3 come from business accounts while a minimum of one business profile gets visited by over 200 million Instagram users daily, per the official figures.

Now, that’s a clear indication of how vital the platform has become over the years and it’s only going to go up in the future. That means, the competition is going to get tougher and you have to stand out among the crowd.

Though Instagram already comes loaded with decent photo-editing features, those are just the basics. To get the most out of Instagram, it’s best to use an Instagram photo editor that accentuates your images, making it more appealing to your audience.

5 Instagram Photo Editors You Should Know About

While there are many Instagram photo-editor apps on both iOS and Android, you can’t afford to miss the following. So, let’s get started.

1. VSCO

The VSCO app, available on both Android and iOS platforms, is completely free for the basic set of functions it offers. The app is packed with exciting preset features that make your photos and videos more stylish and fine-tuned. Applying adjustments like saturation, brightness, contrast, and Grain becomes easy with VSCO’s robust editing tools.

If you don’t like the VSCO app, you can always contact me to edit your Instagram photos.

The app has a lot more to offer if you’re up for a paid membership. From video coloring and exclusive editing tools to a library of 200+ presets, VSCO helps transform the photos into a work of art.

It also has its own creator community where users can discover tutorials, follow each other, and share their images.

2. Snapseed

Struggling to remove distracting elements from your images in a simple way? Then Snapseed is the photo editor you should try. The app, now owned by Google, makes an equal appeal to both the casual and professional photographers with its great effects and filtering options. The app is available for download on iOS and Android at no cost.

If you don’t like the Snapseed app, you can always contact me to edit your Instagram photos.

In addition to the regular rotate and crop tools, Snapseed provides its users with advanced image editing features such as double exposure, tonal contrast, HDR Scape, Black & White, lens blur, as well as white balance.

With Snapseed, you can also share your stunning images directly through the app’s social sharing feature on any social network, including Instagram.

3. Layout

The Layout is Instagram’s own photo-editing application that caters to both the Android and iOS users. With Layout, you can select an image to edit from your photo gallery or click a cool shot instantly with its built-in Photo Booth. Layout becomes a great choice if you’re the one who loves making collages out of your beautiful photos.

If you don’t like the Layout app, you can always contact me to edit your Instagram photos.

The app lets you mix-up up to 9 photos at a time to create personalized, fun collages and layouts. Whether it is flipping and mirroring the image or replacing and resizing it, Layout lets the users be as creative as they want to tell a story of their own.

Moreover, you can also edit images through the filter tools of Instagram and share it immediately on the social network.

4. Square Sized

If you use Instagram, then you already know that you can only share photos on the app if they are square in size. The Square Sized app has taken this basic requirement and turned it into its primary feature.

If you don’t like the Square Sized app, you can always contact me to edit your Instagram photos.

As the name suggests, Square Sized helps you resize your photo in an Instagram-worthy square size. The same is applicable to videos. In addition to the photo-resizing, Square Sized also allows you to take new pictures without leaving the app. Moreover, the app enables you to add wonderful backgrounds, layer filters, overlays, and typography to your shots.

Square Sized is available on iOS with basic features for free.

5. Adobe Photoshop Lightroom CC

With Adobe Photoshop Lightroom CC app, you can edit photos on your phone as well as desktop. The editor, available freely for its basic features on Android and iOS, lets you edit and take photos without hassles and share them instantly on Instagram and other social networking sites. Aside from the free version, Lightroom also offers premium features, including syncing functions across devices.

If you don’t like the Lightroom app, you can always contact me to edit your Instagram photos.

With this image editing app, you can modify color, contrast, and exposure of the photo. It is even possible to copy the edits across various snaps for consistency. One more interesting feature? You can do selective editing of the photo with this editor and let the rest of the image be as it is.

Conclusion

So, now that you have a list of the 5 best Instagram photo editing apps, impressing your audience won’t be a headache anymore. Confused which one among these would prove to be the one for your business? For that, all you need to do is download any of the above apps and give it a try.

Author Bio:

Varsha Solanki is a Digital Marketing Strategist at Space-O Canada, a Software development company. She has 3 years of experience in the Information Technology industry. She spends her time reading about new trends in Digital Marketing and the latest technologies.

How to flip a photo in Photoshop?

Today, we’re going to see how to flip a photo in Photoshop. We’re going to do it in two ways. One way will flip the entire photo and another will just flip a layer.

Let’s begin the tutorial.

Method 1  – Flip a photo in Photoshop

This is the easiest one. Suppose you have multiple layers on your Photoshop file, this method with flip all the layers.

Let’s flip a photo in Photoshop.

Image by pics_kartub from Pixabay.

Go to Image > Image Rotation > Flip Canvas Horizontal to flip the photo horizontally.

This will flip the photo horizontally in Photoshop.

To flip the photo vertically, go to Image > Image Rotation > Flip Canvas Vertical

This will flip the photo vertically in Photoshop.

Method 2  – Flip selected layers in Photoshop

In most of the cases, you may not want all the layers to be flipped. You may just want one or two layers to be flipped. We can also flip layers in Photoshop.

Let’s say I want to flip the text in the below photo.

The text is present in a different layer.

Go to Edit > Transform > Flip Horizontal.

This will flip the layer horizontally in Photoshop.

Now, if you want to flip it vertically, go to Edit > Transform > Flip Vertical.

This will flip the layer vertically in Photoshop.

Bonus steps

If you want to rotate the photo by 90 degrees then you can do that also. Go to Edit > Transform > Rotate 90o clockwise.

This will rotate the photo. Your photo will look like this after the rotation.

If you want to rotate the photo to any other angle, activate Transform Tool by pressing Cmd + T / Ctrl +T.

Now put the cursor next to any eight of the handlebars, and then rotate the layer. Your photo will look like this.

This is all, guys. Check out the offer below.

How to add bleed and crop in Photoshop

photoshop image editor

You might have never heard about bleed and crop if you post your photos online and never bothered about printing them. But, you might head bleed and crop a lot if you print your photos or design. Today, we’re going to see how to add bleed and crop in Photoshop.

Photoshop has not given any standalone feature to add bleed and crop but has given some features that you can use to add bleed and crop. Let’s see how to use it.

Let’s start with the bleed first because we use it more than the crop.

1. How to add bleed in Photoshop?

Before we begin with how to add bleed, let’s understand what is bleed first.

1.1 What is bleed in printing?

Wikipedia has given a very nice and clean definition of bleed.

In printing, bleed is printing that goes beyond the edge of where the sheet will be trimmed. In other words, the bleed is the area to be trimmed off. – Wikipedia

Many economical printers are not capable enough to print edge to edge. So, they left a small piece of an area on the left and right. This left out area is called as bleed.

1.2 How much bleed should I add?

Many printing sites specify the exact bleed size you need to put on your document. If they don’t, a rule of thumb is to go for 0.25 inches on all the four sides.

Now, let’s add bleed in Photoshop

1.3.1 Step 1 – Adding the ruler

Text editing software like Microsoft Word, Apple Pages, and Adobe InDesign, etc. have a dedicated menu bar for this. But, in Photoshop, we need to use Guides to add bleed.

The below photo is A4 in size. It has a width of 8.2 inches and has a height of 11.6 inches, and has a resolution of 300 pixels per inch. Let’s add a bleed of 0.25 inches.

Credit – Image by naobim from Pixabay

The first thing we need to do is that we need to add Ruler. Go to View > Ruler or press Cmd + R / Ctrl + R.

Now, right-click on the Ruler and select Inches.

1.3.2 Step 2 – Adding the guide for the bleed in Photoshop

Go to View > New Guide Layout.

Now, write 0.25 in all the four fields of the Margin. Press OK.

This will add a guide that has a width of 0.25 inches. It’s better to keep all your designs and photo inside this guide.

2. How to add crop in Photoshop?

Before we begin with how to add a crop, let’s understand what is crop first.

2.1 What is the crop in printing?

This is not the cropping that you hear a lot. This is different than cutting out the unwanted part of a photo that we usually do with photos before uploading them on social media sites.

Crop marks, also known as trim marks, are lines printed in the corners of your publication’s sheet or sheets of paper to show the printer where to trim the paper. – Microsoft

2.2 How much crop should I add?

Printing sites specify the exact crop size you need to put on your document. If they don’t, a rule of thumb is to again go for 0.25 inches on all the four sides.

Now, let’s add crop in Photoshop.

2.3.1 Step 1 – Increasing the canvas

Go to Image > Canvas Size or press Cmd + Opt + C / Ctrl + Alt + C.

While making sure that the unit is inches, write 0.25. Keep the Anchor at the center and make sure that Relative is turned on.

Press OK.

This will increase the size of the document by 0.25 inches.

The square boxes you’re seeing on the edges are actually the transparent area. It’s included in the document but not painted with any color.

If somehow you print this transparent area, then nothing will be printed. A pink paper will come out as pink, a yellow paper would come out a yellow, and white will come out as a white.

This is all, guys. This is how you add bleed and crop in Photoshop.

Photoshop Master Reveals Why You Should Never Trust Photos You See On Social Media

Immediately Do About Photoshop

In this age of social media, looks can be very deceiving. The photos on social media often bear little resemblance to when they were taken because they can be digitally manipulated.

A skilled Photoshop master is able to do just about anything to a photo, including making someone look a whole lot better than in real life. A broad nose becomes slim, a thick waist turns into a thin one, flabby upper arms become smooth, eyes look brighter and teeth look whiter.

“Photoshop Holy” – digital manipulation for perfection

A Photoshop master and Weibo user named Kanahoooo has mad photo-editing skills that will make you question those stunning photos you see of people on social media.

She has a huge following on Chinese social media, where she is referred to as “Photoshop Holy.” She says you shouldn’t believe the perfection you see online. People reportedly ask her to make their images look more ‘shiny’ on social media.

The people in the after photos can hardly be recognized from the before photos, often looking slimmer and more beautiful. Her images show just how thin the line is between the beautiful and the not-so-beautiful.

People comment that the photos look unnatural and don’t necessarily make everyone look better. Her response is that what she does is a type of entertainment and that she thinks it is fun to try and make people look different.

Her wizard-level photo editor’s skills are in demand and she is really good at making young girls look perfect. They seek perfection because they feel it is necessary if they want to get ‘likes’ and followers on social media.

Becoming a Photoshop master requires practice

An integral part of digital photography is the post-processing stage. Even when you’ve taken an acceptable photo, there is usually room for some photo editing magic if you want to take it to the next level.

Using Photoshop tools, you can correct issues like slight over-exposure that can wash out skin color and features but it is possible to go a great deal further than that.

Mastering the basics first

Simply learning how to use some of the basics of Photoshop can take time. Adele Markus, a graphic designer who works for Best Essays, says she battled at first to learn how to use the layer panel. She says her early attempts looked as though a child had been busy and it took practice to get the best quality from a photo by applying layering.

Some of the tools in Photoshop are fairly straightforward and easy for beginners to use, whereas others are much more complex and it may take time before you’re ready to use them.

For example, Brightness/Contrast, Exposure, and Shadows/Highlights simply require moving sliders to the right or left to make adjustments. However, more advanced edits require learning how to read a histogram or a chart that shows the tonal range in the photo you’re editing.

Dealing with slight imperfections

Photoshop has many photo-editing tools, such as a Spot Healing Brush you can use to get rid of blemishes and a Clone Stamp tool that allows you to copy pixels from a selected area and then clone it on to another area.

This makes it easy to remove imperfections like a stain on a model’s clothes you didn’t see during a shoot, a spot on the skin, any odd patterns, or a dirty background.

Working on the eyes

One element in photos that can be tricky to get right is the eyes. The less you do to them, the more natural the effect. It’s fine to work on them if they appear a little puffy or have bags under them. However, adding too much sparkle tends to look unnatural and may even make them look unearthly.

Perhaps you’re working on a photo where the model’s eye bags give away the fact that she got little sleep the night before the photoshoot. It takes some practice to improve photos without the changes you make being easy to notice.

Learning how to reduce puffy eyes in Photoshop is not that difficult, but there are different ways to accomplish this and some ways offer a better result than others.

Adjusting colors and shadows

When you start adjusting colors and shadows, you have to understand curves, how to layer and create contrast without creating a collage of blurred colors and overlapping shadows.

Practice makes perfect

When you’re new to a photo-editing program, it is easy to either avoid or overuse fascinating features. The more you use the photo-editing software, the more adept you become.

Kanahoooo or “Photoshop Holy” shares tricks on how to retouch images on her homepage and launches challenges that give other Weibo users a chance to practice and to show off their Photoshop talents. Perhaps your idea of perfection is different from hers – but you still need to put in the time and practice if you want to improve your skills.

Transform photos in Lightroom

Many professional photographers are able to transform photos in Lightroom. This popular photo editing software has many compelling editing functionalities. It allows you to apply your own style, be creative and differentiate your work from other photographers.

Using Lightroom does have a learning curve, but it is not as difficult as learning Photoshop. It is fun to play around with all the features and see what kind of results you can achieve.

When you are learning various editing programs, it takes time to understand how and when to use the various features. Trying too hard to incorporate them too soon is a mistake that beginners often make.

Keep comparing with the original image

A good rule of thumb when photo editing is to make the final images look as natural as possible. In the beginning, it is often tempting to over-contrast or over-saturate a photo, but with time it becomes easier to recognize when an image is well balanced.

Comparing the original image with the edited version while making changes helps you to quickly realize when a photo begins to look unrealistic. For instance, when you want smooth skin, take it slow and work next to the original image so you can see when the skin starts to look plastic.

Less is often more when it comes to photo-editing. For instance, having a bright smile is engaging but over-whitening teeth can make a photo look fake. You don’t want the focal point of the photo to be glaring white teeth.

Conclusion

Editing photos can be fun but you don’t want to fall victim to over-editing. Too many edits will make your photos look unnatural. Of course, if you’re like Kanahoooo, your brief may be to make someone look completely different and you will have great fun doing it. However, if you want to keep your photos looking natural, make only changes you feel are necessary and leave it at that.

About author

Tiffany Harper is a talented writer from New York, an extremely active woman, and a real leader. She began her career as a journalist and later proceeded as an educational writer and editor. Now she works as an experienced subject matter expert with best writing services, sometimes she works as the content consultant dissertation writing service and thesis writing service, like essay writing service in UK, mostly in technology, business, and marketing area. Please do not hesitate to contact her on Twitter.

How to create a silhouette effect in Photoshop?

Sunset Photoshop

Here comes the awaited tutorial. Many of the people demanded me to write a tutorial on creating a silhouette effect in Photoshop. So, here you go.

This is a short tutorial. I’ll be showing you how to create a silhouette effect in Photoshop. I’ll just be using a selection tool and adjustment layers.

Before we begin, let me show you the before and after photos.

After

Before

Image by adamkontor from Pixabay

Let’s begin.

Step 1 – Select the people

Open the photo in Photoshop.

We’re going to use Select Subject to quickly select the people. If you’re using old Photoshop and don’t have Select Subject then you can use the Quick Selection Tool to select the people.

Go to Select > Subject.

This will roughly select the people. The selection is not at all perfect. See the ocean between their chins, chest, and between her legs. Those areas should not have been selected.

Step 2 – Refine the selection in Photoshop

We’re going to refine the selection to deselect the unwanted areas and select the wanted areas. We’re going to do with the help of the Select and Mask tool.

Go to Select > Select and Mask.

Grab the Refine edge brush from the panel. This will show up once Select and Mask is turned on.

Now, start brushing on the edges. See the GIF below. GIF is of 4 MB in size. Give it some time of load. Also, I have increased the speed to two times.

Once that is done, you’ll see the photo without the background.

Step 3 – Give a nice dark effect to the background

Open the layer panel by going to Window > Layer.

Activate the background layer by clicking on the eye icon.

Go to Layer > New Adjustment Layer > Photo Filter

Click on Preserve Luminosity and drag the slider all the way to the right.

Now, duplicate the photo filter adjustment layer 2 times by pressing Cmd + J / Ctrl + J. In the topmost photo filter layer, turn off the preserve luminosity.

Step 4 – Create a silhouette effect in Photoshop

Time to make the people black.

Go to Layer > New Fill Layer > Solid.

In the next window, choose the black color. Press OK.

In the layer panel, drag the solid color fill layer to the top. Now, hold down Opt / Alt and place the cursor between the Solid Color fill layer and the people layer. The cursor will change to an arrow. Click as soon as the cursor changes. See the below GIF.

And, that’s all. Your work is completed here.

Everything about the Object Selection Tool in Photoshop

object selection tool

Adobe Photoshop 2020 is out. With it, Adobe has launched so many new features and one of them is the brand new Object Selection Tool. Let’s see what we have got in this brand new Object Selection Tool in Photoshop.

Let’s begin the tutorial.

What is the Object Selection Tool in Photoshop?

The Object Selection Tool in Photoshop is a tool to select anything in Photoshop. It can be a face, car, tree, house, or basically anything. As of November 2019, the accuracy of the selection is not that perfect for complex edges like hair, but it works pretty well for sharp edges like a house, car, etc.

Where do I find the Object Selection Tool in Photoshop?

You can find it on the tool panel. It’s present along with the Quick Selection Tool or press Shift + W again and again until it activates.

How to use the Object Selection Tool in Photoshop?

The Object Selection tool in Photoshop is easy to use. Though it’s not as easy to use as the Select Subject, but it gives better results than the Select Subject.

In the below photo, I am going to select the fork.

Step 1 – Select the Object Selection Tool in Photoshop

Either press Shift + W or grab the Object Selection Tool from the tool panel.

Select the rectangle from the option panel. I’ll explain the rest of the features in the option panel later.

Now, draw a rectangle around the fork.

This is the result. You can see that it’s nowhere perfect.

Step 2 – Refine the selection using the Object Selection Tool in Photoshop

It seems that Adobe knows that the result doesn’t give perfect results always. So, it has added one more feature in this tool. You can add or subtract something to or from a selection using the same Object Selection Tool.

I am going to show you how you can do it.

Firstly, change the mode to Lasso.

In the option panel, you’ll see four icons on the left side. These icons come handy now.

If you look at the screenshot below, you’ll see that I have marked the things that we want to add to the selection or subtract from the selection.

Fixing the handle

The handle of the fork needs to be added and the slots between the points need to be subtracted from the selection.

We’ll first add the handle to the selection. Click on the second icon in the option panel. See the below screenshot.

When refining the selection, I found it really hard to use the Object Selection Tool because of its inaccuracy. I needed to use it multiple times and had to spend a lot of time which could easily be saved using the Quick Selection Tool.

So I decided to use the Quick Selection Tool instead.

Fixing the slots

Again make use of the Add to Selection and Subtract from Selection icon to do this.

See the below GIF. Yes, you could do the same work in probably half of the time using the Quick Selection Tool. But, I stuck with the Object Selection Tool because this tutorial is on it. Give some time to Adobe and I know that it’ll optimize this tool.

That’s all, guys.

See you in the next tutorial.

How to Create Simple Image for Social Media

An image speaks a thousand words, right? And with social media becoming more image-based, it is a proven fact that people respond to compelling imagery. There are many tools out there, such as Photoshop which facilitate image-making that is tailored for social media sites.

Posts accompanied by a good image are to be far more engaging than text-only images which is why you should get acquainted with tools that simplify the process of creating images for social media campaigns.

Even Twitter, which was once only text-based, has been pivotal in transforming how we use images on social media. Here are some online tools you can use to create stunning online imagery to keep your audience engaged.

1. Canva

Canva is one of the simplest software to use out there for novice designers. It comes complete with templates and beautiful layouts for social media images. Canva is simpler to use than Photoshop and it is also a great foundation to get to know the basics if you are graduating to Photoshop any time soon.

No project is too big or small for Canva and it is versatile. The only snag with Canva is that photo quality can tend to be compromised and images might not be suited for printing due to a low resolution.

2. BeFunky

BeFunky is an online software similar to Canva that allows you to customize images for different uses. You can also create beautiful collages and it is relatively simpler to use than Canva. It also allows you to add elements to a photo, and make special effects on a photo.

For instance, you can turn an image into a cartoon. Similar to the transform feature in Photoshop. BeFunky is an easy tool to use because it allows the user to create headers and social media images with ready-made templates in the right sizes.

3. Creative Market

As its name implies, Creative Market is a digital resource filled with assets that are assembled by creators from all over the world. The features are an excellent way to become more acquainted with designs for social media graphics and include amazing fonts, stock photos, patterns, graphics, clipart, and mockups.

The creative market is designed to put aside the hard work for you and simplify image making for any social media platform. It offers a wide range of options, meaning that there is a variety for the average user.

4. Adobe Stock

Adobe Stock offers a wide range of assets that you can use in your social media for your products or services. The online service offers a collection of 90 million assets including photographs, drawings, videos, and templates.

With these, you can easily change background with Photoshop to suit your brand and establish unique visibility. As a digital marketer, it is important to acquaint yourself with using tools like this because it is less time-consuming. Your online campaigns are sure to shine using this amazing tool.

5. iStock

iStock presents a beautiful range of royalty-free photography, drawings, and videos that you can employ in your social media campaigns. To find plenty of photos and drawings that look great, yet not so mainstream.

iStock offers less mainstream products, and more artistic ones to suit your needs for your brand. You can also save images for future use, and mark things that you like to create a storyboard.

6. GIPHY

Gifs have become an excellent way to easily create animations, as well as download free animated gifs. This is an exciting way to broaden your audience and amplify your brand voice and engage your social media audience.

These moving images can be humorous or serious, but they can make a huge impact on your audience. However, it is important to use these images wisely to avoid overwhelming your viewer. The GIF is an excellent way to solicit chuckles and brighten up the day for clients who follow you on social media.

7. Infogram

Infogram is an excellent way to visualize information, statistics, and reports and it is an app that exists online. The online software includes charts, graphics, dashboards, and maps and it is ideal for creating images that share information.

Infographics are also a way to show off your knowledge, thus securing confidence in the client that you know what you are doing. It is also an excellent way to display, for example, a dissertation writing service. There are over 35 types of charts to choose from that ease working with data. Infogram has a free package and three options for a paid upgrade.

8. Hootsuite Composer

Hootsuite is one of the most established tools out there for social media managers and digital marketers. It allows you to edit images and schedule posts for different networks. The advantage of using Hootsuite is that you get to manage both your social media and image-making in one place.

The ease of not having to log in to all your accounts to upload content one by one makes it very easy to use and saves time. Hootsuite also offers a library of images you can use and customize. Posting is as simple as setting a time or posting it immediately.

It also recommends sizes and dimensions for certain images. The platform is free to use and comes with a host of features that make digital marketing much simpler.

9. Stencil

Stencil is an ideal image editor for marketers, bloggers and small businesses which is very easy to use and features millions of images, backgrounds, icons, and graphics. It also features thousands of quotes and fonts, as well as hundreds of templates.

Stencil is easy to use and in as little as a minute, you can create amazing images using features such as drag and drop, image editing and font editing. Stencil also allows you preselect the platform the image will be featured on so you can select a pre-sized format.

10. PicMonkey

PicMonkey is an excellent way to completely transform a bland photo into the quality and attractive image. The online app allows you to work with a wide range of features to create an effect you are looking for.

The app features amazing editing features that include color blending, exposures, filters, and more editing features. You can either choose to use a template or create your own image. PicMonkey is a paid-for service, and it costs between $7.99 to $39.99 per month.

Conclusion

As a digital marketer, your brief varies from time to time, and these tools accommodate various projects you are briefed to complete. These tools are amazing, but it is always important to expand on your knowledge, and understand that Photoshop is ultimately the best tool to create and edit breathtaking imagery.

About author

Tiffany Harper is a talented writer from New York, an extremely active woman, and a real leader. She began her career as a journalist and later proceeded as an educational writer and editor. Now she works as an experienced subject matter expert with best writing services, sometimes she works as the content consultant dissertation writing service and thesis writing service, like essay writing service in UK, mostly in technology, business, and marketing area. Please do not hesitate to contact her on Twitter.

List Of Best 7 Apps For iPhone Photography

Not all of us can become professional photographers; neither can we keep providing every picture to one of the pros out there. The era of smartwatches and iPhones has made lives easier for all of us with emerging technologies and handy apps designed for everyday peeps. Similarly, we iPhone lovelies keep thinking of ways pictures get in control without the involvement of any experts.

The crazy vacation photos you captured with your family are most of the time blurred because of the backstories they carry with them. More probably, you can’t bring a DSLR everywhere, especially when you’re not planning to take any snaps.

Photography is the story I fail to put in words.

Carrying an iPhone in hand is always about photography no matter what you like. The hobby gets interesting every day because we have countless apps that can edit pictures for us. Nonetheless, not every app comes up with all the features possible. For this reason, you need to look into these seven iPhone photography apps that can make you a capture pro in no time.

1. Snapseed (Rating 3.8 out of 5)

Snapseed is one of the best recognized online apps that can entertain iPhone users very effectively. Its latest version is the 2.19.3 and supports iOS 12, iPhone XR, XS and XS Max, iPad Pro 11 and 12.9. With the help of swiping gestures, you can effectively add diversified effects and enhancements to photos anytime.

It lets you rotate, crop, and straighten images for iPhones and also makes it worthy for iPhone users with a free download. It also has brushes and healing tools that can add more to its texture filters. A beginner can quickly get familiar with this app and have fun.


2. VSCO (Rating 4.4 out of 5)

It’s properly pronounced ‘Visco’ and is one of the most utilized apps used by iPhone users for editing photos. The latest version of this app is 136.0 that involves the fix to stop crashes. The app is a favorite among pro photographers and is highly-rated among iPhone users. It also comes with the feature of a classical look filter.

Moreover, it’s a free app that has a subscription fee for additional tools and filters. You’ll be enticed to know its subscription can unlock more than 130 filters for you to use anytime you like. It will always let you fine-tune the pictures and effects you’ve added to the photos.

3. Halide Camera (Rating 4.6 out of 5)

Supportive and surprising, the Halide Camera app includes high-tech tools for thoughtful photo capturing. Any user will love to download this must-have app in their sets of latest iPhone models. Appreciably, the app is updated according to trends and has a fast lens switcher in its most recent version 1.15.0 especially designed for the iPhone 11 pro.

It allows you to manually control the white balance, shutter speed, and ISO. You can always review your last few shots quickly with this app and work on live histograms to the peak of excitement. It captures TIFF, HEIC, JPG or RAW for users.

4. ProCam 7 (Rating 4.6 out of 5)

Similar to other advancements and features of photo editing apps, an iPhone user can opt for ProCam 7 with the latest version being 12.1.4. You will be enticed to find out about all the bug fixes and improvements of this app along with its four different photo shutter options like self-timer, anti-shake, screen shutter, and interval.

The app supports seven different shooting mods for adding an excellent touch to your picture and has sixty impossible-to-believe filters. Moreover, the app comes with an attractive feature that adds good background music for you in no time.

5. Enlight Photofox (Rating 4.7 out of 5)

Of all the iPhone apps, this is one of the most artistic. You’ll always find Enlight Photofox to be one of the most recommended iPhone apps of the year  because it has a feature that can turn a picture into a drawing or painting.

Though it’s a paid app, it has the option for photomontages, double-exposure, and tilt-shift. Its best function involves multi-layer creative editing through which you can find any picture in the transparent and blend mode. You can add a doodle onto your image or create impressive graphic designs to your images anytime.

6. Adobe Lightroom (Rating 4.7 out of 5)

Downloading an app with such good ratings, free of cost, has always been an exciting idea. The latest version of this app is 4.4.1, and it has been adding further advancements for iPhone people on every step. It also has an iPad version for iPad users.

With the help of the premium version of this app, you’ll always find exciting features to edit photos. With a single tap, the app allows you to manage magically striking changes to your profile pictures. Its premium version comes with an AI power that harnesses and sharpens people and objects.

7. Instagram (Rating 4.8 out of 5)

Instagram is one of the most utilized apps for photography nowadays. Of course, who doesn’t know about Instagram and use it one way or the anther? A photographer may know all the types of cameras and their use in photography, but anyone will be familiar with the purposes of Instagram along with its benefits for photo editing.

The latest version of this app (117.0) includes a bunch of black & white filters along with a great selection of colorful filters, plus it has sharpening adjustments and high-quality exposure. You will always add the last edit to your picture before uploading it on Instagram. The option of adding boomerang, canvas, collage, and reposting also exists on Instagram.

Conclusion

Using an iPhone is a luxury in itself but handling it is a harder step. You will always find these apps on the app store whenever you plan to edit pictures. Capturing an image is something everyone wishes to do all day; therefore, such apps have always been useful for everyone around the world. As they say,

Photographs are return tickets to moments otherwise gone.

About Shane

Shane Radcliffe is a passionate blogger who writes for the sake of providing information about everything related to the virtual market of today. He works with Couponado, an online coupon website platform, and lets people save time by writing about everything a customer wants. Reading and gaming are his main hobbies.

Reduce puffy eyes or eye bags in Photoshop

Some of us have puffy eyes or eye bags. Some of us grow as we get older and some of us have it since our birth. Today, I am going to show you how you can reduce puffy eyes or eye bags in Photoshop.

You can also remove it but that’d look too much photoshopped. So, it’s better to reduce it.

Here is the after and before photos.

After

Before

The photo was taken from Pixabay.

Let’s begin the tutorial.

Step 1 – Grab the Clone Stamp Tool

The first thing we need to do is to grab the clone stamp tool from the tool panel.

Related: See how to use the Clone Stamp Tool in Photoshop.

Grab the Clone Stamp Tool from the tool panel or keep on pressing Shift + S again and again until it comes.

Step 2 – Reduce puffy eyes or eye bags in Photoshop

The next thing we need to do is to remove the eye bags or puffy eyes.

Create a new layer by going to Layer > New > Layer or by pressing Cmd + Shift + N / Ctrl + Shift + N.

Step 2.1: Define the Source

The Clone Stamp Tool is used to copy pixels from one part of the image and paste them on another part. To use the Clone Stamp Tool, you first need to define the source pixels. This will be pixels that are going to be copied. You can do them by holding down the Opt/Alt key.

Once you hold it down, the cursor will change to a sniper cursor.

I’ll paint the skin from this location on the eye bags.

Step 2.2: Paint the Target

Now that I have selected my source, I am going to paint those pixels onto my target. When you do that, you’ll see a cursor that moves synchronously with your cursor. This cursor denotes the pixels that are being copied.

This GIF is of 7 MB in size. So, give it some time to load.

Simply, do this all over the eye bags.

For the best result, you may need to define your source multiple times as I did in the GIF.

This is how the photo will look.

Step 3: Reduce the opacity

Open the layer panel by pressing F7 or going to Window > Layer.

Reduce the opacity to somewhere around 60%.

This is how the final photo looks.