Did you ever happen to accidentally delete your photos or important data from your computer, laptop, camera, SD cards or any other devices which became a nightmare for you? For me, it happened one time. I lost more than 1500 photos that I shot during a trip.
As you’re reading this article, I am sure that you also want to recover your photos. The best way to recover deleted files without any hassle as now a variety of computer repair and optimization companies offer data recovery services. The sure shot way to recover deleted files is through EaseUS data recovery software.
Some of the companies cost a huge amount of money to recover deleted files and do not provide services worth that money. Due to which people get angry when they don’t get the services up to the mark. EaseUs data recovery wizard is the latest version of the software which is useful to recover deleted files for Mac and Windows.
It was founded in 2004 and has served a lot of customers with its fantastic and impressive services. This recovery wizard can retrieve all the data like old deleted files, storage drives that were formatted or any other issues with your hard drive. It can recover audio as well as video files. Other than these any sort of document, graphics, emails, folders or compressed files.
Anything which you can attach to your macOS or Windows will automatically gain access to the storage device and become a place for retrieving the data. As this is a free software as the name indicates it guides you throughout the process how to safely and completely recover your files from the start. It also has some paid versions which have some more capacity of data retrieval than this one but all function at the same level. Free does not mean that it would have some changes in its function as it has been checked as well.
Step 1 – Download the software
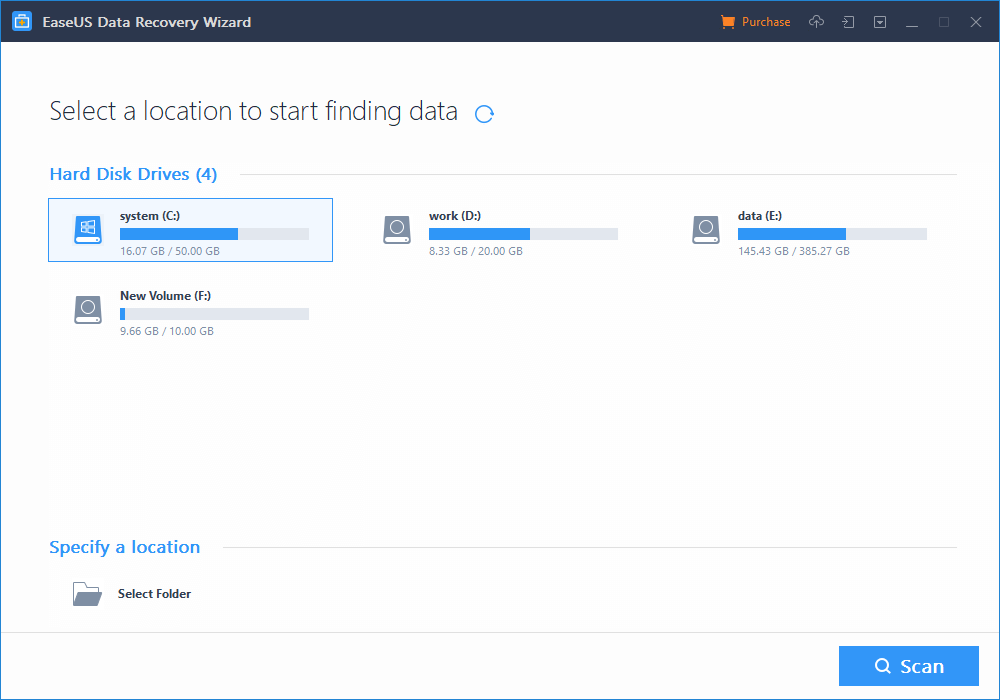
Download the software. when you start downloading, it will initially warn you not to install it on the partition from where you want to recover your files. It helps you all the way and takes you through each and every step to the wizard base interface.
In the first step you will need to pick up the source storage partition from your hard drive and in the second step, you are able to select the chosen files you wanted to recover.
This software does a deep and quick scanning for the lost files. Quick scan as the name indicates help in finding the data very fast and display them in the sort of a list.
Step 2 – Define the drive
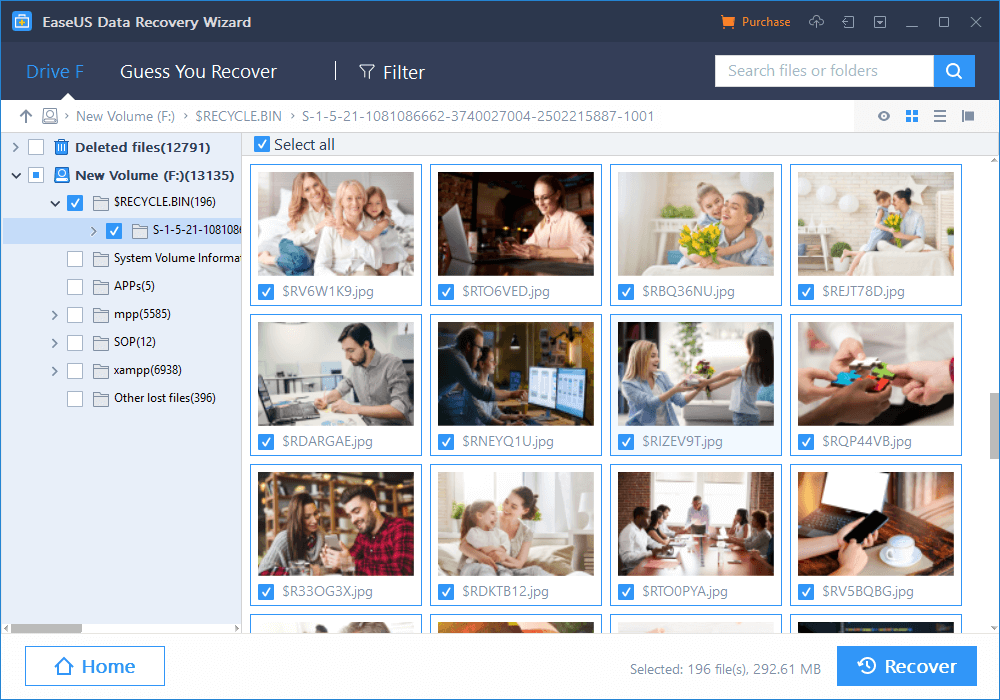
After the deep scan is done, which make it sure that none of the files were left behind and all of them have been hunted down and recovered. After that, this software is able to perform a complete recovery of all the files that were in your storage. It’s also called as hard drive recovery.
Step 3 – Recover the files
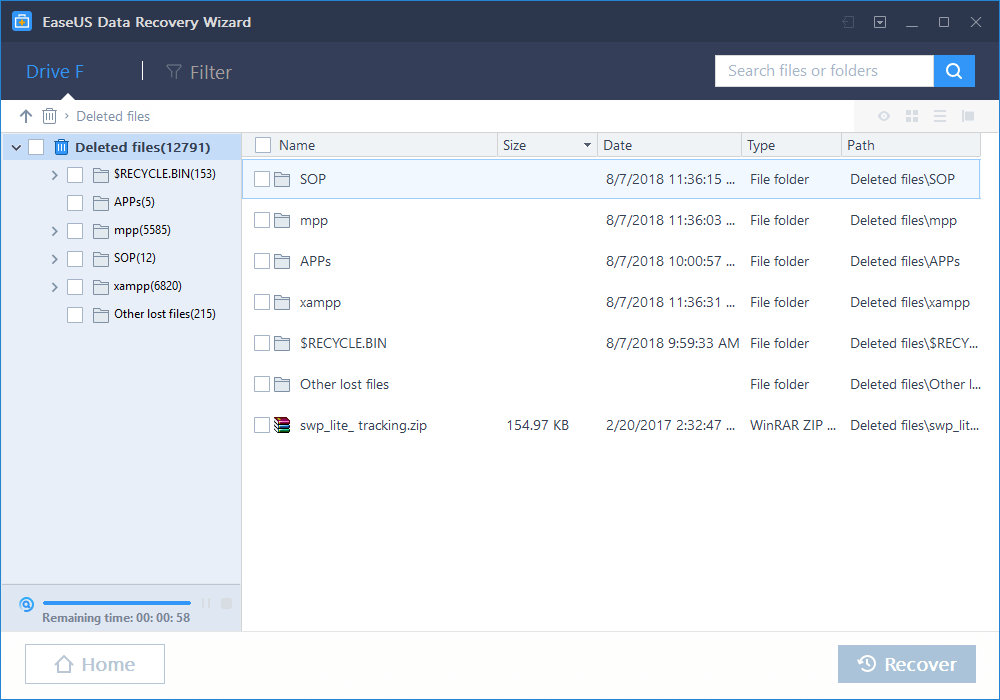
In the end, you are finally happy to see all the documents with their name, date, type, and size. You might preview some of the files by double click. The beauty of this software is that you will also be able to export these files for later reference and retrieve them by clicking on recover.
There was a time when everybody was editing a photo in a cinematic way. They were using Photoshop actions, filters, and some were playing around with adjustment layers to achieve the cinematic effect. With the rise of so many filters, I think that the trend is starting again. So, here I present to you the ultimate guide to cinematic effect in Photoshop.
Let’s understand what we need to have to achieve a cinematic effect. A cinematic effect has to have below things.
An aspect ratio of 16:9
Blacks are brightened and Whites are darkened; basically a faded look
A little tint
We’re going to do the same thing in three different images. The settings of the adjustment layers will change a bit, but everything else will remain the same.
Before we begin, here are few of the before and after photos.
Before
After
Let’s begin the tutorial
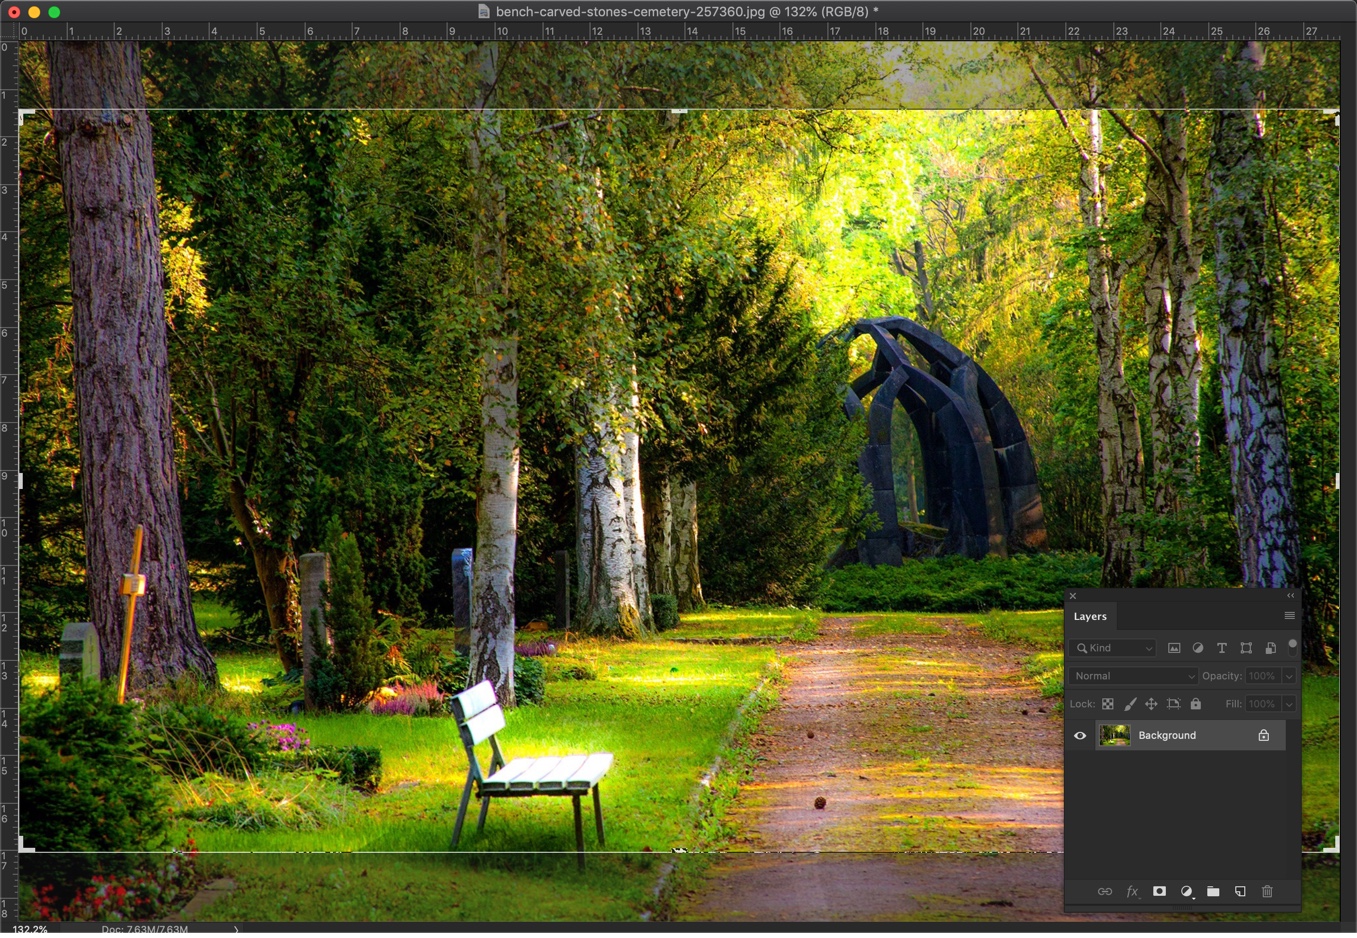
Step 1 – Crop the image to 16:9
Grab the crop tool from the tool panel or press Shift + C again and again until it comes. Choose the 16:9 aspect ratio from the option bar.
You will see 8 handlebars to crop an image. Drag those to keep the area you want to have after cropping.
Press Enter/Return once you have selected the area you want to have.
Step 2 – Add the tint
We are going to add a tint to the photo in this step. The color of tint matters a lot. As a rule of thumb, what is do is that I notice the most dominant color in the photo and add a tint of that color.
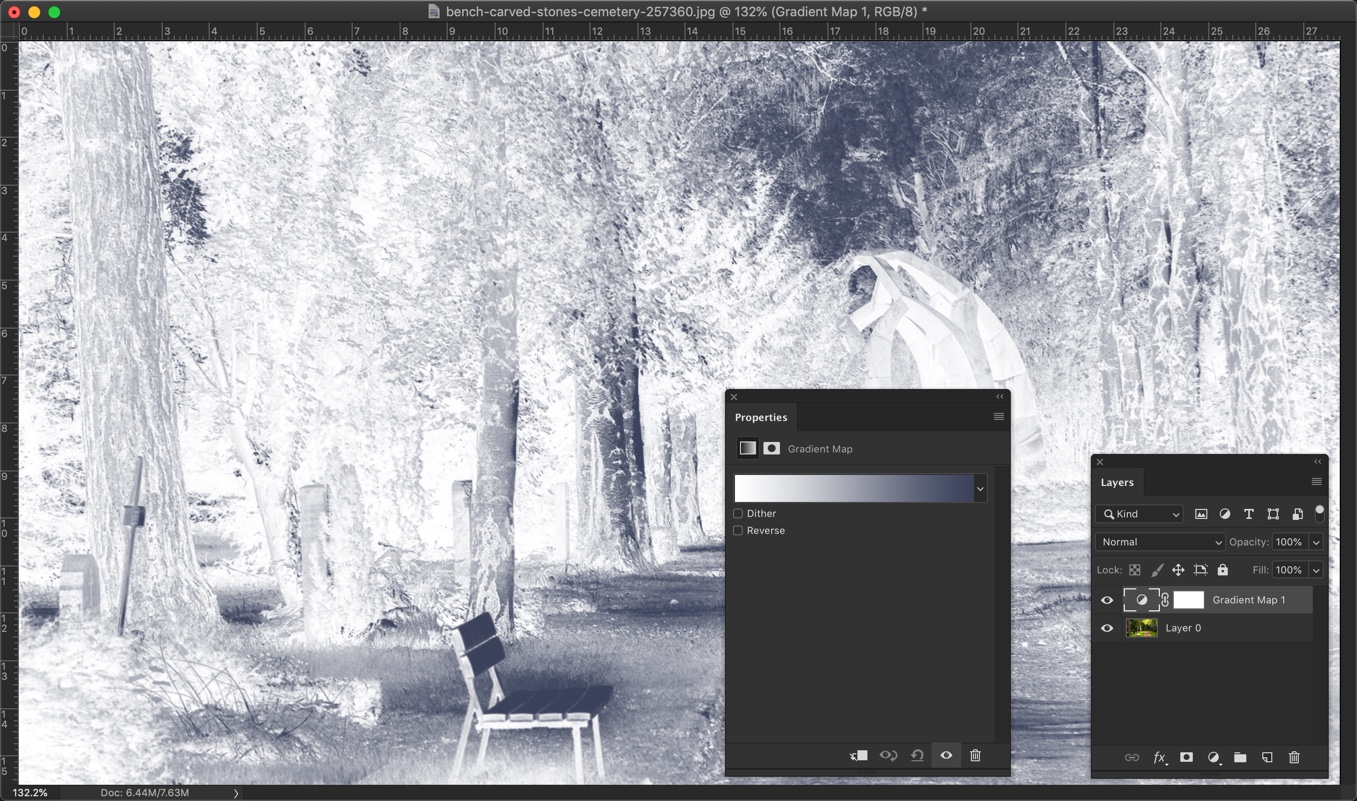
We have Green as the most dominant color in this photo. So, we’re going to give green color tint, and we’re going to use Gradient Map for this.
Go to Layer > New Adjustment Layer > Gradient Map
It will colorize the image based on your foreground and background color. Don’t freak out. We will fix this.
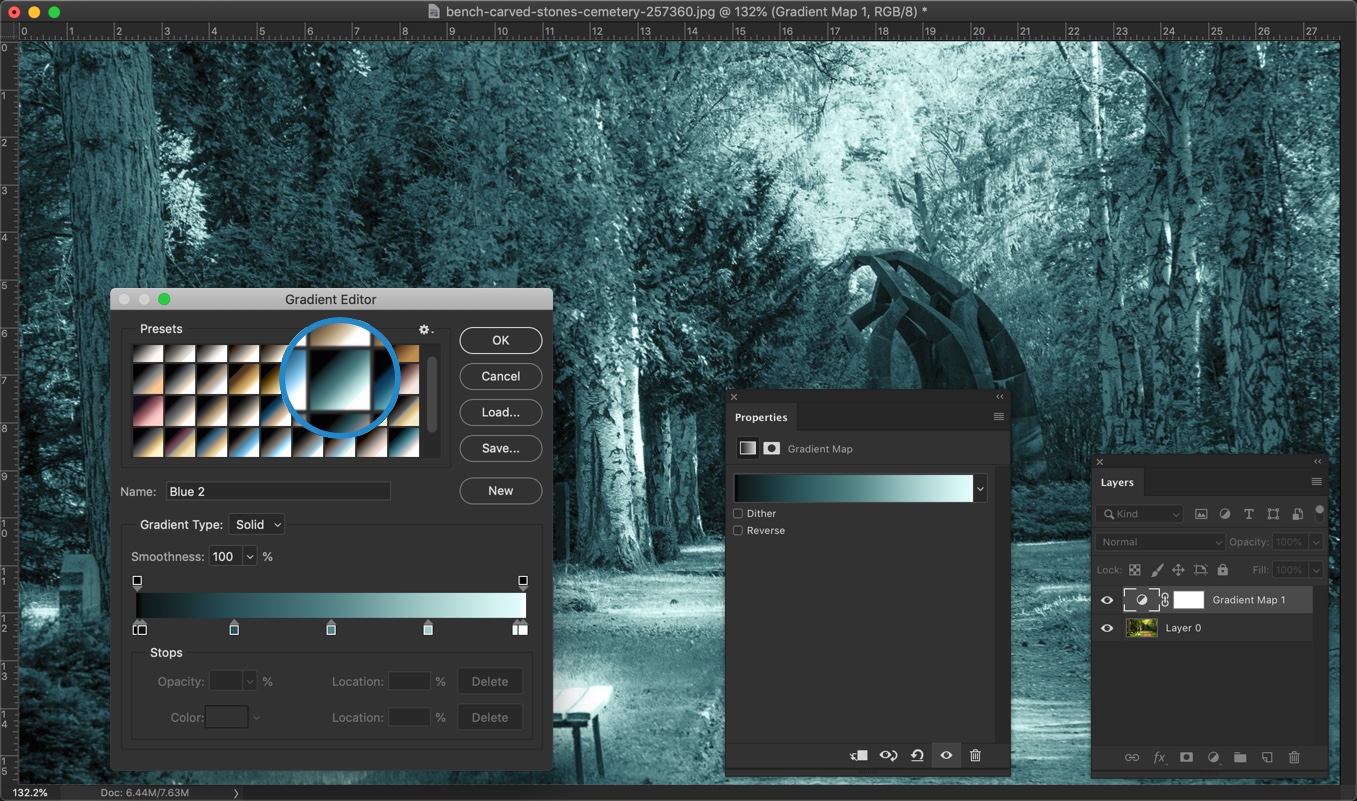
We are going to change the colors. Click anywhere in this box.
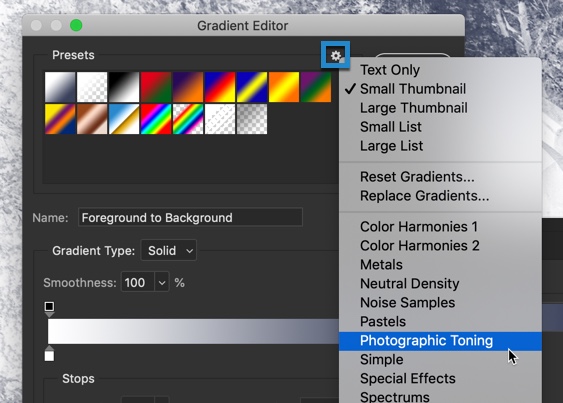
Photoshop has some predefined gradients for photos which are quite awesome. We are going to use those.
Click on the gear icon and choose “Photographic Toning”.
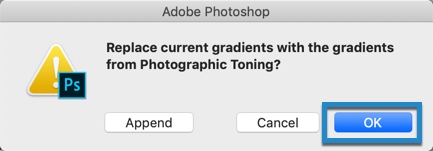
You will be asked whether to append those gradients into the current selection or add those gradients as a new selection. I choose “Add”, but you also choose “Append”.
Now, it’s just a matter of time to find the gradient that suits your image best. My image as Green as the most dominant color. So, I am going to choose something related to green.
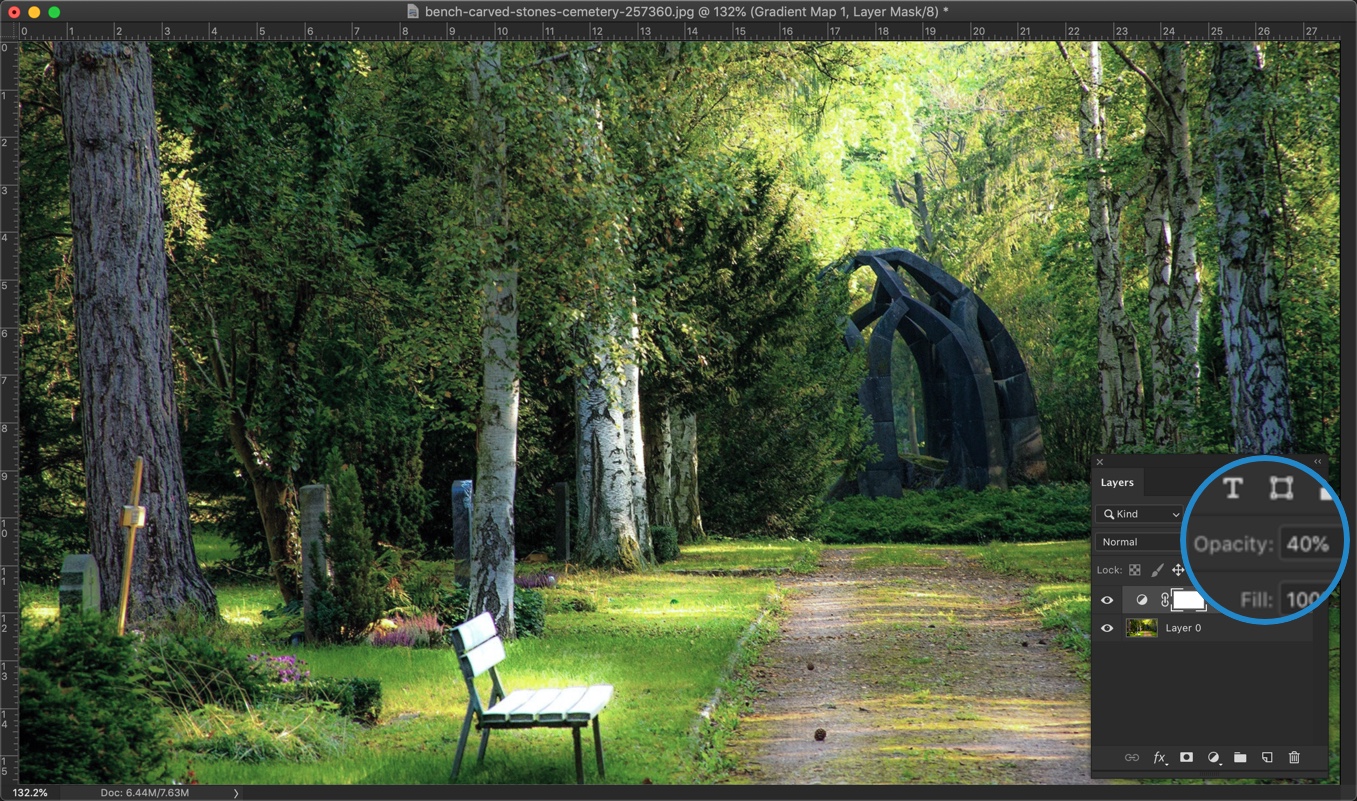
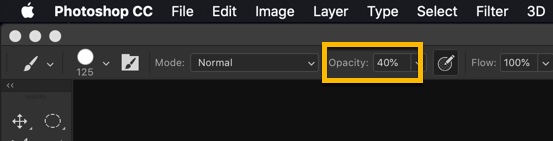
Press OK when you’re done. Reduce the opacity to 40%.
Step 3 – Give the Faded Effect
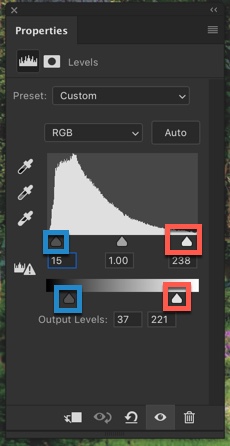
Faded effect means to make black areas brighter and white areas darker. We are going to use the Level adjustment layer for this. Yes, you can decrease the contrast to give faded effect but Level gives more flexibility.
Go to Layer > New Adjustment Layer > Level.
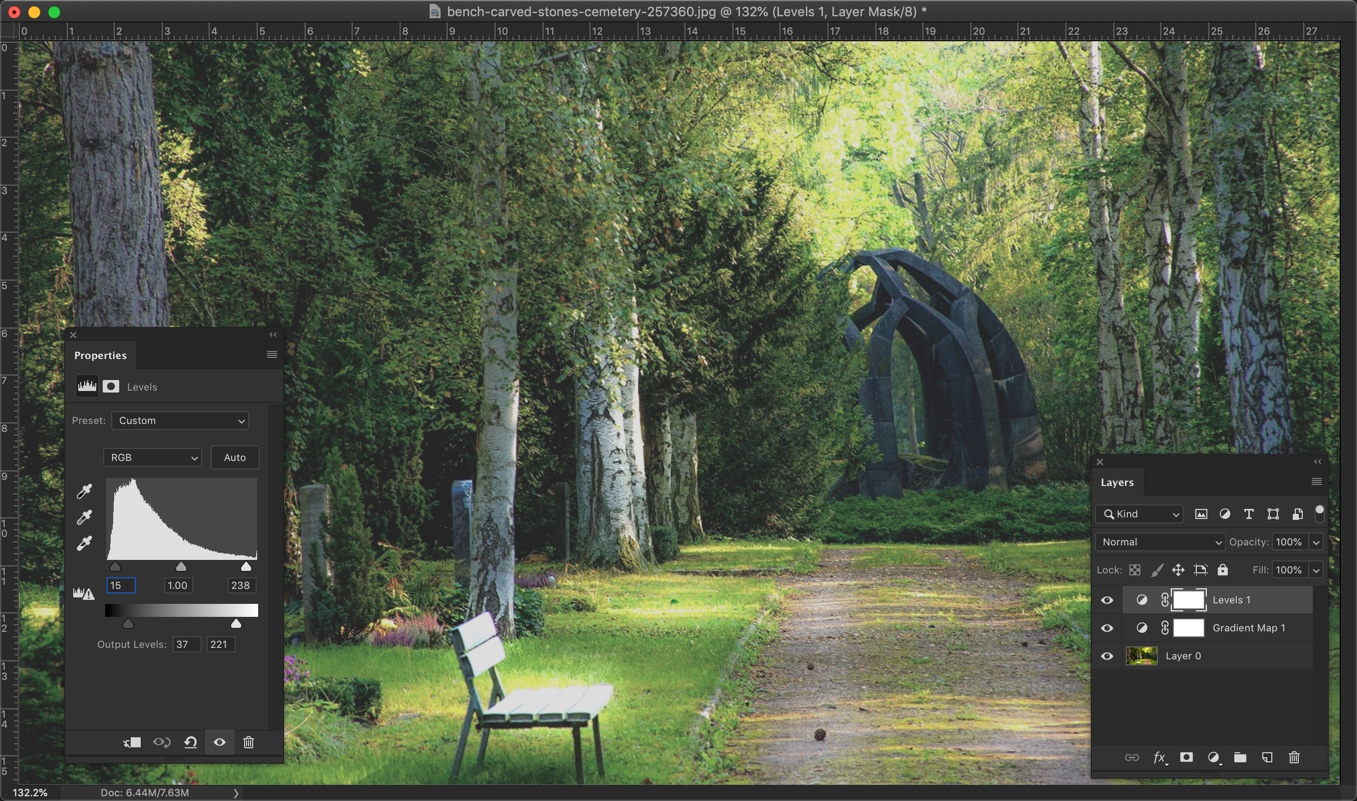
Drag the sliders to the right which are in the blue rectangle. Drag the sliders to the left which are in the red rectangle.
Here is the image.
Step 4 – Add Warmness to give Cinematic Effect in Photoshop
There is one thing missing. And, that is warmness. The photo needs to be a bit warmer.
Let’s add that with Photo filter. Go to Layer > New Adjustment Layer > Photo Filter. Choose “Warming Filter (85)” and increase the Density. Make sure that “Preserve Luminosity” is turned on otherwise the photo will get darker.
And, here you go. This is all. Here’s the final image.
Let’s see few other images also.
I applied the same setting to the below image.
and here is the result.
Here is one more image. The only difference in the below image is that I chose Red dominant color in the gradient map rather than green. This is because the photo has red as the dominant color.
Google trend showed me that many people are looking to invert colors in Photoshop. This is quite simple yet I never wrote a tutorial on it. Shame on me. 😅 So, here’s the tutorial on how to invert colors in Photoshop.
The tutorial is quite simple and I am going to show you three ways to invert colors in Photoshop. Two involves Photoshop menu and panel, and one with the shortcut.
So, here you go.
Way 1 – Using Photoshop Menu Bar to Invert Colors in Photoshop
The very first thing that you need to do is to duplicate the layer which you want to invert. Press Cmd + J / Ctrl + J to duplicate. You know that I am a big fan of non-destructive editing, which means that I am going to edit the image without harming the original image which is present in the “Background” layer.
Now go to Image > Adjustment > Invert.
It will affect the duplicated layer because that layer was active. My original image is completely untouched.
I can easily go back to my original image just by clicking on the eye icon at the left of the layer. I have highlighted that icon in the below screenshot. You can’t see the icon because the layer is hidden and the eye icon is disappeared. But, if the layer is visible, you’ll see the icon there.
Way 2 – Using Layer Panel to Invert Colors in Photoshop
This is the best way to invert colors. You don’t even need to duplicate the background layer in this method.
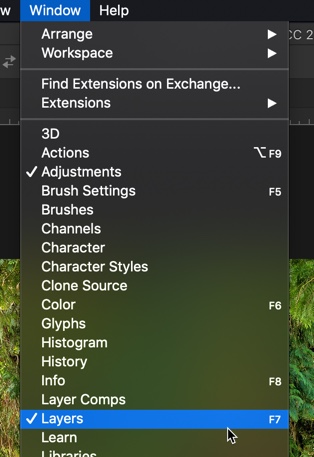
Press F7 to open the layer panel or go to Window > Layers to open layer panel. Click on the “Create New Fill or Adjustment Layer” icon which is fourth from the left. Not choose “Invert”.
This is all. It will create an adjustment layer in the layer panel.
Way 3 – Using Keyboard shortcut to Invert Colors in Photoshop
This is the fastest way to invert colors in Photoshop.
Duplicate the background layer by pressing Cmd + J / Ctrl + J.
Now, press Cmd + I / Ctrl + I to invert the color. It’s this simple and fast
This is all, guys. These are the three ways the best ways to invert colors in Photoshop. Let me know which one you think is best.
Make sure that you make the most of the offer below.
This post is written by Grace Carter. She is a tech editor at Australianhelp.com and Eliteassignmenthelp.com. She teaches interns, works with HRs and improves the quality of services.
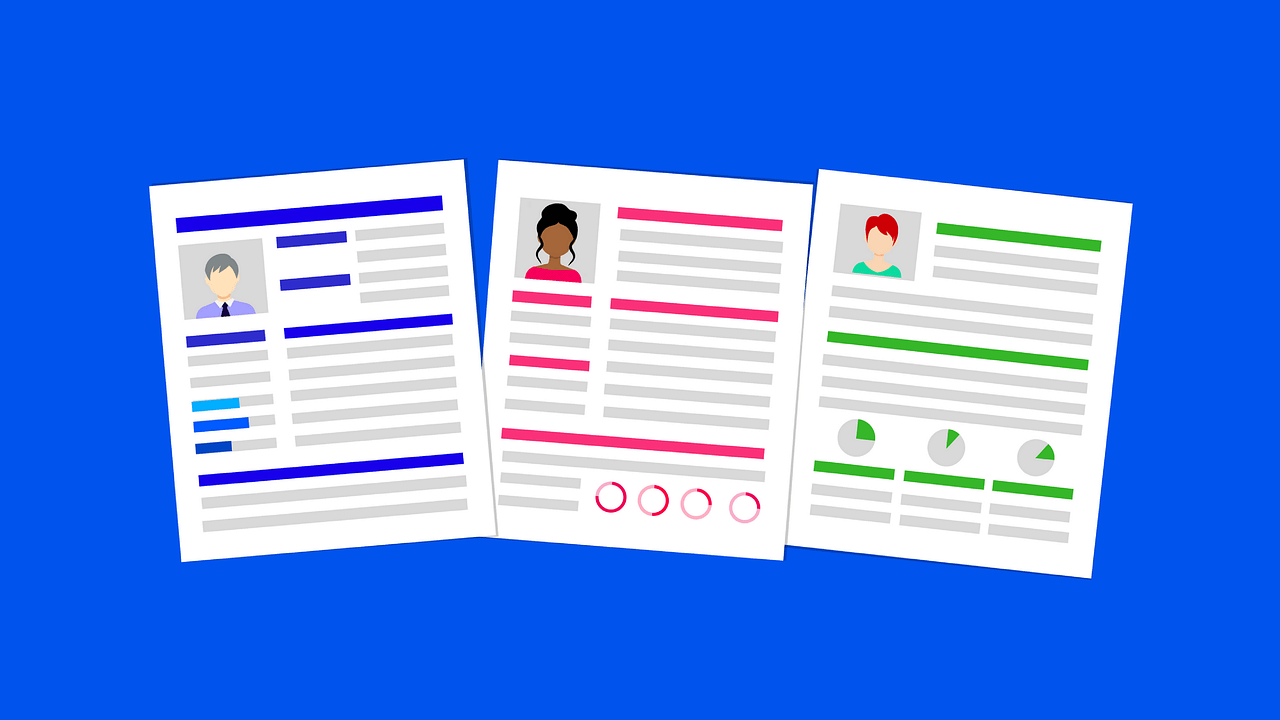
It’s easy to think that you are such an excellent designer that clients will find you. However, there are so many Photoshop designers out there that are just like you. This means that if you want a great job you need to stand out.
And if you want to stand out, you need to write a great Graphic Designer resume.
Here are some tips:
1. You don’t need to be flashy
Many Photoshop designers feel like their resume needs to reflect their skills so they put an emphasis on an interesting design instead of putting an emphasis on good content. While this may attract initial attention, your resume will likely end up in the trash bin because you haven’t put enough effort into making your content shine. Go with something simple and effective.
2. Choose the right format
The format of your resume can make or break your case. It may not seem as important but it definitely is, in a more subtle way. For instance, it affects which sections you place first and in which order you place bullet points within that section.
If you have a lot of experience, go with reverse chronological as it showcases your career first which is likely much more impressive than your education. If you are a newbie, go for the chronological which showcases your education – your strongest point – first.
3. List proper contact info
People often don’t put enough emphasis on this area of their resume. However, when you think about it, this is a really important part. If you mess up your email address or your phone number, you’ll never know if you got hired. It can also say a lot about who you are as a person.
Make it simple – one phone number, one email address (make sure it looks professional), a link to your site and that’s it.
4. Write a good summary
Your summary should be about you and your goals, right?
Not really.
The summary of your resume should be all about what you have to offer to the other party. Write about your experiences but in a way that will allow your recruiters to see how you can help them. Use quantifiable data which is much more eye-catching than your average text. However, don’t make this section longer than five sentences and definitely do not say that your goal is just to get hired. Of course, it is, but you should say something like “My personal goal is to take on a part of the workload at the [name of the company] using my proven skillset”.
Tools That Can Help
How you write your resume is just as important as what is written. Poor grammar and sentence structure could cause doubt in your skill. The best thing you can do to avoid making mistakes is to use some of these tools, previously recommended by resume writers:
Resume Service– Because writing a resume can be so taunting, you can always employ a service like this one to help you with it.
ViaWritingand Simplegrad– Mistakes in grammar are pesky and ruin your reputation. Do something about them with these tools.
Oxessaysand Ukwritings– Proofreading can be a bit time-consuming and you often overlook some of the biggest mistakes. Imagine how that misspelled a niche-specific word is going to look to your recruiter. These tools were recommended by UKWritings review.
StateOfWritingand MyWritingWay– Sometimes, you just need some tips from like-minded people. Look for those on these blogs.
Essayrooand Boomessays– If you are looking for a good editor that can make your resume even better, look for these tools, recommended by Australianreviewer.
“When creating an experience section, you should always pay attention to how relevant it is to the job you are applying to. If you had many assignments, list only the most relevant and similar ones where you excelled. If you are a new Photoshop Designer, you should find a few gigs on job boards or in your local community, do them for cheap and build some experience. It’s really a matter of showcasing your achievements on the job rather than your responsibilities,” says Jenny Green, a resume writer from BigAssignments.com.
Include these as well:
Achievements within your education section – This adds credibility to your degree and makes you more appealing as a candidate.
List your crucial skills – These include those required in the job advertisement.
Add awards and accolades – These make you a lot more compelling g as your skill level is confirmed.
Add a link to your portfolio
Craft The Best Resume You Can
Even though writing a resume can be a bit difficult, you should always do your best. Follow the rules, be honest and remember to include all of the things stated necessary in the job advertisement. Hopefully, these tips help as well.
Last Sunday, I posted the ultimate guide to layer mask in Photoshop and I got emails that there’s no ultimate guide to layers in Photoshop on TrickyPhotoshop. You are partially right. There was no ultimate guide to layers on TrickyPhotshop until now.
Layer panel is something that you will use often in Photoshop. It is the thing that differentiates Photoshop from other cheap photo editing apps. You can do below things with the help of layer panel
Non-destructive editing
Go back to any point in time
Edit a photo with multiple revisions
What can you expect from this tutorial?
I will be showing you how does a layer panel look, what it is, how does it work, all the buttons that you get in a layer panel, its features, and most used shortcuts for layer panel to make photos for your business or personal use to create a better look.
I am going to explain it with an analogy. Think of two identical paintings. One painting is placed on another. So, the final result is a stack of two identical paintings. That is what layers in Photoshop is. It’s a stack of images placed over one another. The only difference between the analogy and the layers is that all layers don’t have to be identical.
In a nutshell, Layers are simply a stack of images placed over one another
If you brushed on the upper painting with white color, the lower painting will stay intact. Also, if a person is seeing the painting from the top, he will not see any change in the lower painting as it is covered by the upper painting. The same way layers also work.
Let’s say that you have two layers and you edit the upper layer. The final image you’ll see is what’s being edited in the upper layer. There are ways to manipulate this but I’ll come to this topic in another tutorial.
2. What is a Layer Panel in Photoshop?
Layer panel is the window where you’ll see all the layers. The highlighted part written with “Background” is a layer.
This is how a layer panel looks in Photoshop. I’ll explain everything in this panel shortly.
3. Where is layer panel located in Photoshop?
If you’re using Photoshop for the first time, it should be at the bottom right.
If by any reason it does not, you can open it by going to Windows > Layer. You can also press F7 as a keyboard shortcut.
4. Anatomy of a layer panel in Photoshop.
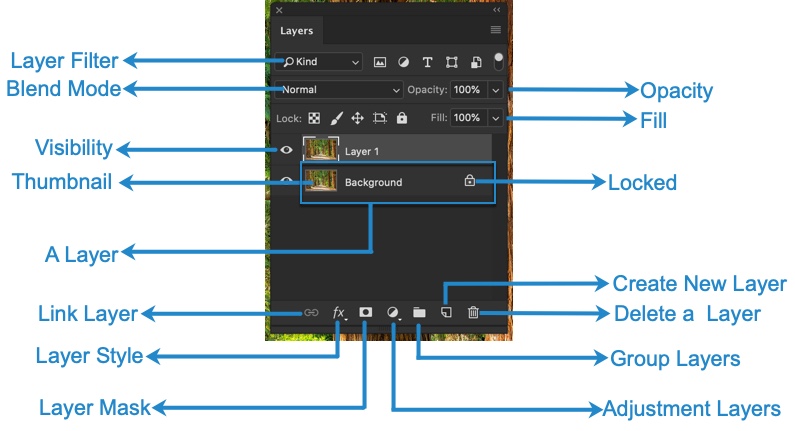
Save below image. It is the most important image if you want to understand the layer panel. Here I have explained all buttons in a layer panel.
I am going to explain each one to you one by one. Let’s start with Layer Filter and go anti-clockwise.
Layer Filter – You will use it once you become an advanced user. There are so many types of layers like a normal layer, adjustment layers, smart object, etc. You can filter the similar types of layers via this.
Blend Mode – This is used to create special effects. Blend mode is basically the behavior of pixels that is based on the behavior of the pixels presents in the below layer. This is a bit complex topic. If you want to learn more, I have already written a complete guide on Blend Modes in Photoshop.
Visibility – You can show or hide a layer by clicking on this. It looks like an eye icon.
Thumbnail – This is the tiny view of the layer. It will preview how your layer looks
A layer – The entire thing that is surrounded by the blue rectangle is a layer.
Link Layer – It will help you to connect/link two layers. Two linked layers move together when you use the Move tool to move a layer
Layer Style – This is where you get options ta add fancy styles like a shadow, outer glow, etc.
Layer Mask – It adds layer mask. The layer mask controls the transparency of a layer.
Adjustment Layers – Here you can do basic adjustments like Brightness, contrast, saturation, photo filter, color balance, etc.
Group Layers – This comes into handy when you have so many layers. You can group multiple layers together so that your layer panel doesn’t look cluttered.
Delete Layer – This allows you to delete a layer. Many a time, you’ll be using the Delete/Backspace key to delete a layer rather than this one.
Create a New Layer – You can create a new layer here. Alternatively, you can use keyboard shortcut Cmd + Shift + N/Ctrl + Shift + N.
Locked – This allow a layer to be protected from moving.
Fill – It adjusts the amount of opacity of the pixels only. Any layer styles are unaffected and remain 100% opaque.
Opacity – It adjusts the amount of opacity. Layer styles are also affected by this.
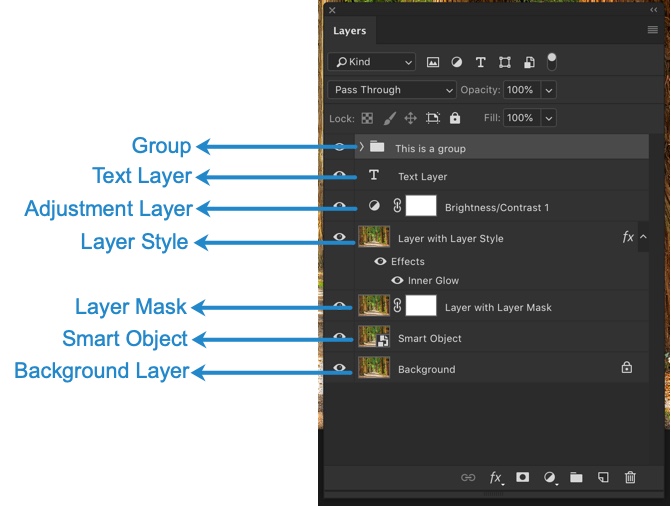
5. Major types of layers in a layer panel
I will explain each layer one by one. Let’s start from the top.
Layer Group – You can group multiple layers inside a folder. Photoshop calls it a group. The icon of a group is a folder. To group multiple layers, hold down Cmd/Ctrl and keep on clicking the layers you want to group. Now, press Cmd + G/Ctrl + G.
Text Layer – This layers can contain only texts. You can change the font, size, styling of the text present in this layer.
Adjustment Layer – This is a special type of layer where you can edit the photo like changing its brightness, contrast, saturation, color, etc. non-destructively (means you can undo or change it at any point of time). Go to Layer > New Adjustment Layer to have a look at the adjustment layers.
Layer Style – Add special effects with this type of layer. You can add inner glow, shadow, bevel, and so many things with this type of layer style. In the above photo, I have added Inner Glow and the same I can see as written. Go to Layer > Layer Style to have a look at the layer styles.
Layer Mask – This allows you to set the transparency of a layer. Suppose, there are two layers in the layer panel and you brushed the left half of the image in the layer mask with the black color. Then the left half of the image in that layer will become transparent and you can see what’s present in the layer beneath it.
Smart Object – A special type of layer that is actually a container that can hold; multiple (or 1) layers, vectors for illustrator, raw files, video, 3D or many other types of objects.
Background Layer – When you open an image, the image will be present in the background layer. There’s a lock sign at the right of the layer. This means that the layer is locked and you cannot move the image in this layer. Click on the lock to unlock it.
6. Shortcuts in layer panel in Photoshop
To select multiple layer, hold down Cmd/Ctrl and then click on the layers.
To turn the visibility on/off of a layer, click on the eye icon present at the left side of the layer.
To copy or duplicate a layer, press Cmd/Ctrl + J.
To move a selection to a new layer, press Cmd/Ctrl + Shift + J.
To move all selected layers to a group, select the layers and then press Cmd/Ctrl + G.
To merge all the layers into a new layer, press Cmd + Opt + Shift + E/Ctrl + Alt +Shift + E.
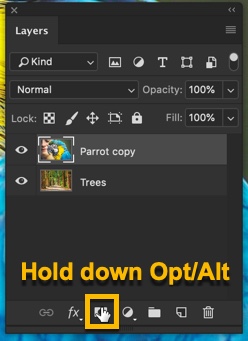
To add an inverted mask (everything will be hidden), hold Option/Alt while adding a mask.
You can drag elements from the layers panel into other documents
To clip a content, hold down Option/Alt and click in the layer panel between two layers.
To cycle through all the blending modes, press Shift + “+”. Press Shift + “-” to cycle in reverse.
This is all for today. Have a look at The Ultimate Guide series for more exciting tutorials.
Make sure that the make the most out of the offer below.
TrickyPhotoshop is for beginners and intermediate Photoshop users, and layer mask is one of the most basic things in Photoshop and all users need to know. I wonder why I never wrote an ultimate guide on the layer mask in photoshop ever since I founded TrickyPhotoshop on 23rd July 2012. Shame on me!
So, to make everything up, I am writing the ultimate guide to layer mask in Photoshop. I am going to tell you all the things that you can do with layer masks. Here is the table of content
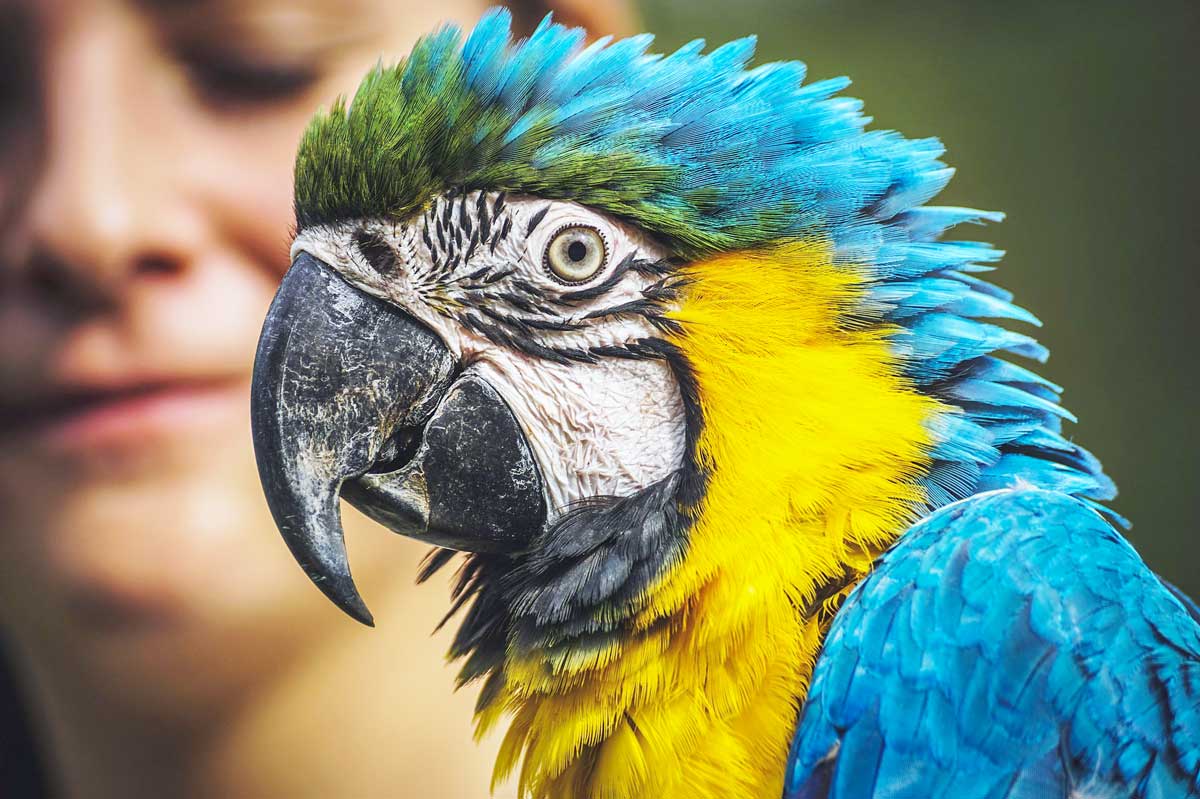
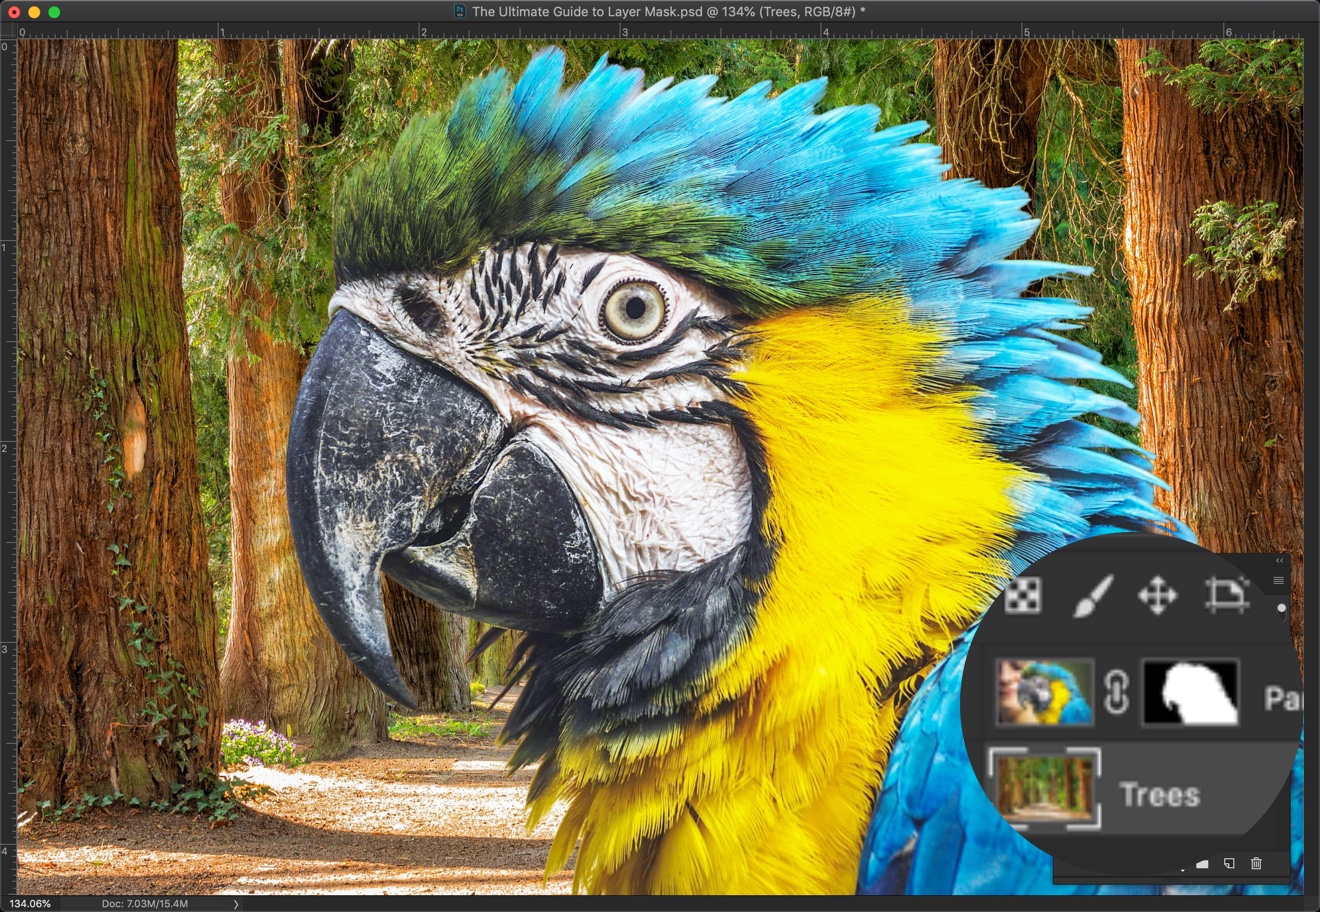
Before I begin with the very first section, I want to show you an image where I hide the original background with the help of Quick Selection tool, Select and Mask, and Layer mask.
After
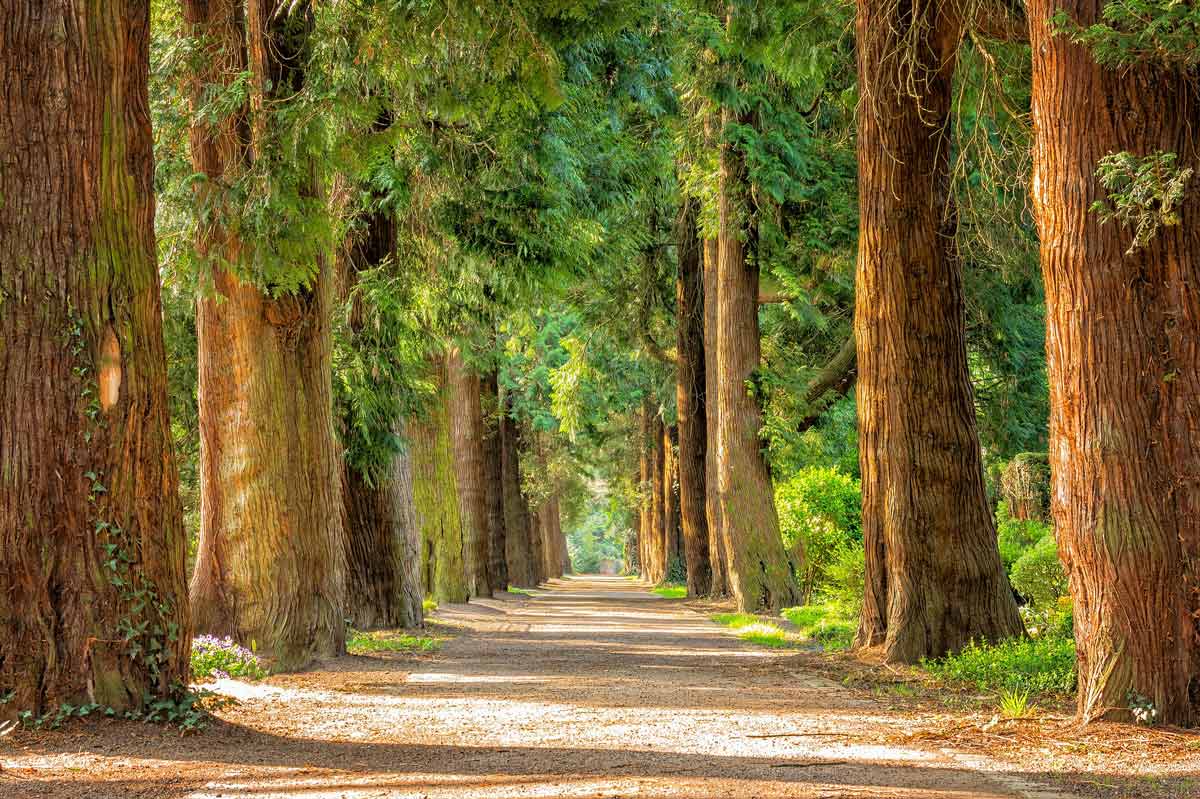
Initial
1. What is Layer Mask in Photoshop?
The layer mask controls the transparency of a layer.
It is only in shades of gray. 100% black means that the area is completely transparent. 0% Black (100% white) means that the area is completely opaque. Any value of gray between 0 – 100% black means the area is translucent. I’ll explain this thing later when I am going to show you how to use a layer mask.
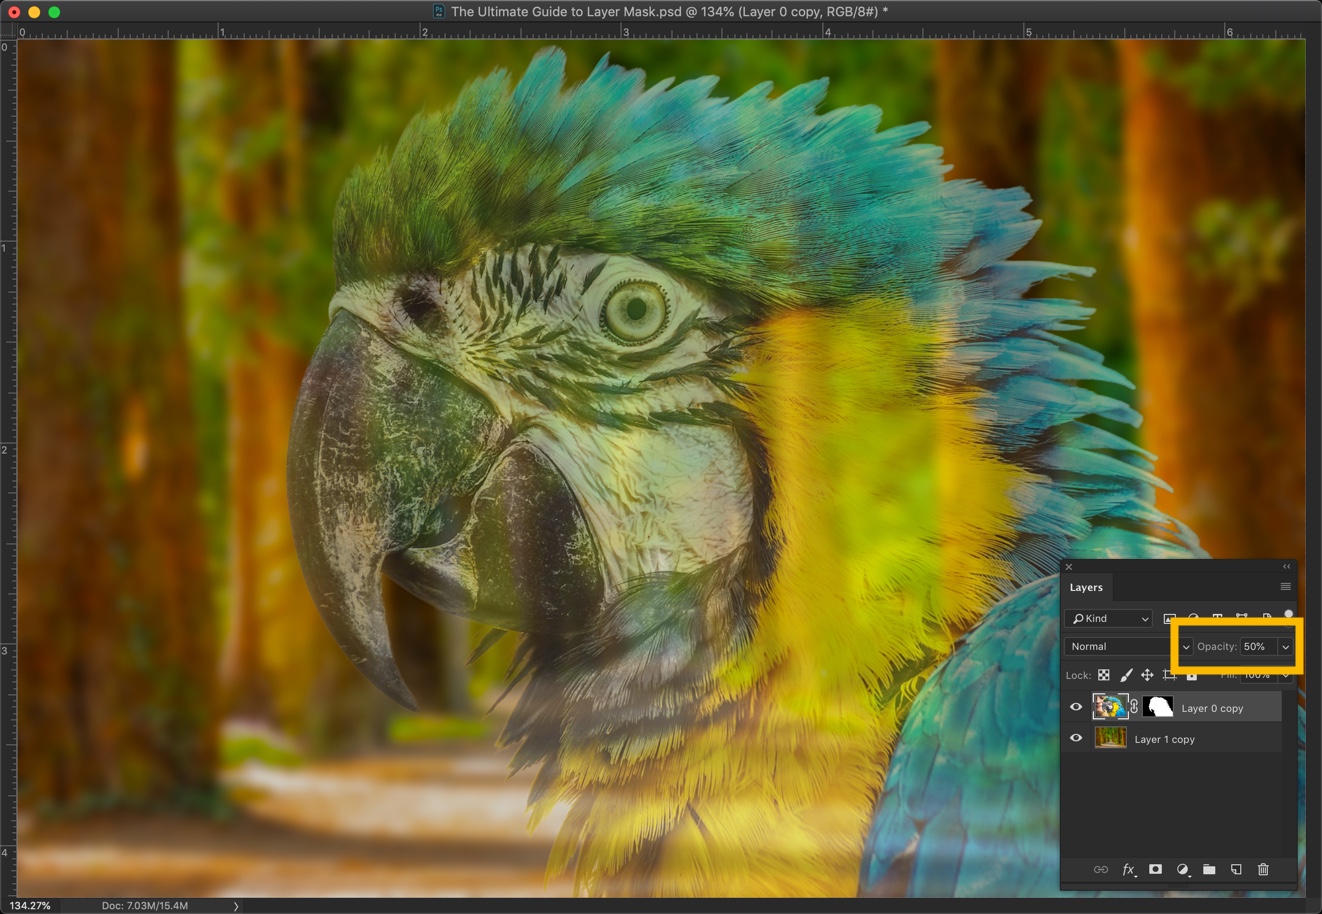
2. How is a layer mask different from the opacity slider?
Opacity slider reduces the opacity of the entire layer. There’s no way you can isolate the area of which you want to reduce the opacity.
Let’s say I want to reduce the opacity of the parrot’s beak to 50%.
Here’s an example. I reduced the opacity to 50% and the entire image of parrot is now translucent. This is not what I intended to do.
Now, I want to show you the result that I did with the layer mask. I’ll show you how I did it later.
Check the beak. Only it’s 50% opaque. Rest of the photo is 100% opaque. I did it with the help of layer mask.
3. Minimum requirements of a layer mask.
If you go back to the original definition of layer mask that I wrote in section 1 which is that it controls the opacity of a layer.
So, a layer mask has to have a layer to work. Without a layer, layer mask will not have anything to the control the opacity of.
4. Where to find layer mask?
The layer mask is present at two locations. One is in the layer panel and another on the menu.
To use it, you need to make sure that the layer is unlocked first in the layer panel. Press F7 is you cannot see the layer panel.
If you see a lock icon next to a layer, it means that the layer is locked and you cannot do anything on this layer unless you unlock it.
Click on the lock icon to unlock it.
Approach 1 for adding a layer mask
Go to Layer > Layer Mask > Reveal All in the menu to add a layer mask.
Approach 2 for adding a layer mask
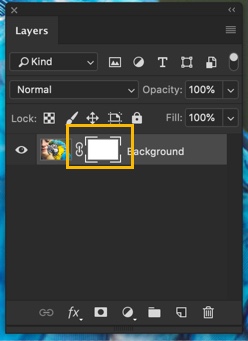
Open layer panel by pressing F7. Click on the icon which is enclosed with the yellow color to add a layer mask.
Once layer mask is added, you will see a rectangular box next to the layer.
5. How to use a layer mask in Photoshop?
The layer mask controls the opacity of a layer.
By now, you know that whenever you add a layer mask, you would see a white rectangular box next to the layer.
Now, let’s understand how to use a layer mask in Photoshop.
Whenever I brush the layer mask with black color, it will hide that part of the layer. Whenever I brush the layer mask with 40% black (a shade of gray) color, it reduces the transparency of that part by 40%. And, whenever I brush the layer with 100% white, it will make that part completely opaque.
Having some difficulty to digest? Read on…
5.1. How to Hide using layer mask?
First of all, I am going to select Black as my foreground color.
I’ll brush the layer mask with the black color.
To make things easier for you to understand, I have already copied a layer below the parrot layer. This is the image that I am putting just below the parrot layer.
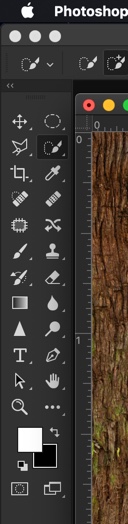
I am going to grab the Brush tool from the tool panel.
Now, I am going to brush the layer with the black color.
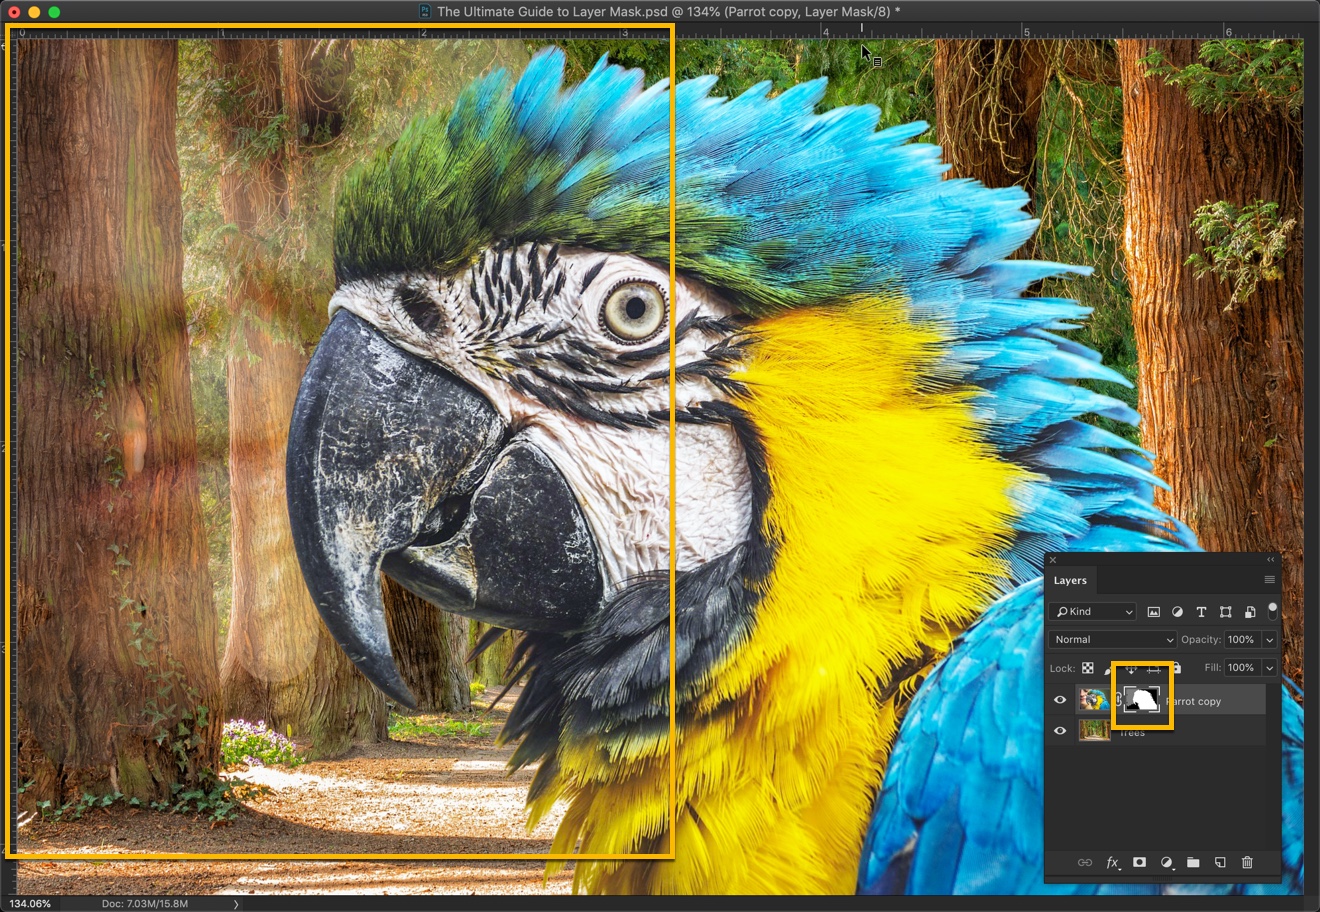
I have brushed randomly and see what happened. I brushed randomly and that part is now hidden. You can the trees from the layer that is present in the below layer.
If you see layer panel, you will also see some black marks in the layer mask. That black mark means that that area is not hidden by the layer mask.
I’ll give a few more examples.
This time I brushed on the right side with the black color. Did you notice what happened? The part where I brushed is now hidden and I can see what’s present in the layer just below to it.
This time I am going to brush on the entire background. Let’s see what happens.
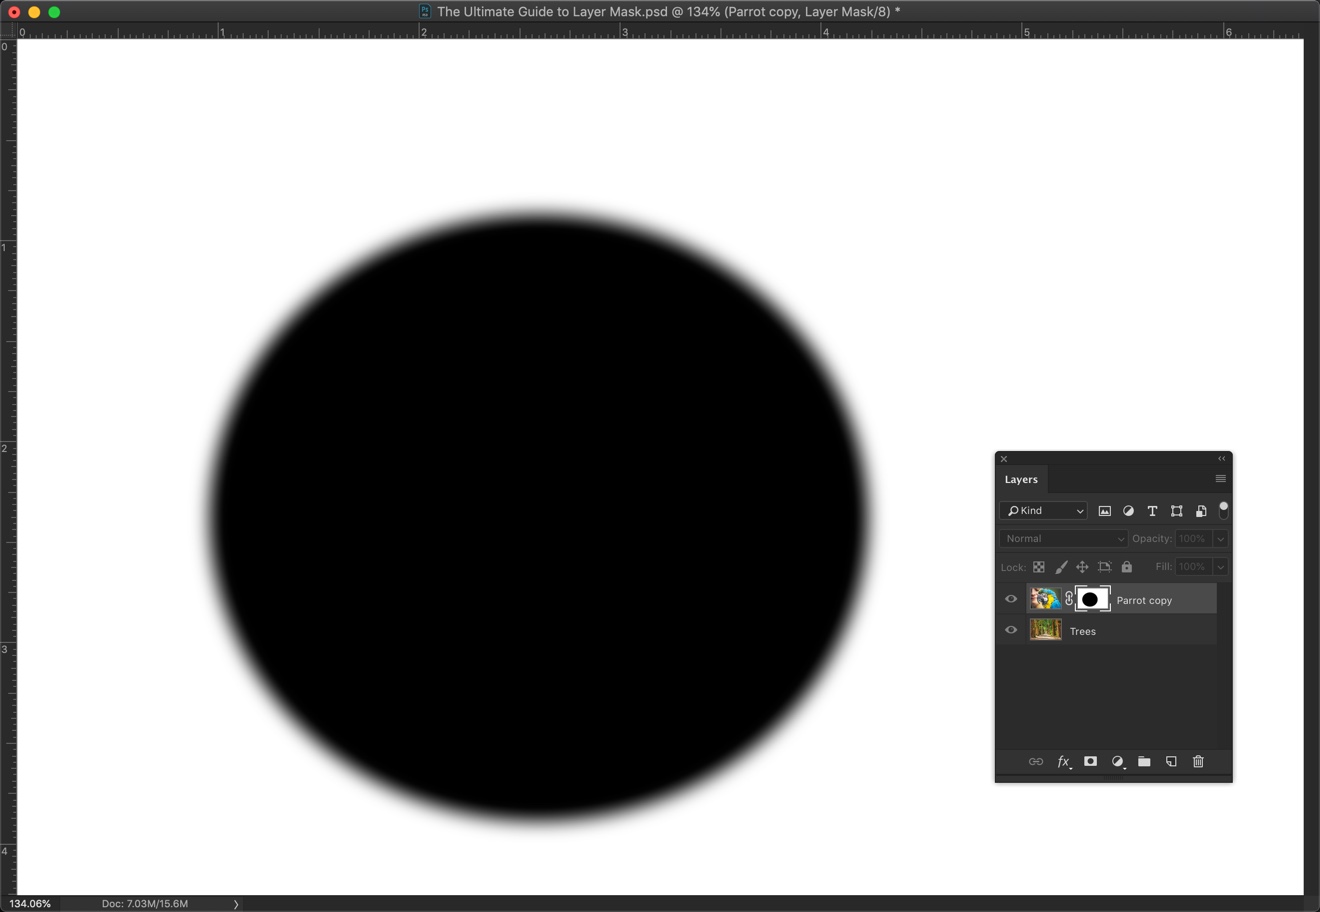
My entire background is now hidden. You can check my layer mask (I magnified it), you will see that the background is of black color and the parrot is of white color.
In a layer mask, Black means that part is hidden and white means that part is visible. So, you can now easily understand that the background is painted with black color and that’s why it’s hidden. Parrot is with a white color that’s why it’s visible.
5.2. How to Reveal using layer mask?
Now, suppose I want to bring back my background. I will simply brush that part with white color.
Time to choose white color as my foreground color.
I am going to paint the left side of the image with the white color. It will make that part visible again.
See below. I have brushed the left side with the white color and I can see the background again. If you see my layer mask, you can also see that the corresponding part is in white color.
You see that how easily I brought the background back? I just brushed it with white color and it’s back.
So, working with layer mask makes your editing non-destructive. It means that you can go back at any point of time without worrying about what would happen to the rest of your image.
Now, what should I do to make the background partially visible?
I can simply reduce the opacity of the brush. In the toolbar of the brush tool, I am going to reduce the opacity to 40%.
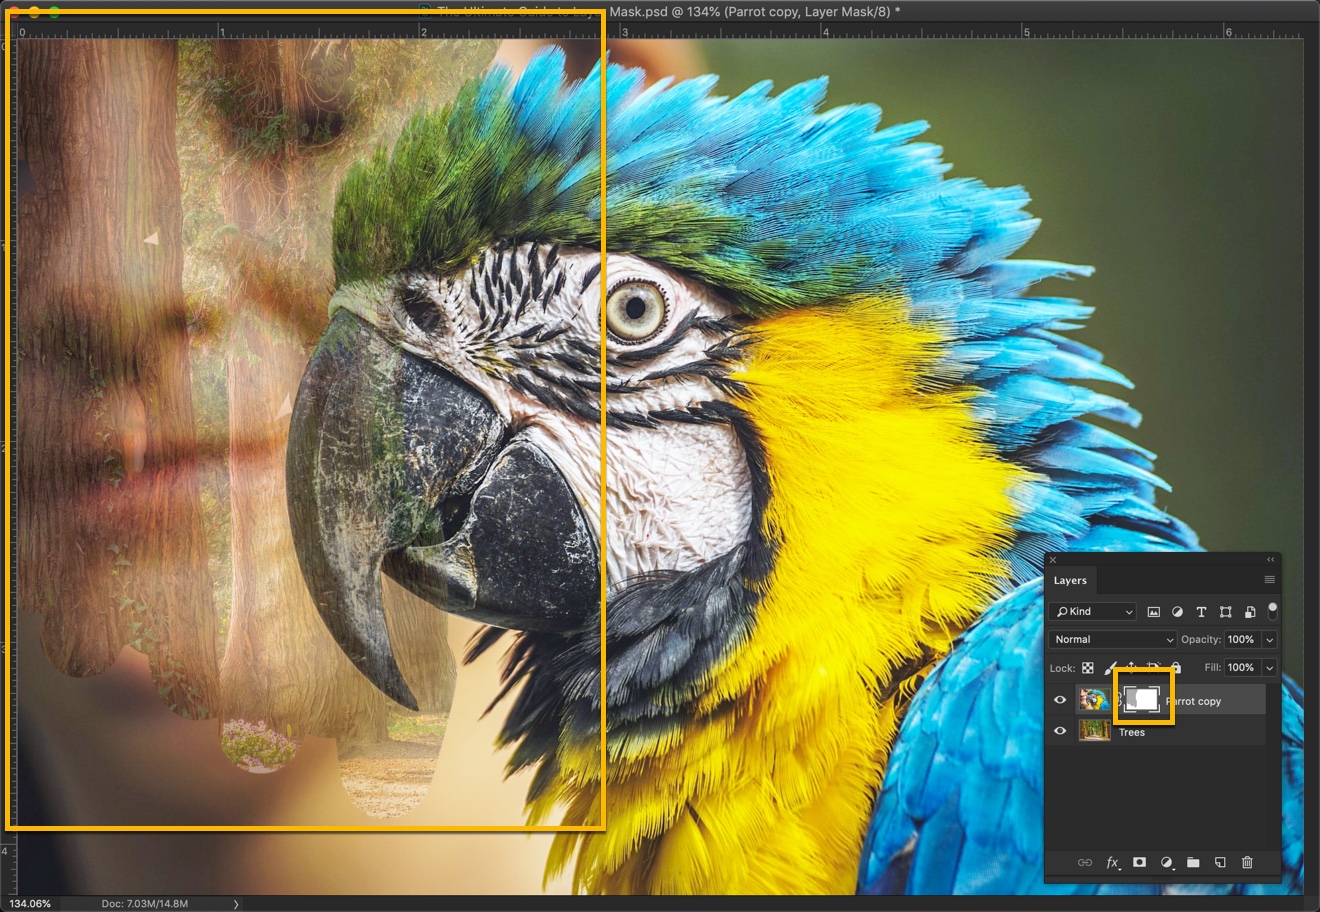
Here I go. I brushed the left side of the image with 40% of the white color. It means that the area is now 40% visible. You can also see that you can see a partially visible face. In the layer panel, you’ll see that area with a gray color.
And yes, this also works the other way round. You can brush with the black color with 40% opacity. It will hide that layer by 40%.
This is how you use a layer mask.
6. Why should you choose layer mask instead of the Eraser Tool?
Eraser tool erases destructively. You cannot go back in time except using History window, but that is so not recommended.
Let’s say that you erased a part of the image and then you made 13 other steps like toned the brightness, fixed the color, corrected the white balance. Now, you realize that you want to bring back what’s erased.
The only way to do it is to use History window (Windows > History) and go back to that step. That’s good. But the problem is the 13 steps that you did after erasing will also be undone. You need to perform those 13 steps again.
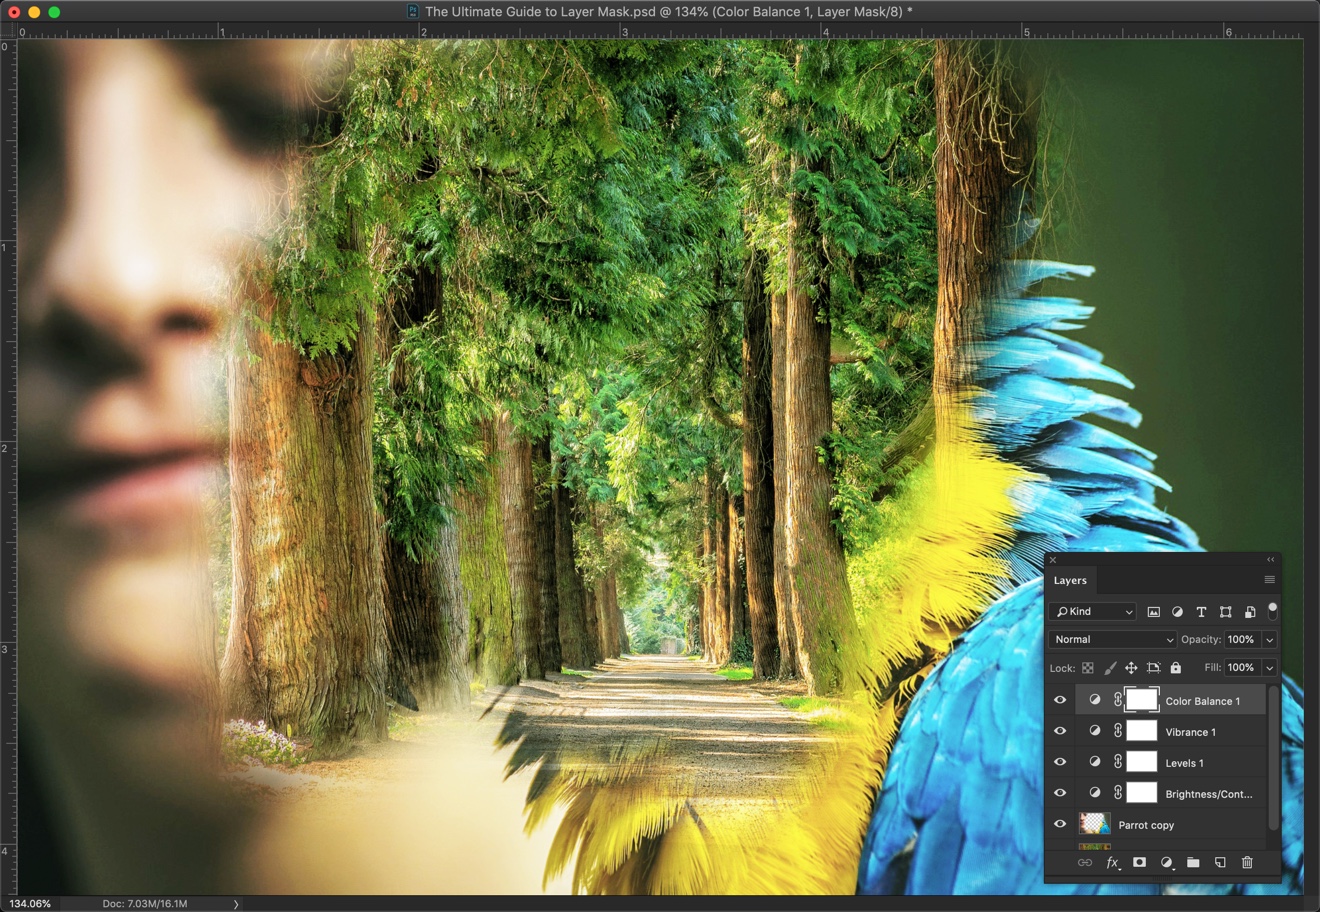
For example, let’s say that I erased some part of the image with the Eraser tool.
Now, I did several other things like adjusting the brightness, contrast, vibrance, etc.
Now, I realized that I made some mistakes while erasing and I need to bring some part of the image back.
To fix this, the only way is to go to the History panel (Windows > History) and click on the step just before when I used the Eraser tool.
And yes, I have my image back. But you know what’s the downside? Whatever steps that I did after erasing (marked with yellow rectangle) are also gone. I need to manually redo those steps again. Things would have become even more complicated if I had performed 100+ steps after using the Eraser tool.
Layer mask fixes this problem. It edits your image non-destructively. It means that you can go back in time at any point of time without worrying about other things.
If you have accidentally hide something by brushing it with the black color, you can unhide it by brushing the same area with the white color.
This is why I always use Layer Mask to hide something.
7. Shortcuts for and in the layer mask
There are few shortcuts for layer mask that will make your life easier.
A. A Layer Mask that will hide the entire layer by default.
Hold down Opt/Alt and click on the layer mask. It will hide the entire layer once it’s created.
B. Disable the Layer Mask
Hold down Shift and click on the layer mask. It will disable it.
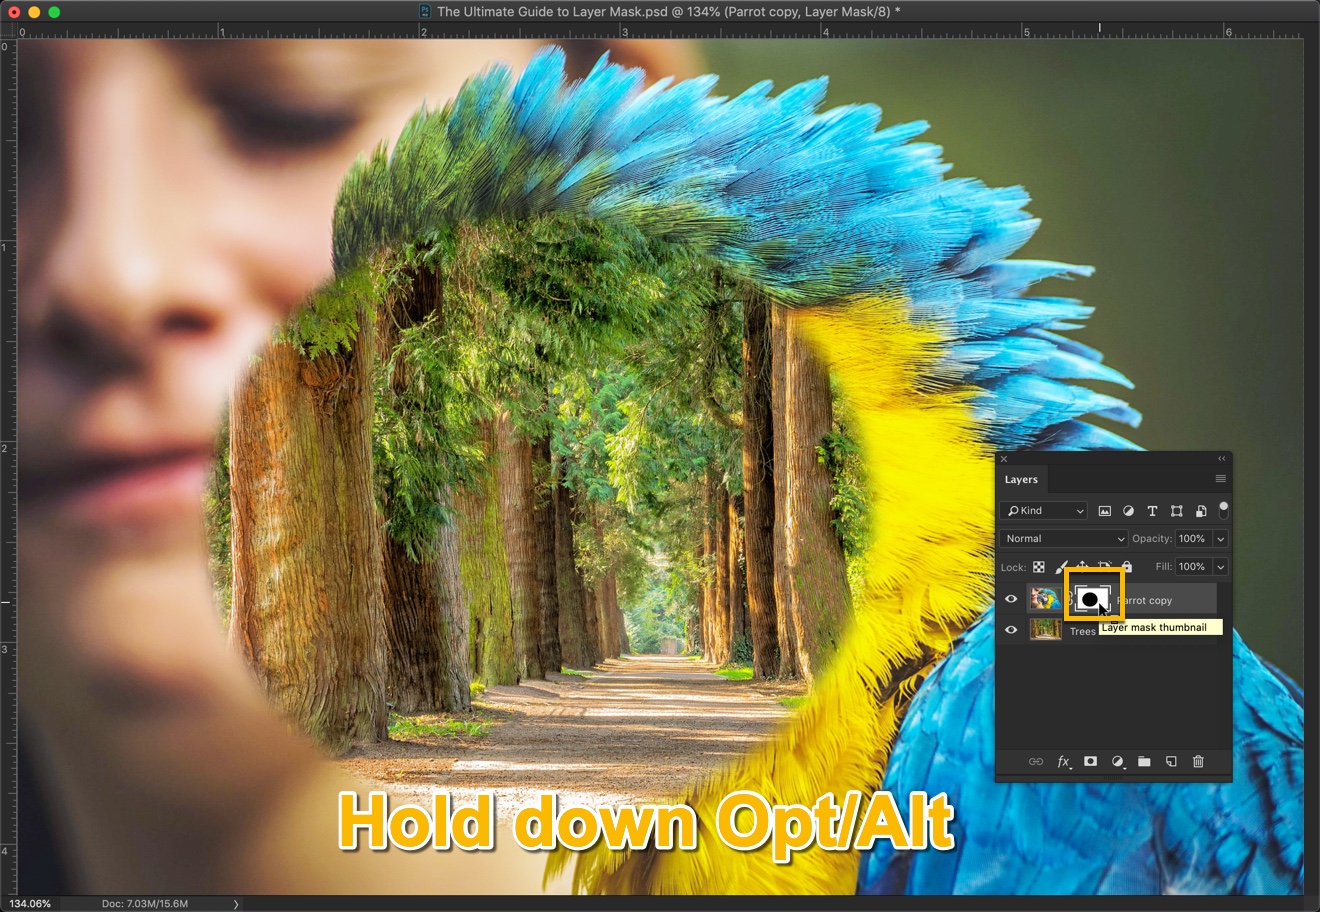
C. To Actually See the Layer mask
You can actually see how it looks like. Hold down Opt/Alt and click on the layer mask.
Your image will look like the below one. Here black part represents what is hidden and the white part represents what’s visible. Again, hold down Opt/Alt and click on the layer mask to go back to the original mode.
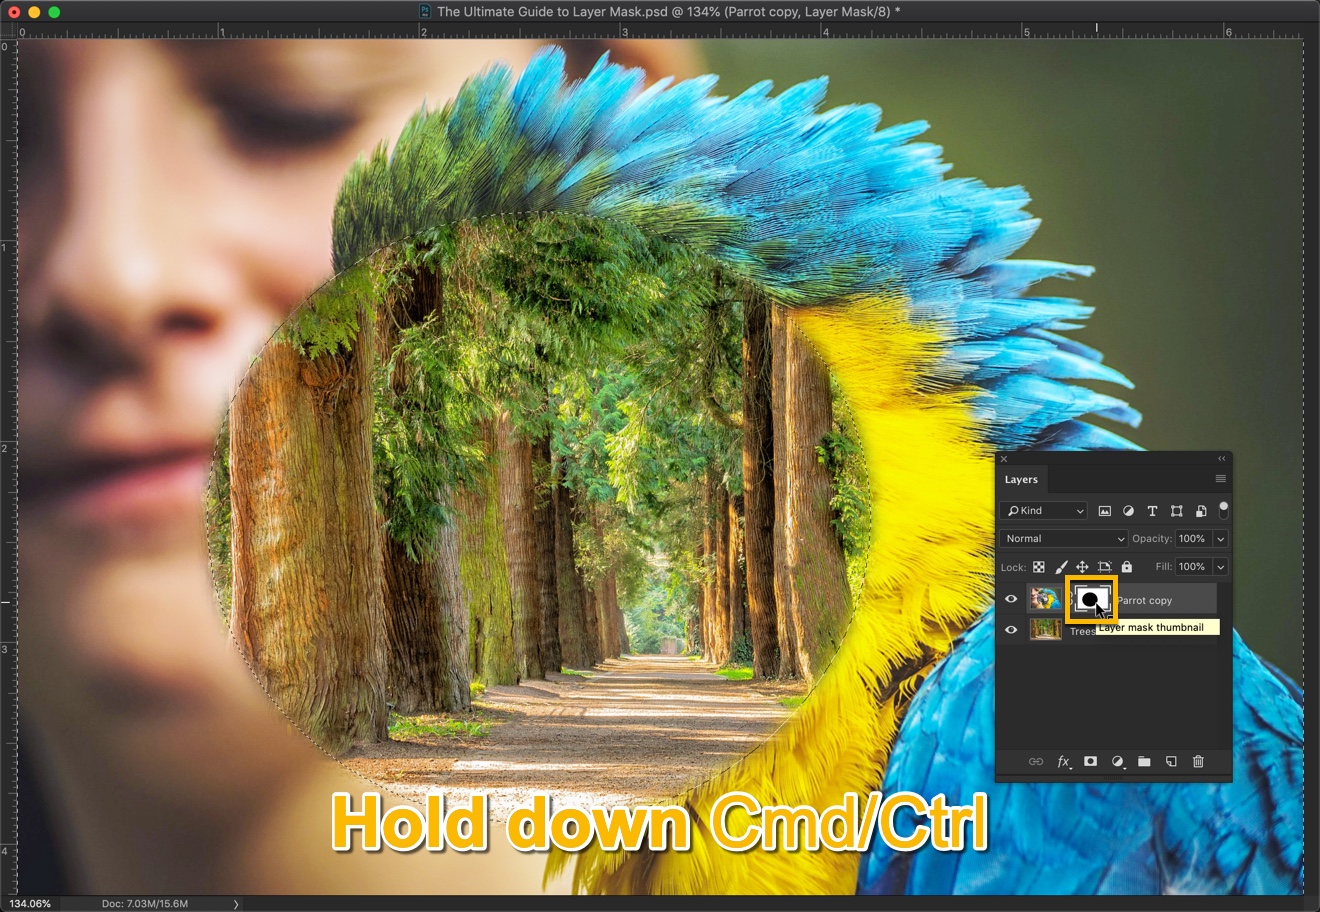
D. To make a selection out of a layer mask
Hold down Cmd/Ctrl and click on the layer mask to make a selection out of a layer mask.
This is all guys. Make sure that you get the most out of the below offer.
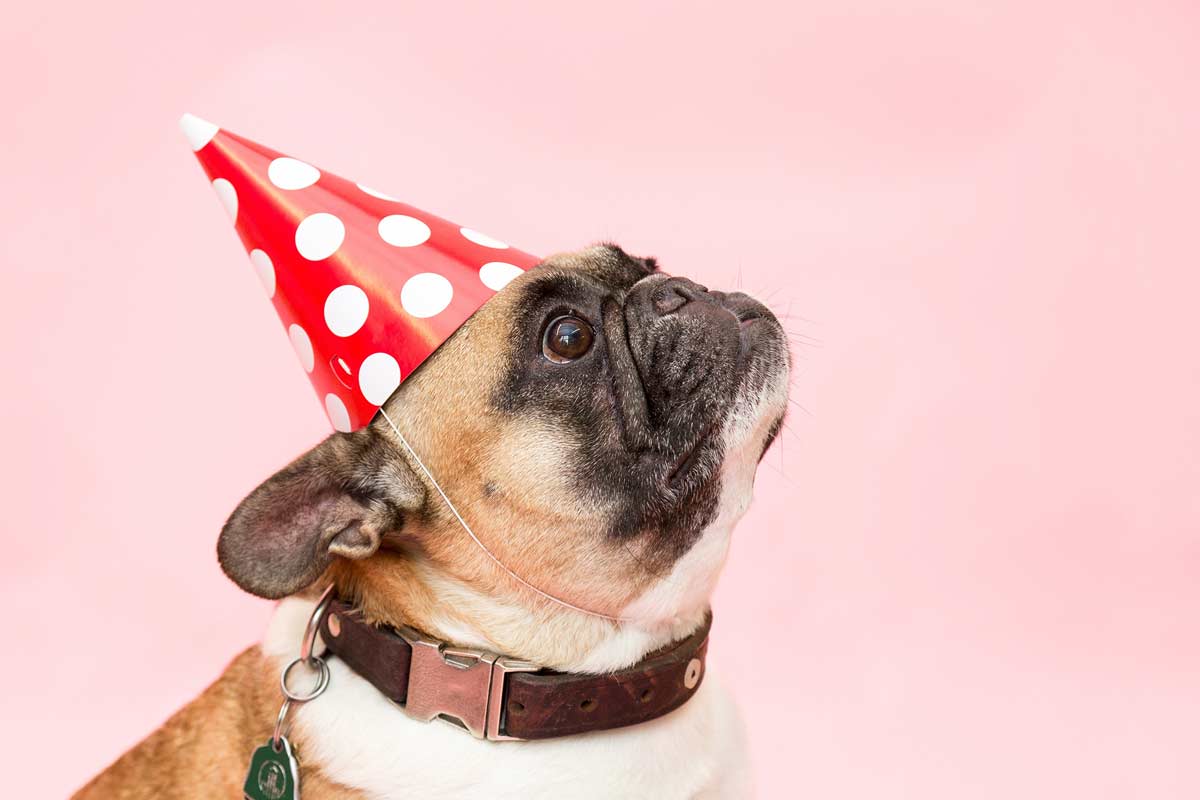
I ran a campaign on my site and asked people the tutorials which they want to read next. And, changing the color of specific areas is on the list. Time to show you how to change the color of specific areas in Photoshop.
Here’s the plan for today’s tutorial. First, we’re going to select the area where you want the color to be replaced. We will do it with the help of the Quick Selection tool (because it’s my favorite). Then we’ll use Hue and Saturation to change the color. After that, I’ll show your one bonus technique which you can also use.
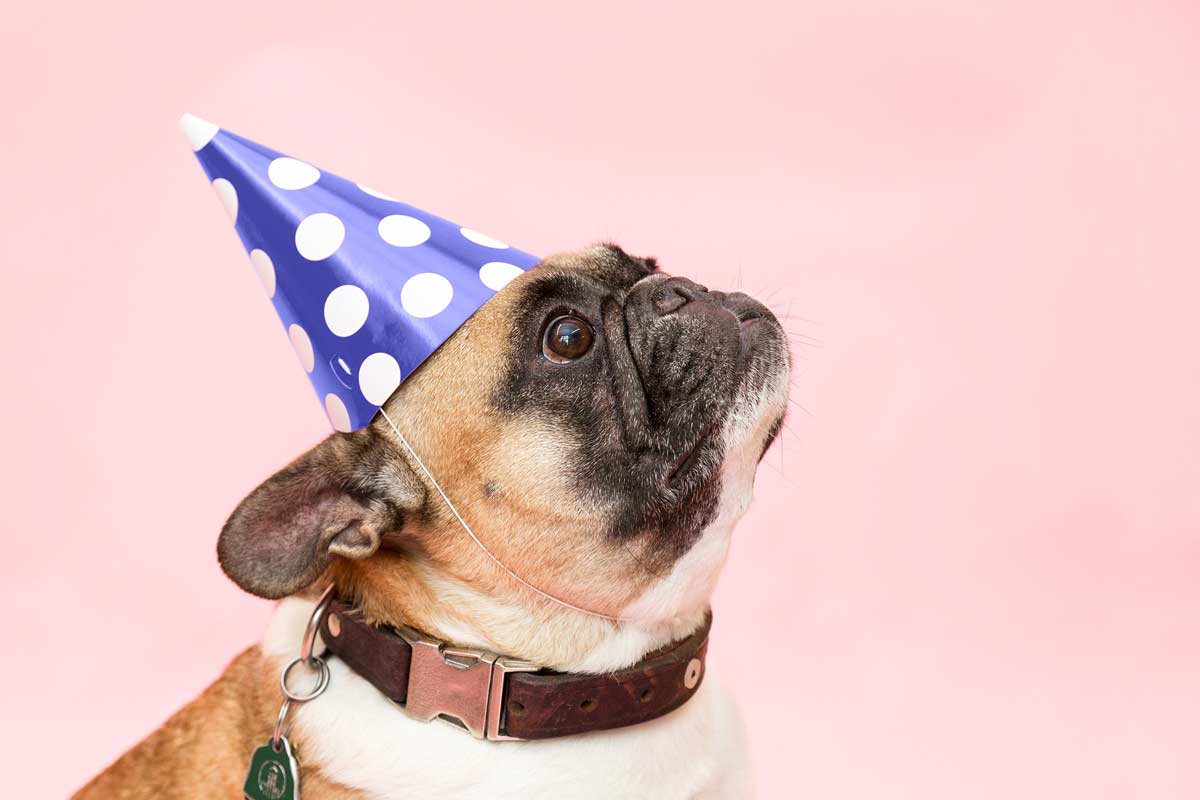
Final image
Initial image
Let’s begin the tutorial
Video
If you like watching videos, here’s the video tutorial for you.
Step 1 – Select the area
I am going to change the color of the hat.
Grab the Quick Selection Tool from the toolbar or press Shift + W again and again until it comes.
Start dragging it on the area to select.
Once done, here is my image.
If you have accidentally selected something unwanted, hold down Opt/Alt and brush over the unwanted area. This will deselect that area.
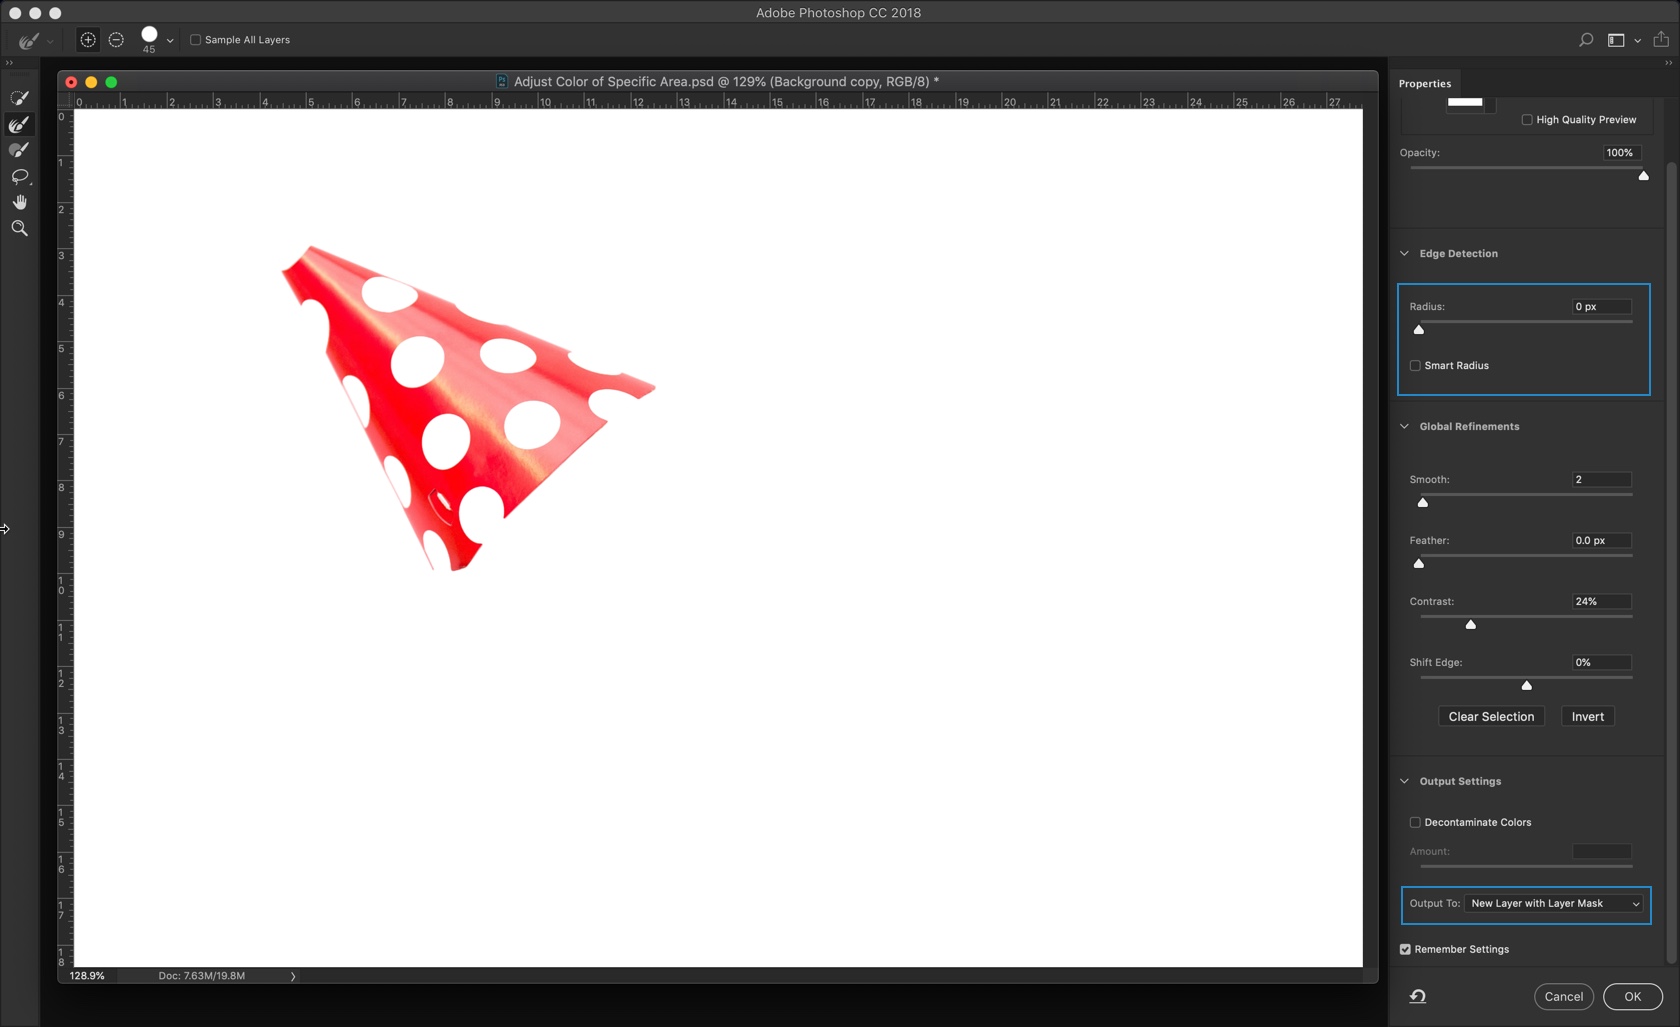
Step 2 – Refine the Selection
Open Select and Mask if you’re using Photoshop CC 2017 and newer. I like to keep the smart radius as 0 as I don’t like its effect. Rather I prefer to use Refine Edge brush for the refined selection. Press OK once done.
This will create a new layer with the selection.
If you’re using older versions of Photoshop, you can use Refine Edge. I cannot show how to do it via Refine Edge because it is not there in Photoshop anymore. But, you can refer the tutorial that I wrote when the tool was present.
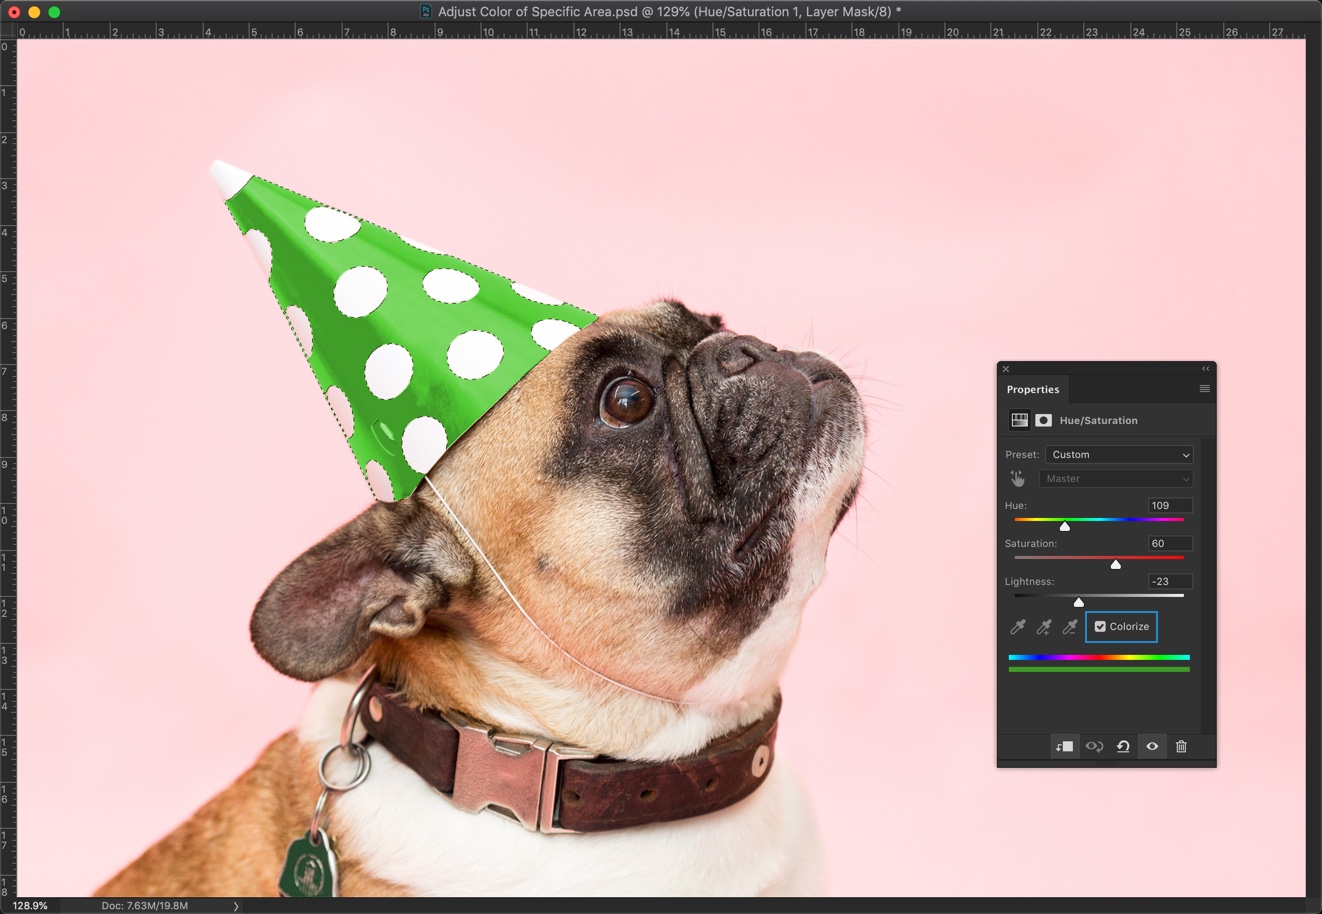
Step 3 – Change the Color of Specific Areas in Photoshop
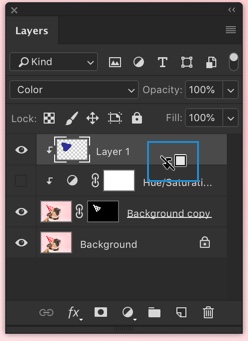
Go to Layer > New Adjustment Layer > Hue/Saturation.
The first thing we need to do is to enable Colorize. This will remove the color of the selected area. I have put a rectangle on this box in the below screenshot so that it’ll be easier for you to locate.
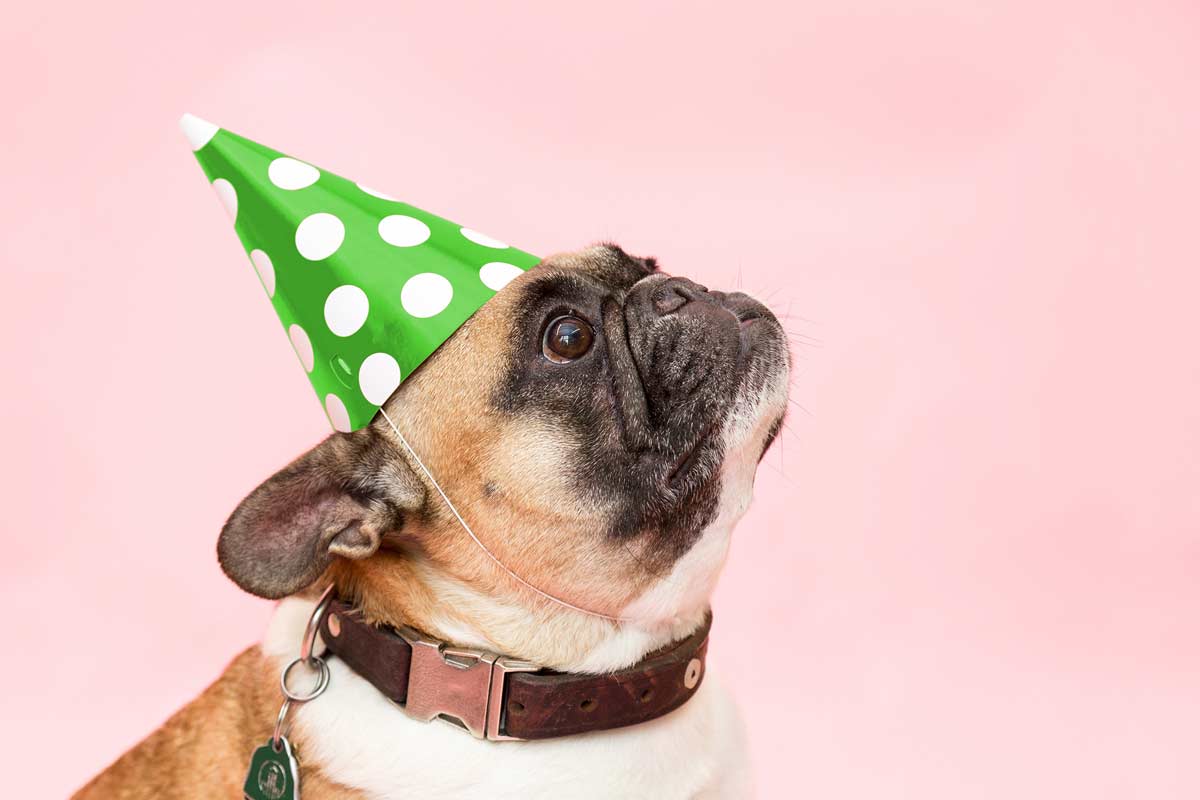
Next thing, I am going to do is to play with the Hue, Saturation, and the Lightness sliders to get the color that I want. I really like this green color so I am going to stick with it.
This is all. This is the final image.
Bonus Step – Change the color via Color Blend Mode
There’s one more way to change the color i.e. Color Blend Mode.
We’re going to create a new layer, fill it with the desired color, and change the color or blend mode. That’s all.
Create a new layer by pressing Cmd + Shift + N/Ctrl + Shift + N. Clip the layer to the layer just below it. This will ensure that it will only affect the layer just below it. Hold down Opt/Alt and put the mouse cursor just in between the two layers. You’ll see that the cursor changes its icon as shown below. Now click the mouse button.
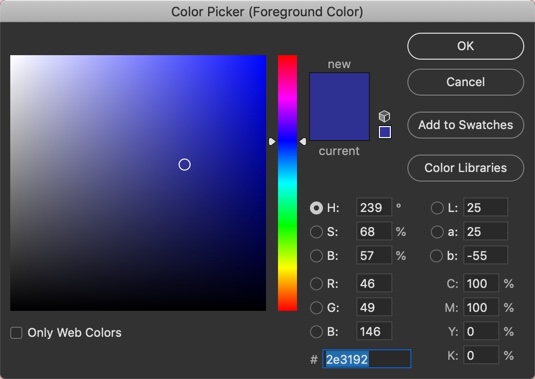
Change the foreground to your desired color. This will be the final color of the area.
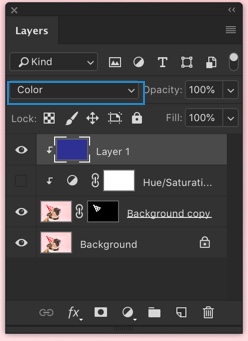
Press Opt + Delete/Alt + Backspace to fill the layer with the foreground color. Change the blend mode to Color.
That’s all! But as you’ll see that the layer is clipped to its below layer, it will only affect the selection.
This is all.
Make sure that get the most out of the below offer.
Hey, guys! A few weeks ago, I ran a campaign in Photoshop where I asked people which tutorial should I write next. And guess what, you’re currently reading one of the most asked tutorials which is to add shadow in Photoshop.
Adding shadow in Photoshop is not a one-step tutorial. Yes, I know that Photoshop provides “Drop Shadow” layer style but that works rarely. To make things even more complicated, you first need to cut out the object of which you want a shadow in order to use the layer style.
Today’s tutorial will be a bit longer because I want to show you the best method to add the shadow (not the fastest). This method will take some time to implement but the result would be perfect.
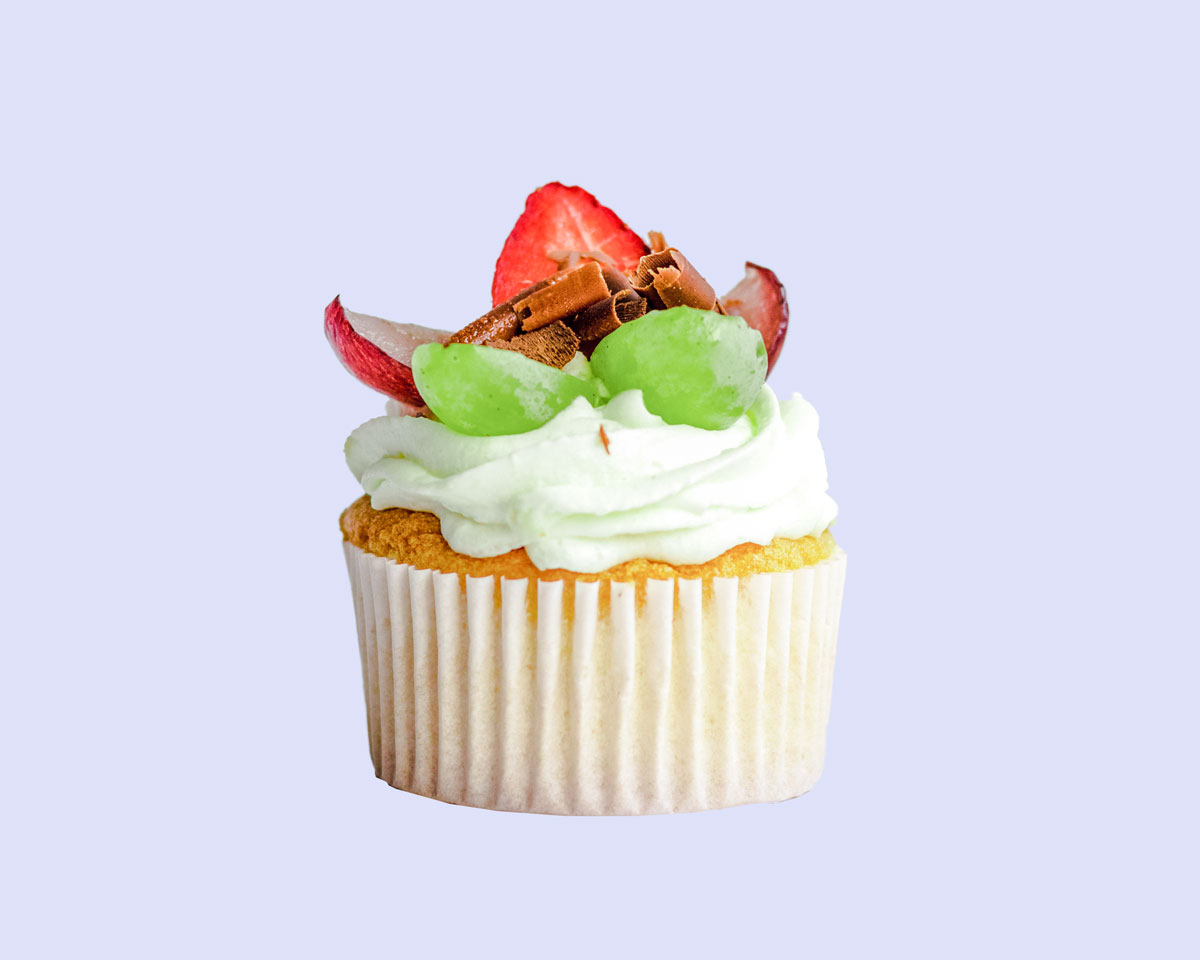
Before I begin, you may want to see the final image.
Final image
Initial image
Let’s begin with the tutorial
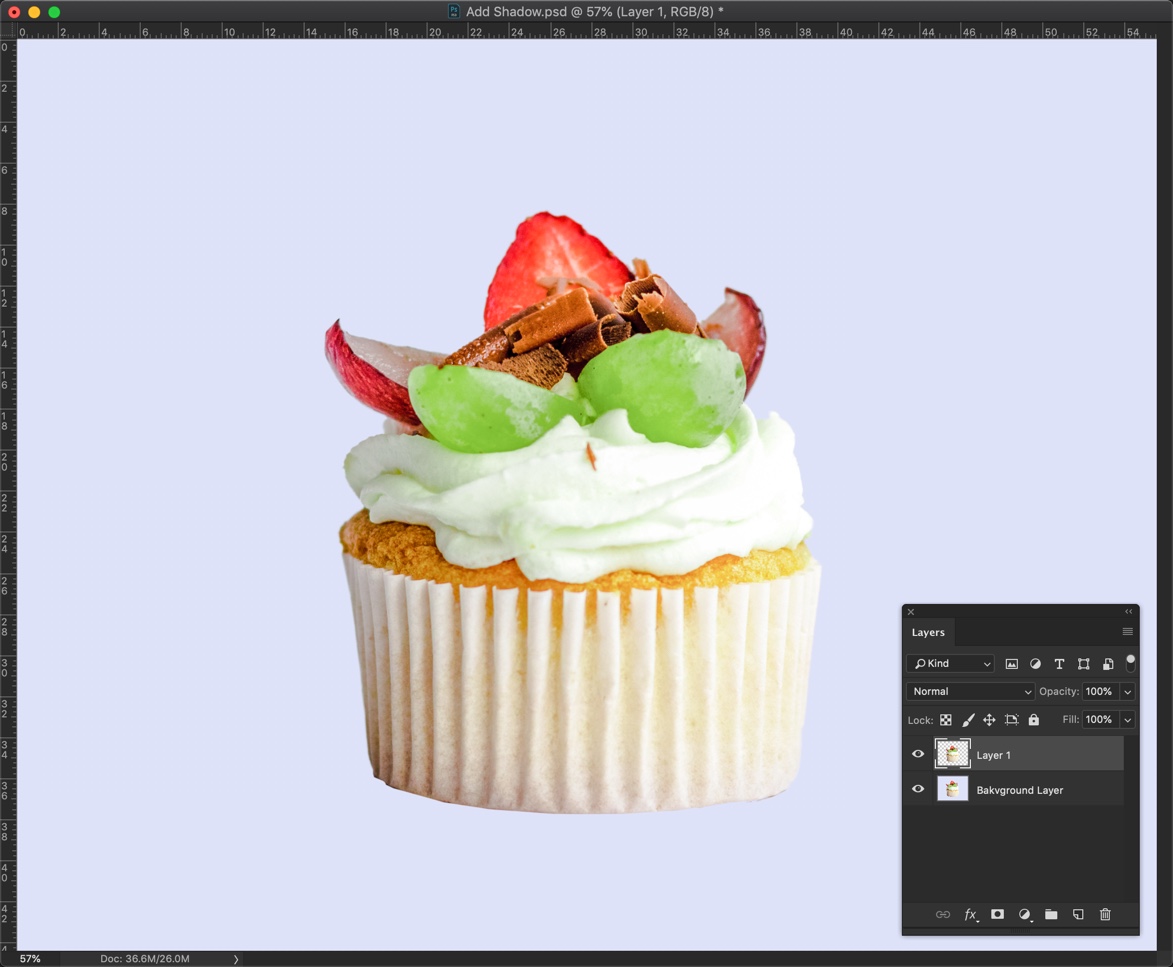
Step 1 – Extract the subject to a new layer
Shadow comes in between the background and the subject. So, we need to extract the subject to a new layer to make things simpler. You’ll understand in later steps why this step is important.
You can use “Select Subject” if you’re using Photoshop CC 2018 to easily extract the subject. If can use Quick Selection Tool if you’re using an older version of Photoshop. I have written a tutorial on how to select using the Quick Selection Tool. You may want to check out that tutorial if you are having difficulty in selecting the subject.
If I used “Select Subject” in my Photoshop and it selected the cupcake. Later I used “Select and Mask” to refine the selection.
Here is the image where the cupcake is in the new layer.
Step 2 – The basics of shadow
You’ll see that there is an extra dark shadow at the places where the subject is touching the ground and there are light shadows around in whenever you see an image with a real shadow.
I am going to replicate the same thing with my image.
In the below image, the area marked with red color will have a dark shadow and the area marked with green color will have a light shadow.
The next thing you’ll notice by looking at an actual shadow that it’s not completely black. It has a tint of blue.
So, I am going to use a very dark blue color for my shadow. The HEX code of my shadow is #131322.
Step 3 – Add Shadow in Photoshop (Dark Shadow)
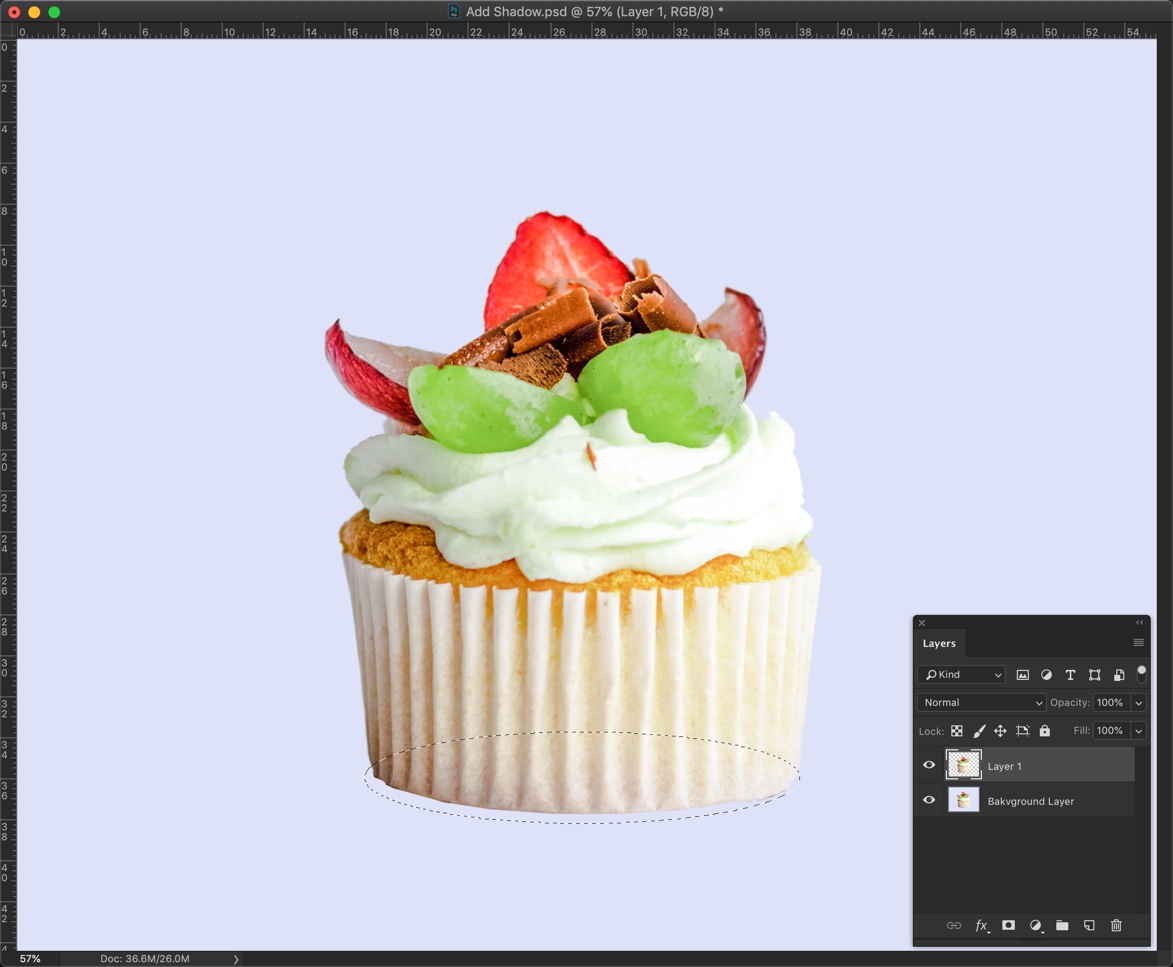
Cupcake has a rounded base. So, I need to create a shadow that should be rounded in shape.
Here’s my plan – I am going to use the Elliptical Marquee tool to make a rough rounded selection around the base and then I’ll fill it with the shadow color to add shadow in Photoshop. After that, I’ll adjust the shape of the shadow with the Free Transform tool.
Grab the elliptical tool from the Tool panel or press Shift + M again and again until it comes.
Make a rough rounded selection around the base.
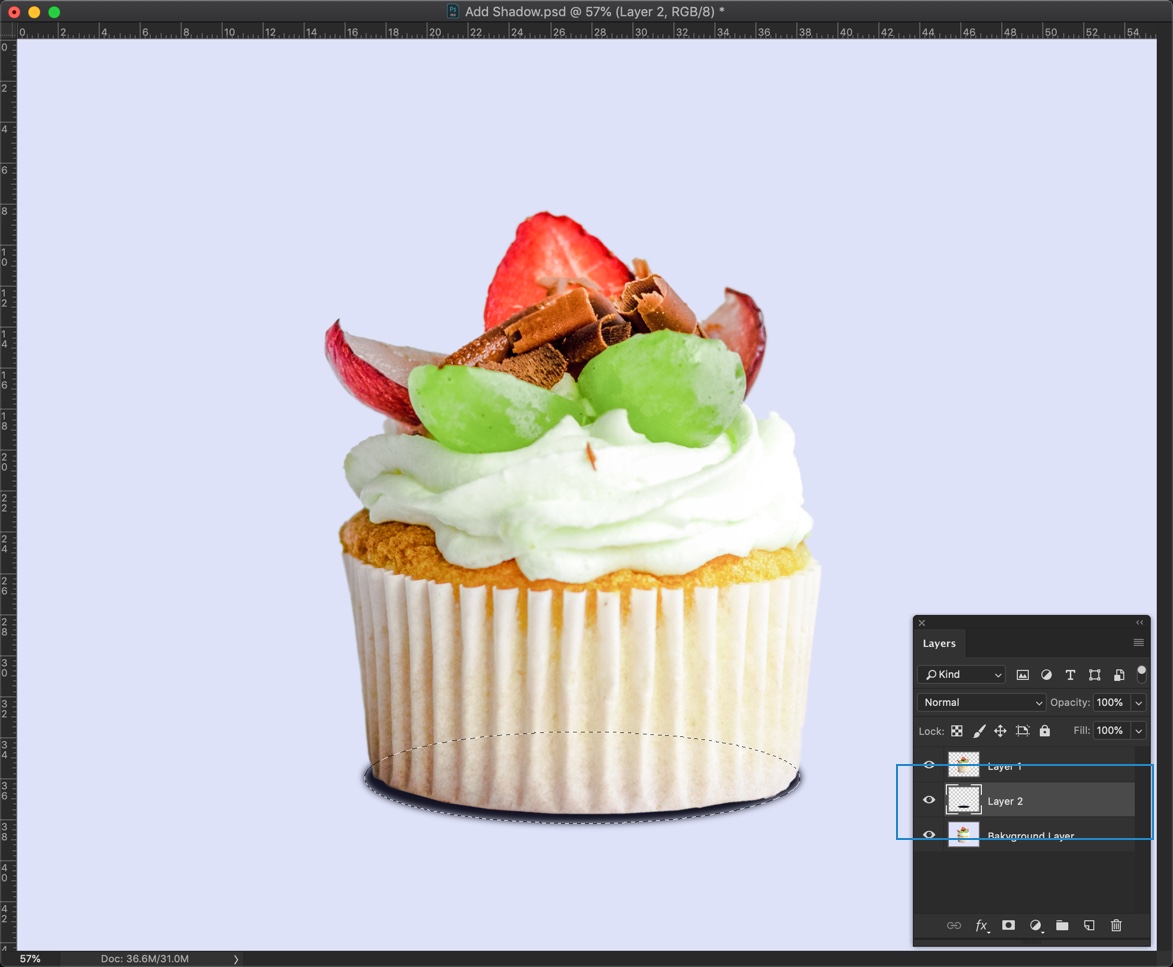
Now, I am going to create a new layer for the shadow. Press Cmd + Shift + N/Ctrl + Shift + N. Drag this layer in between the subject and the background.
Fill the selection with the foreground color that is of our shadow by pressing Opt + Delete/Alt + Backspace.
You can take reference from the below screenshot.
Deselect the selection by pressin Cmd + D/Ctrl + D.
I know that the shadow is not perfect. I am going to show you how to refine it in the next step.
Step 4 – Refine the Dark Shadow
Activate the Free Transform tool by pressing Cmd + T/Ctrl + T.
Now drag the shadow to the edges. You also need to drag the handlebars to change the shape of the shadow.
If you want to skew it, hold down Cmd/Ctrl and then drag any handlebar to skew the shadow.
Once done, press Return/Enter.
Here’s my image.
I think that the shadow is very sharp. It needs to be a bit blurred.
Go to Filter>Blur>Gaussian Blur.
Enter a value that will make the shadow slightly blurred.
Note – whatever value I am entering may not work for you. The value depends on the size of the image. My image is 4000 pixels wide. So, if your image is less wide, you may want to put lesser than 8.5 pixels as the radius in Gaussian Blur.
Press OK once done.
Step 5 – Add the Light Shadow
Create a new layer below the Dark Shadow layer by pressing Cmd + Shift + N/Ctrl + Shift + N and drag it below to the Dark Shadow layer.
Again grab Elliptical Marquee tool from the tool panel or press Shift + M again and again until it comes.
Draw a wide selection around the subject as shown below.
Fill the layer with the foreground color by pressing Opt + Backspace/Alt + Delete. Reduce the opacity to around 20% as shown in the below screenshot.
Deselect the selction by pressig Cmd + D/Ctrl + D.
This time we don’t need Free Transform tool to refine the shadow because the shadow doesn’t have to edge to edge this time. But, we need to blur it.
Step 6 – Blur the Light Shadow
Go to Blue > Gaussian Blur.
This time we’re going to choose a quite high value. I am going with somewhere around 62 pixels.
Press OK once done.
That’s all.
Make sure that you make the most out of the offer that is present just below the final image.
This tutorial is written by William Benetton who is a photographer. You can connect with him on his site.
The Graphics Interchange Format, or GIF for short, has risen to become one of the biggest tools in the internet’s arsenal of expressions. You can find these short, looping video clips adorning social media and web forums all over. Their genius lies in their simplicity and power of repetition: in an internet crammed with sparkling high definition assets, the humble GIF has stood the test of time to become a language of reactions and one of the pillars of memedom. If you’re looking to dip your toe in these waters and start making your own GIFs then Photoshop is probably the best choice of software around, so let’s look at the easiest way to use it to put a GIF together.
Step 1 – Pick Your Video
First thing is to find a video you’ll want to derive your GIF from. Ideally, you’ll be looking for a clip that’s only a few seconds long, as brevity is the life and soul of the GIF. Imagine it as a sentence from a novel, or a rhyming couplet in a song: a GIF is just meant to be a small snapshot or amuses bouche, rather than a fully extrapolated idea. Now comes time to get the video into a useable format for Photoshop. A .mov or .mp4 file is the easiest format to handle. If you’re looking to get the source material from an internet video, a free conversion tool like ClipConverter can let you save the video to the desired format so long as you have the right URL.
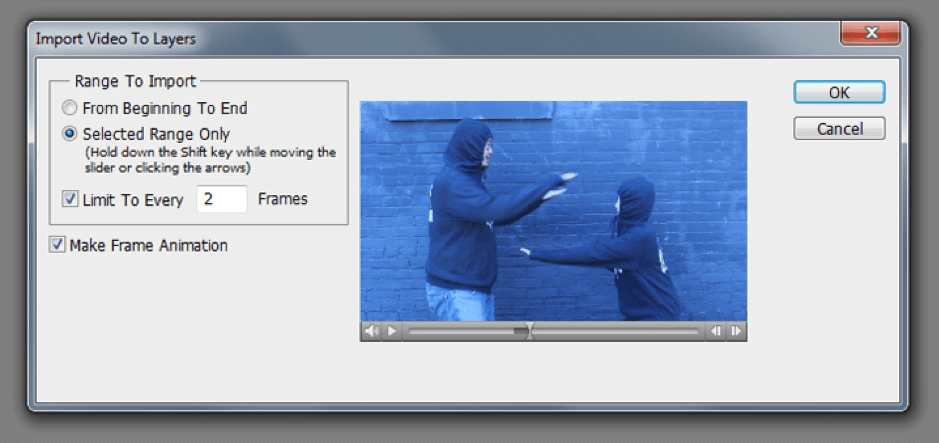
Step 2 – Import the Video to Photoshop
Open Photoshop and import your chosen video by clicking File> Import> Video Frames To Layers. This will lead to an options window where you can set your document up and pick which part of the video you want to make the GIF from.
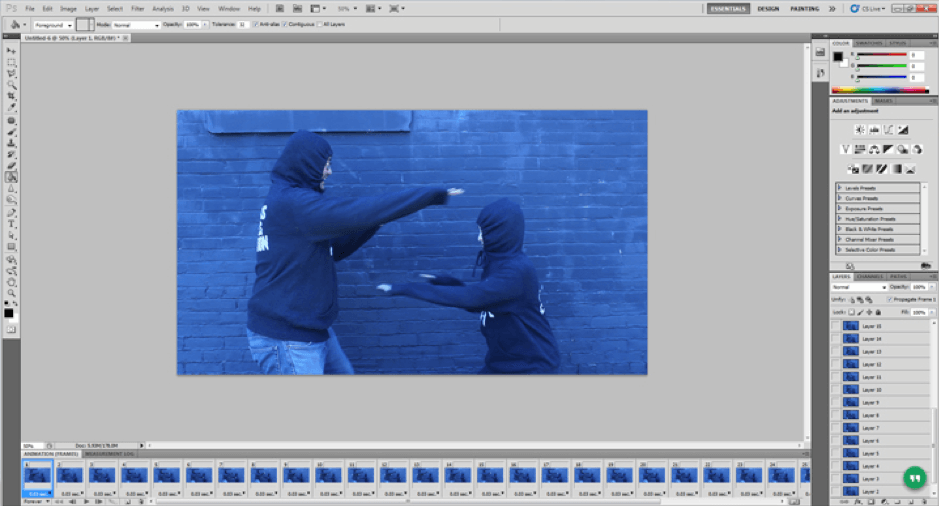
Step 3 – Configure Your Document
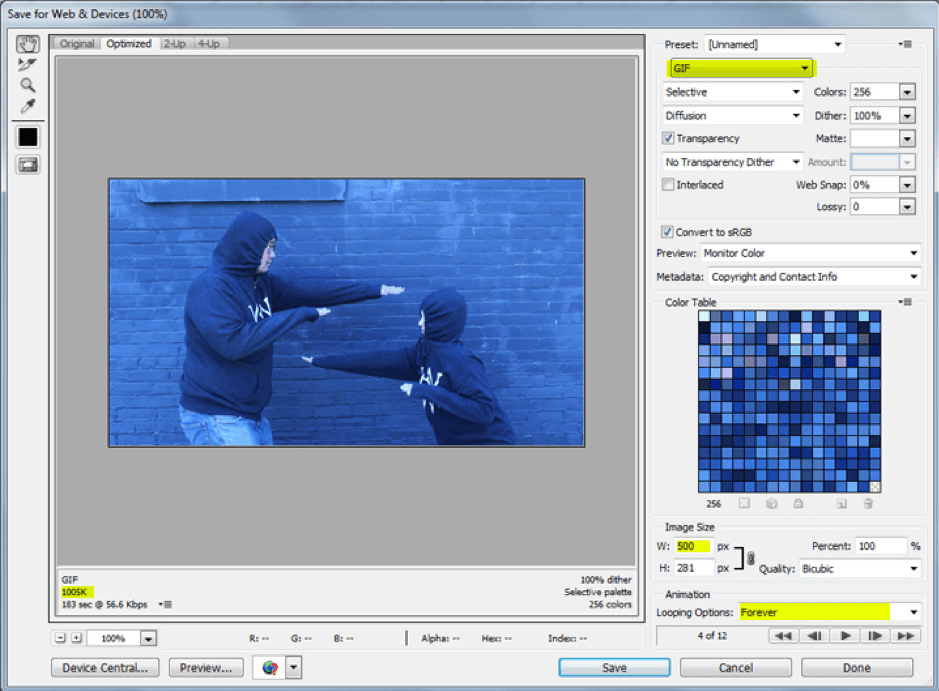
With your document imported, make sure that you have the animation window up and running by clicking on Window> Animation. Now, before doing anything else, calibrate your image size to 500 pixels in width. The reason this is essential is that GIFs are designed to load quickly, often with multiple GIFS open at once on a single page. If your GIF file is too large then this can become cumbersome and lead to long loading times and have your GIF stuttering, which will take away from its impact. It’s one of the reasons that platforms like Tumblr won’t accept GIFs above a certain size.
Step 4 – Frame Editing
With your document ready and your video of choice imported, you can now start editing the frames you want the GIF to be composed of. These can be located in the aforementioned Animation window. The first thing to do is press play to see how the document runs in its current form. From there you can select the frames you want to keep and delete everything else. By the end of the process, you should end up with something between ten and twenty frames. This might seem like a low amount, but remember, you want to keep things short and sweet. If you do end up with more than twenty frames selected, delete either odd or even numbered frames to cut the frame count in half. This will result in choppier playback, but this is something that can be fixed later on.
Step 5 – Loop Your GIF
Whilst this step isn’t technically necessary, it’s one of the biggest appeals of the GIF format, and helps give the format its repetitious, flick-book quality. Plus, if someone laughs once at your GIF, chances are they’ll want to see it more than once. To do so, copy all frames apart from the first and last ones, then re-paste them back into the animation window and drag them over to the far right. Following this, click on the options panel and click “Reverse Frames”.
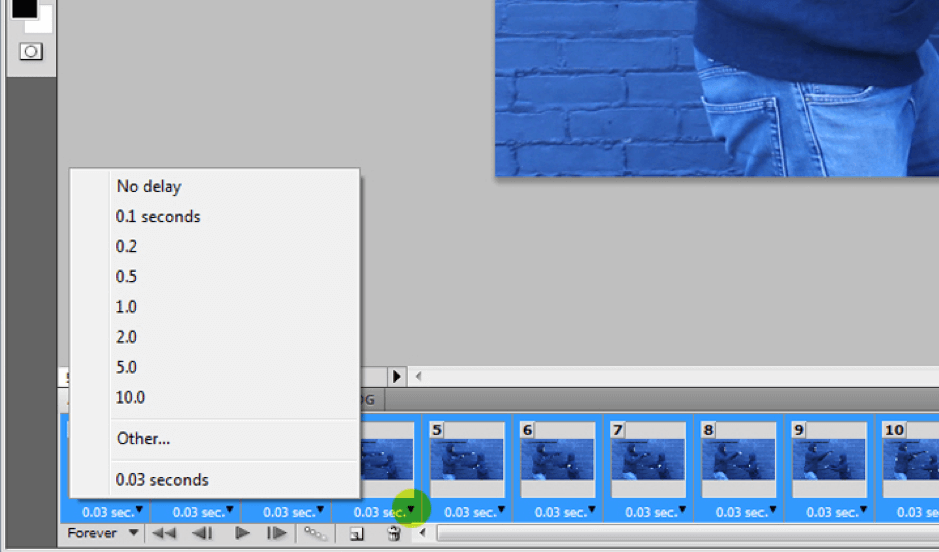
Step 6 – Select Your Frame Rates
The frame rate affects how long each frame will be displayed for. The default setting on Photoshop is 0.03 seconds, but this can be a little too fast for the GIF format. The frame rate best for you will invariably come down to personal preference and the nature of the content of the GIF in question, but setting the frame rate between 0.08 and 0.1 seconds can often prove very effective. The frame rate can be altered in the animation window, by clicking on the small arrow shown within each frame. Be sure to have all of your frames highlighted before altering the frame rate. Note that if you deleted half your frame rates previously, the clip will run much faster, so you’re probably going to need to set your frame rate to somewhere between 0.1 and 0.2 seconds. Bear in mind that the speed of your GIF might not be completely accurate in Photoshop. It’s not until you export it that you’ll be able to tell exactly how fast it plays.
Step 7 – Export Your GIF
Your GIF should be finished and ready to export to file by this point. You can do this by clicking File> Save for Web & Devices, and complete the rest of the file saving options. Remember to keep your GIF small (ideally 2 MB or under), which you can help achieve by lowering quality settings as well as reducing frames. Once saved, you’ve successfully made a GIF, and now it’s just a question of finding a suitable destination for it. Good luck!
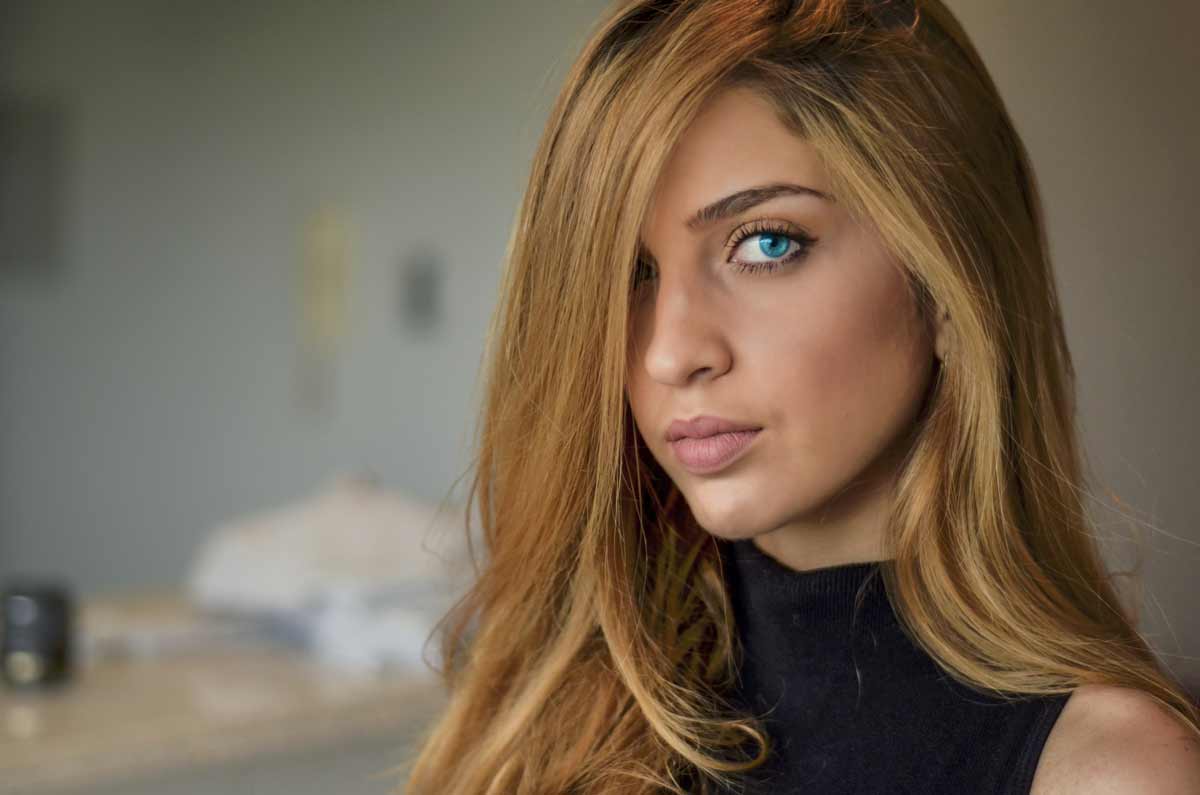
Eyes are one of the most beautiful parts of a human body. Having a beautiful eyes makes the face very attractive. Well, the shape of the eye matters. But, what matters most is the color of the eyes. No wonder that models wear colored contact lenses during photo shoots to look more attractive. And, the workaround of having a beautiful color eye without wearing lenses is Photoshop. In this tutorial, I am going to how to change eye color in Photoshop.
The tutorial is very easy. All we are going to do is to use the Brush tool.
Before I begin, I want to show you the initial and final pictures.
Initial
Final
Let’s begin
Step 1 – Grab the Brush tool
There are many ways to change eye color in Photoshop. I am going to show you the fastest and the easiest one.
Grab the brush tool from the tool panel or press Shift+B again and again until it comes. Reduce the hardness to 0%.
Change the foreground color to the color you would the eyes to have. I am going to change it to #0076a3.
Step 2 – Change the Eye Color in Photoshop
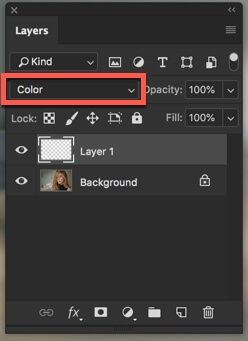
Press F7 to open the layer panel. Alternatively, you can also open it by going to Window>Layers.
Create a new layer by pressing Cmd+Shift+N/Ctrl+Shift+N.
Change the blend mode to Color.
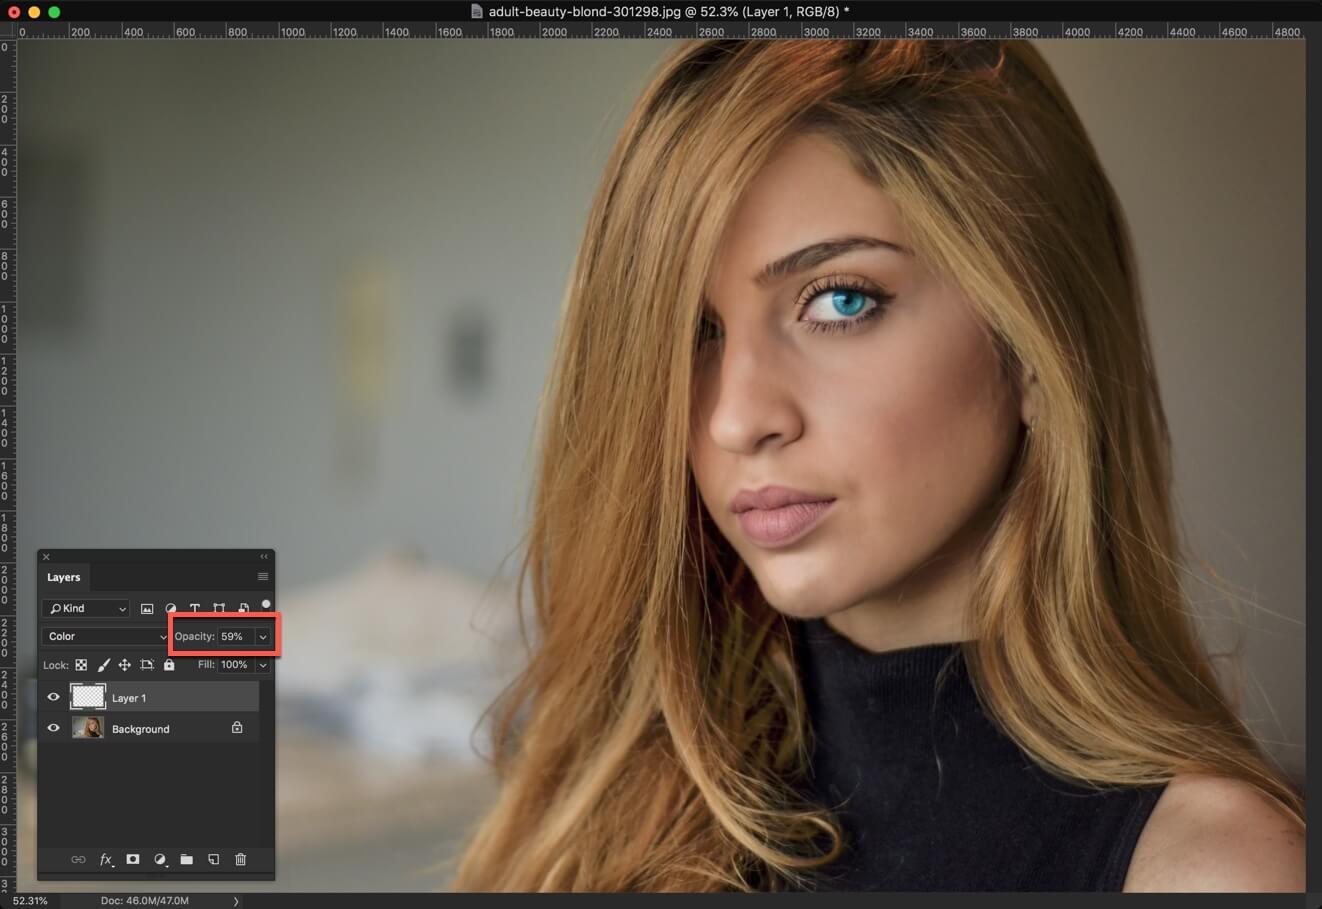
Start brushing the eyes.
If you want, you can first select the iris with the Elliptical Marquee tool and then start brushing. I am skipping that because the end result in my case would be almost same and my hands pretty much know how much should they move the cursor for perfect coloring.
Do it for the second eye also. The second eye is not present in my image so I need to skip that.
Your image should look like this.
I think that the blue is very vibrant. So, I am going to reduce the opacity to 59% in the layer panel.