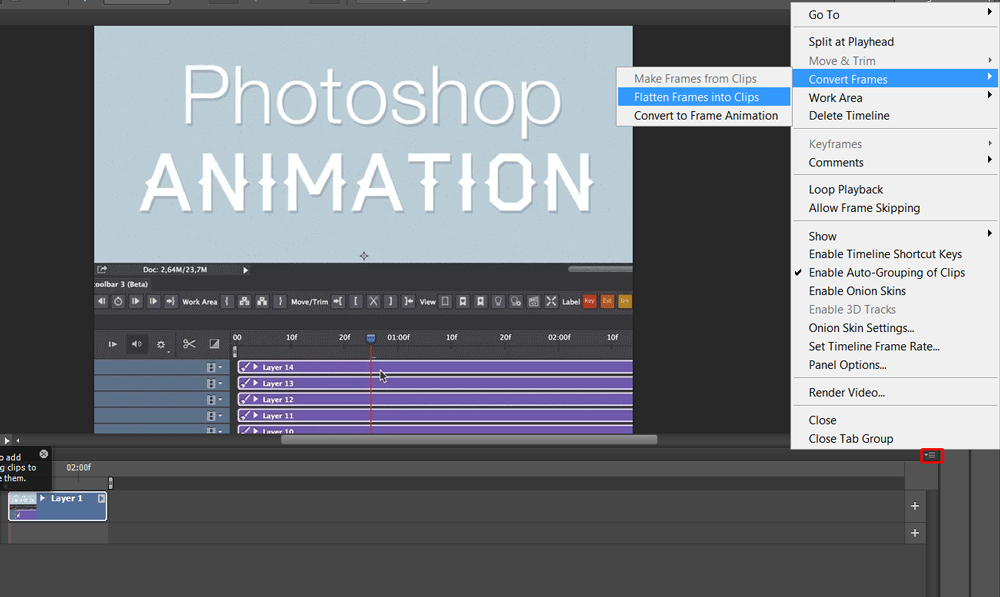
There are some apps that can create a paint effect. But the problem with those apps is that they don’t give you that much flexibility as the Lightroom does. Do you know what gives even more flexibility? Photoshop. But Photoshop is not we’re going to discuss in this tutorial. So, let’s see how can we create a paint effect in Lightroom.
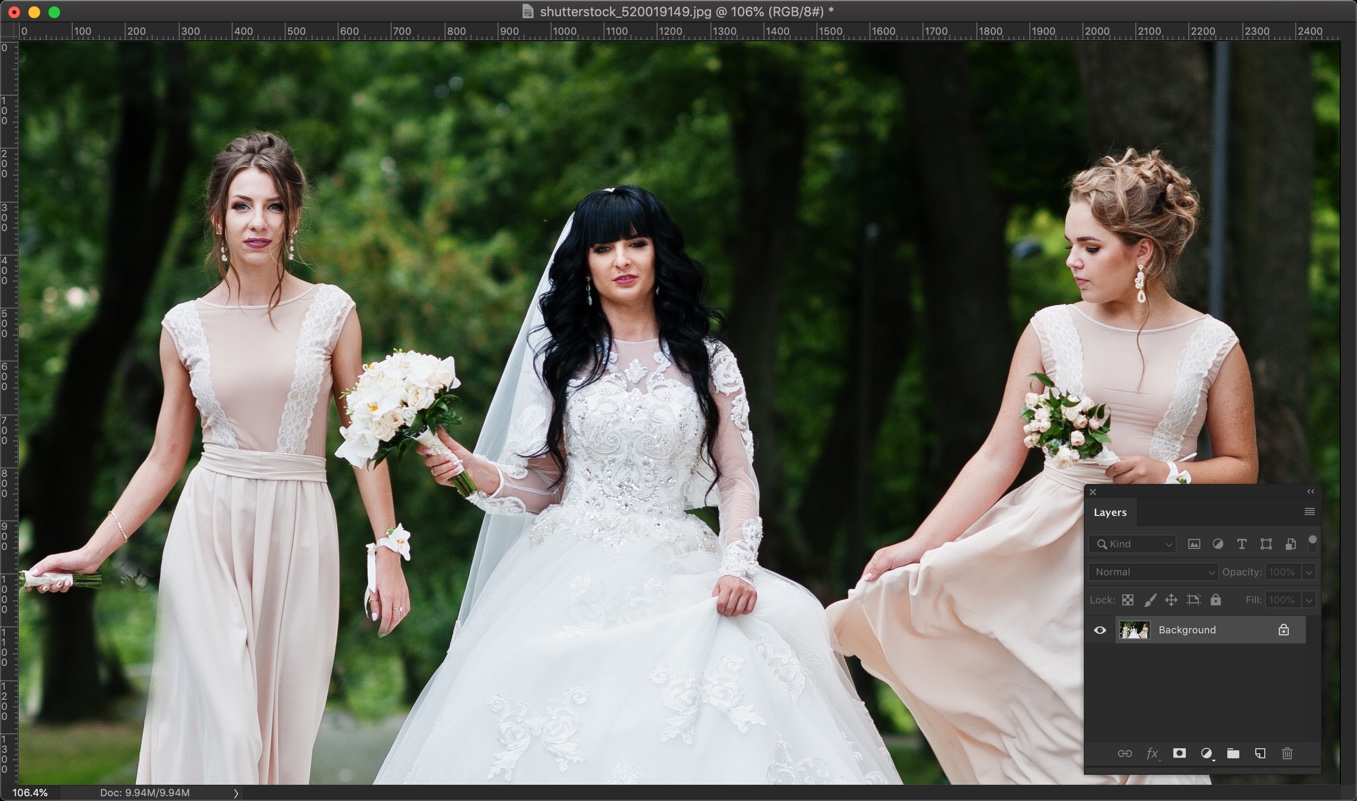
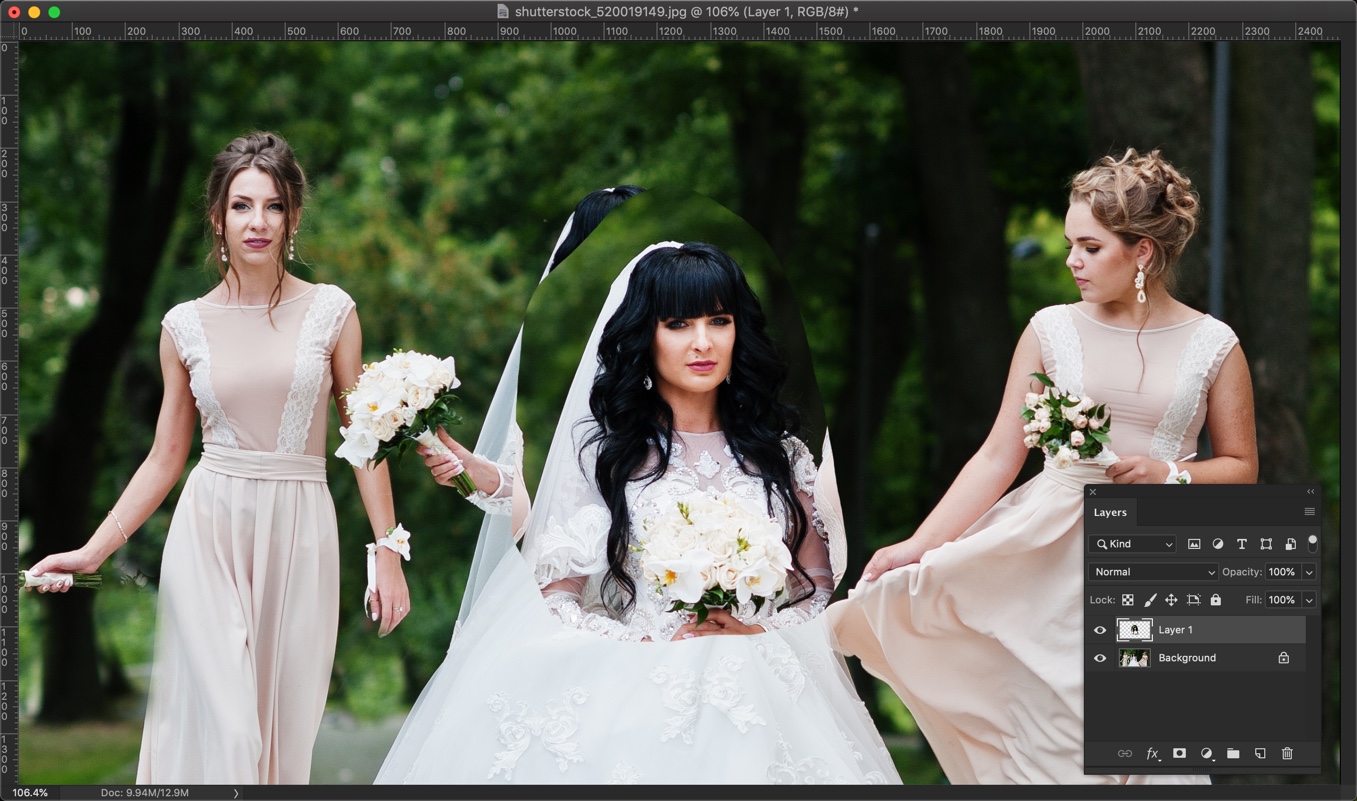
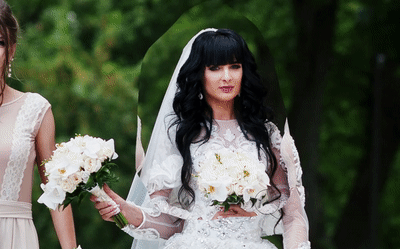
Before we begin, here are the before and after photos.
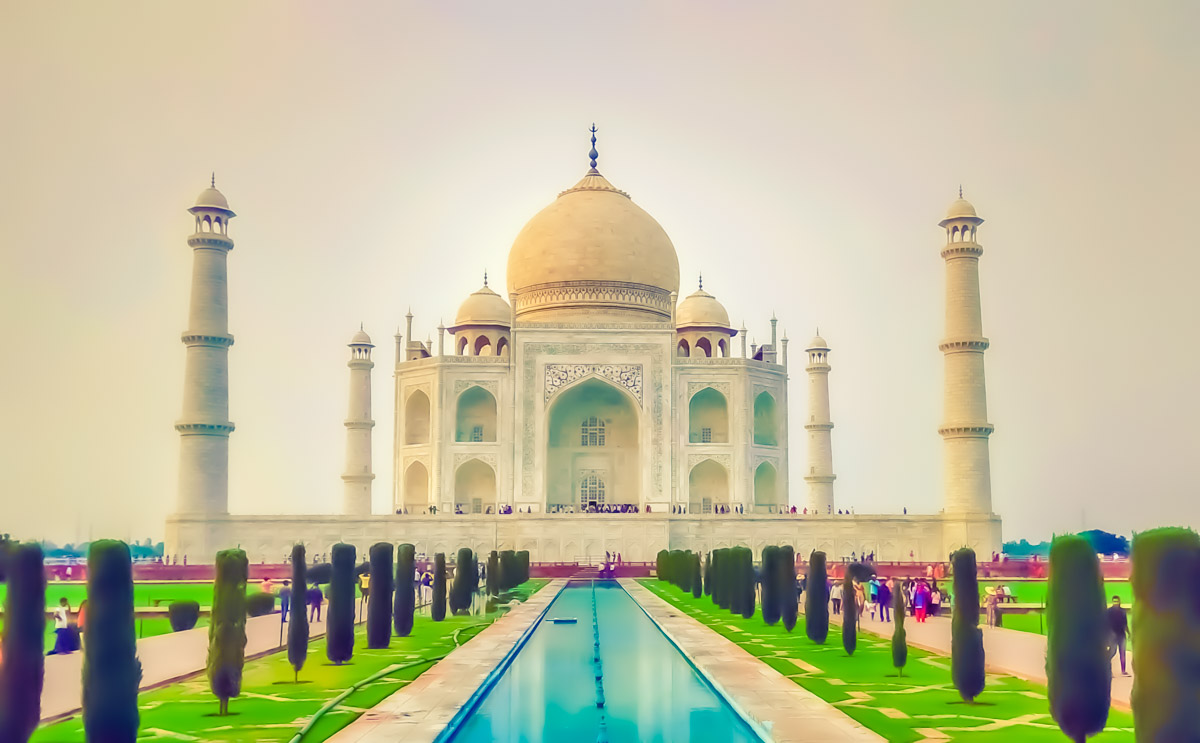
After the paint effect in Lightroom
Before
Download the free preset (no email required)
If you’re interested in downloading the preset for free, here’s the link to download the Lightroom paint effect preset.
Step 1: Adjust the tone
A real painting does not have a high contrast. And, this is what we’re going to do.
Highlights: -100
Shadows: +100
Whites: +35
Blacks: +100
This is how the photo looks. Above setting work with almost all photos. If it makes your photo weird, change the values.
Step 2: Adjust the details
Before we do anything else, head straight to the Details section
Luminance: 100
Detail: 6 (this varies for every photo; the goal is to create a nice looking paint effect in Lightroom)
Color: 100
Detail: 6
This is how your photo should look.
Step 3: Adjust the Split Toning
Time to give a nice color effect to the photo.
Highlights
Hue: 60
Saturation: 62
Shadows
Hue: 235
Saturation:53
Here’s how the photo looks.
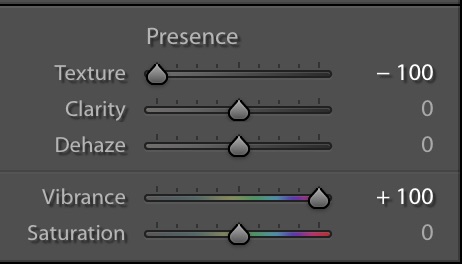
Step 4: Adjust the Presence
There’s a new slider in Lightroom CC 2019. They added the Texture slider which basically softens the photo.
Texture: -100
Vibrace: +100
If you don’t have Lightroom CC 2019 or newer version then you can skip this step. Luminance had done most of the job. This slider is just an add on.
This is how the photo should look.
FREE – Download the preset to create paint effect in Lightroom
You can modify your image by including diverse items of various colors, shapes, styles, and themes. Using the horizontal or vertical type tools you can create and alter the text.
9 Steps to Follow When Adding Text in Photoshop
You don’t have to be an expert or watch endless tutorials on how to include texts on this subject, the steps below will guide you on how use Photoshop like a pro.
What to Know about the Text
There are 2 types of tools used to design or format text the vertical and the horizontal. You begin by entering a text in a new word layer. It can either be a paragraph or a single word. You will notice that every word changes by growing or shrinking, but it doesn’t combine with other texts or jump to the next line. This happens because every text is separate. Click the Enter option to start a new text. Paragraphs will wrap around the bounds you state.
Adding the Text
Go to the toolbar and press on the horizontal or vertical type tool depending on the one you prefer. If you want to design a word, tap anywhere in the photo to establish the location of your text. To develop a paragraph, utilize the mouse to form a rectangle that acts as the textbox. You will notice a tiny outline going via the I-beam; this identifies the alpha position. Choose the kind of texts, lettering, dimensions, color, and style. Print your word and choose to commit.
Create Different Styles
There are several options and tools to craft your desired outcome. You can change the font of your words as many times as you wish and apply new approaches to existing or new words. Alter the size and color and create spaces between the lines.
The faux bold and italic options enable you to italicize or make your texts bold. You can align the text left or any other position. There are also underline and strikethrough options.
Utilize the Text on Shape Tool
Choose the word on shape tool and press on the figure on which to add the word. Move the mouse through the photo to develop the form. To add the word to the picture, waft the mouse until the sign turns to text mode, choose to add a word then select commit. Sometimes the word has to be in the figure. To do this, move the words via the path, or hold Cmd-click and move the mouse simultaneously.
Text on Selection Tool
When you click on commit, your selection changes to a path where you can type your words. Choose the text on the selection option and place the mouse on the item in the photo then move the cursor until you make your selection. The offset slider helps to adjust the size of your selection. Confirm the selection to change it to a path. Hover the mouse along the path until it switches to text mode. Add your words and modify them normally. Finish with commit.
Text on Custom Path
This tool will allow you to draw and include text along on the custom path. Click the custom tool to effortlessly alter your current text to do this, on the click option and choose the current tool. Create a path through the photo then click the cursor to add a word end by committing.
The Masked Style
The type mask tool allows you to create a text from an image. This activity will require you to use the expert mode. Choose the layer where you would like your words to appear. To ensure that you get good results, avoid creating the type border over a word layer. Click on the horizontal or vertical tool, include other options, and then add your text. The type border will appear in the photo on the layer. A reliable essay writer will give you a detailed article on how to use this tool whenever you feel stuck.
Save your Files
Select where you want the files to be saved on your device. When you click ‘file’ a dropdown menu will appear, click ‘save as’ choose a name for your document and save. You can save your image anywhere on your device, in the documents, photos, or even the desktop.
Quick Tips
Adobe Photoshop allows you to quickly add words by typing ‘T’ which takes you to the type tool. In case you experience difficulties with the type tool, make another layer, and if this fails, go to the text tool. You will notice that using the shortcuts on your keyboard does not work; this is because Photoshop uses the keyboard for typing only.
Conclusion
Most people think that Photoshop is challenging to master, but what they do not know is that there are several ways to use this app. Adding text to Photoshop is one of the easiest ways to use this tool to make your images stand out and look professional.
How often do you use Photoshop? Share with us your experience.
Author Bio:
Mollie Porein is a freelance writer who is obsessed with technology, especially Photoshop since it enables us to create unique scenes and mini-worlds. She writes tutorials on how to improve our lives using technology and digital tools. Her work is based on extensive research and her failures that led to success.
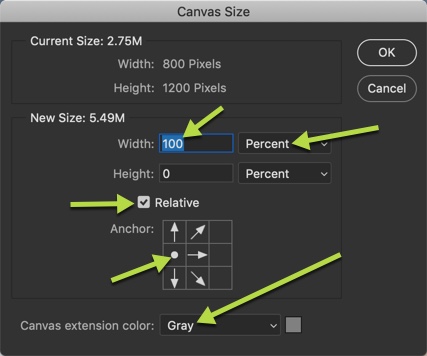
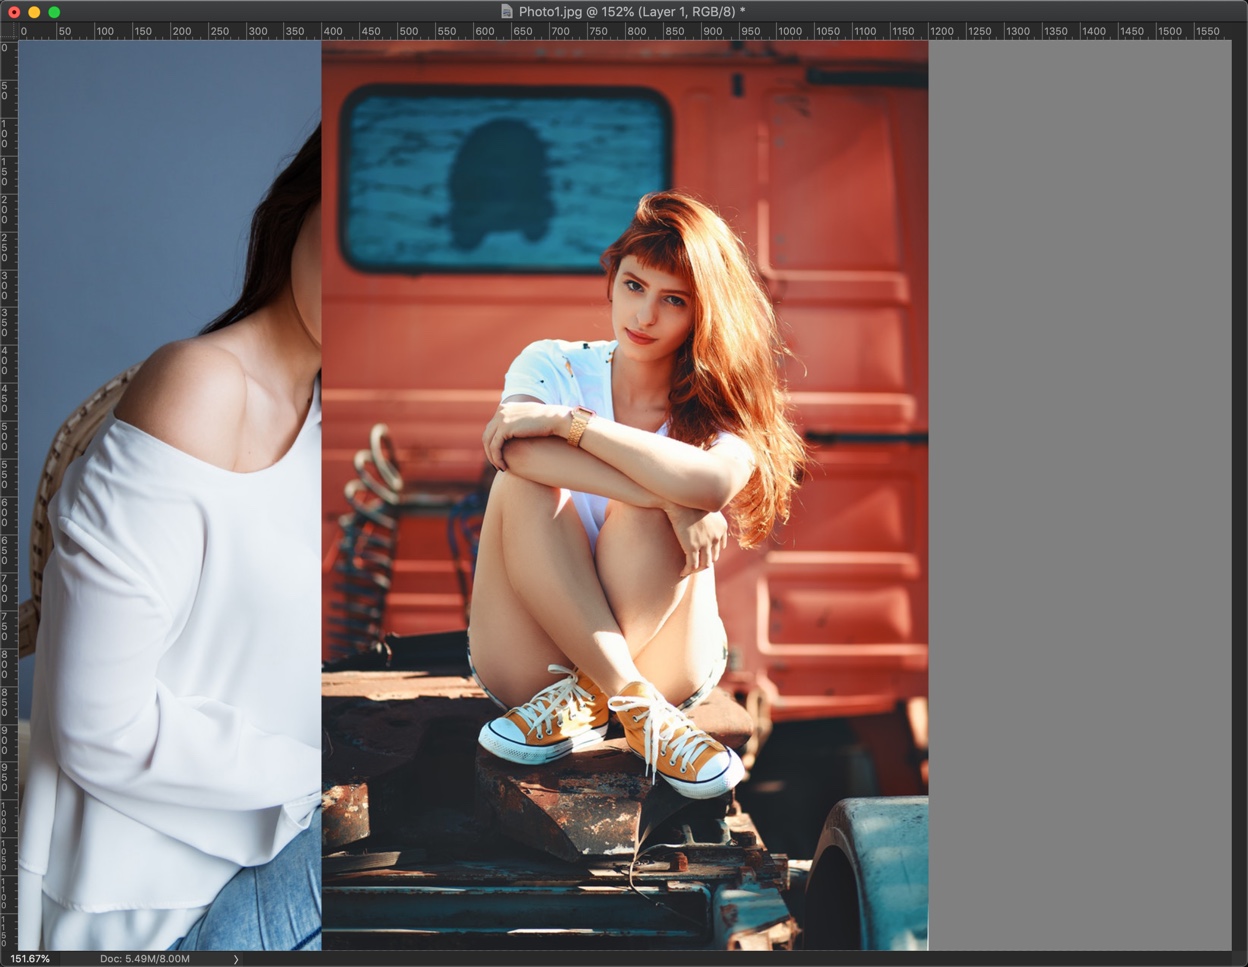
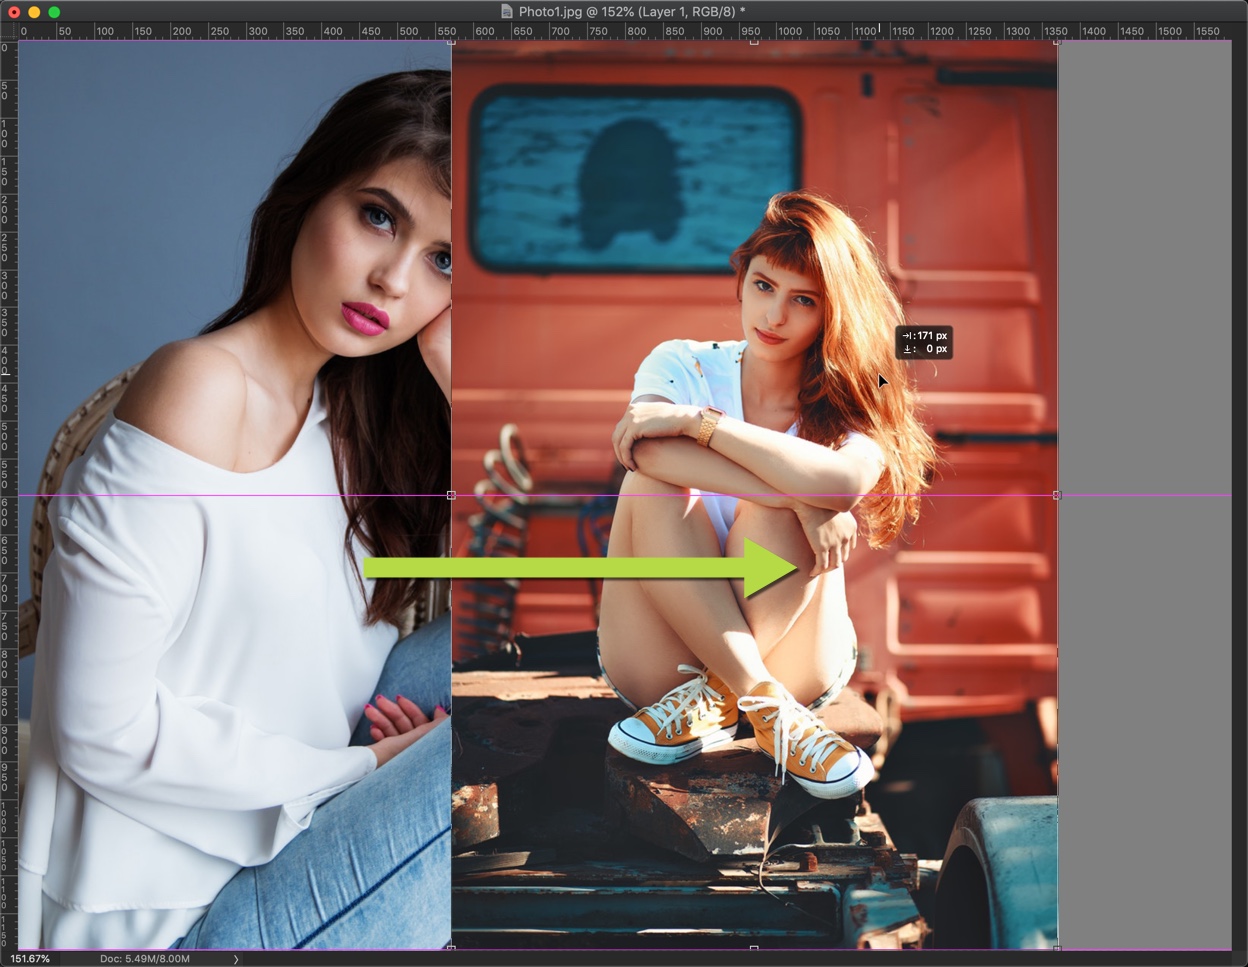
Placing two similar photos side by side looks beautiful. In the world of Instagram, this thing has become a trend and so many influencers are doing this. I thought that why should I not write a tutorial on how to place two photos side by side in Photoshop.
You’re recommend you to use photos which has more height than the width (basically portrait mode) because you don’t want the final photo to be too wide.
I am going to use
Crop Tool
Layer panel
Free Transform tool
to achieve this effect.
This is how the final photo would look like.
Let’s start
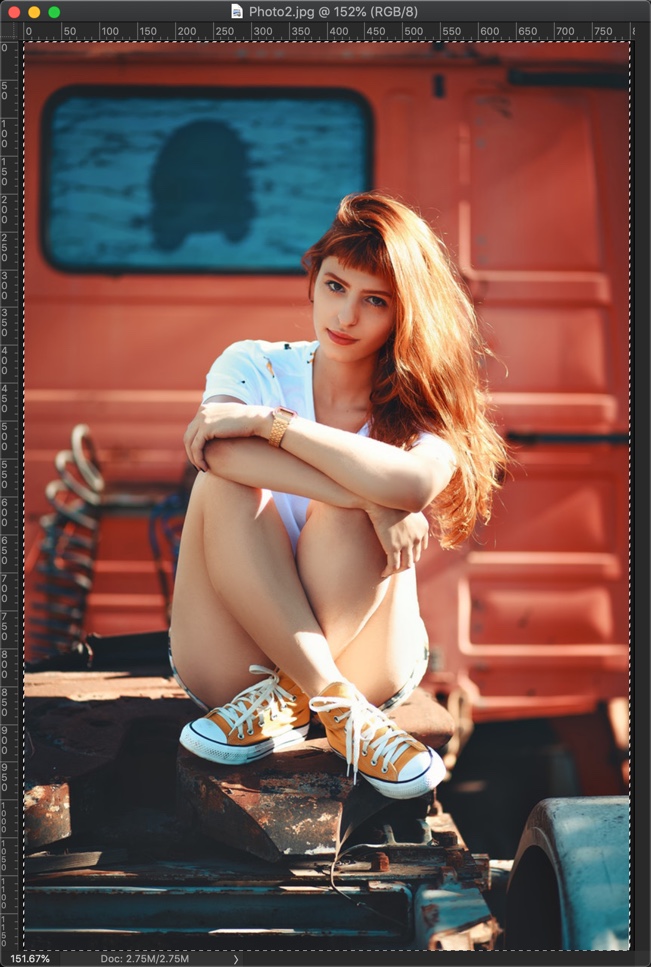
Step 1: Crop both photos
Open both photos in Photoshop.
Grab the Crop Tool from the tool panel or press Shift + C again and again until it comes.
Now, crop the photos to the same width and height.
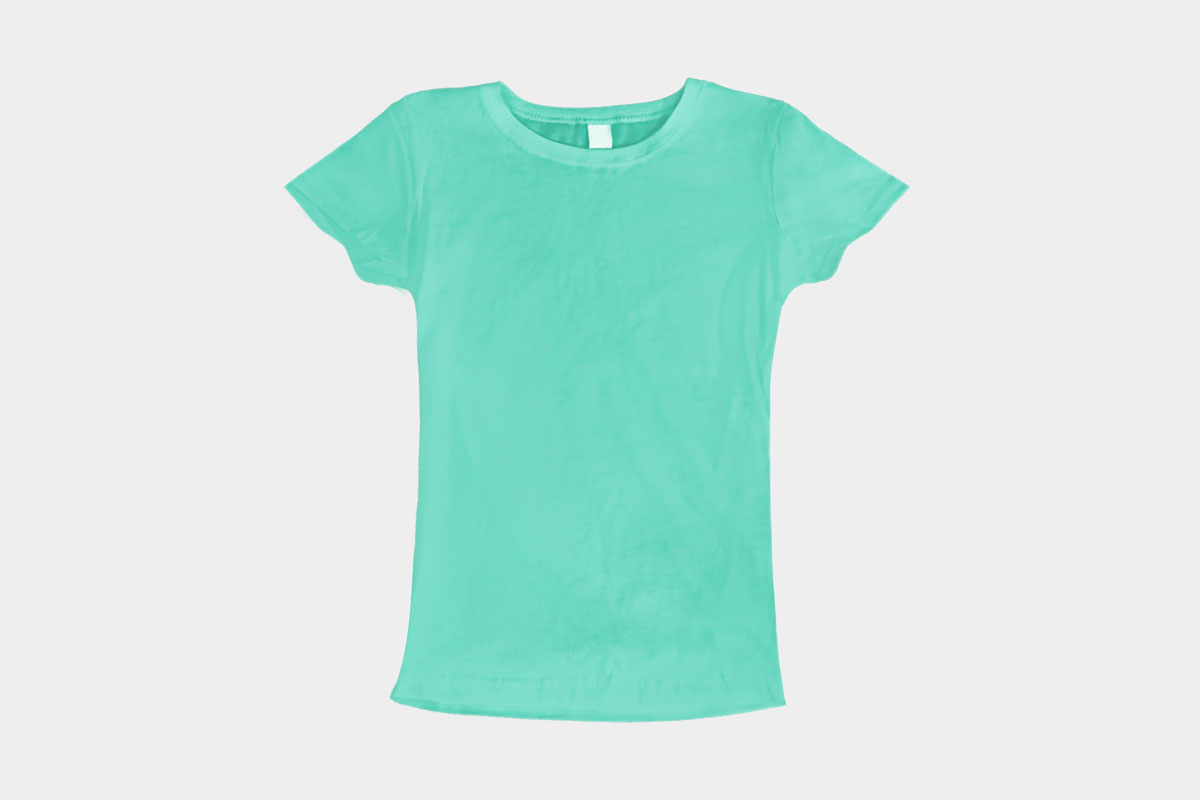
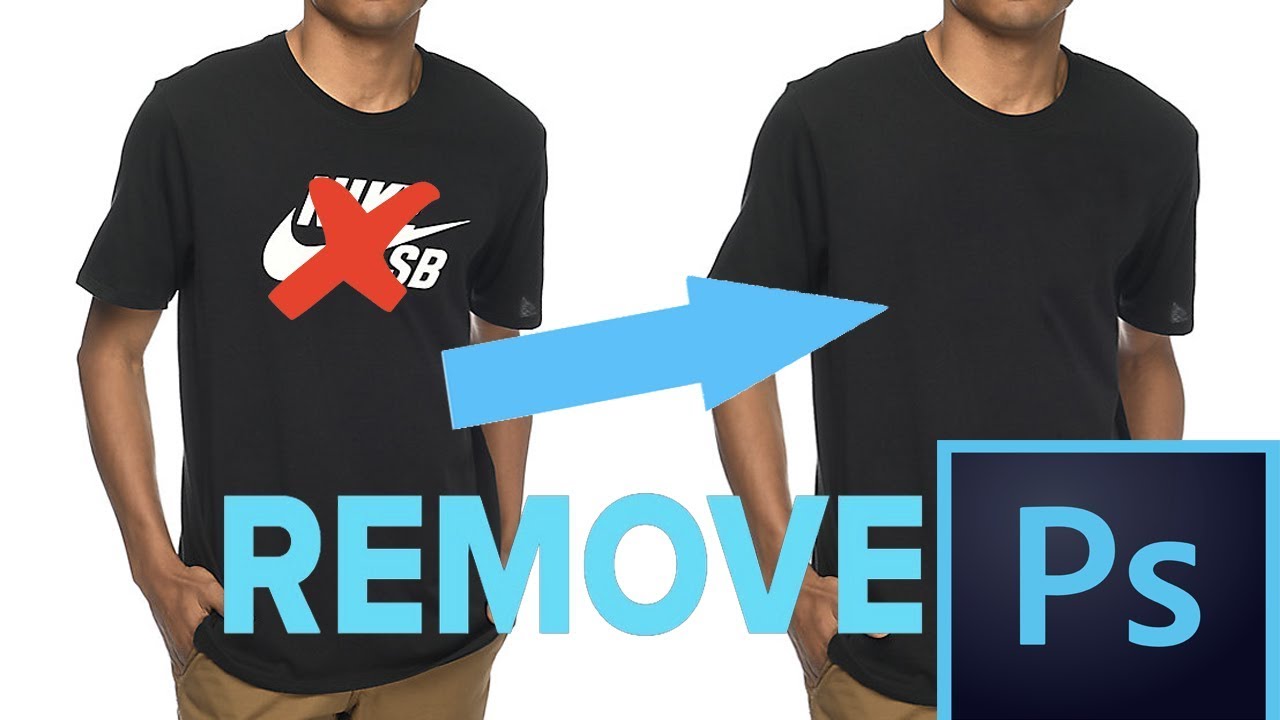
Here comes the long-awaited tutorial. If you’re trying to edit your clothing collection for your e-commerce store, this is the tutorial for you. If you just want to remove a few cloth wrinkles, this is the tutorial for you. I am going to show you how to remove cloth wrinkles in Photoshop.
This is going to a tutorial for the intermediate level users.
I have a video tutorial for you also if you like watching videos.
I also want to tell you that I take projects of editing clothing photos for e-commerce stores. The cost goes down to as low as $2 per photo. I can edit one photo for free for you. Shoot me an email at hello@tricky-photoshop.com.
Video
I’ll post a video this week.
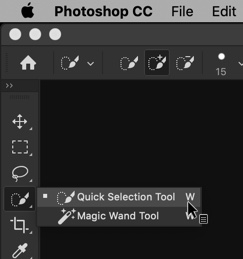
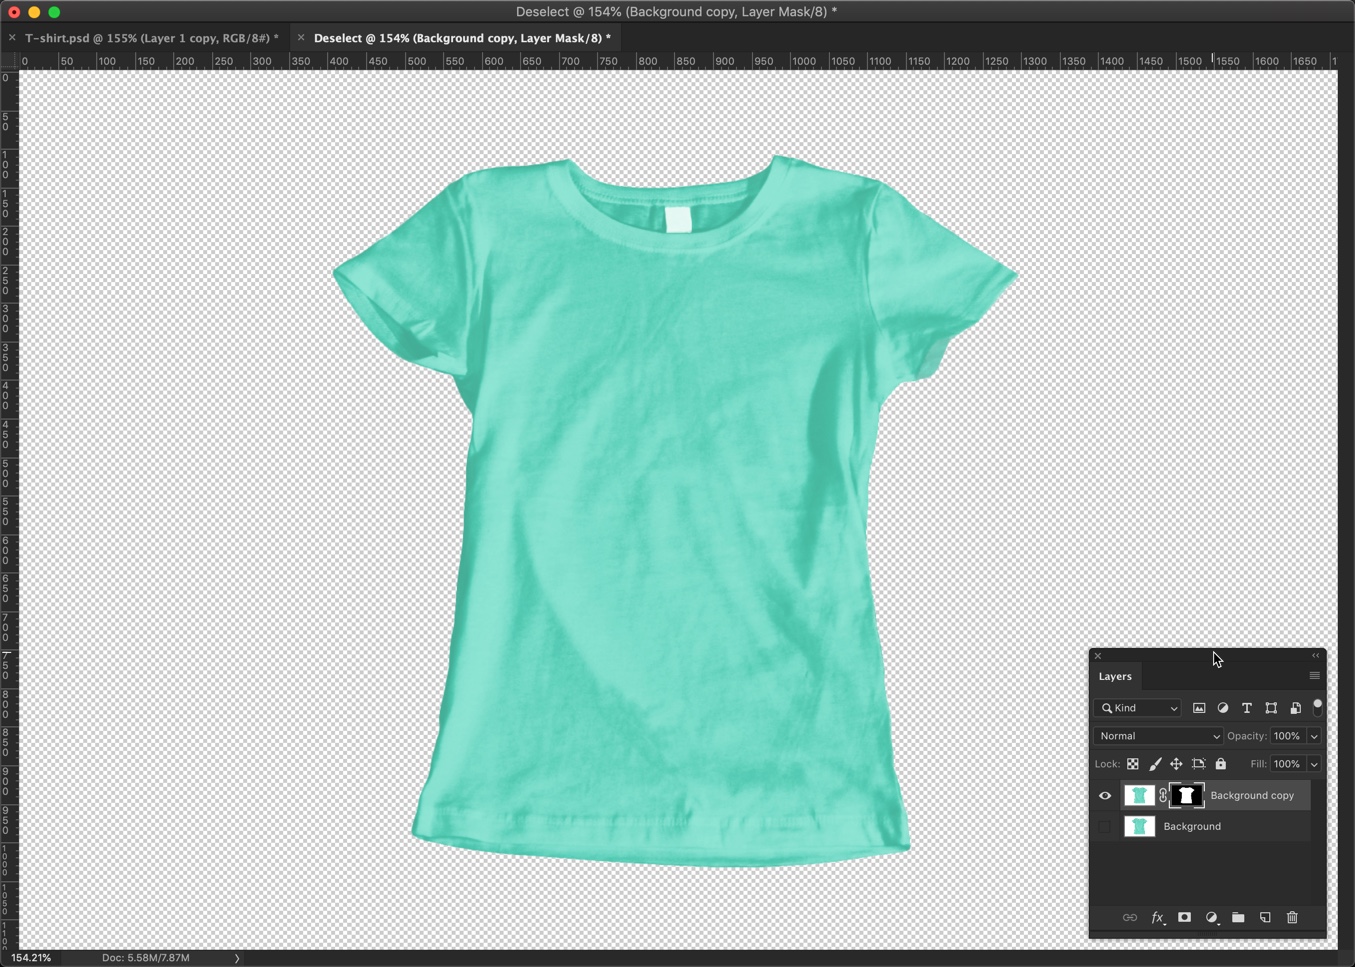
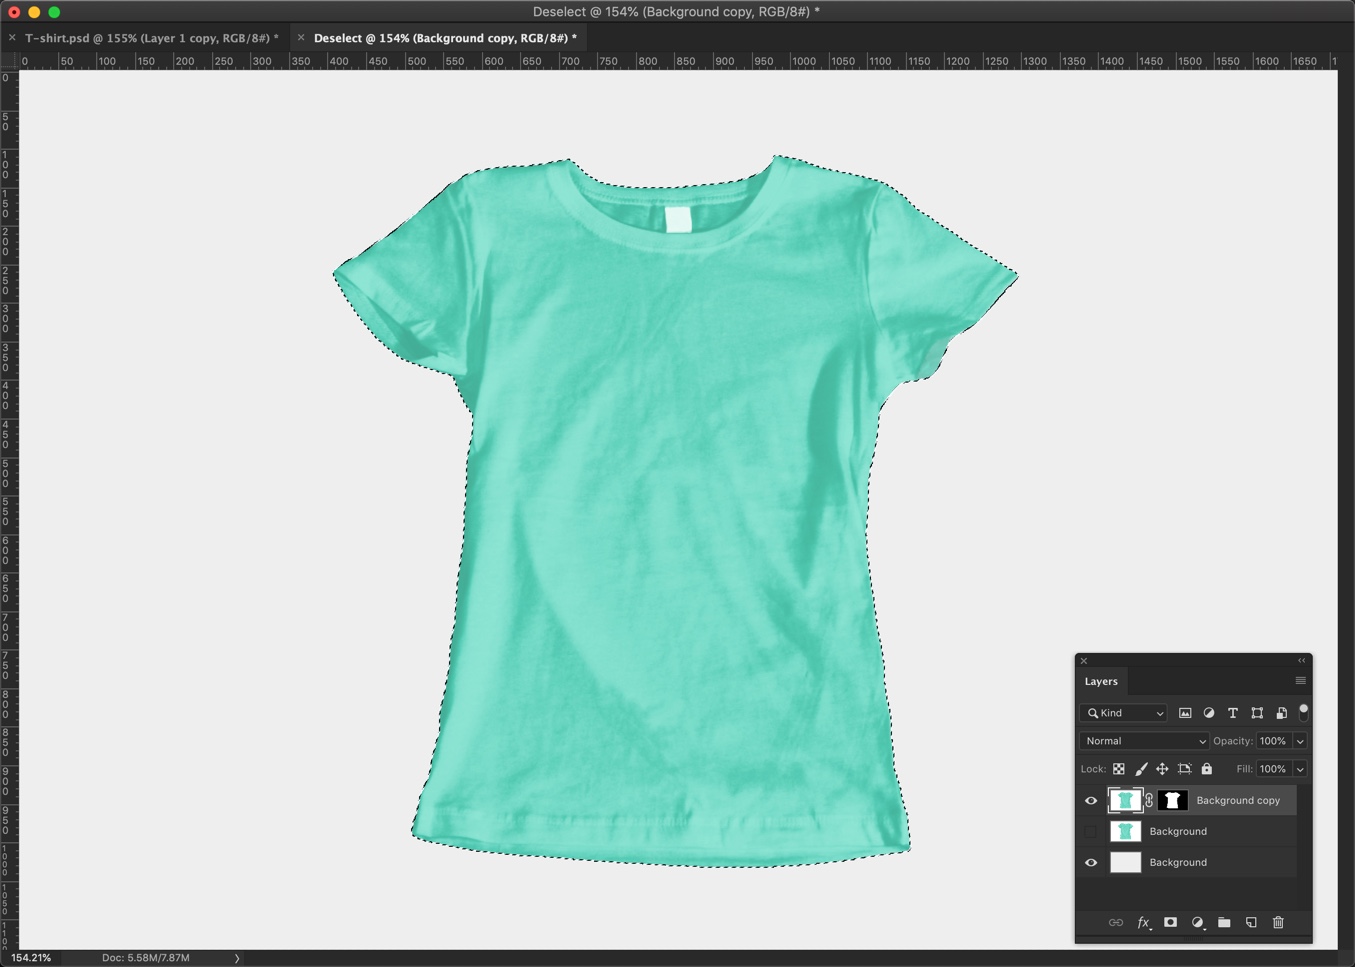
Step 1: Change the background of the cloth in Photoshop
The first thing we need to do is to change the background.
Grab the Quick Selection Tool from the tool panel or press Shift + W again and again until it comes.
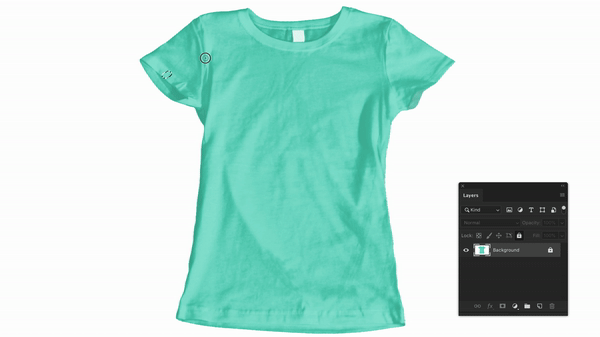
Now drag the tool to select the cloth.
We have made a selection but we’re not sure whether the selection is crisp and sharp. We need to refine it.
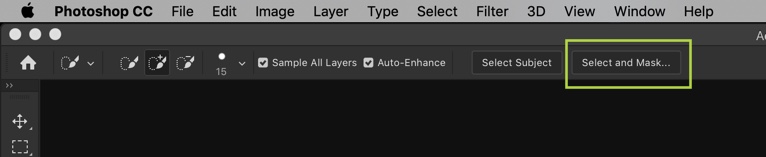
Choose Select and Mask in the option bar to make your selection sharper.
Adjust these sliders to refine your selection. Press OK.
Select and Mask is a very big topic in itself and I cannot explain what do these sliders do in this tutorial. If you want to learn what to these sliders do, you can see that in my tutorial on Select and Mask.
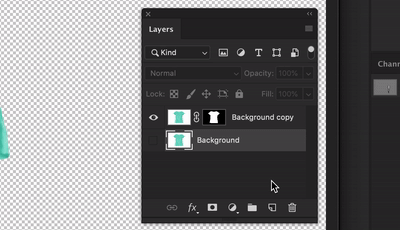
Here’s the photo.
Create a layer by pressing Cmd + Shift + N / Ctrl + Shift + N. Name the background and drag it to the bottom.
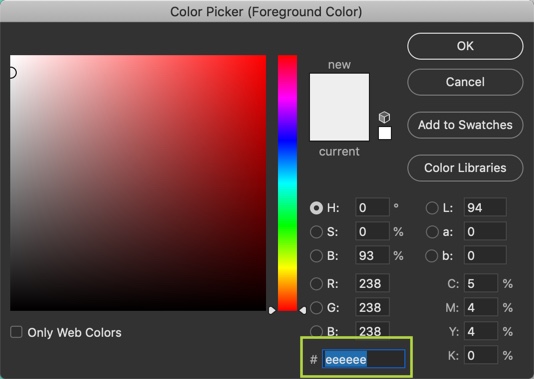
Click on the foreground color.
Write #eeeeee. This will change the color to light gray. Press OK
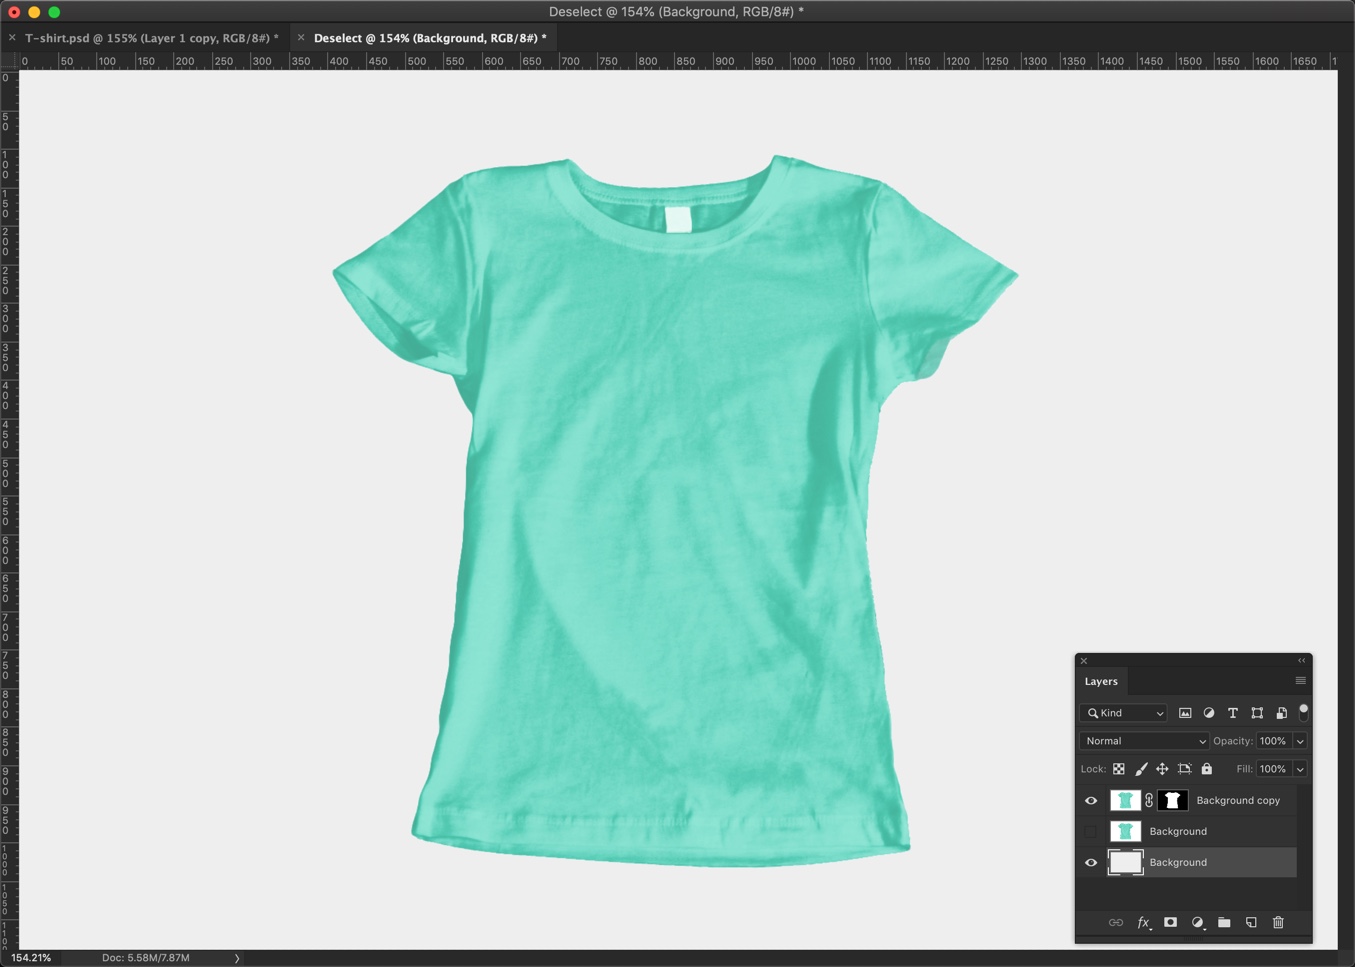
Press Opt + Delete / Alt + Backspace to fill the activated layer with the foreground color. Now you have a light gray background.
If you can’t remove the background, you can hire me. The cost goes down to as low as $2 per photo. I can edit one photo for free for you. Shoot me an email at hello@tricky-photoshop.com.
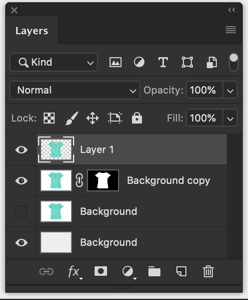
Step 2: Fix the shape of the cloth in Photoshop
We’re fixing the shape non-destructively.
For this, we need to create a new copy of the t-shirt.
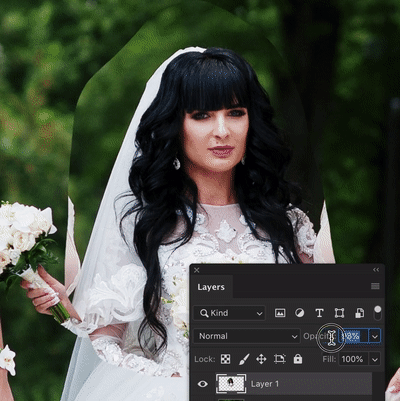
Hold down Cmd and click on the layer mask to select the t-shirt. This will select your t-shirt.
Click on the topmost layer to activate it and press Cmd + J / Ctrl + J to duplicate that.
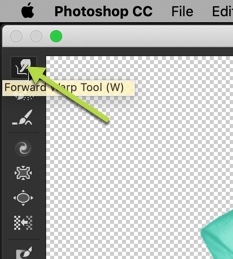
Go to Filter > Liquify
Grab the Forward Wrap Tool.
Now start pushing the bumps to align the t-shirt.
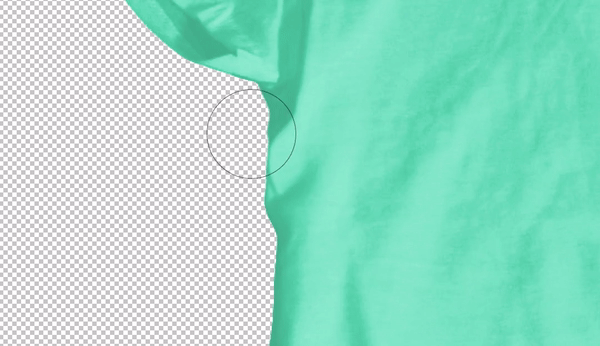
Deactivate the layer from which we duplicated this layer.
Here’s how your final photo should look like.
If you can’t align the cloth, you can hire me. The cost goes down to as low as $2 per photo. I can edit one photo for free for you. Shoot me an email at hello@tricky-photoshop.com. You can see more details on the cloth editing page.
Step 3: Remove cloth wrinkles in Photoshop
Create a new layer at the top of the layer panel by pressing Cmd + Shift + N / Ctrl + Shift + N.
Grab the Mixer Brush Tool from the tool panel or press Shift + B again and again until it comes.
Here’s the photo of my option panel.
Now start brushing the t-shirt. You’ll see the wrinkles fade away.
Here’s the photo.
This is it, guys.
If you can’t remove the wrinkles, you can hire me. The cost goes down to as low as $2 per photo. I can edit one photo for free for you. Shoot me an email at hello@tricky-photoshop.com. You can see more details on the cloth editing page.
If you think that the shape is not perfect then you can again use the Liquify tool to correct the shape. Just follow step 2 again.
Here’s your most asked tutorial. The best 27 Photoshop tips according to me.
I am segregating the tips based on their usage.
Photoshop tips to speed up your work
1: Press Shift + (+) and Shift + (-) to cycle through different blend modes. Make sure that the layer panel is open. Press F7 or go Window > Layer to open the layer panel.
2: To resize, rename and convert a batch of photos, go to File > Script > Image Processor.
3: To get the color style of a different photo, go to Image > Adjustment > Match Color.
4: For black background and white foreground, press D.
5: Press X to swap the background color with the foreground.
6: For interactive zoom, hold down Cmd/Ctrl + Space then drag right to zoom in and left to zoom out.
7: To toggle between opened documents, press Cmd/Ctrl + Tab.
8: For circular or square selection, hold down Opt/Alt when drawing a selection with the Marquee tool.
9: To close all files, Hold down Shift and click on the close icon of any file.
10: To take a look at the entire photo when zoomed in, hold down H to activate the Bird’s Eye view.
11. To sample a color while using the Brush tool, hold down Alt and Photoshop will temporarily activate the Eyedropper tool.
12. To cycle through brushes, keep on pressing (,) and (.).
13. To change the size of the brush, keep on pressing ([) and (]).
14. To change the hardness of the brush, hold down Shift and keep on pressing ([) and (]).
15. To reset a slider in the Camera RAW, double click on the handle of that slider.
16. To cycle through the Dodge and Burn tool, hold down Opt/Alt to instantly activate another tool. For example, if the Dodge tool is activated, hold down Opt/Alt to instantly activate the Burn tool.
17. To change the opacity of the Brush tool, press any number between 0 and 9 to change the hardness. Make sure that the Brush Tool is activated. 1 will set the hardness to 10%, 9 to 90%, and 0 to 100%.
Photoshop tips to take away your irritations
18. To move the selection, hold down Space and move the selection
19. To get 1,000 history states and unlock the undo 1,000 times, go to Edit > Performance and increase the History States. Default is set to 20.
20. To decrease the size of the PSD, hide all the layers in the layer panel and then save. Generally, it reduces size by up to 28%.
21. To protect someone else from editing or saving your PSD, go to File > Save As and then choose Photoshop PDF. Select Security under Permission and create a password.
22. To use shortcuts when when Text tool is activated, press Cmd + Return / Ctrl + Enter. This will move the focus outside of the text field.
23. To select entire content a layer, hold down Cmd/Ctrl and then click on the thumbnail of the layer in the layer panel. Press F7 or go Window > Layer to open the layer panel.
24. To convert a layer style to a layer, right click on the layer style and select Create Layer.
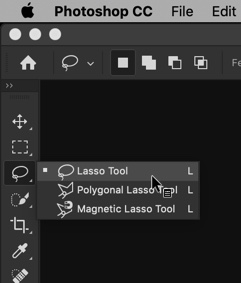
25. To switch between differnt tools of the same set (like swithcihing from the Magnetic Lasso Tool to Polygonal Lasso Tool), hold down Shift and keep on pressing the keyboard shortcut for that tool. For example, keep on pressing Shift + L to swith between different Lasso tools.
Bonus Tips
26. To hide or reveal the selection’s marching ants, Press Cmd/Ctrl + H. The selection will still be there but Photoshop won’t show marching ants.
27. To draw a straight line or to move an object in a striaght line, hold down Shift and the do the move it.
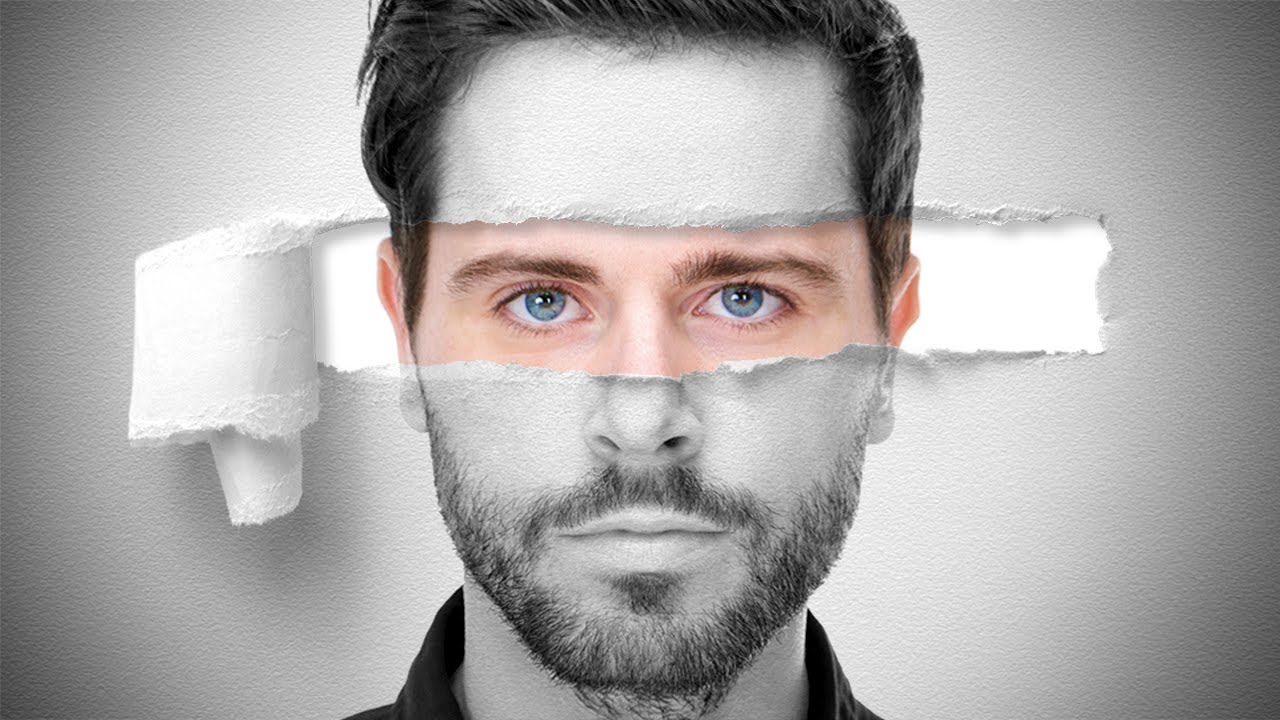
Shooting a group photo and someone blinked? Do your two kids never pose nicely together? Does your pet rarely look at the camera long enough for you to shoot a good photo? If yes, Photoshop can help you out. Today we’ll see how to swap a face in Photoshop.
I am going to swap the face of the same person. You can use the same approach to swap the face between two different persons.
Before we begin, let me show you the before and after
I get countless requests to swap the face of a person. Around 70% of them are not doable because the photos don’t follow the most basic rule.
The two faces must be shot at the same angle.
You cannot swap the face of the girl in the couple photo with the face in the selfie photo. No one can do it. Not even the most talented Photoshop artist in the world.
If you want to replace the whole girl then this rule still follows. In the below photos, you can swap the entire girl because the camera angle is the same. Both photos are shot from the front, and camera height and woman’s height are matching.
Let’s begin the tutorial.
Step 1: Copy the good face that you want in the main photo
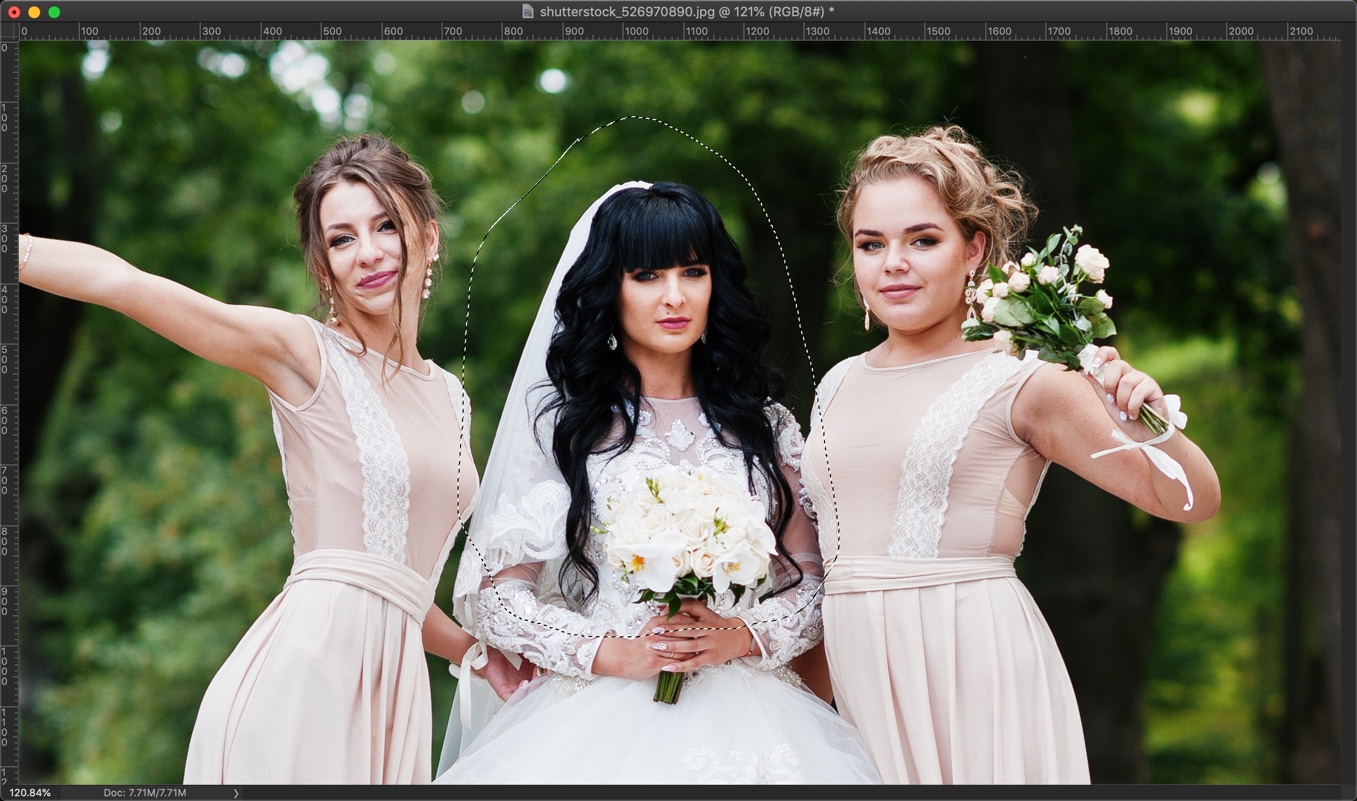
Firstly, we need to select the face that we want to copy. The selection will be rough.
We’re going to use Lasso tool for this. Grab the Lasso Tool from the tool panel or press Shift + L again and again until it comes.
Draw a rough line across the face. Don’t forget to include all the hair. We need to include all hair because swapping the face requires swapping the hair also.
Copy the selected portion (face and the hair here) by either going to Edit > Copy or pressing Cmd + C / Ctrl + C.
Don’t have time to create a selection? Hire me to swap the face. Cost per image varies between $4 – $10. Mail me at hello@tricky-photoshop.com.
Step 2: Swap the face in Photoshop
Go to the other image which is having the not-so-good face.
Paste the face by either going to Edit > Paste or by pressing Cmd + V / Ctrl + V.
Photoshop will paste the face at the center of the photo.
Step 3: Align the swapped face
Activate the Free Transform Tool by pressing Cmd + T / Ctrl + T or by going to Edit > Free Transform.
You’ll now see 8 handlebars.
Now drag and drop the pasted face to the position where her actual face is.
You need to adjust the swapped face a lot of times to perfectly place it.
Pro Tip: Reduce the opacity of the layer on which you pasted the swapped face to somewhere around 40%. Now, align the face. This is what I do every time.
Change the size of the face also to align it properly.
Check the below GIF.
Having difficulty in aligning? Hire me to swap the face. Cost per image varies between $4 – $10. Mail me at hello@tricky-photoshop.com.
Step 4: Hide the unwanted parts
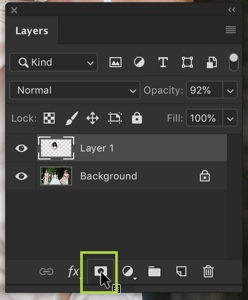
Add a layer mask by clicking on the layer mask button in the layer panel.
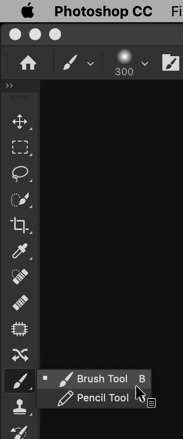
Grab Brush Tool from the tool panel or press Shift + B again and again until it comes.
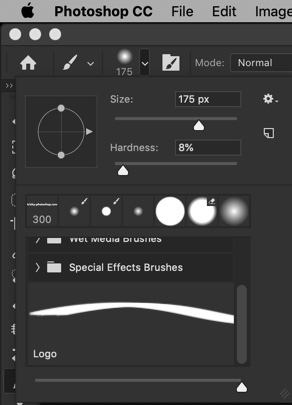
Set the size as per the photo and set the hardness to somewhere around 10%.
Change the foreground color to black.
Brush the area which you want to hide.
Here’s the GIF for you.
Swapped the face and photo is looking photoshopped? Hire me to swap the face. Cost per image varies between $4 – $10. Mail me at hello@tricky-photoshop.com.
Photoshop is one of Adobe’s most popular software solutions. It’s incredibly versatile, as it covers a broad range of applications, from image creation and photo editing to graphic design. However, to master all the possibilities this powerful program can offer you will need some time and persistence.
To get started and to advance in Photoshop, you will need to get well acquainted with PS keyboard shortcuts and dedicate time to watching tutorials and reading useful articles that can help you rise from a beginner to a pro. Here are the top 10 Photoshop articles published in March 2019 that you should definitely check out.
1. Removing unwanted logos
A good way to get started with Photoshop is to learn some of the basics first. If you are interested in photo editing capabilities of this software, this article will prove to be a great starting point.
If you want to learn how to remove unwanted elements from your photographs and adjust the areas behind them to show no signs of editing, this Sleeklens article will teach you everything you wanted to know.
2. Working with hair in photographs
Not every model has a straight, shiny hair that you can easily manipulate with in Photoshop. What can you do if a model on the photographs you need to work on has messy or curly hair? This Adobe’s article will help you sort it out in a few simple steps.
The combination of the Lasso tool and the Content-Aware Fill tool will help you remove any unwanted object, and the Spot Healing Brush can be used for the final touch-ups and leveling out the persistent imperfections.
4. Retouching basics
From adjusting the look of unruly hair and distracting backgrounds to removing skin blemishes: Intro to retouching in Photoshop announces 27 video tutorials and 21 sample images created by PS instructor Aaron Nace. If you’re interested in a course like this, striving to learn to retouch like a pro, make sure to check it out.
5. Faking shallow depth of field
Introducing the concept called the focal plane, this tutorial will help you master different options from Blur Gallery and several other filters, allowing you to create dreamy portraits with a fabricated depth of field. As this look is getting quite popular, learning this skill will undoubtably be useful for you.
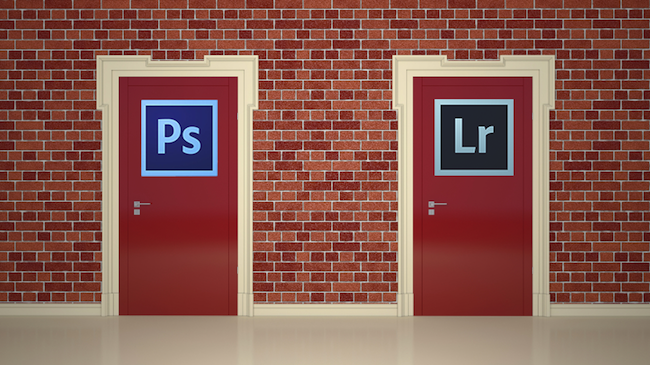
6. Lightroom vs. Photoshop comparison
How can the same picture turn out when edited in two different programs for photo manipulation, both created by Adobe? Fashion photographer Jessica Kobeissi is here to show you the advantages and disadvantages of these programs, showing you the final results at the end of the tutorial.
7. Turning videos into GIFs
According to the Professional writer service experts, the video format, which became extremely popular in 2018, isn’t going away any time soon. Knowing how to create a GIF from video footage can come in handy any day, and this tutorial will help you master this skill in just a few steps.
From adding color and texture and using animations to creating engaging titles, this tutorial will help you make an interesting visual piece you’ll be happy to show.
9. Software meets hardware
Perhaps you’re interested in learning how Photoshop works, but you’re not sure if your computer can handle the software requirements? Check out this CG Director’s article to find out how much RAM Photoshop needs to work optimally, and improve your knowledge on image compression, bit depth, resolution, and working with layers.
10. Nik Photoshop Plug-Ins
To round up the experience, our last Photoshop-related article suggestion covers a topic concerning a software development company Nik, which amazing work lead to a collaboration with Nikon, before it was ultimately bought by Google. The story doesn’t end here, and if you want to know more, check out this Forbes’ article on the subject matter.
Conclusion
March 2019 was marked by some excellent pieces of content that a lot of internet users can learn from. It is no different when it comes to tutorials and articles related to learning various aspects of Adobe’s Photoshop. Edu Birdie review content creators suggest keeping up with the trends, so you can prepare for what the rest of the year will bring along.
In such a crowded marketplace, it’s really important for you as a web designer to do something to set yourself apart. Being talented, energetic, having experience and driving hard towards your goal are good places to start, naturally, but another really important part of your arsenal when it comes to overcoming your competition It’s your cover letter. So, here I bring you the tips for writing a cover letter as a web designer.
A cover letter is a chance to really optimize your designer application: a resume or CV is one thing, but a cover letter lets you really approach your companies of choice directly.
Being able to do this can really make your application appeal directly to your potential employers. Here are a few ways to make it as good as you can.
1. Experience
With all internet design jobs, it’s really important that the message you want to broadcast to your employers most specifically is how experienced you are.
Having a good degree, or having interesting extracurriculars, even having worked at a certain company are not things which will compare to solid web design experience.
Your cover letter has to reassure your potential employer that you can do your job, that you have done it. Don’t slack on this: the more explicit you can state this the better.
2. Be Concise
For all tech positions, no employer is going to appreciate blithering. “Web design is a very black and white field”, writes Mark Anthony, cover letter editor at Academized.
“When a vacancy opens, they want to fill it fast, they are simply looking to see if you can do it and if you can do it well.
So, wasting time in your cover letter with pleasantries and unrelated info will do you no favors.” Approach it like you need every single sentence to have value, justify everything you write.
3. Show Your Knowledge Of The Company
Cover letters are targeted towards specific companies. You never want to give even the slightest sense that you’ve sent the same cover letter format to multiple companies.
One way to ensure that is to speak directly to your knowledge of the company you are applying to. Web design is a field that has a large demand for employment.
It can also be done at a distance sometimes. So, companies like to be able to know that you care about working for them specifically.
Show you know their company and demonstrate why you want to be there in the cover letter.
4. Write It Well
Web design may be a highly technical field where it doesn’t seem much like there is a need to be a top seller. However, engaging, well written and, crucially, accurate writing really spells professionalism and care, not to mention make your cover letter more enjoyable to read.
However, as a web designer, you may be a bit out of practice when it comes to writing. So here are some tools to help you with that:
Academadvisor and Studydemic – These are two resources that will help you with grammar, a subtle area which can really affect the impression your cover letter gives off.
Revieweal and Studentwritingservices– Blogs with general suggestions and tips on how to go about putting together your cover letter. Great for beginners.
Assignment Help and Grade On Fire – A pair of online editing tools, both helpful for running your cover letter through to ensure it’s all accurate.
5. Be Honest
Lying in your application, about the experience, about passion, about anything really is a bad idea. Lying on your cover letter is a really bad idea since it is a personal letter.
If your application ends up being good enough to get an interview you can really find yourself in hot water, quick. By lying on your application, you leave yourself vulnerable to your claims being probed in the interview.
Being found out as not entirely honest on your application gives your potential employer a sense that you will be potentially unreliable and unprofessional.
It also leads them to doubt everything that you wrote, potentially discrediting even your true claims. So, tell the truth and emphasize what you bring not what you wish you could bring.
Conclusion
The cover letter is a really special opportunity for you to show the specific company you are applying to you why you are so keen to work for them and why they ought to be keen to have you.
As a web designer, it is a chance to submit some well-written prose to your company, showing a diversity of skills. You ought to work as hard as you can to make the most of this tool.
As a photographer, this means that you will get a lot of clients for your business. One of the questions you will be faced with early on is whether you should be using raw images of Jpeg. It’s basically raw vs. jpg.
Sometimes living an exceptional moment is not enough. Sometimes you need to capture it all, in a lens, with all its beauty and magnificence. Photography allows you to do so. It doesn’t matter whether you wish to crystallize a moment for your personal use or your business; photographs play a much more significant role in your life than you think they do. Almost all industries use them for marketing their services. On a personal level, people use them to hold on to precious moments.
What are Raw images?
Both Raw and JPEG images are types of file format. RAW is a type of format that captures all the available image data in its entirety. When you take a photo using your camera, the sensor records quite a lot of data.
For instance, let’s say you take a picture of a person. The RAW image will depict every feature of the said person to the tee. This is why it is often said that RAW images have better quality than Jpeg images. Raw images are workable; it is easy to process them afterward. For instance: There is a blog that explains how you can remove dark circles in Photoshop.
Such editing is best done on raw images. Before you think about post-processing, think about the mode of capturing images.
What are JPEG/JPG images?
Contrary to Raw images, Jpeg images are processed in nature. And this occurs within the camera.
Note: JPEG and JPG are the same file formats. They just have a different name. I wrote a tutorial a few months ago and I described why because of Windows we have two names for the same format.
This means that the first output you get after capturing a picture is a compressed and processed version of the photo you took. The level and type of processing vary from one model of camera to another.
Elements like color temperature and exposure are altered according to the settings of the said camera.
Moreover, additional changes like contrast, brightness, sharpening, noise reduction, and addition of blacks are added, and then the file is compressed to deliver the output.
Benefits of Raw Images
To understand which type of format is best for you, it is essential to know the advantages offered by both. Here are the benefits of using raw images.
It produces the best quality images
When you are a professional photographer, the quality of your pictures matter.
Let’s say a company gives you the task of shooting pictures for the website. With their logo design, placed on every picture, they require professional photos as well. Here, quality matters. And the highest level of quality is only delivered by RAW images.
A quality lens can only showcase its full glory through its raw images. After automatically processing it, the results can never be as perfect as they once were.
With raw photos, you are given autonomy to process the images as per your expertise. And your brain is much better than the processing capabilities of any camera.
Greater levels of brightness
There are various stages of turning the black parts of the picture to white. These steps are known as levels of brightness.
All photographers know that the higher the levels of brightness, the better the picture since it ensures smoothness.
Compared to JPEG, which records 256 levels, RAW images tend to record levels between 4096 to 16384. In professional lingo, this is known as “bit.” JPEG is known to capture photos in 8 bit while RAW does so in 12 or 14 bit.
Therefore, additional steps of brightness are much smoother and also allow you to make various alterations to the image without reducing quality. Why? This is because there are more levels available for you to work with.
Easy corrections
As a photographer, you will not just be working in controlled environments. Instead, you might have to cover events where things are dynamic and mobile. Let’s say you get hired to cover a wedding.
It doesn’t matter how great of a photographer you are; some pictures will still come out over or underexposed. It isn’t much you can do if you take photos in jpeg mode.
However, in the case of raw images, you can quickly correct the issues because all the additional information about the image is already stored in the file.
Benefits of JPG
Does this mean that JPEG offers no incentives, at all? No! Here are certain advantages you can only realize if you choose JPEG images.
No need to worry about image processing
If you are new to the world of photography, processing pictures manually might seem like the most laborious task. There are a lot of elements and factors that you need to work with. This is why many beginners prefer JPEG since it does all the processing for you.
When shooting pictures in JPEG mode, all you need to do is focus on your subject and capture the image. All the laborious work is then done by the camera. This includes factors like color saturation, white balance, tone curve, sharpening and color space, etc.
For a beginner photographer, this mode gives them a chance to perfect their photo capturing ability and hence build a sound portfolio. Not only this, but JPEG photos can also help professional photographers with delivering consistent photos, all year round.
It also helps with ensuring quick output, which might be preferred by those who are swamped with projects.
The size of the file is small
JPEG images are compressed files. This means that they take up less space on your memory card. Contrary to this, RAW images are enormous.
After all, they feature every minute detail of the scene they capture. If you are shooting for an event, shooting in RAW mode means carrying a lot of memory cards because they will fill up at a fast rate.
If you have a fast-paced project where you don’t have enough time to keep changing memory cards, it is better to opt for JPEG mode.
Final Verdict
So, which is better? Unless convenience is your priority, it is safe to say that RAW images emerge victorious in this battle. As a photographer, I always try to capture images in RAW mode. This will help you take beautiful portraits that your clients love!
About the author: Michelle Joe is a blogger by choice. She loves to discover the world around her. She likes to share her discoveries, experiences, and express herself through her blogs. You can find her on Twitter, LinkedIn, Facebook