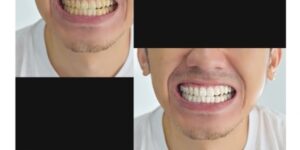
Lately, I keep getting request on my Facebook page to write a tutorial to whiten teeth in Photoshop. How can I say “No” to my regular readers? In fact, if you want me to write a tutorial for you, like my Facebook page and post it there. For this tutorial, I am going to use only one adjustment layer. Yes, you heard it right! You can whiten your teeth with only one adjustment layer.
Sidebar: It seems that you’re in portrait and last time I discussed Changing the Shade of Lips using Photoshop which you should read.
I am going to do is by creating a new adjustment layer and adjust the settings to make the teeth looks flawless. After that, you can also use some other effects to achieve the desired result.
Stock: http://vampurity-stock.deviantart.com/art/i-laugh-like-a-retard-96194582
Final Image
STEP 1: Desaturate the Image
Open your image in Photoshop. The first thing that we need to do is to create a new Hue/Saturation adjustment layer. Go to Layer>New Adjustment Layer>Hue and Saturation. Now click on the icon that is encircled with yellow color in the below screenshot.
Place your mouse on the teeth and press and hold down your left mouse button. Now drag your mouse to the extreme left and then release your mouse button. This will desaturate the color of the teeth. Note that the entire image desaturates.


