Adobe Photoshop 2020 is out. With it, Adobe has launched so many new features and one of them is the brand new Object Selection Tool. Let’s see what we have got in this brand new Object Selection Tool in Photoshop.
Let’s begin the tutorial.
What is the Object Selection Tool in Photoshop?
The Object Selection Tool in Photoshop is a tool to select anything in Photoshop. It can be a face, car, tree, house, or basically anything. As of November 2019, the accuracy of the selection is not that perfect for complex edges like hair, but it works pretty well for sharp edges like a house, car, etc.
Where do I find the Object Selection Tool in Photoshop?
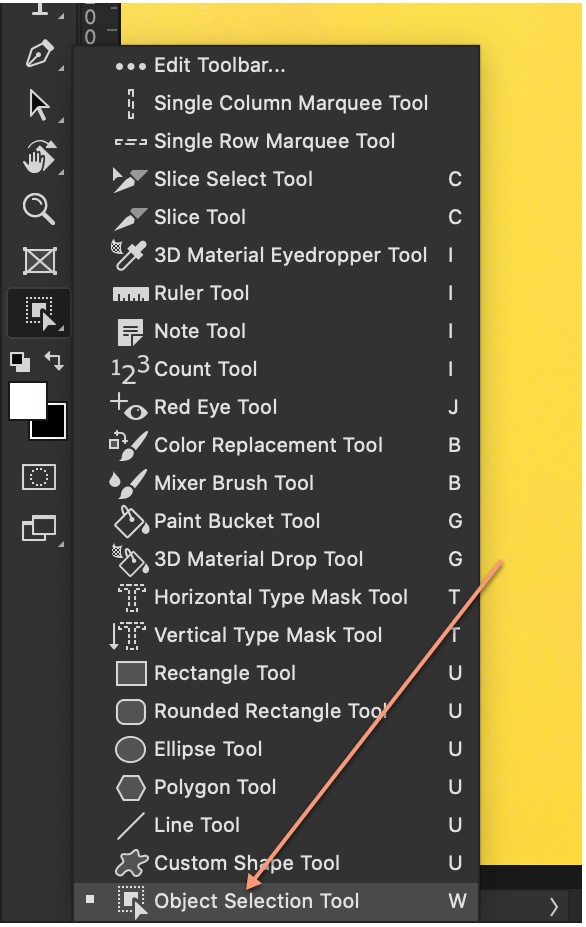
You can find it on the tool panel. It’s present along with the Quick Selection Tool or press Shift + W again and again until it activates.
How to use the Object Selection Tool in Photoshop?
The Object Selection tool in Photoshop is easy to use. Though it’s not as easy to use as the Select Subject, but it gives better results than the Select Subject.
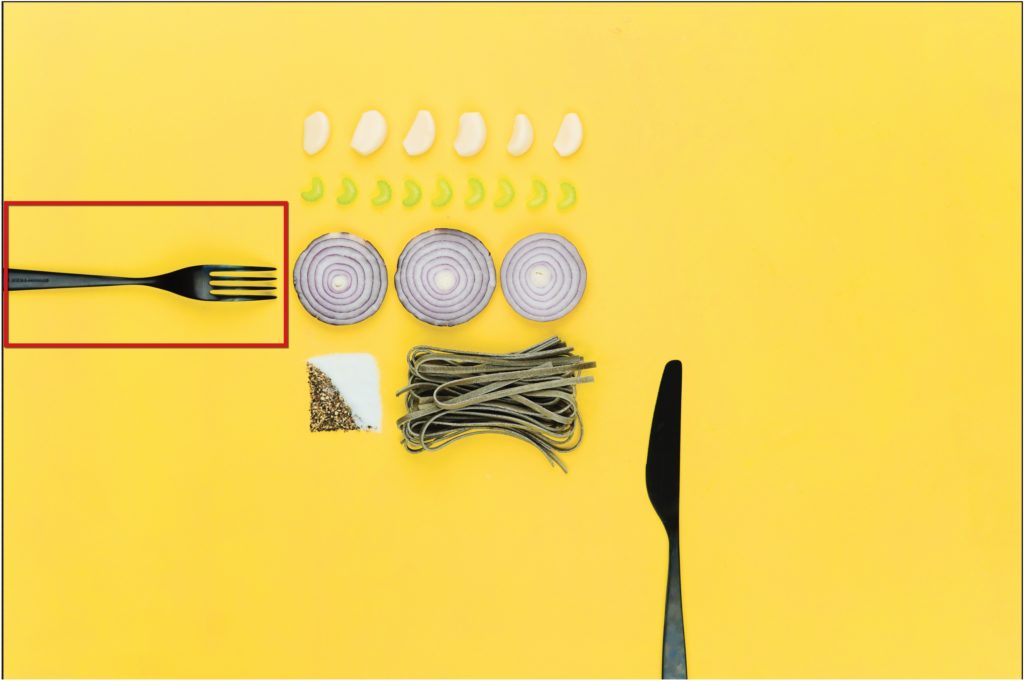
In the below photo, I am going to select the fork.
Step 1 – Select the Object Selection Tool in Photoshop
Either press Shift + W or grab the Object Selection Tool from the tool panel.
Select the rectangle from the option panel. I’ll explain the rest of the features in the option panel later.

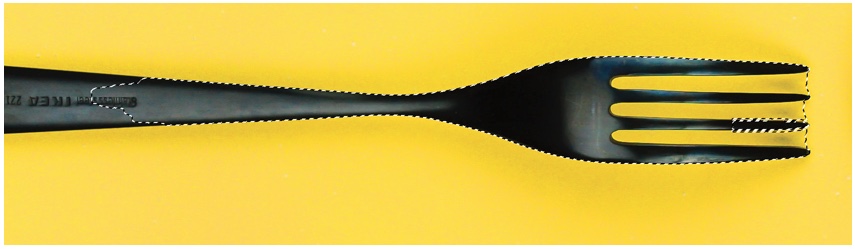
Now, draw a rectangle around the fork.

This is the result. You can see that it’s nowhere perfect.
Step 2 – Refine the selection using the Object Selection Tool in Photoshop
It seems that Adobe knows that the result doesn’t give perfect results always. So, it has added one more feature in this tool. You can add or subtract something to or from a selection using the same Object Selection Tool.
I am going to show you how you can do it.
Firstly, change the mode to Lasso.
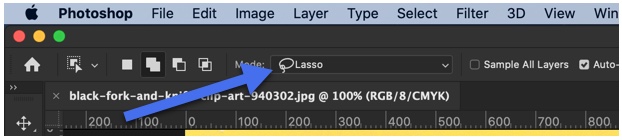
In the option panel, you’ll see four icons on the left side. These icons come handy now.
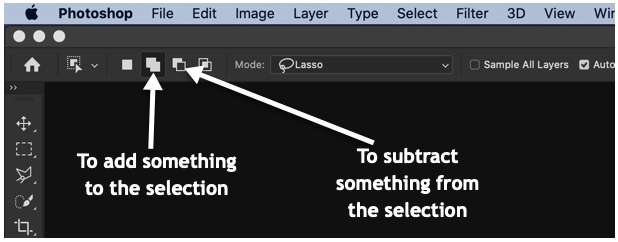
If you look at the screenshot below, you’ll see that I have marked the things that we want to add to the selection or subtract from the selection.
Fixing the handle
The handle of the fork needs to be added and the slots between the points need to be subtracted from the selection.

We’ll first add the handle to the selection. Click on the second icon in the option panel. See the below screenshot.
When refining the selection, I found it really hard to use the Object Selection Tool because of its inaccuracy. I needed to use it multiple times and had to spend a lot of time which could easily be saved using the Quick Selection Tool.
So I decided to use the Quick Selection Tool instead.

Fixing the slots
Again make use of the Add to Selection and Subtract from Selection icon to do this.
See the below GIF. Yes, you could do the same work in probably half of the time using the Quick Selection Tool. But, I stuck with the Object Selection Tool because this tutorial is on it. Give some time to Adobe and I know that it’ll optimize this tool.
That’s all, guys.
See you in the next tutorial.


