Hey, guys! How are you? Welcome to another Instagram tutorial. Last time I showed you how to create Instagram Crema filer in Photoshop. This time, let me show you how to create Instagram Ludwig filter in Photoshop.
Ludwig filter adds a bit of redness and yellowness in the photo and boosts up the contrast. We are going to do the same in Photoshop with the easiest way possible. This is a short tutorial and should not take more than 10 minutes to complete.
But before we begin, let me show you the final image:
Final

Video
If you like watching videos, here’s the video tutorial for you.
Step 1: Tweak Brightness and Contrast
Let’s increase the brightness and contrast of the image.
Go to Layer>New Adjustment Layer>Brightness/Contrast.
Increase the Brightness to 23 and Contrast to 100.

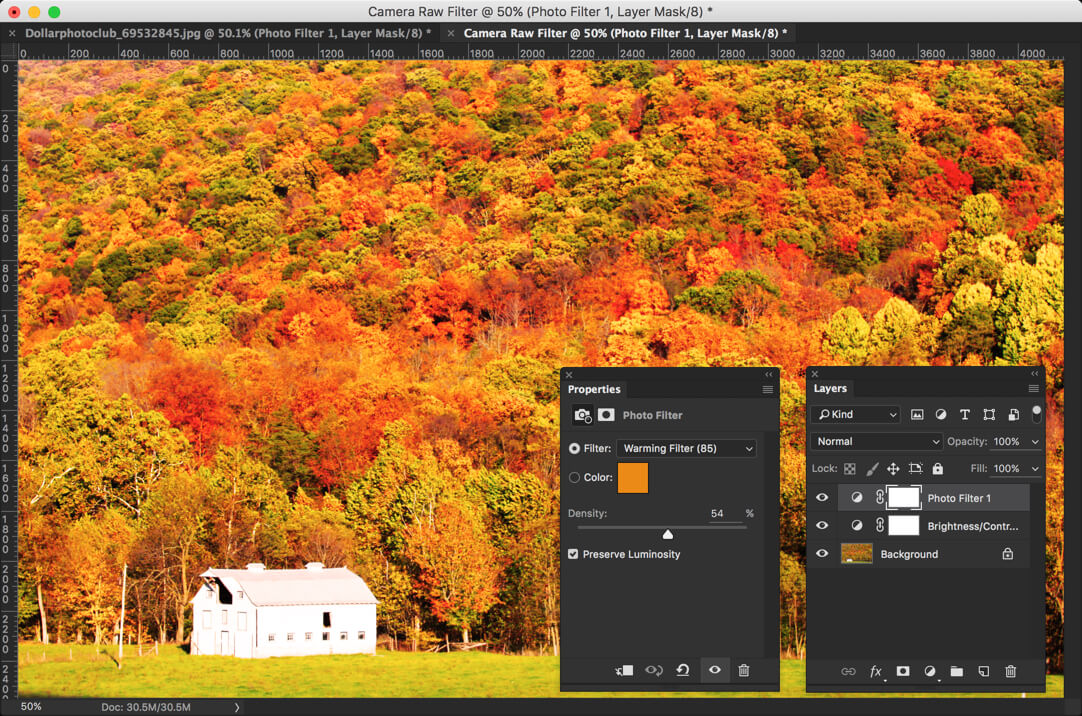
Step 2: Insert Warm Effect
Time to give a warm touch to the photo. Let’s make use of Photo Filter.
Go to Layer>New Adjustment Layer>Photo Filter.
Choose the filter as Warming Filter (85) and increase the density to 54%.
Step 3: Add Redness to the Photo
Let’s give a reddish tone to the image.
Again head back to Layer>New Adjustment Layer>Photo Filter.
This time, choose “Red” as filter and increase the density to 25%.
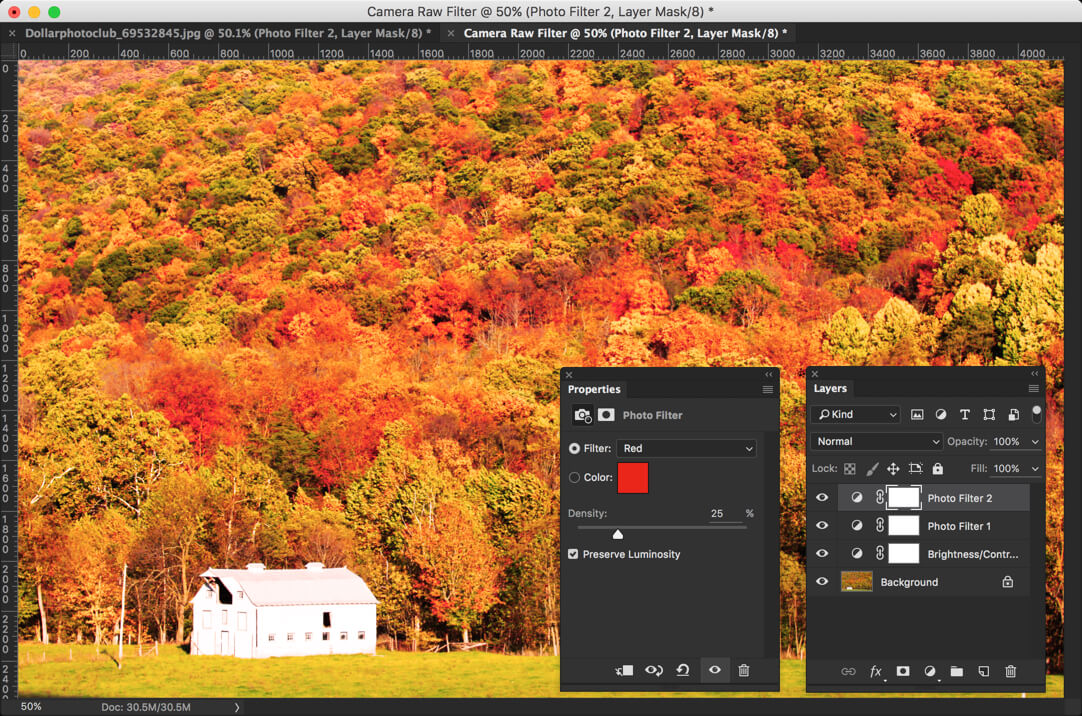
Isn’t the photo start to look exactly same as Ludwig filter? But still there’s one more step to do.
Step 4: Add Vignette Effect
Let’s add vignette effect. The easiest way to do it by using Camera RAW filter. But before using that, we need to stack all the layer onto a new layer. Press Cmd+Opt+Shift+E/Ctrl+Alt+Shift+E to do it.
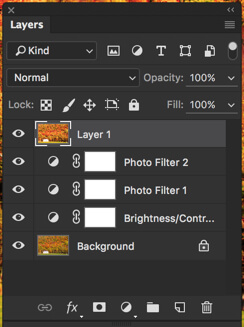
This will create a new layer at the top of your layer panel. To make you understand better, the newly created layer is just a merger of all layers.
Time to open the Camera RAW. Press Shift+Cmd+A/Shift+Ctrl+A to open the image in Camera RAW.
Straightaway move to the Effects tab and decrease the amount to -23. This will add a nice looking vignette to the photo.
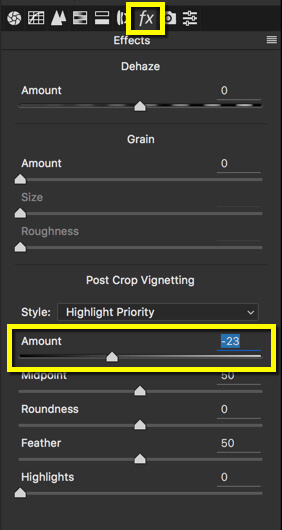
And now we’re done with the tutorial. Here’s the final image again for your reference.
Please support TrickyPhotoshop by sharing this tutorial with your friends and family on Facebook and Twitter.


