The world is recovering from a pandemic and people will be stepping out of the house more and more. The traveler or enthusiast in you will want to step out too and you’ll want to capture those moments and sceneries in the best way possible and capture the best moments with your new DSLR camera. This is why I decided to create a list of the best 17 DSLR cameras under $1000.
To capture your best moments, you’ll need the best DSLR camera possible, but your ‘best’ DSLR camera also needs to be in your budget. Not only does your budget matter, but you’ll also have different criteria for choosing your best DSLR camera.
So, we’re bringing you this list of the 17 Best DSLR cameras under $1000.
What are the eligibility criteria for selecting the best DSLR cameras under $1000?
The criteria for choosing the best DSLR cameras under $1000 for you include:
- Rating on Amazon
- Usability and quality
- Number of reviews
This shows that the performance of the camera is loved by the customers and it also has a high popularity.
What are the criteria to rank the best DSLR cameras under $1000?
We decided to rank the best DSLR cameras for you using the following criteria:
- Ratings (maximum weightage)
- Number of reviews
- Camera Specifications
After analyzing all the data collected, we used a ranking mechanism to rank the best DSLR cameras for you.
List of the 17 best DSLR Cameras under $1000 for You
Here is the list of best 17 DSLR cameras under $1000 for you.
1. Canon EOS Rebel T7i
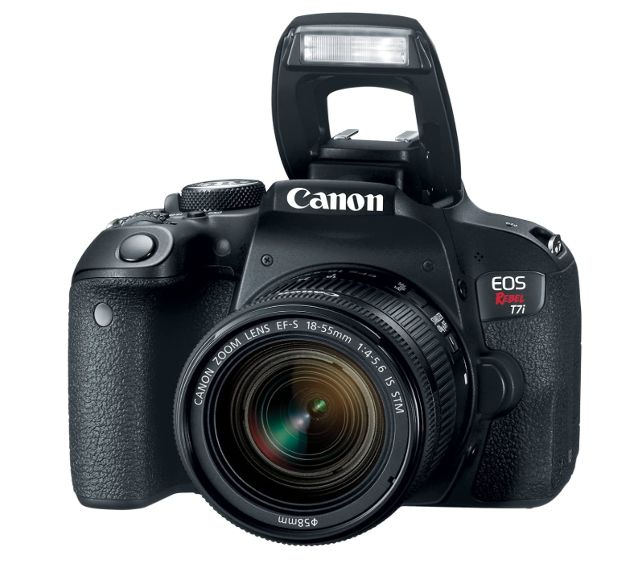
Rating & Reviews: 4.8⭐ and 397 Reviews
Price: $799
Specifications:
- Megapixels: 24.2mp
- Sensor Size: APS-C
- Inbox Lens focal length: 18-55mm
Pros:
- Dual Pixel AF
- LCD touchscreen
- Good build quality & lightweight
Cons:
- No major cons
It’s one of the most liked and best-rated cameras.
It has features like high-speed continuous shooting at up to 60 fps and it weighs approximately 1877 ounces.
With an optical viewfinder to see exactly what you’ll capture, as well as 45-point cross-type AF for accurate results, dual pixel CMOS AF with phase detection, and more, the EOS Rebel T7i is one of the most advanced EOS rebels yet.
2. Canon EOS Rebel T7
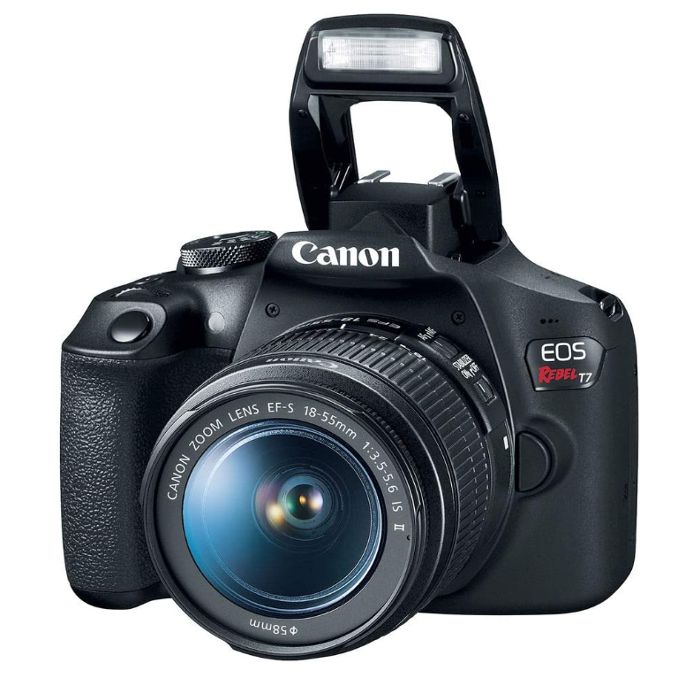
Rating & Reviews: 4.8 ⭐ and 177 Reviews
Price: $459
Specifications:
- Megapixels: 24.1mp
- Sensor Size: APS-C
- Inbox Lens focal length: 18-55mm
Pros:
- WiFi & NFC
- Full HD video
- Full kit included in the package
Cons:
- Good for beginners
- 3 fps continuous shooting
The EOS Rebel T7’s large 24.1 Megapixel CMOS sensor is great for beginners and hobby photographers.
Its Bluetooth, WiFi, and NFC provide good connectivity.
This package also has accessories from Ritz.
3. Canon EOS REBEL SL3
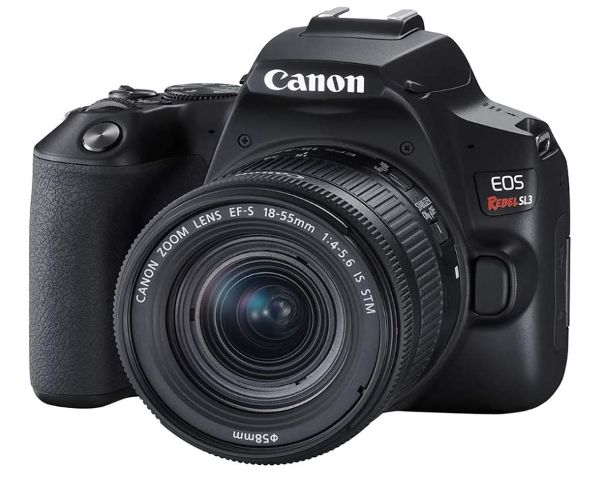
Rating & Reviews: 4.8⭐ and 110 Reviews
Price: $649
Specifications:
- Megapixels: 24.1mp
- Sensor Size: APS-C
- Inbox Lens focal length: 18-55mm
Pros:
- WiFi & NFC
- 4K video recording
- Vari Angle LCD
Cons:
- No 1080p at 24 fps
It’s a perfect camera for someone looking to get into hobby photography.
It’s also very lightweight and does the job perfectly, although it’s not recommended for professional photographers.
4. Pentax KP 24.32
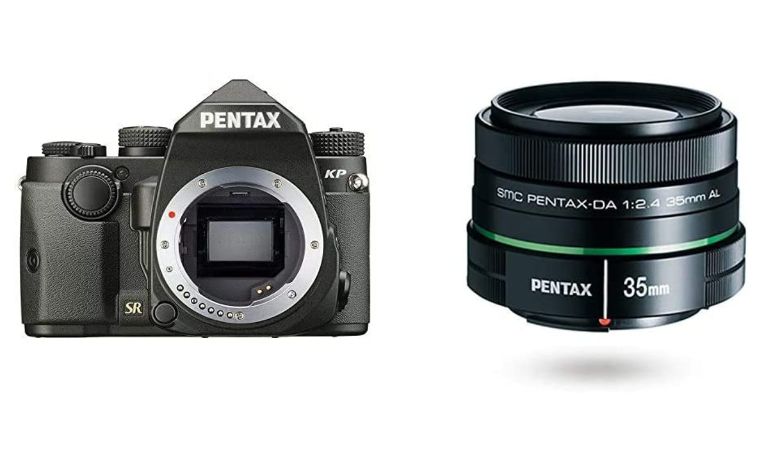
Rating & Reviews: 4.9 ⭐ and 62 Reviews
Price: $863.90
Specifications:
- Megapixels: 24.32mp
- Sensor Size: APS-C
- Inbox Lens focal length: DA 35mm F2.4
Pros:
- 5-axis shake reduction
- CMOS sensor
- Dustproof and waterproof
- Pixel shift resolution
Cons:
- No accurate AF
It’s a camera that takes fantastic photos, is durable, easy to use, it’s fairly priced, and it has a nice size.
It’s also dustproof and waterproof which makes it a good option in the range.
5. Canon EOS Rebel T6

Rating & Reviews: 4.9 ⭐ and 37 Reviews
Price: $529
Specifications:
- Megapixels: 18mp
- Sensor Size: APS-C
- Inbox Lens focal length: Canon EF-S 18-55mm f/3.5-5.6 IS II Lens
Pros:
- 9-point AF
- DIGIC 4+ image processor
- Extended ISO 12800
Cons:
- No major cons
Comprising of a versatile set of imaging capabilities along with support for a connected workflow, the EOS Rebel T6 from Canon is a compact, sleek DSLR featuring an 18MP APS-C CMOS sensor and a DIGIC 4+ image processor.
Combined, these two technologies offer rich image quality with reduced noise, along with a sensitivity range of ISO 100-6400 that can be further expanded to ISO 12800 to suit low and difficult lighting conditions.
6. Nikon D3400
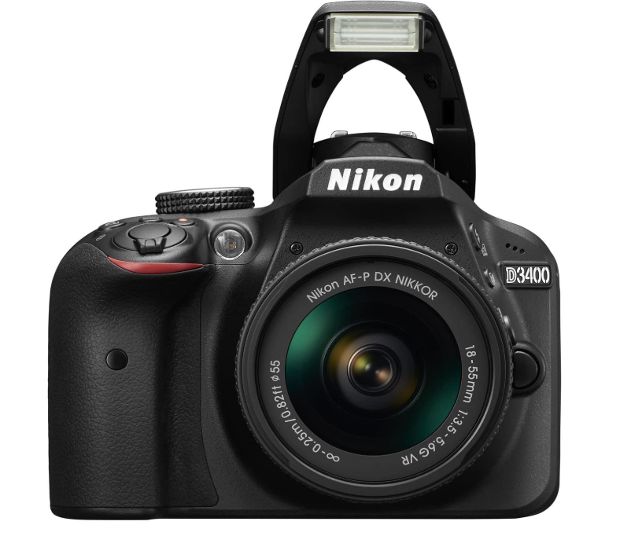
Rating & Reviews: 4.6 ⭐ 1910 Reviews
Price: $596.95
Specifications:
- Megapixels: 24.2mp
- Sensor Size: APS-C
- Inbox Lens focal length: 18-55mm f/3.5-5.6G VR lens
Pros:
- 5 fps continuous shooting speed
- Bluetooth SnapBridge
- Extended ISO 12800
Cons:
- No optical low pass filter
It takes flawless low-light photos with its native ISO range from 100–25,600.
It has the “speed to freeze time” feature and it uses Expeed 4 image processing.
You can always be connected to a smartphone with Nikon SnapBridge connectivity.
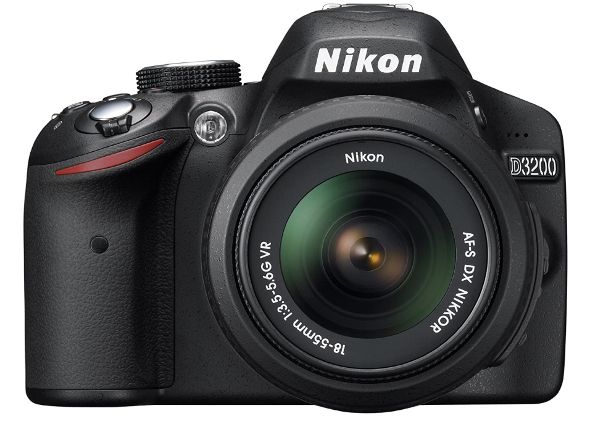
7. Nikon D3200
Rating & Reviews: 4.7 ⭐ and 1686 Reviews
Price: $589.95
Specifications:
- Megapixels: 24.2mp
- Sensor Size: APS-C
- Inbox Lens focal length: 18-55mm f/3.5-5.6G VR lens
Pros:
- 4fps continuous shooting speed
- Extended ISO 12800
- WiFi
Cons:
- Auto Focus issues
The D3200’s compact size and the price makes it a powerful package.
It’s easy to use the HD-SLR and it has serious Nikon power: a 24.2 MP DX-format CMOS sensor that excels in any light, EXPEED 3 image-processing for fast operation and creative in-camera effects, Full HD (1080p) video recording, in-camera tutorials and much more.
8. Nikon D5300

Rating & Reviews: 4.5 ⭐ and 817 Reviews
Price: $634
Specifications:
- Megapixels: 24.2mp
- Sensor Size: APS-C
- Inbox Lens focal length: 18-55mm
Pros:
- 5 fps continuous shooting speed
- ISO boost 25600
- Manual focus included
Cons:
- No image stabilization
The Nikon D5300 Digital SLR Camera has a 24.2-megapixel resolution that is achieved with the Nikon DX-format CMOS sensor.
Nikon’s EXPEED 4 image-processing engine gives your pictures and movies exquisite color.
Additional features: ISO sensitivity range of 100 to 12800, built-in pop-up flash, remote shooting function, built-in GPS, 39 focus points, 5 fps continuous shooting, nine special effects, Scene Auto Selector and more!
9. Nikon D5600

Rating & Reviews: 4.6 ⭐627 Reviews
Price: $796.95
Specifications:
- Megapixels: 24.2mp
- Sensor Size: APS-C
- Inbox Lens focal length: 18-55mm & 70-300mm
Pros:
- 2 inches 1.037m dot VARI angle touchscreen
- Full HD 1080p video recording at 60 fps
- SnapBridge Bluetooth and WiFi with NFC
- Expeed 4 image processor
Cons:
- Auto Focus Issues
The camera is accompanied by an impressive lens and its battery lasts 970 shots per charge.
Nikon also includes cloud storage Nikon Image Space for its users.
It has 39 autofocus points and a good responsive touch screen.
The camera can shoot at 5 fps and in low light at ISO level 25,600.
10. Canon EOS 2000D

Rating & Reviews: 4.7 ⭐ and 608 Reviews
Price: $360.64
Specifications:
- Megapixels: 24.1mp
- Sensor Size: APS-C
- Inbox Lens focal length: 18-55mm
Pros:
- Full HD 1080p video recording at 30 fps
- WiFi & NFC
- DIGIC 4+ image processor
Cons:
- Have to use propriety flash only
- Not good for portraits but does landscape pretty well
With the EOS 2000D and its 24.1 megapixels, you can easily capture first-class photos in DSLR quality and full HD videos in cinema style even in difficult lighting conditions.
Instantly share and operate the camera remotely with WiFi, NFC and the Canon Camera Connect app.
11. Canon EOS Rebel SL1

Rating & Reviews: 4.6⭐ and 577 Reviews
Price: $699
Specifications:
- Megapixels: 18mp
- Sensor Size: APS-C
- Inbox Lens focal length: 18-55mm
Pros:
- Hybrid CMOS AF II
- EF & EF-S lens compatible
- DIGIC 5 image processor
Cons:
- No flip screen feature
The camera has a small body and is lightweight.
It’s power-packed with good features.
Capable of shooting up to 4 fps for 7 consecutive photos, the Canon EOS Rebel SL1 also has full HD mode for videos. It’s also accompanied by a 3-inch touchscreen, optical viewfinder with 0.87X magnification, Hybrid CMOS AF, and scene-intelligent auto mode.
12. Panasonic Lumix G7

Rating & Reviews: 4.6 ⭐ and 516 Reviews
Price: $897.99
Specifications:
- Megapixels: 16mp
- Sensor Size: APS-C
- Inbox Lens focal length: 14-140mm
Pros:
- 4K Ultra HD modes
- OLED live viewfinder
- Silent shooting
Cons:
- Autofocus tracking
- Low light performance
The Panasonic G7 is the sixth camera in their G series line, and I have to say they have finally nailed it.
This camera sits right in the sweet spot of performance, size, and price.
It’s considered a mid-level camera but can do just about anything the higher end models can.
The 16-megapixel sensor has been refined and provides good high iso performance.
Plus RAW files are easy to work with. The headline feature, 4K video, is top-notch although you have limited manual controls for video recording.
Speaking of controls, this camera bristles with dials, levers, and buttons.
The handling is top-notch, everything falls into place and all functions are within easy reach for fast access.
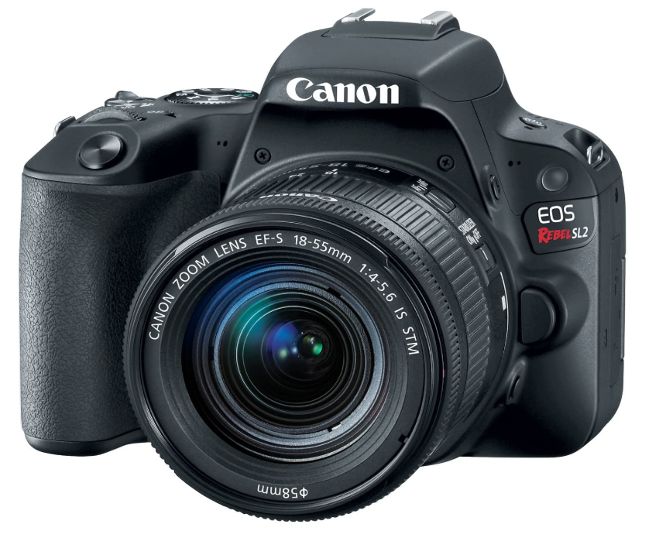
13. Canon EOS Rebel SL2
Rating & Reviews: 4.7 ⭐ and 464 Reviews
Price: $699
Specifications:
- Megapixels: 24.2mp
- Sensor Size: APS-C
- Inbox Lens focal length: 18-55mm
Pros:
- Full HD 60fps recording
- Optical viewfinder
- WiFi & NFC
- DIGIC 7 Image processor
Cons:
- No IR remote support
- The app interface is not great
Canon’s compact EOS Rebel SL2 provides versatile built-in Bluetooth and WiFi connectivity, plus key camera features like a newly-developed 24.2 megapixel APS-C Canon CMOS image sensor paired with Canon’s DIGIC 7 image processor, resulting in Rebel-series firsts such as Dual Pixel CMOS AF for smooth and accurate autofocus and a high-resolution touchscreen monitor that supports both Touch AF and Touch Shutter release functionality.
14. Canon EOS Rebel T5i
Rating & Reviews: 4.5 ⭐ 437 Reviews
Price: $799
Specifications:
- Megapixels: 18mp
- Sensor Size: APS-C
- Inbox Lens focal length: 18-55mm
Pros:
- Optical viewfinder
- Hybrid CMOS AF System
- DIGIC 5 image processor
- 9-point AF system
- Vari-angle Touchscreen 3.0-inch Clear View LCD monitor II
Cons:
- AF not accurate
The incredible image quality and performance starts with an 18.0 Megapixel CMOS (APS-C) sensor and Canon’s superb DIGIC 5 Image Processor.
Combined with an extensive ISO range of 100–12800 (expandable to 25600 in H mode), the EOS Rebel T5i boasts crisp, detailed images, even in low-light situations.
Continuous shooting speed of up to 5 fps allows for fast action capture.
9 cross-type AF focus points help ensure crisp focus throughout the frame, and the Hybrid CMOS AF system enables speedy and accurate autofocus when shooting in Live View mode.
In addition, the camera is compatible with Canon STM lenses for smooth, quiet AF performance.
15. Canon EOS Rebel T6i

Rating & Reviews: 4.5 ⭐ 354 Reviews
Price: $797
Specifications:
- Megapixels: 24.2mp
- Sensor Size: APS-C
- Inbox Lens focal length: 18-55mm
Pros:
- 19-point AF
- Hybrid CMOS AF III System
- WiFi & NFC
Cons:
- WiFi function on phone disrupts some functions
This is a great camera for amateurs and beginners.
It offers good functionality for its price.
You can use its EOS Utility Webcam software to turn the camera into a webcam.
Its high-speed continuous shooting allows up to 50 fps and its ISO is expandable to H: 25600. It also has a DIGIC 6 image processor.
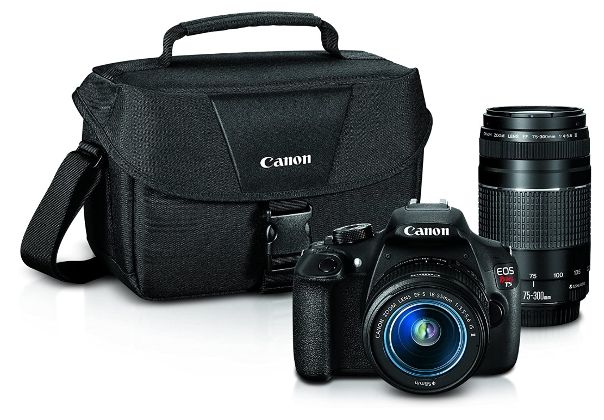
16. Canon EOS Rebel T5
Rating & Reviews: 4.6 ⭐ and 337 Reviews
Price: $474
Specifications:
- Megapixels: 18mp
- Sensor Size: APS-C
- Inbox Lens focal length: 18-55mm + 75-300mm
Pros:
- Continuous shooting up to 3 fps
- Scene Intelligent Auto Mode
- Creative filters
- Built-in flash and feature guide
Cons:
- Minor issues in Autofocus
The Canon EOS Rebel T5 SLR camera with the EF-S 18-55mm IS II standard zoom lens and the 75-300mm telephoto zoom lens is perfect for families, budding photo enthusiasts, and first-time SLR users alike.
The EOS Rebel T5 makes it easy to capture movies and photos that are nothing short of dazzling. It features a powerful 18 megapixel CMOS image sensor and DIGIC 4 image processor for easy recording of HD video and high-resolution photos, and it has a huge 3-inch LCD screen for Live View recording and review.
17. Canon EOS 4000D

Rating & Reviews: 4.5 ⭐ and 225 Reviews
Price: $339
Specifications:
- Megapixels: 18mp
- Sensor Size: APS-C
- Inbox Lens focal length: 18-55mm
Pros:
- DIGIC 4+ Image Processor
- 8 cm (2.7″) TFT LCD, approx. 230 K dots
- Full HD 1080p Video Recording at 30fps
- 9-point autofocus,
- Up to 3 fps Shooting and ISO 12800
- Built-In WiFi, Scene Intelligent Auto
Cons:
- Minor issues in autofocus
Just frame and shoot for great results with Scene Intelligent Auto.
Enjoy guided Live View shooting with Creative Auto mode and add unique finishes with Creative Filters. Shoot with confidence and capture the moment just as you remember it with precise autofocus, 3.0 fps, and DIGIC 4+. Easily frame your shots with the optical viewfinder and see the results on a 2.7 inch LCD screen.
These are the 17 best DLSR cameras under $1000. I am sure that they will serve your purpose.
Like shooting photos on your phone?
If you like to shoot photos on your phone, then you should read our list of the best 25 free photo editing apps.
How can you edit photos?
I am very soon going to a list of software that you can use to edit photos. So, watch this space.
If you need to hire me to edit your photos, you can certainly do it. Click on the below button to contact me.