Change Eye Color in Photoshop in 1 Minute

Hey, welcome to another 1-minute series. Today, I’ll show you how can you change eye color in Photoshop in 1 minute. Yes, I have written a tutorial on this topic a few years ago. The tutorial was quite big and you cannot use that tutorial to change the eye color in just 1-minute. This is why I am bringing you this tutorial.

There has been a good demand for the 1-minute series and many people are asking me to create several 1-minute series. Some of them asked me to write one on how to change eye color in Photoshop. Others are swapping the sky, change skin tone, etc. in just 1-minute. I have written some of them in my 1-minute series. I still need to write many of them. So, bookmark the page so that you come back later.

Before I begin the tutorial, let me show you the final and initial image.

Before

After

Step 1 – Select the Eyes

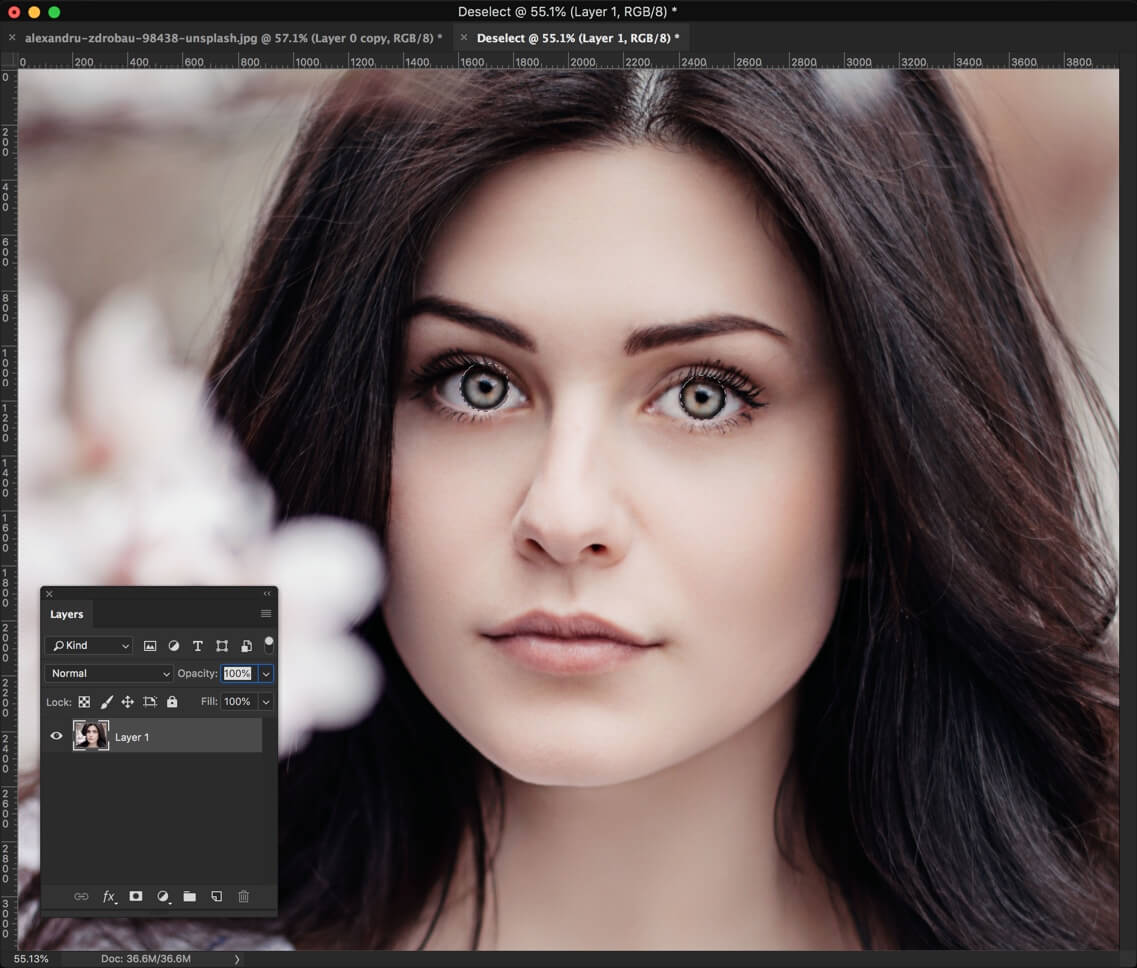
The very first step is to select the eyes. I am going to use Elliptical Marquee tool. I am using Elliptical Marquee tool because eyes are circular and which tool is better than Elliptical Marquee tool. But, if you’re not comfortable then you can use other tools like Quick Selection tool.

Please Shift + M again and again until Elliptical Marquee tool activates. We’re going to select both eyes at the same time. So, we need to activate “Add to Selection” tool which means that your old selection doesn’t get deselected as soon as you make a new selection.

Hold down Shift and start making a selection across one eye at a time. You can hold down Space if you want to move the selection. Select both eyes.
Step 2 – Change Eye Color in Photoshop

Now, we’re going to change the eye color.

Go to Layer>New Adjustment Layer>Hue/Saturation.

First, click on “Colorize”. It will colorize the image (in our case, it’ll colorize the selection).
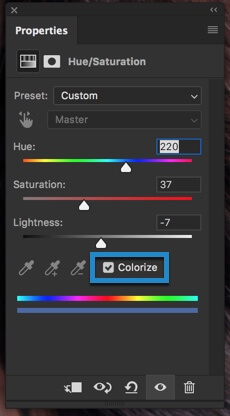
Now, play with the sliders to get the desired color.

Hue – It will change the color
Saturation – It will increase the saturation of the color i.e. more vivid or less vivid
Lightness – It brightness or darkens the color

With these three sliders, you can make any color.
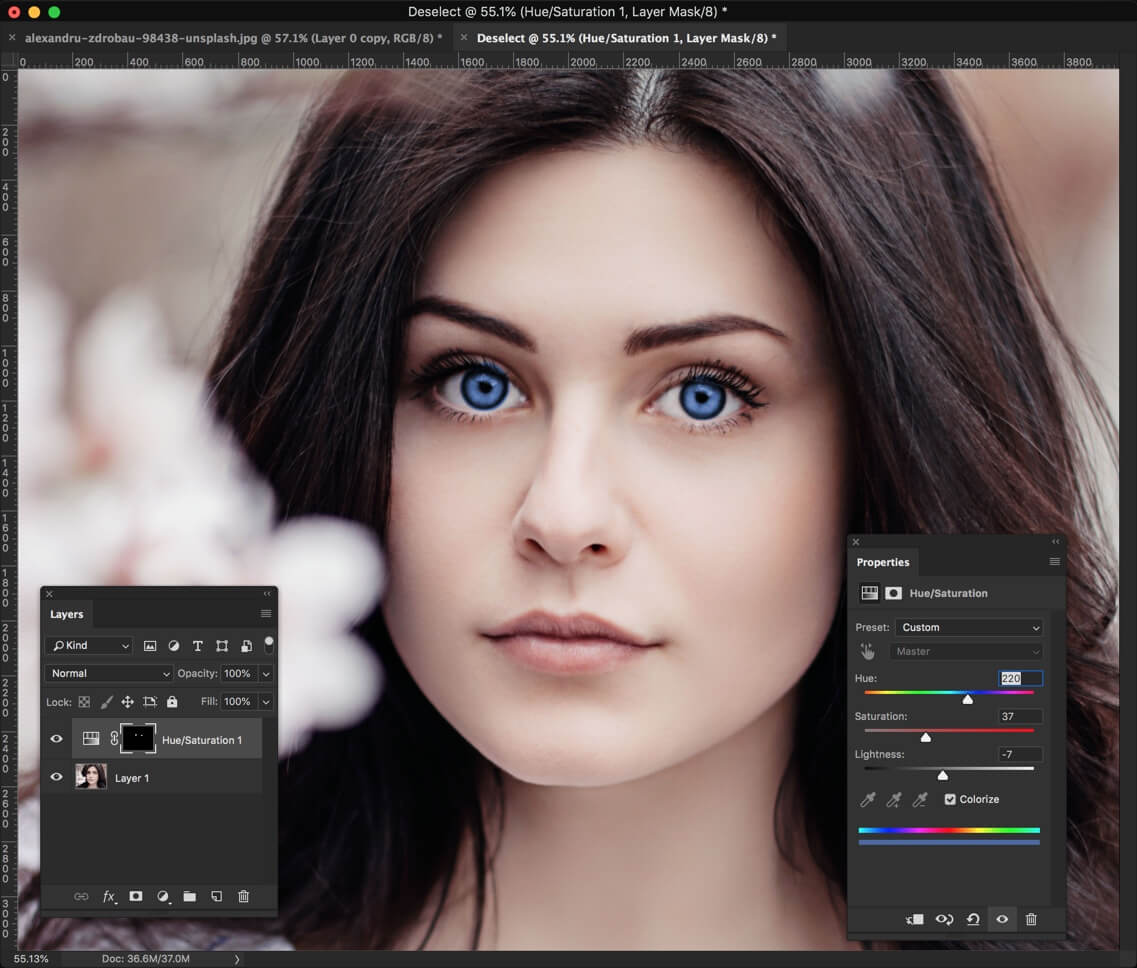
Step 3 – Finetune the Selection

We made some mistakes in step 1 while making the selection. The selection was not perfect. Now, we’re going to fix it.

Zoom in the image so that you can see the eye clearly.

Activate Brush tool. Click on the layer mask. Make the foreground color as black. Now, start painting the area where you don’t want the blue color. I have highlighted some of the areas in the below image.
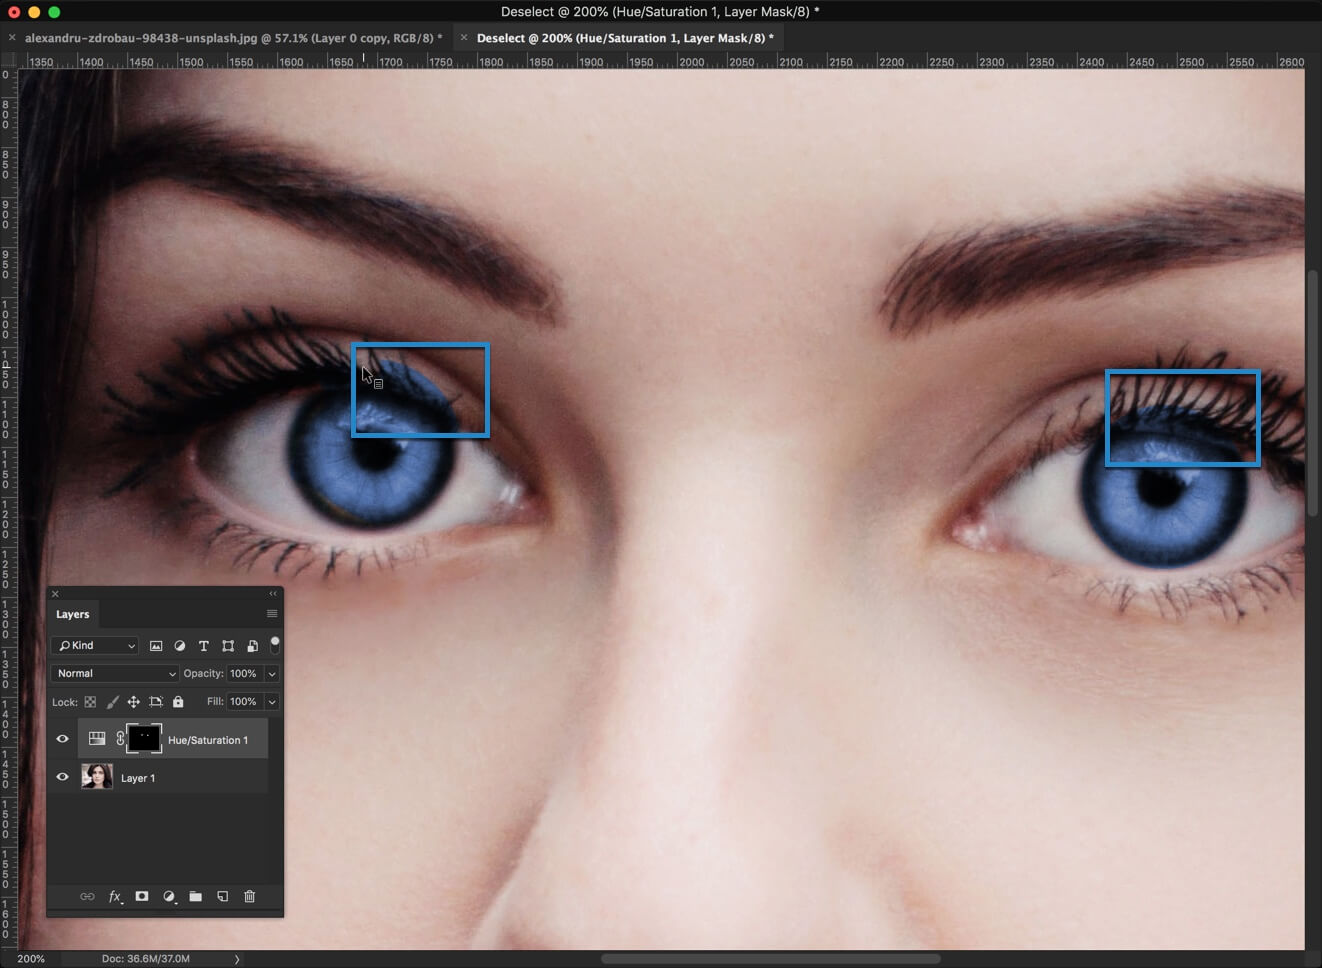
That’s all, guys!

Make sure that you use the below offer.

Create Photoshop Sepia Effect in 1 Minute

Hey guys, welcome to my another Photoshop 1 minute tutorial. This time I am going to show you how to create Photoshop Sepia effect in just 1 minute. If you’re an intermediate or advanced user, you can create it in even lesser than 1 minute. Oh! I forgot to tell this is another tutorial for my 1-minute Photoshop series.

You are seeing many tutorials on Google for Photoshop sepia effect. All of them are great but they are very-very big tutorials. I believe that you should not spend more time in a task that can be completed in a comparatively lesser time. Some tutorials will ask you to open Camera RAW, some will ask you to play with duotone, and some will ask you to use Photoshop filters. All of them will get you the result but will take a good amount of time to achieve the result.

This is why I bring you the Photoshop sepia effect tutorial that you can create in just 1 minute.

Here you go with the final image.

Here’s the initial image.

Let’s start the tutorial.

Step 1 – Set the Foreground Color for Photoshop Sepia Effect

Click on the foreground color and set #704214 as the color. #704214 is the HEX color code of Sepia.

Step 2 – Create a New Layer

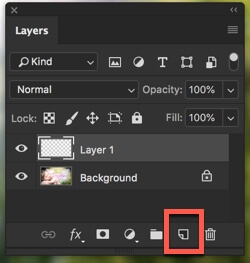
Create a new layer by pressing Cmd+Shift+N/Ctrl+Shift+N. You can also go to Layer>New>Layer to create a new layer. There’s another way to create a new layer. Open Layer Panel by pressing F7  and click on the Create New Layer icon.

Step 3 – Fill the New Layer with the Sepia Color

Time to fill the new layer with the sepia color. Press Opt+Delete/Alt+Backspace to fill the layer with the foreground color.

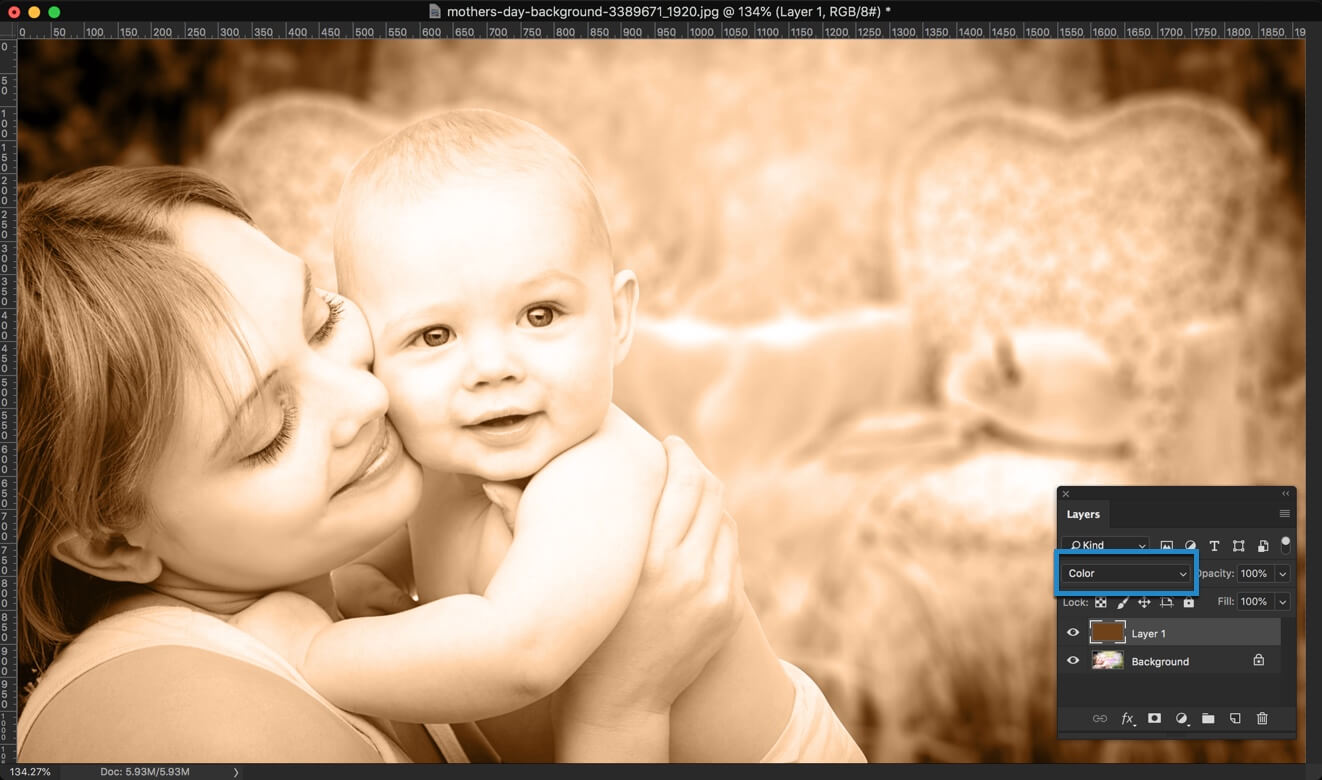
Change the blend mode to “Color”.

That’s all.

Congrats! You now know how to achieve Photoshop sepia effect in just 1 minute. Share this tutorial with your friends and show them that they’ve been adding sepia effect wrongly since birth.

Soften Skin in Photoshop in Less than 1 Minute

You use Photoshop to edit photos. Sometimes you edit landscapes, sometimes party photos, and sometimes your selfies. Whenever you edit selfies, the first thing you do is softening of the skin. Nobody likes rough skin (even on men). You spend around 5-10 mins to use the brush tool, gaussian blur, surface blur etc. to soften the skin, right? What if I tell you that I can give you a hidden feature in Photoshop that will cut down the time to only 1 minute? Yes, you can soften the skin in Photoshop within 1 minute.

Before we begin, I want to show you the before and after photo. Did you see the difference?

Before

Fig. 1

After

Fig. 2

Let’s begin the tutorial.

Step 1 – Duplicate the Layer

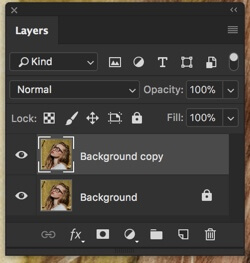
You and I need to use the layer mask in later steps so we need to duplicate the layer. Press Cmd+J/Ctrl+J to duplicate the layer. You can also go to Layer>Duplicate Layer to duplicate a layer. Your layer panel should look like Fig. 3.

Fig. 3

Step 2 – Soften Skin in Photoshop using Camera Raw

This is the step that will soften skin in Photoshop. Photoshop has an inbuilt feature that softens the skin but the name isn’t present with the same name. This is why you didn’t know that you could’ve saved an insane amount of time by using Camera Raw filter.

Go to Filter>Camera Raw filter or press Cmd+Shift+A/Ctrl+Shift+A.

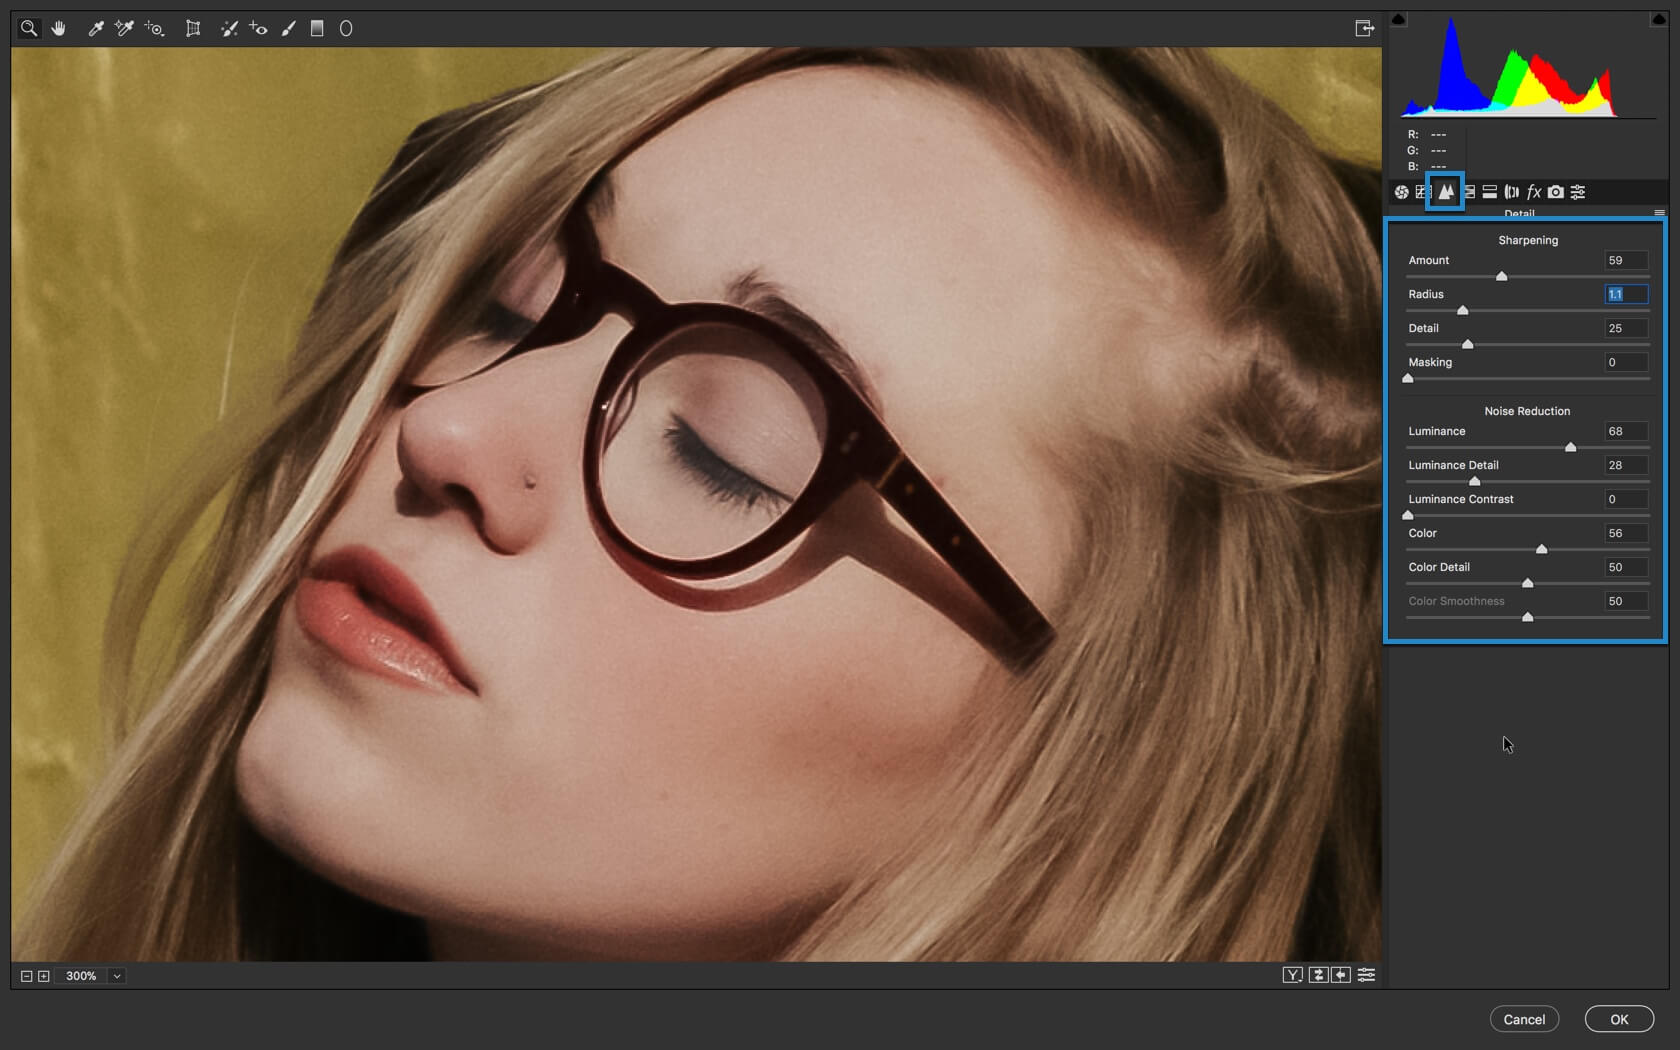
Go to the “Details” tab which is marked with blue color in Fig. 4. Increase the Luminance to a high value. This will soften the skin. The problem is that it softens entire photo. You don’t want eyes and nose to soften, right? This is where Sharpening comes to rescue us. Increase the amount in Sharpening field and this will sharpen the edges.

Press OK

Step 3 – Use Layer Mask for Finetuning

Go to Layer>Layer Mask>Hide All. This will bring back the original photo again.

Sidebar – If you’re not familiar with the layer mask, you better check out my Layer Mask in Photoshop tutorial. The link will open in new tab.

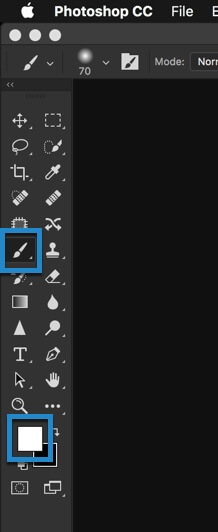
Choose the Brush Tool and change the foreground color to White.

Fig. 5

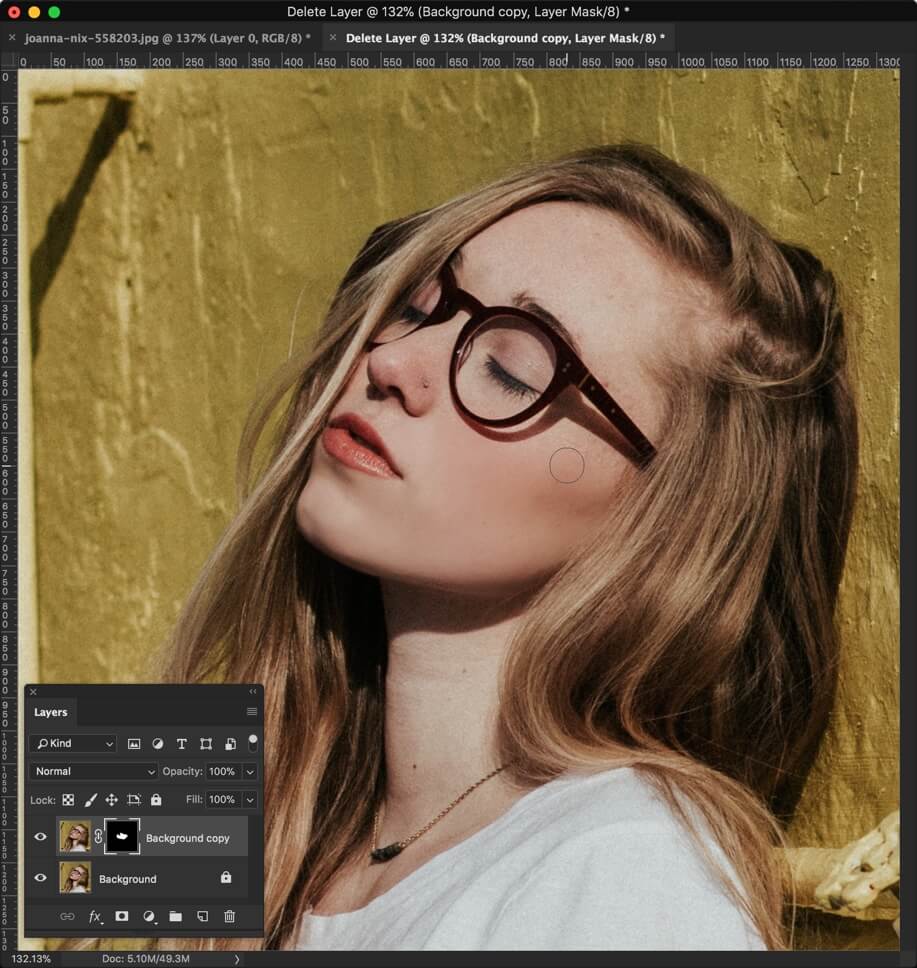
Adjust the size of the brush as per your needs and reduce the hardness to 1-5%. Now start brushing only on the skin. Avoid edges like jawline, nose, eyes, lips, etc. Your photo will start to look like Fig. 6. I have started to brush from the bottom of her face.

Fig. 6

You and I are human and we are bound to make mistakes. This is a certain chance that you might have brushed over the edges also. We’re going to fix that now. Change the foreground color to black and start brushing on the edges like lips, nose etc. Fig. 7 shows how the area where I was brushing just before taking the screenshot. The black arrow represents that area.

Fig. 7

This is all for today. This is how you soften skin in Photoshop. Check out the final image one more time.

Fig. 8