5 Ways To Speed-up Your Photo Editing Workflow

Many photographers prefer being behind the camera for hours than behind a computer screen. But it is often seen that photographers spend more time editing their pictures than what they spend clicking them. Do you feel the same? Are you also looking for a couple of extra hours than the usual 24 hours of the day? Well, it is time to work on your photo editing process.

.Today, we are sharing 5 practical ways to speed up the process of photo editing workflow so that you can have more time to do the work that you actually enjoy..

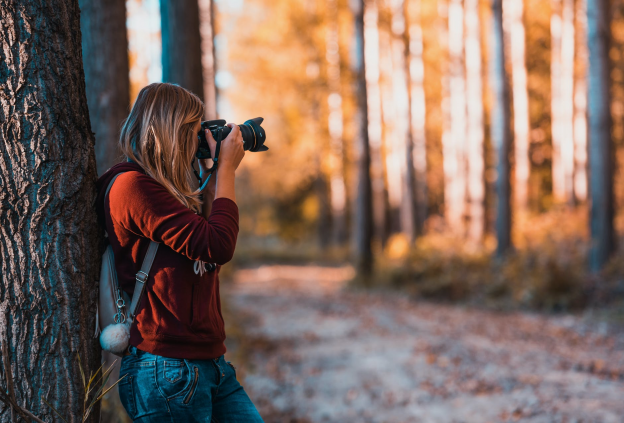
1. Let Your Camera Do The Trick

.If you want to spend less time editing your photos then put more attention into clicking it right. Straighten the horizon lines, zoom-in if you want a better picture or just ensure the lightning is right. You should try and spend more time on the field making adjustments and clicking until you get that perfect shot. It would be a much better experience than just clicking a mediocre picture and then trying to make it your best shot by spending hours and hours editing.

.You might also try clicking different shots with varied adjustments so that later on you can select the one that best suits your requirements. For instance, you can always play with the background or the lights. Setting your camera right will make everything worthwhile than introducing all the effects later on.

.You might also consider upgrading your gear to save up on the editing time. Many photography experts suggest that it is the quality of the camera that decides the quality of the picture. Moreover, one can easily find the best cameras on a budget these days in the market. Also, props like a tripod stand or ring lights could help get that perfect click..

2. Build A Routine

.You must build a personal workflow or an end to end routine that you will follow while editing pictures. This will make your editing process easy and quick. The more you use a consistent photo editing process, the more time you will save. For example, some photographers always start by fine-tuning their image which includes cropping what’s not necessary, adjusting the resolution and straightening the horizons.

.Many photographers also use a routine to organize their work. This is quite helpful when you have thousands of photos and you want to find one out of them. You can choose to manage different folders based on the theme or event of your photos like a wedding or music show. Keep your portraits separate from the others. Create subfolders if you like and be super organized when it comes to storing your photos.

.If you think you do not have enough time for creating a photo editing routine for yourself, you might consider taking help from a third party. Hire someone who can edit your photos. You can even hire a few assistants who can help you out in shoots so that you can get the best photographs at the best time then and there. All this would certainly save your time.

3. Edit The Best Ones

.If you have clicked ten photos of the same type, do not try and edit all ten of them to see which one turns out the best. Instead, select the best one out of those ten, edit it and delete the rest. Do the filtering beforehand to save some of your time and effort. You might want to think about what your customer would prefer out of these images that I have clicked. Then, pick the one that suits you best and start editing.

.Be real when it comes to editing, not judgemental or emotional. You might have clicked so many photos just to capture that perfect moment. So just focus on that perfect picture and forget the rest. Spending hours on an image that has not been clicked in the right way is a sheer wastage of time and we certainly want to avoid that so that we can go outside and capture some more photos!

4. Batching The Tasks

.Batch processing is a term used in computer operating systems where the systems enhance their efficiency by doing the same kind of tasks at the same time. Many people in the operations department of organizations also use this technique to simplify and fasten their workflow. For instance, creating all folders first and then moving files in each or scheduling the calls for the day together so that then they can carry on with the paperwork.

.Similarly, you need to find a way to batch your photo editing tasks. For instance, you can sync an edit to all the photos at the same time. You might want to keep separate days for editing your photos and separate days for clicking them. Sometimes photographers keep half of their day for editing and half of their day for clicking pictures. It could be a little time consuming as you might not be able to finish up all the editing in one day.

.Sometimes you can also edit on the go! It is a fun way to get your work done without feeling that you have to spend a lot of time on it. For instance, if your photo session will take a while to start or if you are traveling, utilize all this time in editing and most of your work would be done while you reach home.

.5. Keep Filters Handy

.Many photographers use this technique while editing photos. They usually select the same filter and then they just alter the filter settings in their photographs to bring different effects. For instance, they might just adjust the blacks and whites, tone, shadows, highlights, and exposure of the same filter in every image.

.This means you do not have to keep applying one filter after another and see how it will make your picture look. Just experiment with the one that you always choose and you will save a lot of your time.

.The amount of time you will spend in editing is also dependent on which software you are using. Many photographers avoid Photoshop until it is something big. They generally prefer using lightweight photo editing tools and applications that would make their pictures look good in just a few clicks.

.Some photographers are now switching to automation for editing which is a much time-saving option. There are photoshop plugins available these days that can do the work for you. They will process a multi-step process super-quickly and you will have plenty of time to spend on other important things.

.6. Quick Decisions

.Here’s a small bonus tip that will be immensely helpful in speeding up your photo editing workflow – take quick decisions. You might just keep switching from one editing effect to another for hours and still be unable to decide which one is the best.

.We have seen many photographers ponder upon the level of white balance that should be there in their photos. Well, the right colors and brightness would make your photo look phenomenal but do not spend too much time making the decision. Just choose.

.You must understand that there is no right or wrong way of photo-editing and every photograph is unique in its own way.

.In a nutshell, photo-editing might be the most time-consuming task for you but it certainly is an important one. Therefore, it cannot be ignored. You can use these 5 tips to speed up the process and we are sure you will see noticeable results. Of course, the process of editing depends on what software you use but we have tried to focus on aspects that would work with any photo-editing software. All you have to do is give it a try.

.Author’s Bio – Jessica Jones is an academic writer at GoAssignmentHelp, a company based in Australia which provides all kind of academic help to the students. She loves to write about technology, education, marketing, digital marketing, life, traveling, home improvement, etc. His company not only helps children living in Australia but also helps in the study of children all over the world. GoAssignmentHelp an academic writing service that provides the best and reliable assignment help in Melbourne.

.

Why Subtle Changes are King of Photo Editing

Once upon a time, when you took a picture, that was all there was to it. There were no filters, enhancers nothing! There was no method for enhancing an image to remove things like red-eye. What you captured was it. Like all things in the modern world, photography has adapted and changed. Photo editing has been a welcomed approach to getting the photo you wanted without being a professional photographer.

While it does take skill to capture an image, it might not always come out as you’d hope. After playing around with lighting effects, trying different angles, and readjusting, you may want to be done. It happens. With photo editors, you can achieve success, changing it with slight enhancements. In the context of social media, the images you post must be attractive to the eye and capture users’ attention. But the good news is that there are small changes you can make to take a so-so image to a cut above. You can also take free stock images to the next level, reinventing for your purposes.

Before delving into what are proper techniques to use and what bad ones to avoid, you should know what types of image editing are available. Here’s a basic breakdown of the options available through most photo editing software:

  • Contrast
  • Lens Correction
  • Reducing Pixel Size
  • White Balance
  • Exposure
  • Color Adjustments
  • Cropping and Resizing

Examples of Bad Photo Editing

If you look online, you’re bound to run into a poorly edited photo. These are everywhere. Often bad photo editing comes down to a rush job. However, it can also be from inexperienced users. Whatever the reason may be, here are some examples of bad photo editing, and things you should avoid.

1. The Over Crop

Cropping is essential. Many issues with photos can be solved with a good crop job. But there is a point where you can take cropping to far. When a photographer or designer cuts too much of an image that it loses an important balance, this can be a negative for the picture.

Also, a side note, be careful with resizing. Images that have been dragged to become a new shape can be easily spotted a mile off. If you want to resize your image go from corner to corner and not side from side. This will give you a much better-shaped image!

2. Too Much White Space

Similarly to overcropping, it is leaving to much white space or ‘edges.’ This type of photo editing simply means you didn’t crop enough. White space isn’t always a bad thing and can be a valuable part of any image. It also doesn’t need to be white; it can be any tone or pattern. You need to make sure your image is aligned and not too crowded or sparse.

You want people to focus on the key elements of your photograph or image. With too much whitespace people may be distracted and unable to tune their senses into the focus aspects. Use your white space to guide them, not deter them.

3. Over Saturated Image

If you play with the contrast on the editing software, you may be thinking the photo now looks more professional, or artistic. However, refrain from over saturating an image, where applicable. It doesn’t look good, and much of the detail can be lost.

Pro-tip; If you’re adjusting your contrast or adding a filter, less is always more. It’s always good to alter images little by little. You should also keep an unedited version of the image open so you can compare it. Also only change one thing at a time and log your changes, You can always go back.

Colour Changes That Make The Grade

Colour is at the heart of every great picture. Depth is expressed with brights and shadows. When colors are true, a picture is more relatable. Colour theory is great for images and photography and can use the science of color to improve your content.

If your image uses bold colors you should work to enhance these or dull them depending on the overall feel of the photograph.  Too much color can be distracting, too many bright colors can be off-putting so it’s best to focus on 2-3 per image. To really grab attention though use one focus color to stand out.

Photo editors, whether you’re using social media filters like Instagram or Snapchat, can enhance the quality of the image. You can add warmth with a vintage look filter such as ‘vintage,’ or cool it down ‘cream.’ Make sure the colors vibe with your theme!

Tips For Photo Editing

By now, it’s pretty clear as to what makes a not-so-great photo. Things like inconsistent color, overuse, or underuse of white space, and not utilizing the right contrast can all play a part. But what can you do to make it better, achieving the quality image you need? What are some excellent tips to follow? How color changes can make a significant difference in the quality of your pictures, what are some good tips to follow?

1. Noise Reduction

Sometimes photos can appear too busy. In these situations, take a look at the picture and ask if it looks like there is simply too much going on. If you honestly answer yes, a suitable correction for this is to reduce the pixels.

Noisey pictures will no doubt cause people to ignore it, people like to figure out what is going on but if something is too difficult to look at, chances are people won’t bother. Reduce the noise and you should immediately notice a difference in the quality of your image.

2. Eliminating Unwanted Tones

One thing many people hate when taking selfies, or photographers find annoying is capturing an overly saturated image. By this, we mean too much red or too much blue tones. While you certainly don’t want to hide the natural beauty of the subject, you can enhance it by canceling out unwanted tons.

For example, let’s say you or your subject has naturally red skin tones. To cancel this out, using a filter during or after taking the picture that has cooling tons will give a more optimal result. Colors can be cool, warm or neutral, to reduce one option head to the other side of the color wheel.

Pro Tip; Complementary shades should be used in multiple things from home decor, branding and of course photography. If you need to make some changes to your image, add a new color by mixing a focus color from your image with a complimentary neutral tone. There are numerous tools online to mix or blend colors to create new shades.

3 Use The Color Wheel- Making Color Adjustments.

Colour Wheels show the relationship between primary, secondary and tertiary colors. You can build color schemes and alter images by simply looking at this wheel. If you need to tone down the color, use a shade from the opposite side of the wheel.

Often many of the problems designers would like to solve with pictures come down to the basic principles of color theory. What cancels out what and what is a complementary color, are just a couple of questions to keep in mind when editing a picture. If you notice there are too many red tons, cool it down.

Depending on what you want out of your image, like truer, accurate color, photo editing can be the best way to get the results you desire. Photoshop has a ton of options for editing the color contrasts, but there are also free tools available online as well as through the App Store.

4. Go Pro with Blurring and Sharpening

So you’ve played around with color contrast, brightening up an image and getting the tones you like. One of the highlights of using photo editing software is being able to take the picture to the next level with blurring and sharpening the image. This is typically done to enhance and draw attention to the subject. Think about the design and purpose of the image before starting this photo editing for optimal results.

Images, even those with perfect focus, can benefit from a tiny bit of sharpening. Bringing more attention to the subject is typically never a bad thing. To top it off, blurring and sharpening will give the image a more polished look, when done correctly. It is essential not to go heavy-handed, instead use tasteful moderation.

Conclusion:

Of all the photo editing options available to you, don’t overthink it. Use your eyes to decide what looks best. This is often the best pro tip of them all. A photo that you think looks to busy or think the colors are off, probably is. Subtle changes, meant for enhancing are the best rules to follow. If you distort an image past the point of knowing what you were trying to capture, this is where editing failures have occurred. You’re the master of your photo!

Author Bio: Currently working as a Marketing Executive at Design Wizard, Claire is passionate about creating amazing content and bringing people together. Having recently graduated with her master’s degree in Marketing she is keen to impact the digital world. Outside of work you can catch Claire taking photos of her rescue dog Storm and checking out social media.

I found time for these 5 things after I gave my photo editing task to someone else

It was the 22nd of July. Fifty new dresses were launching on the 25th of July. I had already told my customers that I am going to launch those dresses no later than 25th and I didn’t even shoot the photos.

I don’t hate shooting photos but I hate editing them. I always thought that I could do more pleasing things if somehow I can throw this boring, mundane, and non-enticing task off of my life.

I spent only 2 minutes per photo which means that I spent more than 400 minutes on 200 photos. I post 4 photos per dress. But, those 400 minutes were like 40,000 minutes to me.

Somehow, I shot and edited the photos before 25th July. I never thought that I would feel this kind of pressure in my entire life. I always thought that I am good at handling pressure but I realized that I am not.

I got fed up so much of this task that I badly want to hand it over to someone else in my team. But, that came out costly because my employee started charging for the overtime and her hourly rate was $22.

Also, the work was not good. The photos she edited were not looking consistent and also the editing style did not match the photos that are present on my site. I can clearly see that the photos she edited look different than the other photos I edited.

BUT the worst thing was that I cannot rely on her because if she’s on leave then I’ll be screwed.

I started thinking this mundane task to someone else. I went to Fiverr, but Fiverr is cheap only if you have 5-10 photos. It becomes expensive if you have 20+ photos. Also, you don’t find anyone reliable there. I wanted to have someone whom I can contact 24×7 and that person has some dedicated time for me. So, I searched more on Google and found TrickyPhotoshop.

I gave my photo editing job to them these are the things that I can do now.

I can now spend more time alone doing nothing

I am an introvert. I enjoy sitting alone more than sitting with two people. Now that I don’t need to edit photos, I can spend 400 minutes every week sitting alone and doing nothing.

Don’t judge me.

I can now learn to play piano

I have always been a huge fan of piano. I like how it sounds. It has always been my second most favorite instrument.

The first one is violent but I have tennis elbow. I cannot move my hands fast especially the elbow.

I love my daughter and I can show it now even more

I used to edit photos every Thursday. I upload them on my site on Fridays and then scheduled to go live every Sunday.

Because I handed over the editing task to TrickyPhotoshop, I can go home 3-4 hours earlier every Thursday.

My daughter comes home from school at 4 PM every day. I reach home at 3:30 PM every Thursday, cook a delicious dish for her, and then we eat it together. Yes, I do this every Thursday.

I can think about the future (even more)

Every Thursday, I think about my company’s future. I do this when I am cooking food for my daughter.

On Thursday morning, I write down things that are haunting me or bugging me. I then think about fixing them. I use Voice Memos on my iPhone to record what can I do about these things.

I can watch documentaries and read Medium.com

I enjoy watching documentaries more than watching Netflix. I prefer watching what are black holes, white dwarfs, nebulas, etc. rather than seeing what did Penny tell Sheldon on that 12th episode of the Big Bang Theory.

I also love reading Startup stories on medium.com. These stories fire me up.

All of these are possible only and only because I delegated the task that I hate doing to someone else.

I am Anna and I run an e-commerce site with an annual turnover of $400K. I sell trending dresses to the ladies.