You have always wondered how to create the most popular Instagram filter in Photoshop. Yes, it’s the most popular filter in Instagram. And, today I am going to show you how to create Instagram Lo-fi filter in Photoshop.
I’ll using multiple adjustment layers and filters to create the tutorial. The tutorial is fairly easy to understand. Let’s begin
But before we begin, let me show you the before and after.
Final
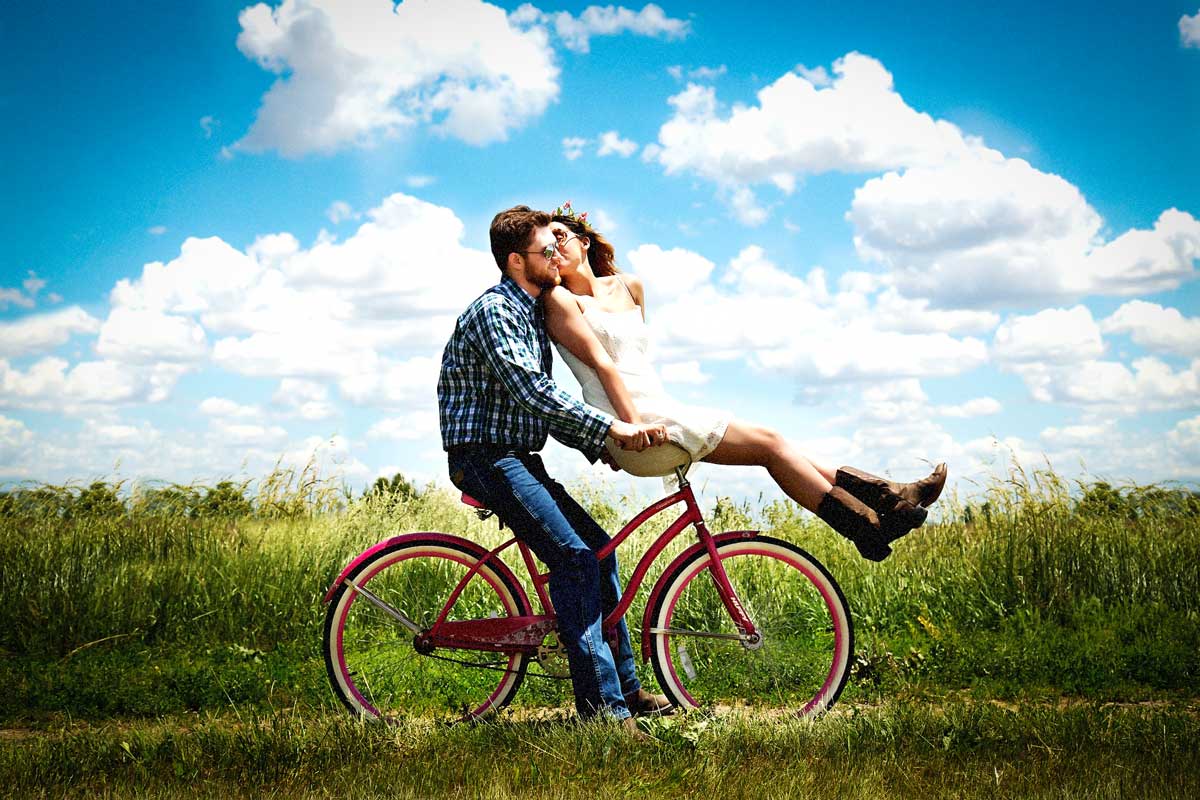
Initial

Video
If you like watching videos, here’s the video tutorial for you.
Step 1: Increase the white and black using Levels
The first thing that we are going to so is to adjust the Levels. Go to Layer > New Adjustment Layer > Levels.

Change the settings as shown below.

Your photo would look like this.

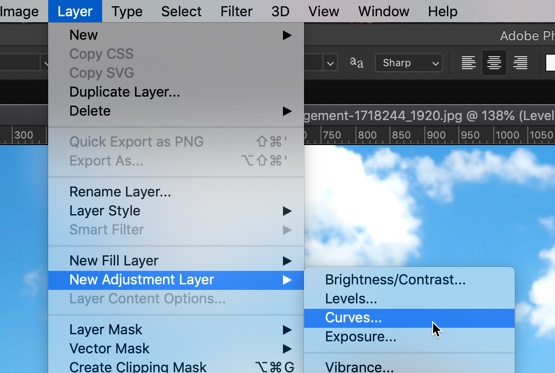
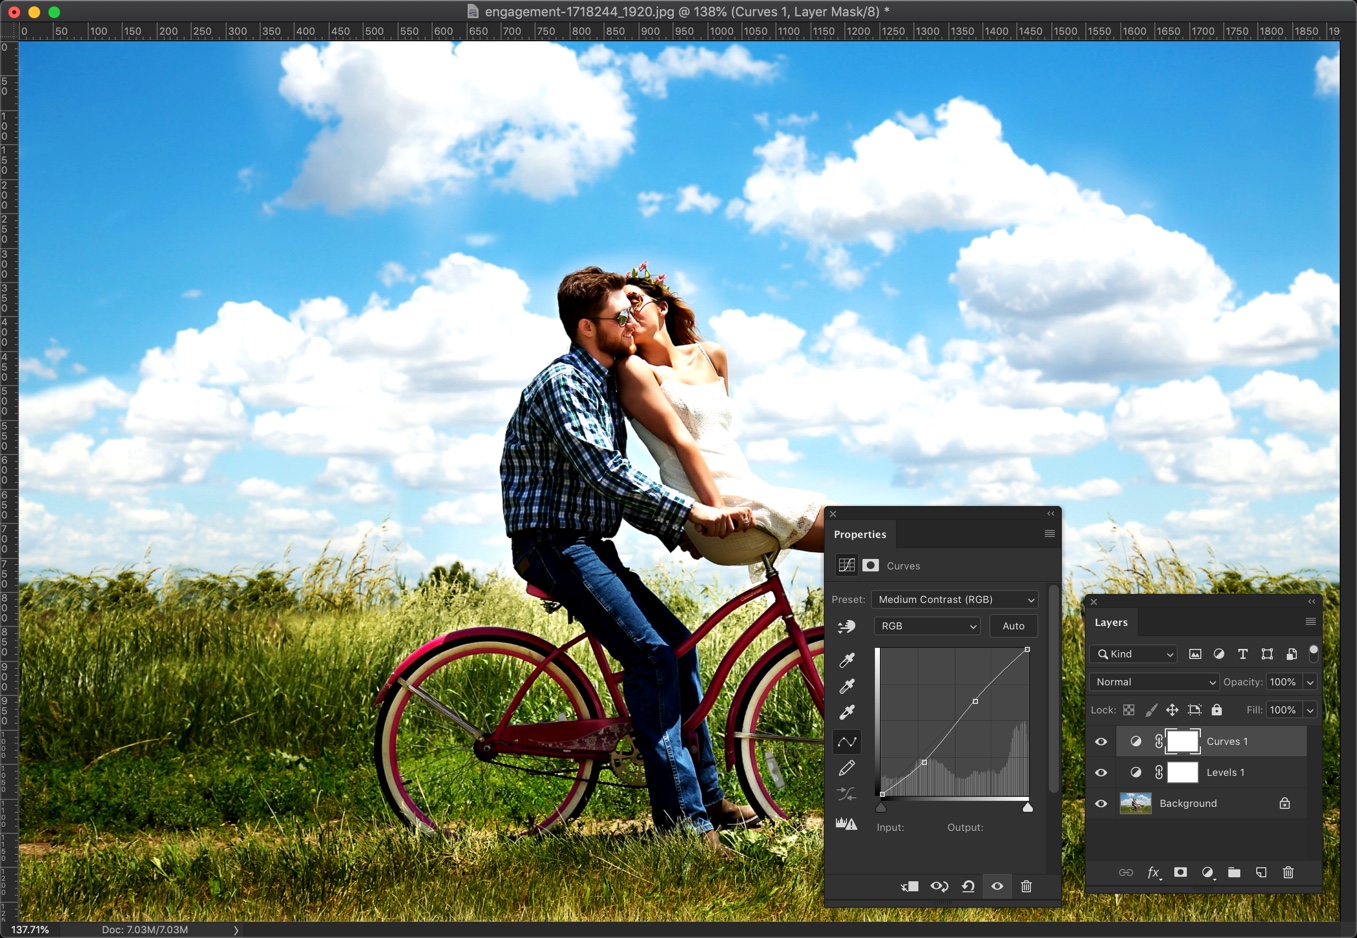
Step 2: Increase the contrast using Curves
Let’s add Curves. Go to Layer > New Adjustment Layer > Curves.
Change the preset to Medium Contrast.
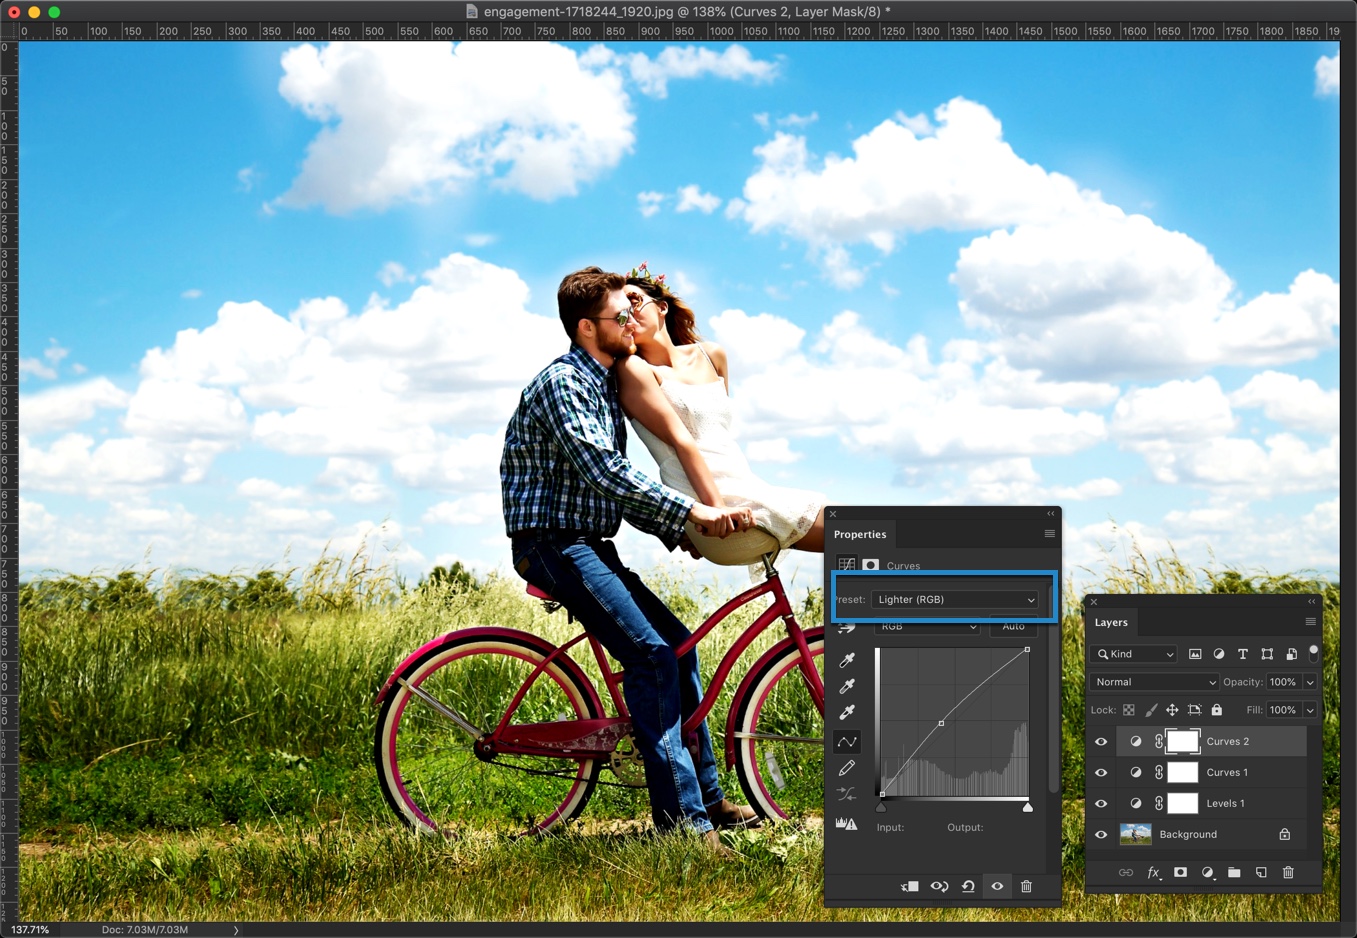
I think that pic has become much dark. I am going to fix it by using Curves. Once again go to Layer > New Adjustment Layer > Curves.
This time change the preset to Lighter.
Step 3: Add a Black Vignette
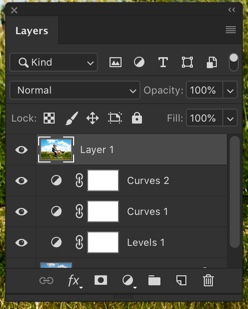
We need to stack all the layers into a new layer. Press Cmd + Shift + Opt + E / Ctrl + Shift + Alt + E.
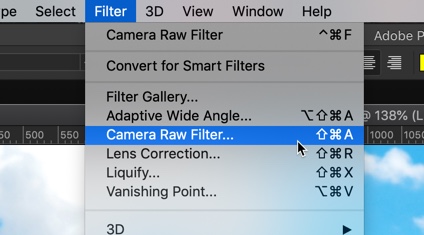
Go to Filter > Camera Raw Filter.
Go to Effects. Decrease the Amount to -40. Press OK.

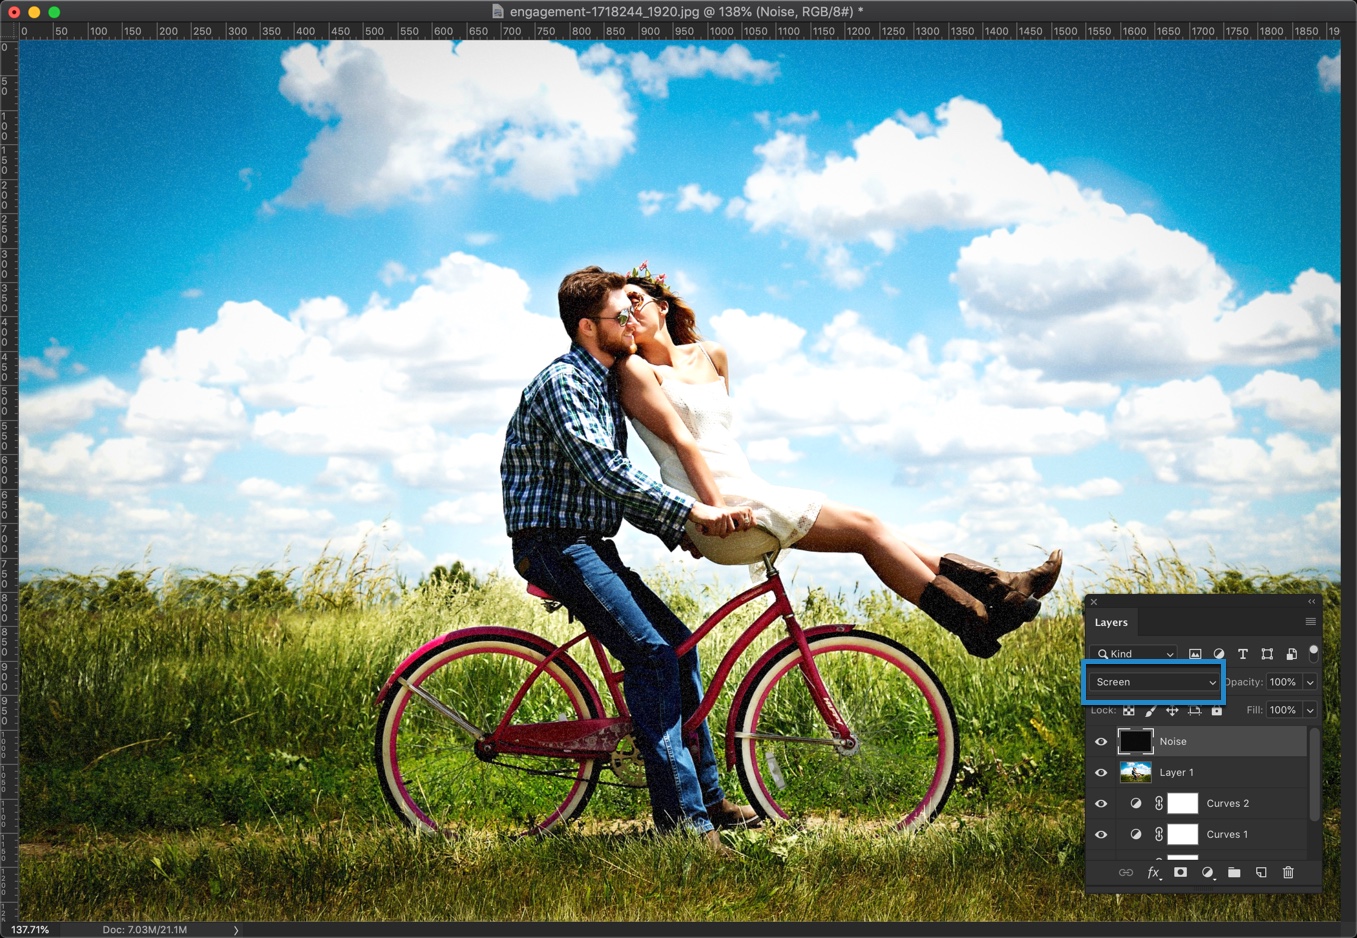
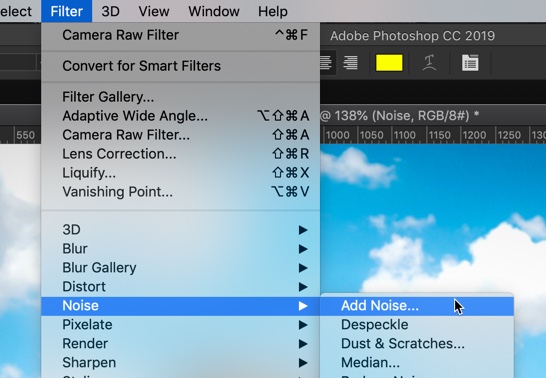
Step 4: Time to Add Some Noise
Now I am going to add new layer. Press Ctrl+Shift+N/Cmd+Shift+N to create a new layer and rename that layer as “Noise” because we are going to add noise to that layer.

Make black as your foreground color by press D.
Fill the Noise layer with the foreground color by pressing Opt + Delete / Alt + Backspace.

Now go to Filter > Noise > Add Noise.
Change the amount as 10, distribution as Gaussian and turn on Monochromatic.
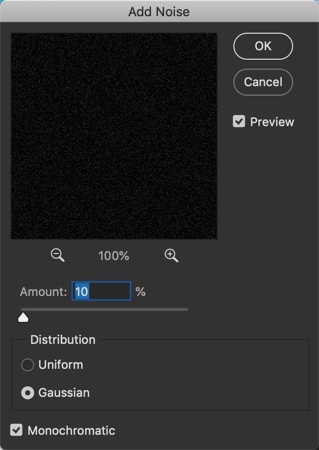
Change the blend mode of “Noise” layer to Screen.