Hey there, welcome to my another tutorial on Instagram Effects. Last time I showed you how to Create Instagram Lark Effect in Photoshop. Today I’ll be showing you How to Create Instagram Reyes Effect in Photoshop. To be very frank, I am not a fan of Reyes Effect but some of my readers are asking me to upload a tutorial on Reyes Effect. As I love my readers a lot, of course I cannot deny their request.
Instagram Reyes effect is much like washing out color and reducing the contrast. It works great with photos that are taken on harsh sunlight.
Let’s go straight to the tutorial. But before I go any further, I would like to show you the final image.
FINAL

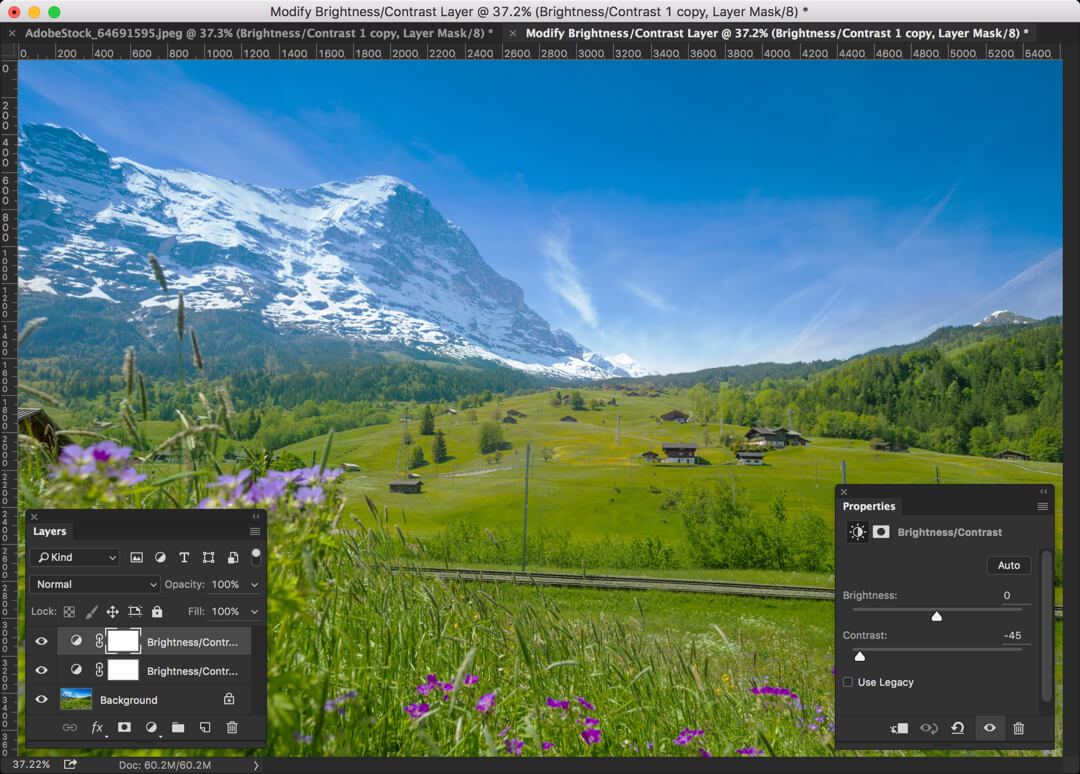
Step 1: Decrease the Contrast
The first thing that you need to do is to decrease the contrast of the image.
Go to Layer>New Adjustment Layers>Brightness/Contrast.
Decrease the contrast to -45.

Step 2: Repeat it One More Time
We even need to decrease the contrast more time. The best way is to duplicate the adjustment layer that we created in last step.
To duplicate a layer, press Ctrl+J/Cmd+J.
Step 3: Reduce the Color
Now we are going to reduce the color so that it appears washed out.
To do so, go to Layer>New Adjustment Layer>Vibrance
Decrease the vibrance all the way down to -100. This will give a washed out effect to the photo.

Step 4: Add Warm Look
Time to give a warm look to the image.
Go to Layer>New Adjustment Layer>Photo Filter.
Rather than going with a preset, we are going to choose a color by ourselves. Select color and then click on the color thumbnail.

Put the HEX color code as #f8b558. Click OK.

Now increase the density to 44%.

Step 5: Increase the Brightness
The image is pretty much dark. Don’t you think so?
We are going to increase the brightness to make it more attractive. But the thing here is that we are going to over-brighten it.
Go to Layer>New Adjustment Layer>Brightness/Contrast.
Increase the brightness to 108.
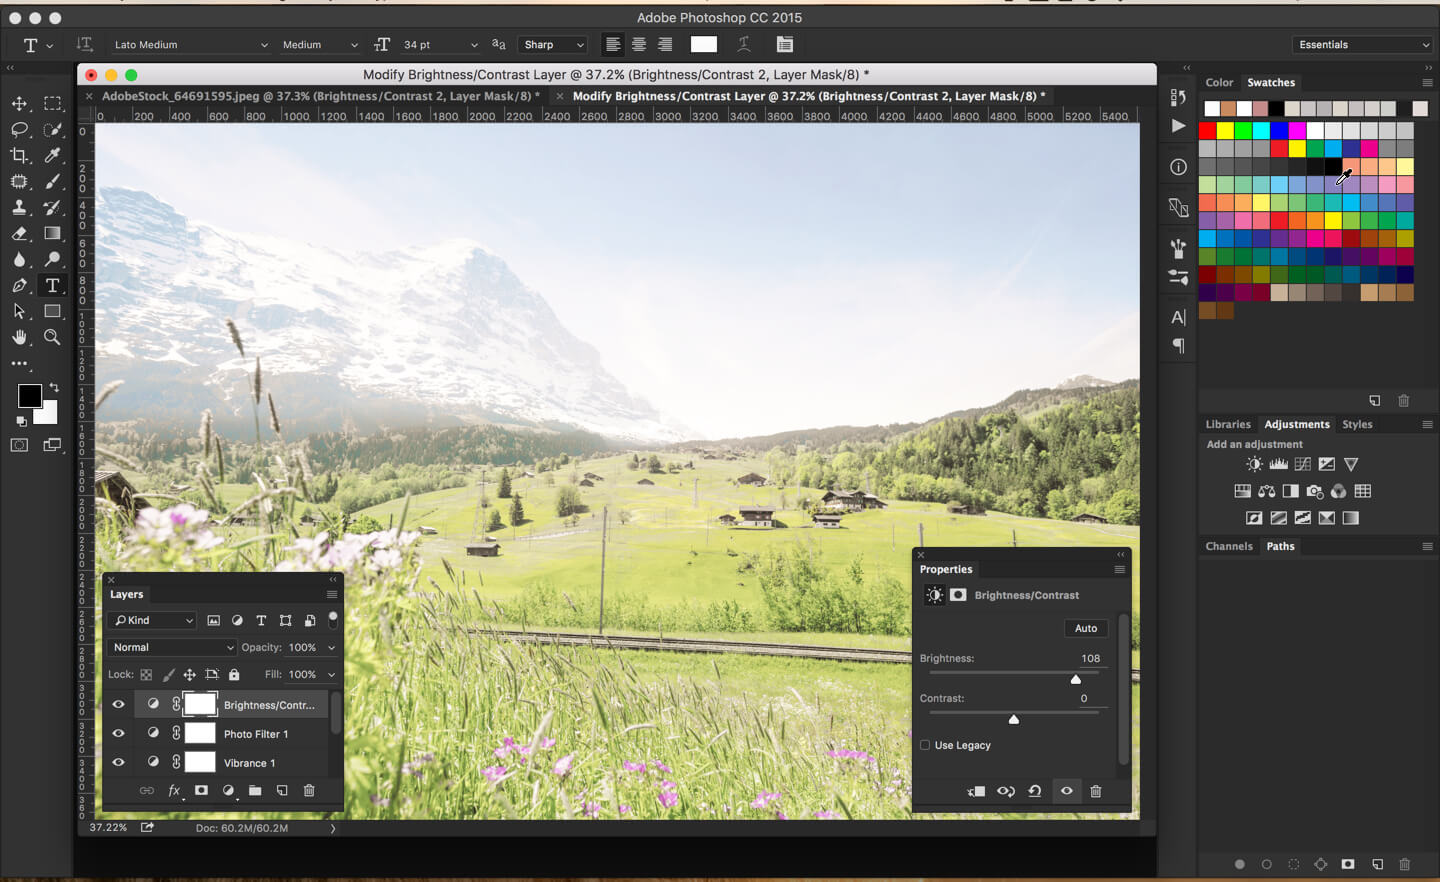
And now we are good.
I hope that you have enjoyed the tutorial.
Here’s the final image again.
Final: Instagram Reyes Effect in Photoshop
Please support TrickyPhotoshop by sharing this tutorial with your friends and family on Facebook, Twitter, or Google+.


