
Stretch marks don’t look good. It doesn’t matter how much you’re asked to love your body and embrace your flaws like stretch marks. The reality is that you and I cannot. The stretch mark on the belly, hips, thighs, and arms don’t look good. The laser removal of stretch marks is expensive and costs around $2500 per session. So, this is why I bring you a workaround. You can remove stretch marks in Photoshop.
You just want to post a photo and realized that your belly stretch marks are showing and you badly want to post that picture. Going to a doctor and laser remove those stretch marks are not an option. The quick workaround is to remove that stretch mark.
Table Of Content
- Video
- Step 1: Duplicate the layer
- Step 2: Remove the stretch mark
- Step 3: (Optional) Make the stretch marks partially visible
So, let’s begin the tutorial on removing stretch marks in Photoshop.
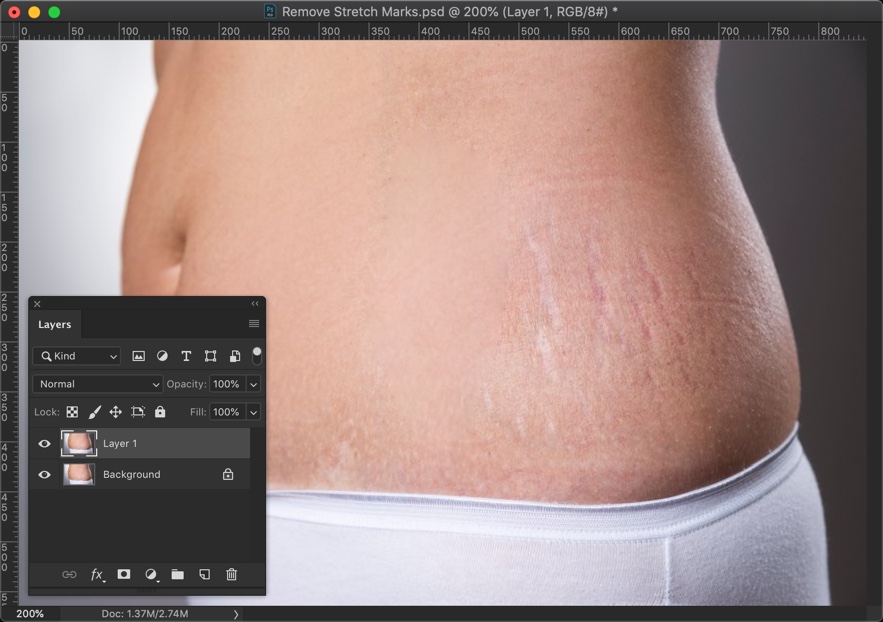
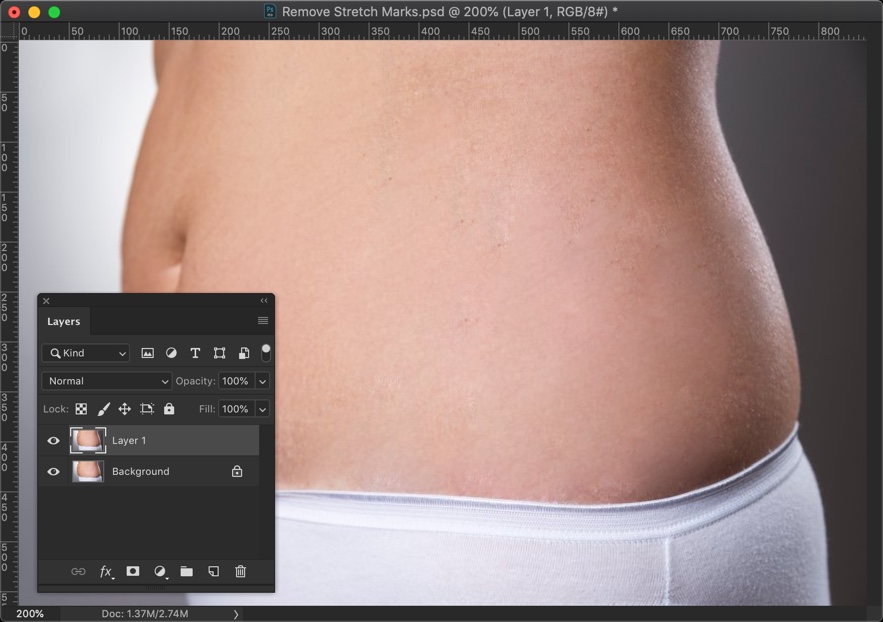
Before we begin, I want to show you the after and before image.
Final
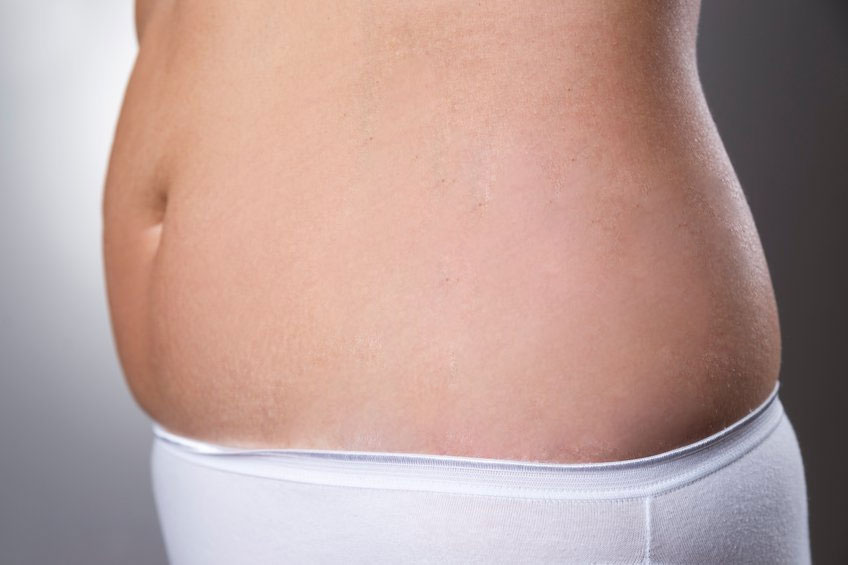
Initial

Let’s begin the tutorial
Video
If you like watching video tutorials, here’s the video tutorial for you.
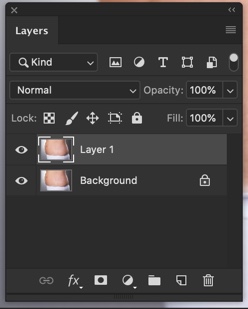
Step 1: Duplicate the layer
We’re going to remove the stretch marks with the Patch tool. There are many tools out there like Mix Brush, Healing Brush Tool, Clone Stamp Tool, etc. but I personally like the Patch Tool.
We want the editing to be non-destructive. So, we’ll duplicate the background layer and work in that layer.
Open the Layer panel by going to Window
[vc_message message_box_color=”warning” icon_fontawesome=”fa fa-picture-o”]Just in case, if you’re feeling lazy to remove the stretch marks then you can hire me to remove that for you. The min cost is $4 per image and the max cost is $10 per image. Send me the image at hello@tricky-photoshop.com.[/vc_message]
Step 2: Remove the Stretch Marks in Photoshop
Grab the Patch tool from the tool panel or press Shift + J again and again until it comes.
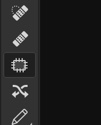
Make sure that the normal is turned on in the option bar.

Roughly draw a selection across one of the stretch marks. Now, drag the selection to the area which does not have any stretch mark.
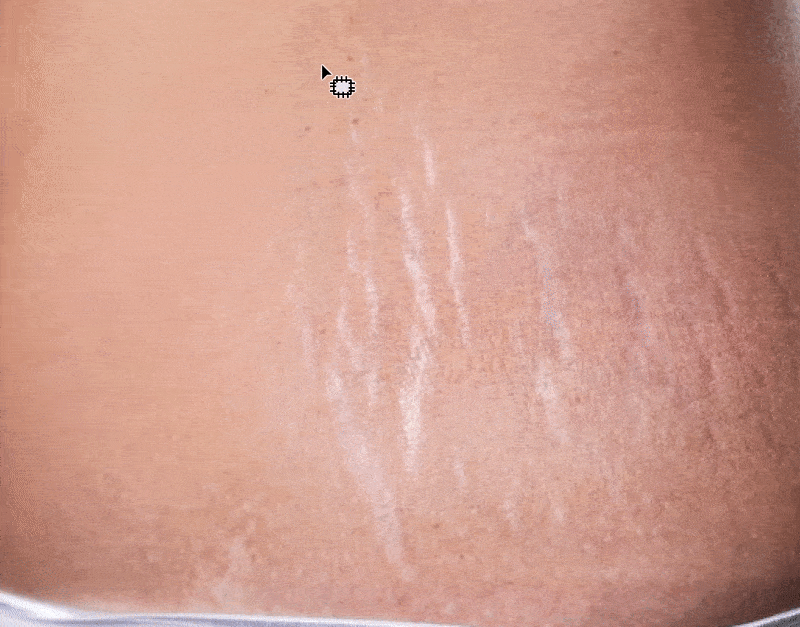
Did you see how beautifully it removed the stretch mark?
Now, do this with other stretch marks also.
Here’s my result.
[vc_message message_box_color=”warning” icon_fontawesome=”fa fa-picture-o”]If you’re feeling lazy to remove the stretch marks then you can hire me to remove that for you. The min cost is $4 per image and the max cost is $10 per image. Send me the image at hello@tricky-photoshop.com.[/vc_message]
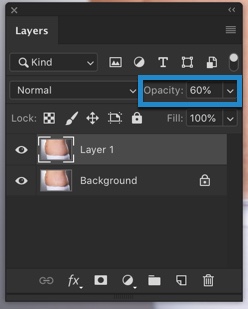
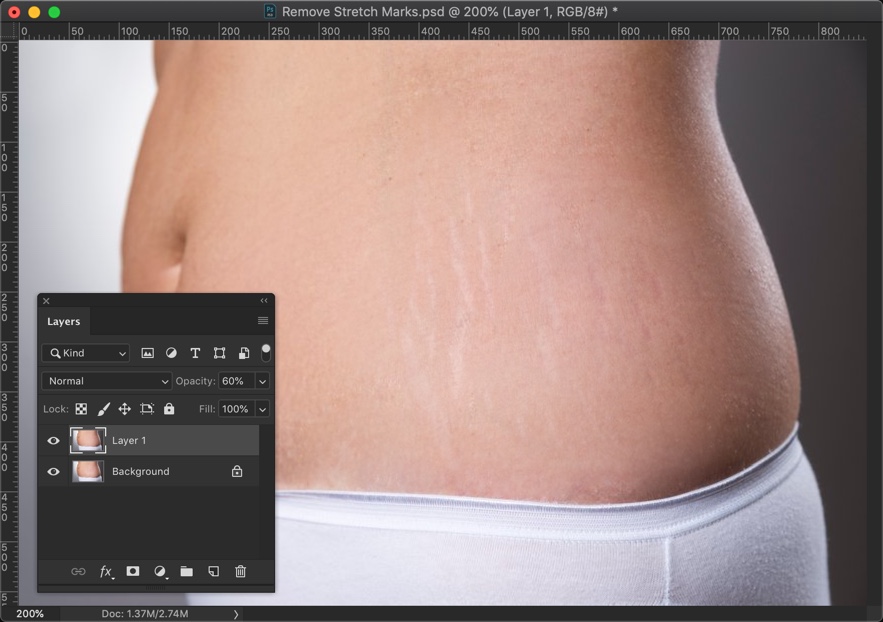
(Optional) Step 3: Make the stretch marks partially visible
If you don’t want to remove it completely then you may want to read this step.
Bring down the opacity of the duplicated layer. Decide the amount as per your requirement. I am going to choose 60%.
This will start showing the stretch marks but it will not be as visible as it was.
[vc_message message_box_color=”warning” icon_fontawesome=”fa fa-picture-o”]If you’re feeling lazy to remove the stretch marks then you can hire me to remove that for you. The min cost is $4 per image and the max cost is $10 per image. Send me the image at hello@tricky-photoshop.com.[/vc_message]