
I get asked how to remove a person many times. Every time I am asked, I say the same thing. There’s no one-way to remove a person. Just like there are more than 5 ways to convert a photo into Black and White in Photoshop there is more than one way to remove a person in Photoshop.
Some people say that the Clone Stamp tool is good, some say that they use Content Aware Fill, some uses the Healing Brush tool, and so on. They all are correct. To remove a person in Photoshop, or to remove an object in Photoshop, it all comes down to the area that is surrounding that person or object and personal preferences.
Today, I am going to show you a workspace (it was a tool in older versions of Photoshop than CC 2019) that can remove a person in Photoshop based on its surroundings. Adobe calls in Content-Aware Fill.
Content-Aware Fill works best if the surrounding of the person or object has a pattern and isn’t too complex. In my image, the background has a pattern of straight lines of sea and sand. Had it been too complex like there were so many random people around the man, Content-Aware Fill would have failed.
It was a menu icon back in versions which are older than CC 2019. But, it is launched as a workspace in Photoshop CC 2019. Adobe might have seen the potential of this tool and decided to enhance it.
I know that all of you don’t have Photoshop CC 2019. So, I am going to write this tutorial for both segment of people i.e. one who have CC 2019 and another who don’t.
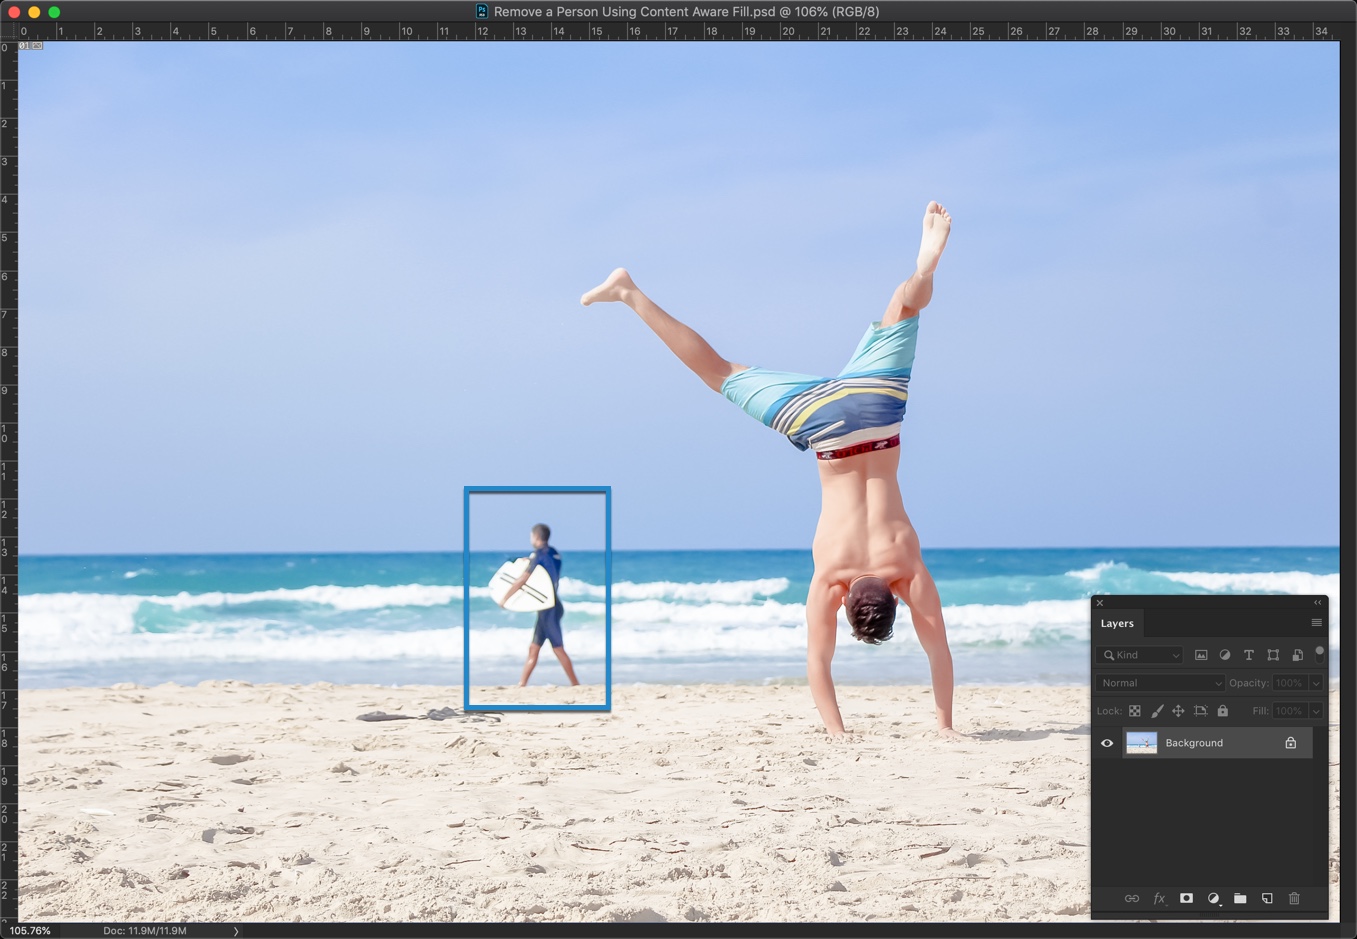
Here’s my image. I want to remove the person who is holding the surfing board.
Content Aware Fill for Older Versions of Photoshop
We are going to use the Fill option and ask Photoshop to automatically fill the person based on his surroundings.
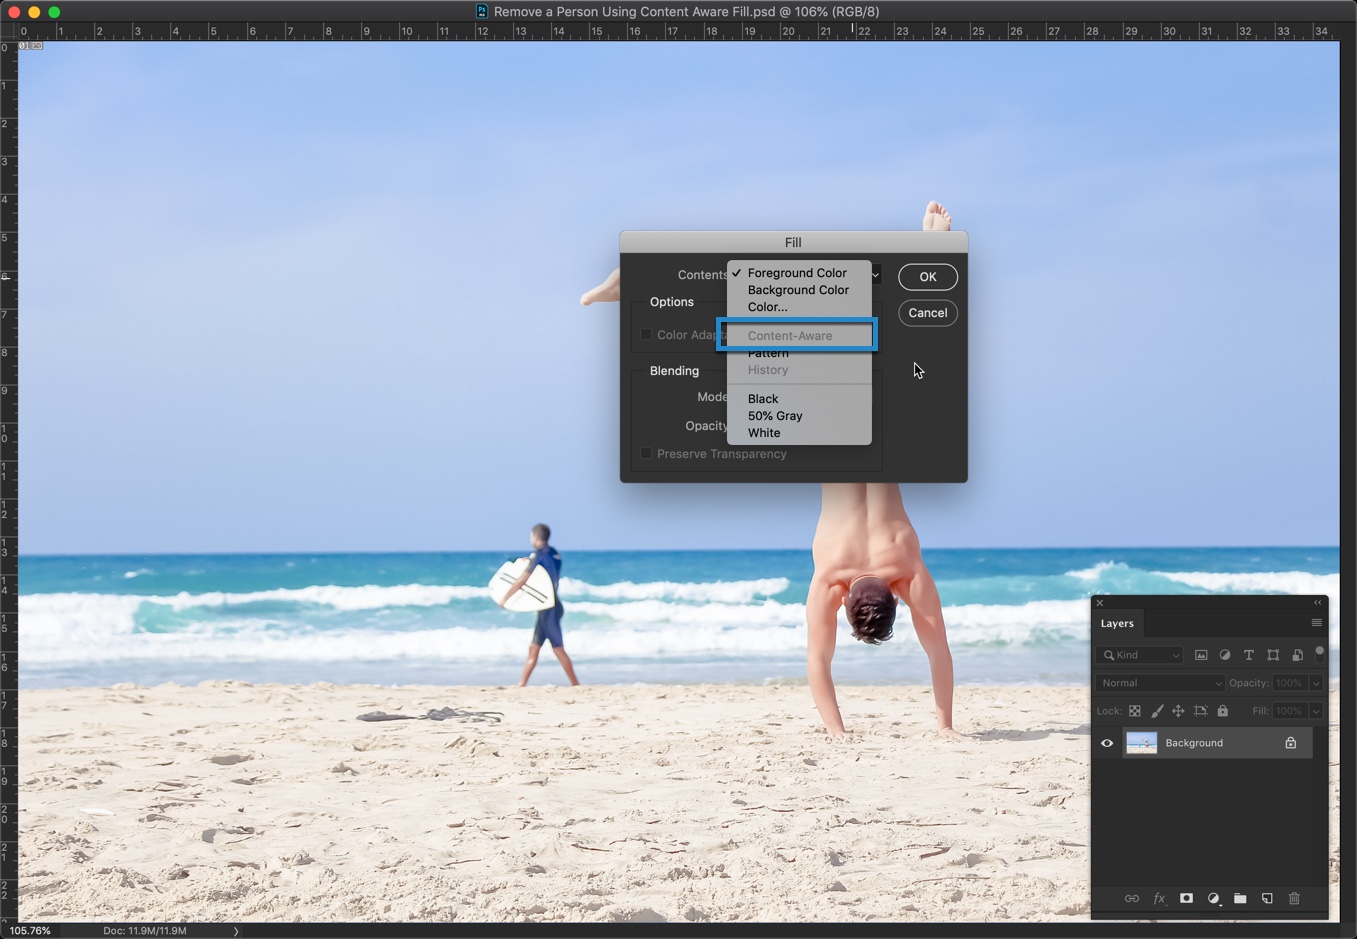
Go to Edit > Fill. We will use Content Aware. But, I noticed that it’s grayed out. This is because I don’t have any selection in my image to fill.
Step 1 – Duplicate the Layer
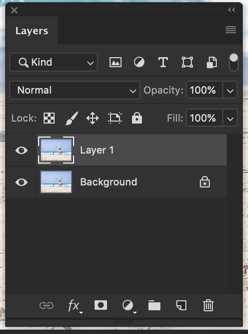
Now, I am going to duplicate my background layer because I want the editing to be non-destructive. This ensures that whatever I do, I will not be touching the original image, and I can go back in time if I mess something up.
Press Cmd + J/Ctrl + J to duplicate the background layer.
Step 2 – Select the person, and Remove the person in Photoshop
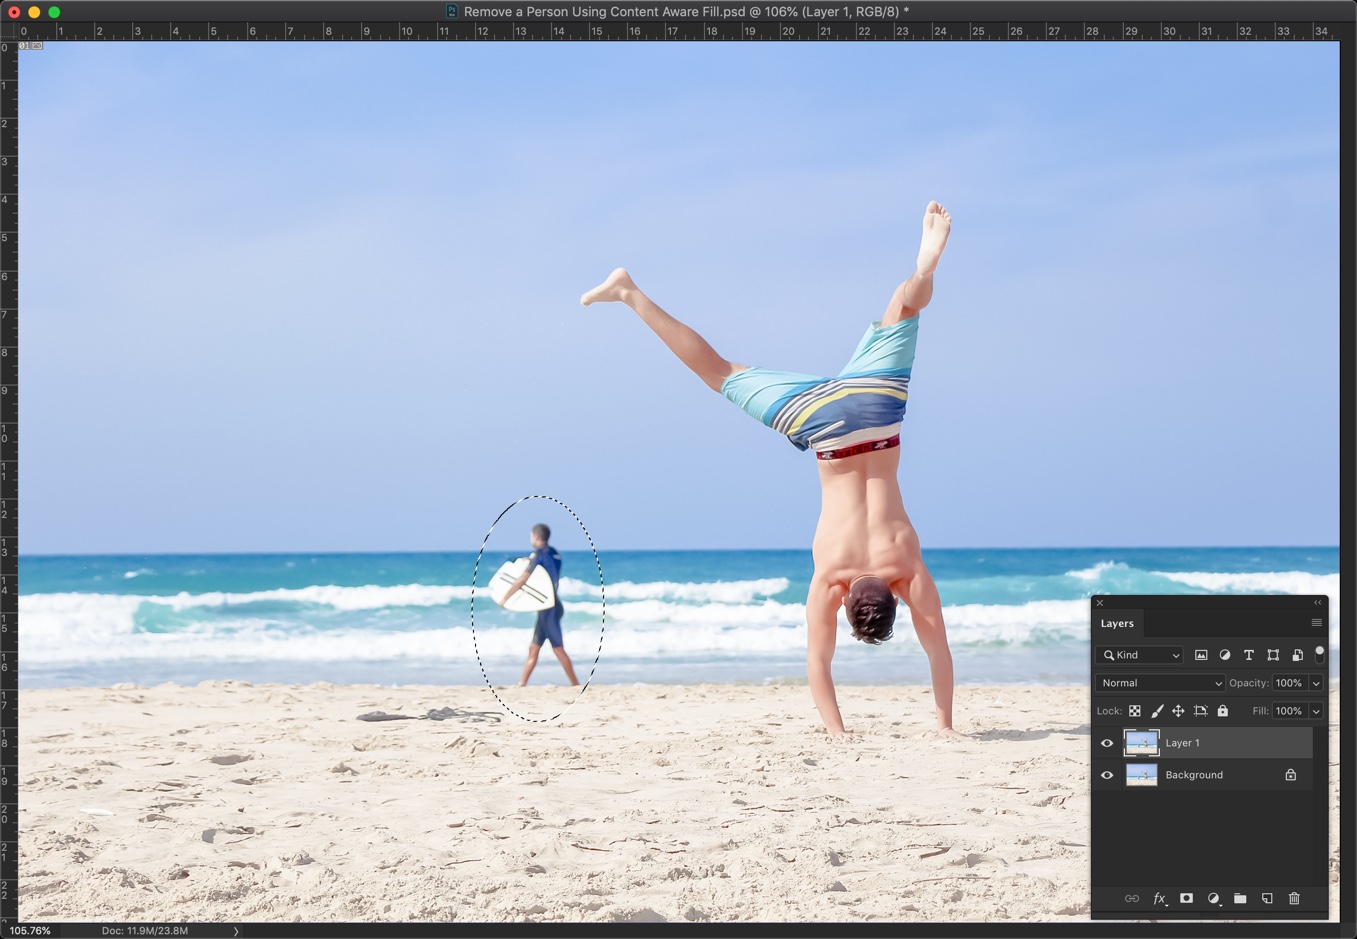
Time to select the person to remove using any selection tool. I am using the Elliptical Marquee tool.
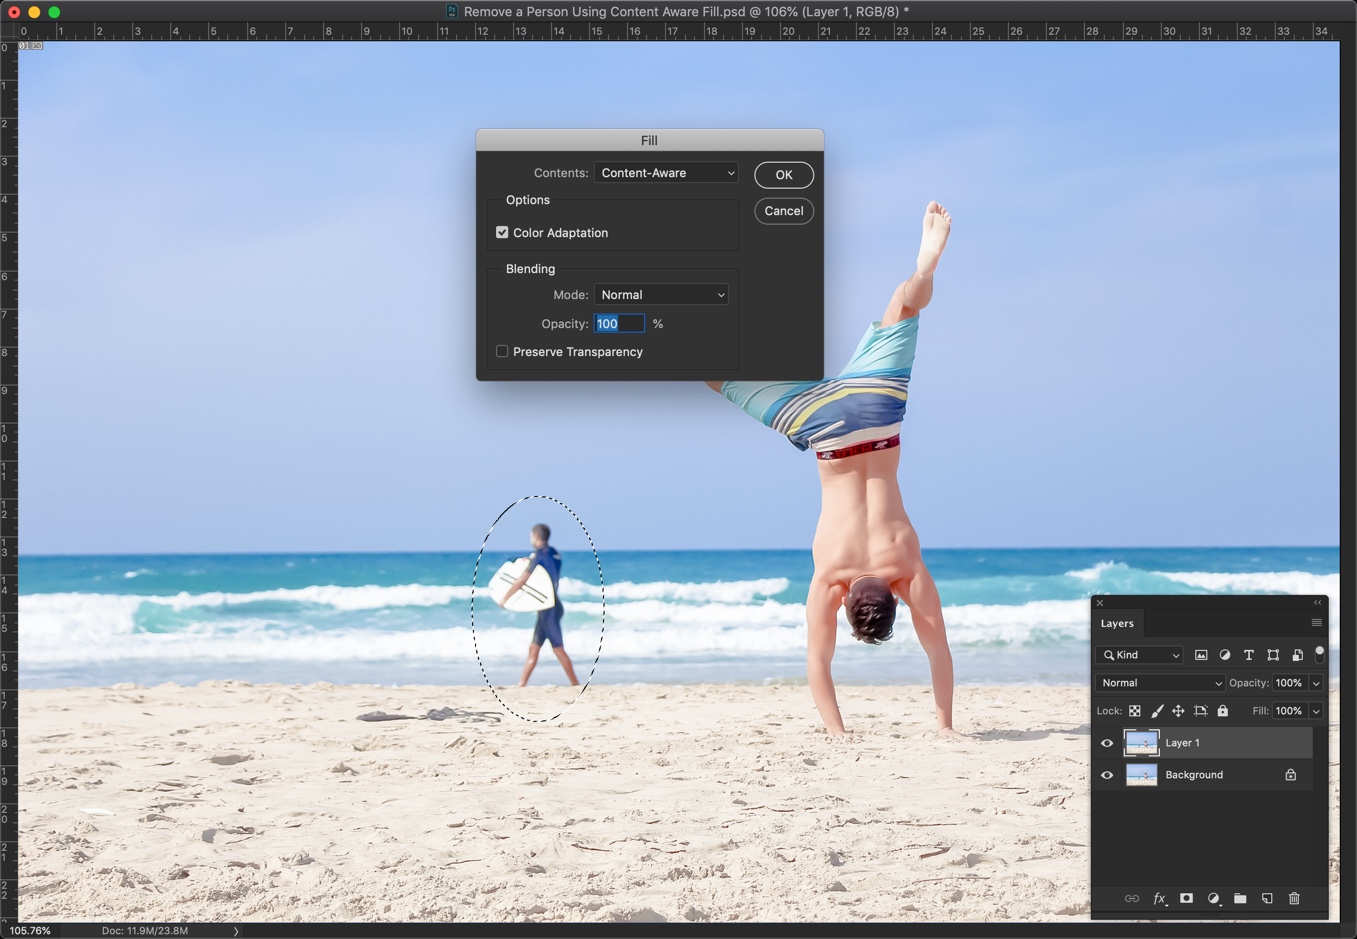
Now, again go back to Edit > Fill. Press Shift + F5 as a keyboard shortcut.
Choose “Content-Aware” and make sure “Color Adapdation” is turned on. Press OK.
Color Adaptation basically tells Photoshop to fill the selection based on the change in colors.
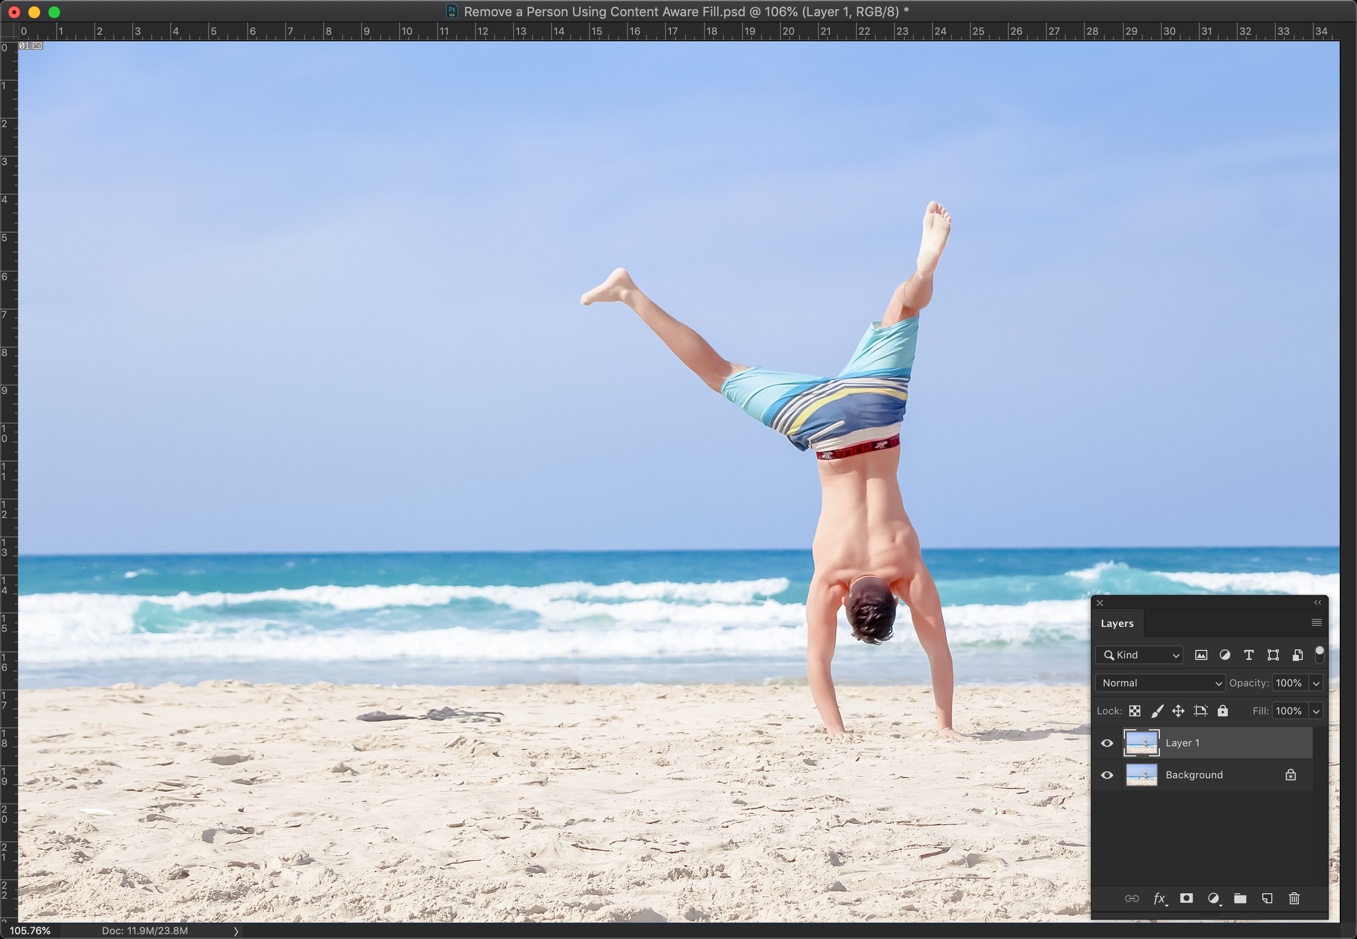
This is how your photo should look. Press Cmd + D/Ctrl + D to deselect.
Here’s the GIF for you.
Content Aware Fill Workspace for Photoshop CC 2019 and Newer Versions
Time to show how to remova a person in Photoshop who like to keep their Photoshop up to date.
Step 1 – Duplicate the Layer
Now, I am going to duplicate my background layer because I want the editing to be non-destructive. This ensures that whatever I do, I will not be touching the original image, and I can go back in time if I mess something up.
Press Cmd + J/Ctrl + J to duplicate the background layer.
Step 2 – Select the Person
Time to select the person to remove using any selection tool. I am using the Elliptical Marquee tool.
Step 3 – Use Content-Aware Fill Workspace
Go to Edit > Content-Aware Fill.
Now, you will see a workspace which looks like the below screenshot.
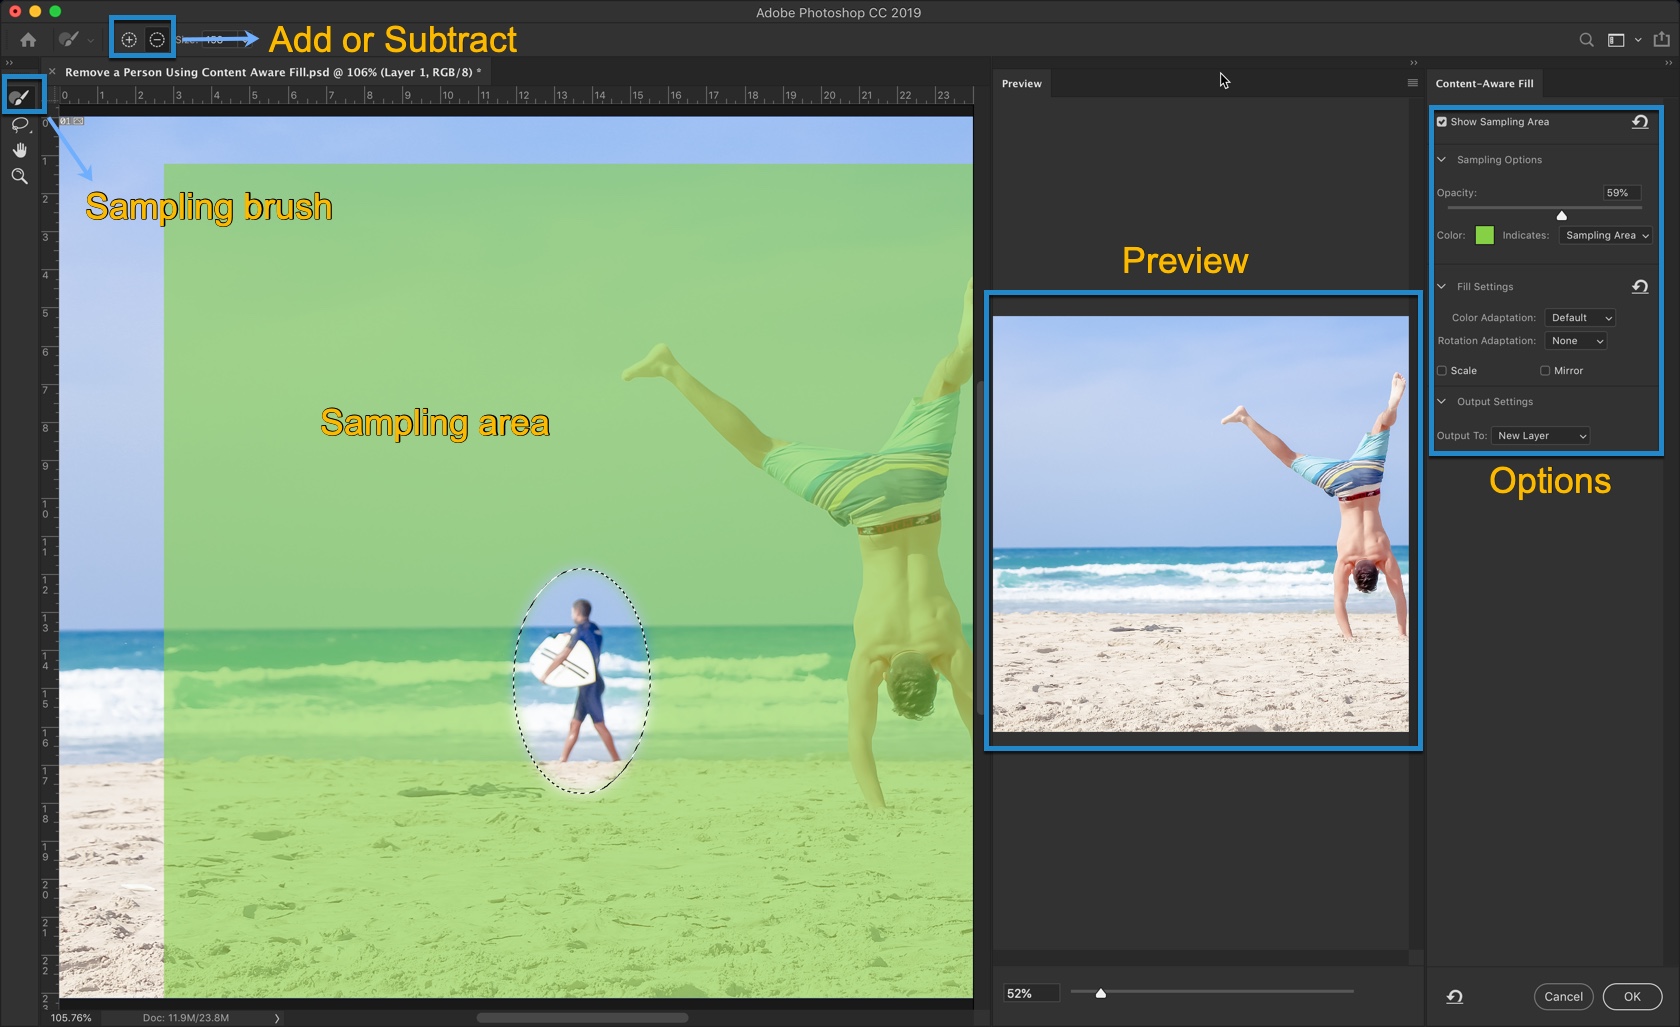
There are 5 parts in this workspace. I have labelled each of them. Allow me to explain to you part one by one.
Sampling Area:
This is the area that is highlighted with the green color.
It shows that Photoshop will use this area as a sample to remove the person. In a simpler language, Photoshop will use this area to identify what to fill in the selected area.
Sampling Brush:
If you want to add or remove the sampling area, use this brush.
Add or Subtract:
If “Add” is turned on (denoted by the + icon), then wherever you brush with the Sampling Bursh, Photoshop will include those areas to the sampling area.
If “Remove” is turned on (denoted by the – icon), then wherever you brush with the Sampling Bursh, Photoshop will exclude those areas fom the sampling area.
Preview:
Real time preview of the final image.
Options:
This is where you tweak the settings to help Photoshop fill the area in a better way.
I will soon write a detailed tutorial on the Content-Aware Fill workspace soon. But for now, coming back to the original topic to remove a person.
The default setting is looking good and it has perfectly removed the person and solved the purpose. So, I am just going to click OK to finalize it.
This is how it looks.
And, this is how you do it.
Make sure that you make the most out of the offer below.
