How to Design Your Own Business Cards?

Having your own business card is a basic requirement of your business. A business card is a professional way to present your business contact details and information to a potential customer, a partner, or other businesses. Having a professional business card reflects the quality of your business and level of professionalism.

Designing your own business card is a way ahead if you are someone who has just started or has a small business. Even your enthusiasm to create your own business card would want you to design your business card.

But what’s the major pain point when you want to design your business card?

Where do you start to design your business card?

You go on Google and search ‘Design your own business card’. What comes in search is a plethora of websites offering custom templates or their services to design your own business cards. Now you are lost in the search results to find a perfect solution and where to start from.

If you are a photographer and looking to design your own photography business card, you would be struggling to find a perfect website for your photography business card.

Most of the websites on the search result give numerous options to design your business card, but mostly in a simple or minimalistic way.
Although some websites may offer some level of a creative touch to your design, then they may ask you to buy their exclusive design.

As a photographer, you are not just a service provider but a creative artist. A creative artist needs a creative way and a creative edge for a photography business card.

Let’s get started with steps to design your own business cards.

Keep these ready before you take your first step

Like its important to have a driving license before you buy a car to drive, it’s important to have some things ready before you start to design your photography business card. 

Brand Name: A name that everyone can associate you with. A brand name is what creates trust for you in the eyes of your customers, clients, and partners. So, having a brand name is important before you start to design your own business card. It’s the brand name to which people will associate your name when they see your business card. 

Brand Logo: What do you think about, or make an image in your head when you hear the word animal? Four legs, body, and tail. But what do you think when you hear the word Lion? A fierce wild carnivorous animal built to kill and you have the image animal with big beards, strong teeth, brownish golden in color, and fierce look.

That’s what a brand name and brand logo do. They complement each other to create an impression in the mind of your audience to think of you when they see your logo or hear your name.

To design your photography business cards the brand name usually goes by your name. Your name should go in a unique and impressive manner. Try with some special fonts and characters to bring a special look and feel to the name you carry.

Color scheme: Did you notice I described the lion with its color? What if you see an animal with the same looks but different colors. You won’t consider it the same. A panther is different from a black panther. What do you think about when I say a blue “M” on a black background? Nothing. And a yellow ‘M’ on a red background? Now you know what I am talking about. That’s exactly what the color scheme does to your brand. So, get a color scheme ready before you start designing your own business card.

Knowing what to communicate

Imagine the business cards as a billboard that goes in hand and from hand to hand. It is important to keep in mind what your customers or clients should think about you when they see your business card. The first impression they make about you when they see your business card is the long-lasting impression in their subconscious mind. Remember “The first impression is the last impression” 

There are a few questions you should keep in mind when you think about what to communicate:

  • What’s your mission?
  • What are your values?
  • What’s your unique positioning?
  • What is your brand personality?
  • What makes you special?
  • What makes you better?

Keeping these things in mind you will be able to think better what you want to communicate with customers and clients.

If you are looking for photography business cards, you should think about your offering, your quality, and what you specialize in to give your cards a unique and stand out feature to communicate what you stand for.

Choose a size

Size and shape of your card. That mostly depends on the standard size of the country you live in, but still, you can choose to stand out. People choose shapes that resonate with their brand. Like, a photographer business card could be shaped like a camera, that’s almost a boxy shape, with a few cutouts and can go well with the brand and business type.

So does the size of the card. Here are some of the popular and standard size across the countries:

  • North American Standard: 3.5 × 2 in. (88.9 × 50.8 mm)
  • European Standard: 3.346 × 2.165 in. (85 × 55 mm)
  • Oceania Standard: 3.54 × 2.165 in. (90 × 55 mm)

When you start editing a new document, or a new project that needs to be printed, one thing that has to be present is borders. That helps your print quality to be better and space for adjustments for any paper alignment issues in the printer.

Trim Line: Its the first line of a border in the card. Its usually taken at 3mm from the edge of the paper or the design format.

Bleed Area: The area between the trim line and the edge of the page is called the bleed area. It’s for safety measures of your design or could be cut out. It could also be designed to suit the shape of your card.

Choose a design template

Choosing a design is the most important and tough task. Creating a design is tougher than choosing a design. So its better to go with available design templates. 

Here are some design template examples you could consider to try with your own business card.

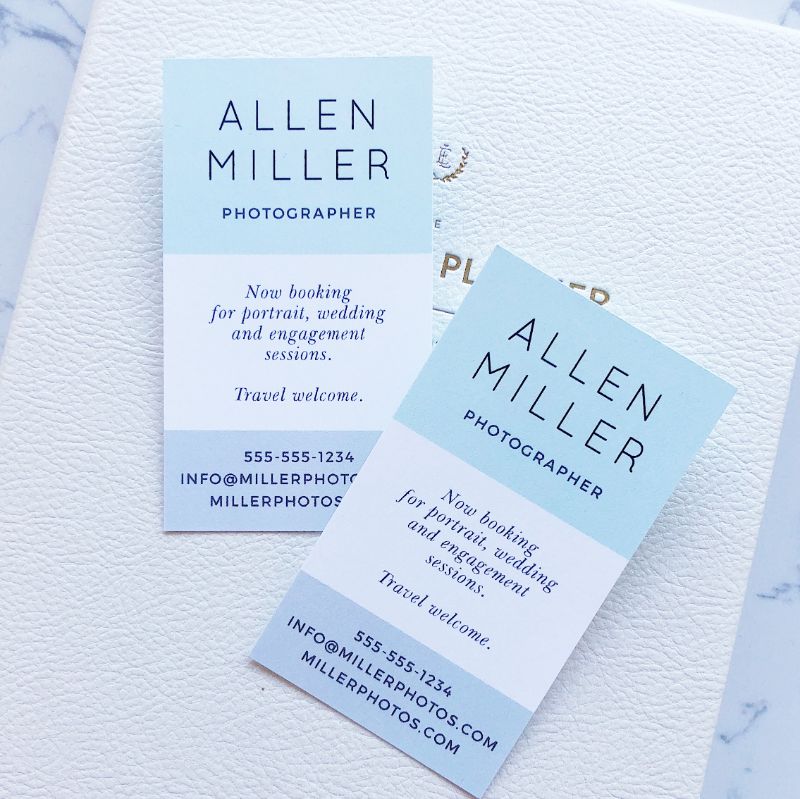
Solid matte color with contrasting color text 

Light Shades and Dark Texts

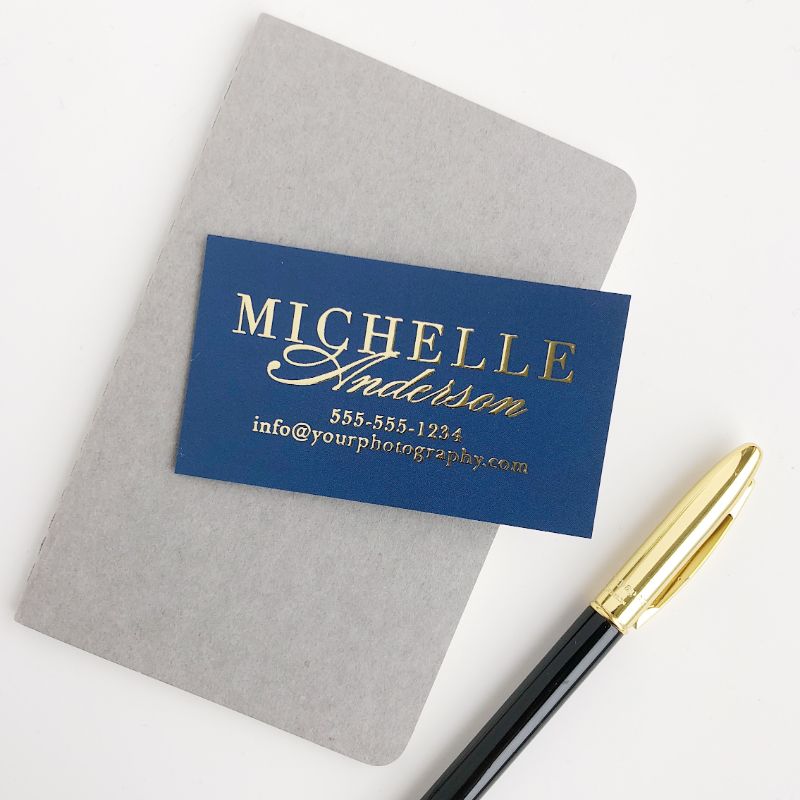
Creative borders and Logo with details

Matte finish background with golden texts for a premium feel

Portraits can be creative

The transparent one

These are some of the most sought after designs in demand. People usually choose to maintain the standard shape but the choice of materials and creativity with designs is never-ending.

Insert your texts, graphics, and logos

Once you have chosen your template the next step is to upload your details. Details are the piece of information that you need to communicate with your customers and clients. Choose each and every detail in proper format and also choose wisely what you want to show in the design of your own business card.

Some details which should be commonly included in your details are your name, phone number, email address, website, and your designation. Some specific details which you can choose to put is a QR code. A QR code is a solution to many tech-related issues that can be used in print media to communicate with electronic media. You could make a QR code of your website, Facebook/ Instagram page, or other links, images, or pages you want your customers to land into.

Hire a designer cum printing service

After going through all the hassles of designing, the final step is to get it printed. There are many services that could print your design or you can get a professional design that is suited to your specific needs for your business cards.

Hiring a professional service can save you a lot of time and money on going through each and every step of the process and you could just give in your details, choose a style and leave the work on them for design and printing and getting it delivered to your doorstep. 

If you are looking to design your own business card I recommend you must check out this Business Cards design and printing service. Their charges are as low as $0.17.

For a professional photographer, it’s not easy to find a design template and service that best suits your needs. Designs have to be creative and attractive to your customers and clients. You must check out the link Photography Business Cards for your designing and printing solutions.

Finalize your design and material

Once you have chosen your designs and your printing services you just need to finalize your design and the materials and finish you need on your business cards and get them printed and ready to use.

Going through all these steps you would be able to get the design your own business card or photography business cards.

Pro tip: Remember your business cards resonate with your brand and values, make them professional, and if in doubt at any point in designing your own business cards hire a professional.

Useful Tips to Create Remarkable Photos

For many individuals, nothing makes magnificent vacation memories more impressive and remarkable than a bunch of exclusive pictures that they take during their trips.

It is easy to make your vacations last in a physical manner.

However, great pictures can provide you with incredible ways to make your vacations unforgettable.

Nonetheless, you ought to learn how to create remarkable photos to enjoy this feeling. But, you do not need to be an expert to take good pictures.

You can always ask for assistance from your friends or peers. And as for your academic writing assignments, you can ask for the professional help from EssayZoo.

Back then, before the invention of smartphones, taking great pictures was a labor-strenuous process.

You ought to possess an ornamental camera and editing software for your computer as well as invest ample time and effort into learning how to utilize them.

But thanks to technology, there are numerous mobile devices and the editing tools that accompany them.

You can create high-quality and outstanding pictures and edit them as you please.

So, if you want to learn how to take nice photos, consider the tips and techniques below.

Capture interesting lighting

Good lighting is one of the primary things for taking good pictures.

While the majority of amateur photographers overlook this photography aspect, professional and skilled photographers fixate about it.

Lighting is the most integral thing to make your pictures embrace a professional look.

But why is it interesting?

Well, not only is it distinctive from what you often see but also highlights the subject and bestows it in a good way.

Strike a pose

Your posture is one of the crucial things when it comes to creating outstanding pictures.

The shutter speed of mobile devices is slow but not in bright light. Shaking or moving the camera around will create blurry images.

So, ensure you hold your phone with both hands while bending your elbows and tucking them into your chest.

Or, you can rest your phone on a tripod, wall, or handrail.

If your mobile camera incorporates a stabilization feature, ascertain that you enable it.

This will assist in reducing the blurriness in the picture.

Understand your camera

One of the fascinating things about mobile photography is that it incorporates settings that will help you create remarkable pictures.

When taking photos, there is that critical moment that you would like to capture.

However, this is not the ideal time for you to dive into the menu to figure out what works best for a specific situation.

Similar to any camera, it is better that you toy around with it one a regular basis and practice with various settings to identify what works best.

Check out the settings on your camera application to see if you can regulate the focus point, ISO, and exposure. Some native applications are equipped with manual or pro settings.

But, if your phone does not have one, you should find a different camera application.

Controlling aperture or shutter speed is not easy. Hence, you need to manage what you can regulate.

Focus on one subject

The majority of exclusive pictures incorporate just one fascinating subject.

Hence, when taking a photo of one, spend ample time setting up the shot.

Professional photographers state that to learn how to take good pictures, you should not fill the whole frame.

Additionally, two-thirds of the pictures ought to be negative space. This helps your subject to stand out more.

However, you need to warranty that you tap the screen of your mobile device to focus your camera on the subject.

This will not only help ascertain that it is focused but that there is good lighting optimization.

Clean the lens

Your lens also ought to be clean at all times if you want to have clear and beautiful photos.

Thus, before taking any photos, you need to ensure that the lens is clean.

Learn to wipe it at all times with a piece of clean cloth to remove any dust particles that may make your photo blur.

Embrace negative space

‘Negative space’ are the areas that lie around and between the subjects of a photo.

It looks like a massive expanse of water, an open sky, a huge wall, or an empty field.

This can alter a picture from good to perfect.

When you incorporate a lot of negative space in your picture(s) your subject will not only stand out but also arouse or conjure a stronger reaction from the viewers.

Embracing negative space can help you take the pictures that you want and get to make your memories remarkable and unforgettable.

You can go about looking for the ideal areas that you can take your photos without worrying about your assignments with the help of WMEFM, you can deliver top-notch academic papers ad find ideal spots for taking your pictures.

Find different perspectives

Taking pictures from an exceptional, startling angle can make them more remarkable.

This tends to build a height or depth illusion with the subjects.

Additionally, it makes the phots stand out since the majority of mobile pictures are taken straight.

So, it is integral that you direct your camera upwards and utilize the sky as a negative space to take your pictures.

Or, you may consider using a slightly downward perspective.

Editing software

An editing tool is efficient in making great photos.

You may take your pictures and find them rather over or underexposed or with a white balance off.

Do not fret too much about it.

There are several editing software such as Snapseed and LightRoom that you can use to edit your pictures.

Also, you can edit pictures from your laptop for more powerful solutions ad better control options.

These editing tools can crop, straighten the horizon, correct white balance, adjust highlights, as well as the shadows.

And as for your academic writing projects, you can get help from https://perfectessay.com/.

In conclusion, taking great photos can help you create remarkable memories.

However, you need to have a good camera, good lighting, negative space, and a particular subject to make it perfect.

And thanks to technology, you do not have to rely on an expensive camera as you can do so from the comfort of your mobile device.

Smartphones are equipped with good cameras and outstanding features that can help you make great photos.

Additionally, you do not need to be a professional to take good photos.

But, you can ask for photo-taking tips from a photo enthusiast.

Nonetheless, above are some of the most efficient tips for taking pictures that you can use to make striking and outstanding memories.

How to Take Formal Photo for CV

When drafting your resume, some companies and organizations will require you to add a photo in your CV. Similar to going for a job interview, the first impression you give to a prospective hiring manager is important.

Your picture is a fundamental part of your profile and together with your recruitment history as well as other credentials, they will market you as a strong potential employee or a firm networking connection.

So, you need to know how to add a picture to your CV to show that you are the ideal candidate for the job. As for the essay writing part, you need not worry about anything as you can get help from https://customessayorder.com/.

However, one question you need to ask yourself is how to take a CV photo for your resume.

Adding a headshot is one of the certain ways to do so. This will help set you apart from other job applicants.

Nonetheless, the ideal question is if a resume photo makes you unique and stand out in a positive or negative manner.

The answer depends on various factors: why you should include the picture and why you should not. Either way, below are some tips and techniques that you can use to learn how to take a formal photo for CV.

Keep it formal

As the photo is for use in an online profile such as LinkedIn or your resume, you may want to have it simple and formal.

Instead of thinking too much about the different outfits you want to try on, think of white, black, or navy tops and simple accessories.

This is not the time for you to display your dangling and shiny earrings or neckpieces. Keep away from busy patterns. Solids are ideal for better headshots.

You want to draw the focus and attention to your face and eyes.

Thus, you do not need to treat this as a fashion contest. You will have all the time to brag or boast your desired threads at your new profession.

So, have a professional photo for your resume that will help increase your chances of landing a face to face interview.

Take off your glasses

Do you want to take your resume photo with glasses or without?

Well, to help you answer that, respond to this, ‘Do you remove your glasses when going to bed?’

If so, go ahead. However, if you are one of the people who wear them on an intermittent or occasional basis, you do not need to put them on.

Also, remember to keep hand gestures and facial expressions neutral.

Do not fish pucker your mouth, make peace signs, exaggerated bug eyes, or squint while facing the camera.

Picture yourself walking into an office for an interview for your dream career. How will you smile? Ponder on that.

Use a neutral background

The most important person in your resume writing process is you.

Hence, the background of your photo CV ought to be something neutral.

It is not a must that it be white. You can choose a distinctive color.

However, over-excitement should not consume you and make you opt for a luminous green or yellow.

Most pictures have white backgrounds. So, with a simple grey or neutral color background, you will be unique and distinctive from other job seekers.

Furthermore, you will not be taking a big risk and you will remain professional.

Ask a friend for help

While it is possible to take the picture yourself, it is beneficial to ask somebody else like your friend for assistance.

Your friend can take your picture for you while you focus on smiling or standing up straight in a manner that shows the hiring managers you want them to hire you.

After taking the photo, you can ask a professional from a reliable writing service such as essaywritingservice.ca to insert and edit the photo for you.

You want a guarantee that you will get the job. So, ask for help from an expert.

Frame from the waist up

Profile pictures for your online profiles or resumes ought to be your profile.

Full body shots are not necessary as they will fill up all the valuable space on your resume that you can use to list your qualifications and accomplishments.

So, instead of taking full-body pictures, consider framing them from the waist up.

This will help get the ideal photo for your CV.

Find some natural light

The background light to your picture is also an important factor that you need to put into consideration.

The lighting helps to make your picture clearer and beautiful.

So, instead of using poor light, use natural light.

This is not difficult to find and it does not require too many adjustments.

So, find a spot where there is enough natural light and take your photo.

Ensure that there are no rays when taking the photo as that will not be the ideal CV picture to use in your resume.

Crop

When taking a photo, you are bound to capture some extra details such as people or other images in the background, or the photo may be too big.

Do not use the whole picture in your resume.

Consider cropping it.

Cut out all the unnecessary parts of your picture.

While at it, ensure that it is proportional and a good fit. There are various cropping tools that you can use to obtain the perfect size.

Use Photoshop a little

Another efficient and effective means of ensuring you obtain the perfect photo for your resume is using Photoshop.

This software application can help you to edit and retouch your photo for use.

So, if you find that you have taken your photo and it does not look impressive, consider using the Photoshop software application.

This software tool will help create, improve, or otherwise edit your photo to perfection.

Also, you can enlist the help of an expert from EssayKitchen if you want an outstanding photo for your resume.

In conclusion, hiring managers get to see astonishing choices of pictures for the accompanying resumes for job applicants.

Most job seekers do not care about the type of photo they include in their resumes.

They use any picture as long as it shows their fashion sense and figures.

Well, if you are one of these people, do not do that.

The choice of profile picture for your resume is very important.

You need to include a photo that will capture the eyes of potential employers first thereby making them see that you are the fit candidate for the job.

So, to include a perfect photo for your CV, consider the resume photo tips above.

11 Best photo editing apps for selfies

It’s been a long time and you’re probably waiting to get out of your home to visit places near you.

What’s the best thing about going out again? Taking pictures, a lot of pictures; both sceneries and selfies.

These outdoor selfies also get more likes on Instagram and Facebook.

The inbuilt photo editors are not really good enough for selfies, so you need better photo editing apps for selfies.

Here we bring to you a list of the best editing apps for selfies. A little while ago, I also published a list of 25 best photo editing apps.

What is the criteria for choosing the best photo editing apps for selfies?

The list of best editing apps for selfies was selected based on the following criteria:

  • Ratings on the app store/play store
  • Recommendations
  • Reviews

This will establish the credibility of our listings and help you find out the best editing apps for selfies.

What is the ranking criteria for the best photo editing apps for selfies?

We did an unbiased review and rated each app based on their ratings, the number of reviews, recommendations by others and their ranking by others. These were the criterion for ranking the best apps for editing selfies:

  • Ratings
  • Reviews
  • Recommendations
  • Frequency


Now we present you this list of the 11 best editing apps for selfies.

1.   Facetune2

Facetune2 is one of the best apps in the store for making your face look great.

It has features to remove blemishes, retouch, soften, remove pores, adjust skin tone, etc. to make your face look more charming.

Pros:

  • Granular control over facial features
  • Easy to use
  • Try features before subscribing to it

Cons:

  • Subscription can put off some users
  • Photos taken with live preview are softer

2.   YouCam Perfect

YouCam Perfect offers unique features like skin tone improver, collage maker, instant beautifier, body enhancer, and also a social community called Beauty Circle.

This is a feature-rich selfie camera app with advanced image editing and enhancer tools.

YouCam Perfect is available as a free download but it is ad-supported.

Pros:

  • Proprietary instant beautification tool
  • In-app social networking
  • Face-detection technology

Cons:

  • Required in-app purchases to remove ads

3.   Retrica

Retrica is an app that can transform your camera into a retro camera.

It has 55 free filters and 80 filters in the paid version.

It has features like randomization mode, blur effect, timer, and interval shooting.

Pros:

  • Loads of great filters
  • Multi-shot capabilities
  • Video shooting features

Cons:

  • Noise issues in videos

4.   AirBrush

It has a clean and smooth user interface and offers features to remove blemishes, pimples, teeth whitening, smile enhancer and skin tone adjusting.

It also has a blush or mascara feature to add makeup to your photos.

Pro:

  • Makeup feature
  • Editing before taking pics
  • Direct sharing on social media

Cons:

  • Advertisements can be distracting

5.   Perfect365

It offers many features to edit photos including options to try many virtual makeup styles and hairstyles. It has features like eye color, face slimming, blemish correction, and under-eye circle removing.

Pros:

  • One-touch makeup
  • Change face shape

Cons:

  • Sometimes pics look heavily photoshopped

6.   VSCO

VSCO is a great camera and editing app with a half-baked online sharing experience bolted onto the side. The editing tools and filters are better than what you’ll find in many other apps, and most of the experience is free. You only need to pay for additional filters. While the sparse icon-driven UI is initially confusing, it’s easy to figure out.

Pros:

  • Simple Design
  • Good for editing
  • Filters are top-notch

Cons:

  • Crashes sometimes in multi-function

7.   Snapchat

Snapchat is a well-known application that doesn’t need an introduction.

It’s one of the most used social media apps and it‘s also good with filters, lenses, and bitmojis.

Pros:

  • Social networking
  • Instant click and share
  • Filters and bitmojis

Cons:

  • Not purely an editing application

8.   Cymera

The Cymera app allows you to create personalized portraits by using your phone.

It’s streamlined so you can click photos and edit them straight from the app.

You’ll have beautiful pieces of artwork to share on your social media in no time.

Pros:

  • Easy to use GUI
  • Many editing tools
  • Built-in camera functions

Cons:

  • Few built-in effects
  • Few border effects

9.   Selfie City

As the name suggests, Selfie City is made for taking selfies. It has many filters and stickers to make your selfie look great and can be used to take pictures directly. Its filters are named after cities like Manhattan, Seoul, Hollywood, New York, etc.

Pros:

  • Selfie filters
  • Stickers
  • Collage maker

Cons:

  • No specific editing feature for photos


10. A Color Story

Most people use A Color Story when they want color filters for pictures.

A Color Story can enhance your social photos with effects, such as color fog and light flares.

Layering multiple effects during editing can make your images truly unique.

Pros:

  • Make custom filters
  • Over 20 free tools
  • Desktop version

Cons:

  • Requires purchase for some filters
  • Confusing Interface

11. Instagram

Who doesn’t know this one? After all, most of the previously mentioned apps are used to make a perfect photo for Instagram.

But Instagram gives you some cool and retro filters that have unmatched quality and it offers some basic editing of pictures before posting.

Pros:

  • Free forever
  • Direct sharing on Facebook and Instagram posts
  • Cool filters
  • Video and short video features (Reels)

Cons:

  • More like social media than a photo editor

The Best Wedding Photography Lightroom Presets

Most wedding photographers use Lightroom Presets.  In fact, of all of the different genres of photographers, wedding photography probably has the highest percentage of photographers that use presets.  Why?  Because they have to process thousands of photos quickly. A second or two saved per image can translate into hundreds of dollars for each wedding; and the faster they can post-produce, the more time they have to focus on other aspects of running a wedding photography studio like marketing, hiring, shooting, and more.

This is why many companies out there have made wedding photography presets for all types of styles.  One of the most recent sets released is Visual Flow’s Wedding Lightroom Presets and we were able to test them out ourselves.  See our thoughts below:

We love the systematic approach by Lighting Condition

The first thing you’ll appreciate about the presets is the systematic approach.  The process goes like this:

Step 1: Select the pack (i.e. the style)

Step 2: Select the preset based on the lighting condition (i.e. hard light)

Step 3: tweak the white balance, exposure, and other adjustments you need to finalize the image.

The settings on your final image should sync effortlessly across all of the images that were shot in the scene with similar settings.  This is the “magic” of their system.  Photo editing in Lightroom by lighting conditions should save wedding photographers a ton of time.

The lighting condition included in each pack is Soft Light, Hard Light, Tungsten, Tungsten Mix, HDR, Green Tint, Backlit, Flash and Black and White.

We love the Retouching Toolkit

The second thing you’ll like is the retouching toolkit.  The toolkit lets you dodge and burn in Lightroom, add color and pop to the skies, and more.  These artistic and creative refinements that you can do in Lightroom (without opening up Photoshop), add to the power of the entire Lightroom Preset system.  Note that the Retouching Toolkit is a separate purchase.

We love the clear organization

The third thing you’ll like is the clear separation of the styles and looks.  They have three different packs as of the time of writing this article: the modern pack, the pastel pack, and the crush pack.  These “packs” are essentially styles, with modern tackling the vibrant, editorial look, pastel being the filmic, light and airy look, and crush as the high contrast, ultra-vivid look.  My favorite is the Crush pack because it’s the most unique and different from the other wedding Lightroom Presets on the market right now. 

In contrast, sometimes you’ll find presets with unclear naming and styles that are all over the place.  That can add to the learning curve and make it less useful when it comes to consistency and workflow.

Before and after image with the Tungsten Lightroom Preset in the Modern Pack.

Before
After
Before
After
Before
After

Conclusion

For the reasons listed above, we can say that these are some of the best Wedding Lightroom Presets on the market.  They aren’t necessarily cheap though, so this may only make sense for working wedding photographers who are busy and need tools that speed up their workflow.  Also, as with all Lightroom Presets, you CAN create similar styles all by yourself.  Actually, creating Lightroom Presets is pretty simple.  Refining them and making them a system is the tough part, which Visual Flow has done for you with this system.

17 Best DSLR Cameras Under $1000

The world is recovering from a pandemic and people will be stepping out of the house more and more. The traveler or enthusiast in you will want to step out too and you’ll want to capture those moments and sceneries in the best way possible and capture the best moments with your new DSLR camera. This is why I decided to create a list of the best 17 DSLR cameras under $1000.

To capture your best moments, you’ll need the best DSLR camera possible, but your ‘best’ DSLR camera also needs to be in your budget. Not only does your budget matter, but you’ll also have different criteria for choosing your best DSLR camera.

So, we’re bringing you this list of the 17 Best DSLR cameras under $1000.

What are the eligibility criteria for selecting the best DSLR cameras under $1000?

The criteria for choosing the best DSLR cameras under $1000 for you include:

  • Rating on Amazon
  • Usability and quality
  • Number of reviews

This shows that the performance of the camera is loved by the customers and it also has a high popularity.

What are the criteria to rank the best DSLR cameras under $1000?

We decided to rank the best DSLR cameras for you using the following criteria:

  1. Ratings (maximum weightage)
  2. Number of reviews
  3. Camera Specifications

After analyzing all the data collected, we used a ranking mechanism to rank the best DSLR cameras for you.

List of the 17 best DSLR Cameras under $1000 for You

Here is the list of best 17 DSLR cameras under $1000 for you.

1. Canon EOS Rebel T7i

Rating & Reviews: 4.8⭐ and 397 Reviews

Price: $799

Specifications:

  • Megapixels: 24.2mp
  • Sensor Size: APS-C
  • Inbox Lens focal length: 18-55mm

Pros:

  • Dual Pixel AF
  • LCD touchscreen
  • Good build quality & lightweight

Cons:

  • No major cons

It’s one of the most liked and best-rated cameras.

It has features like high-speed continuous shooting at up to 60 fps and it weighs approximately 1877 ounces.

With an optical viewfinder to see exactly what you’ll capture, as well as 45-point cross-type AF for accurate results, dual pixel CMOS AF with phase detection, and more, the EOS Rebel T7i is one of the most advanced EOS rebels yet.

2. Canon EOS Rebel T7

Rating & Reviews: 4.8 ⭐ and 177 Reviews

Price: $459

Specifications:

  • Megapixels: 24.1mp
  • Sensor Size: APS-C
  • Inbox Lens focal length: 18-55mm

Pros:

  • WiFi & NFC
  • Full HD video
  • Full kit included in the package

Cons:

  • Good for beginners
  • 3 fps continuous shooting

The EOS Rebel T7’s large 24.1 Megapixel CMOS sensor is great for beginners and hobby photographers.

Its Bluetooth, WiFi, and NFC provide good connectivity.

This package also has accessories from Ritz.

3. Canon EOS REBEL SL3

Rating & Reviews: 4.8⭐ and 110 Reviews

Price: $649

Specifications:

  • Megapixels: 24.1mp
  • Sensor Size: APS-C
  • Inbox Lens focal length: 18-55mm

Pros:

  • WiFi & NFC
  • 4K video recording
  • Vari Angle LCD

Cons:

  • No 1080p at 24 fps

It’s a perfect camera for someone looking to get into hobby photography.

It’s also very lightweight and does the job perfectly, although it’s not recommended for professional photographers.

4. Pentax KP 24.32

Rating & Reviews: 4.9 ⭐ and 62 Reviews

Price: $863.90

Specifications:

  • Megapixels: 24.32mp
  • Sensor Size: APS-C
  • Inbox Lens focal length: DA 35mm F2.4

Pros:

  • 5-axis shake reduction
  • CMOS sensor
  • Dustproof and waterproof
  • Pixel shift resolution

 Cons:

  • No accurate AF

It’s a camera that takes fantastic photos, is durable, easy to use, it’s fairly priced, and it has a nice size.

It’s also dustproof and waterproof which makes it a good option in the range.

5. Canon EOS Rebel T6

Rating & Reviews: 4.9 ⭐ and 37 Reviews

Price: $529

Specifications:

  • Megapixels: 18mp
  • Sensor Size: APS-C
  • Inbox Lens focal length: Canon EF-S 18-55mm f/3.5-5.6 IS II Lens

Pros:

  • 9-point AF
  • DIGIC 4+ image processor
  • Extended ISO 12800

Cons:

  • No major cons

Comprising of a versatile set of imaging capabilities along with support for a connected workflow, the EOS Rebel T6 from Canon is a compact, sleek DSLR featuring an 18MP APS-C CMOS sensor and a DIGIC 4+ image processor.

Combined, these two technologies offer rich image quality with reduced noise, along with a sensitivity range of ISO 100-6400 that can be further expanded to ISO 12800 to suit low and difficult lighting conditions.

6. Nikon D3400

Rating & Reviews: 4.6 ⭐ 1910 Reviews

Price: $596.95

Specifications:

  • Megapixels: 24.2mp
  • Sensor Size: APS-C
  • Inbox Lens focal length: 18-55mm f/3.5-5.6G VR lens

Pros:

  • 5 fps continuous shooting speed
  • Bluetooth SnapBridge
  • Extended ISO 12800

Cons:

  • No optical low pass filter

It takes flawless low-light photos with its native ISO range from 100–25,600.

It has the “speed to freeze time” feature and it uses Expeed 4 image processing.

You can always be connected to a smartphone with Nikon SnapBridge connectivity.

7. Nikon D3200

Rating & Reviews: 4.7 ⭐ and 1686 Reviews

Price: $589.95

Specifications:

  • Megapixels: 24.2mp
  • Sensor Size: APS-C
  • Inbox Lens focal length: 18-55mm f/3.5-5.6G VR lens

Pros:

  • 4fps continuous shooting speed
  • Extended ISO 12800
  • WiFi

Cons:

  • Auto Focus issues

The D3200’s compact size and the price makes it a powerful package.

It’s easy to use the HD-SLR and it has serious Nikon power: a 24.2 MP DX-format CMOS sensor that excels in any light, EXPEED 3 image-processing for fast operation and creative in-camera effects, Full HD (1080p) video recording, in-camera tutorials and much more.

8. Nikon D5300

Rating & Reviews: 4.5 ⭐ and 817 Reviews

Price: $634

Specifications:

  • Megapixels: 24.2mp
  • Sensor Size: APS-C
  • Inbox Lens focal length: 18-55mm

Pros:

  • 5 fps continuous shooting speed
  • ISO boost 25600
  • Manual focus included

Cons:

  • No image stabilization

The Nikon D5300 Digital SLR Camera has a 24.2-megapixel resolution that is achieved with the Nikon DX-format CMOS sensor.

Nikon’s EXPEED 4 image-processing engine gives your pictures and movies exquisite color.

Additional features: ISO sensitivity range of 100 to 12800, built-in pop-up flash, remote shooting function, built-in GPS, 39 focus points, 5 fps continuous shooting, nine special effects, Scene Auto Selector and more!

9. Nikon D5600

Rating & Reviews: 4.6 ⭐627 Reviews

Price: $796.95

Specifications:

  • Megapixels: 24.2mp
  • Sensor Size: APS-C
  • Inbox Lens focal length: 18-55mm & 70-300mm

Pros:

  • 2 inches 1.037m dot VARI angle touchscreen
  • Full HD 1080p video recording at 60 fps
  • SnapBridge Bluetooth and WiFi with NFC
  • Expeed 4 image processor

Cons:

  • Auto Focus Issues

The camera is accompanied by an impressive lens and its battery lasts 970 shots per charge.

Nikon also includes cloud storage Nikon Image Space for its users.

It has 39 autofocus points and a good responsive touch screen.

The camera can shoot at 5 fps and in low light at ISO level 25,600.

10. Canon EOS 2000D

Rating & Reviews: 4.7 ⭐ and 608 Reviews

Price: $360.64

Specifications:

  • Megapixels: 24.1mp
  • Sensor Size: APS-C
  • Inbox Lens focal length: 18-55mm

Pros:

  • Full HD 1080p video recording at 30 fps
  • WiFi & NFC
  • DIGIC 4+ image processor

Cons:

  • Have to use propriety flash only
  • Not good for portraits but does landscape pretty well

With the EOS 2000D and its 24.1 megapixels, you can easily capture first-class photos in DSLR quality and full HD videos in cinema style even in difficult lighting conditions.

Instantly share and operate the camera remotely with WiFi, NFC and the Canon Camera Connect app.

11. Canon EOS Rebel SL1

Rating & Reviews: 4.6⭐ and 577 Reviews

Price: $699

Specifications:

  • Megapixels: 18mp
  • Sensor Size: APS-C
  • Inbox Lens focal length: 18-55mm

Pros:

  • Hybrid CMOS AF II
  • EF & EF-S lens compatible
  • DIGIC 5 image processor

Cons:

  • No flip screen feature

The camera has a small body and is lightweight.

It’s power-packed with good features.

Capable of shooting up to 4 fps for 7 consecutive photos, the Canon EOS Rebel SL1 also has full HD mode for videos. It’s also accompanied by a 3-inch touchscreen, optical viewfinder with 0.87X magnification, Hybrid CMOS AF, and scene-intelligent auto mode.

12. Panasonic Lumix G7

Rating & Reviews: 4.6 ⭐ and 516 Reviews

Price: $897.99

Specifications:

  • Megapixels: 16mp
  • Sensor Size: APS-C
  • Inbox Lens focal length: 14-140mm

Pros:

  • 4K Ultra HD modes
  • OLED live viewfinder
  • Silent shooting

Cons:

  • Autofocus tracking
  • Low light performance

The Panasonic G7 is the sixth camera in their G series line, and I have to say they have finally nailed it.

This camera sits right in the sweet spot of performance, size, and price.

It’s considered a mid-level camera but can do just about anything the higher end models can.

The 16-megapixel sensor has been refined and provides good high iso performance.

Plus RAW files are easy to work with. The headline feature, 4K video, is top-notch although you have limited manual controls for video recording.

Speaking of controls, this camera bristles with dials, levers, and buttons.

The handling is top-notch, everything falls into place and all functions are within easy reach for fast access.

13. Canon EOS Rebel SL2

Rating & Reviews: 4.7 ⭐ and 464 Reviews

Price: $699

Specifications:

  • Megapixels: 24.2mp
  • Sensor Size: APS-C
  • Inbox Lens focal length: 18-55mm

Pros:

  • Full HD 60fps recording
  • Optical viewfinder
  • WiFi & NFC
  • DIGIC 7 Image processor

Cons:

  • No IR remote support
  • The app interface is not great

Canon’s compact EOS Rebel SL2 provides versatile built-in Bluetooth and WiFi connectivity, plus key camera features like a newly-developed 24.2 megapixel APS-C Canon CMOS image sensor paired with Canon’s DIGIC 7 image processor, resulting in Rebel-series firsts such as Dual Pixel CMOS AF for smooth and accurate autofocus and a high-resolution touchscreen monitor that supports both Touch AF and Touch Shutter release functionality.

14. Canon EOS Rebel T5i

Rating & Reviews: 4.5 ⭐ 437 Reviews

Price: $799

Specifications:

  • Megapixels: 18mp
  • Sensor Size: APS-C
  • Inbox Lens focal length: 18-55mm

Pros:

  • Optical viewfinder
  • Hybrid CMOS AF System
  • DIGIC 5 image processor
  • 9-point AF system
  • Vari-angle Touchscreen 3.0-inch Clear View LCD monitor II

Cons:

  • AF not accurate

The incredible image quality and performance starts with an 18.0 Megapixel CMOS (APS-C) sensor and Canon’s superb DIGIC 5 Image Processor.

Combined with an extensive ISO range of 100–12800 (expandable to 25600 in H mode), the EOS Rebel T5i boasts crisp, detailed images, even in low-light situations.

Continuous shooting speed of up to 5 fps allows for fast action capture.

9 cross-type AF focus points help ensure crisp focus throughout the frame, and the Hybrid CMOS AF system enables speedy and accurate autofocus when shooting in Live View mode.

In addition, the camera is compatible with Canon STM lenses for smooth, quiet AF performance.

15. Canon EOS Rebel T6i

Rating & Reviews: 4.5 ⭐ 354 Reviews

Price: $797

Specifications:

  • Megapixels: 24.2mp
  • Sensor Size: APS-C
  • Inbox Lens focal length: 18-55mm

Pros:

  • 19-point AF
  • Hybrid CMOS AF III System
  • WiFi & NFC

Cons:

  • WiFi function on phone disrupts some functions

This is a great camera for amateurs and beginners.

It offers good functionality for its price.

You can use its EOS Utility Webcam software to turn the camera into a webcam.

Its high-speed continuous shooting allows up to 50 fps and its ISO is expandable to H: 25600. It also has a DIGIC 6 image processor.

16. Canon EOS Rebel T5

Rating & Reviews: 4.6 ⭐ and 337 Reviews

Price: $474

Specifications:

  • Megapixels: 18mp
  • Sensor Size: APS-C
  • Inbox Lens focal length: 18-55mm + 75-300mm

Pros:

  • Continuous shooting up to 3 fps
  • Scene Intelligent Auto Mode
  • Creative filters
  • Built-in flash and feature guide

Cons:

  • Minor issues in Autofocus

The Canon EOS Rebel T5 SLR camera with the EF-S 18-55mm IS II standard zoom lens and the 75-300mm telephoto zoom lens is perfect for families, budding photo enthusiasts, and first-time SLR users alike.

The EOS Rebel T5 makes it easy to capture movies and photos that are nothing short of dazzling. It features a powerful 18 megapixel CMOS image sensor and DIGIC 4 image processor for easy recording of HD video and high-resolution photos, and it has a huge 3-inch LCD screen for Live View recording and review.

17. Canon EOS 4000D

Rating & Reviews: 4.5 ⭐ and 225 Reviews

Price: $339

Specifications:

  • Megapixels: 18mp
  • Sensor Size: APS-C
  • Inbox Lens focal length: 18-55mm

Pros:

  • DIGIC 4+ Image Processor
  • 8 cm (2.7″) TFT LCD, approx. 230 K dots
  • Full HD 1080p Video Recording at 30fps
  • 9-point autofocus,
  • Up to 3 fps Shooting and ISO 12800
  • Built-In WiFi, Scene Intelligent Auto

Cons:

  • Minor issues in autofocus

Just frame and shoot for great results with Scene Intelligent Auto.

Enjoy guided Live View shooting with Creative Auto mode and add unique finishes with Creative Filters. Shoot with confidence and capture the moment just as you remember it with precise autofocus, 3.0 fps, and DIGIC 4+. Easily frame your shots with the optical viewfinder and see the results on a 2.7 inch LCD screen.

These are the 17 best DLSR cameras under $1000. I am sure that they will serve your purpose.

Like shooting photos on your phone?

If you like to shoot photos on your phone, then you should read our list of the best 25 free photo editing apps.

How can you edit photos?

I am very soon going to a list of software that you can use to edit photos. So, watch this space.

If you need to hire me to edit your photos, you can certainly do it. Click on the below button to contact me.