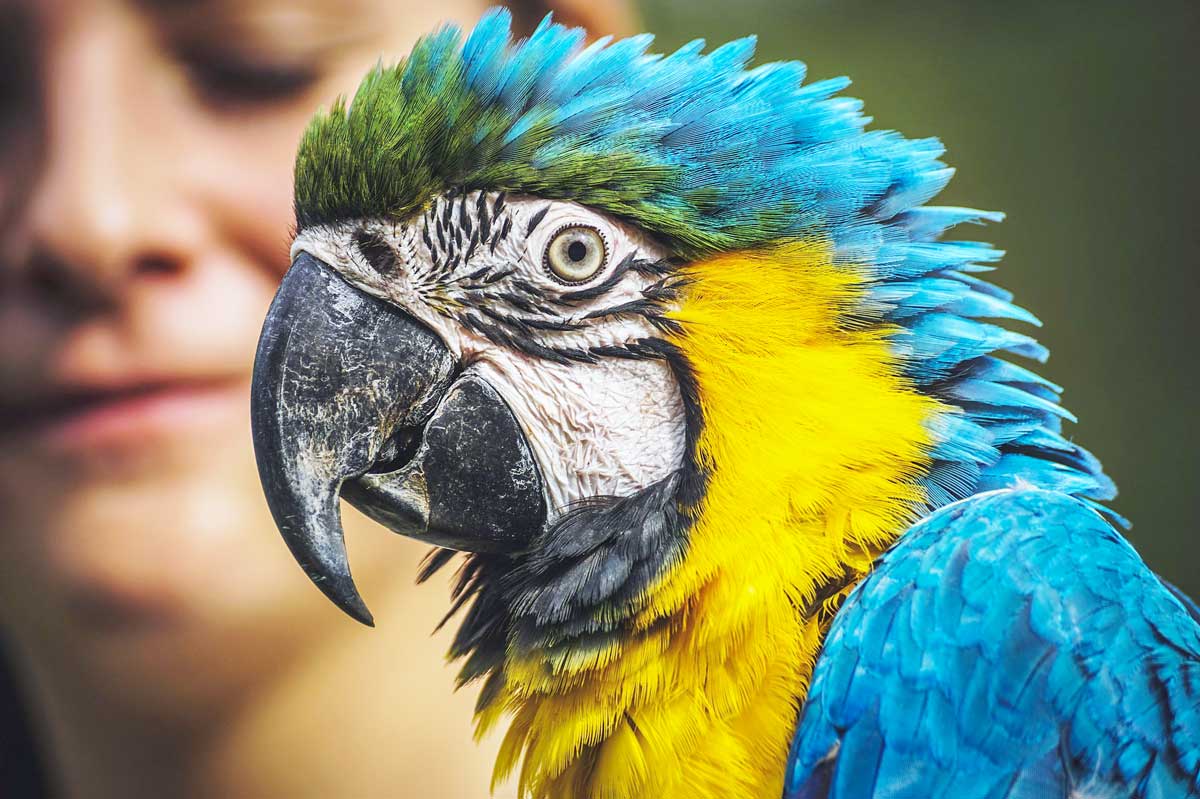
Last Sunday, I posted the ultimate guide to layer mask in Photoshop and I got emails that there’s no ultimate guide to layers in Photoshop on TrickyPhotoshop. You are partially right. There was no ultimate guide to layers on TrickyPhotshop until now.
Layer panel is something that you will use often in Photoshop. It is the thing that differentiates Photoshop from other cheap photo editing apps. You can do below things with the help of layer panel
- Non-destructive editing
- Go back to any point in time
- Edit a photo with multiple revisions
What can you expect from this tutorial?
I will be showing you how does a layer panel look, what it is, how does it work, all the buttons that you get in a layer panel, its features, and most used shortcuts for layer panel to make photos for your business or personal use to create a better look.
Table of Content
- What is layers in Photoshop?
- What is layer panel in Photoshop?
- Where is layer panel located in Photoshop?
- Anatomy of layer panel in Photoshop.
- Major types in layers in layer panel in Photoshop
- Shortcuts in layer panel in Photoshop.
1. What is Layers in Photoshop?
I am going to explain it with an analogy. Think of two identical paintings. One painting is placed on another. So, the final result is a stack of two identical paintings. That is what layers in Photoshop is. It’s a stack of images placed over one another. The only difference between the analogy and the layers is that all layers don’t have to be identical.
In a nutshell, Layers are simply a stack of images placed over one another
If you brushed on the upper painting with white color, the lower painting will stay intact. Also, if a person is seeing the painting from the top, he will not see any change in the lower painting as it is covered by the upper painting. The same way layers also work.
Let’s say that you have two layers and you edit the upper layer. The final image you’ll see is what’s being edited in the upper layer. There are ways to manipulate this but I’ll come to this topic in another tutorial.
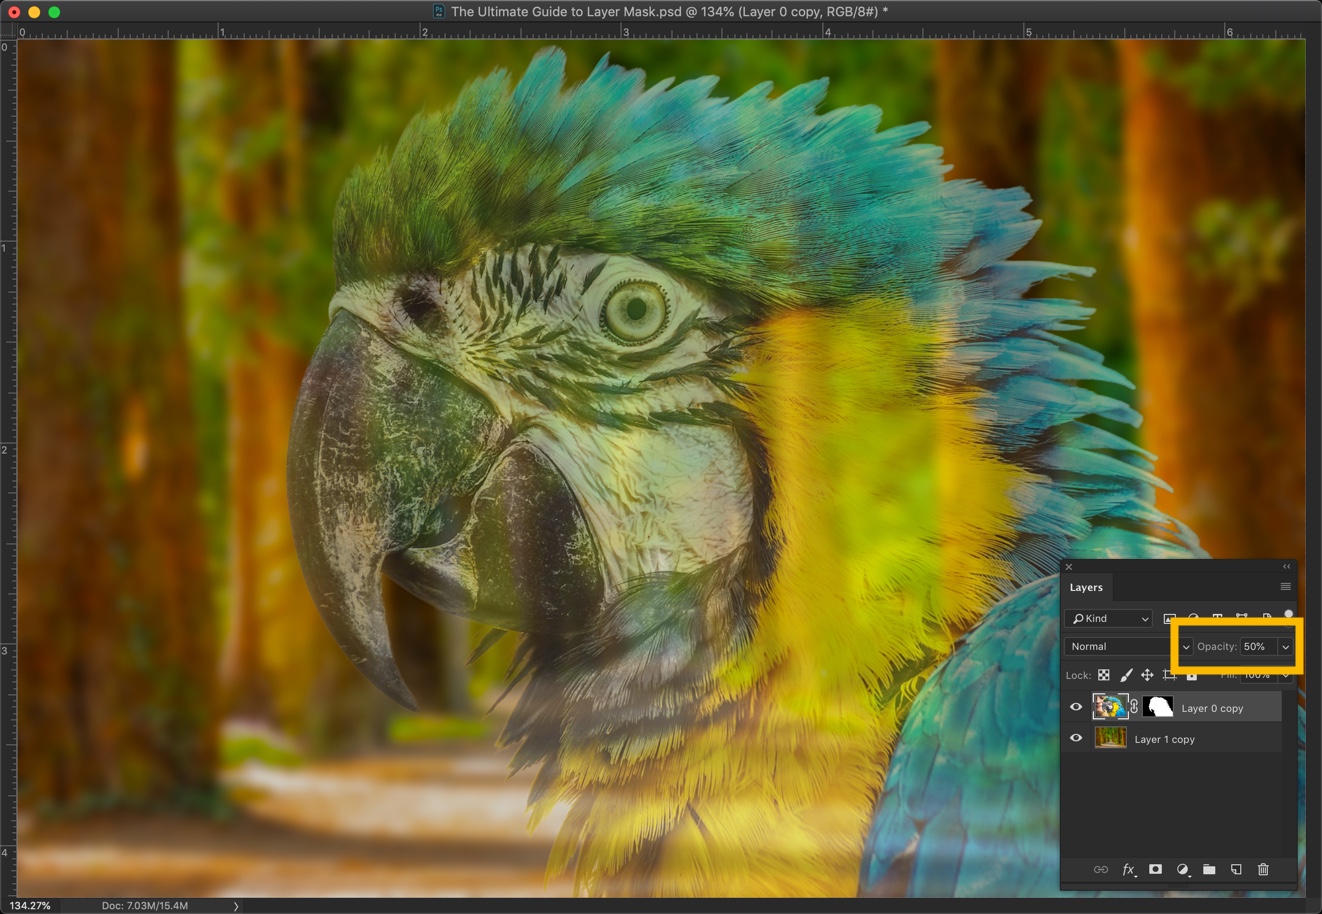
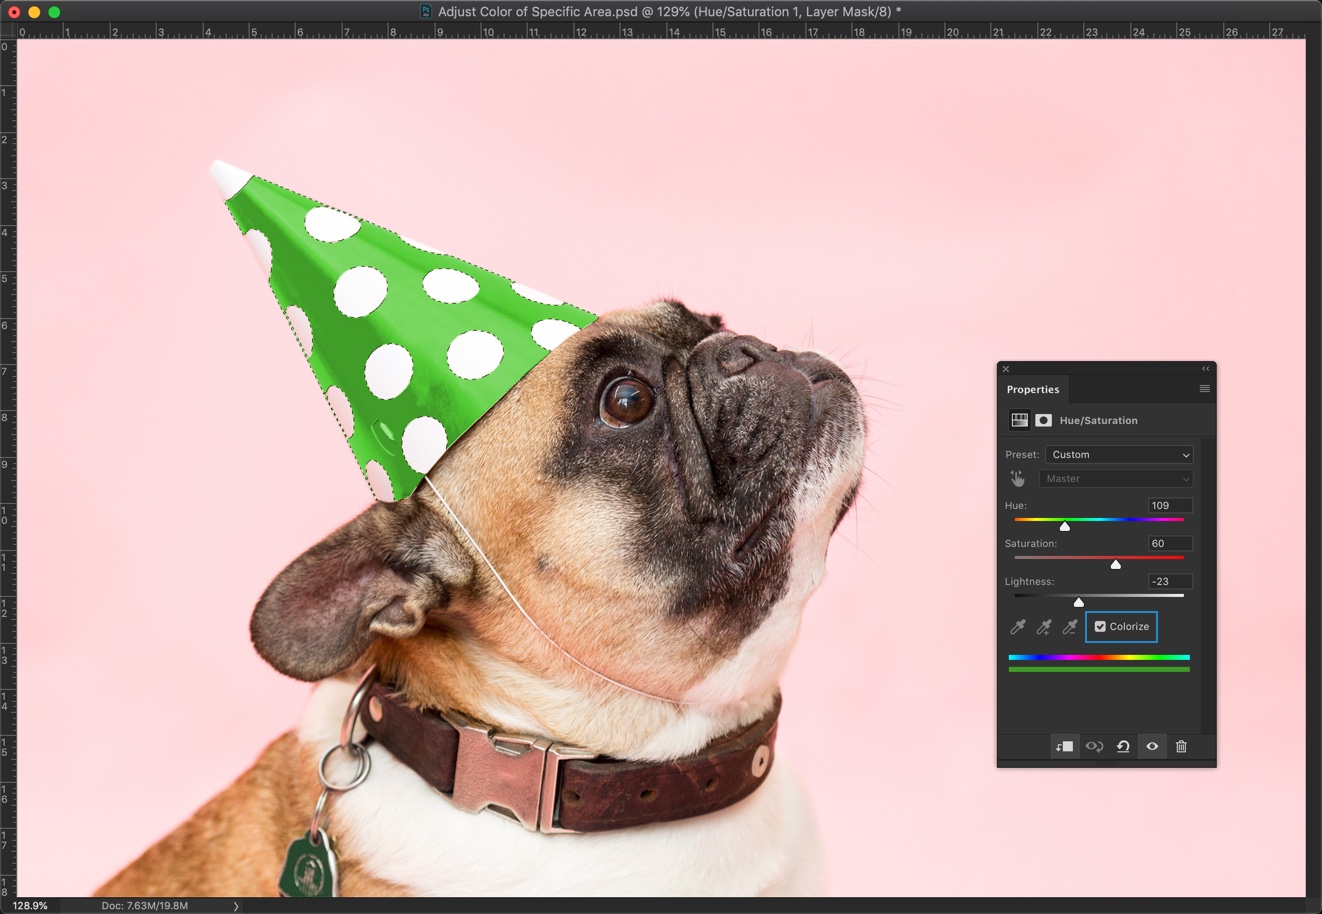
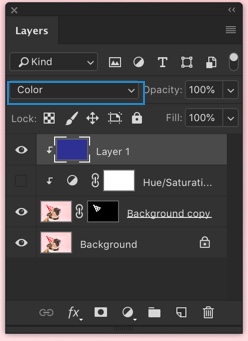
2. What is a Layer Panel in Photoshop?
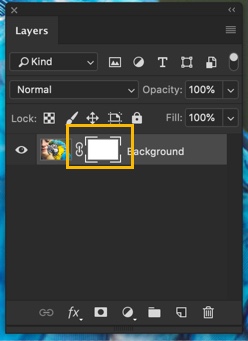
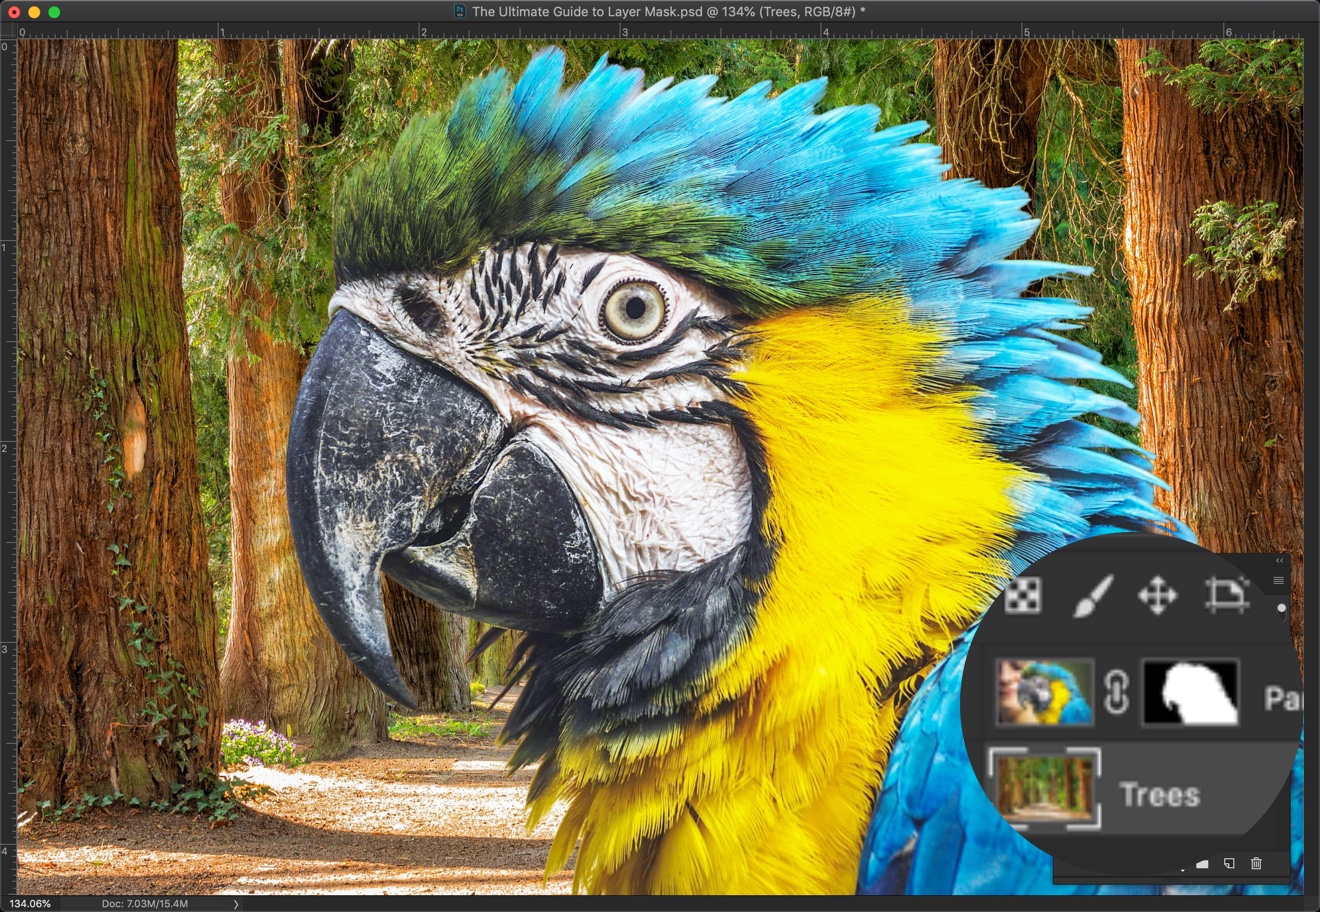
Layer panel is the window where you’ll see all the layers. The highlighted part written with “Background” is a layer.
This is how a layer panel looks in Photoshop. I’ll explain everything in this panel shortly.

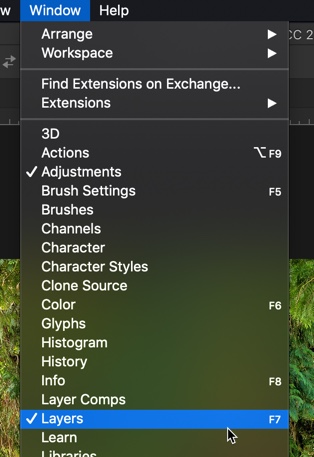
3. Where is layer panel located in Photoshop?
If you’re using Photoshop for the first time, it should be at the bottom right.

If by any reason it does not, you can open it by going to Windows > Layer. You can also press F7 as a keyboard shortcut.
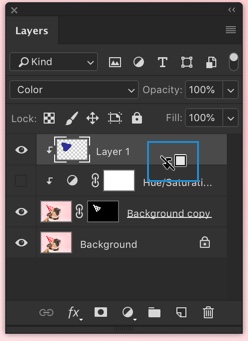
4. Anatomy of a layer panel in Photoshop.
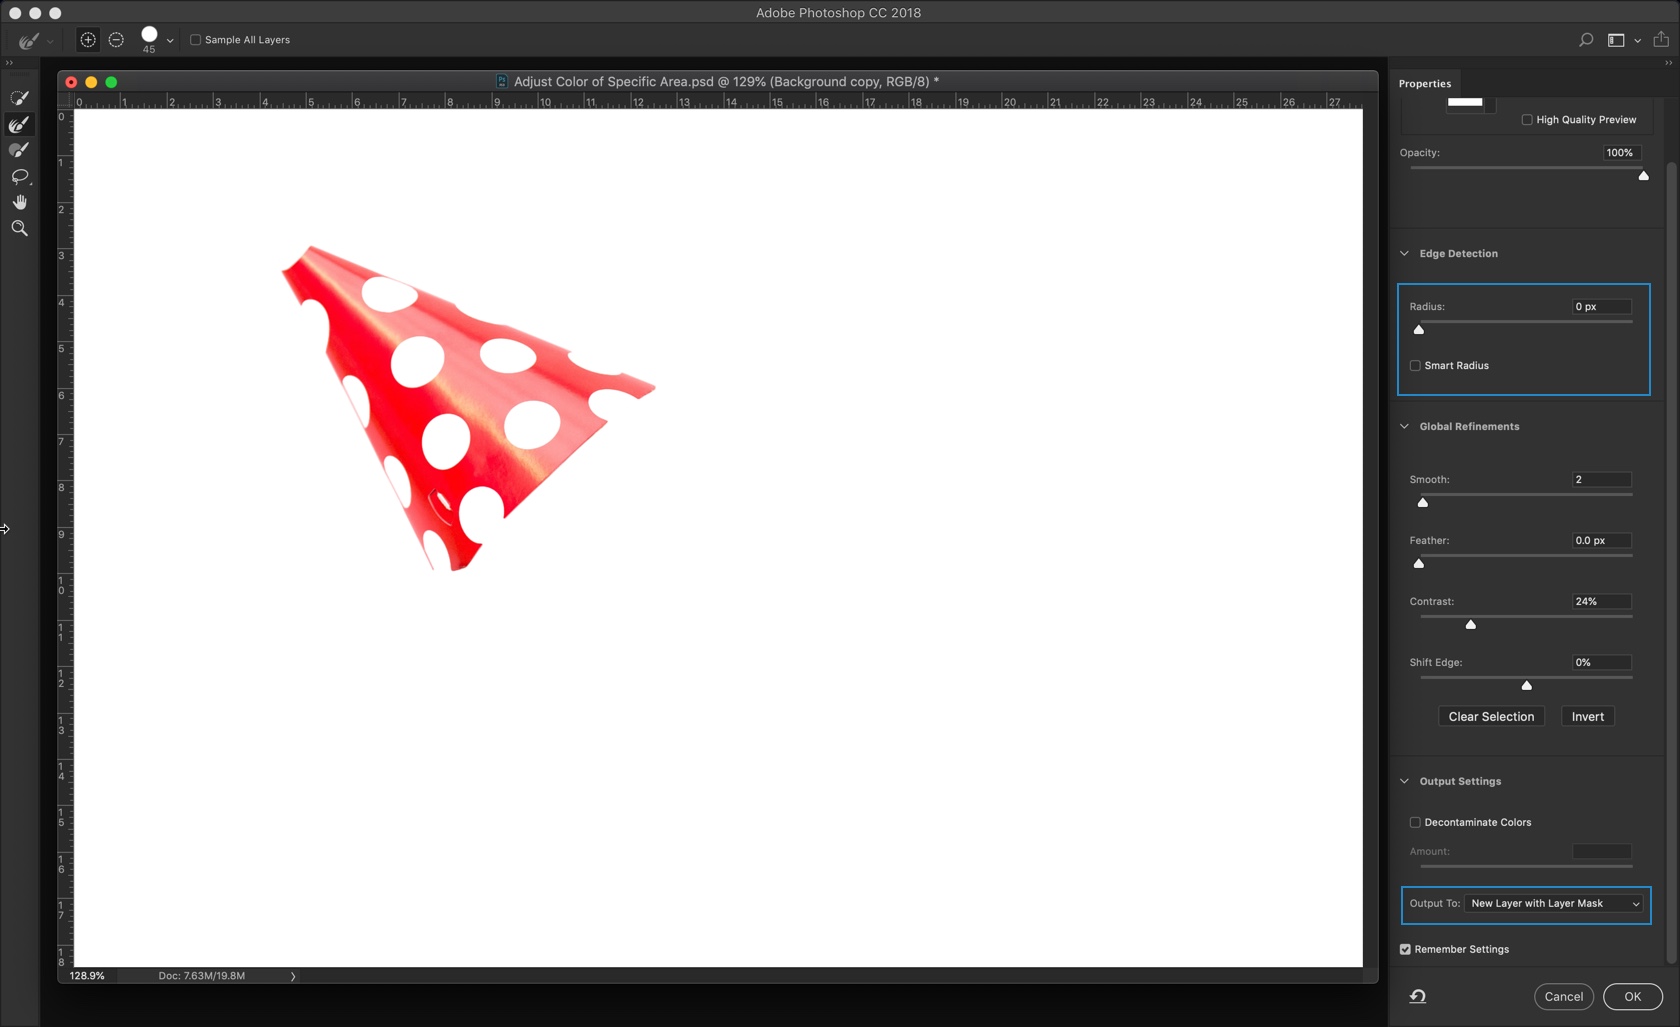
Save below image. It is the most important image if you want to understand the layer panel. Here I have explained all buttons in a layer panel.
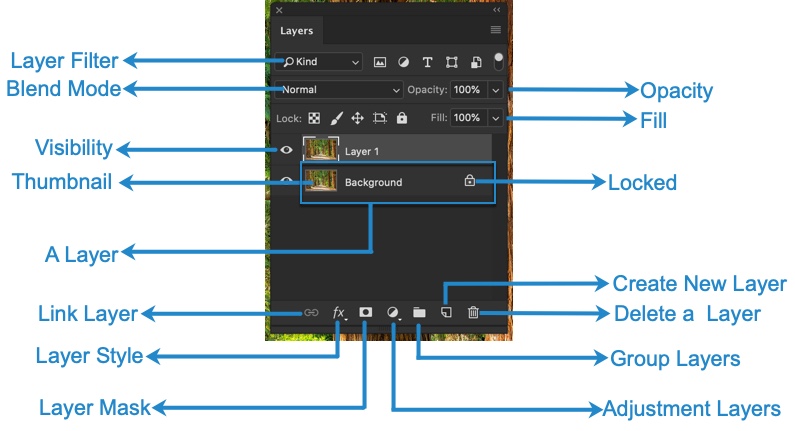
I am going to explain each one to you one by one. Let’s start with Layer Filter and go anti-clockwise.
Layer Filter – You will use it once you become an advanced user. There are so many types of layers like a normal layer, adjustment layers, smart object, etc. You can filter the similar types of layers via this.
Blend Mode – This is used to create special effects. Blend mode is basically the behavior of pixels that is based on the behavior of the pixels presents in the below layer. This is a bit complex topic. If you want to learn more, I have already written a complete guide on Blend Modes in Photoshop.
Visibility – You can show or hide a layer by clicking on this. It looks like an eye icon.
Thumbnail – This is the tiny view of the layer. It will preview how your layer looks
A layer – The entire thing that is surrounded by the blue rectangle is a layer.
Link Layer – It will help you to connect/link two layers. Two linked layers move together when you use the Move tool to move a layer
Layer Style – This is where you get options ta add fancy styles like a shadow, outer glow, etc.
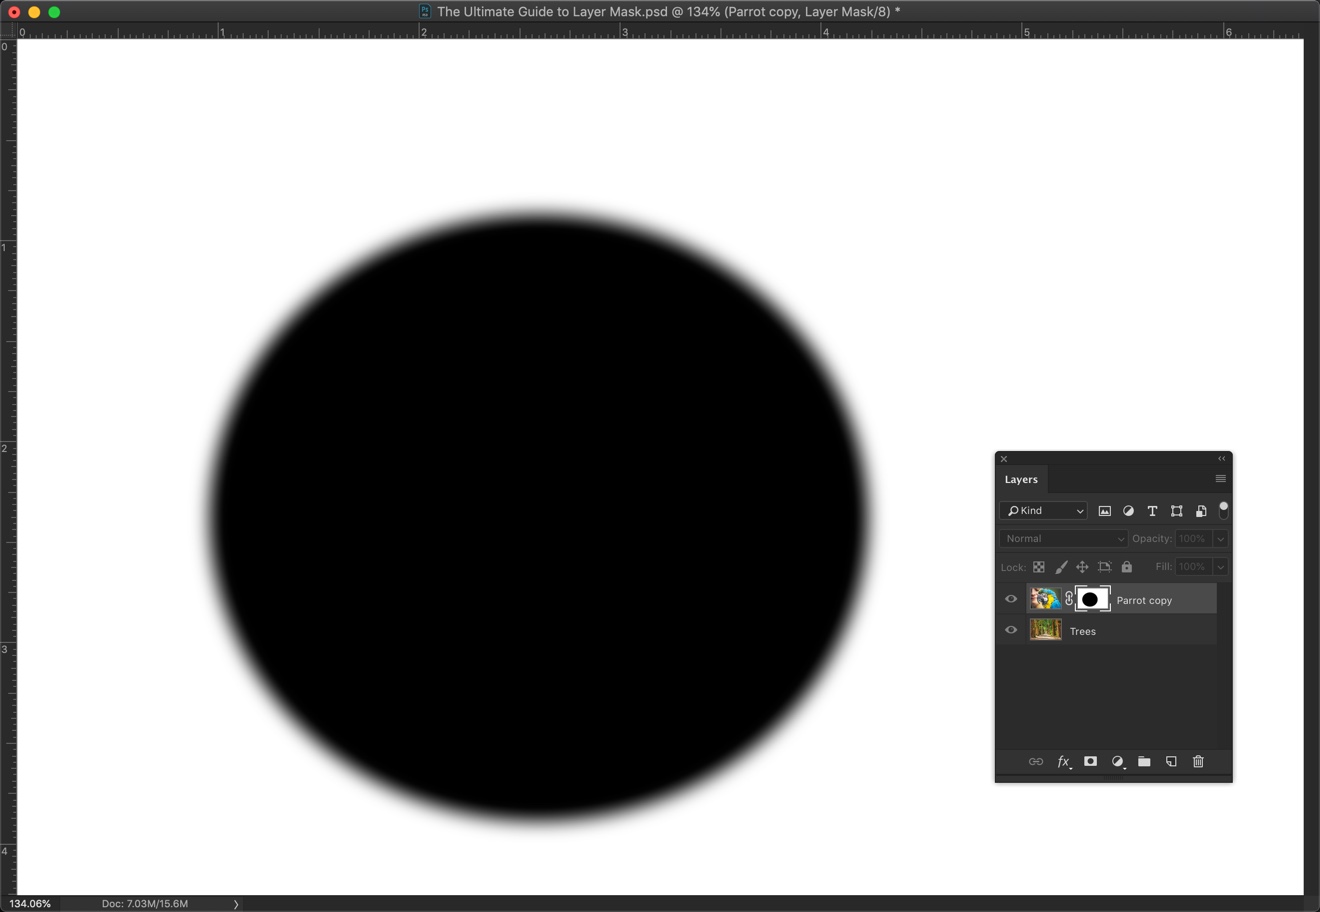
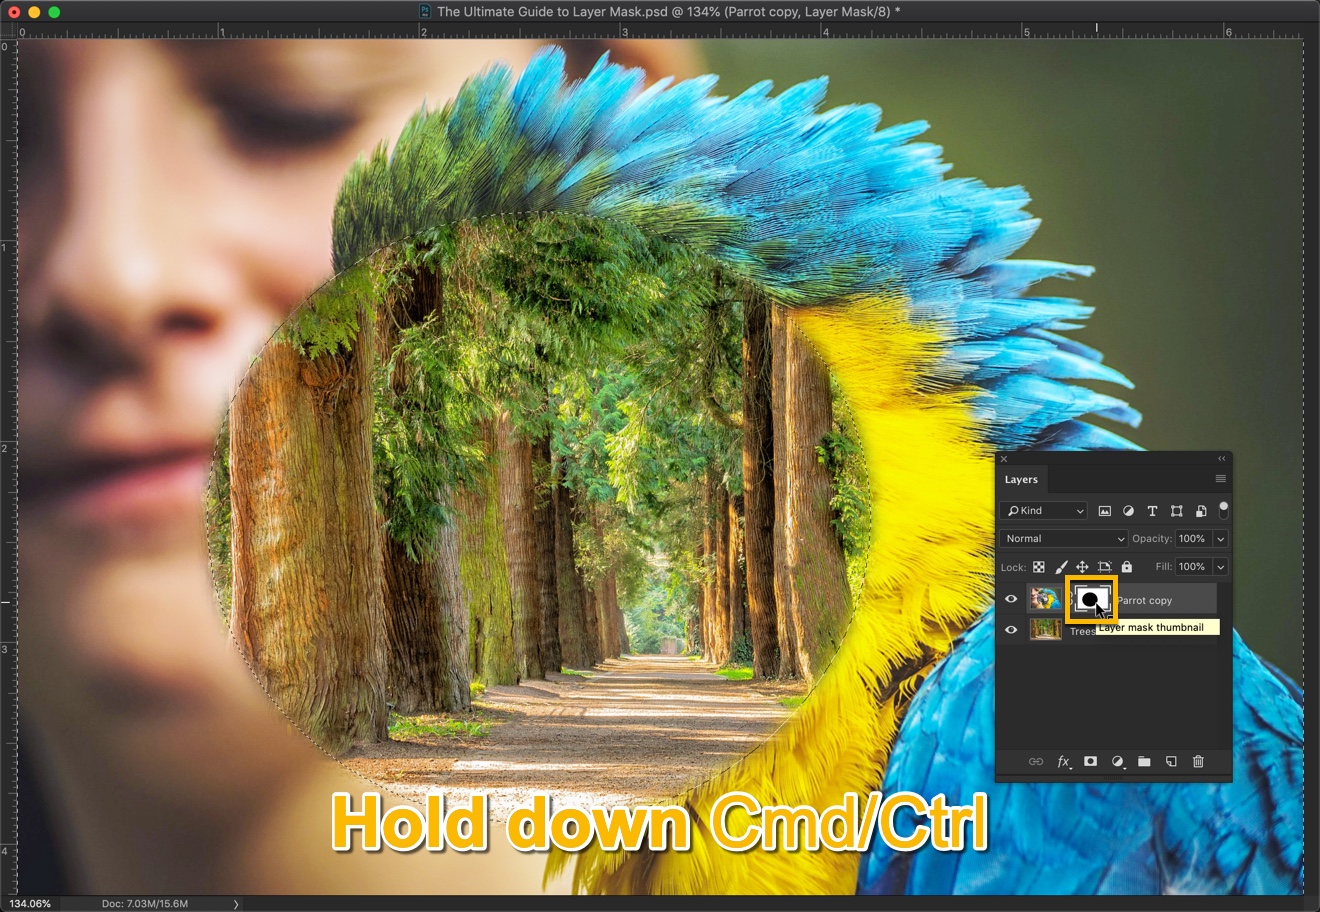
Layer Mask – It adds layer mask. The layer mask controls the transparency of a layer.
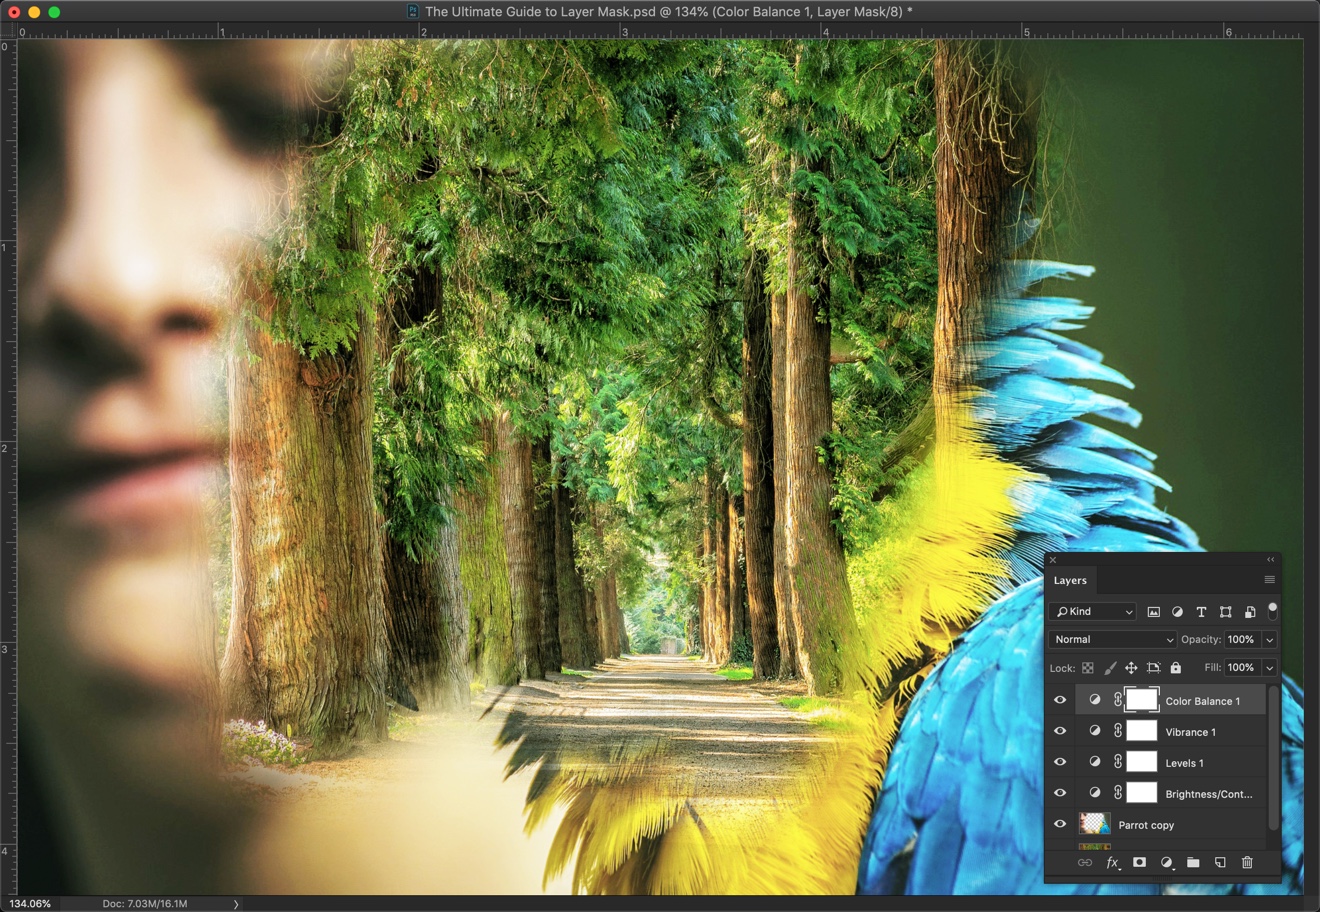
Adjustment Layers – Here you can do basic adjustments like Brightness, contrast, saturation, photo filter, color balance, etc.
Group Layers – This comes into handy when you have so many layers. You can group multiple layers together so that your layer panel doesn’t look cluttered.
Delete Layer – This allows you to delete a layer. Many a time, you’ll be using the Delete/Backspace key to delete a layer rather than this one.
Create a New Layer – You can create a new layer here. Alternatively, you can use keyboard shortcut Cmd + Shift + N/Ctrl + Shift + N.
Locked – This allow a layer to be protected from moving.
Fill – It adjusts the amount of opacity of the pixels only. Any layer styles are unaffected and remain 100% opaque.
Opacity – It adjusts the amount of opacity. Layer styles are also affected by this.
5. Major types of layers in a layer panel
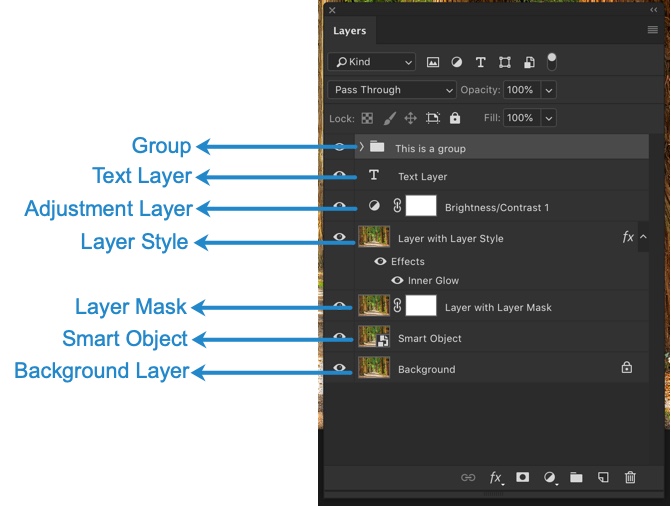
I will explain each layer one by one. Let’s start from the top.
Layer Group – You can group multiple layers inside a folder. Photoshop calls it a group. The icon of a group is a folder. To group multiple layers, hold down Cmd/Ctrl and keep on clicking the layers you want to group. Now, press Cmd + G/Ctrl + G.
Text Layer – This layers can contain only texts. You can change the font, size, styling of the text present in this layer.
Adjustment Layer – This is a special type of layer where you can edit the photo like changing its brightness, contrast, saturation, color, etc. non-destructively (means you can undo or change it at any point of time). Go to Layer > New Adjustment Layer to have a look at the adjustment layers.
Layer Style – Add special effects with this type of layer. You can add inner glow, shadow, bevel, and so many things with this type of layer style. In the above photo, I have added Inner Glow and the same I can see as written. Go to Layer > Layer Style to have a look at the layer styles.
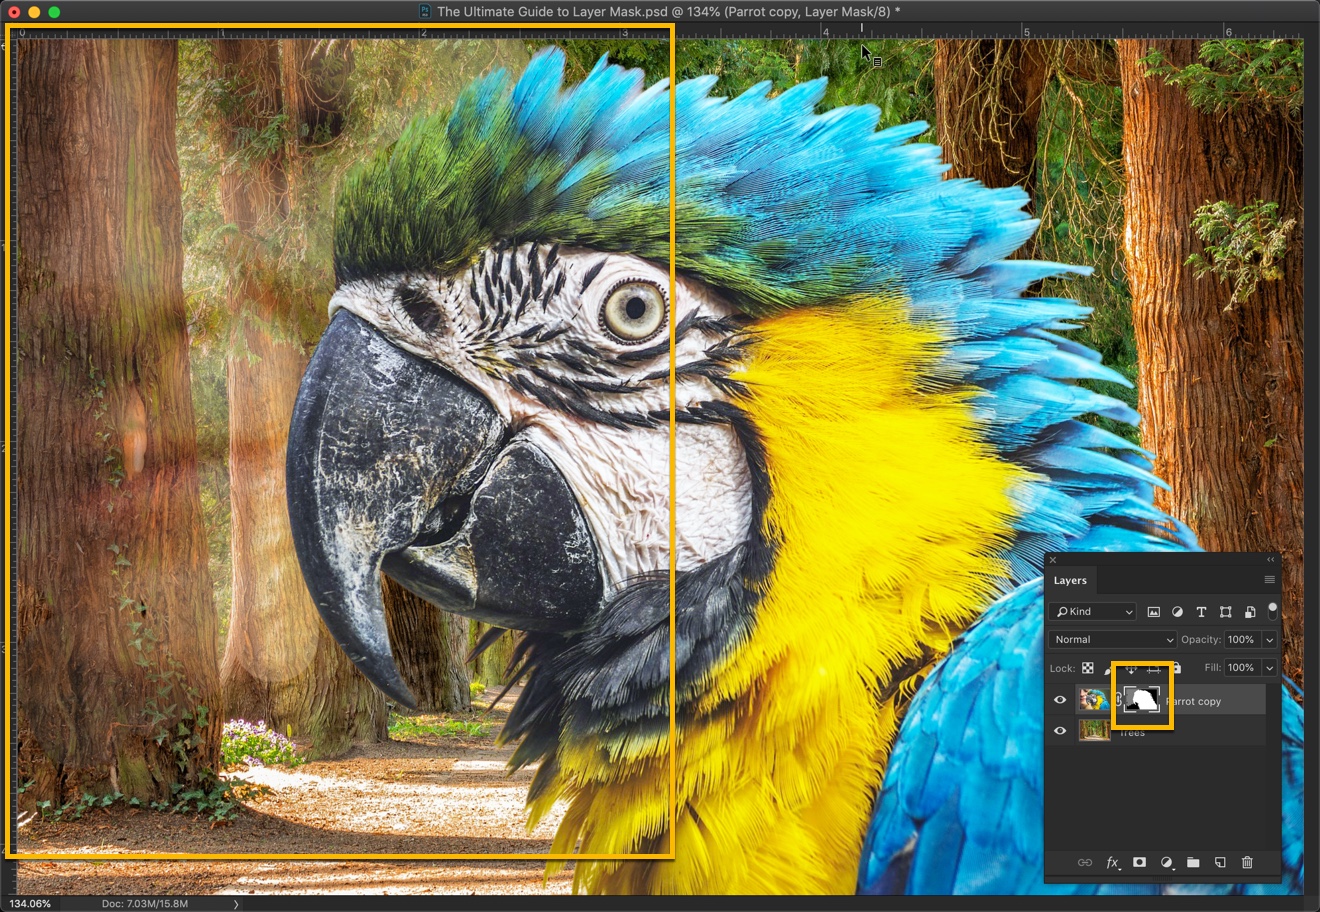
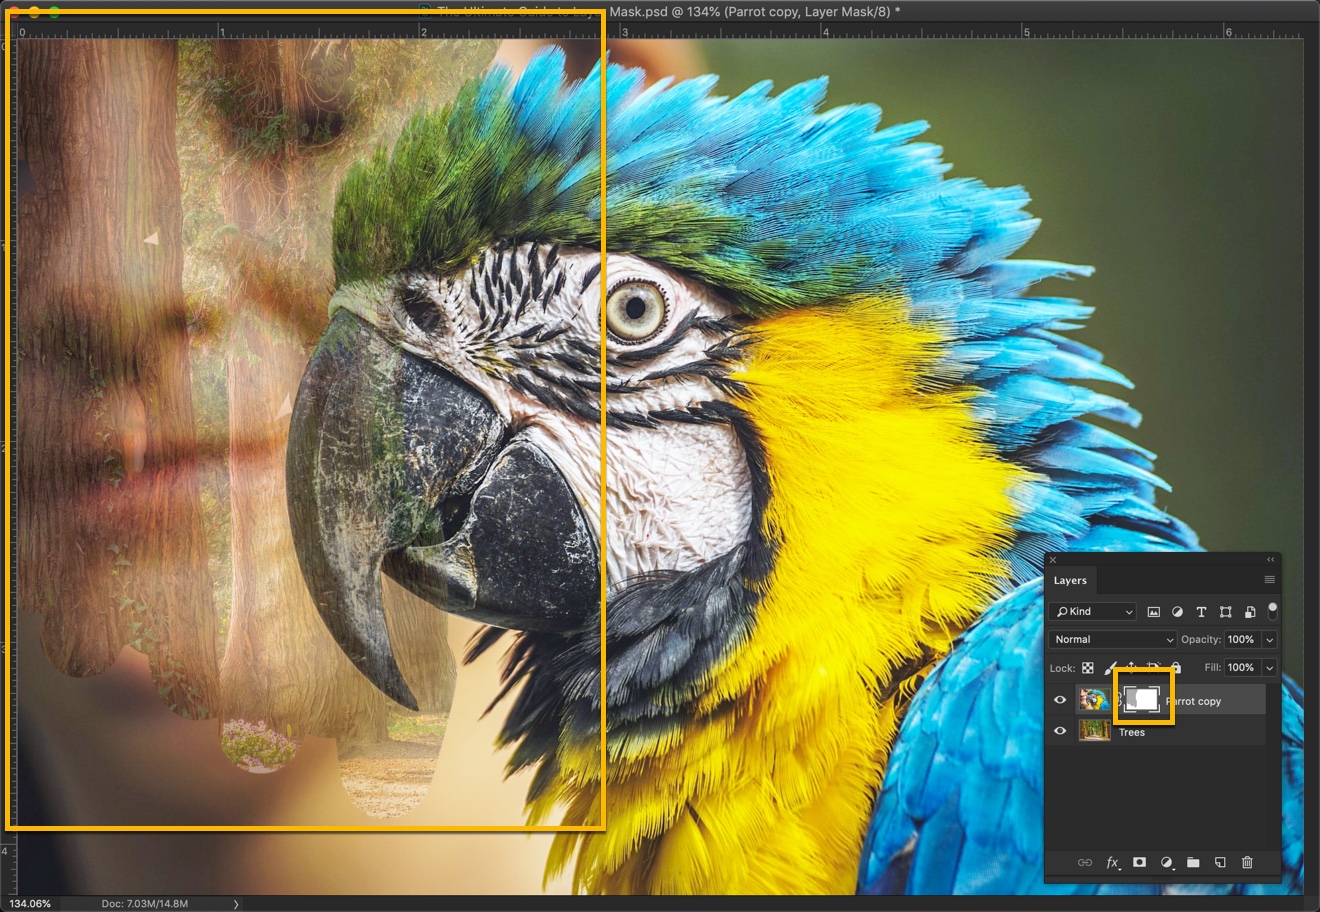
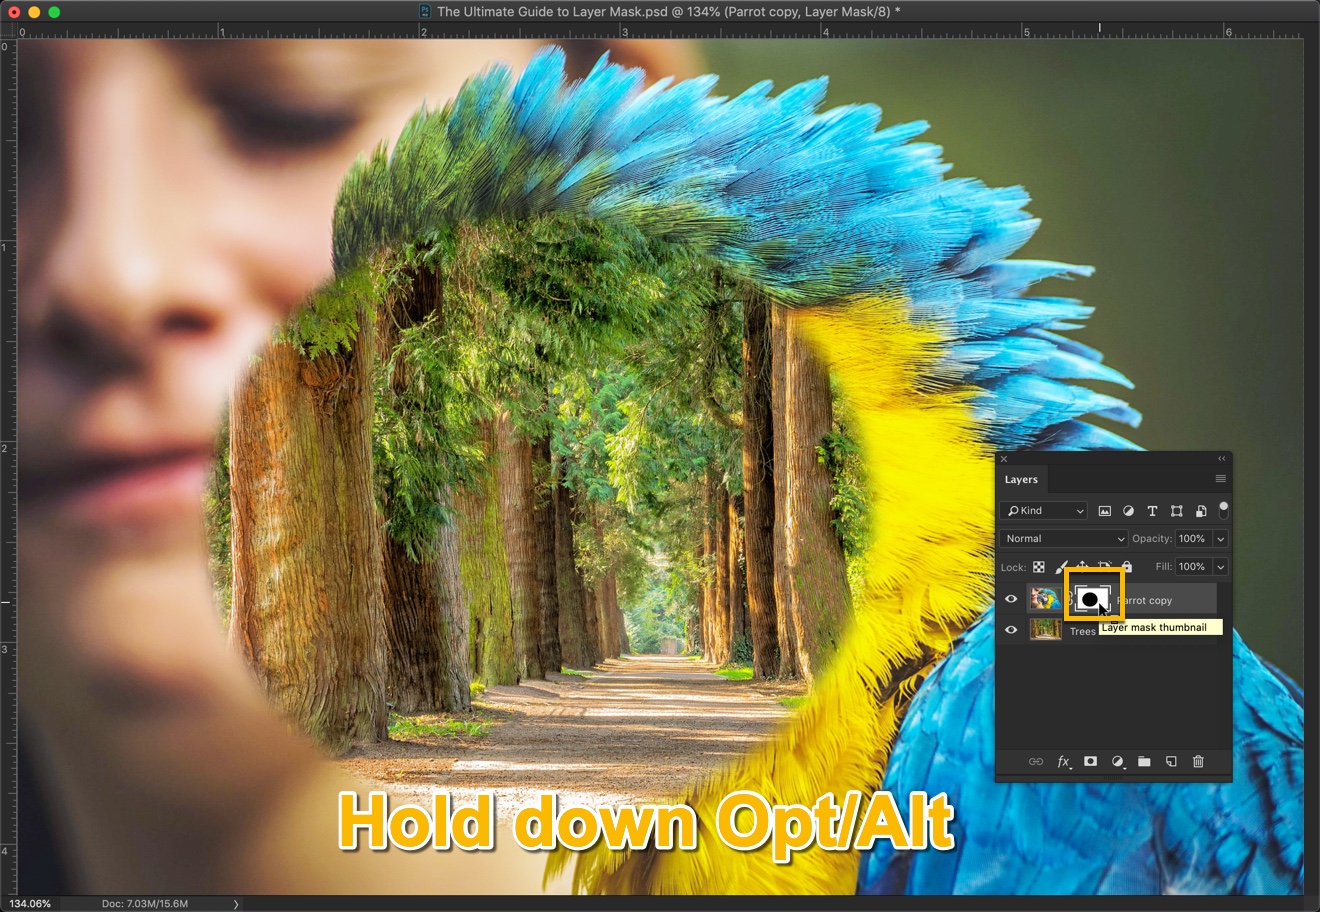
Layer Mask – This allows you to set the transparency of a layer. Suppose, there are two layers in the layer panel and you brushed the left half of the image in the layer mask with the black color. Then the left half of the image in that layer will become transparent and you can see what’s present in the layer beneath it.
Smart Object – A special type of layer that is actually a container that can hold; multiple (or 1) layers, vectors for illustrator, raw files, video, 3D or many other types of objects.
Background Layer – When you open an image, the image will be present in the background layer. There’s a lock sign at the right of the layer. This means that the layer is locked and you cannot move the image in this layer. Click on the lock to unlock it.
6. Shortcuts in layer panel in Photoshop
To select multiple layer, hold down Cmd/Ctrl and then click on the layers.
To turn the visibility on/off of a layer, click on the eye icon present at the left side of the layer.
To copy or duplicate a layer, press Cmd/Ctrl + J.
To move a selection to a new layer, press Cmd/Ctrl + Shift + J.
To move all selected layers to a group, select the layers and then press Cmd/Ctrl + G.
To merge all the layers into a new layer, press Cmd + Opt + Shift + E/Ctrl + Alt +Shift + E.
To add an inverted mask (everything will be hidden), hold Option/Alt while adding a mask.
You can drag elements from the layers panel into other documents
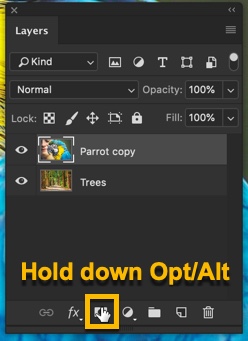
To clip a content, hold down Option/Alt and click in the layer panel between two layers.
To cycle through all the blending modes, press Shift + “+”. Press Shift + “-” to cycle in reverse.
This is all for today. Have a look at The Ultimate Guide series for more exciting tutorials.
Make sure that the make the most out of the offer below.