I know how bad it feels when you have a nice photo but it’s not big enough to print or post. I had so many photos that I wanted to enlarge badly but I didn’t know how to. Finally, I am glad that I finally found how to enlarge photos in Photoshop and I am going to share this knowledge with you.
Enlarging photo reduces its quality. Yes, it’s the truth and you cannot do anything here. The thing we will focus on is to enlarging a photo and keeping as much quality as we can.
Let’s start the tutorial.
I am going to enlarge this photo in Photoshop. I downloaded it from Pixabay. I wrote a tutorial back in 2012 but it’s 2019 now and who cares about 2012.

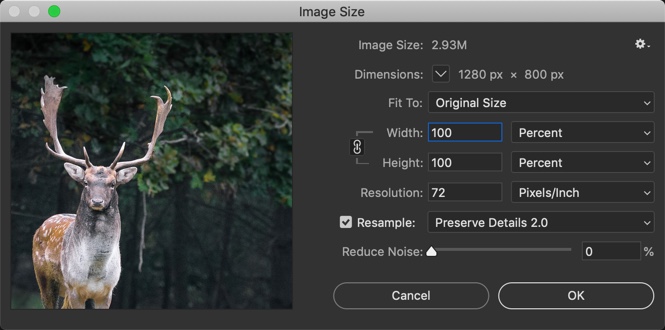
Its size is 1280 by 800 pixels.

Step 1: Open the Image Size Box
Go to Image > Image Size or press Cmd + Opt + I / Ctrl + Alt + I.

This will open the Image Size box.
Step 2: Enlarge Photos in Photoshop
You are wondering what is resampling, right?
Resampling means you’re changing the pixel dimensions of an image. When you downsample, you’re eliminating pixels and therefore deleting information and detail from your image. When you upsample, you’re adding pixels. Photoshop adds these pixels by using interpolation.
-Dummies.com
There are eight resampling methods in Photoshop. I like two. These are Preserve Details 2.0 and Bicubic Smoother.
We’re going to discuss each of the resampling methods one by one and see which one is the best.
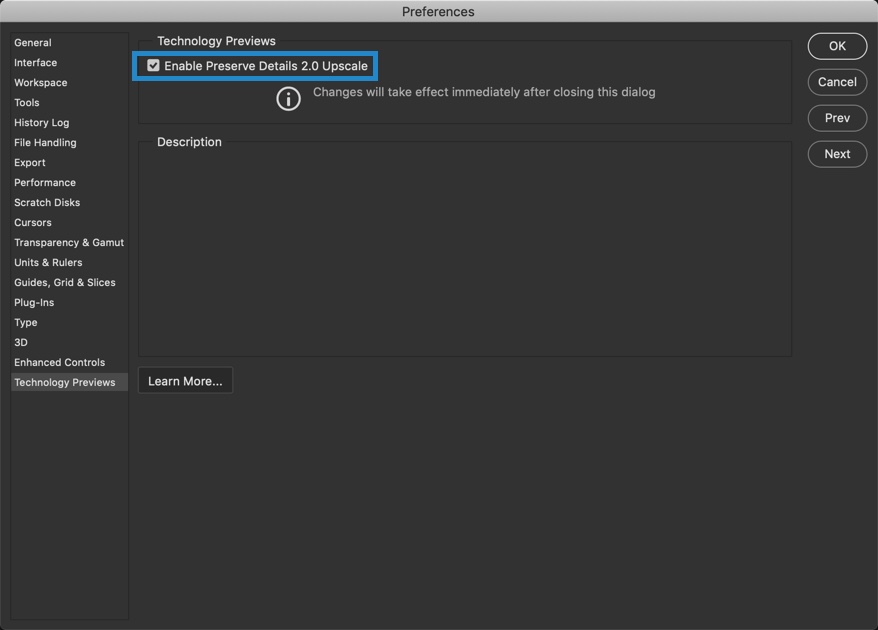
But, we need to turn on Preserve Details 2.0 in the Photoshop Preference. Preserve Details 2.0 is available only for testing purpose and not turned on by default. Go to Photoshop > Preference (macOS) or Edit > Preference (Windows).Go to Technology Preview.

Turn on the “Preserve Details 2.0.”
Now, come back to the Image Size box. Here’s a screenshot of 8 resampling methods.

Here are the 8 resampling methods that are not of much use.
Automatic
Photoshop will decide the best resampling method for your photo and enlarge it. I am not a fan of this though.
Preserve Details
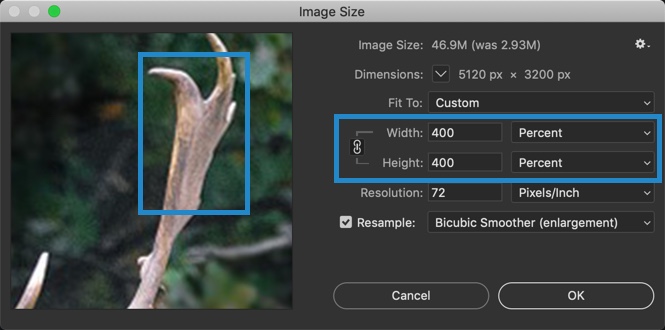
Preserve Details keeps the edges sharp when you enlarge a photo in Photoshop. Let’s see a sample. I am going to enlarge the photo by 400%. Let me show you before and after.

Preserve Details 2.0
Preserve Details 2.0 uses advanced deep learning artificial intelligence to detect and maintain important image details without oversharpening anything else. In a common man’s language, it sharpens the edges when you enlarge a photo in Photoshop but it makes sure that the edges don’t get oversharpened. Let’s see a sample. I am going to enlarge the photo by 400%. Let me show you before and after.
This method creates lesser noise than the previous method and edges are even sharper.

Bicubic Smoother
Bicubic Smoother resampling method is similar to Bicubic in the way it creates new pixels. But, this method blurs pixels slightly to blend the new ones into the old ones, making the image smoother and more natural looking.
This method softens and slightly blurs the image. Also, this method does not have “Reduce Noise” slider like the previous two methods.
Bicubic Sharper
Bicubic Sharper resampling method is also similar to Bicubic in the way it creates new pixels. But, instead of blurring whole pixels to improve blending between the new and old like Bicubic Smoother, it softens only the pixels’ edges. Adobe recommends this method for downsizing images, though some Photoshop gurus claim that it also produces better enlargements than Bicubic Smoother.
Bicubic
Bicubic resampling method tells Photoshop to figure out the colors of new pixels by averaging the colors of even more pixels surrounding the new one in order to make a better guess. This method takes longer than the previous two but produces smoother transitions in areas where one color fades into another.
Nearest Neighbor
Nearest Neighbor resampling method gives you the lowest image quality. With this method, Photoshop looks at the colors of surrounding pixels and copies them. It is infamous for creating jagged edges, so you’ll want to use it only on images with hard edges like vector images.
Bilinear
Bilinear resampling method tells Photoshop to guess the color of new pixels by averaging the colors of the pixels surrounding it. It produces slightly better results than the Nearest Neighbor and is still pretty fast.
Bicubic Smoother vs. Preserve Details vs. Preserve Details 2.0
I am going to show you the enlarged images which are resampled by the three most popular resampling methods. Yes, the three most popular resampling methods are Preserve Details 2.0, Preserve Details, and Bicubic Smoother.
Bicubic Smoother softens the edges which make the images slightly blurry. Preserve details does a good job but the edges get oversharpened. Preserve Details 2.0 does the best job and the edges don’t get oversharpened.
So, Preserve Details 2.0 is the best choice as of now till Adobe launches a new and better resampling method in Photoshop.
This is how you enlarge photos in Photoshop.