
Today’s world is full of sharing our own content. You take photos and share them on 500px.com, Instagram, Flickr, and Facebook. But, your photos can be used by any person without your permissions. One more problem is that if someone wants to contact you by looking at your photo on a random site, it will be very hard. This is where adding copyright and contact info to your photos come handy. So, I think that I should write a tutorial on how to add contact info to a photo in Photoshop.
I found a beautiful picture on Pexels by Mr. Luke Siemionov and I decided to use that photo for this tutorial. For this tutorial, I am just showing how to add copyright and contact info. I respect Luke’s work and I will not add my copyright info to this image.

Photo by Luka Siemionov from Pexels
Let’s go
Step 1 – Open File Info
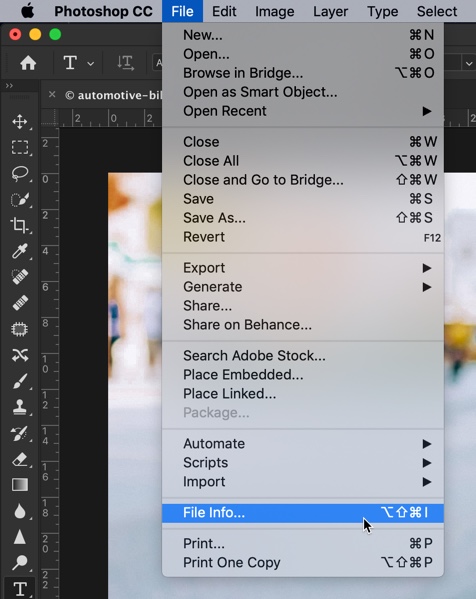
Open the image in Photoshop. Go to File > File Info. You can also press Cmd + Opt + Shift + I/Ctrl + Alt + Shift + I as keyboard shortcut.
Step 2 – Fill the Information in the Contact Details
Photoshop will open the Basic tab as soon as it opens the File Info.
Write down everything that you want to add.
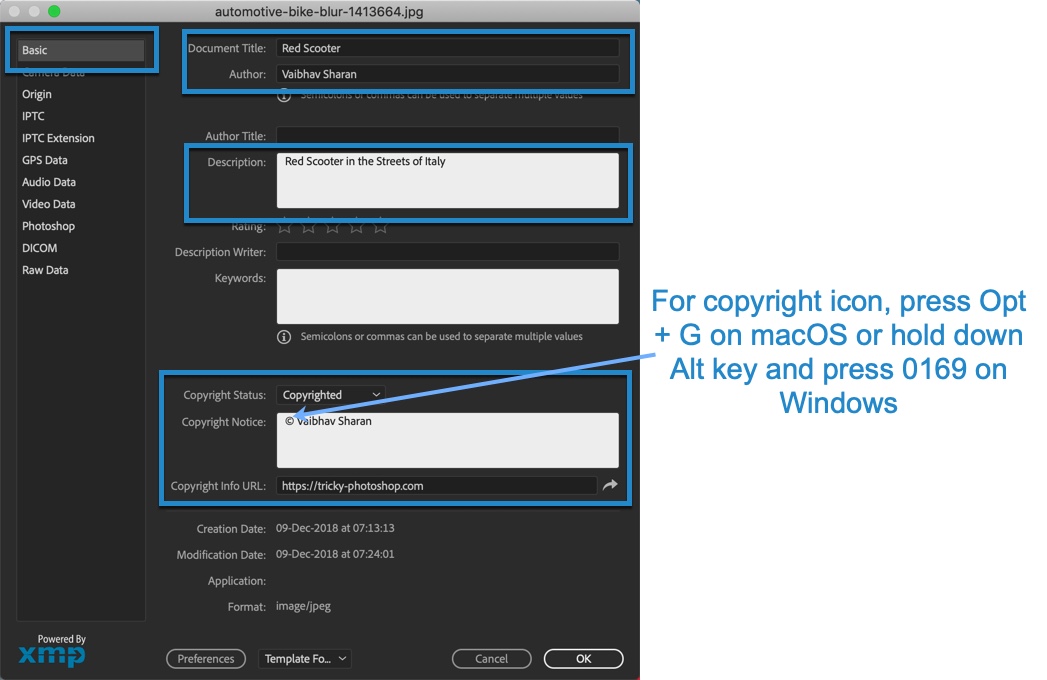
In the copyright status, change the status to “Copyrighted”.
Wondering how to add the copyright symbol? For macOS, press Opt + G. For Windows, hold down Alt and then press 0169.
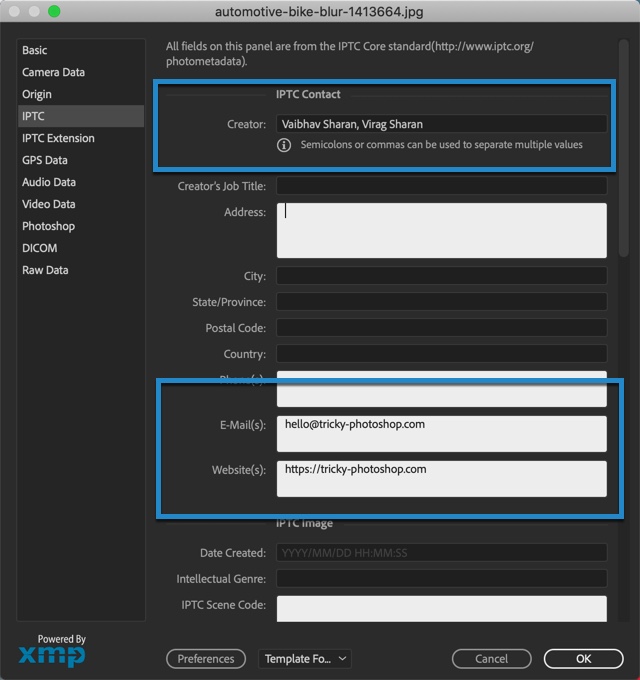
Now, switch to the IPTC tab.
Before we begin, I want to explain what is IPTC.
What is IPTC?
IPTC (International Press Telecommunications Council) is the most common metadata among photographers to add their contact info and copyright status.
This is how it’s defined on iptc.org.
IPTC Photo Metadata sets the industry standard for administrative, descriptive, and copyright information about images.
Enter your contact info here.
You can also add multiple names in the “Creator”. So, when someone finds your photo then one will see multiple people in the creator.
Enter your email ID and website so that one can easily contact you.
Press OK.
Step 3 – Export the Copyright Info for Future Uses
I would be frustrated if I need to write this info one by one for every photo that I take.
Photoshop understands this pain. It allows you to create a template that I can use for all of the future images with just a few clicks.
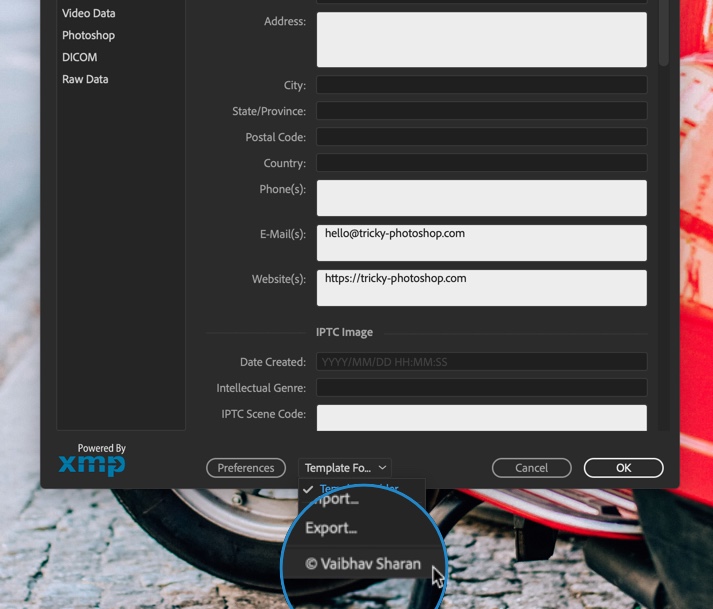
At the bottom, click on the Export. Refer the below screenshot.

Give it a name and save it at the default location that Photoshop suggests you.

Step 4 – How to Import Copyright Info
Simply open the File Info from File > File Info.
Go to the bottom and choose the copyright info that you created. That’s all.
Step 5 – Add Copyright and Contact Info to Multiple Photos
You need to have Adobe Bridge (a standalone software that comes free with Photoshop subscription) for this.
Open Adobe Bridge and browse to the photos.

Select the photos to which you want to add the copyright and contact info. Right click on them and select File Info.

Select the copyright info and press OK. That’s all.

This is all, folks.
Make sure that you make the most out of the offer below.