Hey, folks! it’s been a few weeks since I have uploaded a new article on TrickyPhotoshop. I must say that I am quite busy with my another venture, I Innovate Magazine – the magazine for Entrepreneurs, these days. But this should not be an excuse. I know that you get upset about not seeing any new tutorial for weeks and I also know that I need to upload more frequently. I will also try my best to upload at least a new article every week. Last time I discussed Brush Tool in Photoshop. Today, as the title already gave you a hint, we’re going to see the brand new Select and Mask feature in Photoshop 2017. Yes, you saw it right. Photoshop 2017 is here.
Since the past few years, or at least I am noticing, Adobe has been trying hard to make the selection as easy as possible. This can be seen by removal of extraction and introduction of Refine Edge back in Photoshop CS3. Now with the addition of Select and Mask tool, the selection is now easier than ever.
Let me show you how to use this feature. All you need to have is the Quick Selection Tool activated.
Select Using Quick Selection Tool
Let’s grab Quick Selection Tool from the tool panel or press Shift+W again and again until it comes. Make sure that “Add to Selection” is turned on.
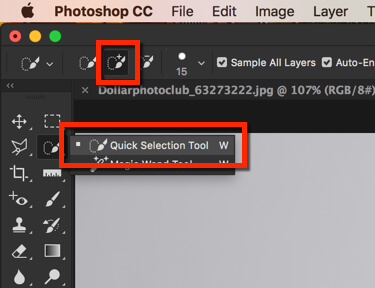
Now hold your mouse button and drag it to select.
You can also go through my tutorial on How Beginners can use Quick Selection Tool. I have explained everything in detail in that tutorial.
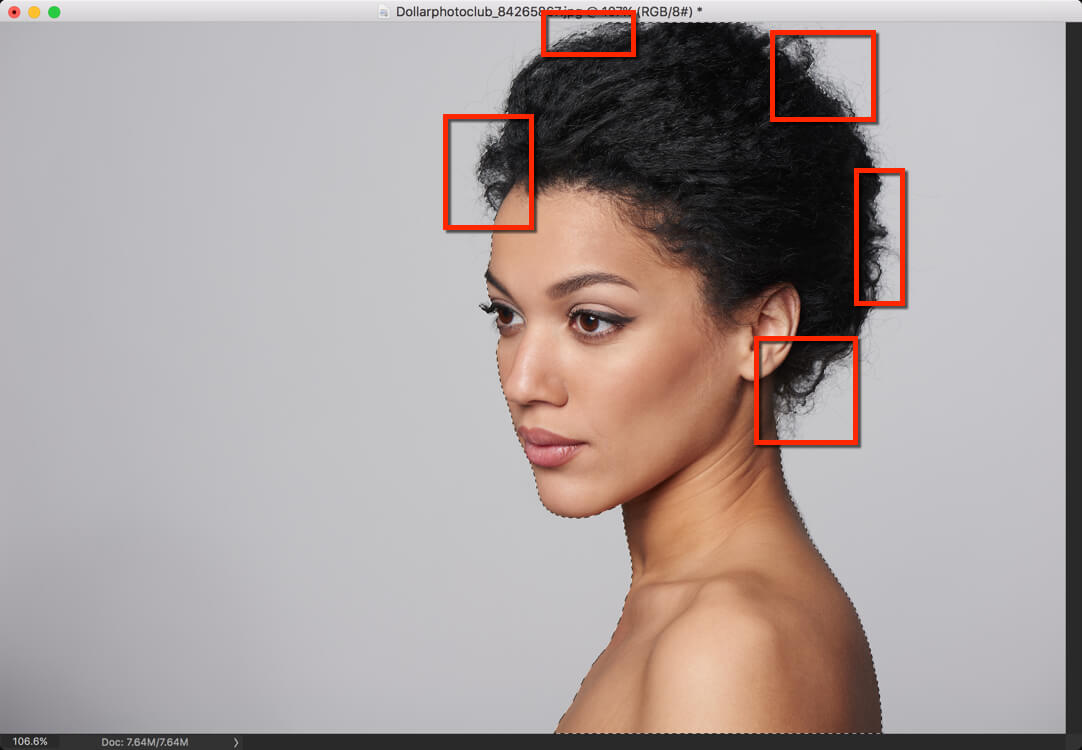
Once you’re done with the selection, you need to make sure every single part is selected. In hurry, usually what happens is that we forget to select every bit of the thing that we want to select. Later, when we use Refine Edge (it’s gone in Photoshop 2017, at least in version 20161012.r.53 x64), we struggle to get the desired outcome.
In below image, I have made few rectangles that show where we usually miss the selection.
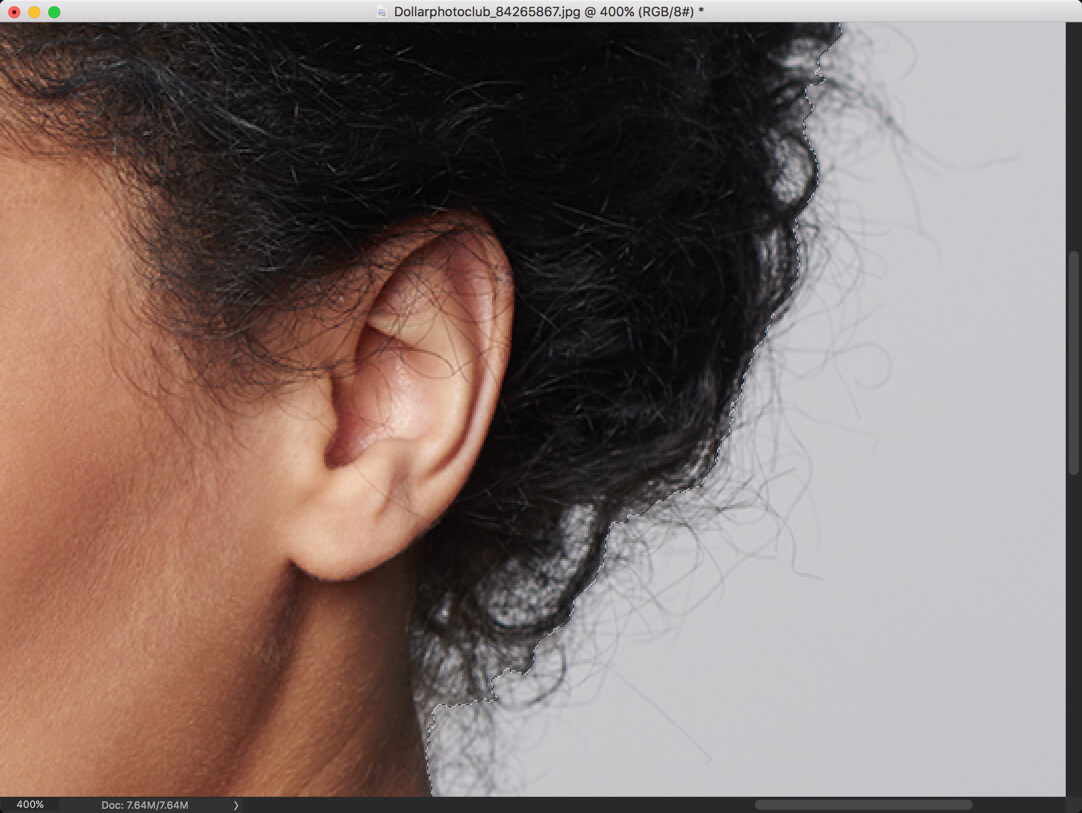
Let’s zoom in to see it better. Are you seeing the marching ants? See how precisely are the walking around the hair.
Refine the Selection Using Select and Mask Tool
Now, let’s go to Select and Mask. Activate it by pressing Cmd+Opt+R/Ctrl+Alt+R.
As my image is quite big, one thing that I usually always go is turning on “Smart Radius” and increase the radius all the way to 250 pixels.
This does all of the work.
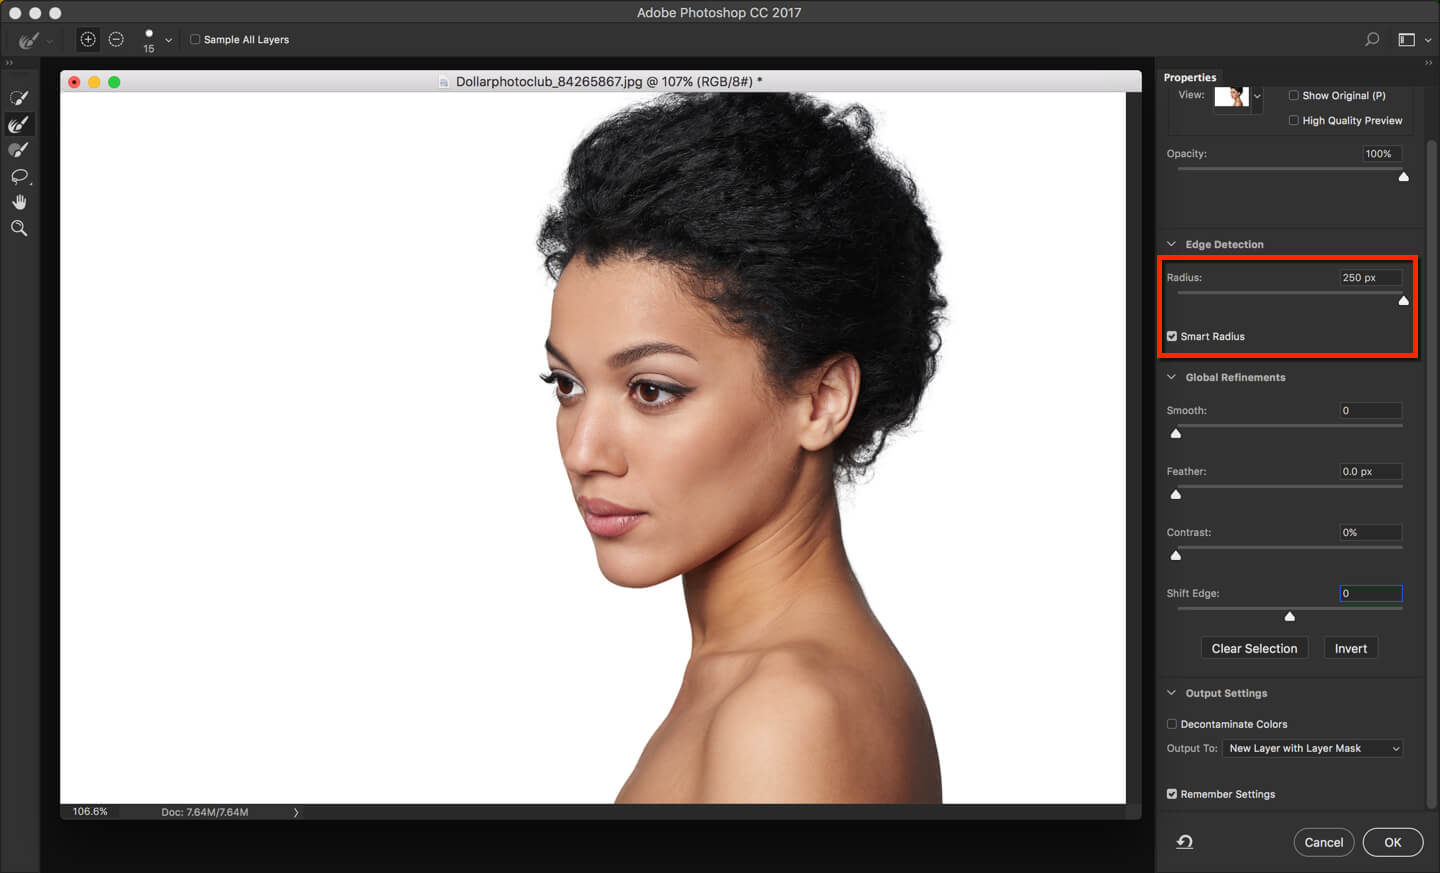
Did you see how efficiently it worked around the hair? It selects the hair flawlessly.
Did you notice one more thing? All of the other settings are the default. This means alone Radius did all of the work.
Isn’t it amazing?
Now, let your friends know about this tool by sharing this with them on Facebook and Twitter.
Also, make sure that you make most of the offer below.


