
Are your yellow teeth bothering you? Do you want to whiten teeth in photos? Do your pale-colored teeth look ugly to you?
Worry no more. I’m here for you. I’m going to show you how can you whiten your teeth in your photo fabulously. We’re going to use an app for it. Plus, whitening teeth is totally free.
Before we show you, let me show you what info you can get from this tutorial.
What causes yellow teeth in photos?
Many times teeth appear yellower in photos than they actually are.
This is because of the light source.
When there’s enough light, teeth don’t appear that yellow. But when the light isn’t enough or the surrounding light has a yellow tone, your teeth are likely to look yellower than they actually are.
How to avoid yellow teeth in photos?
It’s easy to guess the answers as we already know what causes yellower teeth in photos.
- Simply avoid taking photos when the surrounding light source is yellow.
- Use camera flash during the night. It reduces the yellow tint in photos.
Is there an app to whiten teeth in photos?
Yes, there are many.
To whiten teeth in pics, we’re going to use a free app. We’re going to use PicsArt.
It’s a free app. You can download it from the Apple App Store or Google Play


How to whiten teeth in an app for free?
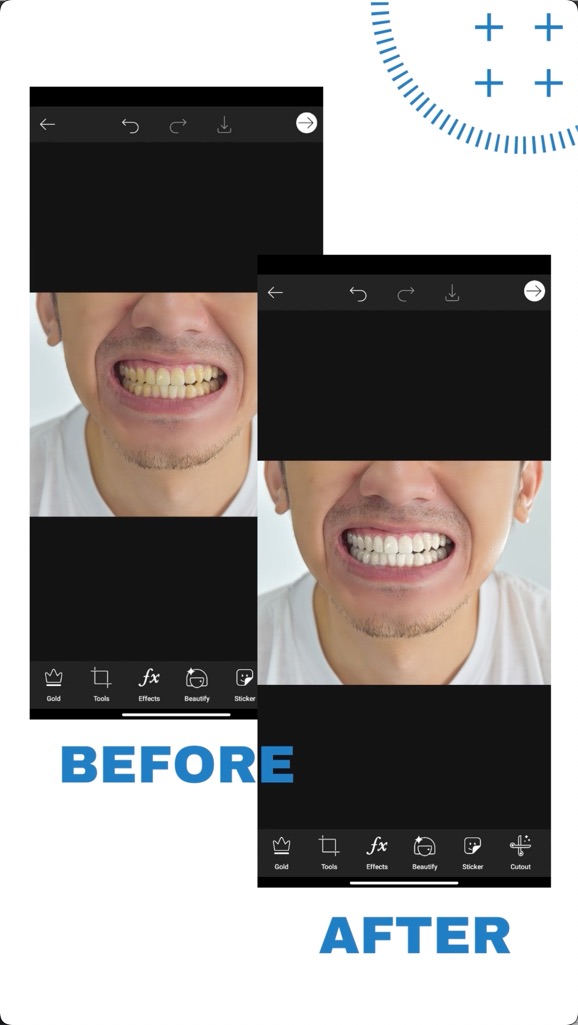
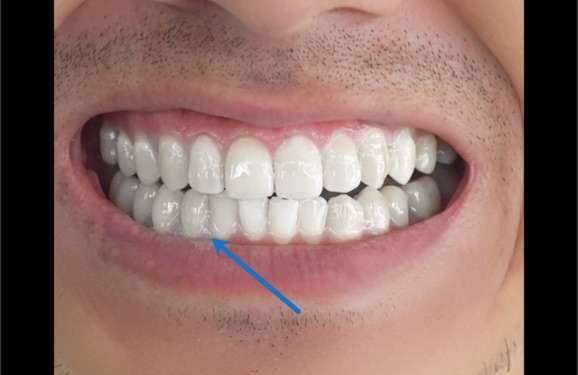
Let’s see before and after photos first.
We have a tutorial on how to whiten teeth in a photo on YouTube. Let me put that video here first.
If you like to watch a video tutorial, go ahead and watch the video I put above.
If you’re like me who likes to read, keep on reading. I’m going to show you a step-by-step tutorial on how to whiten teeth in photos in PicsArt for FREE.
Step 1 – Open the photo in PicsArt
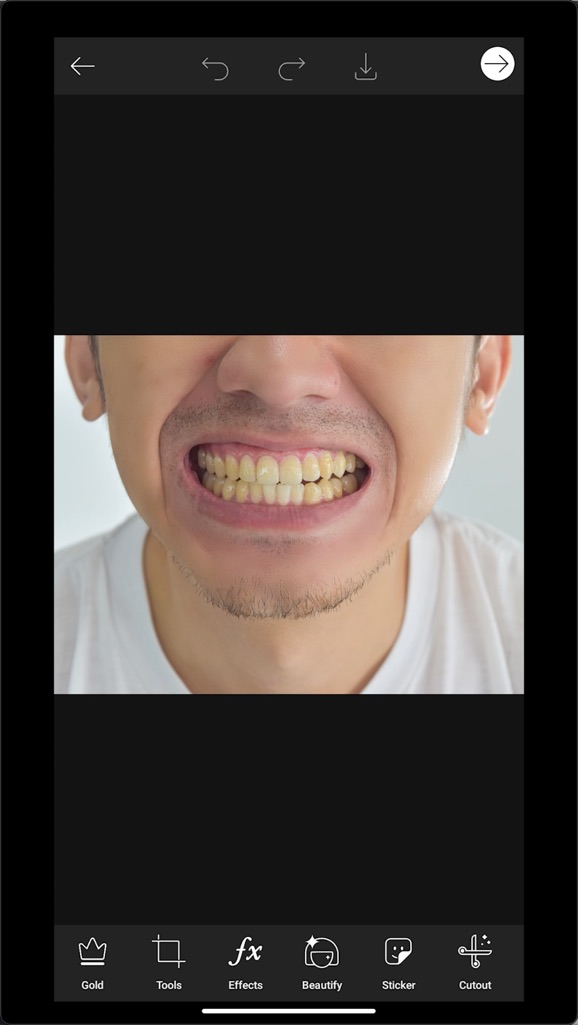
Go to Tools > Adjust.

Step 2 – Whiten the teeth in a photo on an app for free
Make the following adjustments.
This will change the entire photo. But we’ll fix it later.
Our goal right now is to make sure that the teeth look white.
- Saturation: -82
- Brightness: +4
- Highlight: +45
- Clarity: +14
- Contrast: +15
Now, our teeth look bright and white.

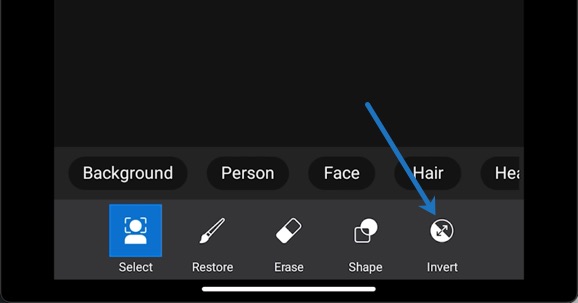
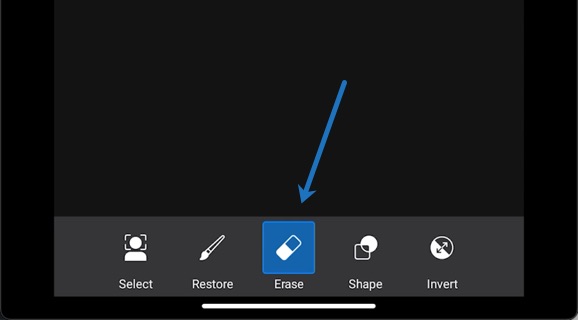
Step 3 – Undoing the brightening of the other parts
Tap on the Eraser icon.

Tap on Invert. This will invert all the changes.
Zoom in to the teeth to whiten them.
Tap on Restore.
Change the brush dimensions to this.
- Size: 58
- Opacity: 100
- Hardness: 70

Now, start brushing only the teeth to whiten them.

Here’s a short video for you.
Keep on doing it until you brushed all your teeth white.

You might’ve brushed some parts of the gum gray.
We’re now going to fix it.
To fix this, tap on the Eraser icon.
And now brush on the parts that you don’t want to be grayed out.
That’s all! You have whitened the teeth successfully in your photo.
See the Before and After again.
Other apps you can use to remove your double chin
If you don’t use PicsArt, you can use these apps also.
The steps will be the same. Only the UI will be different.
- Snapseed
- Photoshop Express
Let TrickyPhotoshop whiten teeth in your photos
I understand if you’re not getting a good result. This is a complex tutorial for many of us.
I’m here to help you. My team will whiten your teeth in your photos. We provide photo editing services. We’d love to keep our services free like we kept this tutorial free, but we won’t be able to pay our editors and bills.
Conclusion
- You saw how to whiten teeth in a photo using an app.
- You can also reduce your teeth appearing yellower by shooting photos in bright white light.
- Or you can use our photo editing service if you’re not getting a good result.