Did you ever happen to accidentally delete your photos or important data from your computer, laptop, camera, SD cards or any other devices which became a nightmare for you? For me, it happened one time. I lost more than 1500 photos that I shot during a trip.
As you’re reading this article, I am sure that you also want to recover your photos. The best way to recover deleted files without any hassle as now a variety of computer repair and optimization companies offer data recovery services. The sure shot way to recover deleted files is through EaseUS data recovery software.
Some of the companies cost a huge amount of money to recover deleted files and do not provide services worth that money. Due to which people get angry when they don’t get the services up to the mark. EaseUs data recovery wizard is the latest version of the software which is useful to recover deleted files for Mac and Windows.
A few facts about this great way to recover deleted files.
It was founded in 2004 and has served a lot of customers with its fantastic and impressive services. This recovery wizard can retrieve all the data like old deleted files, storage drives that were formatted or any other issues with your hard drive. It can recover audio as well as video files. Other than these any sort of document, graphics, emails, folders or compressed files.
Anything which you can attach to your macOS or Windows will automatically gain access to the storage device and become a place for retrieving the data. As this is a free software as the name indicates it guides you throughout the process how to safely and completely recover your files from the start. It also has some paid versions which have some more capacity of data retrieval than this one but all function at the same level. Free does not mean that it would have some changes in its function as it has been checked as well.
Step 1 – Download the software
Download the software. when you start downloading, it will initially warn you not to install it on the partition from where you want to recover your files. It helps you all the way and takes you through each and every step to the wizard base interface.
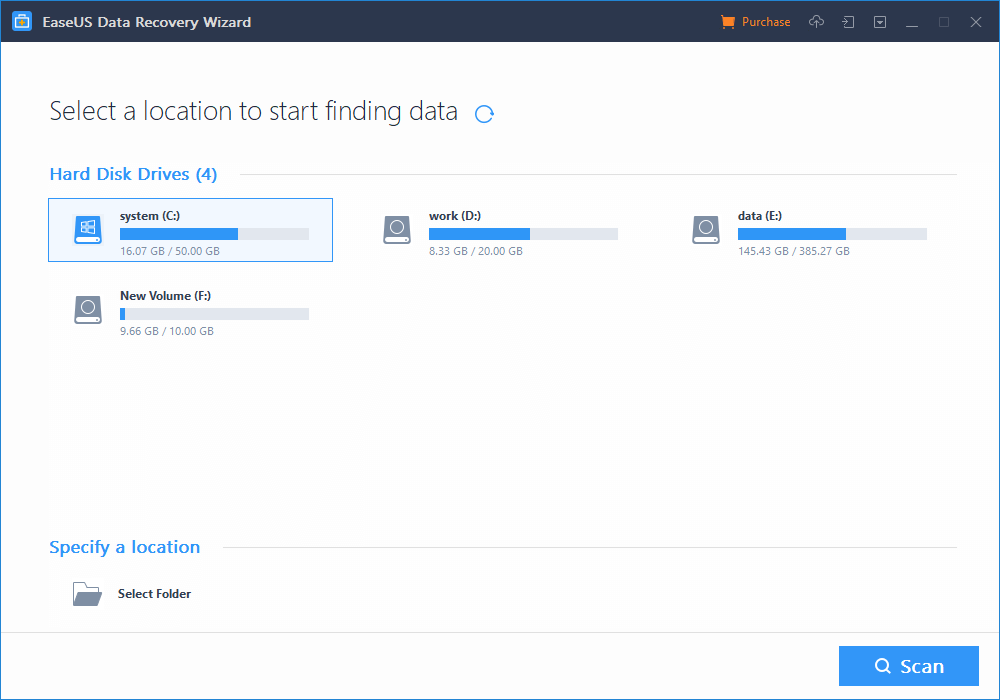
In the first step you will need to pick up the source storage partition from your hard drive and in the second step, you are able to select the chosen files you wanted to recover.
This software does a deep and quick scanning for the lost files. Quick scan as the name indicates help in finding the data very fast and display them in the sort of a list.
Step 2 – Define the drive
After the deep scan is done, which make it sure that none of the files were left behind and all of them have been hunted down and recovered. After that, this software is able to perform a complete recovery of all the files that were in your storage. It’s also called as hard drive recovery.
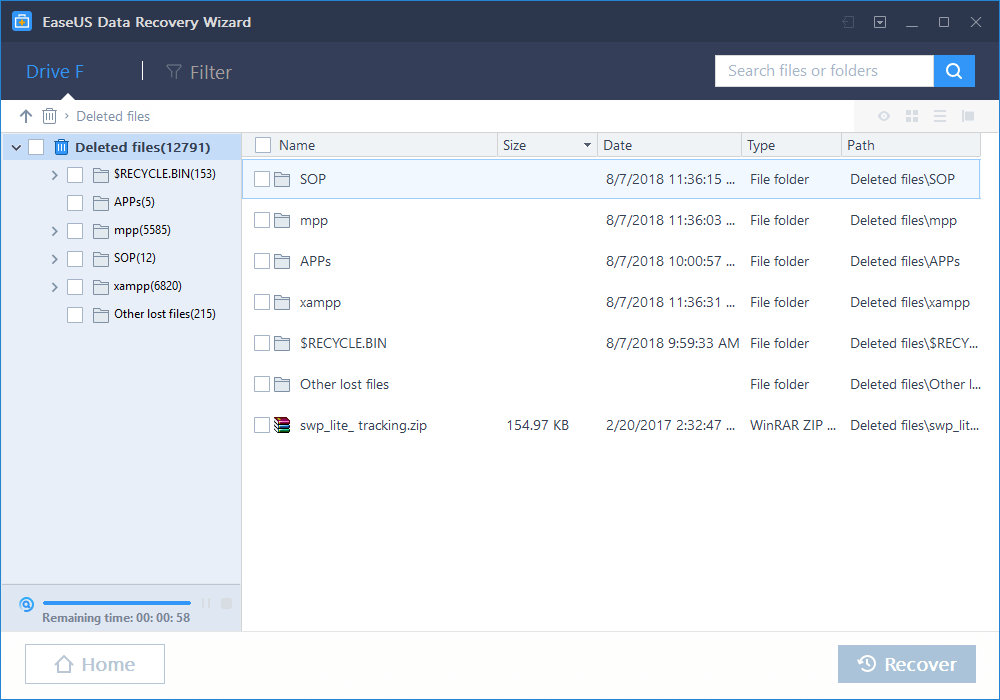
Step 3 – Recover the files
In the end, you are finally happy to see all the documents with their name, date, type, and size. You might preview some of the files by double click. The beauty of this software is that you will also be able to export these files for later reference and retrieve them by clicking on recover.