
Hey, guys! Welcome to my another tutorial from 30 Days to Learn Photoshop. In this tutorial, I am going to show you how to use Spot Healing Brush Tool in Photoshop. In the last tutorial, I showed you how to use Crop Tool in Photoshop.
Spot Healing Brush tool in Photoshop is mainly used to remove tiny flaws or unwanted things. One of the greatest use of this tool is to remove acne. Spot Healing Brush tool is widely used for that. To keep this in mind, today’s tutorial is aligned with the removal of acne.
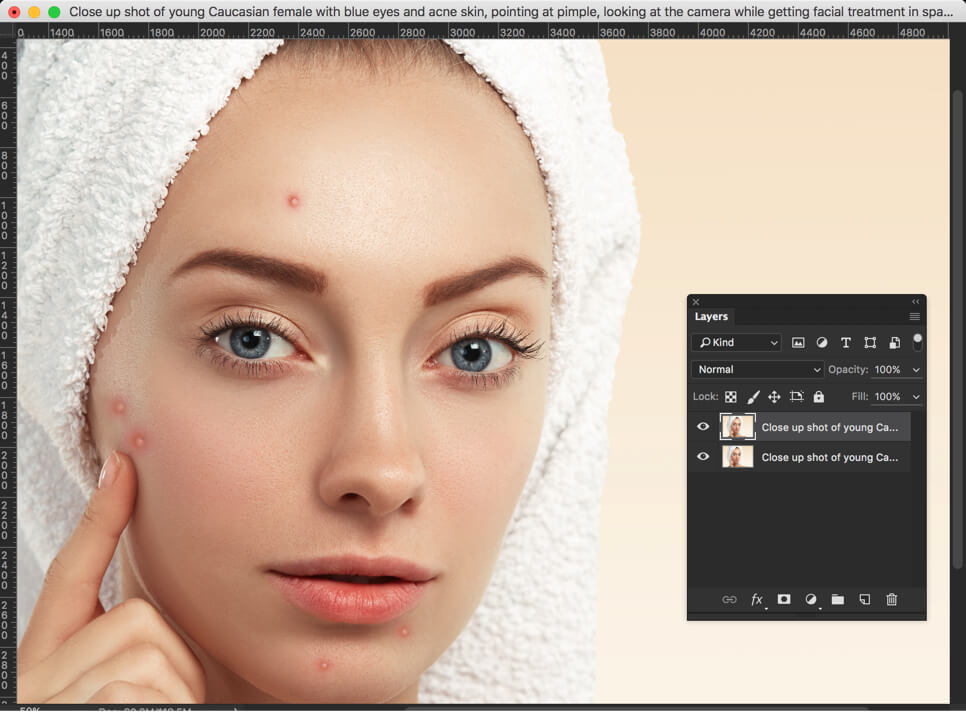
Before we begin, I would like to show you the final image.

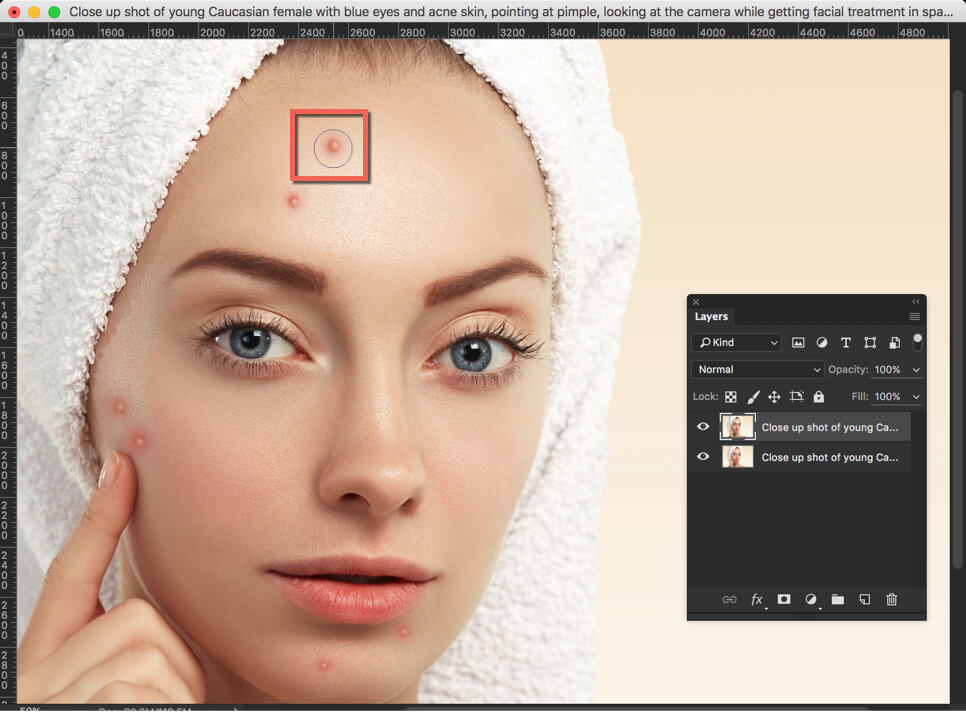
This is what initial image looks like.

Let’s begin with the tutorial
What is Spot Healing Brush Tool in Photoshop?
Spot Healing Brush tool in Photoshop is a brush tool that creates a pattern on the brushed area either by using Photoshop’s Content-Aware technology or by matching its nearby pixels.
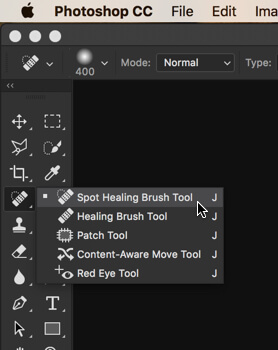
Where is Spot Healing Brush Tool located?
You can activate this tool either by grabbing it from the tool panel or pressing Shift+J again and again until it comes.
How to Use Spot Healing Brush Tool
It’s pretty much simple to use Spot Healing Brush Tool in Photoshop.
Step 1: Activate Spot Healing Brush Tool
As shown above, grab it from the tool panel
After grabbing it from the tool panel, just put it on the acne or the thing that you want to remove.
Step 2: Paint on it
Now paint on it. Make sure that the size of your brush is comparatively larger than the acne.

Step 3: Do it One More Time
As soon as you lift your mouse button, Photoshop fills the acne with regenerated pixels. In case you notice any strange kind of pattern being created, simply paint on the area one more time.

After painting it one more time, here’s the result.
Option Bar of Spot Healing Brush Tool
As soon as you activate this tool, you might have noticed that the option bar has changed. To make this tool even more effective, we can make use of this option bar.
Now let me explain you each tweak one by one.
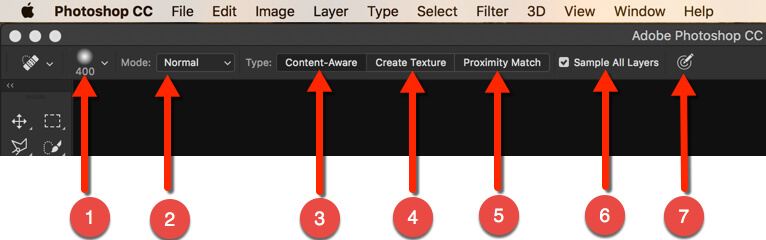
- Size: This functionality lets you increase or decrease size of your brush. It also lets you decide the hardness of your brush. Harder the brush is, sharper are the edges.
- Mode: This is something that we had already discussed in details on Blend Modes. This option lets you choose blend mode of the picture.
- Content-Aware: In CS5, Photoshop introduced a new feature called as content-aware. What it does is that it fills the area with computed pixels. In other words, it recreates the pixels based on its surrounding.
- Create Texture: It takes the texture from its surrounding, and puts it on the brushed area.
- Proximity Match: You can better call it as less advanced version of Content-Aware tool. It takes the surrounding pixels and blend it into the brushed area
- Sample All Layers: If you have multiple layers, you better turn it on. If turned on, it will take all the layers into consideration to create pixels rather than the current layer you’re working on.
- Pressure Size: Works when you have a pressure sensitive tablets like Wacom tablets.
Time to wrap up this tutorial. I hope that you have enjoyed it. If you have any doubt, don’t forget to ask it in the comment section below.
Please support TrickyPhotoshop by sharing this tutorial with your friends and family on Facebook, Twitter, and Google+.