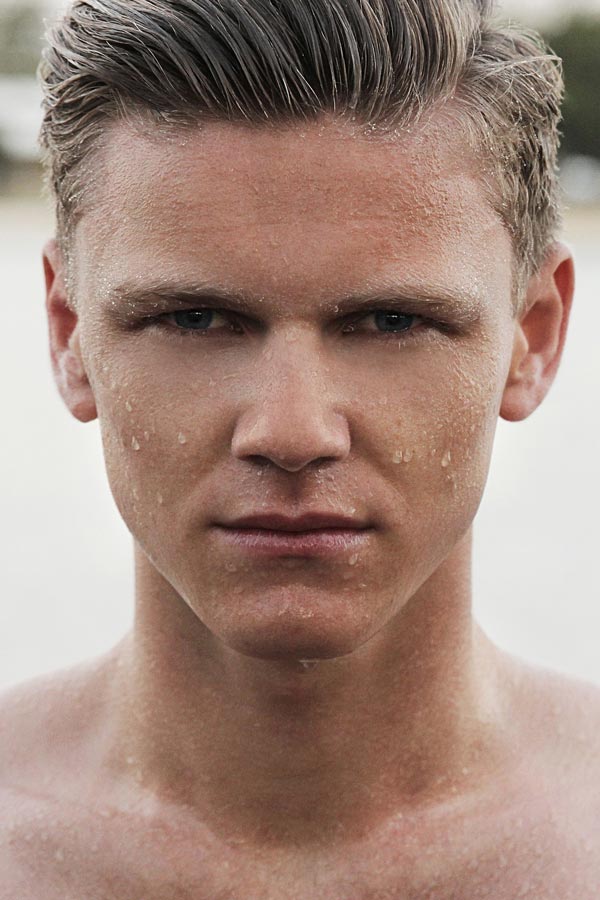
Some of us have puffy eyes or eye bags. Some of us grow as we get older and some of us have it since our birth. Today, I am going to show you how you can reduce puffy eyes or eye bags in Photoshop.
You can also remove it but that’d look too much photoshopped. So, it’s better to reduce it.
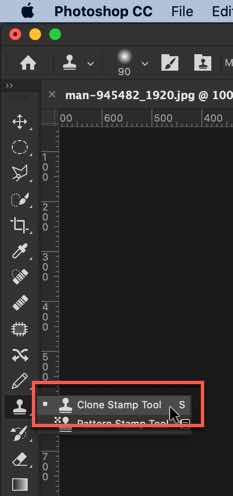
Grab the Clone Stamp Tool from the tool panel or keep on pressing Shift + S again and again until it comes.
Step 2 – Reduce puffy eyes or eye bags in Photoshop
The next thing we need to do is to remove the eye bags or puffy eyes.
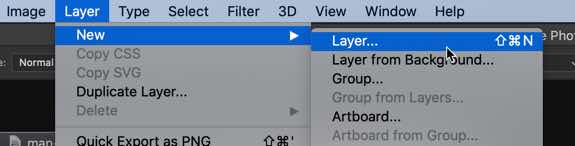
Create a new layer by going to Layer > New > Layer or by pressing Cmd + Shift + N / Ctrl + Shift + N.
Step 2.1: Define the Source
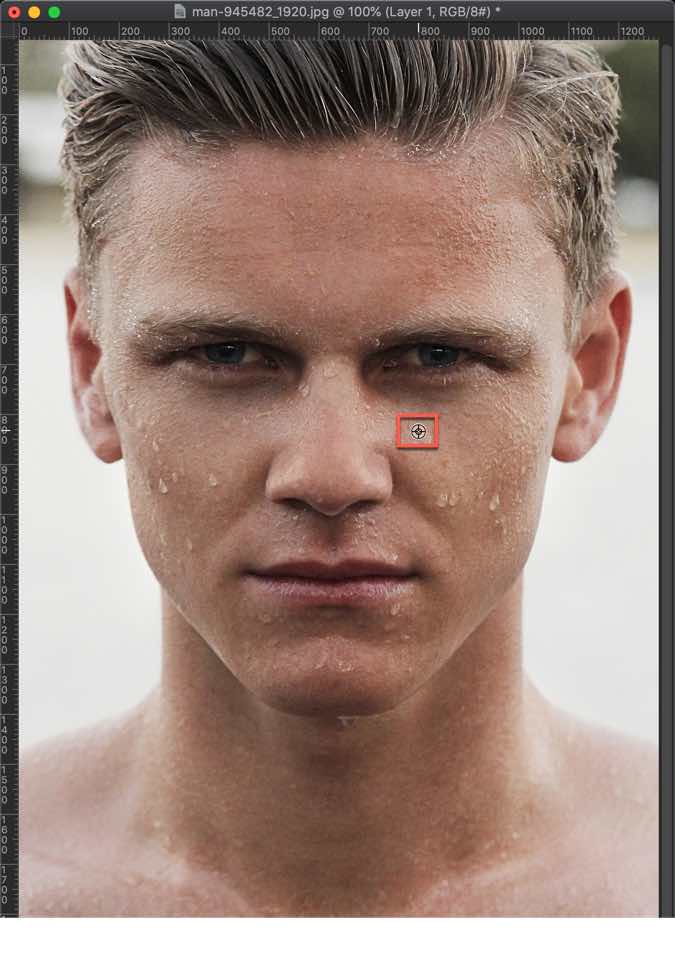
The Clone Stamp Tool is used to copy pixels from one part of the image and paste them on another part. To use the Clone Stamp Tool, you first need to define the source pixels. This will be pixels that are going to be copied. You can do them by holding down the Opt/Alt key.
Once you hold it down, the cursor will change to a sniper cursor.
I’ll paint the skin from this location on the eye bags.
Step 2.2: Paint the Target
Now that I have selected my source, I am going to paint those pixels onto my target. When you do that, you’ll see a cursor that moves synchronously with your cursor. This cursor denotes the pixels that are being copied.
This GIF is of 7 MB in size. So, give it some time to load.
Simply, do this all over the eye bags.
For the best result, you may need to define your source multiple times as I did in the GIF.
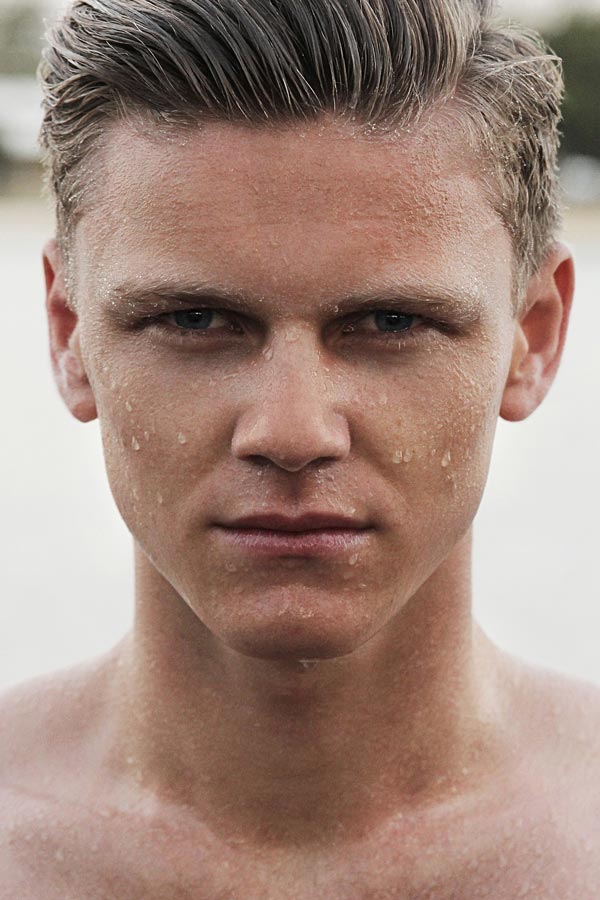
This is how the photo will look.
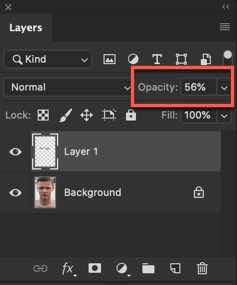
Step 3: Reduce the opacity
Open the layer panel by pressing F7 or going to Window > Layer.
There are hundreds of thousands of businesses that sell online through eCommerce platforms like Shopify, Woocommerce, Amazon, BigCommerce. etc. So, I decided to collate the product photo uploading requirements for all major eCommerce platforms.
Let’s start.
There are some astonishing facts that you’d be interested in it.
A simple LinkedIn search shows that
There are 15,000+ fashion and apparel companies in the US alone
What does this mean to you?
This means that your photos have to be of top-notch if you want to perform better than your competitors. Because
76% people say that product photos influence their buying decision.
I get frequently asked by my client that what should be the ideal size of the photo. I tell them that
the ideal size is 3000 x 3000 pixels with a resolution of 72 dpi.
the photo size should never cross 150KB.
But, we’ll see today what does eCommerce platform suggests
1. Shopify photo uploading requirements
Maximum upload size: 4472 x 4472 pixels with a file size of up to 20 MB
Amazon is pretty strict when it comes to the requirements. My Amazon clients always have the toughest time getting their photos approved.
Minimum size to zoom in: Images should be at least 1000 pixels in either width or height
Recommended size: 2056 pixels wide
Image frame: The product should fill 85% of the frame
Background color: ALL product photos should have a white background
File format: You can upload JPEG, PNG, GIF or TIFF files.
File names: The file name must include the product identifier (this is your Amazon ASIN, JAN, EAN, 13-digit ISBN or UPC). After that, a period and a file extension (see accepted file types listed above). For example, 1234567890123.tif or A987654321.jpg. You may not include dashes, spaces or other characters in the file name.
Design: You can’t include any text, borders, logos, mannequins or watermarks in your images.
WooCommerce is basically a plugin for your WordPress site. It does not have its own platform. It simply converts your WordPress site into an eCommerce site.
So, there’s no defined set of rules for the product photos. You should check your WordPress theme guidelines for the photo uploading requirements. But, I’ll give you a rough idea.
Minimum size to zoom in: Depends on the WordPress theme
Recommended size: 2056 pixels wide
Maximum file size: 64 MB
Recommended file size: 100KB
Image frame: The product should fill 85% of the frame
File format: You can upload JPEG, PNG, GIF or TIFF files.
4. BigCommerce photo uploading requirements
Maximum upload size: Nothing defined by BigCommerce
Recommended size: 2056 x 2056 pixels
Minimum size to zoom in: 1000 pixels on the longest side
Magento is also a highly customizable platform. Unlike Shopify and BigCommerce, it’s a kind of software that installs on your web server. But, unlike WooCommerce, it doesn’t need WordPress to run.
So, there’s no defined set of rules for the product photos. You should check your WordPress theme guidelines for the photo uploading requirements. But, I’ll give you a rough idea.
Minimum size to zoom in: You can customize it
Recommended size: 2056 pixels wide
Recommended file size: 100 KB
Image frame: The product should fill 85% of the frame
File format: You can upload JPEG, PNG, GIF or TIFF files.
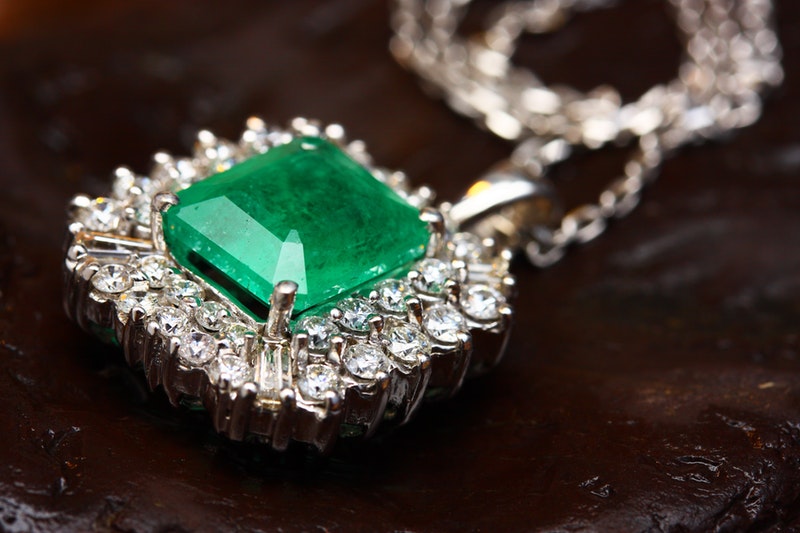
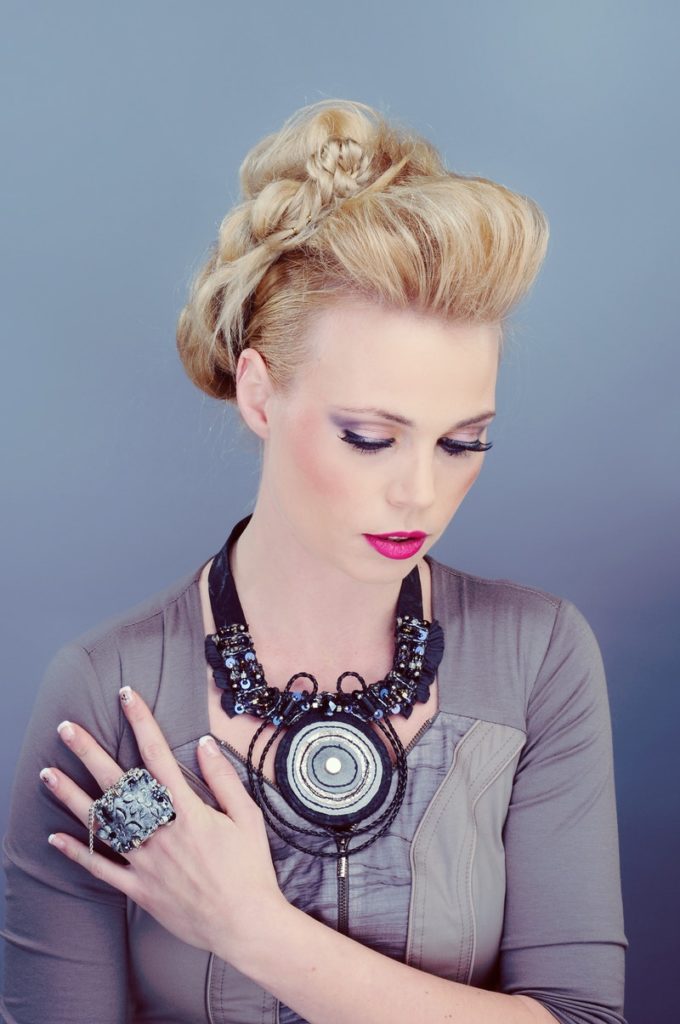
Photographing small objects like jewelry yields very important things to focus on. This includes aspects of photography like lighting that illuminates the object, making details stand out, avoiding deformation by astute composition, and using the focus in an effective way to increase the sharpness of the jewelry. You do not need a professional studio to create the perfect portrait. Working at home with your jewelry may be your best bet as a photographer, just make sure you have a nice table and a white background. Here is a guide to taking professional shots of your jewelry at home.
1. Tips for lighting
Make sure your light source is soft. A large-sized diffuser and a studio flash are warranted. Your camera may be able to enact the work needed to be done. Using an umbrella with absorbing fabric as a diffuser window and the flash of your camera can be optimal. White feather cardboard acting as a white reflector is great for the lighting stage.
2. Working on reflection
To photograph your jewels, the configuration of your lighting set should be this: the flash, with the camera having a window pointed at it while having an adequate angle on the table. With the light in front of the camera, make sure to not have the light shining directly onto the lens. The white reflectors will need to need to be on the sides of the camera as the light shoots off the reflectors and makes the jewel pop.
Your jewelry is typically shiny, that’s what it makes it extremely appealing. This means that they may reflect light as a mirror would. An idea to combat this is to have the white reflectors that were set on the sides of the camera make the jewel mirror.
Use natural light if you do not have flash, and modify your exposure depending on the amount of natural light given by the sun. To measure lightness without a photometer, look at your camera’s histogram and use that to make the changes.
3. Composing the photograph
Consider if the picture you have taken will be a stand-alone or if it is part of the whole series of photographs. Mainly just focus on attention to detail as well and remember why you are shooting the photograph. Is it for an advertisement, your own portfolio for your photography business, or just a passion project?
Using the longest focal length your camera supplies are a great way to avoid imperfections. 105mm focal length will be the catalyst for a close focus or hold the camera at different lengths away to adjust the picture. Giving “air” to the object as well as paying attention to lines is important. Place the jewelry in a natural position to give it a more authentic look.
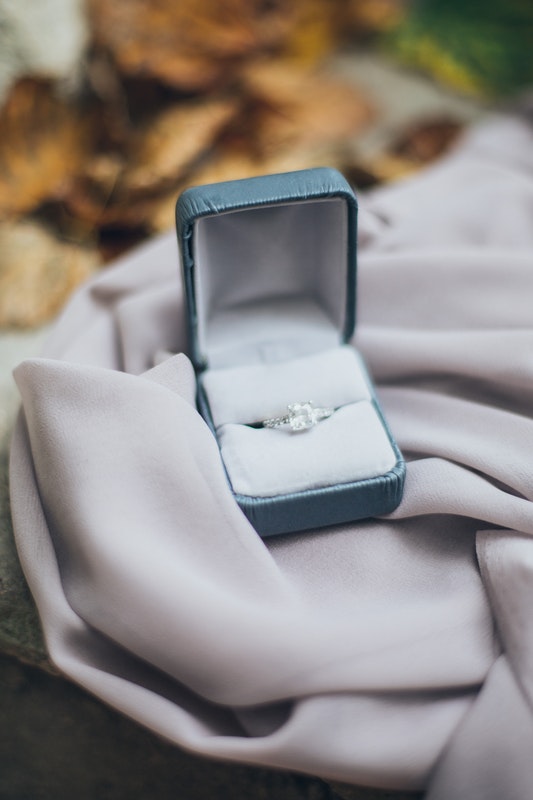
When dealing with jewelry that hangs, a frontal view to simulate the look of a necklace by hanging it is the right call. Incline a ring that is on the surface, with the tilt providing a lot more. If you are interested in standing the ring right up with the use of a box or bulky object, use a dollop of wax.
4. Optimizing the macro focus
You are all set up with the proper background, the jewelry is on an appropriate surface, and the camera’s framing is optimal. It is time to look at the camera’s focus. Knowing the rules of depth is important to take full opportunity of the focus and to get the best image possible.
Using a closed diaphragm for depth is recommended even if there is a loss of quality when the image is reproduced. Stacking or joining different shots when editing can help alleviate this problem. To give the picture an extended depth of field, use different focus points.
5. Taking advantage of a rail
Hugh Wright, a photography writer from Australia 2 Write and Next Coursework offers you this tip: “A millimeter rail for macro photography is vital for these kinds of shots. The camera can move without touching the focus and once all of these pictures are taken, head to your digital workshop.”
6. Using Photomerge
Align the images for your first step. To do this, the Photomerge tool can be used, followed by deselecting the part where is said Merge Images. After this, select all layers, head to the Edit Menu, and then select on Merge Layers Automatically. Selecting this will create a layer mask by joining all the focused parts of the image, showing all these images together.
Because you are working with an object of high value and quality, make sure it is clean and shining the way it should be. You want to exemplify the beauty of the jewelry, and when using functions in macro, these characteristics will be illuminated. After all of this, use your digital work station to make the background as white as you can. This will make the jewelry look as good as possible.
7. Using the proper background
The most popular way to shoot jewelry is by using a white or neutral infinity curve. If you want to emphasize the elegance, using a black mannequin may be exactly what you want to do. Pick one up at a craft store near you. Do not forget however, the background must still be white, so drape a white cloth over the top of it and remove the background later.
This end goal of photographing your jewelry at home is to manufacture a soft light while mitigating the number of shadows. Using a black background may be easier. Tina Waverly, who is a design blogger at Write My X as well as Brit Student reminds you to be creative; “You can always experiment with different backgrounds the most experienced you get. Try a pastel color palette to help express your art or a certain mood you are trying to get your image to exude.”
Follow these tips in the comfort of your own home. These will ensure that your jewelry photo-shoot is everything you want it to be and more.
A father of 3 boys, Michael Dehoyos is a content marketer and editor at PhD Kingdom and Academic Brits. Helping firms with their marketing strategy concepts, while contributing to countless sites and publications, Dehoyos is a true professional. When he’s not working as a content marketer or editor, he is writing at Origin Writings.
Today I am going to show you how to create an Instagram Lo-Fi filter in Lightroom. This is going to be an epic tutorial. If you like the Lo-Fi filter on your photos but don’t like using Instagram for all your photos then this tutorial is for you.
Plus, I am going to give you the preset for free also. No signup and email are required, just one click to download the preset. This button will scroll you to the bottom of the page.
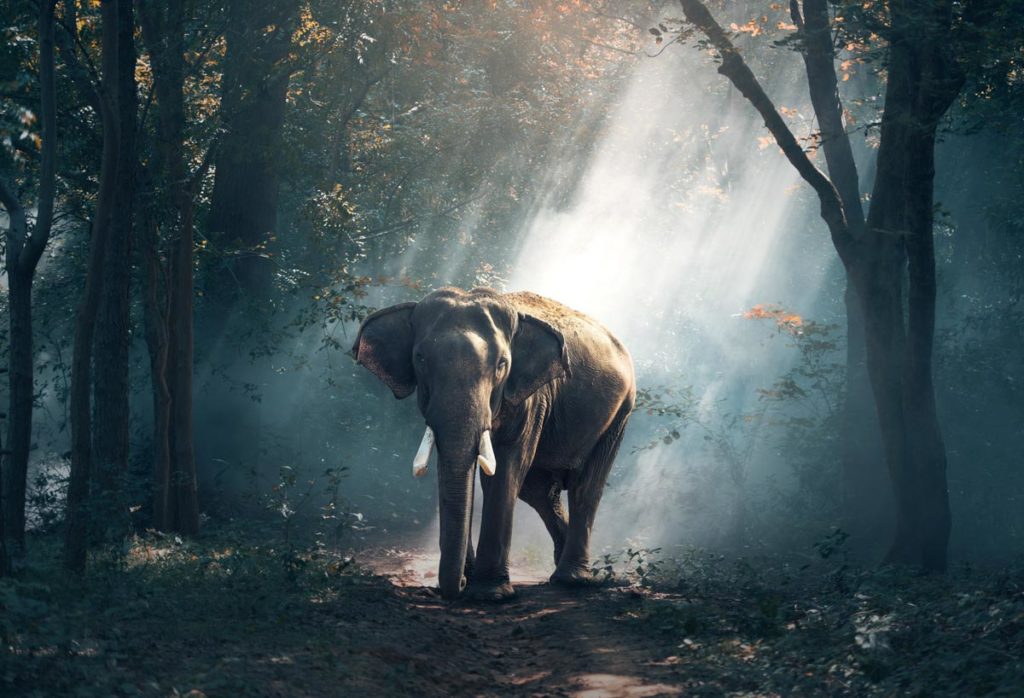
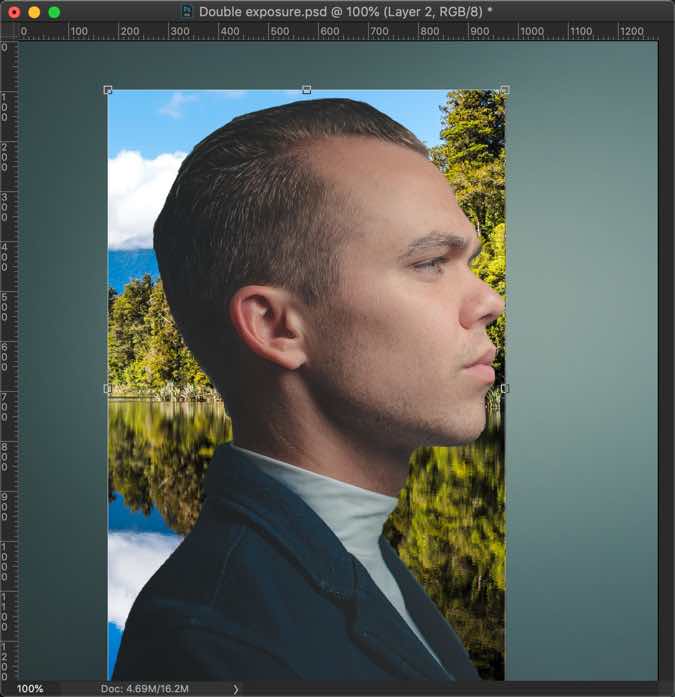
You’ve seen double exposure effect somewhere and now you want to know how to do in Photoshop, right? You’ve wondered how do I do it and that’s why you’re reading this tutorial. Today, I’ll show you how to create a double exposure photo in Photoshop.
Look no further because this is the tutorial where you’ll know everything.
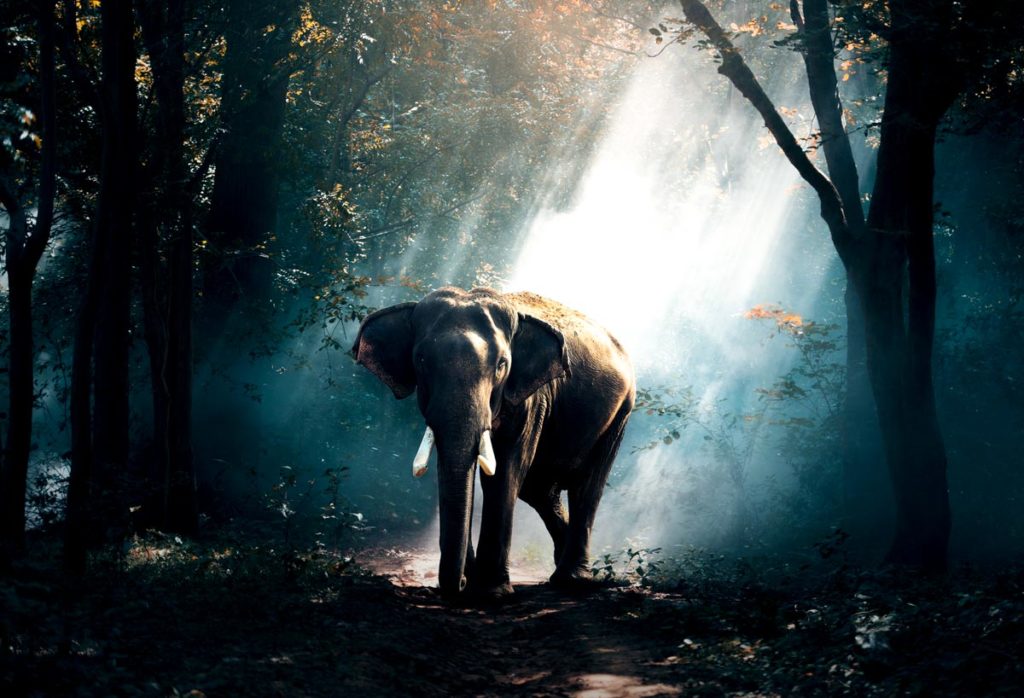
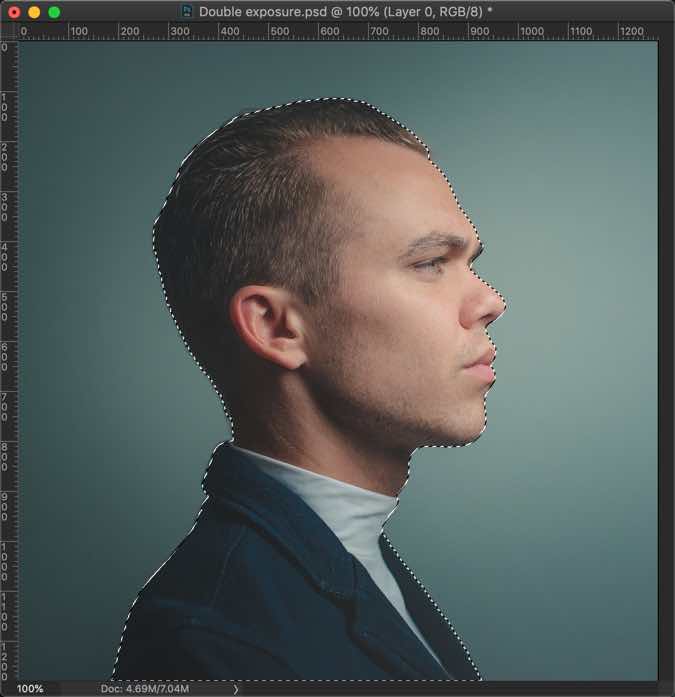
Before we begin, let me show you the after and before.
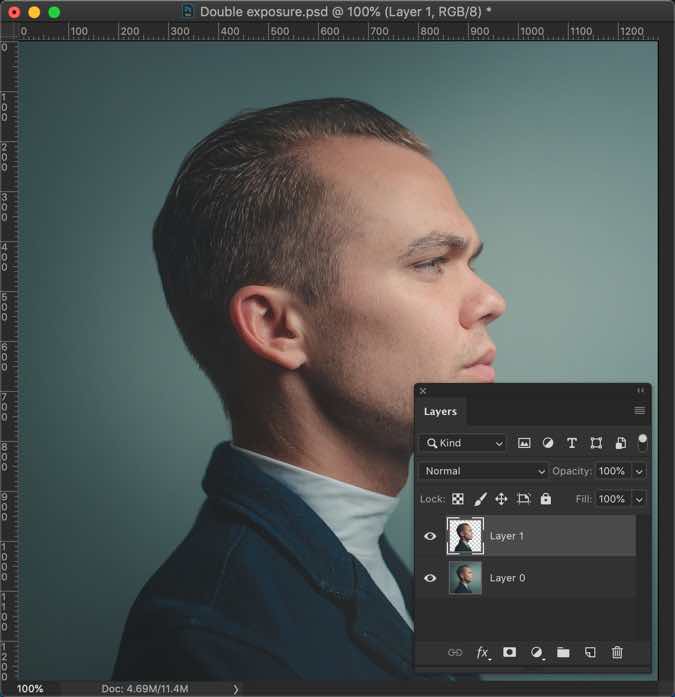
Press Cmd + J / Ctrl + J to copy the selection to a new layer.
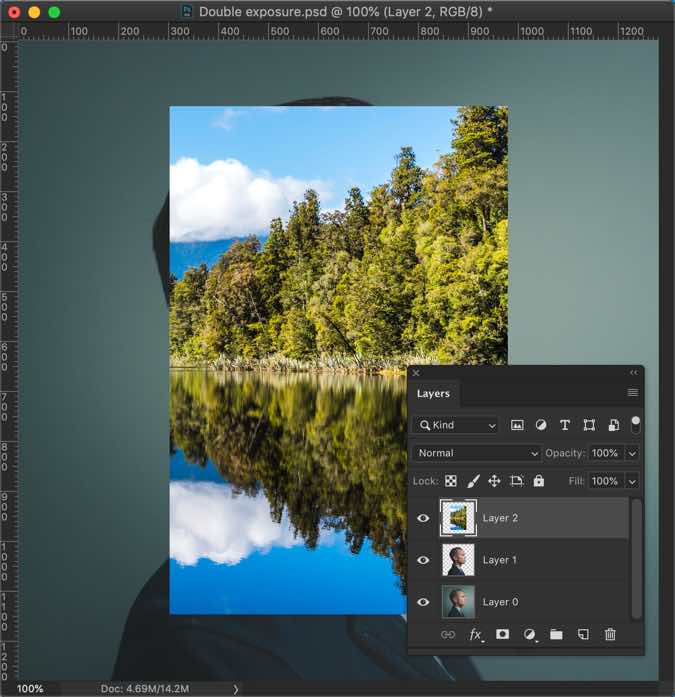
Step 2: Open and select the other photo
Time to open the other photo.
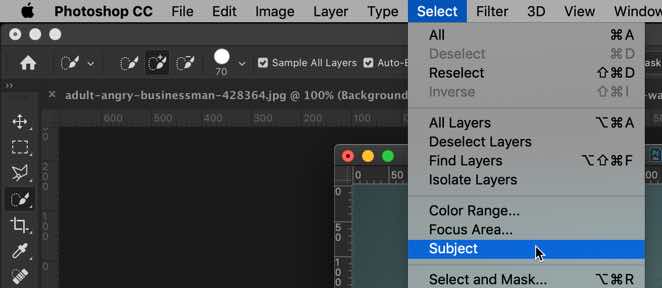
We’ll select the portion which we’d like to use as the double exposure.
Grab the rectangular marquee tool from the tool panel or press Shift + M again and again until it comes.
Draw a rectangle on the part which you want to use for the double exposure. I am going to use this part.
Copy the selection by pressing Cmd + C / Ctrl + C.
Go back to the original photo and paste it by pressing Cmd + V / Ctrl + V.
Step 3: Align the landscape photo
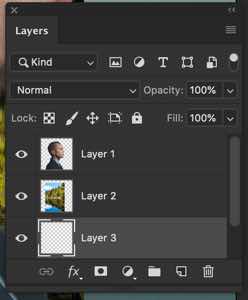
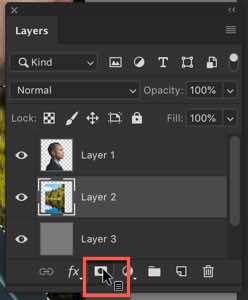
Drag the landscape layer below the man’s layer.
Activate the Free Transform Tool and align the landscape photo in such a way that it covers the entire body of the man.
Press Return/Enter.
Step 4. Change the background
Create a new layer below the landscape photo by pressing Cmd + Shift + N / Ctrl + Shift + N.
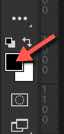
Click on the foreground color.
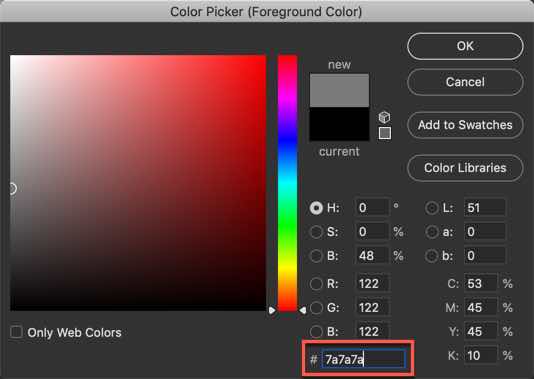
Write #7a7a7a in the box. Press OK
Press Opt + Delete / Alt + Backspace to fill the layer with the newly selected layer.
Step 5: Create double exposure photo in Photoshop
The first need we need to do is to make sure that its edges totally align with the face.
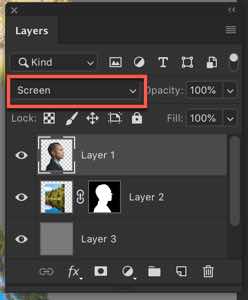
Hold down Cmd/Ctrl and click on the thumbnail of the photo. This will select the man.
Click on the landscape layer and then click on the Layer Mask.
Now, the landscape photo aligns with the man’s photo.
Change the blend mode of the man’s photo to Screen.
Again activate the landscape layer.
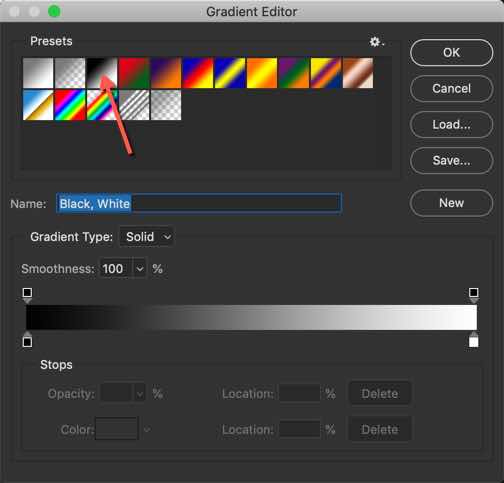
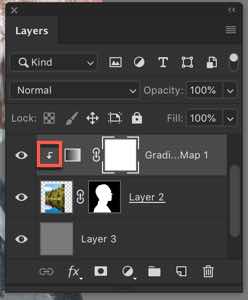
Go to Image > Adjustment > Gradient Map.
Click on the box.
Choose the black to white gradient and press ok.
This will convert the landscape photo to black and white.
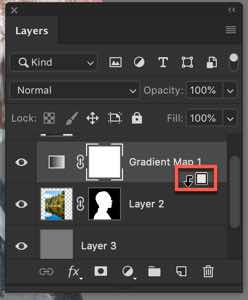
But, there’s a problem. The gradient map is affecting all the layers below it including the background. We need to fix it.
We’ll clip the gradient map layer to the landscape layer. Hold down Alt/Opt and place the cursor just at the edge of the layer. You’ll see that cursor changes. Then click.
This arrow would come up which means that the gradient map is affecting only the layer below it.
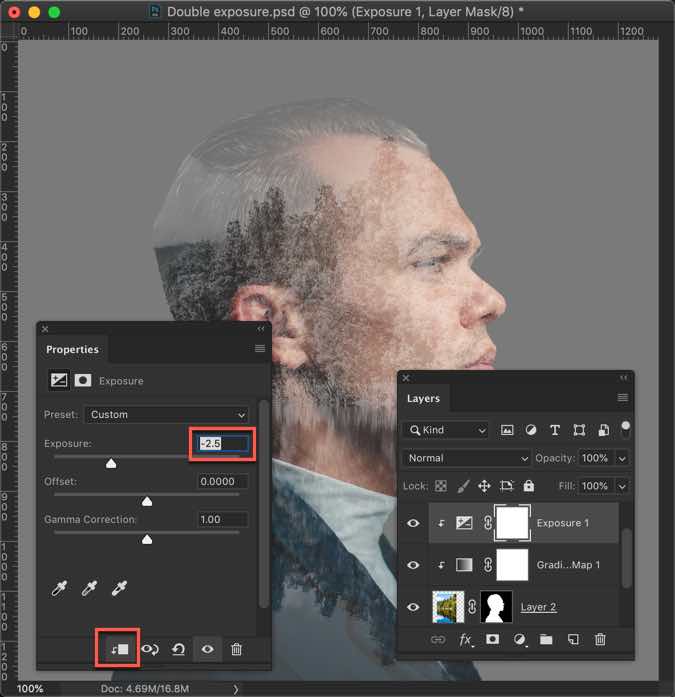
Time to reduce exposure. Click on the adjustment layer button and choose Exposure.
Reduce it to -2.5. Also, click on the clipping mask button.
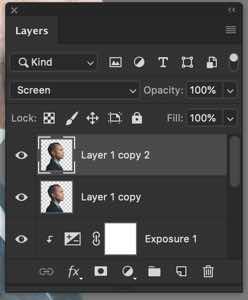
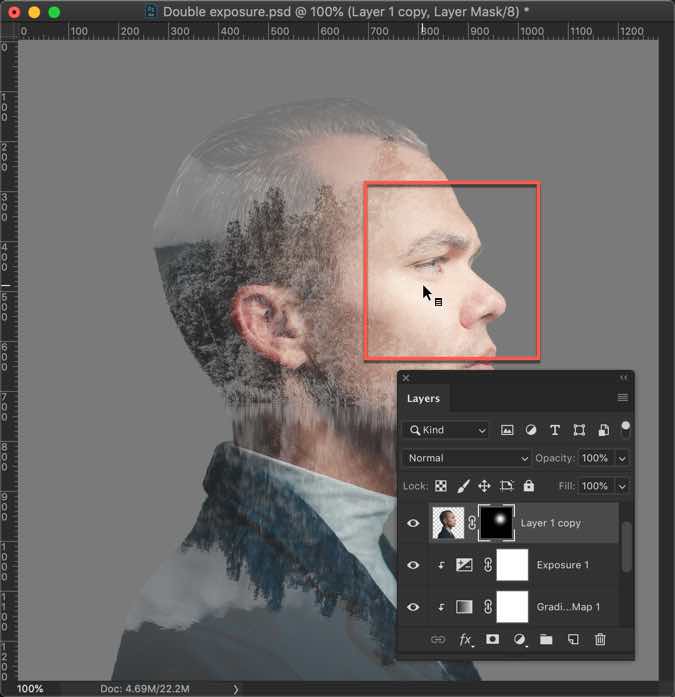
Step 6: Give effect to the man’s photo
Click on the man’s photo layer. Duplicate it by pressing Cmd + J / Ctrl +J.
Change the blend mode of the below layer to Normal.
We all want beautiful photos. Who doesn’t strive towards the perfect Instagram profile? Who doesn’t want to improve those vacation photos that are supposed to get printed?
But most of us are too busy. We have our jobs, our homes, and an exercise routine to take care of. Hey, students even buy assignment help because they can’t handle all the pressure. Time for complex photo editing on Photoshop? Not so much. So we opt for the usual Instagram filters that make our photos look tacky.
What if I told you there was a better solution? Lightroom has some pretty cool presets that are just as quick as Instagram filters. The tool is simpler than most people assume. So let’s get out of our tiny little boxes and do something cool to our photographs for a change.
1. Start by Choosing the Best Photos
Do you remember the good old days when we had to use photographic film for our cameras? We could take a limited number of photos on it. It was expensive, so we were saving it. We’d stage the scene, get our model to strike the perfect pose, and snap. That was it. No second attempts, since the film was too precious to use for similar photos.
The digital world is so much better! We can take as many photos of a scene as we want. We have tons of memory, so we don’t mind snapping several similar photographs. But when the time for choosing the one comes, it’s a problem. Lightroom has a simple feature to help us solve it.
Highlight all similar photos in a folder.
Press N – a shortcut key that takes you to Survey view mode.
You’ll see all similar photos in a single window, so you can eliminate them one by one until you end up with the perfect shot to edit.
2. Try Different Presets
Did you choose the right photo? Cool! Are you ready to start editing it?
When you choose the photo to edit on the Lightroom smartphone app, you’ll see the option Presets in the bottom menu. Tap it. It will lead you to cool effects that work exactly like Instagram filters. The difference? They are better and they don’t look like the majority of Instagram photos.
Play around with these presets. You know how to do that. Experiment with different ones (you’ll just press the X if you don’t want to save the last one you tried). The cool thing about Lightroom is that you can layer on different presets, so you get a unique effect for your photo.
3. Adjust the Features
The preset will do a lot for you. When chosen properly, it will brighten up the photo. Light is Lightroom’s forte!
But why don’t you try to make it even better? Most of the work is done; you just need to adjust a few elements to see if you can improve the result.
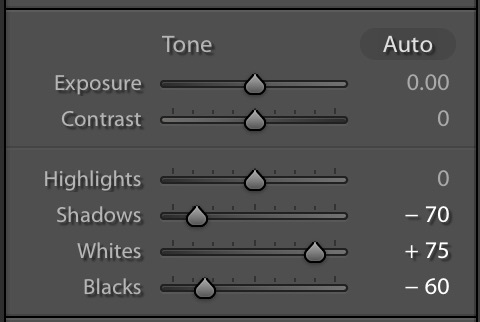
When you choose Light, you can play with the highlights, contrasts, shadows, and exposure of your photograph.
4. You Want to Maintain a Theme? Save Your Settings!
Why would you stick to the same style of photographs when there are so many opportunities to experiment? No one is forcing you to do so. If you like versatility, you can play with lightness and darkness and make a unique story out of each image you post. But if you want your Instagram profile to be impressive and recognizable, that’s not the right way to go.
Instagram stars engage in the branding process. The photographers and editors to help them with the photos, and they hire writers from a college paper writing service to create the perfect captions. You don’t have to go that far. But you can maintain a theme, which will make your visuals recognizable for your followers.
Before you set a theme, you should play around with Lightroom. Try different settings on your favorite photos, so you’ll see how they look. Is there a particular style of editing that you love? Save those settings! Once you’re sure you got a photo to perfection, click on the + button (located in the Presets panel when you’re using Lightroom on a computer). Name your preset and click OK.
When you have a new photo to edit, apply your very own preset. It’s your style. It’s your character expressed through image features. You can’t do that on Instagram!
5. Make Subtle Adjustments
There’s a thin line between professional-style editing and absolute tackiness.
For example, if you try to brighten the model’s skin on a portrait photo, the Adjustment Brush will do a good job. But if you go too far, the photo will lose its vibe.
The difference between an amateur and a pro photographer is in the dose of edits. The amateur is so excited with the new features they discover that they want to use them all… on a single photo! There’s a word to describe this result: kitsch. Look it up.
The pro, on the other hand, will invest in high-quality gear and do minimal editing once the photo is taken. Their photography looks more natural, even if there’s a fantasy vibe to it. It looks real. Even average cameras and smartphones take good photos today, so there’s no need to brush the realism layer away. Do the needed editing, but keep them real!
Lightroom Gets Better As You Practice More
Like any other editing tool, Lightroom also has a learning curve. But it’s not Photoshop. It’s way simpler and less overwhelming. If you don’t understand how it works when you first use it, don’t despair! Just practice. It’s fun to play with your photos and see where you can get them with a couple of edits.
Presets are the coolest thing for beginners. If you know how to apply filters on Instagram, you’ve got this! From there on, you’ll build upon your photo editing skills and the results will keep getting better!
Lauren Adley is a writer and editor at Australia writings and best paper writing service. She is dedicated to her family, work and friends. She is keen on reading, playing the guitar and traveling. She is interested in educational, marketing and blogging issues. Feel free to connect with her on Twitter if you need bestessays review.
You’re fed up with seeing the white background in eCommerce photos and you want to try something new. Search no further because I am going to show you 9 alternatives to a white background for your eCommerce photos.
To be honest, white is still the best background if you want to go with the number of sales. eCommerce product photos with white background tend to sell more.
Amazon spends billions of dollars every year on research and it is using a white background then this means that there must be a reason. And I cannot think of any reason other than better sales.
But, there’s a catch. the white background is not always the best background.
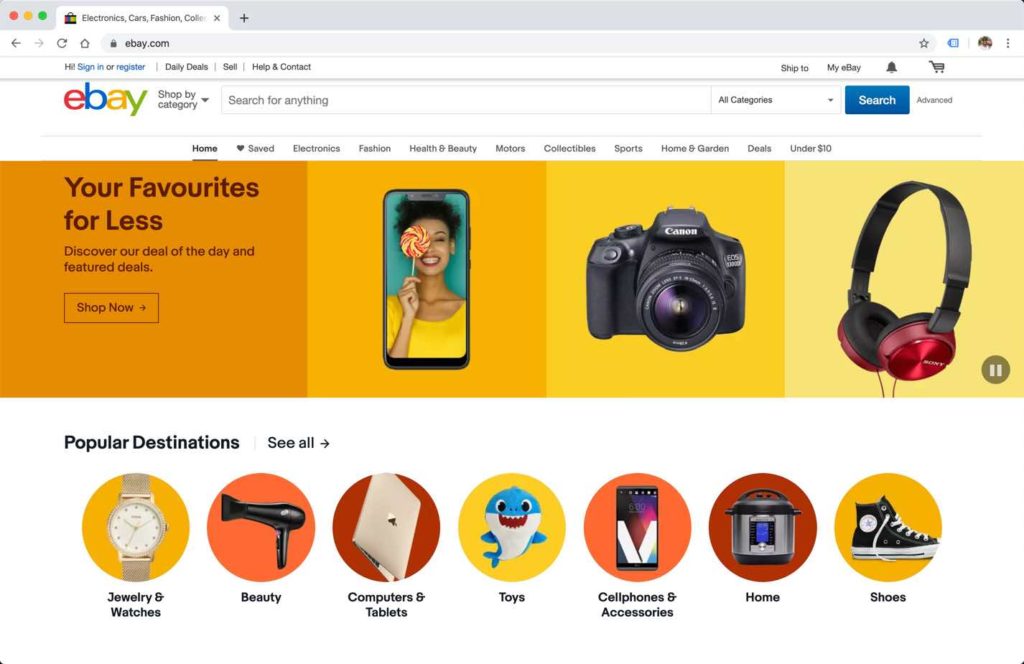
The color of the background in eCommerce photos which usually give you better sale results is the one that is the color of your website background.
Amazon’s website background color is white so the white background in eCommerce photos tends to convert better. If your website’s background color is black then black background for your eCommerce photos should convert better.
The goal is to make the product stand out. There should be the least amount of distraction. Having a different background for your eCommerce photos than the website background adds distraction.
In case you’re still not convinced, here are the 9 background that you can use.
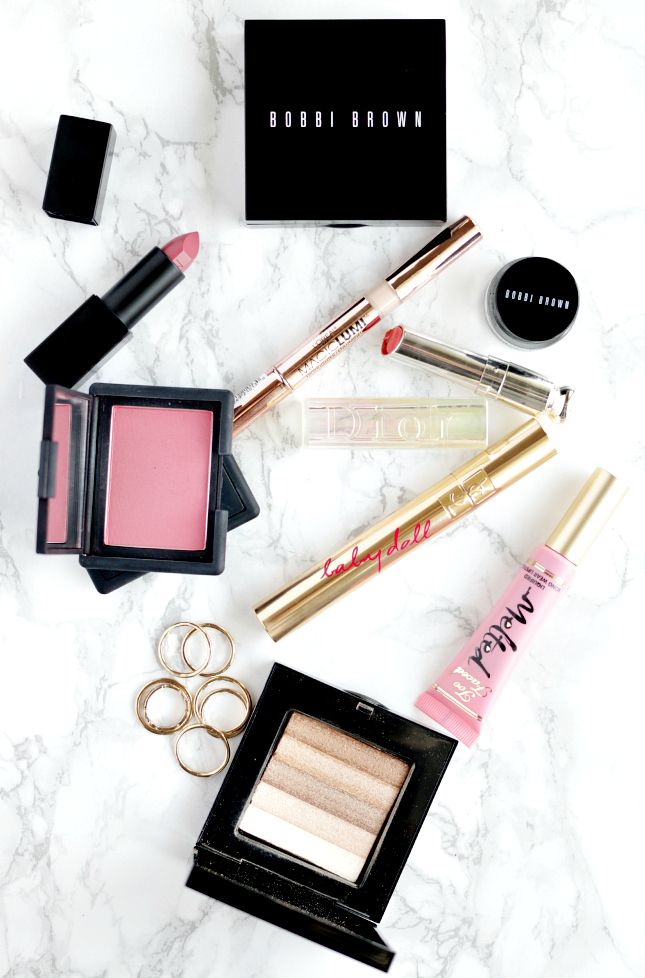
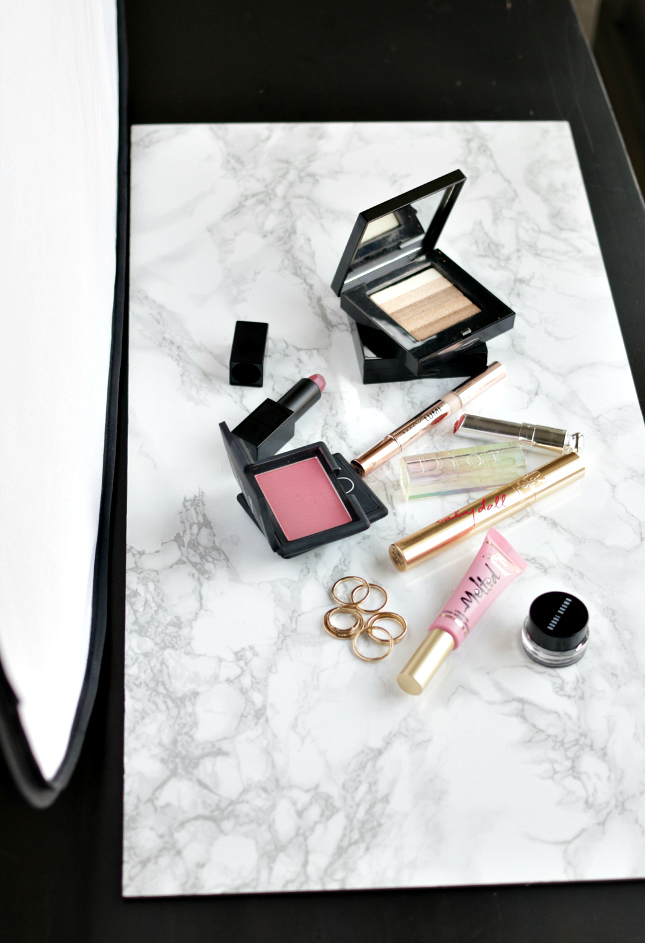
1. Marble
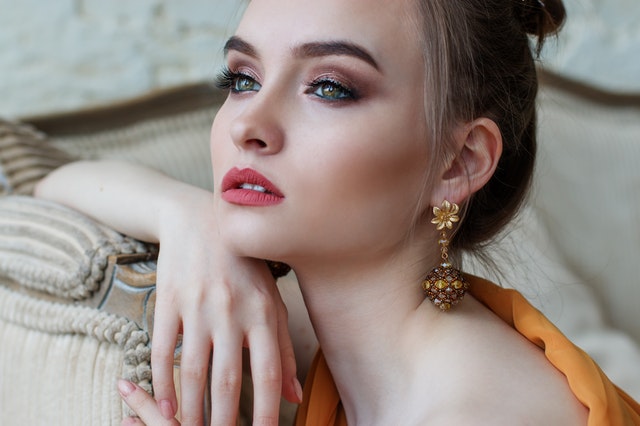
When to use: when you sell luxury items that people wear (for example – cosmetic items, skincare items, etc.)
Marble is associated with luxury and gentleness. When people see a marble background in an eCommerce photo, they immediately think that the cost of the product is much more than the market average and the product is soft for the skin.
This background tends to attract females more.
Source – bobbibrowncosmetics.com
How to shoot?
Method 1: – Get a marble slab or sheet. Place your product nicely and shoot it.
Method 2: – Shoot on any regular background and then change the background to marble in Photoshop. The benefit here is that you can use multiple textures of marble here unlike method 1. There are a bunch of free stock photos available on the internet. Use them and your photos will not be monotonous with one texture of marble only.
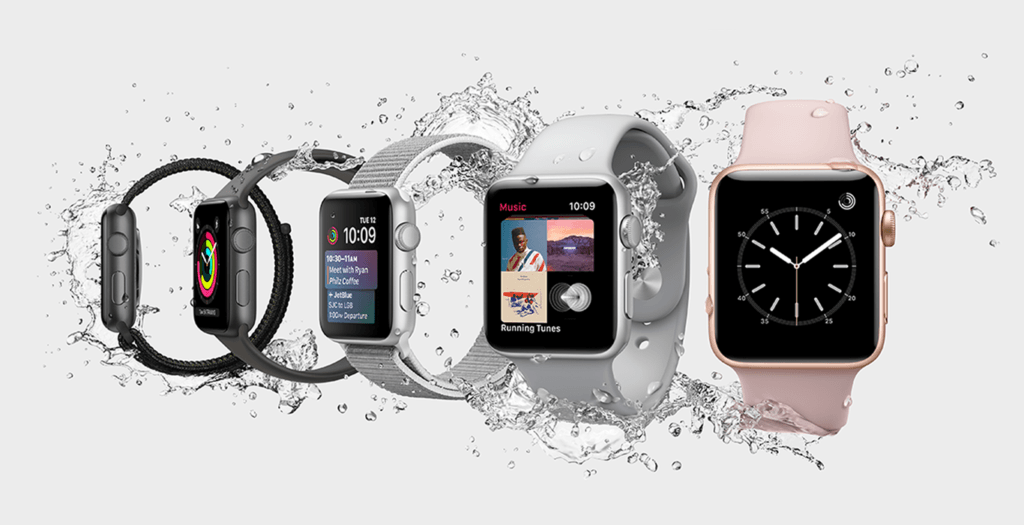
When to use: when you want to show how/where to use your product
This is by far is the best background to show your buyers how to use your product. Here you choose the background where a person is actually using your product or your product is being used somewhere. You can show a photo like this.
This type of photos works a lot better if you show your product photos against a white or other solid color backgrounds. Don’t expect a good conversion rate if you only show lifestyle photos.
See how good Apple is telling that Apple Watch is waterproof (or basically splash-proof).
How to shoot?
Method 1: – Shoot your product photos while using them. You can take the backpack photo above as an example
Method 2: – Shoot a normal photo and change everything in Photoshop. For example, you cannot shoot the photo of the Apple Watch like the photo you are seeing above. The only way to add water splash is to use Photoshop.
3. Light gray
When to use: when you just want to show any other color than white but still want to have a nice conversion rate.
We’ve seen that this is the second-best background for conversion. Yes, the first is the white background but you’re bored with the white color.
How to shoot?
Shoot the photo against a green or any background and then change the background in Photoshop
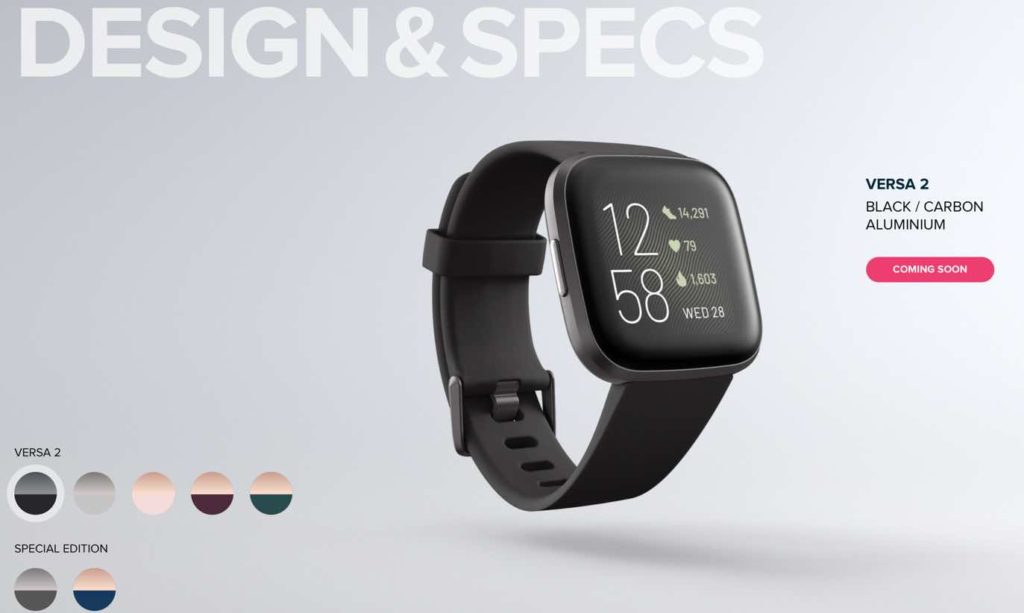
4. Gradient
When to use: when you just want to show any other color than white but still want to have a nice conversion rate.
Gradient with a light product shadow also looks good. It’s your personal choice whether you want to go with a solid color or a gradient.
Fitbit uses a nice medium to light gray gradient for its Versa 2 smartwatch. The light watch shadow is also adding beauty to this photo. This makes us think that the watch is floating above the ground.
source: fitbit.com
How to shoot?
Shoot the photo against a green or any background and then change the background in Photoshop
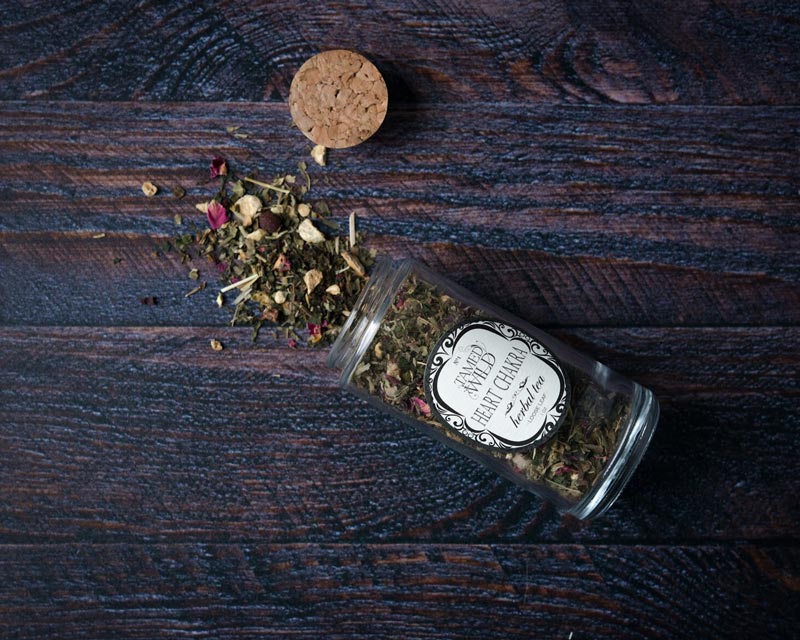
5. Wood
When to use: when your product is antique, hand made, or directly or indirectly related to the trees/plants
You can use the wooden background after showing the close up shots of your products against a solid color background.
Wooden background gives a perception that your product is handmade.
How to shoot?
Method 1: – Get a wooden slab or sheet. Place your product nicely and shoot it.
Method 2: – Shoot on any regular background and then change the background to marble in Photoshop.This is what we do for our clients.
6. Fur/cotton
When to use: when your product is very soft on the skin
You can use the fur background after showing the close up shots of your products against a solid color background. Fur background gives a perception that your product is something that the users will put or apply on their skin and there’ll be no side effects.
How to shoot?
Method 1: – Get a fur or cotton. Place your product nicely and shoot it.
Method 2: – Shoot on any regular background and then change the background to fur in Photoshop. The benefit here is that you can use multiple textures and colors of fur here unlike method 1. There are a bunch of free stock photos available on the internet. Use them and your photos will not be monotonous with one texture of fur only. This is what we do for our clients.
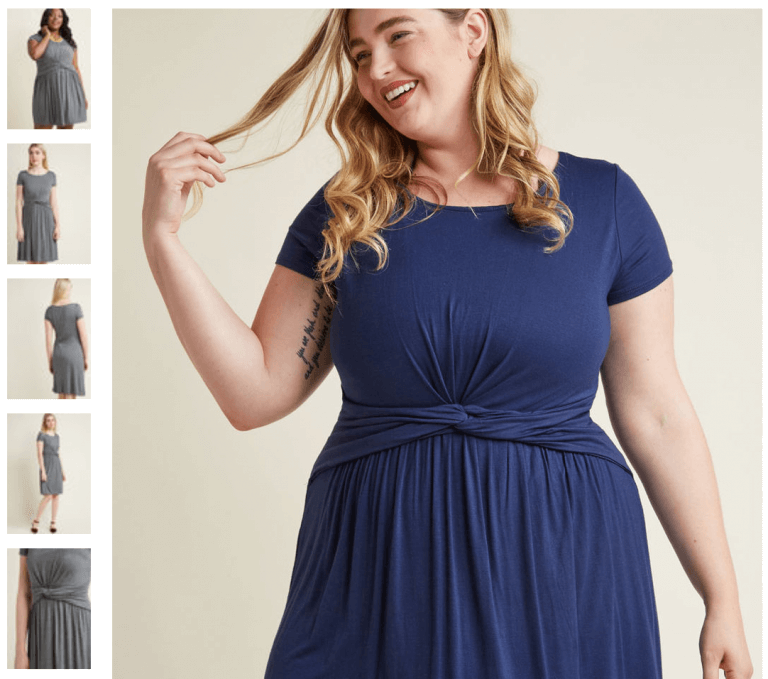
7. Sepia
When to use: when you just want to show any other color than white and gray, or want to increase customer loyalty.
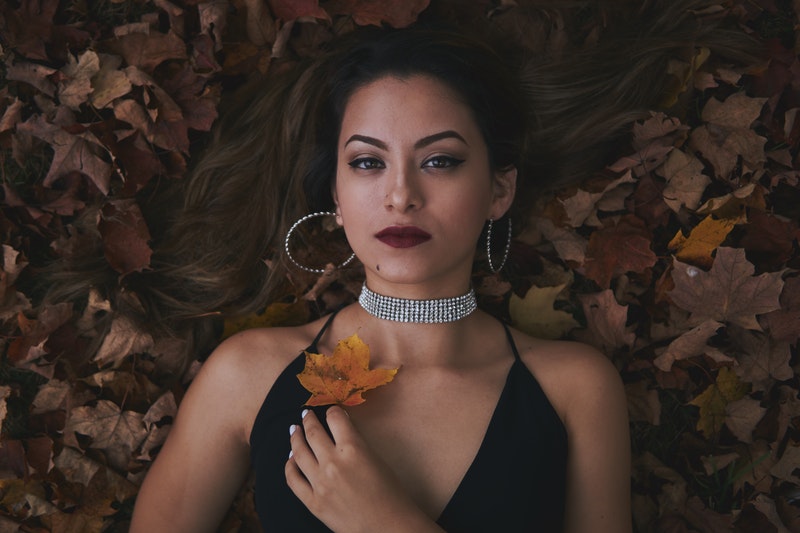
Sepia background works good for female dresses and your customers tend to feel that your company is friendly. This increases customer loyalty and your customers feel that you’re a small company who care its customers a lot.
Source: modcloth.com
How to shoot?
Method 1: Shoot the photo against a green or any background and then change the background in Photoshop
Method 2: Shoot the photo against a sepia wall
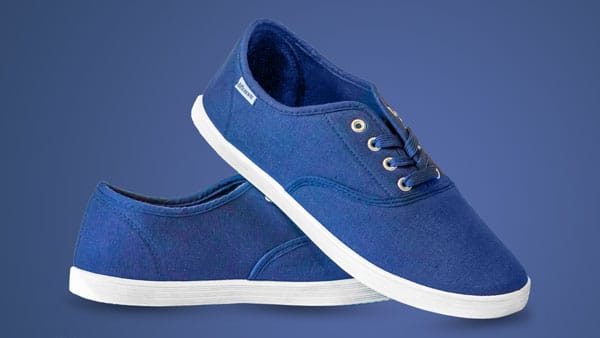
8. Color of the product
When to use: when you want to highlight one of your products
Here you set the background color that is two shade lighter or darker than the product color.
I could not find a good photo to show as an example so I designed this photo in Photoshop for you. Here the background is a gradient and the center of the background is two shade lighter than the color of the shoe.
How to shoot?
Shoot the photo against a green or any background and then change the background in Photoshop
9. Black
When to use: only for super luxury items
Black color signifies luxury. If you sell luxury items like watches that cost more than $2,000 then you may want to use the black background.
Don’t use a black background on items that are not at all luxury because your price-sensitive customers may exit your site without making any purchase.
Source: rolex.com
How to shoot?
Shoot the photo against a green or any background in a dim light and then change the background in Photoshop
Do you lack the Photoshop skills?
I help the founders or creative directors eCommerce companies to show beautiful product photos by editing the photos for them. My clients are as small as companies with 2 co-founders and as big as ITT with 10,000+ employees.
If you want, I can show you how your product would look like. I can do it for free.
With each year we’re getting more and more powerful phones, app developers are making their apps more and more advanced. They’re utilizing all the power and speed that the powerful mobile CPUs are offering to them.
Today we’re going to see the 10 best iOS and Android photo editing apps that you can use to edit your daily day-to-day life photos. Be the need is to post on Instagram, Facebook, Snapchat, or even frame it, these apps can help you out.
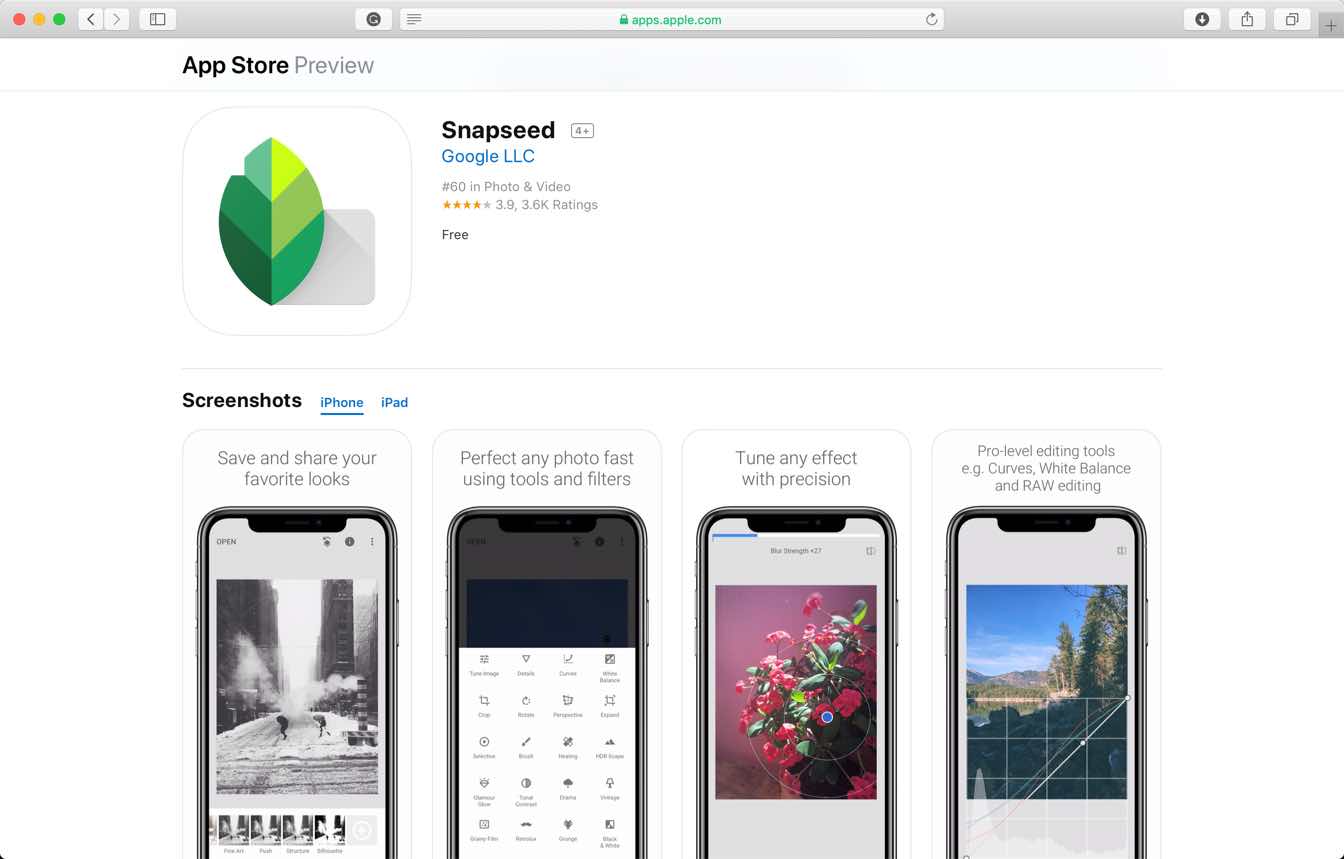
There’s no doubt that Snapseed topped the list. With its powerful engine and feature-packed yet minimal interface, you can make your photos 1000 times better.
The app is very intuitive, and even the advanced features aren’t cluttered or overly complicated (that said, performance and accuracy aren’t compromised either). There are a lot of features, and I like how you can choose to save your edits step by step and can see exactly what you did (and even undo!) after a picture is saved. This does everything you need it to do, and if you spend a lot of time you can get professional-grade editing.
I use this in tandem with another app. I use this one to fine-tune my work and to use the collage feature.
Basically, what the other app lacks, this app has, and vice versa. You can’t make a multilayered photo rendering on this app, and that’s ok, but it would be nice if there was a way to overlay photos on top of each other using an opacity feature.
Despite that not being an option, this app still gets 5 stars from me. I love that there are so many filter options and that you can of course manually edit your photos.
The blemish remover works well, although it would be nice to have an eraser too. The collage feature is great. You can really produce some cool stuff. It’s really helped me develop my style of tree and nature-based art.
Although, most regrettably, as of yet, when I try to use the collage feature, there’s been white lines through my artwork. I’ve tried reinstalling, doing the latest iOS update, and contacting Adobe directly.
Anyways, despite my recent troubles with this app, it’s been well worth it, and I owe a lot to the software that has allowed me to make some pretty cool art- at least I think so.
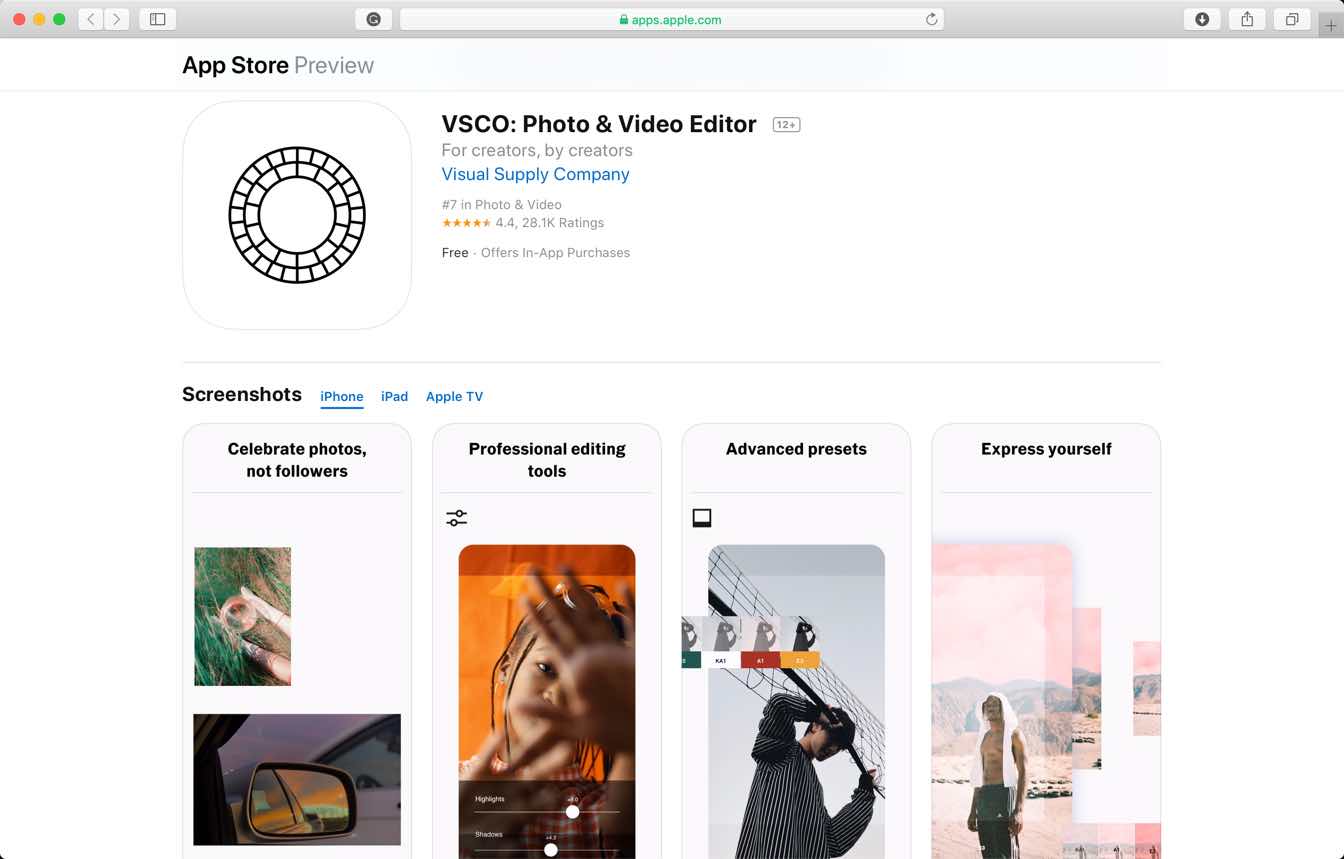
I use this to edit all my photos and I love it, I’m also a VSCO X member and I definitely recommend it for everyone.
But, I would like it if you guys made the highlight option to not only take away highlights but to enhance them as well or present an option where I can select what portions of my image I want to be highlighted (I’d prefer this more), and the same for shadows.
Also, I’d like to be able to add presets to DSCO, not just the ones you offer as soon as I take it, because the way it functions now I’d have to save the DSCO, then re-upload it to VSCO, which I find tedious.
I’d also like the option to turn other videos I have into DSCO.
Oh, also for DSCO, I want to be able to save it to my VSCO library, instead of only being to save it to my phone or uploading it to my VSCO feed, and make it longer, DSCOs are so short.
And it would be cool if they introduced options that are fun like chromatic aberration, or vintage scratches and dust. If they have all these things I wouldn’t touch another app.
I’m a hardcore adobe fan but the software that has been working the best for me out of all the creative cloud platform it’s no doubt the Lightroom mobile.
I have spent tons of money on expensive software, apps, and different hardware stuff trying to get my pictures to the next level but I can’t stop using Lightroom mobile.
I love using my iPhone and most of the time I’m flying my drone and like to edit my pictures on the spot right after I’m finished so I don’t know anything else as good or as close to Lightroom mobile, not to mention that once you have done some of the work on the go once you hit the computer it’s synced with your Lightroom desktop version so you can either keep working on the desktop or lay down and keep working on the mobile version on your phone.
And the best part for me is that is very convenient to just grab the phone out of the pocket and take a picture instead of using a huge DSLR for a simple picture that sometimes you might not have time to set up the tripod and everything before the subject has moved etc.
I like to have a camera for every scenario, GoPro for underwater, drone for aerial photography, DSLR for my professional photography and my iPhone photography for quick snaps that I don’t feel like carrying a huge bag full of accessories and for every one of those cameras Lightroom mobile app works well!
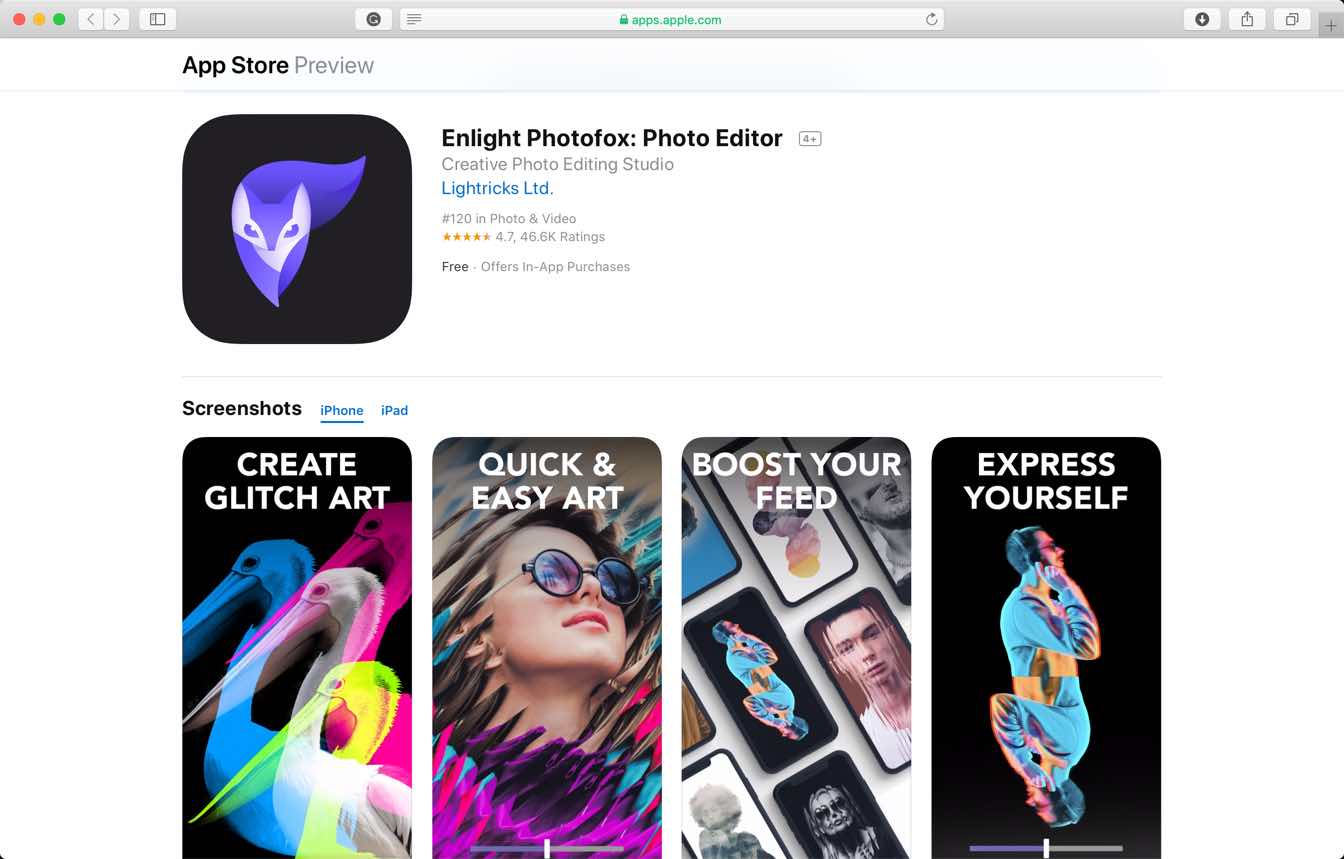
I got this app because I liked the idea of changing pictures.
I also got it for a PhotoJournalism class. Anyway, when I first opened this app I thought “Here we go… another app that downloads free but is subscription-based and if you don’t pay the subscription then you only get the lame features..” but then I actually started messing around with it and found that you can still do a WHOLE LOT on it even without the pro.
Now I’m not saying you don’t need the pro because there are a lot of really cool features there too but, I can still do what I need to do without having to pay a lot of money. This app is really great.
Sometimes it makes me a little mad because if I want to change or move something after it’s done I can’t. This drives me nuts because I want to see what it looks like without the focusing circle I can’t until after it’s set in stone.
Anyway sorry about the super long review but if you made it this far that means you’re interested and if you’re interested I can honestly say as someone who does not like to pay for apps that you should GET THIS APP!!!!
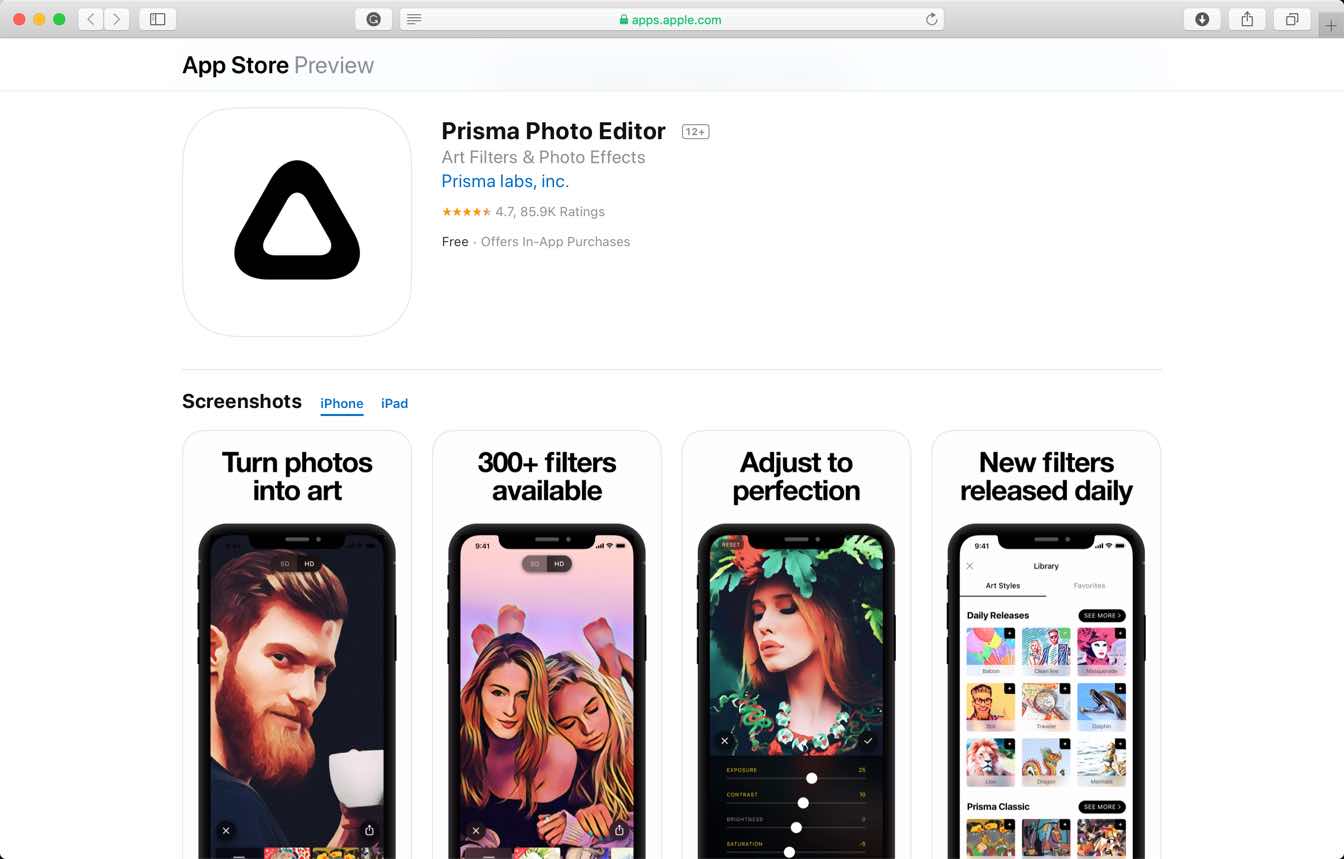
Prisma’s gorgeous pictures are almost too cool for words, but if we had to pick one to describe our 2016 iPhone App of the Year, it’d be “sublime.”
Powerful AI re-creates our photos as breathtaking images that really look hand-painted, complete with natural textures and stylish, spontaneous strokes. The only thing more fun than experimenting with the effects is showing off the results to our friends.
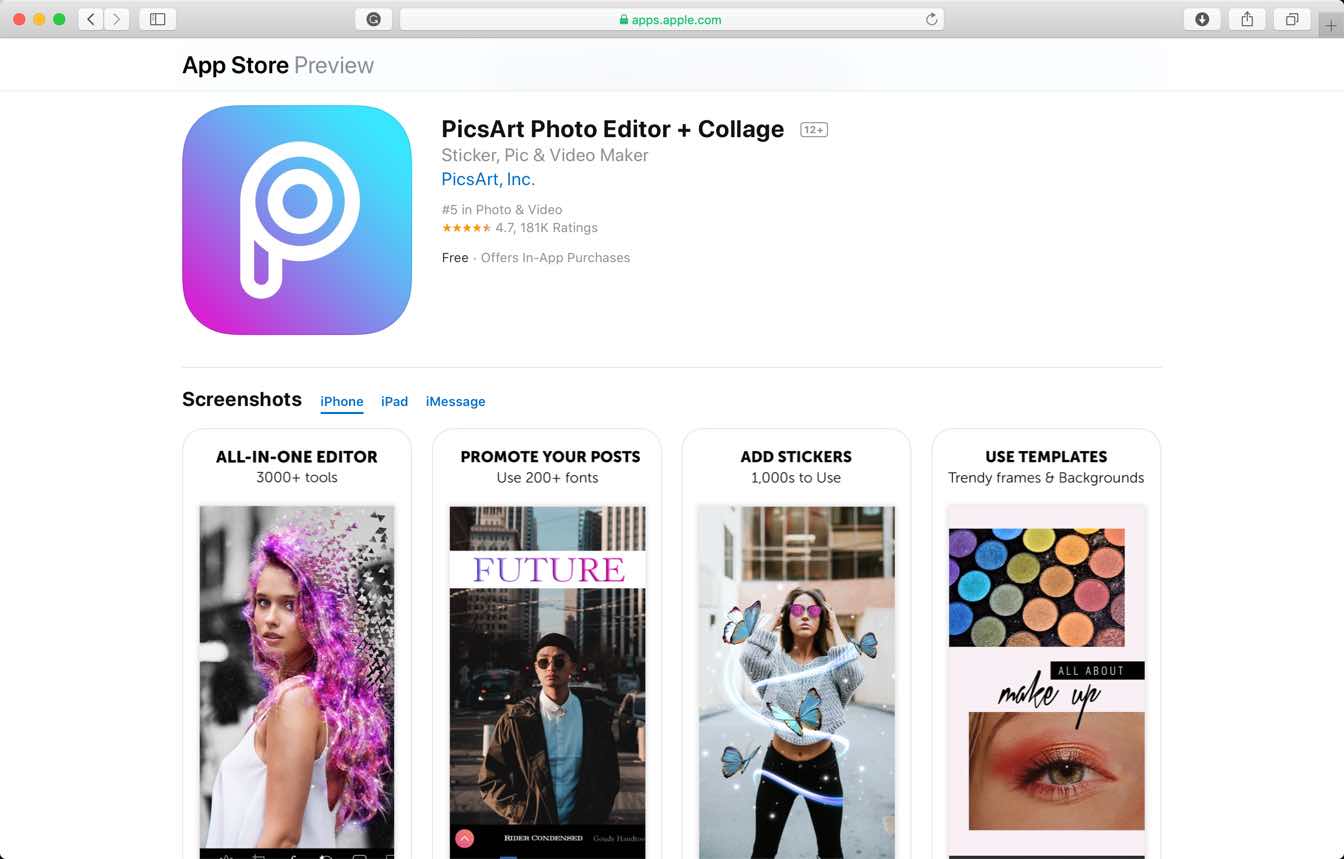
First of all this app is AMAZING!!! It lets you edit whatever picture you want!!! You just go to search and type in whatever you want! Like for example, you type in cats ( cats are my favorite animal I love them and know a lot about them) it will show you a bunch of cat pictures and also cute ones !!! It’s so simple.
You name it they have it. And if you want you can even put your own pictures on the game and other people can edit your pictures!!! and when you want to edit a picture you just tap it and then tap remix on the bottom and when you edit here a few things you can do.
So you can add other pictures where ever you want and do that just tap add a picture and then you can decrease the amount of opacity and you can add in lens flares! then if the picture is too big then you just tap cut out on the bottom and make a shape around the stuff you keep and out of the shape the stuff you want to get rid of.
Afterlight 2 is an amazing app that gives you the power to turn your pictures into a work of art with minimal effort using their powerful tools that provide pro-quality editing.
I love the fact that they are using one price for all purchase. I know that in this day and times, many developer teams and companies are using subscriptions for full access to their applications to keep money afloat. But I believe that because they’re not in that category, they stand out to many users looking to have an amazing application such as Afterlight 2 without having to worry about another subscription.
However, if Afterlight 2 does decide to add such subscription or add-ons for extra features, I would support them! Anyways, keep up the good work guys and have a blessed day.
Hands down the best app money can buy. Affordable, feature-rich, user-friendly and powered to the gills. Stop looking and download this NOW.
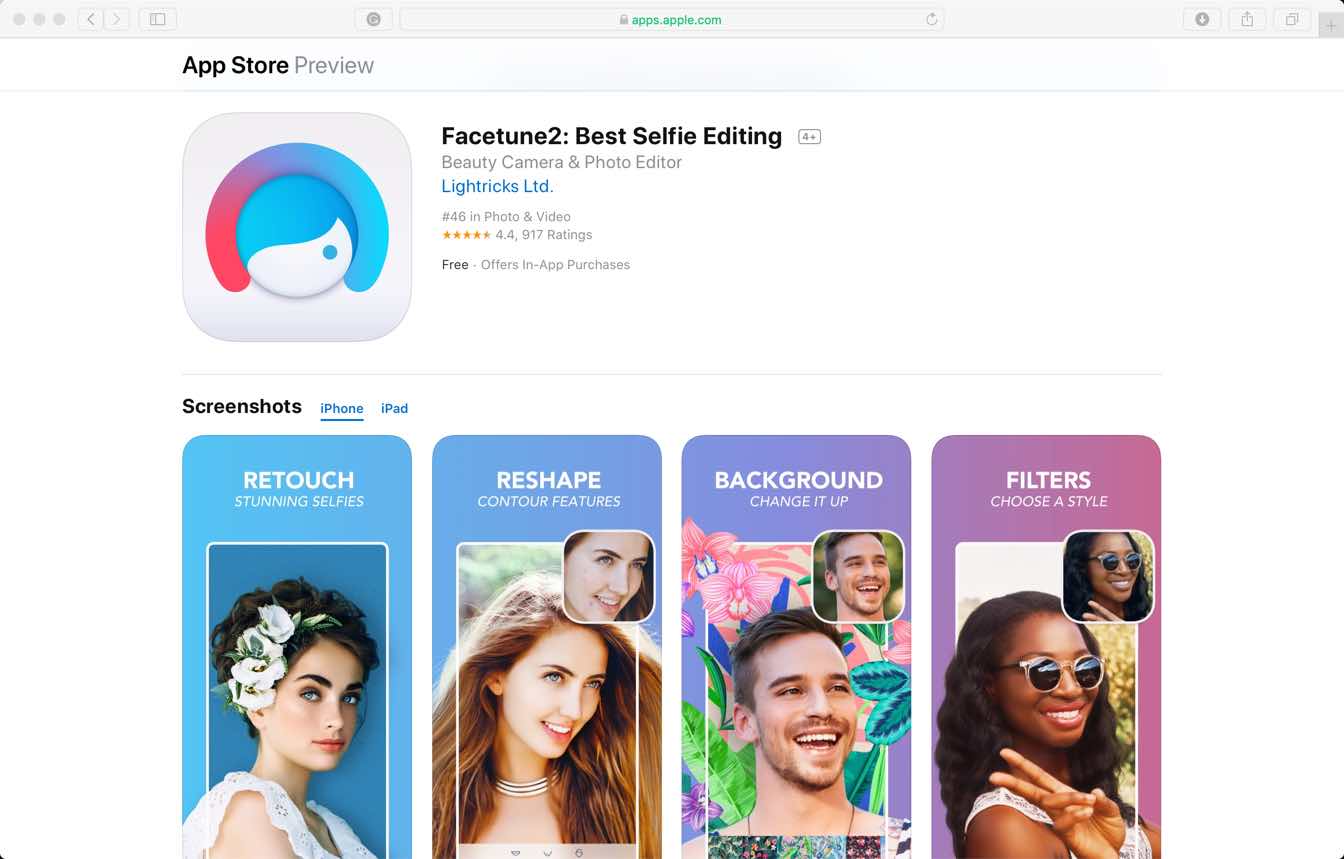
Facetune calls themselves as the selfie photo editing app. This is because all you can edit is the face and body. If you’re looking forward to editing some landscapes then you may want to use other apps.
I like how I can take pictures in whatever background I want, knowing that I have an app that’s going to take off anything I don’t want there.
I like how I don’t need to worry about a perfect background! I could be behind a cute wall but there could be a bunch of trash on the floor but who cares because I could just go back and remove whatever I don’t want there and just keep my cute wall!
Other than object removal, the app has so many other editing features and tools you can use to PERFECTIFY your picture!! (I don’t know if that’s a word or not but I’m gonna use it anyway!)
My personal favorite feature would definitely be the object removal because I can take pics wherever I want, and later go remove objects and add other details as well!
With all that being said, I definitely recommend the TouchRetouch app because it can do so many different things to make your picture even more beautiful than it already is, it’s also super affordable for what it is and I’m pretty sure a lot of people would appreciate that! You should definitely look into getting this app!!