How to Change Negative Image Into Positive in Photoshop

This tutorial is contributed by Peter Hill. He is the best editor of BestEssayTips. He is a socially active person, likes traveling and photo/video editing. He finds himself in writing. Feel free to contact him on Google+.

Sometimes you may need to turn a set of negative images into positive those have inverted values, or it may also happen that you have mistakenly scanned a number of negatives without using the appropriate mode. In such a situation, you may feel depressed being unaware of the process of changing a negative image into positive. But, from onwards you don’t have to be so because in this article we have presented a complete guideline that shows you the step by step process of turning your negative images into a bunch of successful positives. We feel delighted to let you know that there is rarely any guideline that is as exact and clarified as this one. So, stay till the end and preserve the article.

Changing of Negative Images to Positives

The changing process is essentially divided into two precise segments where the first one relate how you can invert the image and the second segment tells you about the correction of color. The sole motive of this division is to facilitate the entire thing for you. Let’s begin with the first segment.

Inverting Image

Inverting image refers to the interchange of up and down and right and left of an image.  An inverted image is also known as a reversed image. However, the first segment is divided into the three following phases to present the entire method easily.

Step 1

At first, click the file > option to open it. Then, from there press the open option or Ctrl+O.

Step 2

Now, use the following options consecutively: image, adjustment, and invert. Your image will instantly turn into positive. You can even back it to negative using the command once more. Using this procedure, you can change both the color and values according to the complements of them.

Step 3

In this final step of the inverting image segment, you should click Layer, then New Adjustment Layer and finally Invert only if you are interested in completing the action as a segregated layer. You can remove it subsequently if needed.

So here ends the ‘Inverting Image’ part whose successful completion leads to the beginning of the latter segment known as ‘Correction of color.’

Correction Of Color

Correction of color is an attempt to set colors on your positive matching the settings and requirement. Though the phrase sounds to be interesting and exciting, yet it is a matter of great responsibility because a faulty color correction can ruin the entire image or even make it look funny. Like the previous segment, this one also has three significant phases where each phase is connected to one another and remains unfinished when another phase is not performed correctly.

Step 1

At first, you should open the Color Balance Toolby consecutively clicking Image, Adjustment, and Color Balance. Otherwise, you can simply click Ctrl+Bfor opening the window of Color Balance.

Step 2

Then, draw the descending ruler for Cyan / Red the entire path to the right side toward Red. You should perform this for the midtones, highlights, and shadows by examining each of the choices of Tone Balance at the end of your window and re-performing the action of the sliding ruler.

Step 3

In the end, you should drag the sliding ruler for Yellow / Blue whole path towards Yellow with the Shadows selected. Your image will start looking like a bit well-adjusted at this situation. You can still bring additional slighter modifications for removing any cast of cyan and blue that appears on the image through the inversion of the orange-dyed negative.

With this, the segment of color correction comes to an end. If you can follow each phase meticulously, then there is no doubt that you will be 100 percent successful in creating a great color combination without causing a bit damage to your image.

Pro Tips For You

  • Never perform a subsequent phase leaving the leading one unperformed
  • Never drag the sliding ruler for Red/Cyan or Blue/Yellow in lieu of Cyan/Red or Yellow/Blue

Final Judgment

Though there might be many more ways for changing your images from negative to positive, yet the way mentioned above is the most accredited one all over the world. So, why to take a risk while the best procedure is at hand? Therefore, we humbly recommend you to adopt this methodology just to enjoy the great outcomes that you never have.

[Pro Hack] Use Content Aware Fill to Remove a Person in Photoshop

I get asked how to remove a person many times. Every time I am asked, I say the same thing. There’s no one-way to remove a person. Just like there are more than 5 ways to convert a photo into Black and White in Photoshop there is more than one way to remove a person in Photoshop.

Some people say that the Clone Stamp tool is good, some say that they use Content Aware Fill, some uses the Healing Brush tool, and so on. They all are correct. To remove a person in Photoshop, or to remove an object in Photoshop, it all comes down to the area that is surrounding that person or object and personal preferences.

Today, I am going to show you a workspace (it was a tool in older versions of Photoshop than CC 2019) that can remove a person in Photoshop based on its surroundings. Adobe calls in Content-Aware Fill.

Content-Aware Fill works best if the surrounding of the person or object has a pattern and isn’t too complex. In my image, the background has a pattern of straight lines of sea and sand. Had it been too complex like there were so many random people around the man, Content-Aware Fill would have failed.

It was a menu icon back in versions which are older than CC 2019. But, it is launched as a workspace in Photoshop CC 2019. Adobe might have seen the potential of this tool and decided to enhance it.

I know that all of you don’t have Photoshop CC 2019. So, I am going to write this tutorial for both segment of people i.e. one who have CC 2019 and another who don’t.

Here’s my image. I want to remove the person who is holding the surfing board.

1.jpg

Content Aware Fill for Older Versions of Photoshop

We are going to use the Fill option and ask Photoshop to automatically fill the person based on his surroundings.

Go to Edit > Fill. We will use Content Aware. But, I noticed that it’s grayed out. This is because I don’t have any selection in my image to fill.

2.jpg

Step 1 – Duplicate the Layer

Now, I am going to duplicate my background layer because I want the editing to be non-destructive. This ensures that whatever I do, I will not be touching the original image, and I can go back in time if I mess something up.

Press Cmd + J/Ctrl + J to duplicate the background layer.

3.jpg

Step 2 – Select the person, and Remove the person in Photoshop

Time to select the person to remove using any selection tool. I am using the Elliptical Marquee tool.

4.jpg

Now, again go back to Edit > Fill. Press Shift + F5  as a keyboard shortcut.

Choose “Content-Aware” and make sure “Color Adapdation” is turned on. Press OK.

Color Adaptation basically tells Photoshop to fill the selection based on the change in colors.

5.jpg

This is how your photo should look. Press Cmd + D/Ctrl + D to deselect.

6.jpg

Here’s the GIF for you.

6.gif

Content Aware Fill Workspace for Photoshop CC 2019 and Newer Versions

Time to show how to remova a person in Photoshop who like to keep their Photoshop up to date.

Step 1 – Duplicate the Layer

Now, I am going to duplicate my background layer because I want the editing to be non-destructive. This ensures that whatever I do, I will not be touching the original image, and I can go back in time if I mess something up.

Press Cmd + J/Ctrl + J to duplicate the background layer.

3.jpg

Step 2 – Select the Person

Time to select the person to remove using any selection tool. I am using the Elliptical Marquee tool.

4.jpg

Step 3 – Use Content-Aware Fill Workspace

Go to Edit > Content-Aware Fill.

Now, you will see a workspace which looks like the below screenshot.

8.jpg

There are 5 parts in this workspace. I have labelled each of them. Allow me to explain to you part one by one.

Sampling Area:

This is the area that is highlighted with the green color.

It shows that Photoshop will use this area as a sample to remove the person. In a simpler language, Photoshop will use this area to identify what to fill in the selected area.

Sampling Brush:

If you want to add or remove the sampling area, use this brush.

Add or Subtract:

If “Add” is turned on (denoted by the + icon), then wherever you brush with the Sampling Bursh, Photoshop will include those areas to the sampling area.

If “Remove” is turned on (denoted by the – icon), then wherever you brush with the Sampling Bursh, Photoshop will exclude those areas fom the sampling area.

Preview:

Real time preview of the final image.

Options:

This is where you tweak the settings to help Photoshop fill the area in a better way.

I will soon write a detailed tutorial on the Content-Aware Fill workspace soon. But for now, coming back to the original topic to remove a person.

The default setting is looking good and it has perfectly removed the person and solved the purpose. So, I am just going to click OK to finalize it.

This is how it looks.

6.jpg

And, this is how you do it.

Make sure that you make the most out of the offer below.

[Complete Guide] How to recover deleted photos in macOS and Windows?

Did you ever happen to accidentally delete your photos or important data from your computer, laptop, camera, SD cards or any other devices which became a nightmare for you? For me, it happened one time. I lost more than 1500 photos that I shot during a trip.

As you’re reading this article, I am sure that you also want to recover your photos. The best way to recover deleted files without any hassle as now a variety of computer repair and optimization companies offer data recovery services. The sure shot way to recover deleted files is through EaseUS data recovery software.

Some of the companies cost a huge amount of money to recover deleted files and do not provide services worth that money. Due to which people get angry when they don’t get the services up to the mark. EaseUs data recovery wizard is the latest version of the software which is useful to recover deleted files for Mac and Windows.

A few facts about this great way to recover deleted files.

It was founded in 2004 and has served a lot of customers with its fantastic and impressive services. This recovery wizard can retrieve all the data like old deleted files, storage drives that were formatted or any other issues with your hard drive. It can recover audio as well as video files. Other than these any sort of document, graphics, emails, folders or compressed files.

drw-free

Anything which you can attach to your macOS or Windows will automatically gain access to the storage device and become a place for retrieving the data. As this is a free software as the name indicates it guides you throughout the process how to safely and completely recover your files from the start. It also has some paid versions which have some more capacity of data retrieval than this one but all function at the same level. Free does not mean that it would have some changes in its function as it has been checked as well.

Step 1 – Download the software

Download the software. when you start downloading, it will initially warn you not to install it on the partition from where you want to recover your files. It helps you all the way and takes you through each and every step to the wizard base interface.

In the first step you will need to pick up the source storage partition from your hard drive and in the second step, you are able to select the chosen files you wanted to recover.

EaseUS Data Recovery-select a location.png

This software does a deep and quick scanning for the lost files. Quick scan as the name indicates help in finding the data very fast and display them in the sort of a list.

Step 2 – Define the drive

After the deep scan is done, which make it sure that none of the files were left behind and all of them have been hunted down and recovered. After that, this software is able to perform a complete recovery of all the files that were in your storage. It’s also called as  hard drive recovery.

EaseUS Data Recovery Software-Scan

Step 3 – Recover the files

In the end, you are finally happy to see all the documents with their name, date, type, and size. You might preview some of the files by double click. The beauty of this software is that you will also be able to export these files for later reference and retrieve them by clicking on recover.

EaseUS Data Recovery-Preview

The Ultimate Guide to Cinematic Effect in Photoshop

There was a time when everybody was editing a photo in a cinematic way. They were using Photoshop actions, filters, and some were playing around with adjustment layers to achieve the cinematic effect. With the rise of so many filters, I think that the trend is starting again. So, here I present to you the ultimate guide to cinematic effect in Photoshop.

Let’s understand what we need to have to achieve a cinematic effect. A cinematic effect has to have below things.

  • An aspect ratio of 16:9
  • Blacks are brightened and Whites are darkened; basically a faded look
  • A little tint

We’re going to do the same thing in three different images. The settings of the adjustment layers will change a bit, but everything else will remain the same.

Before we begin, here are few of the before and after photos.

Before

before1.jpg

After

after1

Let’s begin the tutorial

Step 1 – Crop the image to 16:9

Grab the crop tool from the tool panel or press Shift + C again and again until it comes. Choose the 16:9 aspect ratio from the option bar.

1.jpg

You will see 8 handlebars to crop an image. Drag those to keep the area you want to have after cropping.

2.jpg

Press Enter/Return once you have selected the area you want to have.

3.jpg

Step 2 – Add the tint

We are going to add a tint to the photo in this step. The color of tint matters a lot. As a rule of thumb, what is do is that I notice the most dominant color in the photo and add a tint of that color.

We have Green as the most dominant color in this photo. So, we’re going to give green color tint, and we’re going to use Gradient Map for this.

Go to Layer > New Adjustment Layer > Gradient Map

It will colorize the image based on your foreground and background color. Don’t freak out. We will fix this.

4.jpg

We are going to change the colors. Click anywhere in this box.

5.jpg

Photoshop has some predefined gradients for photos which are quite awesome. We are going to use those.

Click on the gear icon and choose “Photographic Toning”.

6.jpg

You will be asked whether to append those gradients into the current selection or add those gradients as a new selection. I choose “Add”, but you also choose “Append”.

7.jpg

Now, it’s just a matter of time to find the gradient that suits your image best. My image as Green as the most dominant color. So, I am going to choose something related to green.

8.jpg

Press OK when you’re done. Reduce the opacity to 40%.

9.jpg

Step 3 – Give the Faded Effect

Faded effect means to make black areas brighter and white areas darker. We are going to use the Level adjustment layer for this. Yes, you can decrease the contrast to give faded effect but Level gives more flexibility.

Go to Layer > New Adjustment Layer > Level.

Drag the sliders to the right which are in the blue rectangle. Drag the sliders to the left which are in the red rectangle.

10.jpg

Here is the image.

11.jpg

Step 4 – Add Warmness to give Cinematic Effect in Photoshop

There is one thing missing. And, that is warmness. The photo needs to be a bit warmer.

Let’s add that with Photo filter. Go to Layer > New Adjustment Layer > Photo Filter. Choose “Warming Filter (85)” and increase the Density. Make sure that “Preserve Luminosity” is turned on otherwise the photo will get darker.

12.jpg

And, here you go. This is all. Here’s the final image.

after1

Let’s see few other images also.

I applied the same setting to the below image.

before2.jpg

and here is the result.

after2.jpg

Here is one more image. The only difference in the below image is that I chose Red dominant color in the gradient map rather than green. This is because the photo has red as the dominant color.

after3.jpg

How to Invert Colors in Photoshop

Google trend showed me that many people are looking to invert colors in Photoshop. This is quite simple yet I never wrote a tutorial on it. Shame on me. 😅 So, here’s the tutorial on how to invert colors in Photoshop.

The tutorial is quite simple and I am going to show you three ways to invert colors in Photoshop. Two involves Photoshop menu and panel, and one with the shortcut.

So, here you go.

Way 1 – Using Photoshop Menu Bar to Invert Colors in Photoshop

The very first thing that you need to do is to duplicate the layer which you want to invert. Press Cmd + J / Ctrl + J to duplicate. You know that I am a big fan of non-destructive editing, which means that I am going to edit the image without harming the original image which is present in the “Background” layer.

1.jpg

Now go to Image > Adjustment > Invert.

It will affect the duplicated layer because that layer was active. My original image is completely untouched.
2.jpg

I can easily go back to my original image just by clicking on the eye icon at the left of the layer. I have highlighted that icon in the below screenshot. You can’t see the icon because the layer is hidden and the eye icon is disappeared. But, if the layer is visible, you’ll see the icon there.

3.jpg

Way 2 – Using Layer Panel to Invert Colors in Photoshop

This is the best way to invert colors. You don’t even need to duplicate the background layer in this method.

Press F7 to open the layer panel or go to Window > Layers to open layer panel. Click on the “Create New Fill or Adjustment Layer” icon which is fourth from the left. Not choose “Invert”.

4.jpg

This is all. It will create an adjustment layer in the layer panel.

5.jpg

Way 3 – Using Keyboard shortcut to Invert Colors in Photoshop

This is the fastest way to invert colors in Photoshop.

Duplicate the background layer by pressing Cmd + J / Ctrl + J.

Now, press Cmd + I / Ctrl + I to invert the color. It’s this simple and fast

2

This is all, guys. These are the three ways the best ways to invert colors in Photoshop. Let me know which one you think is best.

Make sure that you make the most of the offer below.

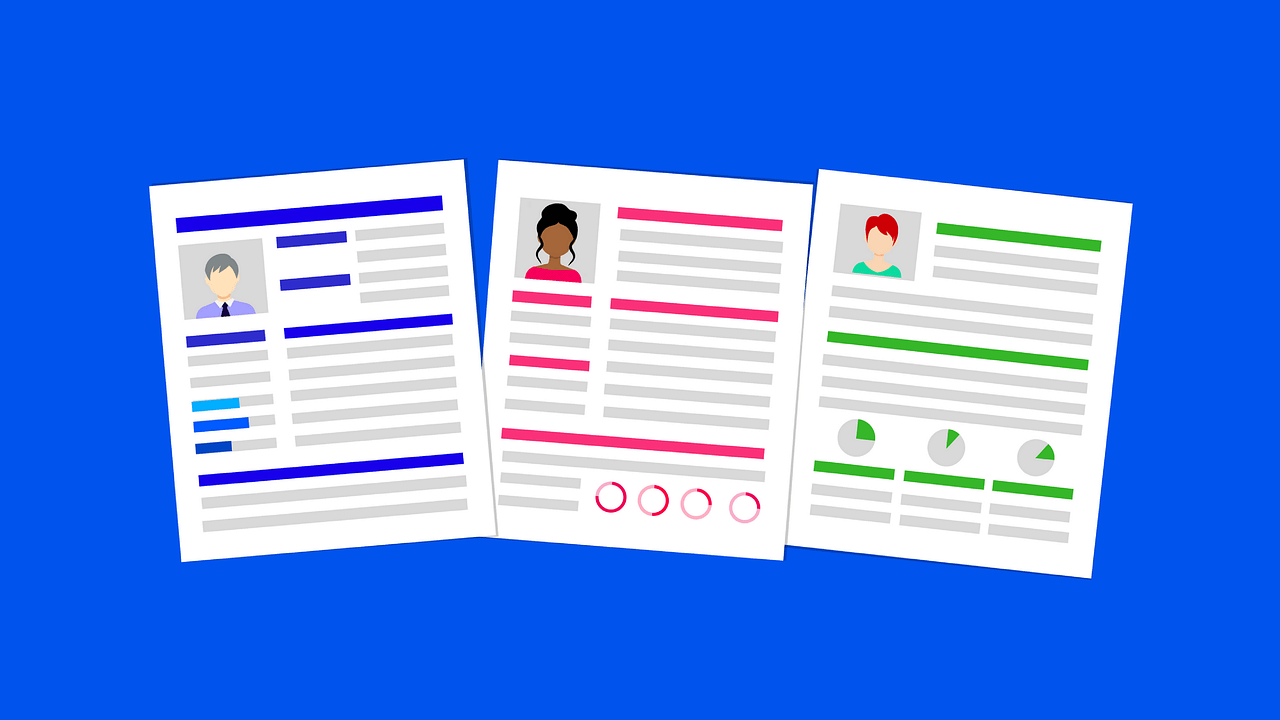
How To Write a Creative and Compelling Graphic Designer Resume

This post is written by Grace Carter. She is a tech editor at Australianhelp.com and Eliteassignmenthelp.com. She teaches interns, works with HRs and improves the quality of services.

It’s easy to think that you are such an excellent designer that clients will find you. However, there are so many Photoshop designers out there that are just like you. This means that if you want a great job you need to stand out.

And if you want to stand out, you need to write a great Graphic Designer resume.

Here are some tips:

1. You don’t need to be flashy

Many Photoshop designers feel like their resume needs to reflect their skills so they put an emphasis on an interesting design instead of putting an emphasis on good content. While this may attract initial attention, your resume will likely end up in the trash bin because you haven’t put enough effort into making your content shine. Go with something simple and effective.

2. Choose the right format

The format of your resume can make or break your case. It may not seem as important but it definitely is, in a more subtle way. For instance, it affects which sections you place first and in which order you place bullet points within that section.

If you have a lot of experience, go with reverse chronological as it showcases your career first which is likely much more impressive than your education. If you are a newbie, go for the chronological which showcases your education – your strongest point – first.

3. List proper contact info

People often don’t put enough emphasis on this area of their resume. However, when you think about it, this is a really important part. If you mess up your email address or your phone number, you’ll never know if you got hired. It can also say a lot about who you are as a person.

Make it simple – one phone number, one email address (make sure it looks professional), a link to your site and that’s it.

4. Write a good summary

Your summary should be about you and your goals, right?

Not really.

The summary of your resume should be all about what you have to offer to the other party. Write about your experiences but in a way that will allow your recruiters to see how you can help them. Use quantifiable data which is much more eye-catching than your average text. However, don’t make this section longer than five sentences and definitely do not say that your goal is just to get hired. Of course, it is, but you should say something like “My personal goal is to take on a part of the workload at the [name of the company] using my proven skillset”.

Tools That Can Help

How you write your resume is just as important as what is written. Poor grammar and sentence structure could cause doubt in your skill. The best thing you can do to avoid making mistakes is to use some of these tools, previously recommended by resume writers:

  • Resume Service– Because writing a resume can be so taunting, you can always employ a service like this one to help you with it.
  • ViaWritingand Simplegrad– Mistakes in grammar are pesky and ruin your reputation. Do something about them with these tools.
  • Oxessaysand Ukwritings– Proofreading can be a bit time-consuming and you often overlook some of the biggest mistakes. Imagine how that misspelled a niche-specific word is going to look to your recruiter. These tools were recommended by UKWritings review.
  • StateOfWritingand MyWritingWay– Sometimes, you just need some tips from like-minded people. Look for those on these blogs.
  • Essayrooand Boomessays– If you are looking for a good editor that can make your resume even better, look for these tools, recommended by Australianreviewer.
  • WritingPopulistand LetsGoAndLearn– These writing guides are an excellent writing help if you get stuck.

Write about your experience

“When creating an experience section, you should always pay attention to how relevant it is to the job you are applying to. If you had many assignments, list only the most relevant and similar ones where you excelled. If you are a new Photoshop Designer, you should find a few gigs on job boards or in your local community, do them for cheap and build some experience. It’s really a matter of showcasing your achievements on the job rather than your responsibilities,”  says Jenny Green, a resume writer from BigAssignments.com.

Include these as well:

  • Achievements within your education section – This adds credibility to your degree and makes you more appealing as a candidate.
  • List your crucial skills – These include those required in the job advertisement.
  • Add awards and accolades – These make you a lot more compelling g as your skill level is confirmed.
  • Add a link to your portfolio

Craft The Best Resume You Can

Even though writing a resume can be a bit difficult, you should always do your best. Follow the rules, be honest and remember to include all of the things stated necessary in the job advertisement. Hopefully, these tips help as well.