Hey guys, I had written a tutorial on the same topic in 2013. The tutorial is now old and many of you are asking me to write a fresh one. So, let’s begin to talk about our today’s tutorial which is to change the hair color in Photoshop.
You and I are getting to know the fashion trends much sooner now with the rise of Instagram. You follow a fashion model and you like her hair color. You badly want that color but you don’t know how would you look. You can check it in Photoshop simply. Change the hair color in Photoshop and look by yourself.
If you’re a photographer then you can also use this to change the hair color in Photoshop of your models.
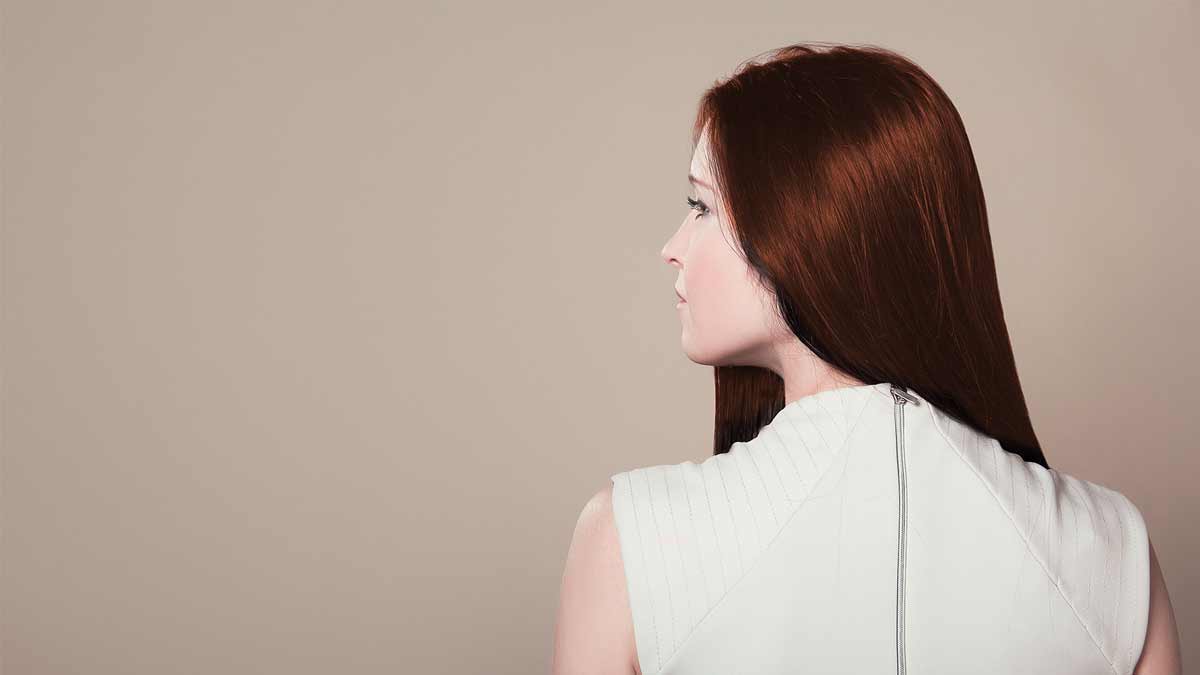
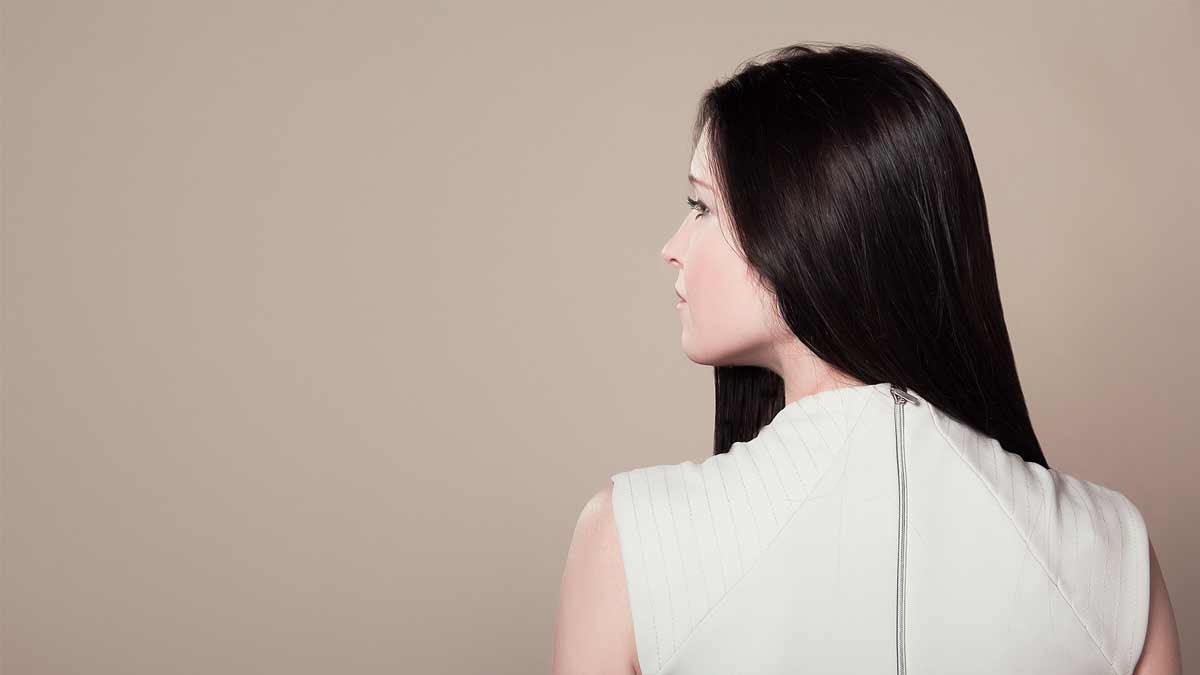
Before I begin, I would like to show you the before and after picture.
After
Before
With this said, let’s begin this tutorial.
Step 1 – Select the Model
We are going to use an adjustment layer to change the hair color in Photoshop. So, you want to make sure that adjustment layer only affects the hair, not anything else. Selecting hair is one of the most difficult things in Photoshop. So, we’re going to select the model and then use Layer Mask to isolate the hair.
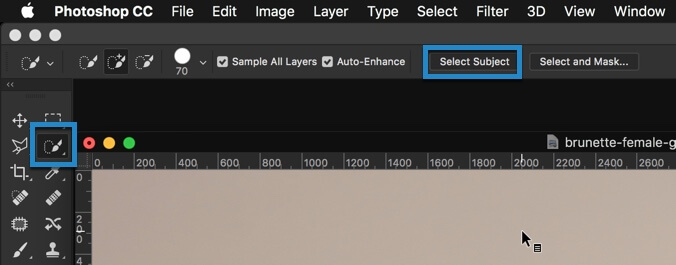
If you’re using Photoshop CC 2018 then you have a perfect tool to do that which is Select Subject. We’re going to use this to select the model.
Go to Quick Selection Tool and then click on Select Subject in the option bar.
If you don’t have Select Subject feature then you need to manually select the model using tools like Quick Selection Tool, Pen Tool, etc.
Go to Select>Select and Mask. Choose the Refine Edge brush and start painting.
Step 2 – Change the Hair Color in Photoshop
Go to Layer>New Adjustment Layer>Hue/Saturation. Make sure that you have turned on clipping and colorize. Both are highlighted in the below image.
Adding clipping will make sure that whatever you do will affect only the layer below it. This is the layer which contains only the model. So, we would like to ensure that only model color gets changed.
Turning on colorize will colorize the entire color. Now, you can choose whatever color you want. I am going with the brunette.
Step 3 – Remove the Color from the Model
Make Black as your foreground color. Activate Brush tool by pressing B.
Now start painting on model except her hair. This will remove the color from everywhere but her hair.
And here you go. You can play with the colors in Hue/Saturation adjustment layer.
Eyes are the most beautiful part of our face. People fall in love after looking at eyes. Their shape, movement, or even color make all the differences. Today, I am going to show to make the most beautiful part of a face even more beautiful. I am going to show you how to add eyeliner in Photoshop.
There are two ways you can add eyeliner in Photoshop. One is to create one in Photoshop and another is to download the image of an eyeliner and paste. We’re going with the second option because that’s much easier and time saver.
You need to download the image of the eyeliner before you proceed. I have attached it for you to make your life simpler. The best thing is that it’s a PNG image with no background. So, you won’t see the not-so-beautiful white background whenever you paste it in Photoshop.
Step 1 – Open the Eyeliner Image in Photoshop
We need to copy the eyeliner image so that we can use it on other images. Open it on Photoshop.
We’re going to copy the eyeliner. Open the layer panel by pressing F7. Hold down Cmd/Ctrl and click on the layer thumbnail. This will select the eyeliner and then press Cmd+C/Ctrl+C to copy.
Step 2 – Add Eyeliner in Photoshop
Press Cmd+V/Ctrl+V to paste the eyeliner on another image.
Step 3 – Align the image according to the eyes
It’s better to zoom in the image so that you can align the eyeliner better. Press Cmd+”+”/Ctrl+”+” to zoom in.
Time to align the eyelinerPress Cmd+T/Ctrl+T to activate the free transform tool. Now drag the eyeliner and align it with the eyes. It doesn’t have to be perfect. Look at the below screenshot. I have aligned it from viewer’s left but it’s not aligned from the viewer’s right. We’re going to fix it now.
Hold down Cmd/Ctrl and put the cursor on the adjustment handle which is not aligned. Look at the screenshot below to understand things better. The cursor will change to white.
Now, only that part of the eyeliner will move which is associated with the cursor.
Step 4 – Duplicate the Layer
I think that the eyeliner is not looking much visible. It’s translucent. Let’s duplicate the layer. Press Cmd+J/Ctrl+J to duplicate it. Now, it’s looking good.
Step 5 – Duplicate and Flip for the Another Eye
Time to proceed with the next eye. Again duplicate the layer by pressing Cmd+J/Ctrl+J. Now, we’re going to flip it. Go to Edit>Tranform>Flip Horizontal. This will flip the layer horizontally.
Align the eyeliner like we did in step 3 and step 4.
I have done it in my image.
With this, we can wrap up this tutorial.
I know that you like this tutorial. Share it with your friends.
This article is contributed by Clarence J. Tilford from essayservices.org. Head out to the website for cheap essay writing service.
Photo is something very special and precious one. We capture some beautiful moments and emotions in photo. People call photographers in special occasions to make it more special and capture the special events special moments. It’s natural that we always love to remember special events and some beautiful smiley and happy days of our life.
Still everyone could not be photographers. Photography is an art and a passion. Every one could not be expert in photography. Photography is not like other professions. It needs special talent and skill to make the moment more enjoyable and more happening. Now a day’s youngsters choose photography field and take it as a passion. It needs extra talent and skill to understand the photographic angle and the photographic tools and techniques.
After the new invention of Photoshop, the photographers got a new way and new technique to make their photo and image more beautiful and more attractive. Photoshop brought new version of photography and gave a new image and made a simple picture to more attractive and different. Photoshop is a instrument, not a support. A bad photo is a bad photo it can’t be made good by editing or by doing extra processing or adjustments. But by overusing Photoshop and editing a good photo will be turning to bad. So we have to be very careful while using Photoshop.
By using Photoshop neatly and carefully we can make a photo more attractive and photographers must know basic techniques of using Photoshop. Photoshop makes your most excellent photo into a remarkable masterpiece. There are essential skills that photographers must know and they should adopt those skills in their photos.
Use of brush
In Photoshop brush is an elementary and foundational tool. It’s not easy to use it has its own way and method. A perfect photographer must know how to use the brush in Photoshop. If he understands that the photographer will be able to understand the related tools. There is fundamental equipment beginners should learn about the brush tool.
The photographer must know how to use a different brush and when which brush should be used. There is also an adjustment in brush size. So the photographer must understand the usage of brush in a different size. Not only that, those beginners are not able to understand the brush dullness. So he must understand the brush cloudiness and brush flow.
Tool selection
In Photoshop there is a number of ways to select tools. Some are simple and some are a complicated one. There are two selection tools which every beginner photographer must know. The marquee tool and another is lasso tool.
The marquee tool gives you the option of different shapes and size by selecting the particular size you have to do work or edit in that size. Lasso tool is a freehand tool. You have to draw the area which you want to work it out. It has no limitation of size and shape. Selection of particular area helps you to work within a specific area without affecting other parts of the image. It’s up to you which one you want to select and which will make your photo more attractive.
Using filter tool
Some photographers rarely use the filter tool in Photoshop. But every beginner should have the knowledge about filtering in Photoshop then only he can understand the basics of Photoshop. Pick an image and use your techniques of filtering in it. Then you will be able to understand the real use of filtering in Photoshop.
Vignette technique
Vignette is technique basically used to high light the real picture in the frame. Without diverting your mind you can focus on the picture. It’s basically darkening and giving extra blackish colour to the edge of the frame so that you can concentrate on the subject. As a result of the vignette, there will be a dark shade around the subject.
Sharpening the picture
It’s another tool in Photoshop that every beginner must be aware of. In its word itself, we can get the idea that it’s used to make the picture sharper and more detailed. I will suggest using this tool while photo shopping your image but never use it too much. When you make the picture more detailed may be at one point it will lose the attribute of attraction so photographers must use it but for limited.
Brightening and contrast
It’s another very important tool in Photoshop. It’s very easy to make an adjustment so one must be very careful by using it. We have to apply them very carefully. When the photo session was done in Light room the photographer must use brightening tool to make it clearer and adjust it to correct flow of exposure. One must be very care full while using brightening and contrasting tool because it goes hand in hand. It must complement each other.
Curves and level
Curves and level tools are one of the advanced approaches of brightening and contrasting tool. We use brightening and contrast tool in Photoshop at the same time Photoshop gives another tool called curves and levels its use also the same but we can same that it’s somewhat more advanced than other. It makes subject targeted. It’s not easy to use at first but later you will use it and you can handle it easily and you will wonder about its result.
Photoshop content aware fill
It’s very useful and very advanced tool in Photoshop. By using this tool you can make your picture more attractive and beautiful. You can avoid the unwanted area by selecting from the frame and delete it. You just select an unwanted area from the frame and apply this tool. This tool carefully reads the frame and without much effort removes the selected area.
Colour balancing tool
Colour balancing tool always helps you to look into your picture from a different angle. Colour balancing helps you to understand how the existing colours interact or complement each other. Colour is the very important part which you can try while ornament ling your photographs.
Cropping tool
The cropping tool is easy to apply and its use must be known to the photographers while they are photo shopping. It helps the photographer to drag the photo and select it as he wants. It gives a more accurate look at your image and helps to focus on your subject matter.
So these are some Photoshop skills which every beginner photographers should adopt in their picture. Some are easy to handle and some are difficult in the beginning later on you can use it. It’s all about new creativity and new thoughts.